Articles
How To Make A Charmed Quilt
Modified: October 18, 2024
Discover the step-by-step guide to creating a stunning charmed quilt. Explore our articles and learn how to bring your quilt to life with charm and style.
(Many of the links in this article redirect to a specific reviewed product. Your purchase of these products through affiliate links helps to generate commission for Storables.com, at no extra cost. Learn more)
Introduction: What is a Charmed Quilt?
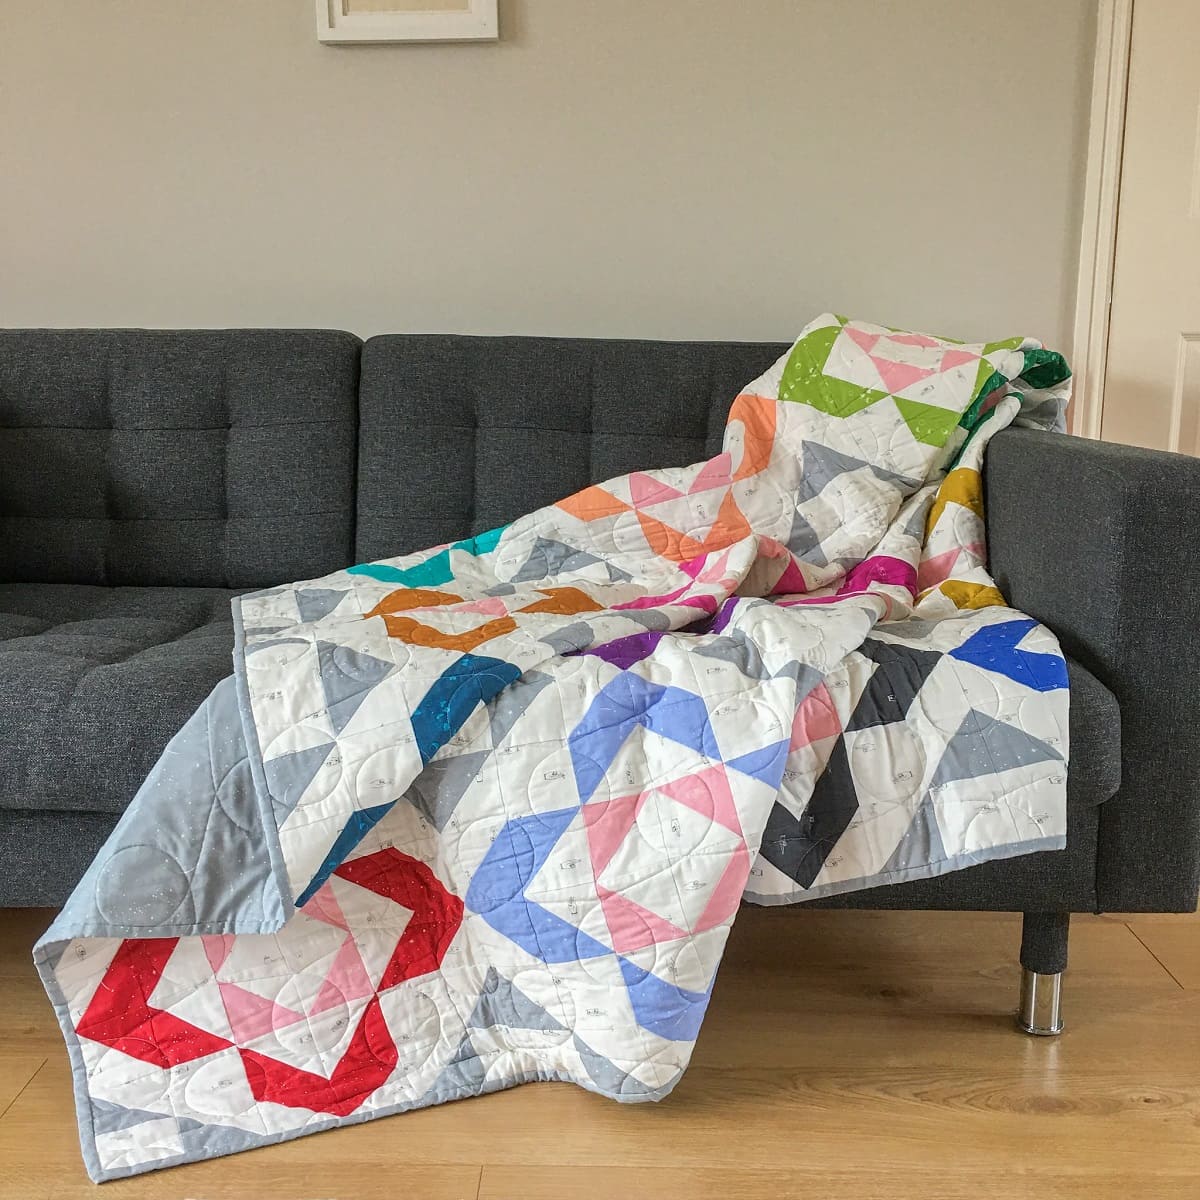
Quilting is a beloved craft that has been passed down through generations, resulting in beautiful and cherished heirlooms. One popular quilting technique is the creation of a charmed quilt. A charmed quilt, also known as a charm pack quilt, is a project that incorporates pre-cut fabric squares to create stunning designs. These quilts are not only a joy to make but also make lovely gifts and additions to your home decor.
The term “charmed” in the world of quilting refers to a collection of pre-cut fabric squares that usually measure 5 by 5 inches. These charm packs are often sold as coordinated sets, with a wide variety of fabrics from the same collection. This eliminates the need to spend hours choosing individual fabrics and ensures a cohesive look for your quilt.
Creating a charmed quilt offers a fantastic opportunity to exercise your creativity and express your personal style. With a wide array of fabric designs available, you can tailor your quilt to match any theme, color scheme, or aesthetic preference.
Whether you are a seasoned quilter or a beginner looking to embark on your first quilting project, making a charmed quilt is an excellent choice. Not only does it provide an opportunity to experiment with different fabric combinations, but it also allows for endless design possibilities.
In this article, we will guide you through the step-by-step process of creating your very own charmed quilt. From gathering materials to adding the finishing touches, you will learn all the essential techniques and tips to make a beautiful and enchanting quilt.
Key Takeaways:
- Crafting a charmed quilt is a delightful journey that allows you to express your creativity, showcase your personal style, and create a cherished heirloom that brings warmth and beauty to your home.
- From selecting fabrics to adding embellishments, the process of making a charmed quilt is a labor of love that culminates in a unique and meaningful creation, ready to be proudly displayed, enjoyed, and shared with loved ones.
Step 1: Gathering Materials
Before starting your charmed quilt project, it is important to gather all the necessary materials. Having everything prepared in advance will make the quilting process smoother and more enjoyable.
Here are the materials you will need:
- Charms Packs: These are pre-cut fabric squares that form the foundation of your quilt. Determine the size and quantity of charm packs based on the desired quilt size. Typically, a charmed quilt requires multiple charm packs.
- Backing Fabric: Choose a fabric that complements the charm pack collection and is large enough to cover the entire quilt. A popular choice is a solid-colored fabric that matches one of the colors in the charm packs.
- Batting: Batting is the layer of insulation that goes in the middle of the quilt sandwich. Consider the size and thickness of the batting based on your preference and the desired warmth of the quilt.
- Thread: Select a thread color that complements the fabrics used in the quilt. It is essential to use a high-quality thread that is durable and suitable for machine quilting if you plan to quilt using a sewing machine.
- Quilting Ruler and Rotary Cutter: These tools are crucial for accurate fabric cutting. A quilting ruler helps measure and mark fabric, while a rotary cutter provides clean and precise cuts.
- Pins or Clips: Use pins or quilt clips to hold the fabric layers together during the quilting process.
- Quilting Needles and Thimble: Choose quilting needles that are sharp and suitable for hand quilting. A thimble protects your finger while pushing the needle through the layers of fabric.
- Iron and Ironing Board: Pressing the fabric before and during quilting is essential. Make sure you have an iron and ironing board handy to achieve crisp and neat seams.
- Marking Tools: Depending on your quilting design, you may need marking tools such as washable fabric markers or tailor’s chalk to mark guidelines or quilt motifs on the fabric.
- Optional Embellishments: If you desire to add extra flair to your quilt, consider embellishments such as buttons, ribbons, or appliques, which can be sewn onto the quilt top.
By gathering all these materials before starting your project, you can streamline the quilting process and ensure a smooth and enjoyable journey in creating your charmed quilt.
Step 2: Choosing Fabrics
Choosing the right fabrics for your charmed quilt is an exciting and creative process. The selection of fabrics can greatly impact the overall look and feel of your quilt, so it’s essential to choose fabrics that not only appeal to your personal taste but also complement each other harmoniously.
Here are some tips to help you in choosing fabrics for your charmed quilt:
- Consider the Theme: Determine if you have a specific theme or color scheme in mind for your quilt. This could be based on a favorite color, a specific pattern, or even a particular season or occasion. Keeping a theme in mind will guide your fabric selection process.
- Coordinate Colors: Look for fabrics that coordinate well with each other. Consider using a color wheel for guidance. You can choose fabrics that are complementary (opposite on the color wheel), analogous (next to each other), or monochromatic (variations of the same color).
- Mix Patterns and Solids: Experiment with a combination of patterned fabrics and solid-colored fabrics. This will add visual interest and depth to your quilt. Ensure that the patterns and solids complement each other and are in proportion to create a balanced design.
- Vary the Scale: When selecting patterned fabrics, pay attention to the scale of the patterns. Mixing fabrics with different pattern scales (large-scale, medium-scale, small-scale) will add visual appeal and prevent the quilt from looking too monotonous.
- Consider Fabric Quality: Opt for high-quality quilting cotton fabrics. These fabrics are durable and easy to work with, ensuring that your quilt will stand the test of time. Check for a tight weave, vibrant colors, and a soft hand feel.
- Collect Charms Packs: If you are using pre-cut charm packs, select packs that not only coordinate with each other but also offer a good variety of patterns, colors, and textures. This will enhance the visual interest of your quilt.
- Trust Your Instincts: Ultimately, trust your instincts and choose fabrics that speak to you and evoke joy. Your personal taste and intuition play a significant role in creating a quilt that reflects your unique style.
Remember, quilting is a creative process, and there are no strict rules when it comes to fabric selection. Feel free to experiment, mix and match, and let your creativity guide you in choosing fabrics that will make your charmed quilt come alive with charm and personality.
Step 3: Cutting and Preparing Fabric Pieces
Once you have gathered your fabrics and finalized your fabric selection, it’s time to start cutting and preparing the fabric pieces for your charmed quilt. This step is crucial as it ensures that all the fabric squares are uniformly sized and ready for assembly.
Follow these steps to cut and prepare the fabric pieces:
- Wash and Press Fabrics: Before cutting the fabrics, it’s a good idea to pre-wash them to remove any shrinkage. Follow the washing instructions on the fabric package. After washing, iron each fabric to remove any wrinkles and create a smooth surface for cutting.
- Prepare the Charm Packs: If you are using pre-cut charm packs, they are already conveniently sized. However, if you chose to use your own fabric or make custom-sized fabric squares, use a quilting ruler and rotary cutter to measure and cut the desired dimensions. Ensure that all fabric squares are the same size for consistency.
- Trim Excess Threads: After cutting each fabric square, check for any loose threads and trim them with a sharp pair of scissors. This will give your fabric pieces a clean and tidy appearance.
- Organize and Arrange the Fabric Pieces: Once all the fabric squares are cut and trimmed, organize them based on your desired arrangement for the quilt top. You can lay them out on a design wall, table, or lay them in rows on the floor. This arrangement will help you visualize the final design and ensure that you are satisfied with the fabric placement.
- Consider Seam Allowance: Take into account the seam allowance when arranging the fabric pieces. A standard 1/4-inch seam allowance is common in quilting. Ensure that there is enough space between the fabric squares to accommodate the seam allowance without cutting into the design.
- Label and Stack: Once you are happy with the fabric arrangement, consider labeling each fabric piece or taking a photo for reference. This will help you stay organized during the sewing process. Once labeled, stack the fabric pieces in the desired order to keep them in sequence.
Taking the time to cut and prepare the fabric pieces accurately will make the quilting process easier and more enjoyable. Once the fabric pieces are prepared, you are ready to move on to the next step: designing the quilt layout.
Step 4: Designing the Quilt Layout
Designing the layout of your charmed quilt is an exciting step that allows you to showcase your creativity and create a visually stunning quilt. The quilt layout determines how the fabric pieces will be arranged and how the overall design will come together.
Follow these steps to design the layout of your charmed quilt:
- Consider Quilt Size and Pattern: Determine the desired size of your quilt and the pattern you want to create. This will guide your layout decisions and help determine the number of fabric pieces needed.
- Experiment with Different Arrangements: Lay out the fabric pieces on a design wall, table, or floor and experiment with different arrangements. Try various combinations of colors, patterns, and fabrics to see what visually appeals to you. This is your chance to showcase your personal style and create a design that is uniquely yours.
- Pay Attention to Balance and Contrast: Create a balanced composition by distributing colors, patterns, and fabrics evenly throughout the quilt. Consider the contrast between light and dark fabrics and incorporate a mix of solids and patterns for added visual interest.
- Take Photos for Reference: Once you are satisfied with a layout, take photos from different angles to serve as a reference. These photos will help you remember the arrangement and can be useful later during the quilting process.
- Consider Block Placement: If you are creating a quilt with repeated blocks, pay attention to the placement of each fabric block within the overall layout. This can create a dynamic effect and add movement to the quilt design.
- Seek Feedback: If you’re unsure about the layout or want a second opinion, seek feedback from fellow quilters or friends. They may offer valuable insights and suggestions to enhance your design.
Remember, there are no right or wrong decisions when it comes to designing your quilt layout. It’s all about what appeals to you and reflects your personal style. Take your time, experiment, and have fun creating a layout that is visually captivating and brings your charmed quilt to life.
Read more: How To Make A Quilt
Step 5: Sewing the Quilt Blocks
Sewing the quilt blocks is an essential step in the process of creating your charmed quilt. This is where the individual fabric squares are sewn together to form the quilt top. Follow these steps to sew the quilt blocks:
- Prepare Your Sewing Machine: Ensure that your sewing machine is in good working condition. Clean the machine, change the needle if needed, and thread it with a coordinating thread color.
- Organize Fabric Blocks: Retrieve the fabric blocks you arranged earlier in the desired layout. Keep them in the same order and orientation as you planned to maintain the design.
- Set the Seam Allowance: Most quilting patterns use a standard 1/4-inch seam allowance. Ensure that your sewing machine is set to the correct seam allowance before starting. You can use a seam guide or tape on your machine as a visual reference.
- Start Sewing: Begin sewing the fabric blocks together in rows. Place the right sides of two fabric blocks together, aligning the edges, and pin them in place if desired. Sew along the edge using a straight stitch, backstitching at the beginning and end to secure the seam. Repeat this process to sew the blocks in each row.
- Press the Seams: After sewing each row together, press the seam allowances with an iron. Pressing the seams flat or open will help create crisp and precise quilt blocks.
- Join the Rows: Once the individual rows are complete, join them together to form the complete quilt top. Match the seams from each row, pin them in place if desired, and sew along the edges using a 1/4-inch seam allowance. Press the seam allowances as before.
As you sew the quilt blocks together, pay attention to the alignment of the fabric squares and the accuracy of your seam allowance. Taking your time and being precise will result in a neat and polished quilt top.
Remember to enjoy the process of piecing together the quilt blocks. As each block comes together, you will start to see your charmed quilt taking shape, bringing your design to life.
When making a charmed quilt, be sure to use a consistent seam allowance to ensure that all of your blocks are the same size and fit together neatly.
Step 6: Assembling the Quilt Top
Assembling the quilt top is an exciting step where you bring all the quilt blocks together to create a cohesive and beautiful design. In this step, you will attach borders (if desired) and arrange the quilt blocks to form the complete quilt top. Follow these steps to assemble your charmed quilt top:
- Prepare the Borders: Measure the dimensions of your quilt blocks and determine if you want to add borders to enhance the design or increase the size of the quilt. Cut fabric strips for the borders, making sure they are the appropriate width and length.
- Attach the Borders: Sew the borders to the sides of the quilt blocks first, matching the length and width of each side. Press the seam allowances outward or toward the border fabric to create a smooth and flat border.
- Arrange the Quilt Blocks: Lay out the bordered quilt blocks in the desired order to form the quilt top. Consider the overall design, color placement, and visual balance as you arrange the blocks. You can refer to your reference photos or design plan from earlier.
- Join the Quilt Blocks: Once you are satisfied with the arrangement, sew the quilt blocks together row by row. Match the seams, pin them in place if desired, and sew along the edges using the same seam allowance as before. Press the seam allowances to set them.
- Check for Squareness: Throughout the process of assembling the quilt top, check for squareness and make any necessary adjustments. Ensure that the borders are straight and the blocks align properly. This will contribute to the overall professional look of your quilt top.
- Press the Quilt Top: Once the quilt top is fully assembled and all seams are pressed, use an iron to press the entire quilt top. This will help flatten the seams, improve the quilt’s appearance, and prepare it for the next steps of the quilting process.
Assembling the quilt top brings you one step closer to completing your charmed quilt. Take your time during this step to ensure that the blocks are joined together accurately, and the overall design reflects your vision and creativity.
Once the quilt top is assembled, you are ready to move on to the next steps, which involve adding borders and binding to your quilt.
Step 7: Adding Borders and Binding
Adding borders and binding to your charmed quilt provides the finishing touches that complete the look and functionality of your quilt. Borders frame the quilt top and add visual interest, while binding secures the edges and gives the quilt a polished and professional finish. Follow these steps to add borders and binding to your quilt:
- Prepare Border Strips: Determine the width and length of the borders you want to add to your quilt. Cut fabric strips accordingly, ensuring they are long enough to cover each side of the quilt top.
- Attach Borders to the Quilt Top: Sew the border strips to the sides of the quilt top, matching the length and width. Start with the side borders, then add the top and bottom borders. Press the seam allowances outward or toward the border fabric.
- Measure for Binding: Measure the perimeter of your quilt to determine the length of binding needed. Cut fabric strips for binding, making sure they are wide enough to cover the quilt’s edges with a seam allowance.
- Prepare Continuous Binding Strips: If necessary, sew the binding fabric strips together at a 45-degree angle to create continuous binding strips. Press the seams open and trim any excess fabric.
- Attach Binding to the Quilt: Starting from the middle of one side, align the raw edges of the binding strip with the raw edges of the quilt. Sew along the edge using a straight stitch, leaving a small tail of binding unstitched. Continue attaching the binding to each side of the quilt, mitering the corners.
- Finish Binding: After attaching the binding to all sides, fold it over the quilt’s edges to the backside. Hand-stitch or machine-stitch the binding in place, securing it to the back of the quilt. Trim any excess binding if needed.
- Press and Finish: Once the binding is securely attached, use an iron to press the quilt, paying attention to the borders and binding. This will provide a final touch of crispness to your quilt.
Adding borders and binding transforms your quilt top into a completed quilt. The borders add a decorative frame, while the binding ensures the edges are secure and durable.
Take your time and pay attention to the details during this step to achieve a professional-looking finish. Once the borders and binding are in place, your charmed quilt will be ready for the next step: quilting the layers.
Step 8: Quilting the Layers
Quilting the layers is an essential step in creating a beautiful and durable charmed quilt. The quilting process involves stitching the three layers of the quilt together— the quilt top, batting, and backing fabric. This not only enhances the quilt’s design but also adds stability and durability. Follow these steps to quilt the layers of your charmed quilt:
- Prepare the Quilt Sandwich: Lay the backing fabric on a flat surface, wrong side up. Smooth out any wrinkles or creases. Place the batting on top, ensuring it extends beyond the edges of the quilt top. Finally, carefully lay the quilt top, right side up, on top of the batting and backing fabric. Smooth out any wrinkles or bubbles.
- Baste the Layers: To hold the layers together during quilting, you need to baste them. There are several basting methods you can choose from, such as thread basting, pin basting, or spray basting. Whichever method you choose, make sure the layers are securely held together without any shifting or bunching.
- Choose Quilting Technique: Decide on the quilting technique you want to use for your quilt. Common quilting techniques include hand quilting, machine quilting, or a combination of both. Consider your skill level, the desired look, and the time you’re willing to invest in the quilting process.
- Mark Quilting Designs (optional): If you want to incorporate specific quilting designs, use washable fabric markers or tailor’s chalk to mark the quilting lines or motifs on the quilt top. This will serve as a guide during the quilting process.
- Quilt along the Marked Lines or Freestyle: Using a quilting needle and coordinating thread, quilt along the marked lines or freestyle quilt if you prefer. If machine quilting, make sure to adjust the needle tension and stitch length appropriately. For hand quilting, use a thimble to protect your finger and make quilting stitches through all layers.
- Tie or Knot the Quilting Threads: Once you’ve finished quilting, tie or knot off the loose quilting threads on the back of the quilt. Trim any excess threads carefully.
- Verify Quilting Stability: To ensure that all layers are securely held together, gently check the quilt sandwich for any loose areas or puckering. Smooth out any problem spots and adjust the basting if necessary.
Quilting the layers is a labor of love that adds depth, texture, and stability to your charmed quilt. Whether you choose intricate quilting designs or simple straight-line quilting, the quilting phase is an opportunity to showcase your creativity and enhance the overall beauty of your quilt.
After quilting the layers, your charmed quilt is almost complete. The final step involves adding embellishments and finishing touches to make it truly unique and special.
Read more: How To Make Wine Glass Charms
Step 9: Finishing Touches: Adding Embellishments
Adding embellishments to your charmed quilt is the final step in the creative journey of quilt-making. Embellishments can add personality, texture, and visual interest to your quilt, making it truly unique and one-of-a-kind. Follow these steps to add embellishments to your charmed quilt:
- Assess the Quilt: Take a step back and examine your quilt. Consider the overall design, color scheme, and theme of the quilt. This will help you determine the type of embellishments that will enhance its beauty.
- Choose Your Embellishments: There are numerous options for embellishing your quilt. Some popular choices include buttons, beads, ribbons, lace, appliques, embroidery, or fabric painting. Select embellishments that complement the design, fabric, and theme of your quilt.
- Plan the Placement: Decide where you want to add the embellishments on your quilt. Whether it’s on specific fabric blocks, border corners, or along the quilt’s edges, plan the placement to create a balanced and aesthetically pleasing composition.
- Sew or Glue the Embellishments: Depending on the type of embellishments you’ve chosen, use a suitable method to attach them to the quilt. Sew the buttons, beads, or appliques securely using hand-stitching or machine stitching. If using glue, ensure it is appropriate for fabric and will not damage or discolor the quilt.
- Consider Embroidery or Quilting: You may also choose to incorporate embroidery or quilting stitches as embellishments. Use embroidery floss or thread to add decorative elements or create intricate designs. You can also continue the quilting pattern into the borders or create additional quilting in specific areas.
- Keep it Balanced: As you add embellishments, aim for balance and harmony. Avoid overwhelming the quilt with too many embellishments or creating a cluttered look. Step back occasionally to assess the overall impact of the additions.
- Secure Loose Threads: After attaching the embellishments, check for any loose threads and trim them carefully. Securing loose threads will give your quilt a polished and finished appearance.
Adding embellishments to your charmed quilt is an opportunity to showcase your creativity and add your personal touch. It’s the final step in the quilting process and allows you to truly make the quilt your own.
Once you’re satisfied with the embellishments, step back and admire your beautiful charmed quilt. It’s now ready to be enjoyed and cherished for years to come.
Conclusion: Enjoying Your Charmed Quilt
Congratulations, you have completed the journey of creating your charmed quilt! From selecting fabrics to sewing the quilt blocks, from adding borders to quilting the layers, and finally embellishing your quilt, you have put your creativity and passion into every stitch.
Your charmed quilt is not just a beautiful piece of art, but also a labor of love – a reflection of your dedication and craftsmanship. Now it’s time to sit back, relax, and enjoy the fruits of your labor.
Here are a few suggestions on how to fully enjoy your charmed quilt:
- Display proudly: Find the perfect spot to showcase your quilt. Whether it’s on a bed, a couch, or a wall, proudly display your quilt for all to admire and appreciate.
- Get cozy: Curl up under your charmed quilt and savor its warmth and comfort. Enjoy its softness as you read a book, watch a movie, or simply relax and unwind.
- Gift with love: Consider gifting your charmed quilt to a loved one. A handmade quilt is a thoughtful and heartfelt gift that carries love and warmth in every stitch.
- Create lasting memories: Use your charmed quilt as a backdrop for special moments. Take family photos, have picnics, or gather around it during special occasions. Your quilt will become a part of cherished memories for years to come.
- Share your knowledge: Pass on your quilting skills and knowledge to others. Teach a friend or family member to make their own charmed quilt and spread the joy of quilting.
- Continue the journey: Quilting is a never-ending journey of creativity and learning. Take what you’ve learned from making your charmed quilt and embark on new quilting adventures. Explore different techniques, designs, and styles to challenge and inspire yourself.
Remember, your charmed quilt is more than just a beautiful textile. It carries your passion, creativity, and dedication. It holds the memories of the time and effort you invested in its creation.
Enjoy the cozy moments, the memories made, and the pride you feel as you wrap yourself in the warmth and beauty of your charmed quilt.
Frequently Asked Questions about How To Make A Charmed Quilt
Was this page helpful?
At Storables.com, we guarantee accurate and reliable information. Our content, validated by Expert Board Contributors, is crafted following stringent Editorial Policies. We're committed to providing you with well-researched, expert-backed insights for all your informational needs.


0 thoughts on “How To Make A Charmed Quilt”