Articles
How To Mount Blinds Inside A Window
Modified: January 9, 2024
Learn how to mount blinds inside a window with our informative articles. Discover step-by-step guides and expert tips for a flawless installation.
(Many of the links in this article redirect to a specific reviewed product. Your purchase of these products through affiliate links helps to generate commission for Storables.com, at no extra cost. Learn more)
Introduction
When it comes to window treatments, blinds are a popular choice for homeowners looking to add both style and functionality to their windows. Installing blinds inside the window frame can give a clean and streamlined look to the room, as the blinds seamlessly fit within the window recess. Whether you’re a DIY enthusiast or a homeowner looking to save on installation costs, mounting blinds inside a window is a relatively simple task that can be accomplished with a few basic tools and some careful measurements.
In this article, we will walk you through the step-by-step process of mounting blinds inside a window. From measuring the window to selecting the right blinds and installing them correctly, we’ve got you covered. So let’s dive right in and get started!
Key Takeaways:
- Accurate measurements, careful preparation, and proper installation of brackets and headrail are crucial for mounting blinds inside a window. Attention to detail ensures a secure and seamless fit, enhancing both functionality and aesthetics.
- Customizing and adding finishing touches to the blinds not only ensures their functionality but also enhances the overall look of the space. Regular maintenance and care will prolong the longevity of the blinds, providing long-term benefits.
Step 1: Measure the Window
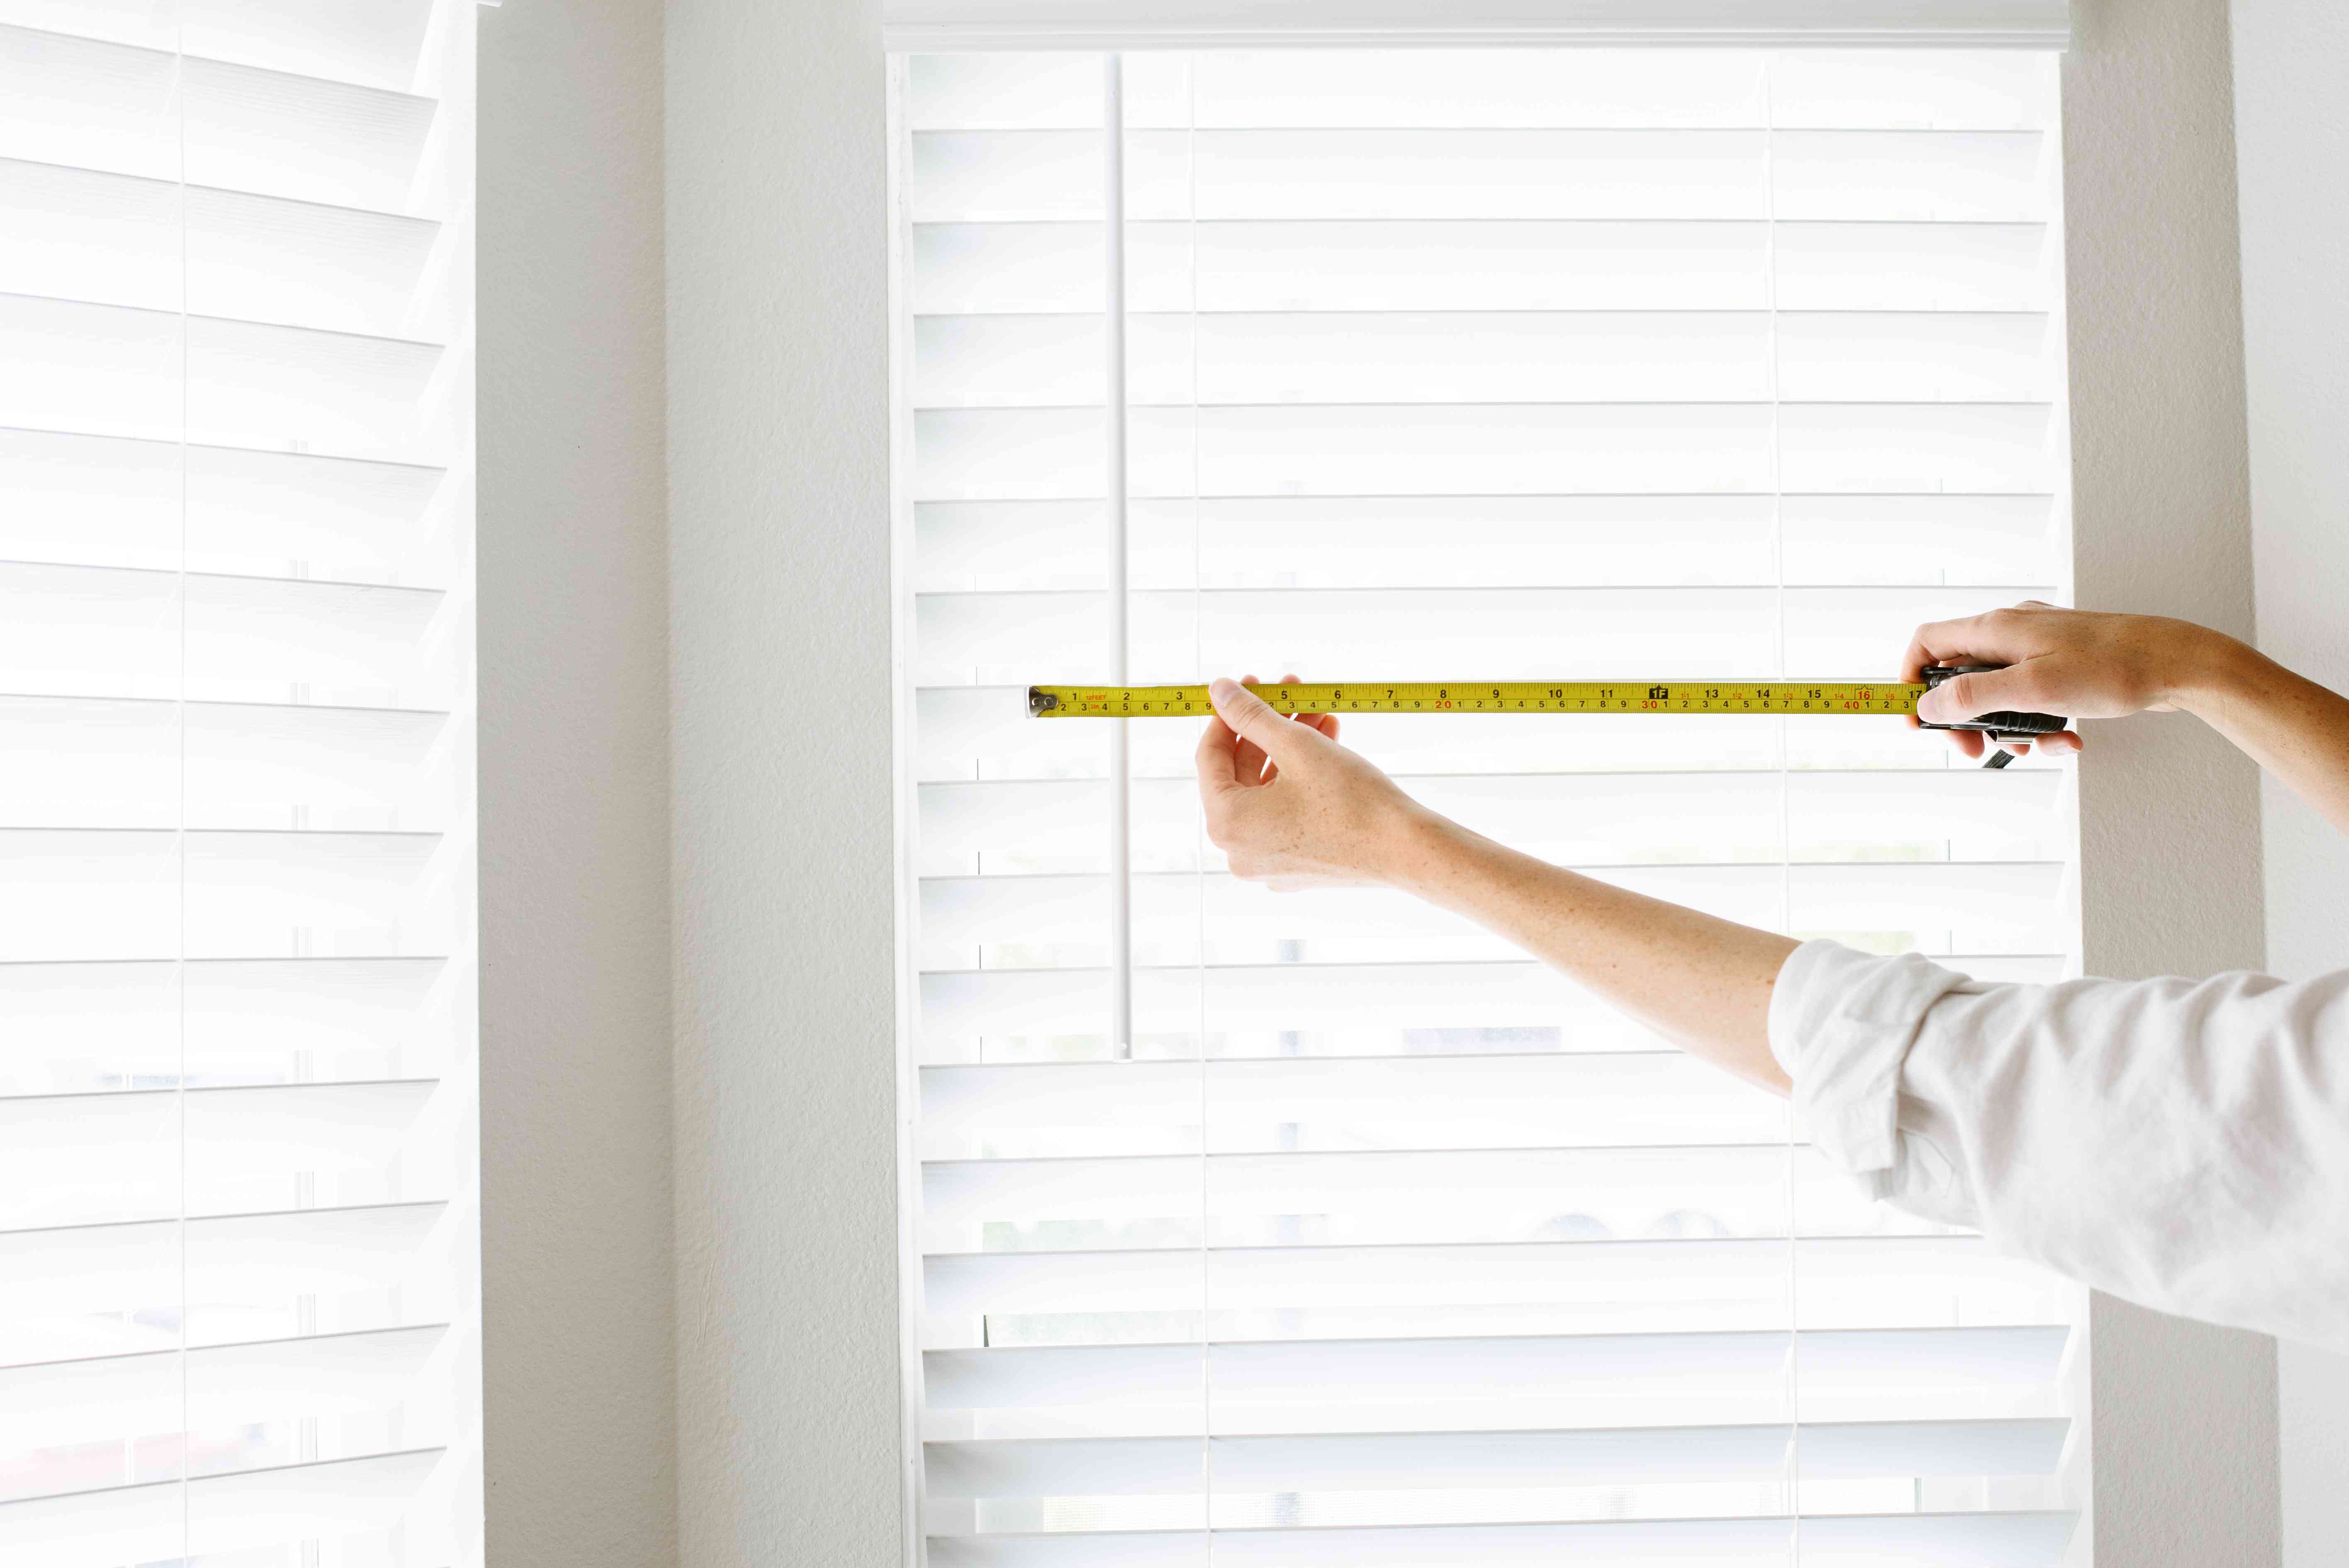
The first and most crucial step in mounting blinds inside a window is to accurately measure the window opening. This step ensures that you purchase the right size blinds and that they fit perfectly within the window frame.
Start by using a metal tape measure to measure the width and height of the window opening. Measure at least three different points horizontally and vertically and take the smallest measurement to ensure a proper fit.
When measuring the width, take the measurement from the inside edges of the window frame on the top, middle, and bottom. Write down the smallest measurement as the width of your window.
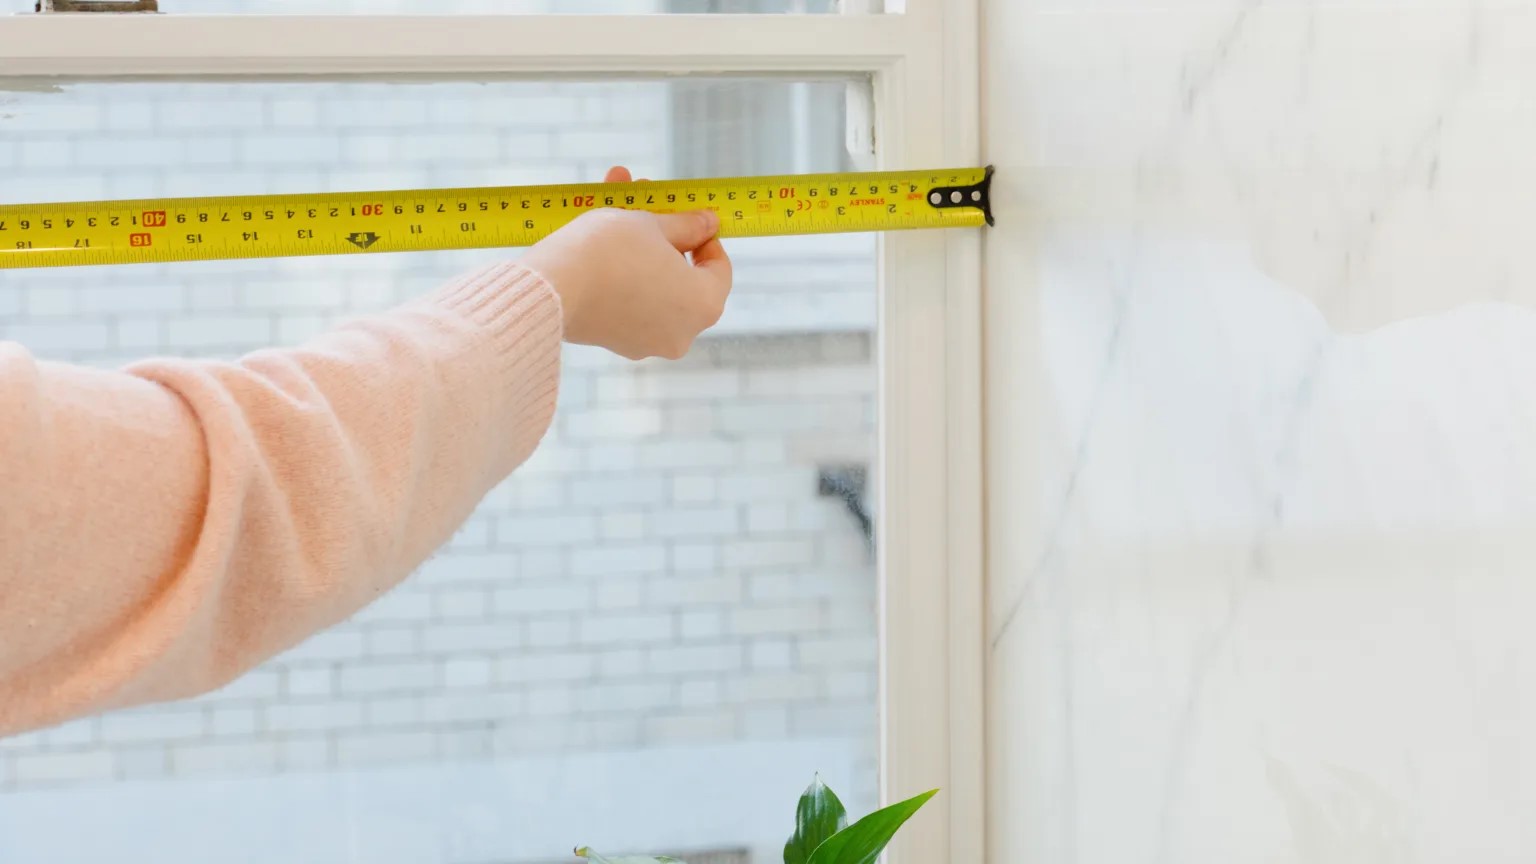
Similarly, when measuring the height, take the measurement from the inside edges of the window frame on the left, middle, and right. Again, write down the smallest measurement as the height of your window.
It’s important to note that you should measure the inside width and height of the window frame, not the outer edges. This will allow the blinds to fit snugly within the window opening and provide a clean look.
Once you have accurate measurements, double-check them to ensure accuracy. Mistakes in measurement can lead to ill-fitting blinds and may require you to make additional adjustments later on.
By taking the time to measure your window accurately, you’ll be off to a great start in ensuring that your blinds fit perfectly inside the window frame.
Step 2: Choose the Blinds
After measuring the window, the next step is to browse through the wide array of blinds available and select the perfect style for your window. Blinds come in various materials, colors, and sizes, so take some time to consider your preferences and the overall aesthetic of the room.
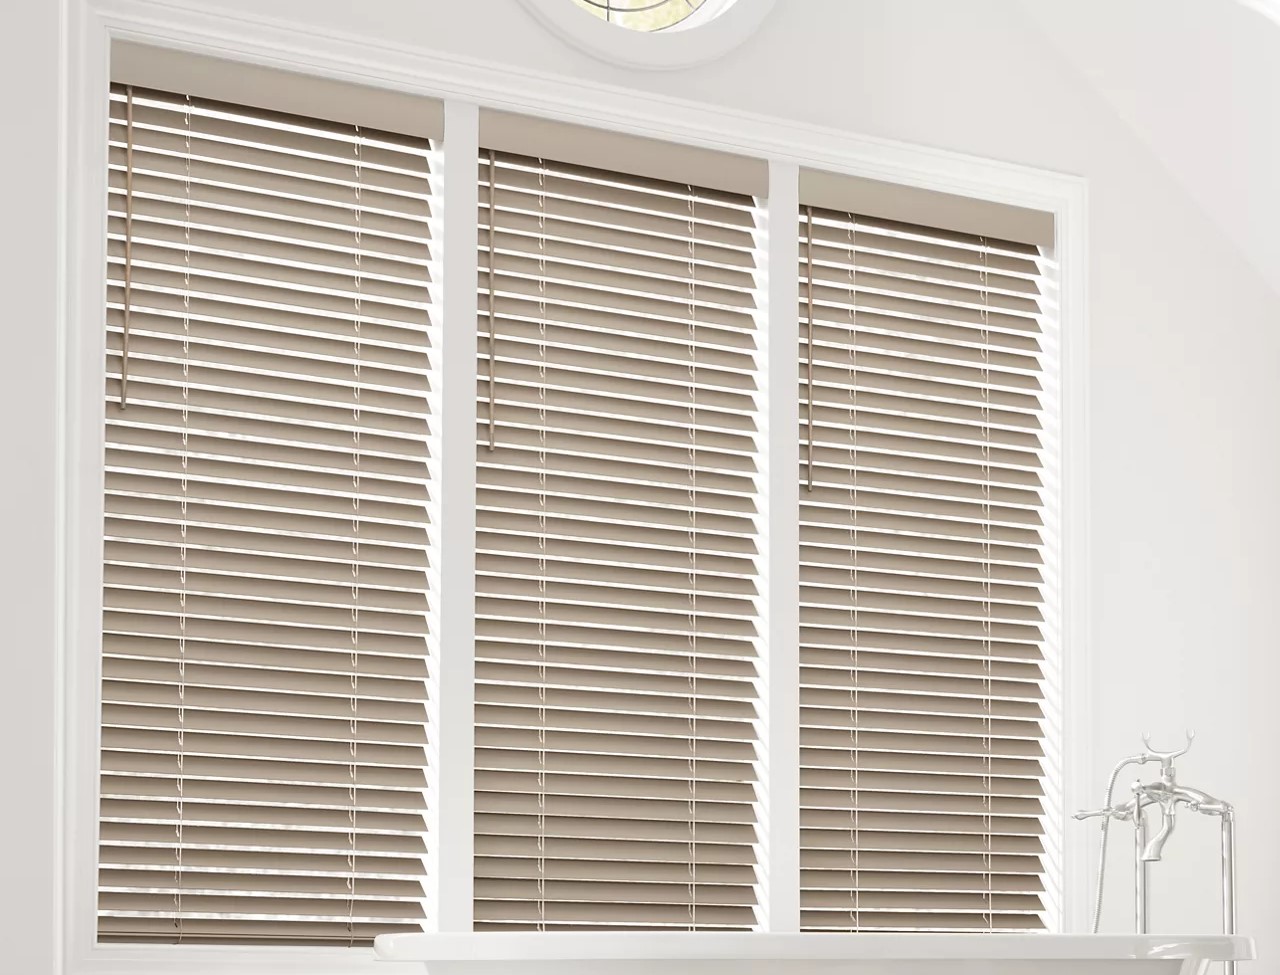
One popular choice for mounting blinds inside a window is the classic horizontal blinds. These blinds feature slats that can be tilted to control the amount of light and privacy in the room. They are available in materials such as wood, faux wood, aluminum, and vinyl, each offering its own set of benefits and visual appeal.
If you’re looking for a sleek and modern look, consider opting for vertical blinds. These blinds consist of long vertical slats that can be rotated and pulled across the window, perfect for larger windows or sliding glass doors.
Another option to consider is cellular blinds, also known as honeycomb blinds. These blinds are characterized by their unique honeycomb structure, which provides insulation and energy efficiency. They are a great choice for windows in rooms where temperature control is a priority.
In addition to the style and material, consider the color and finish of the blinds. Neutral tones, such as white or beige, are versatile options that can complement any decor scheme. However, don’t be afraid to go bold with vibrant colors or patterned blinds to make a statement in the room.
Once you’ve chosen the blinds that best suit your preferences and needs, make sure to check the measurements and ensure that they are the correct size for your window. Some blinds can be customized to fit specific window dimensions, so it’s crucial to double-check before making a purchase.
By carefully selecting the blinds for your window, you can enhance the overall aesthetic of the room while also ensuring that they fit perfectly inside the window frame.
Step 3: Gather the Tools and Supplies
Before you begin the installation process, it’s essential to gather all the necessary tools and supplies. Having everything ready will save you time and make the process smoother. Here are the tools and supplies you will need:
- A power drill with the appropriate drill bit
- Screwdriver (may vary depending on the type of screws included with your blinds)
- Measuring tape or ruler
- Pencil or marker
- Level
- Step ladder or stool (if needed)
- Blinds mounting brackets (usually provided with the blinds)
- Screws (typically included with the blinds)
- Wall anchors (if necessary)
- Optional: a stud finder if you plan to mount the blinds onto a wall stud
Having these tools and supplies easily accessible will allow you to work efficiently and ensure that everything is within reach when you need it. Before you start the installation process, it’s a good idea to read through the manufacturer’s instructions that come with your blinds. This will make you familiar with any specific requirements or additional tools that may be needed.
It’s worth noting that certain blinds, such as those specifically designed for mounting inside a window frame, may come with specialized brackets or attachment mechanisms. These brackets are typically easy to install and require minimal tools. However, different manufacturers may have slight variations, so always refer to the instructions provided.
By having all the tools and supplies ready, you’ll be well-prepared to move on to the next steps of the installation process smoothly and efficiently.
Step 4: Prepare the Window Frame
Before installing the blinds, it’s important to prepare the window frame to ensure a proper and secure fit. Here are the steps to prepare the window frame:
- Clean the window frame: Start by cleaning the inside of the window frame to remove any dirt, dust, or debris. This will provide a clean surface for the brackets to adhere to and ensure a smooth installation.
- Inspect the window frame: While cleaning, take a moment to inspect the condition of the window frame. Look for any signs of damage or issues that may affect the installation. If you notice any damages, it’s best to fix them before proceeding.
- Remove any obstructions: Check for any window hardware, such as latches or handles, that may obstruct the installation. If necessary, remove or adjust them to ensure that the blinds can be properly installed.
- Mark the bracket positions: Using a pencil or marker, mark the position of each bracket on the inside of the window frame. Measure and mark an equal distance from the top of the frame for each bracket. Use a level to ensure that the marks are aligned horizontally.
Preparing the window frame ensures a clean and smooth installation process. By cleaning the frame and checking for any obstructions or damages, you can avoid any potential issues that may arise during the installation. Marking the bracket positions also ensures that the blinds will be installed in a straight and level manner.
Once you have prepared the window frame, you are ready to move on to the next step of installing the brackets.
Step 5: Install the Brackets
Now that you have prepared the window frame, it’s time to install the brackets. The brackets are the key components that will hold the blinds securely in place. Follow these steps to install the brackets:
- Position the first bracket: Take one of the brackets and align it with the marked position on the window frame. Make sure it is centered and level. Use a pencil or a marker to mark the screw holes on the frame through the bracket’s mounting holes.
- Pre-drill the screw holes: Use a power drill with an appropriate drill bit to pre-drill pilot holes at the marked positions. This will prevent the frame from splitting or cracking when you insert the screws.
- Attach the first bracket: Place the bracket back in its position and align the holes. Insert the screws provided with the blinds and tighten them securely using a screwdriver or drill with a screwdriver bit. Be careful not to overtighten, as it may damage the frame.
- Repeat the process for the remaining brackets: Position the second bracket on the opposite side of the window frame, ensuring it is level with the first bracket. Mark the screw holes, pre-drill, and attach the bracket. If your blinds require additional brackets, follow the same process for each one.
- Double-check the alignment: Once all the brackets are installed, double-check their alignment and ensure they are level and properly secured to the window frame. Make adjustments if necessary.
Installing the brackets is a crucial step in mounting blinds inside a window. Properly installed brackets will provide a sturdy foundation for the blinds and ensure their functionality and longevity.
Make sure to refer to the manufacturer’s instructions for any specific guidelines or recommendations regarding the bracket installation process. Different blinds may have slightly different installation requirements, so it’s important to follow the instructions provided.
With the brackets securely in place, you’re ready to move on to the next step of attaching the blind headrail.
When mounting blinds inside a window, make sure to measure the inside width accurately to ensure a proper fit. Use a level to ensure the brackets are installed straight for a professional look.
Step 6: Attach the Blind Headrail
With the brackets securely installed, it’s time to attach the blind headrail. The headrail is the top portion of the blinds that holds all the slats together and allows for easy opening and closing. Follow these steps to attach the blind headrail:
- Position the blind headrail: Hold the blind headrail in front of the brackets, aligning it with the installed brackets. The headrail should fit snugly into the brackets with the provided grooves or slots lining up.
- Slide the headrail into the brackets: With one hand holding the headrail, use your other hand to gently push and slide the headrail into the brackets. Make sure it is level and properly aligned within the brackets.
- Secure the headrail: Once the headrail is in place, secure it by locking it into the brackets. Depending on the type of brackets, there may be a locking lever or mechanism that you can engage to hold the headrail in place. Follow the manufacturer’s instructions for properly securing the headrail.
- Test the functionality: After attaching the headrail, test the blinds’ functionality by pulling on the lift cords or wand control. Ensure that the blinds operate smoothly, opening and closing without any issues. If there are any difficulties, double-check the installation and adjust if necessary.
Attaching the blind headrail is a crucial step in the installation process. Make sure to carefully follow the manufacturer’s instructions, as different blinds may require specific methods for attaching the headrail.
Once the headrail is securely attached and the blinds are functioning properly, you can move on to the next step of checking for proper functionality to ensure everything is in working order.
Step 7: Check for Proper Functionality
Once the blind headrail is securely attached, it’s important to check for proper functionality to ensure that everything is in working order. Follow these steps to check the functionality of your blinds:
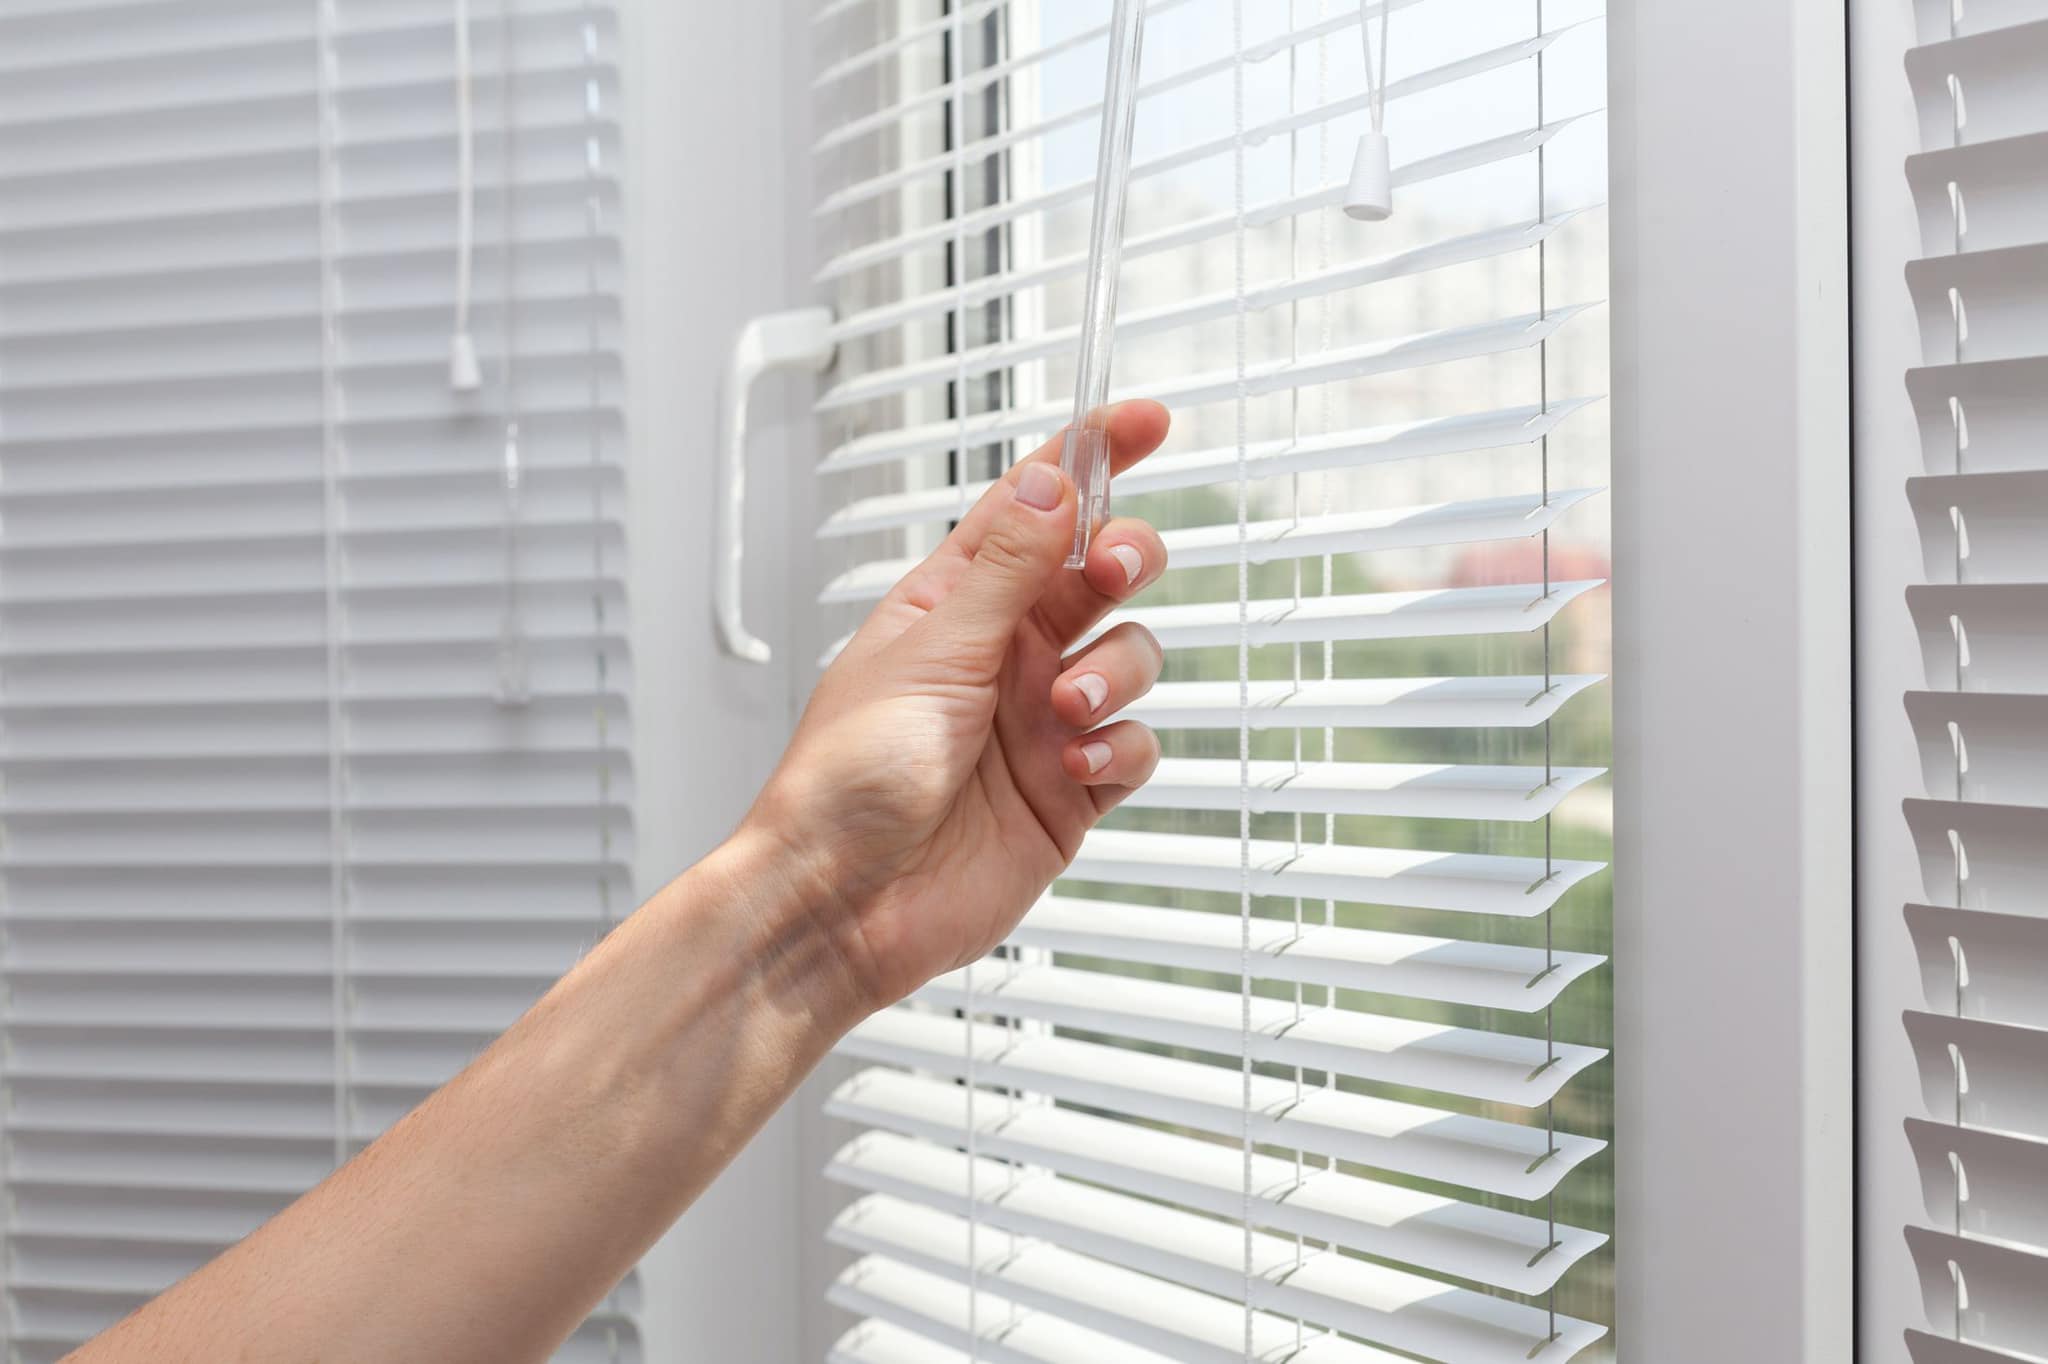
- Test the lift mechanism: Gently pull on the lift cords or use the wand control to raise and lower the blinds. Pay close attention to how smoothly they operate and if there are any obstructions or issues. The blinds should move up and down with ease.
- Check the slat tilting mechanism: If you have blinds with adjustable slats, test the tilting mechanism. Rotate the tilt rod or use the tilt wand to tilt the slats in different directions. Ensure that the slats move smoothly and stay in the desired position without any difficulty.
- Assess the cord length and safety features: If your blinds have cords, check the length of the cords to ensure they are properly secured and not posing a safety hazard, especially if you have children or pets. Some blinds come with cord cleats or cord tensioners to keep the cords out of reach.
- Inspect for any issues or adjustments needed: Take a close look at the blinds and the installation. Check for any misaligned slats, loose brackets, or other issues that may need adjustment or tightening. Also, evaluate the overall appearance to ensure a clean and uniform look.
By carefully checking the functionality of your blinds, you can identify and address any issues before completing the installation process. This will ensure that your blinds are in perfect working order and provide the desired level of light control and privacy for your space.
If you encounter any difficulties or notice any problems during the functionality check, consult the manufacturer’s instructions or seek professional assistance if needed. It’s important to address any issues promptly to ensure the long-term functionality of your blinds.
Once you are satisfied with the functionality and appearance of your blinds, you can proceed to the next step of adjusting and customizing them to meet your specific needs.
Step 8: Adjust and Customize
After checking the functionality of your blinds, it’s time to make any necessary adjustments and customize them to fit your preferences. Follow these steps to adjust and customize your blinds:
- Leveling the blinds: Use a level to ensure that the blinds are straight and level. If you notice any slanted or uneven blinds, adjust the tilt mechanism or the positioning of the headrail until they are level.
- Evening out the slats: If you have horizontal blinds and notice any slats that are uneven or misaligned, gently adjust them until they are all at an equal level. This will give your blinds a neat and uniform appearance.
- Trimming the blinds (if applicable): Depending on the type of blinds you have, you may be able to trim them to fit the exact width of your window. Follow the manufacturer’s instructions to safely trim the blinds to the desired width, ensuring a perfect fit.
- Adding valances or cornices (optional): To enhance the aesthetic appeal of your blinds, consider adding a valance or cornice board at the top. These decorative elements can hide the headrail and give your blinds a finished look that complements your décor.
- Cord adjustments (if necessary): If your blinds have cords, adjust their length to ensure they are out of reach of children or pets. Use cord cleats or tensioners to secure the cords and prevent them from becoming tangled or posing a safety hazard.
- Promptly address any issues: If you notice any issues during the adjustment process, such as loose brackets, tangled cords, or misaligned slats, address them promptly. Tighten screws, untangle cords, and adjust slats as needed to ensure optimum functionality and appearance.
By taking the time to adjust and customize your blinds, you can ensure that they not only function well but also enhance the overall aesthetics of your space. Making these small adjustments will help you achieve the desired look and functionality.
Once you have completed the adjustments and customizations, you can move on to the final step of adding the finishing touches to complete the installation of your blinds.
Read more: How To Install Honeycomb Blinds Inside Mount
Step 9: Finishing Touches
Now that your blinds are properly installed and adjusted, it’s time to add the finishing touches to complete the installation process. These final steps will ensure that your blinds not only function well but also enhance the overall aesthetic of your space:
- Remove any installation debris: Take a moment to clean up any debris or dust that may have accumulated during the installation process. Use a damp cloth or vacuum to remove any particles from the window frame and surrounding area.
- Smooth out and align the slats: Run your hand along the slats to ensure they are all smooth and aligned. Gently adjust any slats that may be out of place to maintain a neat and uniform appearance.
- Adjust the blinds to your desired position: Open or close the blinds to your desired position to control the amount of light and privacy in the room. Play around with the tilt mechanism or lifting cords to find the perfect position that suits your preferences.
- Step back and admire your work: Take a step back and appreciate your efforts in installing the blinds. Admire how they not only provide functionality but also enhance the overall look of your window and room.
- Clean and maintain your blinds: Regularly clean and maintain your blinds to keep them looking their best and ensure their longevity. Follow the manufacturer’s instructions for cleaning and care, whether it’s dusting the slats or using a gentle cleaning solution.
- Enjoy your newly installed blinds: Finally, sit back and enjoy the benefits of having beautifully installed blinds in your home. Take pleasure in the privacy, light control, and aesthetic appeal that they bring to your space.
By completing these finishing touches, you’ll wrap up the installation process and have fully functional, visually pleasing blinds that add value to your home.
Remember, if you have any concerns or questions during the installation process or later on, don’t hesitate to consult the manufacturer’s instructions or seek professional assistance. Proper installation and maintenance will ensure that your blinds continue to enhance your space for years to come.
Congratulations on successfully mounting blinds inside your window!
Conclusion
Mounting blinds inside a window is a rewarding DIY project that can enhance the functionality and aesthetic appeal of your home. By following the step-by-step process outlined in this article, you can successfully install blinds inside your window with ease.
Starting with accurate measurements, choosing the right blinds, and gathering the necessary tools and supplies, you’ll be well-prepared to begin the installation process. With careful preparation of the window frame, installation of brackets, attachment of the blind headrail, and checking for proper functionality, you’ll ensure a secure and seamless fit.
Adjusting and customizing the blinds to meet your preferences and adding the finishing touches will complete the installation process. Taking the time to clean, align, and admire your work will leave you with fully functional and visually pleasing blinds that enhance your living space.
Remember to regularly maintain and clean your blinds to keep them looking their best and ensure their longevity. Follow the manufacturer’s instructions for care and consult professionals if needed.
Enjoy the benefits that blinds provide, such as privacy, light control, and an elevated aesthetic appeal. Experience the satisfaction of a job well done as you enjoy the comfort and beauty of your newly installed blinds.
Now it’s time to sit back, relax, and take pride in your home improvement accomplishments!
Frequently Asked Questions about How To Mount Blinds Inside A Window
Was this page helpful?
At Storables.com, we guarantee accurate and reliable information. Our content, validated by Expert Board Contributors, is crafted following stringent Editorial Policies. We're committed to providing you with well-researched, expert-backed insights for all your informational needs.