Home>Articles>How To Install Bali Blinds With An Inside Mount
Articles
How To Install Bali Blinds With An Inside Mount
Modified: December 7, 2023
Learn how to easily install Bali blinds with an inside mount. Follow our step-by-step guide and get your blinds set up hassle-free. Perfect for anyone looking for informative articles on blind installation.
(Many of the links in this article redirect to a specific reviewed product. Your purchase of these products through affiliate links helps to generate commission for Storables.com, at no extra cost. Learn more)
Introduction
Installing blinds can be a quick and easy way to enhance the privacy and aesthetics of your home. When it comes to inside mounts, Bali blinds are a popular choice among homeowners. With their sleek design, customizable options, and ease of installation, Bali blinds offer both functionality and style.
In this article, we will guide you through the step-by-step process of installing Bali blinds with an inside mount. From gathering the necessary tools to adjusting and testing the blinds, we will provide you with all the information you need to complete the installation successfully.
Before we dive into the installation process, it’s important to note that inside mounts are suitable for windows with sufficient depth to accommodate the blinds. If your window frame does not have enough depth, you may need to consider an outside mount instead.
Now, let’s get started with the first step: gathering the necessary tools and materials.
Key Takeaways:
- Installing Bali blinds with an inside mount is a straightforward process that enhances privacy and aesthetics. Accurate measurements, proper alignment, and testing are key to a successful installation.
- By following the step-by-step guide, homeowners can confidently install Bali blinds, transforming their windows with style and functionality. Attention to detail and adherence to manufacturer instructions ensure long-lasting performance.
Read more: How To Install Honeycomb Blinds Inside Mount
Step 1: Gather the Necessary Tools and Materials
Before you begin installing your Bali blinds with an inside mount, it’s essential to gather all the tools and materials you’ll need. Having everything readily available will make the installation process much smoother and more efficient.
Here are the tools and materials you will need:
- Measuring tape: This will help you accurately measure the window frame and determine the sizing for your blinds.
- Level: A level tool will ensure that your blinds are properly aligned and straight during installation.
- Pencil or marker: You’ll need a pencil or marker to mark the mounting locations and any required adjustments along the way.
- Screwdriver: Depending on the type of brackets included with your Bali blinds, you may need a screwdriver to secure the brackets to the window frame.
- Drill (if necessary): If your window frame requires pilot holes for the brackets, you’ll need a drill and appropriate drill bits.
- Step ladder: Depending on the height of your window, a step ladder may be necessary to reach and install the blinds comfortably.
- Bali blinds kit: Ensure that you have the complete Bali blinds kit, including the headrail, brackets, valance, and any additional components specified in the instructions.
Once you have gathered all the necessary tools and materials, you can proceed to the next step: measuring the window frame.
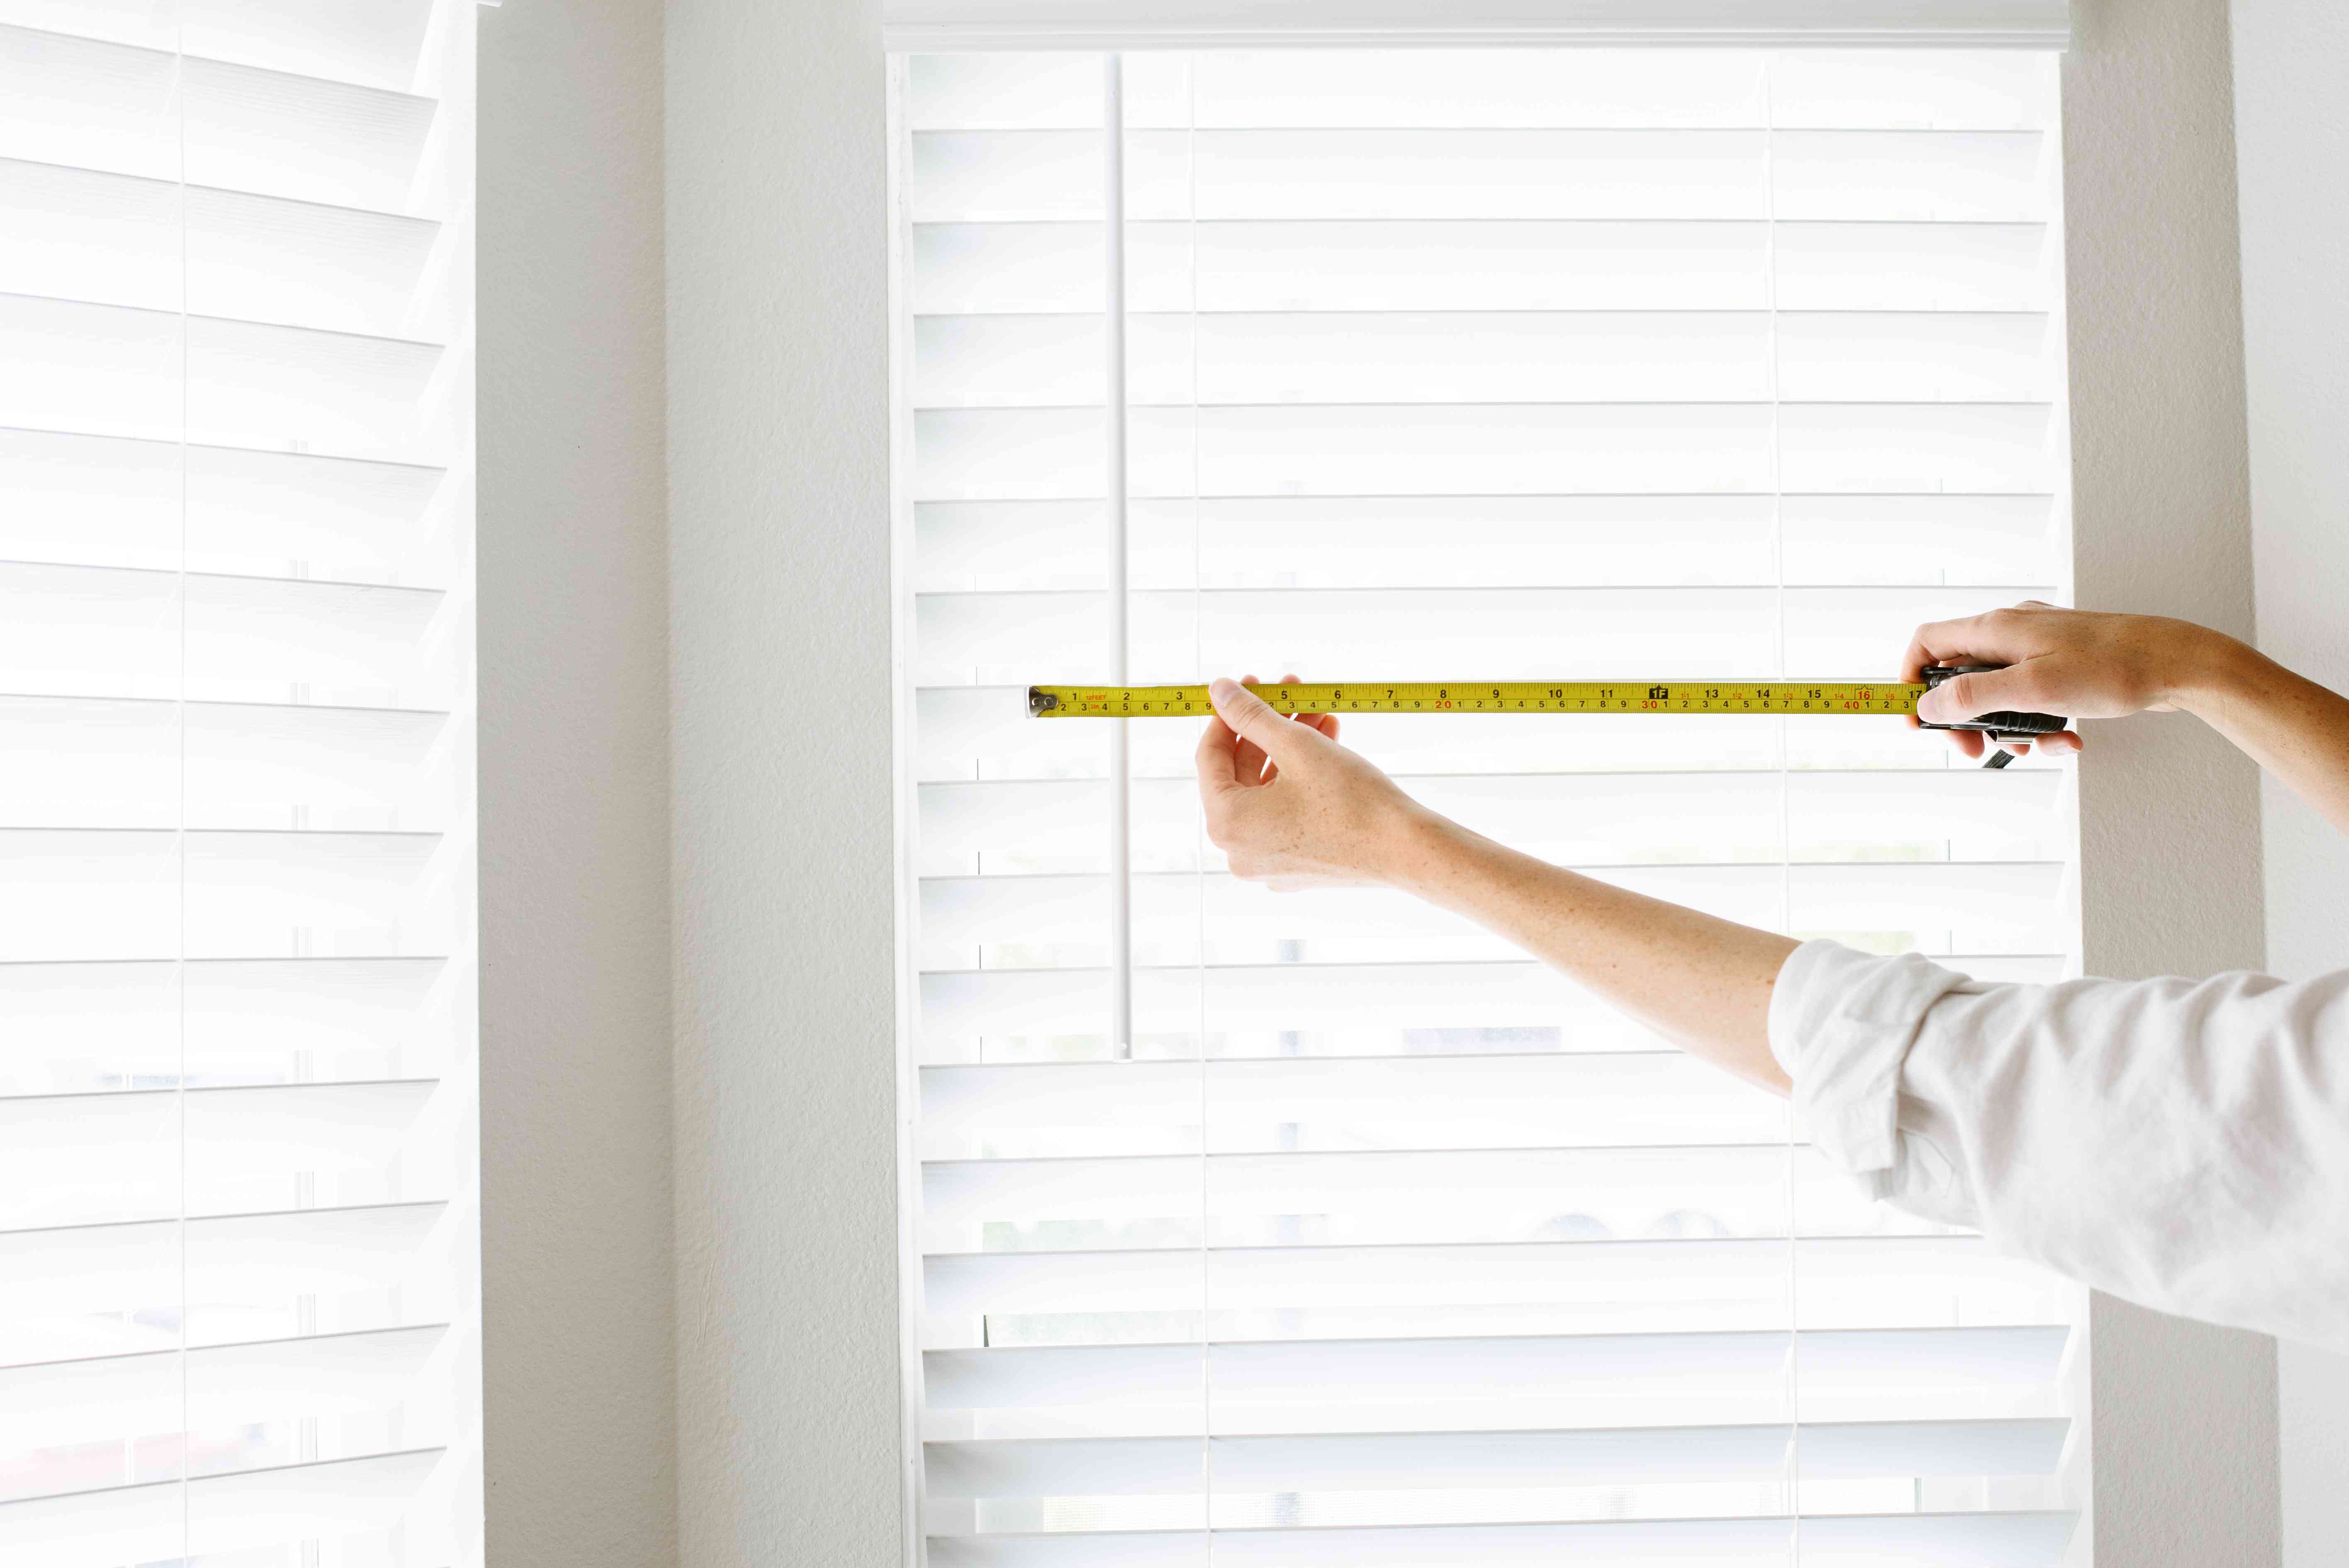
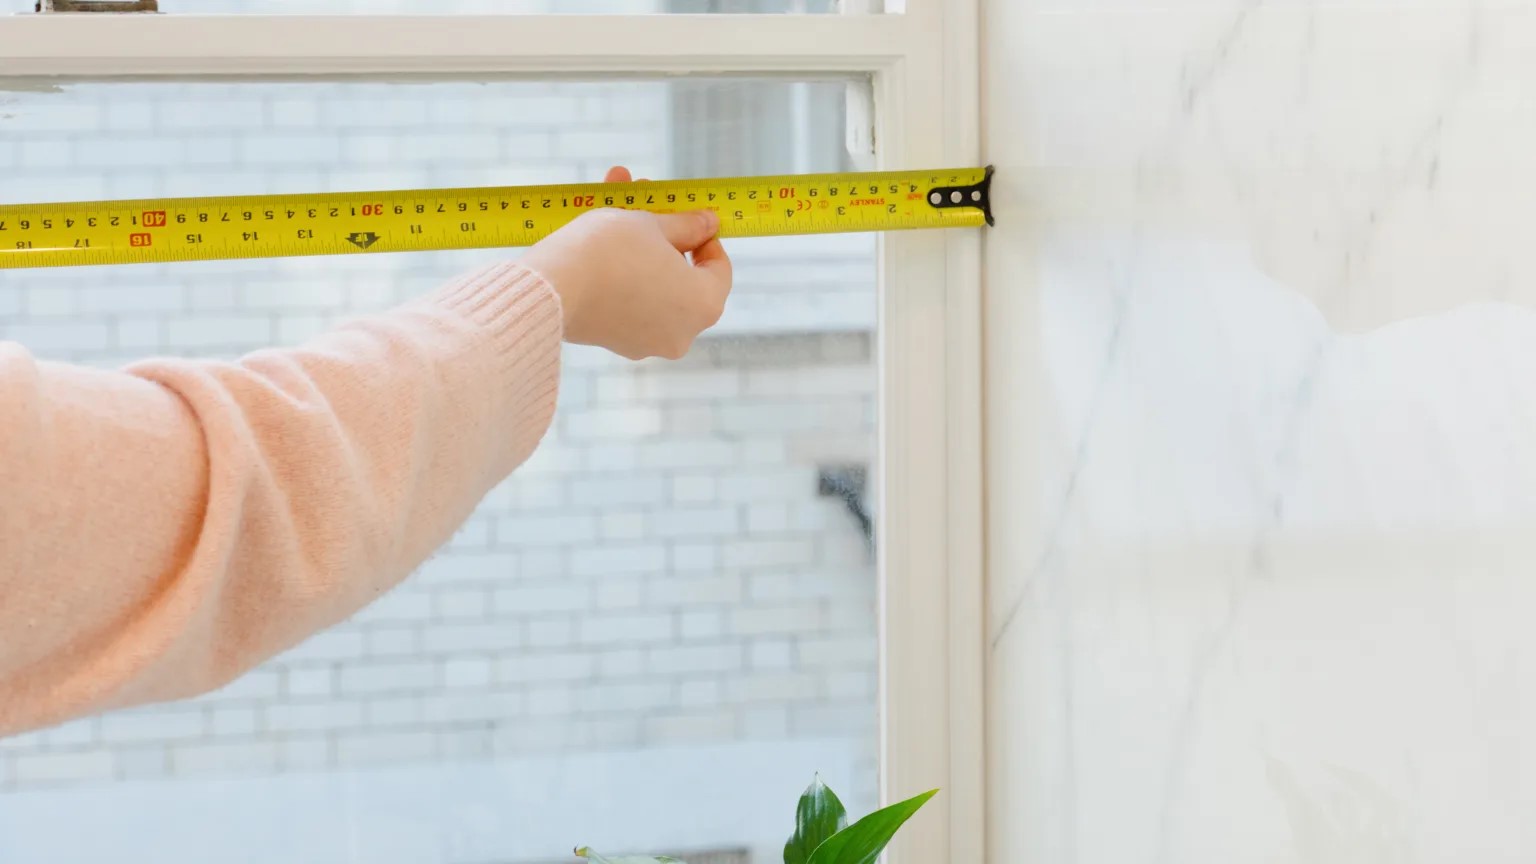
Step 2: Measure the Window Frame
Accurate measurements are crucial to ensure that your Bali blinds fit properly and function correctly. Before proceeding with the installation, take the time to measure the window frame accurately.
Here’s how to measure the window frame for an inside mount:
- Start by measuring the width of the window frame. Measure the inside width at the top, middle, and bottom of the window. Note down the smallest measurement, as this will be the width of your blinds.
- Next, measure the height of the window frame. Again, measure at the left, center, and right sides of the window, and record the shortest measurement. This will be the height of your blinds.
It’s important to measure the window frame precisely to avoid any issues during installation. Take into account any obstructions, such as handles or locks, and make sure to measure inside the frame, not the outer edges.
Once you have obtained the width and height measurements, double-check them to ensure accuracy. Keep these measurements handy as you will need them for selecting the appropriate blinds and configuring the brackets in the next steps.
Having successfully measured your window frame, it’s time to move on to the next step: determining the mounting depth for your Bali blinds.
Step 3: Determine the Mounting Depth
Before installing your Bali blinds with an inside mount, it’s essential to determine the mounting depth of your window frame. The mounting depth refers to the amount of available space between the window glass and any obstructions, such as handles or locks.
To determine the mounting depth, follow these steps:
- Measure the distance from the front edge of the window frame to any obstructions that may interfere with the blinds.
- Subtract this measurement from the smallest width measurement you obtained in Step 2. The result will be the maximum width of your blinds, taking into account the available mounting depth.
- Repeat the same process for the height measurement, considering any obstructions along the top or bottom edge of the window frame. Subtract the obstruction distance from the smallest height measurement to get the maximum height for your blinds.
It’s crucial to determine the mounting depth accurately to ensure the blinds fit flush against the window glass and operate smoothly. This step will also help you select the appropriate size brackets for installation.
With the mounting depth determined, you are ready to proceed to Step 4: installing the brackets for your Bali blinds.
Step 4: Install the Brackets
Now that you have measured the window frame and determined the mounting depth, it’s time to install the brackets for your Bali blinds. The brackets will securely hold the blinds in place and ensure proper functionality.
Follow these steps to install the brackets:
- Hold one bracket against the top left corner of the window frame. Use a pencil or marker to mark the screw holes on the frame.
- Repeat the process for the top right corner of the window frame, ensuring that the brackets are aligned horizontally with each other.
- If the brackets require pilot holes, use a drill and an appropriate drill bit to create the holes according to the marked positions.
- Secure the brackets to the window frame using screws or other fasteners provided in your Bali blinds kit. Make sure the brackets are firmly attached.
- Once the top brackets are secured, repeat the process for the bottom brackets, ensuring they are aligned vertically with each other.
It’s important to double-check the alignment and levelness of the brackets before tightening the screws completely. Use a level tool to ensure the brackets are perfectly vertical or horizontal, depending on the orientation of the blinds.
With the brackets successfully installed, you are ready to move on to the next step: attaching the headrail of your Bali blinds.
When installing Bali blinds with an inside mount, make sure to measure the width at the top, middle, and bottom of the window to account for any variations. This will ensure a perfect fit.
Read more: How To Install Zebra Blinds Inside Mount
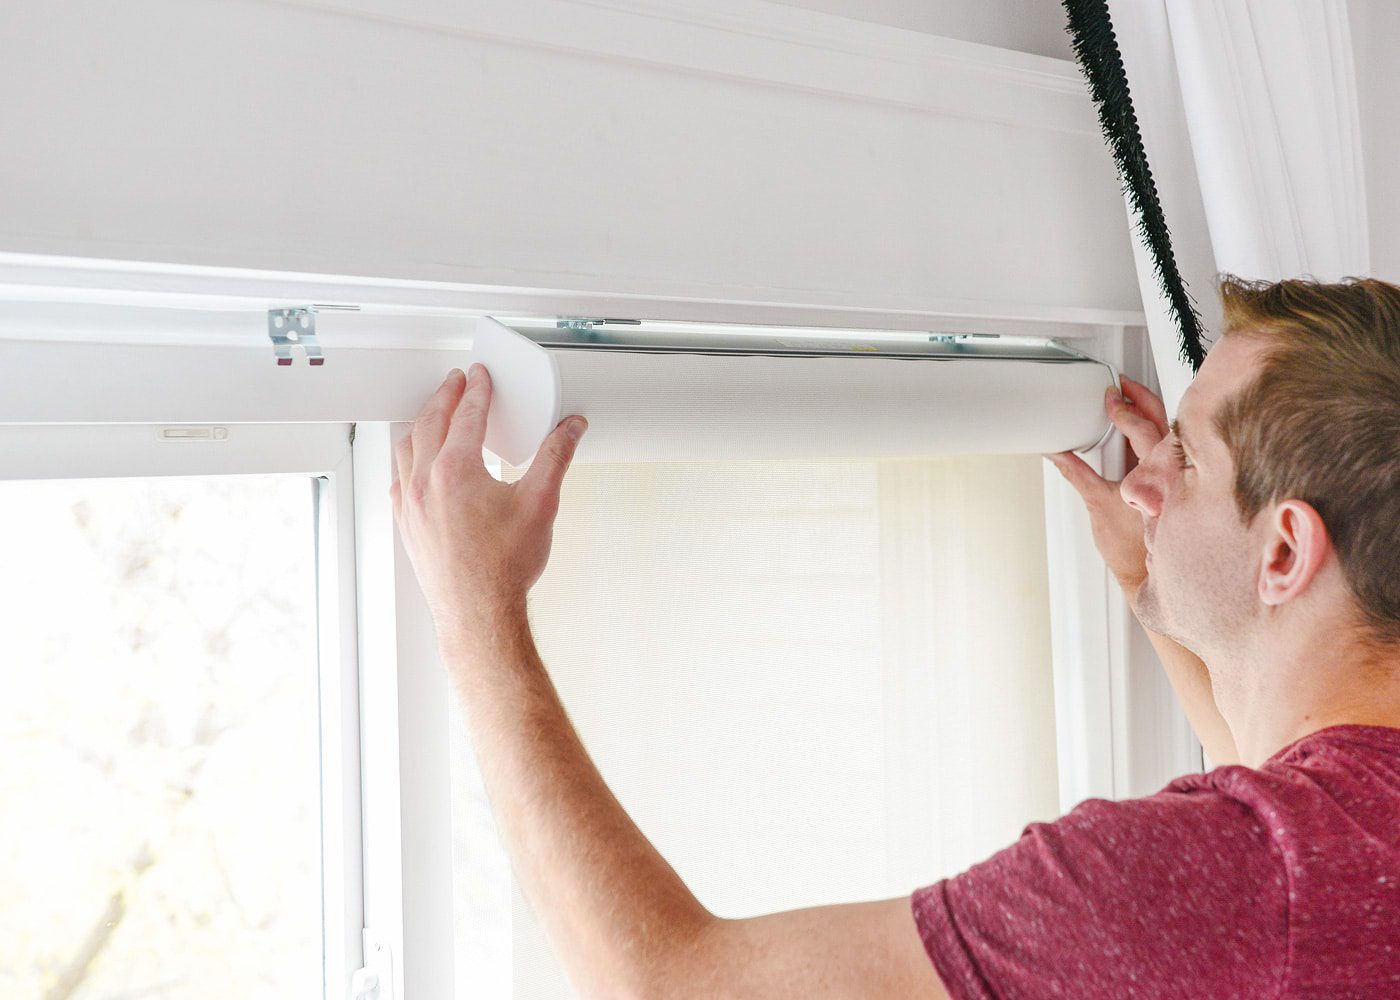
Step 5: Attach the Headrail to the Brackets
With the brackets securely installed, it’s time to attach the headrail of your Bali blinds to the brackets. The headrail is the long horizontal component that houses the blinds and allows them to be raised and lowered.
Follow these steps to attach the headrail:
- Position the headrail so that the hooks or tabs on the back align with the brackets on the window frame.
- Slide the headrail into the brackets, ensuring that it is fully inserted and secure.
- Once the headrail is in place, give it a gentle tug to test its stability. It should be firmly held by the brackets.
Make sure that the headrail is level and aligned properly with the window frame. Adjustments can be made by sliding the headrail sideways or repositioning the brackets if necessary.
At this point, your Bali blinds are starting to take shape. However, there are a few more steps to complete the installation and add finishing touches. The next step is to install the valance for a polished look.
Step 6: Install the Valance
Adding a valance to your Bali blinds provides a finishing touch and enhances the overall appearance of your window treatment. The valance is a decorative piece that attaches to the headrail and covers the top portion of the blinds.
Follow these steps to install the valance:
- Ensure that the valance clips or brackets are included in your Bali blinds kit.
- Attach the valance clips or brackets to the headrail according to the instructions provided.
- Slide the valance onto the clips or brackets, making sure it is centered and level.
- Secure the valance in place by gently pressing down on it until it snaps into position.
Once the valance is installed, take a step back and admire your newly transformed window. The valance adds a touch of elegance and completes the overall look of your Bali blinds.
With the valance securely in place, there is just one final step remaining: adjusting and testing the blinds.
Step 7: Adjust and Test the Blinds
Now that you have successfully installed the brackets, attached the headrail, and installed the valance, it’s time to adjust and test the blinds to ensure they are operating smoothly.
Follow these steps to adjust and test your Bali blinds:
- Start by ensuring that the blinds are in the fully closed position.
- If your blinds have a tilt mechanism, use the tilt wand or cord to adjust the slats to your desired angle.
- If your blinds have a lift mechanism, gently pull on the lift cord or use the lift wand to raise and lower the blinds.
- Test the blinds at different intervals to make sure they are functioning properly and moving smoothly.
- If any adjustments are needed, refer to the instructions provided with your Bali blinds kit for troubleshooting tips.
Take your time to familiarize yourself with the operation of the blinds and ensure they are meeting your expectations in terms of functionality and appearance.
Once you are satisfied with the adjustment and testing of the blinds, you have successfully completed the installation process of your Bali blinds with an inside mount.
Congratulations! Your new blinds not only provide privacy and light control but also add a touch of elegance and style to your home.
Remember, regular cleaning and maintenance will help prolong the life and beauty of your blinds. Follow the manufacturer’s instructions for cleaning and care to ensure they remain in optimal condition.
Enjoy the benefits and beauty of your newly installed Bali blinds for years to come!
Conclusion
Installing Bali blinds with an inside mount is a rewarding project that can enhance the privacy, aesthetics, and functionality of your windows. By following the step-by-step guide outlined in this article, you can confidently complete the installation process and enjoy the benefits of your beautifully installed blinds.
From gathering the necessary tools and materials to measuring the window frame, determining the mounting depth, installing the brackets, attaching the headrail, installing the valance, and adjusting and testing the blinds, each step plays a crucial role in achieving a seamless and professional installation.
Remember to take accurate measurements, ensure proper alignment, and test the functionality of your blinds before considering the installation complete. Pay attention to any specific instructions provided by the manufacturer to ensure long-lasting performance and optimal operation.
By installing Bali blinds with an inside mount, you can transform your windows, create a stylish and cohesive look in your space, and enjoy the benefits of improved privacy, light control, and aesthetic appeal.
So, grab your tools, follow the steps outlined in this article, and get ready to enjoy the beauty and functionality of your newly installed Bali blinds!
Frequently Asked Questions about How To Install Bali Blinds With An Inside Mount
Was this page helpful?
At Storables.com, we guarantee accurate and reliable information. Our content, validated by Expert Board Contributors, is crafted following stringent Editorial Policies. We're committed to providing you with well-researched, expert-backed insights for all your informational needs.


0 thoughts on “How To Install Bali Blinds With An Inside Mount”