Articles
How To Store Drywall Mud
Modified: May 6, 2024
Looking for tips on storing drywall mud? Check out our articles for expert advice and best practices to keep your drywall mud fresh and ready for your next project.
(Many of the links in this article redirect to a specific reviewed product. Your purchase of these products through affiliate links helps to generate commission for Storables.com, at no extra cost. Learn more)
Introduction
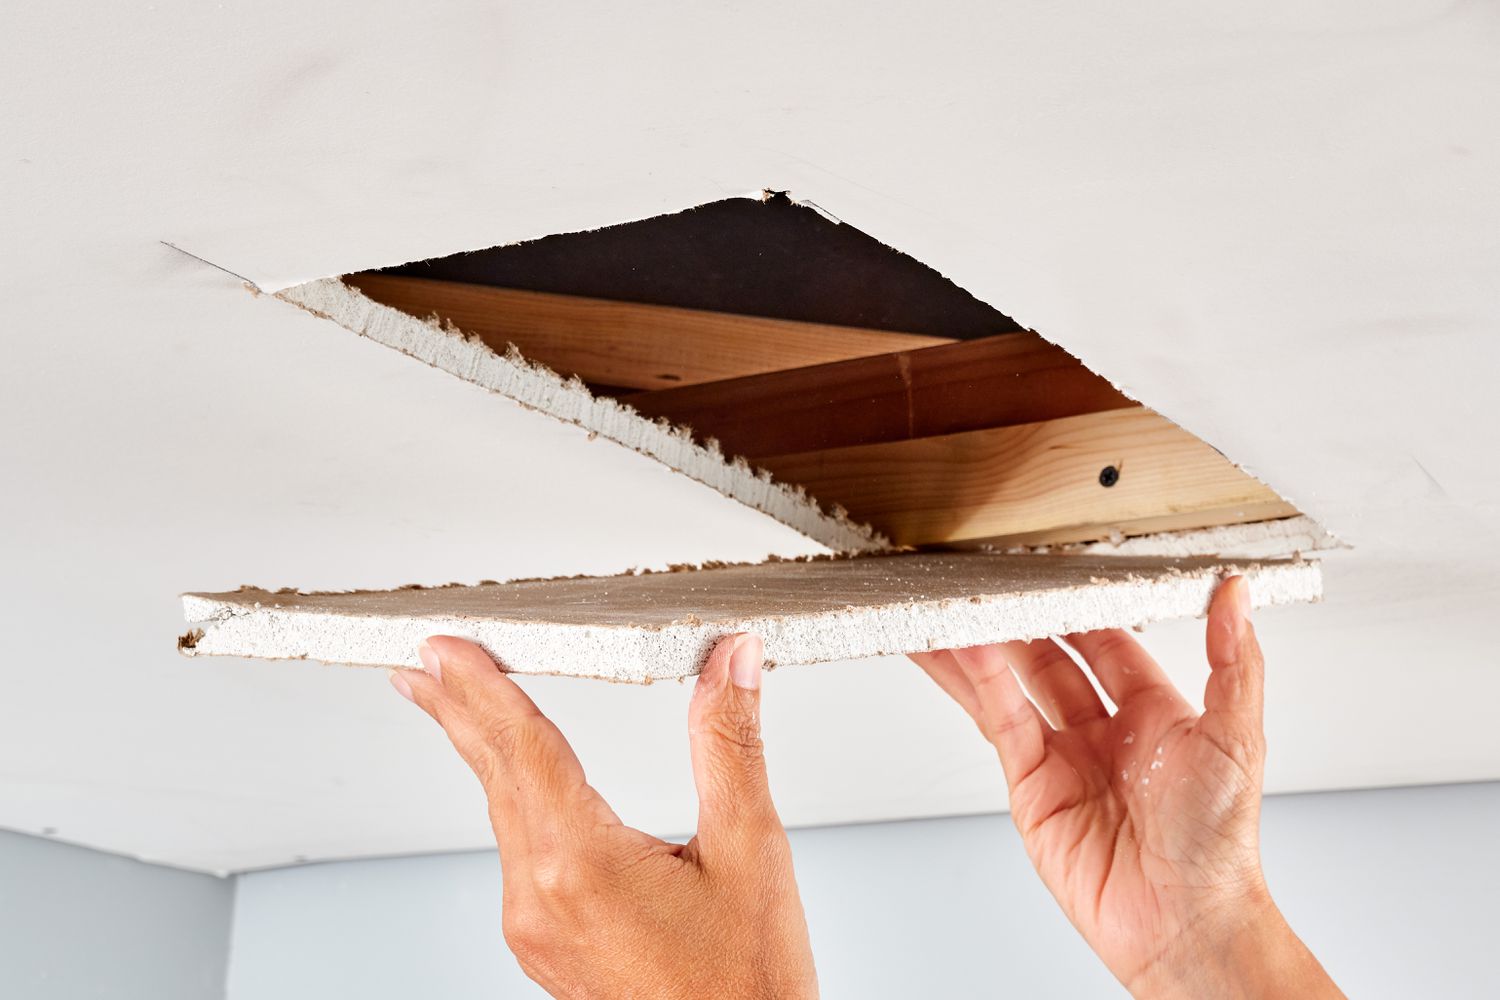
Drywall mud, also known as joint compound or simply mud, is an essential substance used in the construction and renovation of walls and ceilings. It plays a crucial role in creating a smooth and seamless finish, hiding imperfections and creating a solid foundation for paint or wallpaper. However, proper storage of drywall mud is often overlooked, leading to wastage and deterioration in quality.
In this article, we will explore the importance of storing drywall mud correctly and provide you with a step-by-step guide to ensure its longevity and usability. By following these simple tips, you can save money, reduce waste, and always have high-quality mud on hand for your next project.
Key Takeaways:
- Proper storage of drywall mud is crucial to maintain its workability, prevent contamination, and save money by extending its shelf life. Follow the step-by-step guide to ensure high-quality mud for future projects.
- Choosing the right container, preparing it properly, and storing drywall mud in optimal conditions are key to preserving its quality and usability. Regular maintenance and inspection help identify and address any issues early on, ensuring professional results for your projects.
Read more: How To Store Drywall
Why Proper Storage of Drywall Mud is Important
Proper storage of drywall mud is crucial for several reasons. First and foremost, it helps maintain the consistency and workability of the mud over time. When exposed to air, drywall mud can dry out, become lumpy, and lose its ability to spread smoothly. By storing it correctly, you can extend its shelf life and ensure that it remains easy to work with.
Additionally, proper storage prevents contamination of the drywall mud. When left uncovered or stored in unsanitary conditions, dust, dirt, and other debris can find their way into the container. These contaminants can not only affect the quality of the mud but also create imperfections in the finished wall surface.
Another important reason to store drywall mud properly is to prevent freezing and thawing. Many drywall mud products contain water, which can freeze in low temperatures. When frozen, the water expands and can cause the container to crack or burst. This not only leads to messy and wasteful spills but also compromises the integrity of the mud, making it difficult to achieve a smooth finish.
Furthermore, storing drywall mud properly allows for better organization and efficiency. By keeping your mud containers in a designated storage area, labeled and arranged in an orderly manner, you can easily locate and access the specific products you need for each project. This saves time and effort, allowing you to focus on the task at hand.
Lastly, proper storage of drywall mud helps save money. When mud is improperly stored and becomes dry and clumpy, it cannot be salvaged and must be discarded. This results in unnecessary waste and the need to repurchase new supplies. By implementing proper storage practices, you can maximize the use of your drywall mud, reduce waste, and save money in the long run.
Now that we understand the importance of proper storage, let’s explore the materials needed and the step-by-step process to store drywall mud effectively.
Materials Needed for Proper Storage
Before you start storing your drywall mud, it’s important to gather the necessary materials to ensure proper storage conditions. Here is a list of items you will need:
- Airtight Containers: Look for containers specifically designed for storing wet materials. These can be found at home improvement stores or online. Make sure they have tight-sealing lids to prevent air and moisture from entering.
- Plastic Liners: It’s a good idea to line your containers with plastic bags or plastic wrap to provide an extra layer of protection against moisture and air.
- Spatula or Trowel: Having a spatula or trowel on hand will make it easier to transfer the drywall mud from its original container to the storage container.
- Labeling Materials: Invest in waterproof labels or a permanent marker to clearly label each container with the date of purchase and the type of drywall mud.
- Storage Area: Find a cool, dry place to store your drywall mud. Avoid areas prone to extreme temperatures, humidity, and direct sunlight.
- Shelving or Racks: To keep your storage area organized and prevent containers from tipping over, consider installing shelving or racks to hold the containers securely.
By gathering these materials beforehand, you will be well-prepared to store your drywall mud properly and ensure its longevity and usability for future projects.
Step 1: Choosing the Right Container
The first step in proper storage of drywall mud is selecting the right container to hold your mud. Here are some factors to consider when choosing the container:
- Size: Consider the quantity of drywall mud you typically use for your projects. Choose a container size that can comfortably accommodate the amount of mud you will be storing. It’s better to have a slightly larger container to avoid overflow.
- Material: Look for containers made of durable, non-reactive materials such as plastic or metal. These materials will protect the drywall mud from air, moisture, and contaminants.
- Airtight Seal: Ensure that the container has a tight-fitting lid that creates an airtight seal. This will prevent air from entering the container and drying out the mud.
- Easy to Clean: Choose a container that is easy to clean. Drywall mud can be messy, and being able to easily wash out the container will maintain cleanliness and prevent the buildup of dried mud.
- Transparent: While not essential, transparent containers have the advantage of allowing you to see the amount of drywall mud remaining without opening the container.
Once you have found the perfect container, it’s time to prepare it for storing your drywall mud. Move on to the next step to learn how to do this effectively.
Step 2: Preparing the Container
Preparing the container before storing your drywall mud is essential for maintaining its quality and usability. Follow these steps to properly prepare the container:
- Clean the Container: Before transferring the drywall mud, ensure that the container is clean and free from any residue or debris. Wash it with warm, soapy water and rinse thoroughly to remove any contaminants that may affect the mud.
- Dry the Container: Allow the container to air dry completely before proceeding. Moisture can compromise the integrity of the drywall mud and lead to unwanted clumps or mold formation.
- Line the Container: To provide an additional layer of protection, line the container with a plastic bag or plastic wrap. This will help prevent direct contact between the mud and the container, reducing the risk of the mud drying out or sticking to the container walls.
- Double Check the Lid: Ensure that the lid of the container is clean and in good condition. Check for any cracks or damage that may compromise the airtight seal. It’s a good practice to have a spare lid in case the original one becomes damaged over time.
By taking the time to properly prepare the container, you can create an optimal environment for storing your drywall mud and prolong its shelf life. Now that the container is ready, let’s move on to transferring the drywall mud in the next step.
Read more: How To Remove Mud From A Carpet
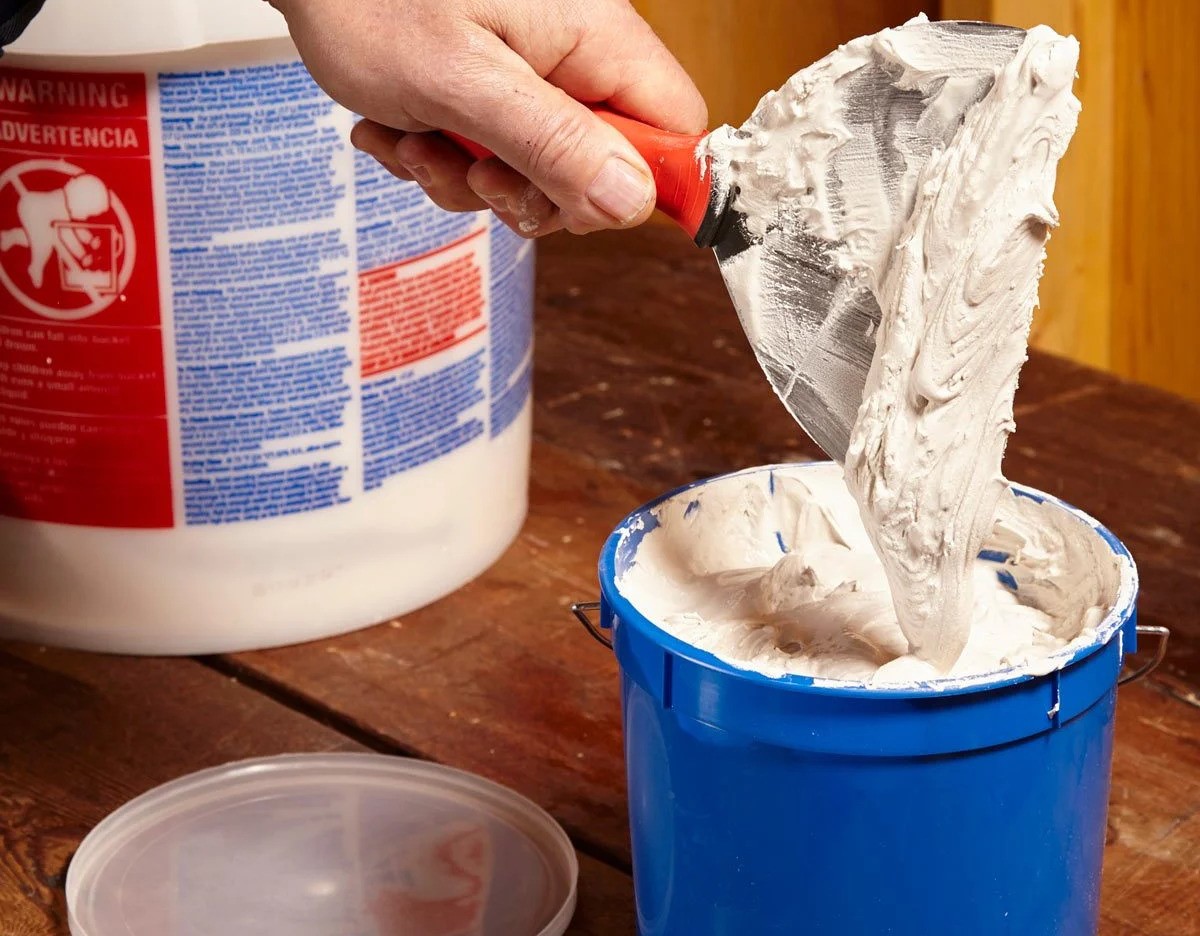
Step 3: Transferring the Drywall Mud
Now that your container is prepared, it’s time to transfer the drywall mud from its original packaging to the storage container. Follow these steps:
- Open the Original Packaging: Carefully open the original packaging of the drywall mud, whether it’s a bucket or a box. Use a spatula or trowel to scrape off any remaining mud from the sides and bottom of the container.
- Scrape the Mud: Use the spatula or trowel to scrape the drywall mud into the prepared storage container. Be thorough but gentle to minimize spills and waste.
- Smooth the Surface: Once all the mud is transferred, use the spatula or trowel to smooth the surface of the mud in the storage container. This helps eliminate air pockets and creates an even surface for sealing.
- Wipe the Container: Wipe any excess mud from the rim and sides of the container to ensure a clean seal when the lid is closed.
Take your time during this step to ensure that the drywall mud is transferred properly and without any spills or mess. Now that the mud is in the storage container, let’s move on to the next step of sealing it to maintain its freshness.
Store drywall mud in a cool, dry place away from direct sunlight and extreme temperatures. Keep the container tightly sealed to prevent it from drying out. If the mud has been opened, cover the surface with plastic wrap before sealing the lid to create an airtight seal.
Step 4: Sealing the Container
Properly sealing the container is crucial to prevent air and moisture from entering and compromising the quality of the drywall mud. Follow these steps to ensure a tight and secure seal:
- Place the Lid on the Container: Position the lid on top of the container, ensuring that it aligns properly.
- Press Down Firmly: Apply pressure to the lid and firmly press down to create a tight seal. The lid should fit snugly against the container to prevent any air or moisture from entering.
- Check for Air Leaks: After sealing the container, check for any potential air leaks by lightly pressing around the edges of the lid. If you feel any air escaping, adjust the lid to create a better seal.
- Secure the Lid: Once you are confident that the seal is tight, secure the lid with any locking mechanisms or fasteners provided with the container. This adds an extra layer of protection against accidental spills or the lid coming loose.
It’s important to note that the container should be stored in an upright position to maintain the integrity of the seal. Ensure that the sealing process is done carefully and effectively to maximize the lifespan of your drywall mud.
Now that the container is sealed, it’s time to move on to the next step of labeling and organizing for easy identification.
Step 5: Labeling and Organizing
Labeling and organizing your stored drywall mud is essential for easy identification and efficient use in future projects. Follow these steps to effectively label and organize your containers:
- Label Each Container: Use waterproof labels or a permanent marker to clearly label each container with important information such as the date of purchase, brand, and type of drywall mud. This will help you keep track of the age of your mud and easily identify the specific product you need.
- Include Additional Details: Consider including any additional information on the label that may be helpful, such as the color, quantity, or any special properties of the mud.
- Group by Type or Project: If you have multiple containers of drywall mud, consider grouping them together based on type or specific projects. This will make it easier to locate the right mud for each task.
- Create an Inventory List: Keep a record of the stored drywall mud and update it whenever a new container is added or used up. This will help you keep track of your inventory and plan accordingly for future projects.
- Arrange in an Accessible Manner: Place your labeled containers in a designated storage area such as a shelf or rack. Ensure that they are easily accessible and arranged in a way that allows you to find and retrieve the specific mud you need without any hassle.
By effectively labeling and organizing your drywall mud containers, you can save time and avoid any confusion or frustration when it comes to finding the right mud for your projects. Now that your containers are labeled and organized, let’s move on to the next step of storing them in the proper conditions.
Step 6: Storing in the Proper Conditions
Storing your drywall mud in the proper conditions is essential to maintain its quality and extend its shelf life. Follow these guidelines to ensure the optimal storage conditions:
- Choose a Cool and Dry Location: Find a storage area that is cool and dry to prevent the drywall mud from drying out or becoming clumpy. Avoid areas with high humidity or extreme temperatures, as they can deteriorate the mud’s consistency and usability.
- Avoid Direct Sunlight: Keep your stored drywall mud away from direct sunlight, as exposure to UV rays can degrade its quality and affect its performance.
- Avoid Freezing and Thawing: Protect the drywall mud from freezing temperatures, as the water content inside it can expand and cause the container to crack or burst. If you live in a cold climate, store the containers in an insulated area or use a space heater to maintain a consistent temperature.
- Keep Away from Contaminants: Store the drywall mud away from any potential contaminants such as dust, dirt, or chemicals. These substances can affect the quality and performance of the mud, leading to imperfections in the finished wall surface.
- Maintain Proper Ventilation: While it’s important to keep the storage area cool and dry, ensure that there is sufficient ventilation to prevent the buildup of moisture. Good airflow will help maintain the integrity of the drywall mud.
By storing your drywall mud in the proper conditions, you can ensure that it remains in optimal condition for future use. Now that you know how to store your drywall mud, let’s move on to the final step of regular maintenance and inspection.
Read also: 13 Best Mud Mixer for 2024
Step 7: Regular Maintenance and Inspection
Regular maintenance and inspection of your stored drywall mud is important to ensure its continued quality and usability. Follow these steps to properly maintain and inspect your drywall mud:
- Check for Signs of Contamination: Periodically inspect your containers of drywall mud for any signs of contamination, such as mold, mildew, or strange odors. If you come across any contaminated mud, discard it immediately to avoid compromising the quality of your other supplies.
- Inspect the Seal: Regularly check the seal on your containers to ensure it is still intact and airtight. If you notice any signs of a weakened or broken seal, replace the lid or transfer the mud to a new container to maintain its freshness.
- Monitor the Consistency: When you open a container of drywall mud for use, pay attention to its consistency. If the mud appears clumpy, dried out, or has an unusual texture, it may be past its prime and should be replaced.
- Rotate Stock: To prevent any individual container of drywall mud from sitting unused for too long, create a rotation system where you use the oldest containers first. This ensures that all of your supplies are regularly used and prevents any unnecessary waste.
- Keep the Storage Area Clean: Regularly clean the storage area to prevent the buildup of dust or debris, which can contaminate the drywall mud. Wipe down the shelves or racks and ensure that the area remains organized and free from any potential contaminants.
By regularly maintaining and inspecting your stored drywall mud, you can ensure that it remains in optimal condition for your future projects. Proper maintenance and inspection will help you identify any issues early on and take the necessary steps to address them.
With these steps, you now have a comprehensive guide on how to store drywall mud properly. By following these guidelines, you can extend the shelf life of your drywall mud, reduce waste, and always have high-quality mud available for seamless and professional wall finishing. Happy storing!
Conclusion
Properly storing drywall mud is essential for maintaining its quality, workability, and longevity. By implementing the steps outlined in this guide, you can ensure that your drywall mud remains in optimal condition for future projects. From choosing the right container and preparing it for storage to sealing it effectively and organizing your supplies, each step plays a crucial role in preserving the integrity of the mud.
Storing drywall mud in the proper conditions, such as a cool and dry location away from direct sunlight and contaminants, helps prevent the mud from drying out or becoming clumpy. Additionally, regularly inspecting and maintaining your supplies ensures that you quickly identify any signs of contamination or deterioration, taking appropriate actions to address them.
Remember to label and organize your containers for easy identification and efficient use, and regularly rotate your stock to prevent any single container from sitting unused for too long. By following these practices, you can reduce waste, save money, and always have high-quality drywall mud on hand for professional results.
Proper storage of drywall mud is a small but vital step in achieving a smooth and flawless finish on your walls and ceilings. By investing a little time and effort into storing your drywall mud correctly, you can ensure that your projects go smoothly and your walls look their best.
So, the next time you stock up on drywall mud, remember these storage tips and techniques. By doing so, you’ll be well-prepared to tackle your next home renovation or construction project with confidence and ease.
Now that you're clued up on keeping drywall mud in tip-top shape, why not dive deeper into crafting skills with our insightful guides? If you've enjoyed transforming spaces and tweaking tools, you’ll love discovering the perks of taking projects into your own hands. Our feature on DIY projects unpacks all you need to know about the joys and rewards of creating something from scratch. Ready to take your crafting curiosity to new heights?
Frequently Asked Questions about How To Store Drywall Mud
Was this page helpful?
At Storables.com, we guarantee accurate and reliable information. Our content, validated by Expert Board Contributors, is crafted following stringent Editorial Policies. We're committed to providing you with well-researched, expert-backed insights for all your informational needs.


0 thoughts on “How To Store Drywall Mud”