Articles
How To Repair Garage Concrete Floor
Modified: November 1, 2024
Learn effective techniques and tips for repairing your garage's concrete floor with our informative articles. Enhance the durability and appearance of your space with our expert advice.
(Many of the links in this article redirect to a specific reviewed product. Your purchase of these products through affiliate links helps to generate commission for Storables.com, at no extra cost. Learn more)
Introduction
Having a garage with a damaged concrete floor can be a frustrating and unsightly problem. Cracks, holes, and uneven surfaces not only diminish the aesthetic appeal of your garage but can also pose safety hazards. Fortunately, repairing your garage concrete floor is a task that can be tackled with the right tools and knowledge.
In this article, we will guide you through the process of repairing your garage concrete floor, ensuring that it is restored to its original condition. We will cover everything from assessing the damage to cleaning, filling cracks and holes, applying a concrete patch, and finally sealing the floor to provide long-lasting protection.
Before we dive into the steps for repairing your garage concrete floor, let’s go over the tools and equipment you’ll need to get the job done:
- Protective gear (gloves, safety glasses, and a dust mask)
- Hammer
- Chisel or scraper
- Wire brush
- Concrete cleaner
- Concrete crack filler
- Concrete patching compound
- Trowel
- Sanding block or grinder
- Vacuum or brush
- Concrete sealant
Key Takeaways:
- Proper preparation, thorough cleaning, and meticulous assessment of damage are essential for successfully repairing a garage concrete floor. Following the step-by-step process ensures a durable and visually appealing outcome.
- Sealing the concrete floor provides vital protection against moisture and stains, enhancing its longevity and appearance. By investing time and effort into the repair process, you can revitalize your garage floor for long-term enjoyment.
Read more: How To Prepare A Concrete Floor For Painting
Tools and Equipment Needed
Repairing your garage concrete floor requires a specific set of tools and equipment to ensure a successful outcome. Here’s a list of items you’ll need to have on hand before you begin the repair process:
- Protective Gear: Safety should always be a priority when working with concrete. Make sure you have gloves, safety glasses, and a dust mask to protect yourself from potential hazards.
- Hammer: A hammer is essential for removing loose or crumbling concrete. Use it to gently tap any damaged areas and assess the stability of the floor.
- Chisel or Scraper: For more stubborn areas of damaged concrete, a chisel or scraper can be used to remove any loose material. This will create a clean surface for the repair process.
- Wire Brush: A wire brush is necessary for cleaning the concrete surface. It helps to remove dirt, debris, and loose particles, ensuring proper adhesion of repair materials.
- Concrete Cleaner: Before applying any repairs, it’s important to thoroughly clean the entire floor surface. A concrete cleaner will help to remove grease, oil stains, and other contaminants that may hinder the repair process.
- Concrete Crack Filler: Cracks in the concrete floor need to be properly filled to prevent further damage and ensure a level and smooth surface. A concrete crack filler is specifically designed to fill small to medium-sized cracks effectively.
- Concrete Patching Compound: Larger holes or damaged areas will require the use of a concrete patching compound. This type of compound is designed to fill and bond with the existing concrete, providing a durable repair.
- Trowel: A trowel is an essential tool for applying the crack filler and patching compound. It allows for smooth and even application, ensuring a professional finish.
- Sanding Block or Grinder: Once the repair materials have dried, a sanding block or grinder can be used to level out any rough patches or high spots on the concrete surface. This will create a seamless blend between the repaired area and the surrounding floor.
- Vacuum or Brush: After sanding, it’s important to clean the floor surface to remove any dust or debris. A vacuum or brush can be used to ensure a clean and smooth surface before applying a sealant.
- Concrete Sealant: To provide long-term protection for your garage concrete floor, applying a concrete sealant is essential. This will help to prevent moisture penetration, staining, and future damage.
By having these tools and equipment readily available, you’ll be well-prepared to tackle the repair process and restore your garage concrete floor to its original condition.
Preparation
Before you begin the repair process for your garage concrete floor, proper preparation is key to ensure a successful outcome. Here are the essential steps to follow for effective preparation:
- Clean the Area: Start by removing any objects or vehicles from the garage to create a clear workspace. Sweep the entire floor surface to eliminate loose dirt, debris, and dust. Use a broom or vacuum cleaner to ensure a thorough cleaning.
- Assess the Damage: Carefully examine the concrete floor for any cracks, holes, or uneven areas. Look out for signs of moisture or structural issues. Make note of the extent of damage and the areas that require repair.
- Plan the Repair: Based on your assessment, create a repair plan. Determine whether you need to fill cracks, patch holes, or level out uneven surfaces. This will guide you in selecting the appropriate repair materials and tools for the job.
- Gather the Materials: Referencing your repair plan, gather all the necessary materials and tools you’ll need for the job. This includes concrete crack filler, patching compound, trowel, wire brush, cleaning solution, protective gear, and any other specific items based on the repair requirements.
- Read the Instructions: Before using any repair products, carefully read and follow the instructions provided by the manufacturers. Each product may have specific application guidelines and drying times, so it’s important to familiarize yourself with the instructions beforehand.
- Protect Surrounding Areas: To prevent any accidental spills or damage to surrounding surfaces, protect them by using drop cloths or plastic sheeting. This will help contain the repair materials and keep the area tidy.
- Put on Protective Gear: Prior to starting the repair process, put on the necessary protective gear. Wear gloves, safety glasses, and a dust mask to protect yourself from any potential hazards, such as dust particles or chemical exposure.
By following these preparation steps, you’ll ensure that you’re ready to approach the repair process with a clear plan and all the necessary materials and safety precautions in place. This will help you achieve optimal results and a restored garage concrete floor that is both functional and visually appealing.
Assessing the Damage
Before you begin repairing your garage concrete floor, it’s crucial to assess the extent of the damage. This will help you determine the appropriate repair methods and materials needed to restore the floor. Here’s how to assess the damage:
- Visual Inspection: Take a close look at the entire concrete floor, examining it for visible cracks, holes, or uneven areas. Note any areas of deteriorated or crumbling concrete. Pay attention to the severity and size of each damaged section.
- Probe the Cracks and Holes: To determine the depth and stability of cracks and holes, use a small tool such as a screwdriver or chisel to gently probe the damaged areas. Insert the tool into the crack or hole and gauge its depth. Unstable or deep areas will require more extensive repair.
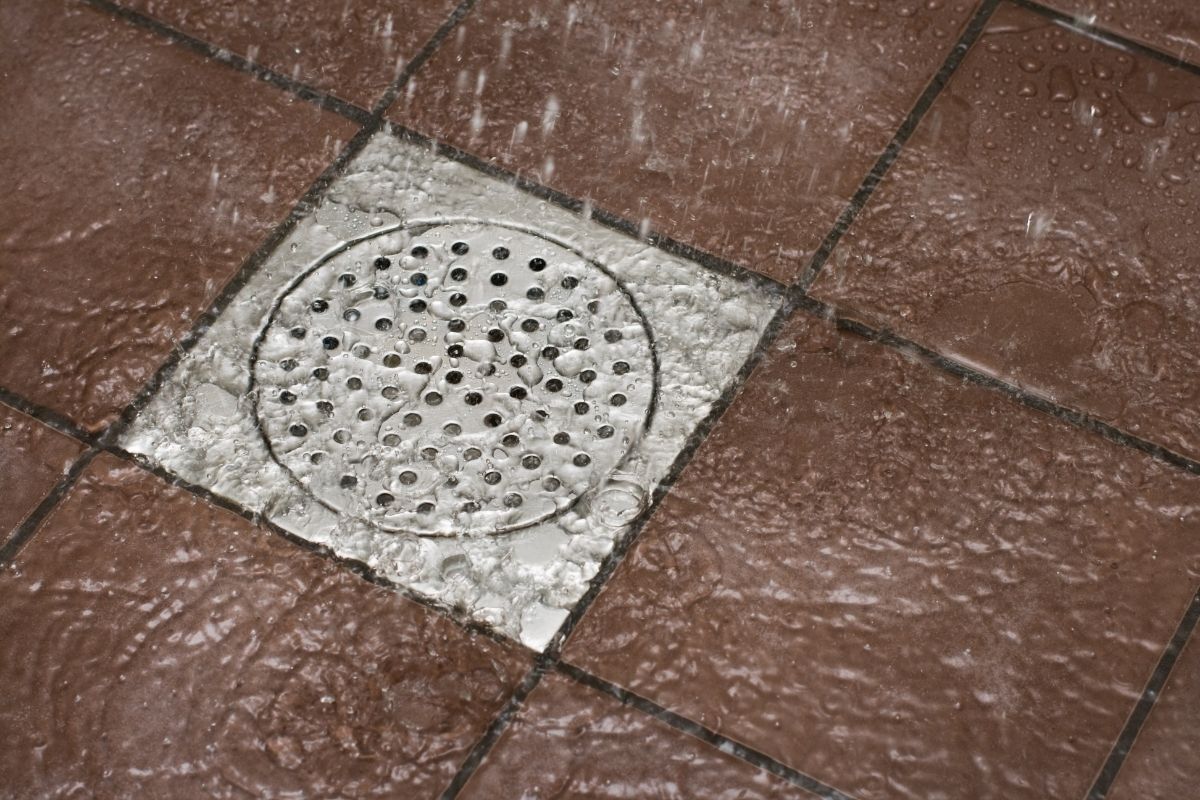
- Look for Moisture or Structural Issues: Check for signs of water damage or moisture problems. Look out for any areas where water may be seeping through the concrete or causing discoloration and mold growth. Additionally, be aware of any structural issues, such as significant sinking or heaving of the concrete floor.
- Consider the Surrounding Floor Areas: Assess the condition of the unaffected areas surrounding the damage. Look for signs of wear and tear, as well as any potential underlying issues that may need to be addressed during the repair process.
- Take Measurements and Photos: Measure the dimensions of the cracks, holes, or uneven areas. This will help you determine the amount of repair materials needed. Take clear, detailed photos of the damaged areas to refer back to during the repair process.
By thoroughly assessing the damage, you’ll have a clear understanding of the repair requirements and can proceed with confidence. Remember to take accurate measurements and document the damage to ensure an effective repair process.
Cleaning the Concrete Surface
Before you begin repairing your garage concrete floor, it’s crucial to thoroughly clean the surface. Cleaning the concrete will help remove dirt, debris, grease, and other contaminants that can hinder the repair process and compromise the adhesion of the repair materials. Here’s how to clean the concrete surface effectively:
- Sweep or Vacuum: Start by sweeping or vacuuming the entire garage floor surface to remove loose dirt, dust, and debris. Use a broom or a vacuum cleaner with a brush attachment to ensure a thorough cleaning.
- Remove Stains and Grease: For any stubborn stains or grease spots, use a concrete-specific cleaning solution or a mixture of warm water and dish soap. Apply the cleaning solution to the stained areas and scrub with a stiff-bristle brush or a deck brush to loosen the dirt.
- Rinse with Water: After scrubbing, rinse the floor with clean water to remove the cleaning solution residue. You can use a hose or a bucket of water to rinse the surface thoroughly. Make sure all the cleaning solution is completely washed away.
- Address Oil Stains: Oil stains can be particularly challenging to remove from concrete surfaces. If you have oil stains on your garage floor, apply a commercial degreaser specifically designed for concrete. Follow the instructions provided by the manufacturer and use a scrub brush to agitate the degreaser into the stain. Rinse the area with water once the degreaser has been applied.
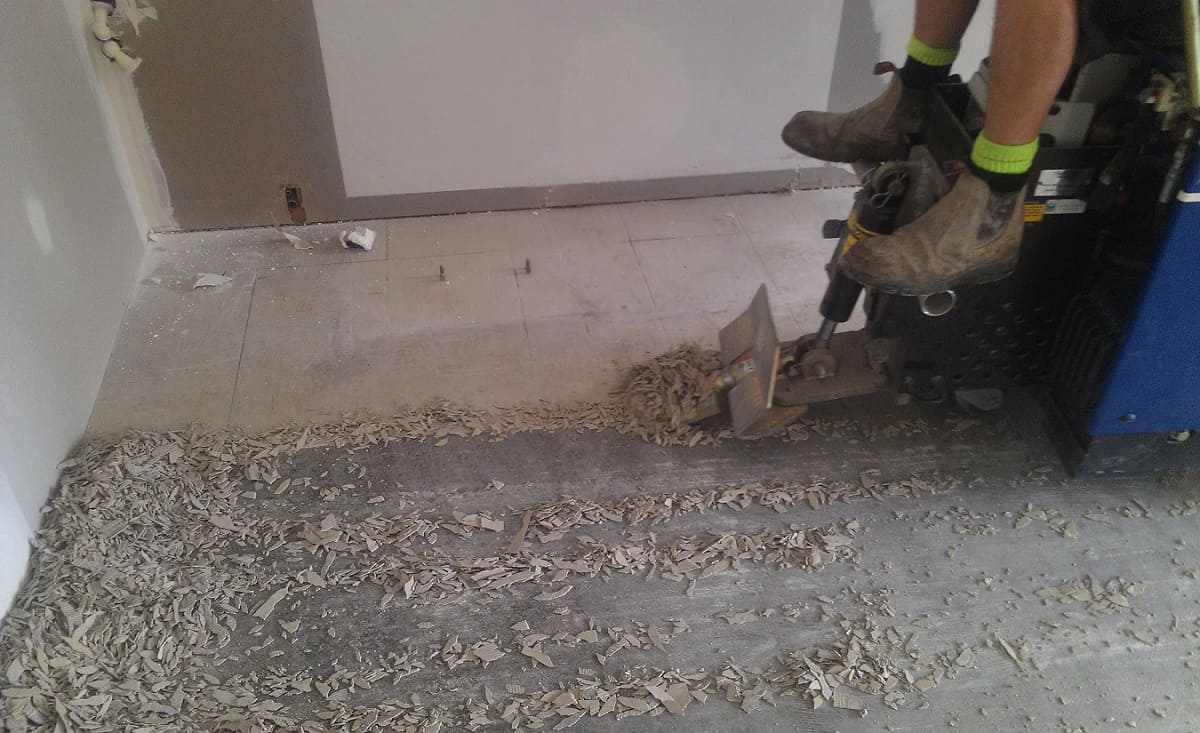
- Remove Tough Residue: If there are any stubborn residue or paint drips on the concrete, you can use a scraper or a wire brush to gently scrape them off. Be cautious not to damage the concrete surface.
- Allow the Surface to Dry: After cleaning, give the concrete surface ample time to dry completely. This ensures that the repair materials adhere properly. Depending on the weather conditions, drying may take a few hours or longer.
By thoroughly cleaning the concrete surface, you create a clean and receptive base for the repair materials. This step is essential for achieving a durable and long-lasting repair. Make sure to allow the surface to dry completely before moving on to the next step in the repair process.
Read more: How To Lay Tile On Concrete Floor
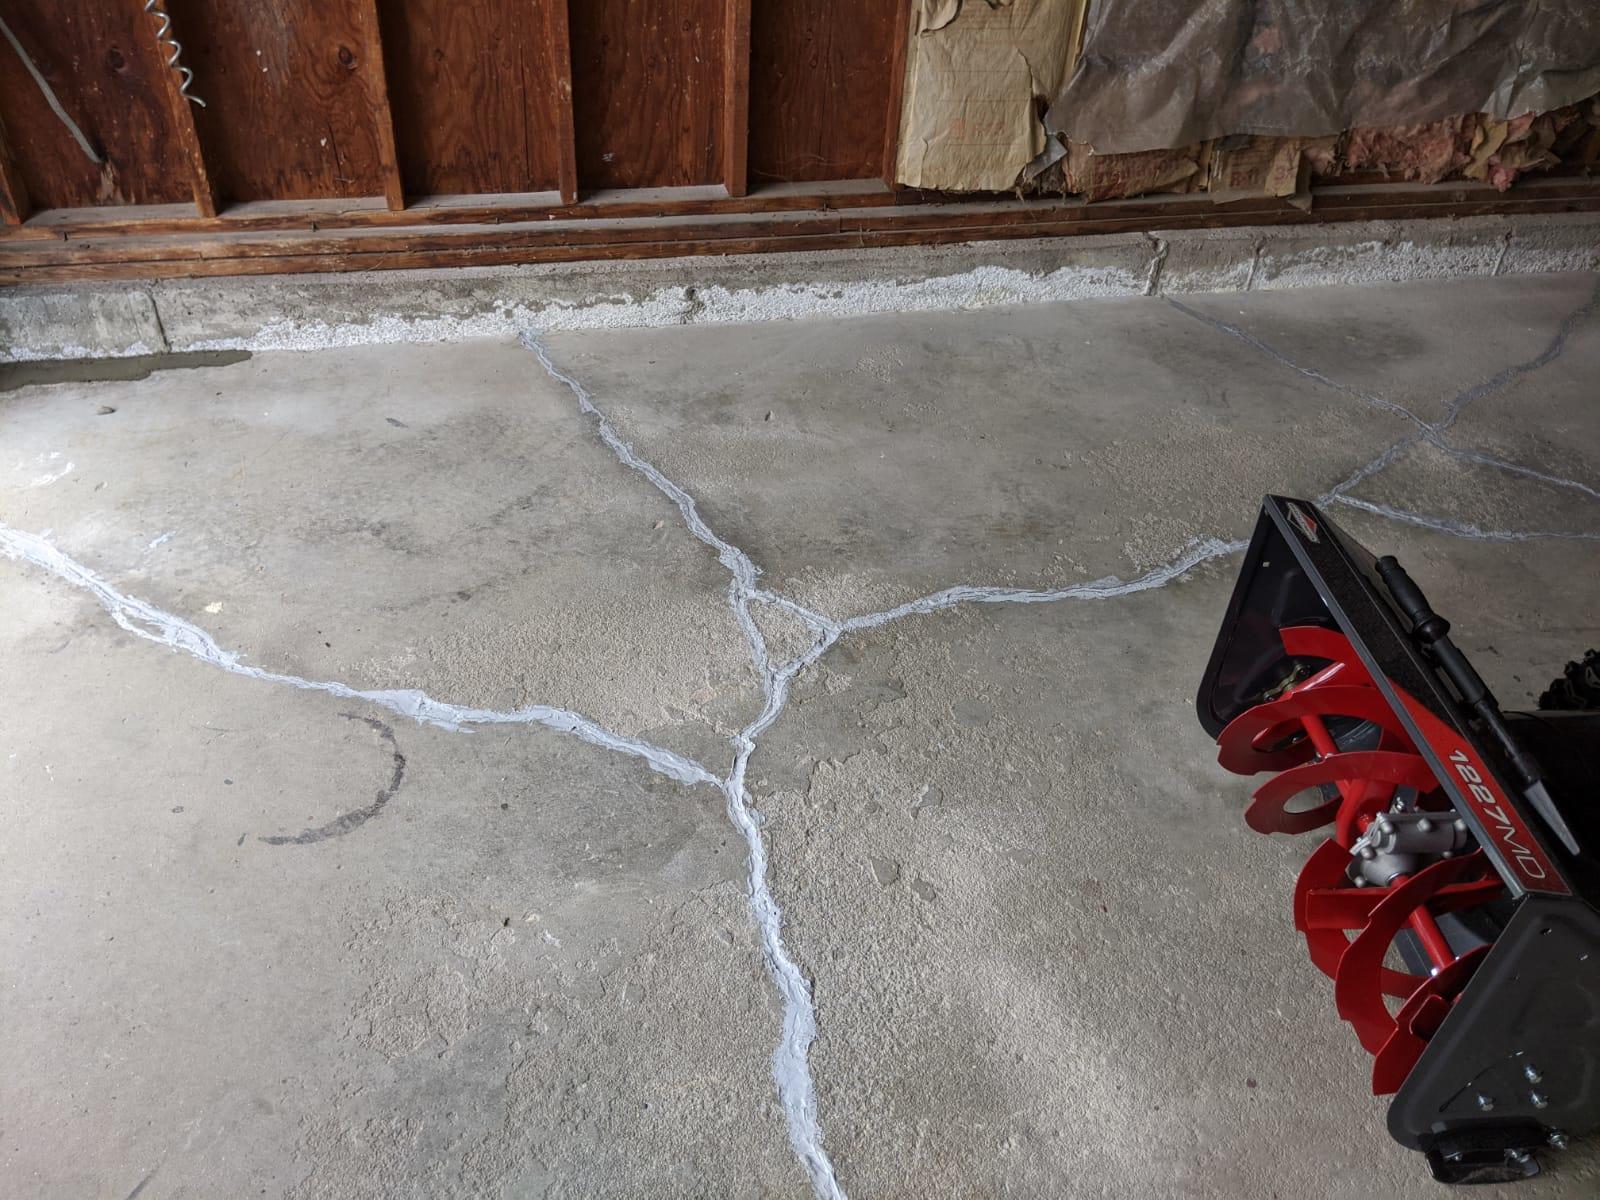
Filling Cracks and Holes
Cracks and holes in your garage concrete floor not only compromise the structural integrity but also detract from its appearance. Filling these imperfections is essential to create a smooth and level surface. Here’s how to effectively fill cracks and holes in your garage concrete floor:
- Preparation: Begin by preparing the cracked or damaged areas. Use a wire brush or scraper to remove any loose debris, dirt, or crumbling concrete from the cracks and holes. This will create a clean surface for the filling material.
- Concrete Crack Filler: For small to medium-sized cracks (around 1/4 inch wide), use a concrete crack filler. Carefully follow the manufacturer’s instructions and use a caulk gun or squeeze bottle to apply the filler into the cracks. Be sure to fill the cracks completely and slightly overfill to compensate for shrinkage.
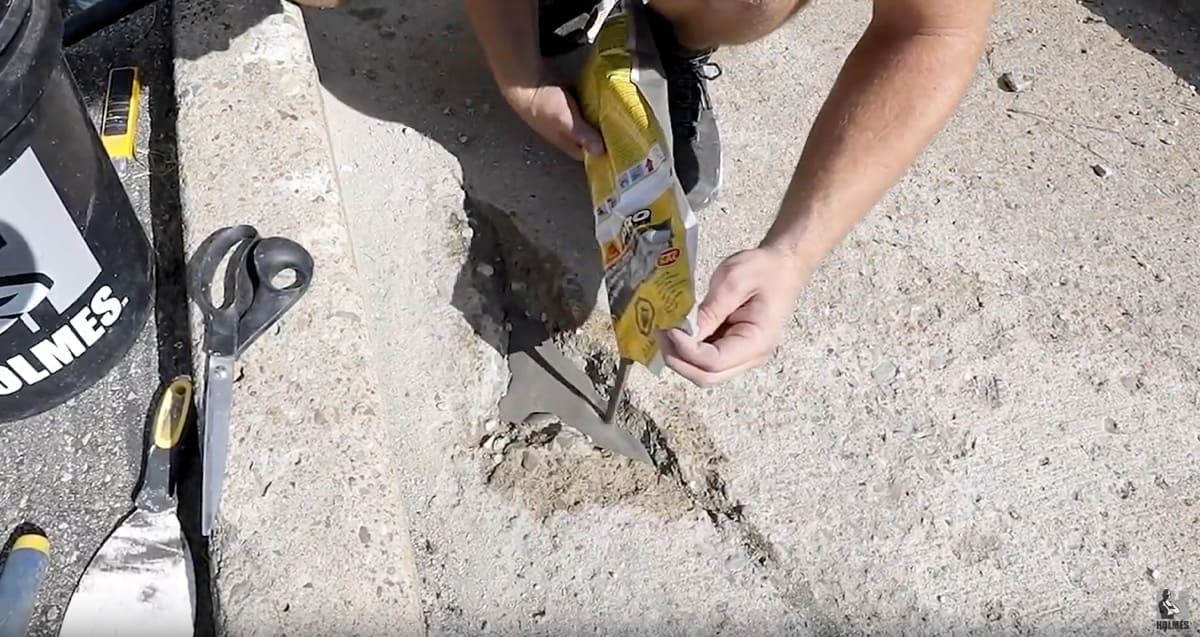
- Patching Compound: Larger holes or damaged areas require the use of a concrete patching compound. Mix the patching compound according to the manufacturer’s instructions until it reaches a thick, paste-like consistency.
- Apply the Patching Compound: Use a trowel to apply the patching compound to the holes or damaged areas in the concrete floor. Press the compound firmly into the damaged areas, ensuring it is level with the surrounding floor surface. Smooth out the surface with the trowel to create an even finish.
- Allow Time to Cure: After applying the crack filler or patching compound, allow it to dry and cure according to the manufacturer’s instructions. The curing time may vary depending on the product and weather conditions. Avoid stepping or placing any weight on the repaired areas during this time.
- Sand or Grind: Once the crack filler or patching compound has fully cured, use a sanding block or a grinder to smooth out any rough patches or high spots on the surface. This will create a seamless transition between the repaired area and the rest of the concrete floor.
By carefully filling cracks and holes in your garage concrete floor, you restore its structural integrity and create a visually appealing surface. Properly following these steps will ensure a durable repair and a smooth finish.
Before repairing a garage concrete floor, make sure to thoroughly clean the surface and remove any loose debris or old coatings. This will ensure better adhesion for the repair materials.
Applying a Concrete Patch
When dealing with larger holes or damaged areas on your garage concrete floor, applying a concrete patch is necessary for a proper repair. A concrete patch provides a durable and long-lasting solution to restore the surface. Here’s a step-by-step guide on how to apply a concrete patch:
- Clean and Prepare the Area: Before applying the concrete patch, make sure the damaged area is clean and free of debris. Use a wire brush or scraper to remove any loose concrete or dirt from the area.
- Mix the Patching Compound: Follow the manufacturer’s instructions to mix the concrete patching compound. Use a mixing container and a mixing paddle attached to a drill for a consistent and uniform blend. The patching compound should reach a thick, paste-like consistency.
- Moisten the Area: Before applying the patching compound, moisten the damaged area with water. This helps to improve adhesion between the existing concrete and the patch.
- Apply the Patching Compound: Using a trowel, apply the patching compound to the damaged area. Start by filling the hole or cavity, ensuring the compound is slightly overfilled to compensate for shrinkage. Press the compound firmly into the area and use the trowel to create a smooth and even finish.
- Feather the Edges: To create a seamless blend between the patch and the surrounding concrete, feather the edges of the applied compound. Use the trowel to gradually blend the edges of the patch with the surrounding floor surface.
- Allow Time to Cure: After applying the concrete patch, allow it to dry and cure according to the manufacturer’s instructions. This may take several hours or longer, depending on the product and weather conditions. Avoid stepping or placing any weight on the patched area during the curing process.
- Sand or Grind (if necessary): Once the concrete patch has fully cured, use a sanding block or a grinder to smooth out any rough patches or high spots. This will create a seamless transition between the repaired area and the rest of the concrete floor.
By following these steps, you can effectively apply a concrete patch to fix larger holes or damaged areas on your garage concrete floor. This will restore the surface’s durability and aesthetics, ensuring a long-lasting repair.
Smoothing and Leveling the Surface
After repairing cracks, holes, or applying a concrete patch to your garage concrete floor, it’s important to smooth and level the surface to ensure a seamless finish. This step will help create a smooth and even surface that blends seamlessly with the surrounding area. Here’s how to smooth and level the surface effectively:
- Allow Time to Dry: Before smoothing and leveling the repaired areas, ensure that the repair materials have fully dried and cured according to the manufacturer’s instructions. This may take several hours or longer, depending on the product and weather conditions.
- Sand the Surface: Use a sanding block or a grinder with a diamond blade to carefully sand down any rough patches or high spots on the repaired areas. Start with a coarse grit sandpaper and gradually transition to finer grits for a smoother finish. Be cautious not to sand too aggressively, as this can damage the surrounding concrete.
- Check for Levelness: After sanding, check the surface for levelness. Use a level tool to ensure that the repaired areas are even with the surrounding floor. If necessary, make adjustments by applying additional patching compound or sanding down high spots until a level surface is achieved.
- Vacuum or Brush: Once you’ve smoothed and leveled the repaired areas, use a vacuum or a brush to remove any dust or debris. This will create a clean surface for the next steps in the repair process.
Smoothing and leveling the surface of your garage concrete floor is crucial for achieving a seamless and professional-looking repair. Taking the time to sand down rough patches and ensure levelness will result in a finished floor that blends harmoniously with the rest of the concrete surface.
Curing and Drying
After making repairs and smoothing the surface of your garage concrete floor, it’s important to allow sufficient time for curing and drying. Curing refers to the process of allowing the repair materials to harden and reach their full strength, while drying refers to the evaporation of moisture from the surface. Proper curing and drying ensure that the repairs become durable and ready for use. Here’s what you need to know:
- Follow Manufacturer’s Instructions: Different repair products have varying curing and drying times. It’s important to carefully read and follow the manufacturer’s instructions provided with the repair materials. This will ensure that you give them the appropriate amount of time to fully cure and dry.
- Avoid Foot Traffic and Weight: During the curing process, it’s crucial to minimize foot traffic and weight on the repaired areas. Heavy objects, vehicles, and even pets should be kept off the surface until it is fully cured. This helps prevent damage and ensures that the repairs set properly.
- Optimal Curing Conditions: Providing the ideal curing conditions is essential for the repair materials to cure properly. Maintain a consistent temperature as recommended by the manufacturer and avoid exposing the repaired areas to extreme heat or cold. Also, keep the area well-ventilated to facilitate proper drying.
- Patience is Key: Curing and drying times can vary depending on factors such as ambient temperature, humidity levels, and the specific repair materials used. It’s important to exercise patience and allow ample time for the repairs to fully cure and dry. Rushing the process may result in weakened repairs.
- Monitor the Surface: Regularly check the repaired areas to ensure they are progressing well during the curing and drying process. Look for any signs of cracking, shrinking, or other issues that may require additional repair or adjustment. If any concerns arise, consult the manufacturer’s instructions or seek professional advice.
By adhering to the suggested curing and drying guidelines provided with the repair materials, you’ll ensure that your garage concrete floor repairs become strong, durable, and ready for use. Remember to exercise patience and allow sufficient time for the repairs to cure and dry completely before subjecting them to normal foot traffic or placing heavy objects on the surface.
Read more: How To Install Wood Floor On Concrete
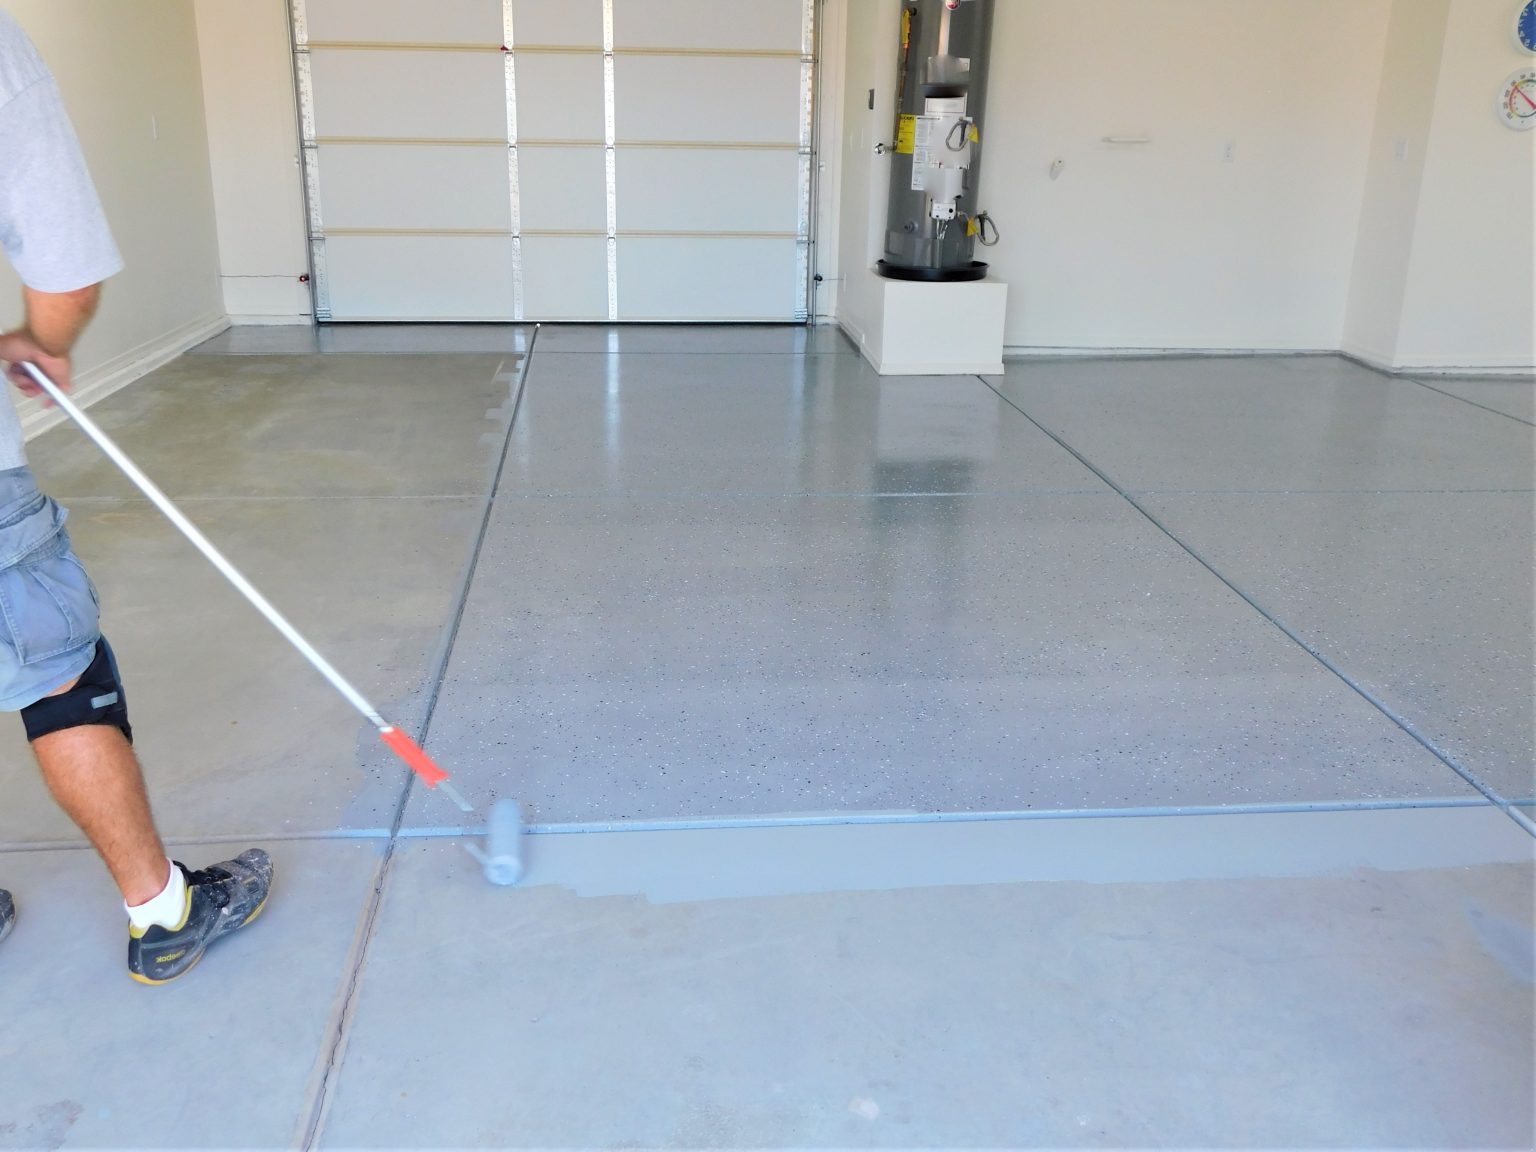
Sealing the Concrete Floor
Sealing your garage concrete floor is an important final step in the repair process. A concrete sealer provides protection against moisture, stains, and general wear and tear. It enhances the appearance of the floor and extends its lifespan. Here’s how to seal your concrete floor:
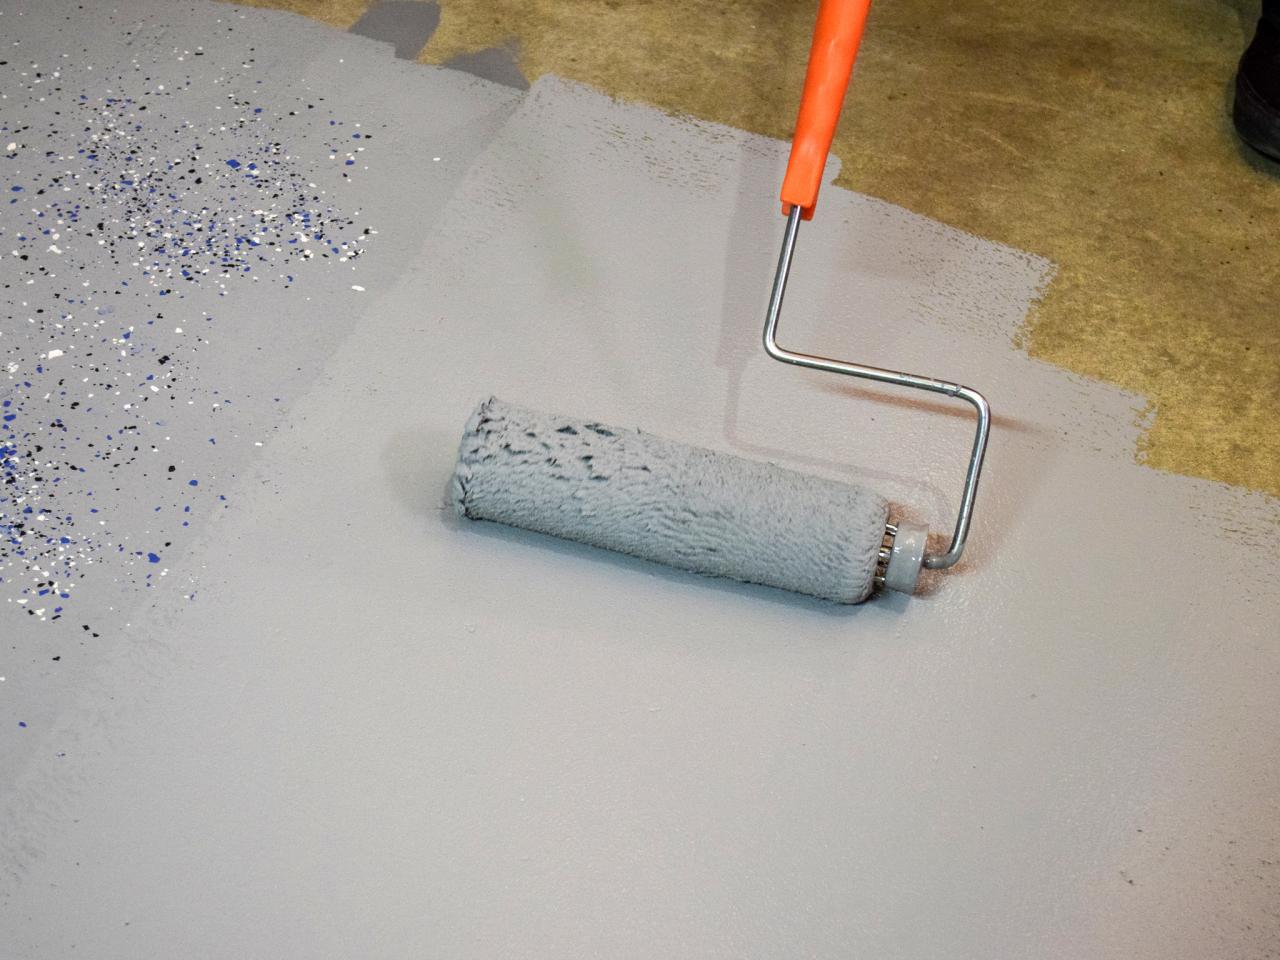
- Clean the Surface: Before applying the sealer, ensure that the concrete floor is thoroughly clean. Sweep or vacuum any debris and remove any remaining stains or contaminants using a concrete cleaner or degreaser. Rinse the surface with water and allow it to dry completely.
- Choose the Right Sealer: There are various types of concrete sealers available, including penetrating sealers and topical sealers. Consider factors such as the level of gloss desired, the level of protection needed, and the specific conditions of your garage when selecting the appropriate sealer. Read the manufacturer’s instructions to choose the right product for your floor.
- Apply the Sealer: Using a roller or a sprayer, apply the sealer evenly across the entire garage floor. Begin at one corner and work your way towards the exit to avoid getting trapped in the room. Apply the sealer in thin, even coats, allowing each coat to dry according to the manufacturer’s instructions before applying another coat. Refer to the product label for recommended drying times.
- Follow Application Guidelines: Be sure to follow the specific application guidelines provided by the sealer manufacturer. This may include using a specific type of roller or sprayer, applying multiple coats, or ensuring proper ventilation during the application process. Adhering to these guidelines will ensure optimal results.
- Allow for Drying and Curing: After applying the final coat of sealer, allow sufficient time for drying and curing. This often requires at least 24-48 hours, but drying times can vary based on the product and environmental conditions. Avoid walking or placing objects on the surface until it is fully dry and cured.
- Maintain the Sealed Floor: Regularly clean and maintain your sealed garage concrete floor to preserve its appearance and protective qualities. Sweep or dust mop regularly to remove dirt and debris. Avoid using harsh chemicals or abrasives that may damage the sealer. Additionally, consider reapplying the sealer every few years or as recommended by the manufacturer to ensure continued protection.
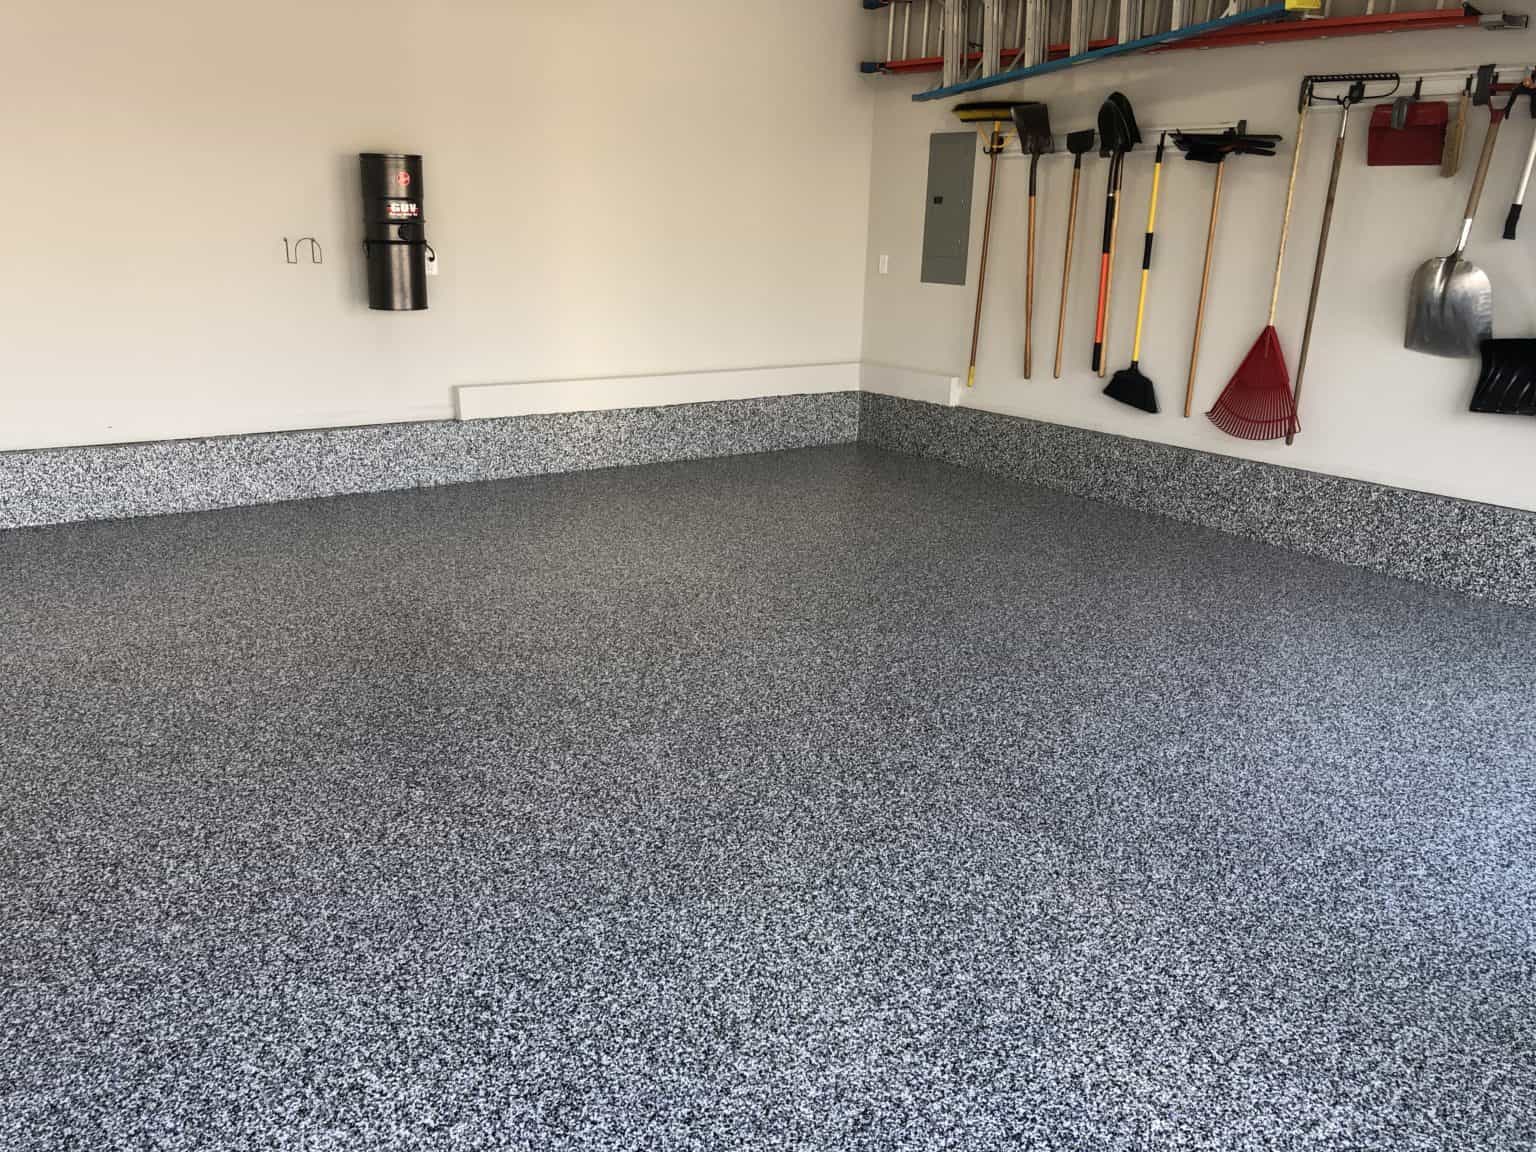
Sealing your garage concrete floor not only enhances its appearance but also provides essential protection against moisture and stains. By following these steps and properly maintaining the sealed surface, you can enjoy a durable and visually appealing garage floor for years to come.
Conclusion
Repairing and restoring your garage concrete floor is a worthwhile endeavor that can significantly improve the functionality and appearance of your space. By following the steps outlined in this article, you can successfully repair cracks, holes, and damaged areas, ultimately achieving a smooth, level, and visually appealing surface.
Starting with proper preparation and assessment of the damage, you can gather the necessary tools and materials to tackle the repair process. Cleaning the concrete surface thoroughly ensures optimal adhesion of repair materials, while filling cracks and holes creates a solid foundation for a durable repair. Applying a concrete patch allows you to tackle larger damaged areas, while smoothing and leveling the surface brings your floor back to a seamless finish.
After all repairs are complete, allowing sufficient time for curing and drying ensures that the repairs become strong and ready for use. Finally, sealing the concrete floor provides protection against moisture, stains, and other forms of wear and tear, enhancing its longevity and appearance.
Remember to take the necessary safety precautions throughout the repair process, including wearing protective gear and using tools responsibly. Follow the guidelines and instructions provided by manufacturers for the repair materials and sealer you choose to ensure optimal results.
By investing time and effort into repairing your garage concrete floor, you not only improve the functionality of the space but also enhance its overall value and aesthetic appeal. Enjoy your revitalized garage floor and make the most of your renewed space for years to come!
Frequently Asked Questions about How To Repair Garage Concrete Floor
Was this page helpful?
At Storables.com, we guarantee accurate and reliable information. Our content, validated by Expert Board Contributors, is crafted following stringent Editorial Policies. We're committed to providing you with well-researched, expert-backed insights for all your informational needs.


0 thoughts on “How To Repair Garage Concrete Floor”