Articles
How To Put Up Wire Fence
Modified: January 9, 2024
Learn how to put up a wire fence with our informative articles. Get expert tips and step-by-step instructions to ensure a successful installation.
(Many of the links in this article redirect to a specific reviewed product. Your purchase of these products through affiliate links helps to generate commission for Storables.com, at no extra cost. Learn more)
Introduction
Putting up a wire fence is a practical and effective way to secure your property and keep unwanted visitors out. Whether you’re looking to create a boundary around your garden, keep livestock contained, or protect your property from trespassers, a wire fence is a reliable and durable solution. In this article, we will guide you through the step-by-step process of installing a wire fence.
Before we dive into the details, it’s important to note that safety should always be a top priority when undertaking any DIY project. Make sure to wear protective gear, such as gloves, safety goggles, and sturdy footwear. Additionally, be aware of any utility lines or underground cables in the area where you plan to install the fence.
To get started, you’ll need to gather the necessary materials. Here’s a list of items you’ll typically need:
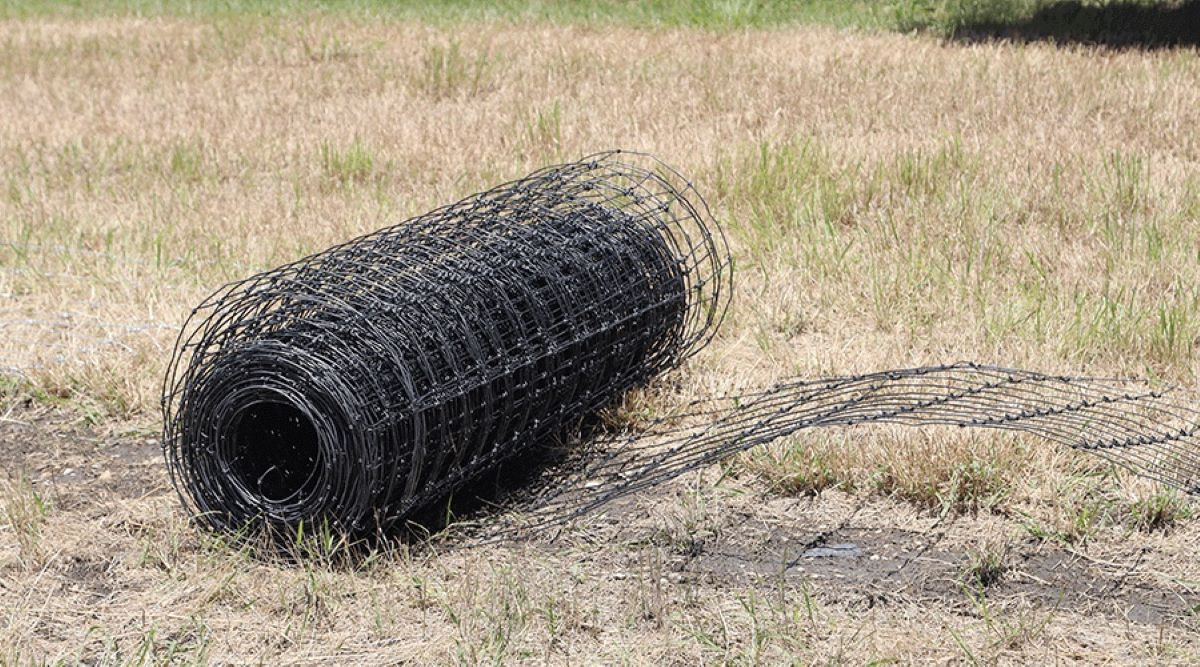
- Wire mesh or chain-link fence
- Fence posts
- Fence post caps
- Top rail
- Tension wire or bracing wire
- Gate (if applicable)
- Gate hardware (hinges, latch, etc.)
- Concrete or gravel for setting fence posts
- Fence staples or clips
- Fence strainers (if using tension wire)
- Wire cutters
- Post hole digger or auger
- Level
- Measuring tape
Now that you have all the materials ready, let’s move on to the step-by-step process of installing your wire fence.
Key Takeaways:
- Prioritize safety and proper planning when installing a wire fence. From measuring and marking to securing the mesh, attention to detail ensures a secure and visually appealing fence that meets your specific needs.
- Regular maintenance and finishing touches are crucial for the longevity of your wire fence. By staying vigilant and addressing any issues promptly, you can ensure a functional, secure, and visually appealing fence for years to come.
Read more: How To Put Up Welded Wire Fence
Materials Needed
Before you begin installing a wire fence, it’s important to ensure you have all the necessary materials. Here’s a detailed list of what you’ll typically need:
- Wire mesh or chain-link fence: This will serve as the main body of your fence. Choose a wire mesh or chain-link fence that is suitable for your specific needs, such as the size of the openings and the gauge of the wire.
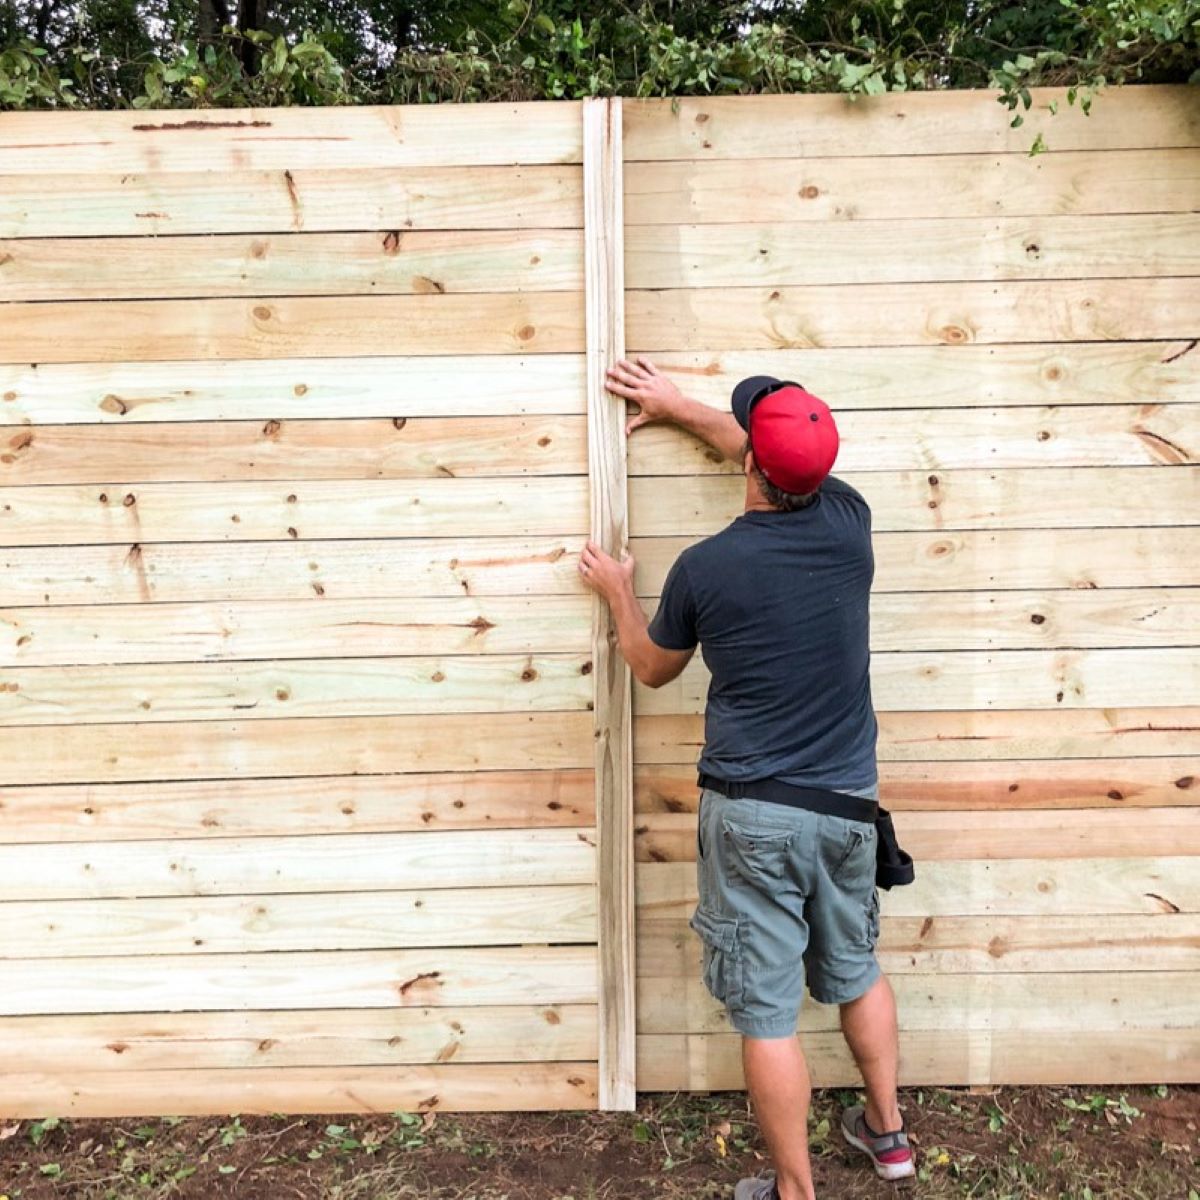
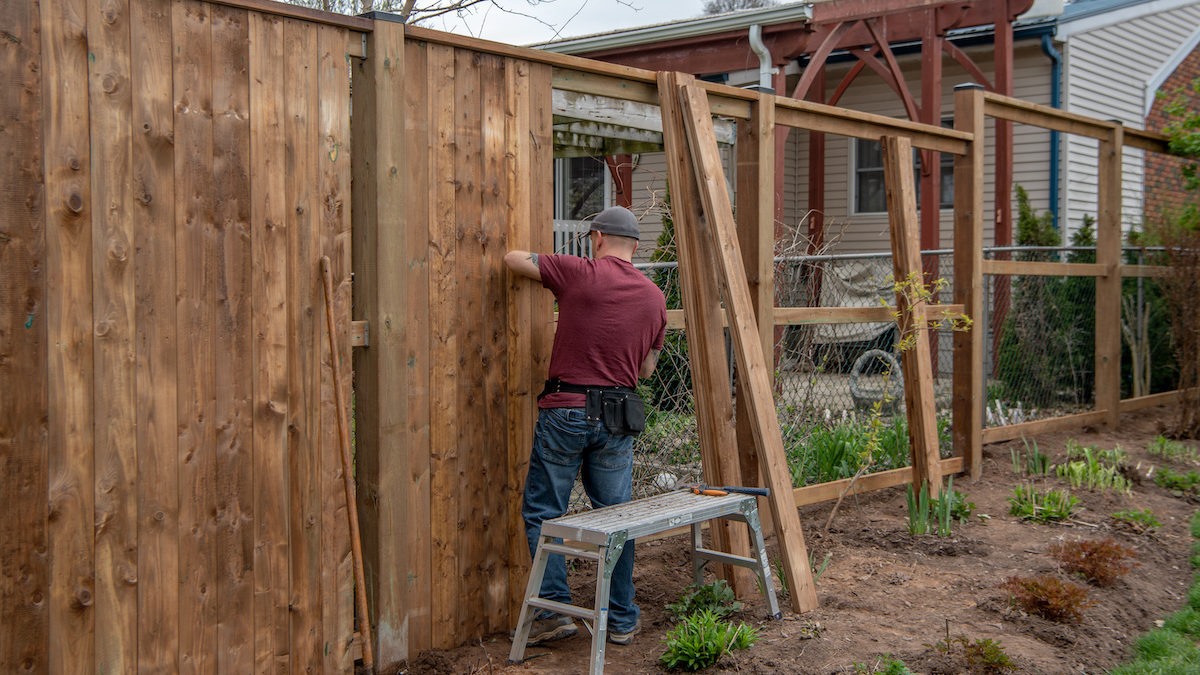
- Fence posts: Fence posts are the vertical supports that hold the wire mesh or chain-link fence in place. The type and size of fence posts you’ll need will depend on the type of terrain and the height of your fence. Common options include wooden posts, metal T-posts, and concrete posts.
- Fence post caps: Post caps are placed on top of the fence posts to protect them from rainwater and other elements. They also add a decorative touch to your fence.
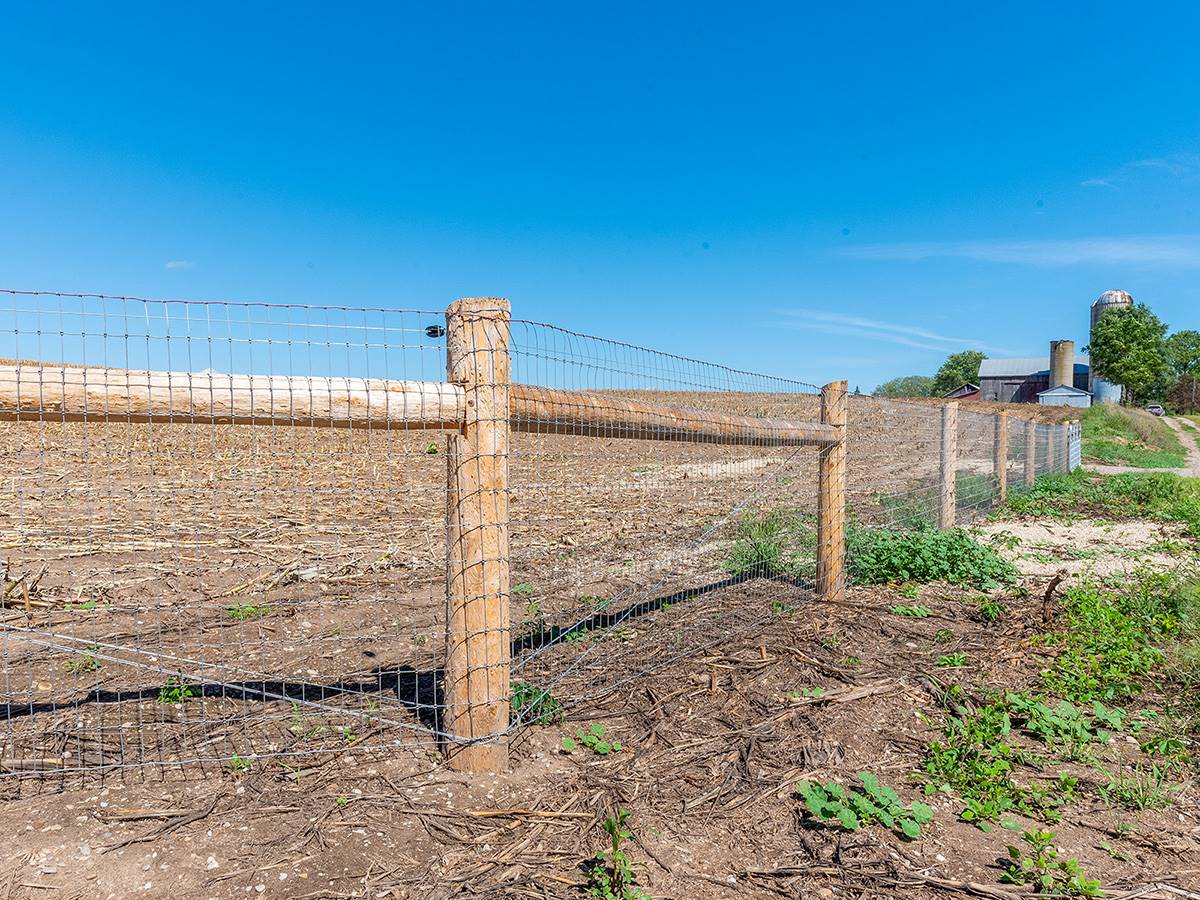
- Top rail: The top rail runs horizontally along the top of the fence and provides additional stability. It is typically made of metal and helps to keep the wire mesh or chain-link fence taut.
- Tension wire or bracing wire: Tension wire is used to keep the bottom of the fence secure and prevent animals from digging under it. Bracing wire is used to reinforce corners and ends of the fence. Choose the appropriate wire based on the size and length of your fence.
- Gate (if applicable): If you plan to have an entry point in your fence, you’ll need a gate. The size and style of the gate will depend on your specific needs and preferences.
- Gate hardware: Gate hardware includes hinges, latches, and locks. Make sure to choose hardware that is durable and suitable for the size and weight of your gate.
- Concrete or gravel: You’ll need concrete or gravel to set the fence posts securely in the ground. This provides stability and prevents the posts from shifting over time.
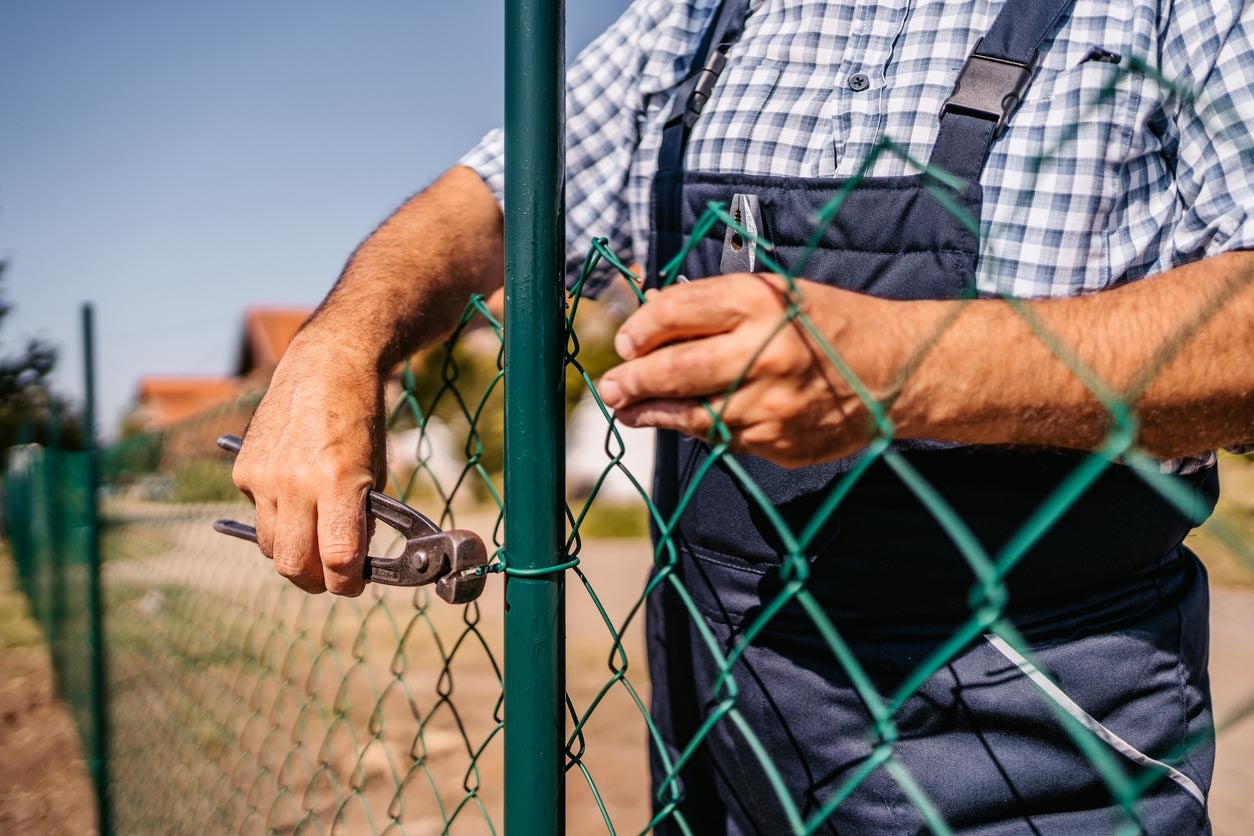
- Fence staples or clips: These are used to attach the wire mesh or chain-link fence to the fence posts. Fence staples are typically used for wooden posts, while clips are used for metal posts.
- Fence strainers (if using tension wire): Fence strainers are used to tighten the tension wire and keep it taut. They are essential for maintaining the stability and integrity of the fence.
- Wire cutters: Wire cutters are necessary for cutting the wire mesh or chain-link fence to the desired length and for trimming any excess wire.
- Post hole digger or auger: You’ll need a post hole digger or auger to dig the holes for the fence posts. This will make the installation process easier and ensure that the posts are set at the correct depth.
- Level: A level is used to ensure that the fence posts are straight and level, resulting in a professional-looking fence.
- Measuring tape: A measuring tape is essential for accurately measuring the distances between fence posts and ensuring that your fence is properly aligned.
Having all these materials on hand will ensure a smooth and efficient installation process for your wire fence. Now that you’re fully equipped, let’s move on to the step-by-step instructions for installing the fence.
Step 1: Determine the Location and Layout
The first step in installing a wire fence is to determine the location and layout of your fence. Consider the purpose of your fence, the boundaries of your property, and any specific areas you want to enclose. Take into account any local regulations or zoning restrictions that may affect the placement and height of your fence.
Walk around your property and identify the areas where you want to install the fence. Use stakes or markers to mark the corners and endpoints of the fence line. Take measurements to ensure that your fence will be evenly spaced and aligned. Consider any natural obstacles, such as trees or rocks, and plan accordingly.
Next, think about the height of your fence. The height will depend on the purpose of the fence and local regulations. If you’re installing a fence for security or privacy, a taller fence may be needed. If you’re enclosing a garden to protect it from animals, a shorter fence may suffice.
Once you have determined the location and layout of your fence, it’s a good idea to consult with your neighbors, especially if the fence will be shared. Communicate your plans and ensure that they are in agreement with the placement and design of the fence.
Before proceeding to the next step, it’s important to contact utility companies to mark any underground utility lines. This will help you avoid any accidents or disruptions during the installation process.
By taking the time to carefully determine the location and layout of your fence, you’ll ensure that your fence serves its intended purpose and meets any applicable regulations. With this information in hand, you’re ready to move on to the next step: measuring and marking the positions for fence posts.
Step 2: Measure and Mark the Positions for Fence Posts
After determining the location and layout of your wire fence, the next step is to measure and mark the positions for the fence posts. The spacing between the posts will depend on the type of wire mesh or chain-link fence you’re using, as well as the height of your fence.
Start by measuring the length of your fence line and divide it by the desired spacing between the posts. This will give you the number of fence posts you’ll need. Typically, posts are spaced between 6 and 8 feet apart, but this may vary depending on the specific requirements of your fence.
Once you know how many posts you’ll need, use a measuring tape and a marker to mark the positions where the posts will be placed. It’s important to make sure the marks are level and aligned with the boundaries of your fence line.
When marking the positions for the fence posts, take into account any gates or corners. Gates require additional posts and hardware, so make sure to mark these spots accordingly. For corners, it’s recommended to use bracing wire or additional support to ensure stability.
Always double-check your measurements and marks before moving on to the next step. It’s essential to have precise and accurate markings to ensure that your fence is straight and properly aligned.
Remember to consider the depth of the holes when marking the positions for the fence posts. The holes should be deep enough to provide stability and prevent the posts from shifting over time. The general rule of thumb is to dig the holes at least one-third of the height of the post.
With the positions for the fence posts accurately measured and marked, you’re now ready to move on to the next step: digging the fence post holes.
Step 3: Digging Fence Post Holes
Now that you have marked the positions for your fence posts, it’s time to start digging the fence post holes. The depth and diameter of the holes will depend on the type of soil and the size of your fence posts.
Begin by using a post hole digger or an auger to dig the first hole. The hole should have a depth that is at least one-third of the height of the fence post. It’s important to dig the holes deep enough to provide stability and prevent the posts from leaning or shifting over time.
When digging the holes, make sure to remove any rocks, roots, or other obstructions. A clean and properly dug hole will make the installation process easier and ensure a secure fence.
If you’re working with soft or sandy soil, it’s a good idea to widen the bottom of the hole slightly to provide additional stability. Conversely, if you’re dealing with dense or clay soil, you may need to use a pry bar or post hole tamper to compact the soil around the post.
As you dig each hole, periodically place the fence post in it to ensure that the depth and alignment are correct. Use a level to check that the post is perfectly vertical. Make any necessary adjustments before moving on to the next hole.
Continue digging the remaining fence post holes, maintaining the same depth and alignment for each one. It’s important to keep the spacing between the posts consistent to ensure the integrity and stability of the fence.
Once all the holes have been dug, you’re ready to move on to the next step: setting the fence posts into the ground.
Remember to take breaks as needed and stay hydrated during the digging process. Digging fence post holes can be physically demanding, so pace yourself and use proper lifting techniques to avoid injury.
Read more: How To Put Up Garden Fence
Step 4: Set the Fence Posts
After digging the fence post holes, it’s time to set the fence posts securely into the ground. This step is crucial for the stability and durability of your wire fence.
Start by placing the first fence post into its corresponding hole. Ensure that it is centered and aligned properly, both vertically and horizontally. Use a level to make sure the post is perfectly vertical, adjusting as necessary.
Once the first post is properly positioned, pour concrete or gravel into the hole around the base of the post. If using concrete, follow the manufacturer’s instructions for mixing and pouring. Make sure the concrete fills the hole up to ground level, leaving a slight mound on top to help with water runoff.
As you pour the concrete or gravel, periodically check and adjust the alignment of the post to ensure it remains straight. Use a post level to verify that the post is still vertical while the concrete sets.
Repeat this process for the remaining fence posts, one post at a time. Make sure to check each post’s alignment and levelness as you go along.
If you are working with wooden posts, it’s important to note that they may require additional support during the setting process. Use temporary braces or supports to keep the posts upright and in position until the concrete or gravel has fully cured.
Once all the fence posts are set, allow the concrete to cure according to the manufacturer’s instructions. This typically takes at least 24-48 hours. During this time, avoid putting any weight or strain on the posts to ensure they remain stable.
Setting the fence posts properly is vital for the overall integrity and longevity of your wire fence. Taking the time to ensure they are securely anchored in the ground will provide a solid foundation for the rest of the installation process.
Now that the fence posts are set, you’re ready to move on to the next step: attaching the tension wire.
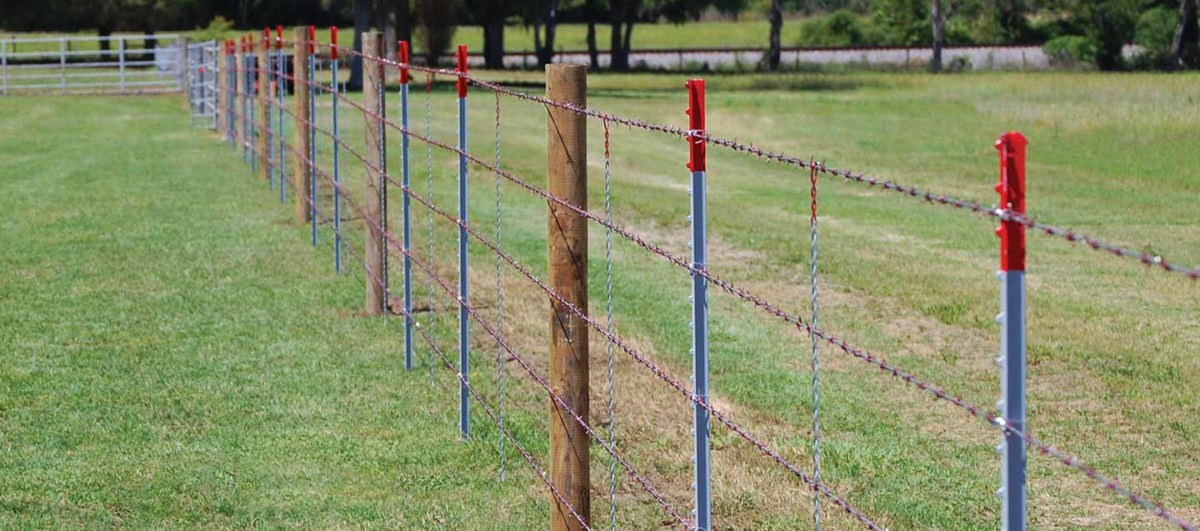
Step 5: Attach Tension Wire
Attaching tension wire to your wire fence provides additional stability and support, especially along the bottom of the fence. This helps to prevent animals from digging under the fence and maintains the overall integrity of the structure.
Start by unrolling the tension wire along the length of the fence, starting at one end. The tension wire should be positioned on the same side as the fence fabric or wire mesh.
At each fence post, use fence staples or clips to secure the tension wire to the post. Place the staples or clips about 6-12 inches apart, ensuring that the tension wire is pulled taut as you go along.
Proper tensioning is essential for the effectiveness of the wire fence. To tension the wire, you can use fence strainers or tensioning bands specifically designed for this purpose.
Start by attaching a fence strainer or tensioning band to the first fence post, about 6-8 inches above the ground. If using a fence strainer, thread the tension wire through it and tighten it using a strainer handle or tensioning tool.
If using tensioning bands, wrap them around the post and the tension wire, then tighten them using a tensioning tool or a pair of pliers. Ensure that the tension wire is pulled tight and straight between the fence posts.
Continue attaching fence staples or clips and tensioning the wire at each fence post until you have secured the entire length of tension wire. The wire should not sag or have any slack.
Once the tension wire is securely attached, check the overall alignment and tension by running your hand along the wire. It should feel tight and firm, without any noticeable dips or slack spots.
Attaching tension wire adds an extra layer of support and stability to your wire fence, making it more resistant to external forces and enhancing its overall effectiveness. With the tension wire in place, you’re now ready to move on to the next step: stretching the wire mesh.
When putting up a wire fence, make sure to properly stretch the wire to prevent sagging over time. Use a fence stretcher tool to achieve the right tension.
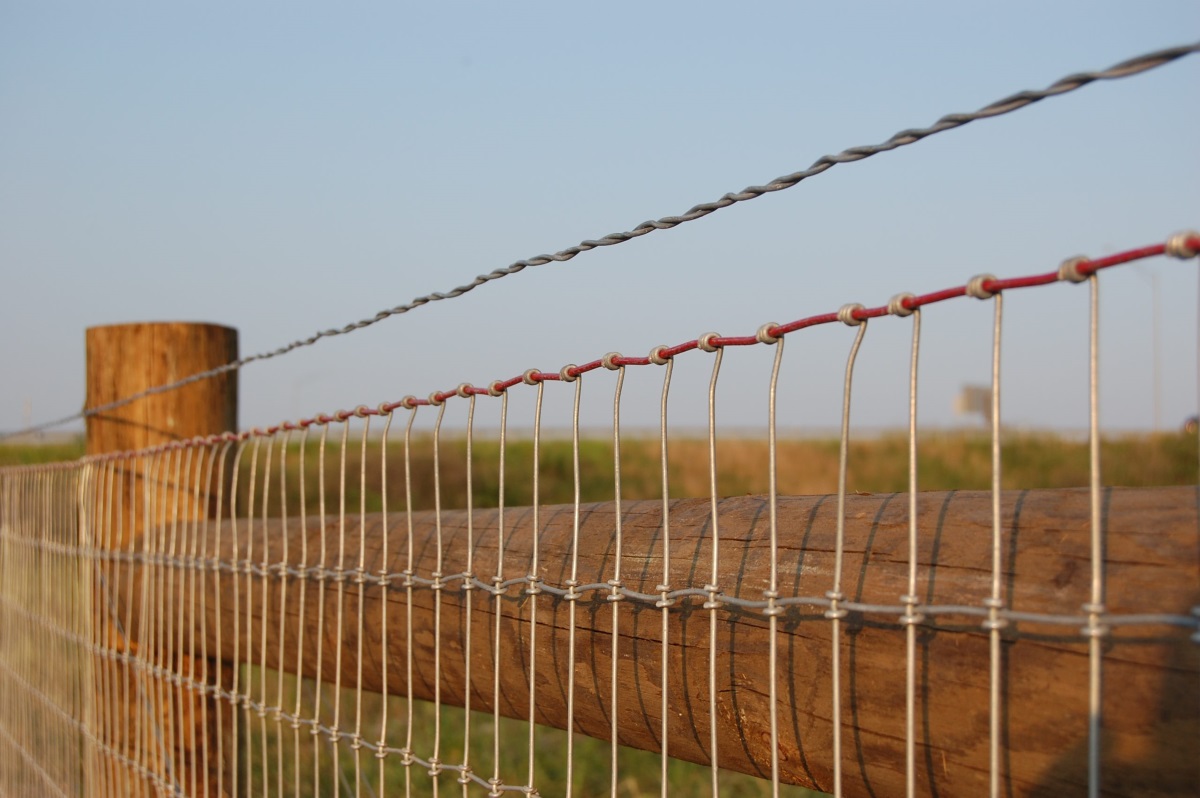
Step 6: Stretching the Wire Mesh
Stretching the wire mesh is a critical step in the installation process, as it ensures that the fence remains taut and well-supported. This step is particularly important for chain-link fences or fences with wire mesh.
Start by unrolling the wire mesh along the fence line, starting at one end. Make sure the mesh is positioned on the same side as the tension wire.
Begin attaching the wire mesh to the fence posts using fence staples or clips. Space the staples or clips about 12-24 inches apart, ensuring they are securely fastened to the fence posts.
Once the mesh is attached to the first fence post, move to the opposite end of the fence line. Using a come-along tool or fence stretcher, start pulling the mesh towards the second fence post.
As you stretch the wire mesh, work your way back along the fence line, attaching it to each fence post as you go. Use a tension bar to keep the mesh in place while you work on stretching and attaching it securely.
Ensure that the wire mesh is stretched tightly to avoid sagging or loose sections. Use the come-along tool or fence stretcher to achieve the desired tension, making sure to distribute the tension evenly along the fence.
Take your time and make adjustments as needed to ensure that the mesh is straight, level, and properly aligned with the fence posts. This will result in a professional and visually appealing wire fence.
Continue stretching and attaching the wire mesh until you reach the end of the fence line. Be careful not to overstretch the mesh, as this can cause it to warp or damage the fence posts.
Once the wire mesh is fully stretched and attached to all the fence posts, inspect the entire fence line to ensure there are no loose or sagging sections. Make any necessary adjustments and ensure that the mesh is secure and well-supported along the entire length of the fence.
Stretching the wire mesh properly is vital for the strength, stability, and appearance of your fence. With the wire mesh stretched and secured, you’re now ready to move on to the next step: securing the wire mesh to the fence posts.
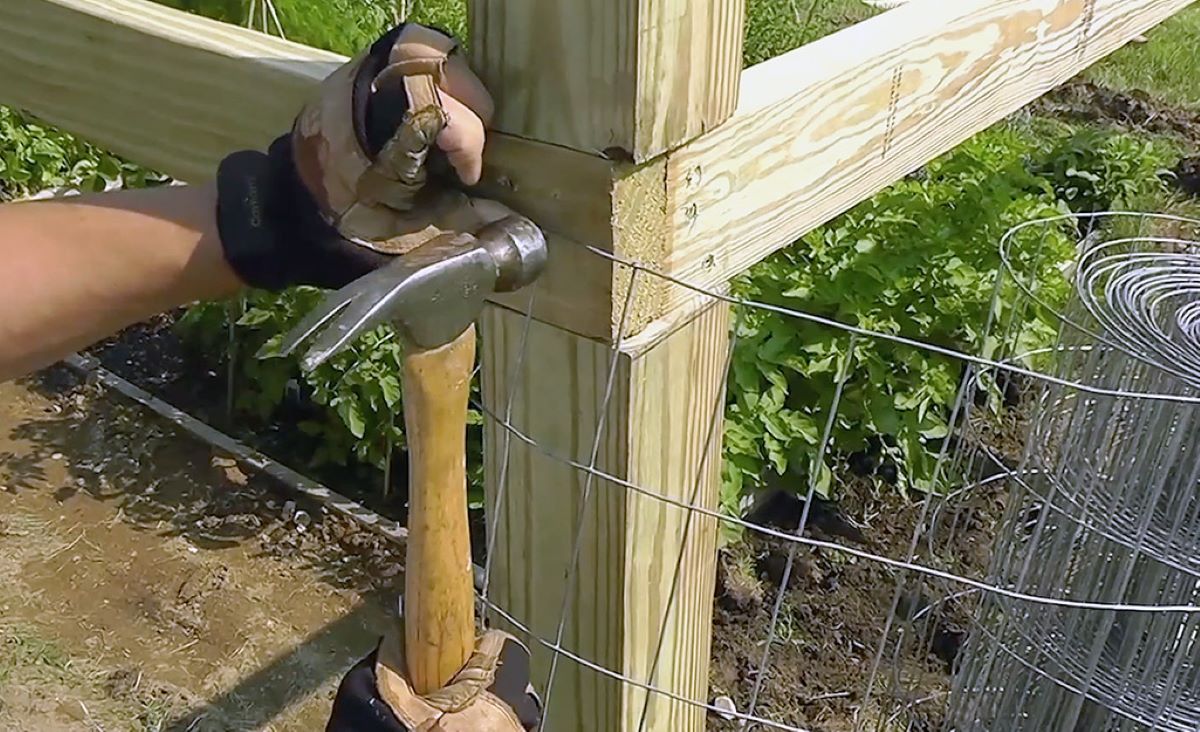
Step 7: Secure the Wire Mesh to the Fence Posts
Securing the wire mesh to the fence posts is an important step to ensure that the fence remains in place and maintains its integrity over time. By properly attaching the mesh to the posts, you’ll create a sturdy and long-lasting wire fence.
Start by examining the wire mesh and identifying the top and bottom edges. The top edge should be smooth, while the bottom edge typically has a tension wire or a selvage (a selvage is a reinforced edge to prevent unraveling).
Begin at one end of the fence line and unroll the wire mesh, positioning it against the fence posts. Make sure the mesh is aligned properly and covers the entire height of the posts.
Using fence staples or clips, secure the top edge of the mesh to the top rail or the top of the fence posts. Space the staples or clips about 12-24 inches apart to ensure a secure attachment.
Next, work your way down the fence line, securing the mesh to each fence post. Use fence staples or clips along both sides of the wire mesh, ensuring it is tightly attached to the posts.
For chain-link fences, use tie wires or hog rings to secure the mesh to the fence posts. Insert the tie wires or hog rings through the holes in the mesh and around the posts, twisting them tightly to secure the mesh in place.
Make sure to pay close attention to the bottom of the fence, as this is the area most vulnerable to animals attempting to dig under the fence. Use additional fence staples or clips to secure the tension wire or selvage at the bottom of the mesh to prevent any gaps.
As you attach the wire mesh to the fence posts, check periodically to ensure that it remains straight and aligned. Adjust as needed to maintain a professional and visually appealing appearance.
Inspect the entire fence line once you have secured the wire mesh to ensure that it is securely attached and there are no gaps or loose sections. Make any necessary adjustments or reinforcements to ensure a solid and well-supported fence.
By properly securing the wire mesh to the fence posts, you’ll create a durable and reliable wire fence that withstands the test of time. With the mesh securely attached, you’re now ready to move on to the next step: installing the top rail.
Read more: How To Put Up A Fence Post
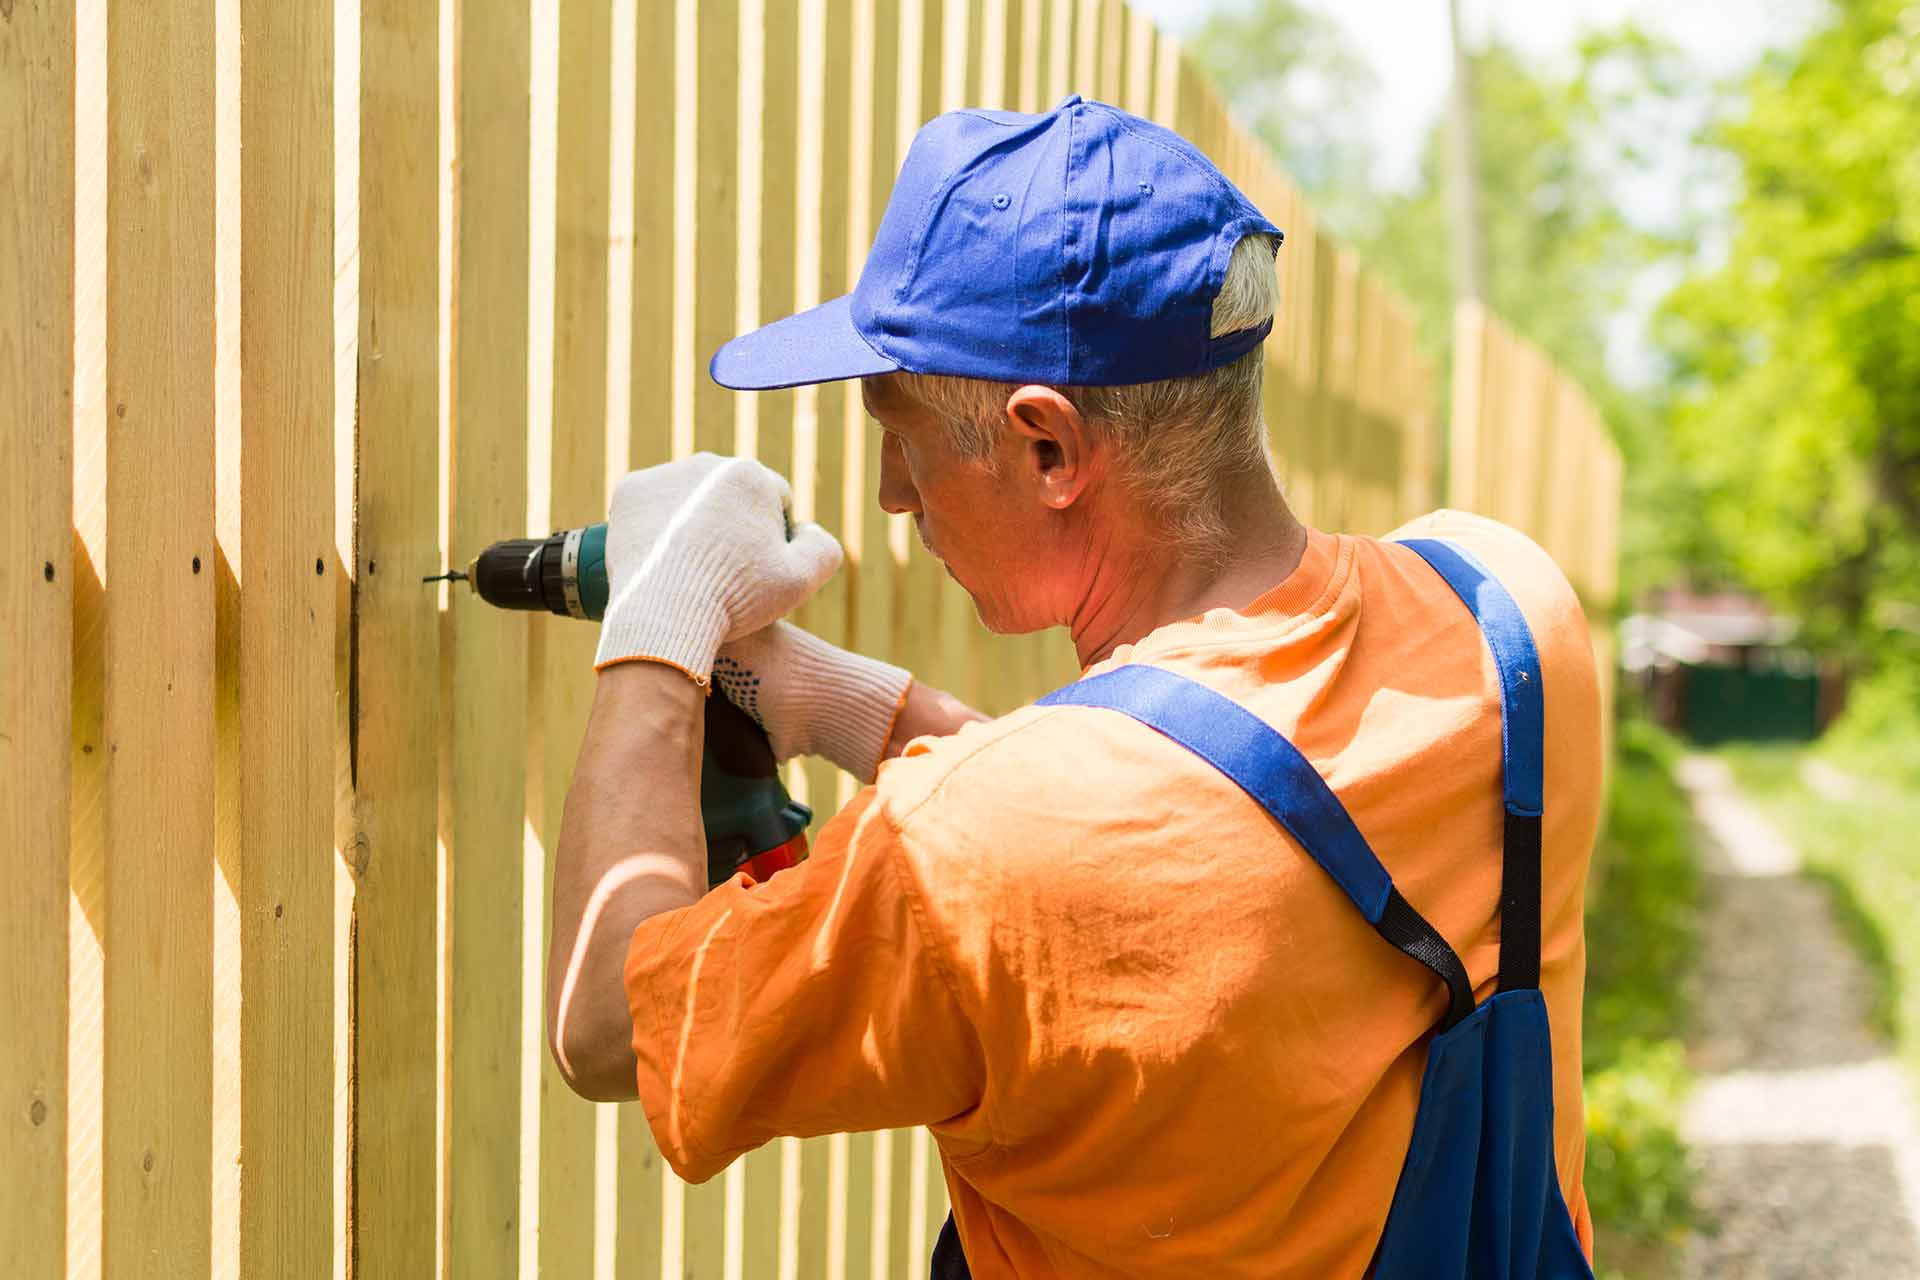
Step 8: Install the Top Rail
Installing the top rail is an important step in adding stability and rigidity to your wire fence. The top rail runs horizontally along the top of the fence, providing support to the wire mesh or chain-link fence.
To begin, measure the length of the fence where the top rail will be installed. Cut the top rail according to the measured length using a saw or appropriate cutting tool. Ensure that the top rail is long enough to cover the entire length of the fence without any gaps.
Start at one end of the fence and position the top rail on top of the fence posts. The rail should rest securely on top of the posts, creating a straight and level line.
Using rail end caps or brackets specifically designed for fence rails, attach the top rail to each end post. Make sure the rail is secured tightly to the end posts, ensuring stability and preventing any movement or dislodging.
For longer fence sections, it’s recommended to add additional rail supports in the middle to provide extra reinforcement. Attach the additional rail supports to the fence posts using brackets or rail end caps, evenly distributing them along the length of the fence.
Once the top rail and any additional rail supports are in place, secure them to the fence posts using screws or bolts. Make sure that the rail is firmly attached to the posts, reinforcing the overall structure of the fence.
Inspect the top rail to ensure it is straight and level along the entire fence line. Use a level or measuring tool to verify that the rail is properly aligned to create a visually appealing and professional-looking fence.
Installing the top rail not only adds stability to the wire fence but also enhances its appearance. The rail provides a clean, finished look, elevating the overall aesthetic appeal of your fence.
With the top rail securely installed, you’re now ready to move on to the next step: adding gates and gate hardware, if applicable.
Step 9: Add Gates and Gate Hardware
If you want to create an entry point in your wire fence, adding gates is the next step in the installation process. Gates provide convenient access to your property while maintaining the security and functionality of your fence.
Start by determining the location and size of the gate. Consider the width of the opening and any specific requirements you may have, such as accommodating larger vehicles or equipment.
Measure the width of the opening and select a gate that fits your needs. You can choose from various gate styles, including chain-link gates, wooden gates, or custom-designed gates to match your fence.
Once you have the gate, position it in the desired location, ensuring that it lines up with the fence posts and is level. Use shims or wedges if necessary to ensure it is properly aligned.
Attach gate hinges to the gate and the fence post on one side. Make sure the hinges are securely fastened and can support the weight of the gate. Depending on the gate size and material, you may need multiple hinges for added support.
Install a gate latch or lock on the opposite side of the gate to secure it when closed. Choose a latch or lock that suits your needs in terms of security and ease of use.
Consider adding additional gate hardware such as gate handles for convenience or gate stops to prevent the gate from swinging too far.
Test the gate to ensure that it opens and closes smoothly. Make any necessary adjustments to the hinges or latch to ensure proper functionality.
Lastly, inspect the gate and its hardware to ensure everything is securely attached and functioning as intended. Double-check that the gate swings freely and remains closed when latched.
Adding gates to your wire fence provides a practical and functional access point while maintaining the security and integrity of the fence structure. With the gate and gate hardware installed, you’re ready for the final step: finishing touches and maintenance.
Step 10: Finishing Touches and Maintenance
Completing the installation of your wire fence involves some final touches and ongoing maintenance to ensure its long-term functionality and appearance. Here are the final steps to wrap up the installation process:
1. Trim Excess Wire: Use wire cutters to trim any excess wire protruding from the fence posts or gates. This will give your fence a clean and neat finish.
2. Check for Loose Fasteners: Inspect the entire fence for any loose fence staples, clips, or fasteners. Make sure they are securely attached, tightening or replacing them as needed.
3. Add Post Caps: Place post caps on top of each fence post to protect them from water damage and give your fence a polished look. Select post caps that are compatible with the type and size of your fence posts.
4. Regular Maintenance: To keep your wire fence in good condition, perform regular maintenance tasks. This might include removing debris or vegetation that accumulates near the fence, checking for rust or corrosion, and repairing any damage promptly.
5. Inspect and Repair: Regularly inspect your wire fence for any signs of damage, such as loose wires, bent posts, or sagging sections. Repair or replace any damaged components to maintain the structural integrity of the fence.
6. Keep Vegetation Clear: Trim or remove any vegetation growing near the fence, as it can cause damage over time or provide an opportunity for animals to access or damage the fence.
7. Consider Coating or Painting: If desired, you can coat or paint your wire fence with a weather-resistant finish to protect it from the elements and enhance its visual appeal. Make sure to use a paint or coating that is suitable for the type of wire mesh or chain-link fence you have.
8. Monitor and Repair Gate Hardware: Regularly check the gate hinges, latch, and other hardware for any signs of wear, damage, or malfunction. Lubricate hinges and ensure that the gate operates smoothly.
9. Check for Animal Digging: Periodically inspect the bottom of the fence for any signs of animal digging or attempts to burrow under the fence. Secure any loose sections and consider reinforcing the bottom with additional wire or materials if necessary.
10. Stay Vigilant: Keep an eye out for any signs of damage, wear, or weakness in your wire fence. Promptly address any issues to prevent them from escalating and compromising the integrity of the fence.
By performing these finishing touches and regular maintenance tasks, you can ensure that your wire fence remains functional, secure, and visually appealing for many years to come.
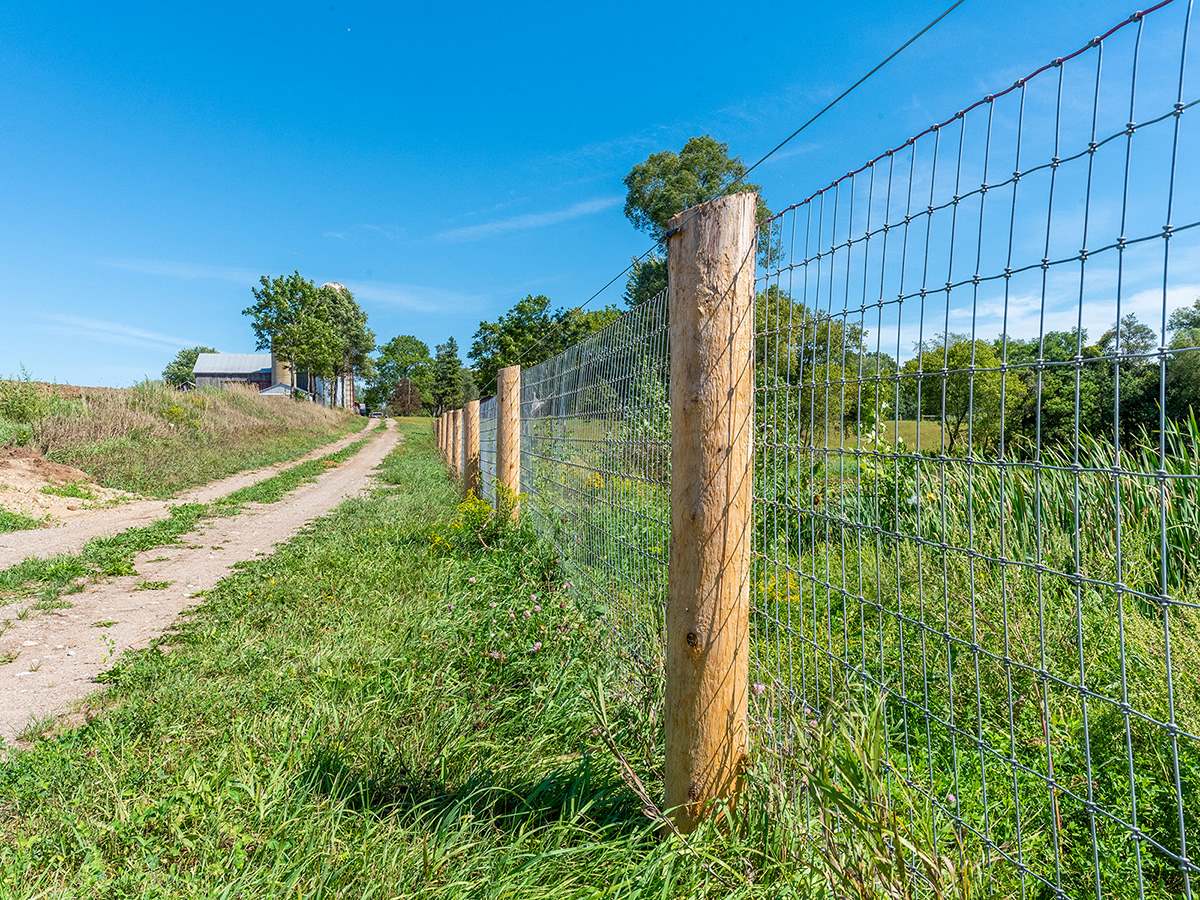
With these ten steps, you have successfully installed a wire fence. Whether you were creating a boundary, securing your property, or keeping your animals safe, your new fence will provide the necessary protection and peace of mind.
Conclusion
Installing a wire fence is a rewarding and worthwhile project that provides security, protection, and aesthetics to your property. By following the ten-step process outlined in this article, you can confidently and effectively install a wire fence that meets your specific needs.
Throughout the installation process, it’s crucial to prioritize safety by wearing appropriate protective gear and taking necessary precautions. Additionally, be mindful of any local regulations or zoning restrictions that may impact your fence installation.
From determining the location and layout of your fence to adding gates and gate hardware, each step plays a crucial role in creating a robust and visually appealing wire fence. Properly measuring, marking, digging, and setting the fence posts ensure stability and durability, while attaching tension wire and stretching the wire mesh add extra support and enhance the overall integrity of the fence.
With the installation completed, don’t forget the finishing touches, such as trimming excess wire, installing post caps, and performing regular maintenance. By taking care of your wire fence and addressing any issues promptly, you can extend its lifespan and maintain its functionality and appearance.
Remember, while the installation process may require time, effort, and attention to detail, the end result is a secure and reliable fence that enhances the value and appeal of your property.
Whether you’re enclosing a garden, keeping livestock contained, or protecting your property, a well-installed wire fence provides peace of mind and serves as a visual boundary. Enjoy the benefits of your newly installed wire fence and take pride in the accomplishment of creating a safe and secure space.
Now that you have completed this comprehensive guide, you are equipped with the knowledge and understanding to successfully install a wire fence. Happy fencing!
Frequently Asked Questions about How To Put Up Wire Fence
Was this page helpful?
At Storables.com, we guarantee accurate and reliable information. Our content, validated by Expert Board Contributors, is crafted following stringent Editorial Policies. We're committed to providing you with well-researched, expert-backed insights for all your informational needs.


0 thoughts on “How To Put Up Wire Fence”