Articles
How To Put Up Garden Fence
Modified: October 18, 2024
Discover step-by-step articles on how to put up a garden fence. From planning to installation, learn valuable tips and techniques for a successful project.
(Many of the links in this article redirect to a specific reviewed product. Your purchase of these products through affiliate links helps to generate commission for Storables.com, at no extra cost. Learn more)
Introduction
Putting up a garden fence is a great way to enhance the privacy, security, and overall aesthetics of your outdoor space. Whether you want to keep out unwanted visitors or simply define the boundaries of your property, a well-constructed fence can serve multiple purposes. However, the process of installing a garden fence can seem daunting, especially if you have little to no experience with DIY projects.
But fear not! With proper planning, the right tools and materials, and a step-by-step approach, you can successfully install a garden fence that will not only meet your needs but also add value to your property. In this article, we will guide you through the process of putting up a garden fence, from determining the purpose of the fence to adding the finishing touches.
Before we dive into the step-by-step instructions, it’s important to note that the specific details and techniques may vary depending on the type of fence you choose to install. Whether you opt for a classic wooden fence, a modern metal fence, or a more decorative option like a picket fence, the general principles outlined in this guide can be adapted to suit your project.
So, if you’re ready to embark on your garden fence installation journey, let’s get started with step 1: determining the purpose of the fence.
Key Takeaways:
- Proper planning, choice of materials, and attention to detail are essential for successfully installing a garden fence that enhances privacy, security, and aesthetics. Understanding the purpose of the fence and complying with local regulations are crucial steps in the process.
- From measuring and marking the boundary to adding finishing touches, the installation of a garden fence requires careful consideration and consistent effort. Choosing the right type of fence, securing the panels or boards, and maintaining the fence are key elements in creating a functional and visually appealing outdoor space.
Read more: How To Put Up Field Fence
Step 1: Determine the Purpose of the Fence
Before you start installing your garden fence, it’s essential to determine the purpose it will serve. Understanding the reason behind your fence will help you make informed decisions about its design, height, material, and other specifications. Here are some common reasons for installing a garden fence:
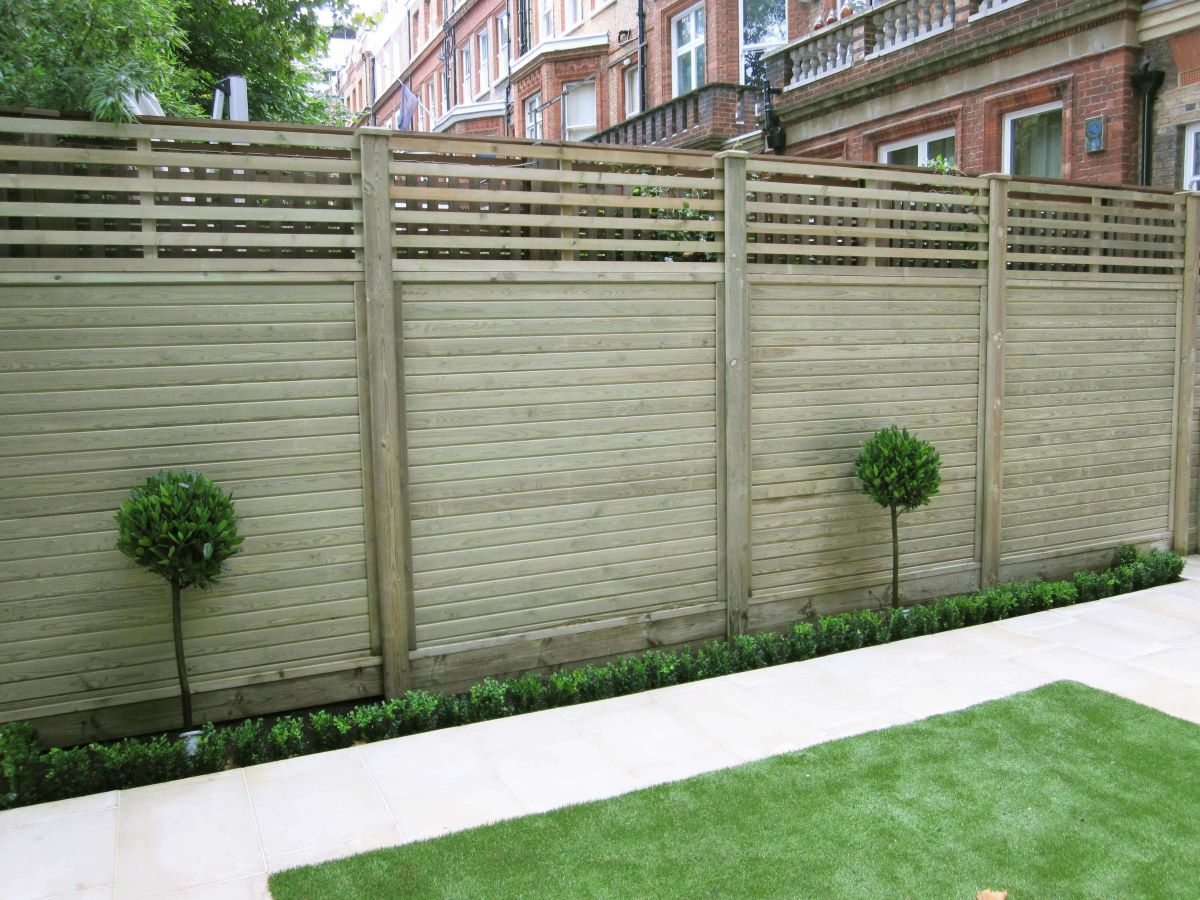
- Privacy: If you want to create a secluded outdoor space where you can relax and enjoy your garden without prying eyes, a privacy fence is the way to go. These taller fences, typically made of wood or vinyl, offer maximum privacy and block the view from neighboring properties or the street.
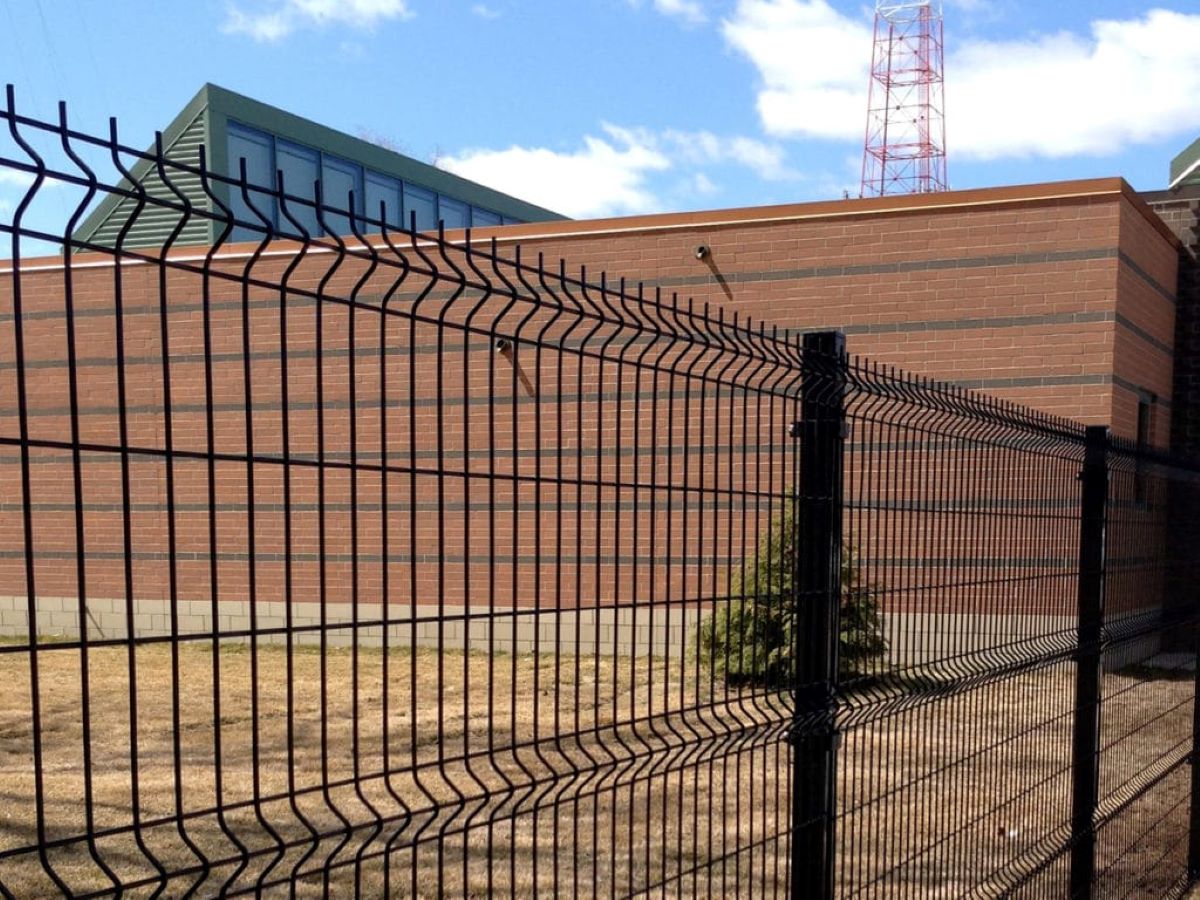
- Security: If security is your primary concern, you might opt for a sturdy and durable fence that can deter intruders and keep your property safe. A metal fence or a chain-link fence topped with barbed wire or spikes is a common choice for security purposes.
- Boundary definition: If your main goal is to demarcate your property line and prevent any disputes with neighbors, a simple and low-profile fence can do the job. Consider lightweight and easy-to-install options like a wire fence or a decorative picket fence.
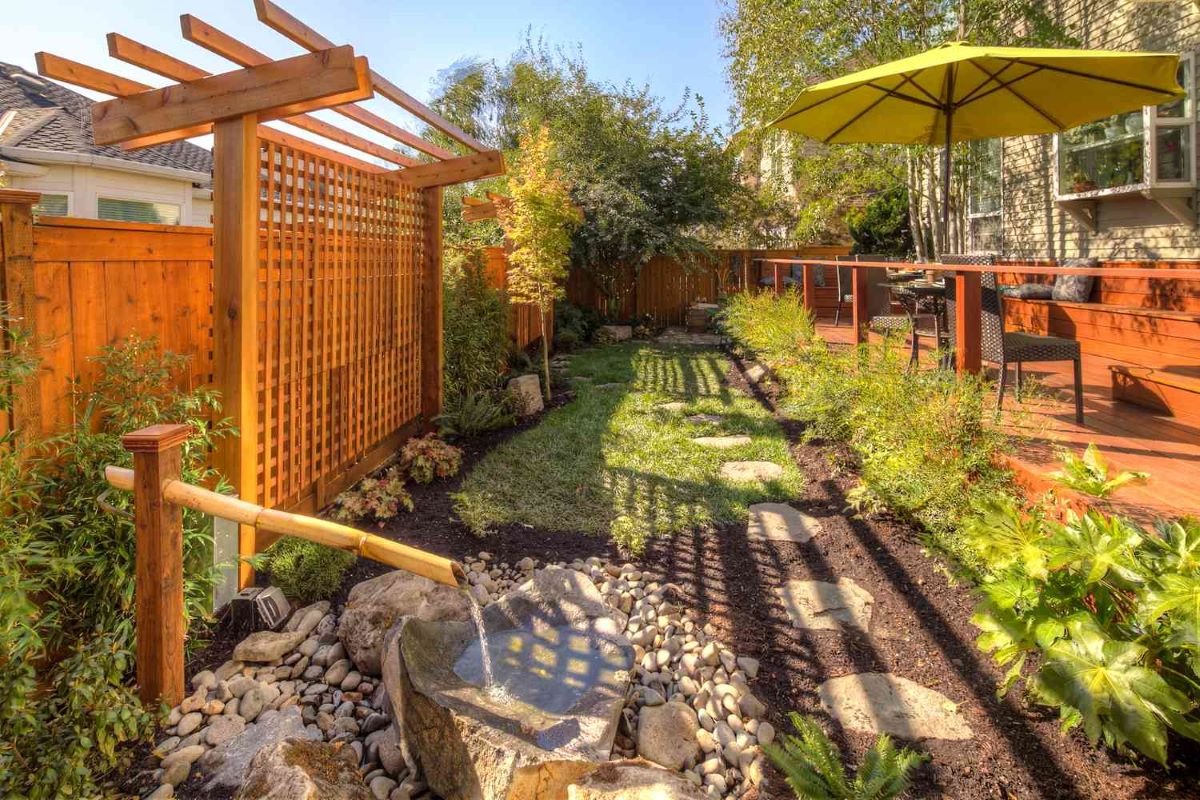
- Decoration: Sometimes, the purpose of a garden fence is purely aesthetic. It can serve as a backdrop for your beautiful flowers and plants, adding a touch of charm and visual appeal to your outdoor space. In this case, you have a wide range of options, from ornamental iron fences to wooden lattice fences.
Once you’ve identified the primary purpose of your fence, consider any secondary objectives you may have. For example, if you’re installing a privacy fence for sound reduction, you might want to choose a material that is known for its noise-blocking properties, like vinyl or dense hardwood.
Additionally, it’s important to check with your local authorities or homeowner’s association regarding any regulations or restrictions on fence height and materials. By understanding the purpose and complying with local guidelines, you can make an informed decision and start planning the installation of your garden fence.
Step 2: Choose the Type of Fence
Choosing the right type of fence for your garden is crucial as it will determine not only the functionality but also the overall appearance of your outdoor space. There are various types of fences to consider, each offering different benefits and aesthetics. Here are some popular options to help you decide:
- Wooden Fence: A classic and versatile choice, wooden fences provide a timeless look that can complement any garden style. They offer privacy, security, and can be customized in terms of height and design. Cedar, redwood, and pressure-treated pine are commonly used for wooden fences due to their durability and resistance to rot and insect damage.
- Vinyl Fence: If low maintenance is a priority for you, a vinyl fence might be the ideal option. Vinyl fences are easy to clean, resist fading, and come in a variety of styles and colors. They are also resistant to rot, mold, and pests, making them a durable choice for long-term use.
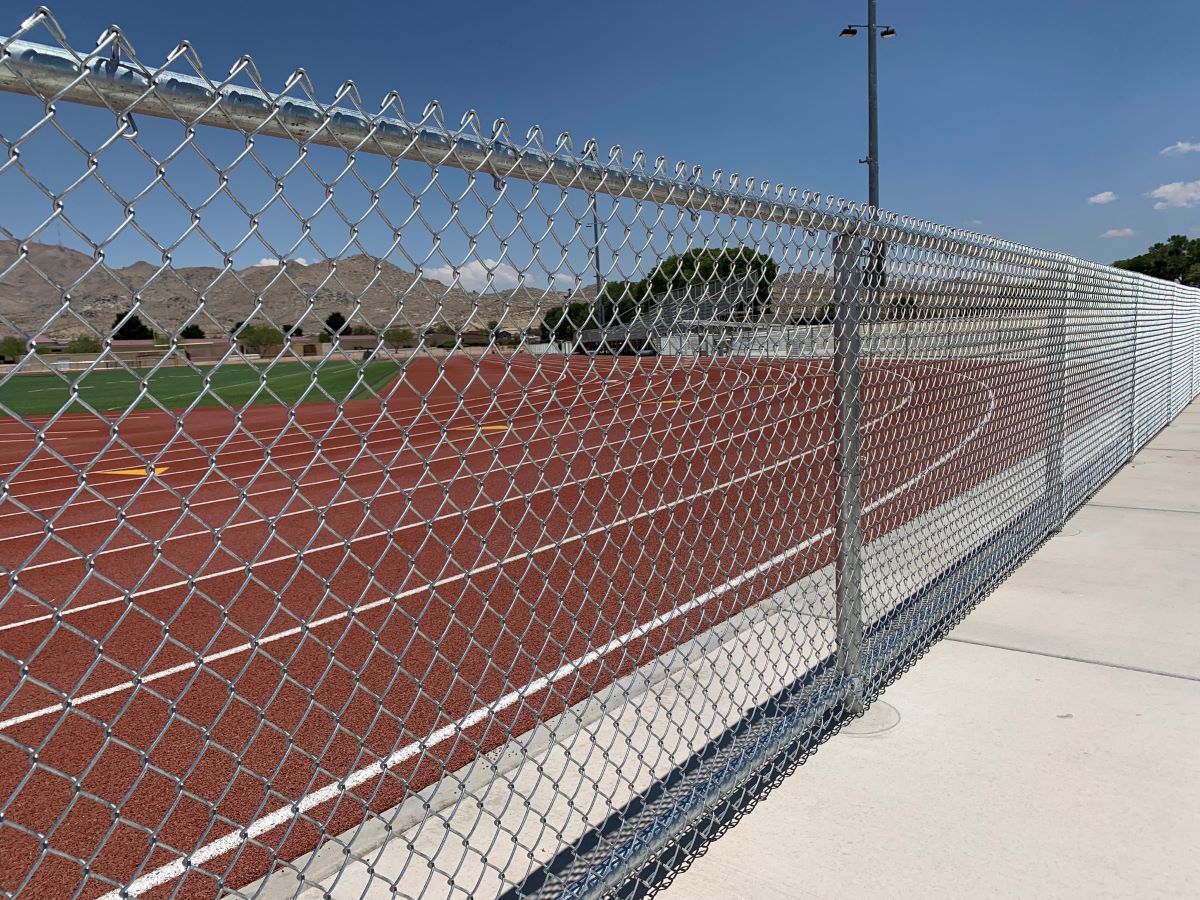
- Chain Link Fence: Chain link fences are known for their affordability, durability, and low maintenance. They are often used for security purposes and are a popular choice for commercial properties. Although they may not provide the same level of privacy as other fence types, they can be enhanced with privacy slats or even vines and plants for a more attractive appearance.
- Wrought Iron Fence: For an elegant and sophisticated look, wrought iron fences are hard to beat. They offer excellent security while allowing visibility through the ornate and decorative patterns. However, it’s important to note that wrought iron fences require regular maintenance to prevent rust and corrosion.
- Aluminum Fence: Similar to wrought iron fences, aluminum fences offer a stylish and classic appearance without the risk of rusting. They are lightweight, durable, and can be customized to various styles, making them a popular choice for both residential and commercial properties.
Consider the specific needs of your garden, such as the level of privacy required, the desired level of security, and your aesthetic preferences. Additionally, take into account the climate and environmental factors of your area, as some fencing materials may be more suitable for certain weather conditions. Research different fence types, compare their pros and cons, and choose the one that best fits your needs and complements the overall style of your garden.
Once you have chosen the type of fence, you can move on to the next step and gather the materials and tools required for the installation process.
Step 3: Gather Materials and Tools
Before you begin installing your garden fence, it’s essential to gather all the necessary materials and tools. Having everything ready beforehand will streamline the installation process and ensure that you have everything you need at your disposal. Here’s a list of common materials and tools needed for most garden fence installations:
Materials:
- Fence panels, boards, or pickets (depending on the chosen fence type)
- Fence posts (wood, vinyl, or metal)
- Concrete or gravel (for setting the fence posts)
- Fasteners (screws or nails)
- Gate(s) and hardware (if applicable)
- Fence caps or finials (for decorative purposes)
- Stain, paint, or sealant (for wooden fences)
Read more: How To Put Up A Snow Fence
Tools:
- Tape measure
- Level
- String or chalk line
- Post hole digger or auger
- Shovel
- Hammer
- Electric or cordless drill
- Saw (if cutting fence panels or boards)
- Screwdriver or nail gun
- Mixing container and mixing tool (if using concrete)
- Paintbrush or sprayer (for finishing touches)
Make sure to acquire high-quality materials that are suitable for your specific fence type and climate conditions. Additionally, ensure that your tools are in good working condition and that you have the necessary safety equipment, such as gloves and safety glasses, to protect yourself during the installation process.
If you are unsure about any tools or materials, consult with a professional or seek guidance from a reputable home improvement store. They can provide recommendations based on your specific project requirements and help ensure that you have everything you need for a successful garden fence installation.
Once you have gathered all the materials and tools, it’s time to move on to the next step: measuring and marking the boundary of your fence.
Step 4: Measure and Mark the Boundary
Before you start digging holes and setting your fence posts, it’s crucial to accurately measure and mark the boundary where your fence will be installed. This step is essential for ensuring that your fence is installed on your property and that it aligns with any local regulations or guidelines. Follow these steps to measure and mark the boundary:
- Obtain a copy of your property survey: If you have a property survey, locate it, as it will provide accurate measurements of your property lines. If you don’t have a survey, consider hiring a professional surveyor to determine the exact boundaries of your property.
- Identify property corners: Using the property survey or any existing markers, locate the corners of your property. These markers could be metal stakes, concrete monuments, or other visible markers placed when the property was surveyed.
- Measure and mark the fence line: Starting from one property corner, use a tape measure or a long piece of string to measure and mark the desired fence line. Drive a wooden stake into the ground at each end of the fence line, ensuring that the stakes are securely planted and visible.
- Verify the fence line: Use a tape measure or string to check that the distance between the two stakes matches the desired length of the fence line. Adjust the stakes if necessary to ensure accurate alignment.
- Mark post hole locations: Along the marked fence line, use a measuring tape to determine the spacing between each fence post. Typically, posts are placed 6 to 8 feet apart. Mark the locations for the post holes using spray paint or wooden stakes.
It’s crucial to double-check your measurements and alignment before proceeding to the next step. Additionally, consult any applicable local regulations or homeowner’s association guidelines to ensure that your fence is installed within the permissible boundaries and setback distances.
Keep in mind that in some dense urban areas or neighborhood developments, you may be required to obtain permits or submit your fence installation plans for approval. Check with your local building department or homeowner’s association to ensure compliance with any regulations or approval processes.
Once you have accurately measured and marked the boundary, you’re ready to move on to the next step: digging the fence post holes.
Step 5: Dig Fence Post Holes
With the boundary of your fence marked, it’s time to start digging the fence post holes. The depth and diameter of the holes will depend on the type of fence you are installing and the soil conditions in your area. Here’s how to dig the fence post holes:
- Gather the necessary tools: Grab your post hole digger or auger, shovel, and a wheelbarrow or bucket for removing excavated soil.
- Start digging the first post hole: Begin at one of the marked post hole locations and dig down into the ground. The depth of the hole will depend on the height of your fence, but as a general rule of thumb, it should be around one-third of the total length of the fence post.
- Check the hole depth: Use a tape measure or a level to ensure that the hole is deep enough. If needed, continue digging until the desired depth is reached.
- Measure the width of the hole: Measure the diameter of the hole, ensuring that it is wide enough to accommodate the fence post. As a general guideline, the diameter should be about three times the width of the post.
- Repeat for the remaining post holes: Move on to the next post hole location and repeat the process of digging to the appropriate depth and width.
- Remove loose soil: Use a shovel or the post hole digger to remove any loose soil from the bottom of the hole. This will help provide a stable base for the fence post.
- Clean up and dispose of excavated soil: Transfer the excavated soil into a wheelbarrow or bucket, and set it aside for later use or disposal.
Keep in mind that if you encounter rocky or clay soil, you may need additional tools, such as a pickaxe or a breaker bar, to break through tough ground. It’s important to remove any rocks or roots that may obstruct the proper placement of the fence post.
Remember to take breaks if needed and stay hydrated during the digging process, as it can be physically demanding. If you’re working with a large fence or have limited time available, consider renting a power auger to speed up the hole digging process.
Once you have dug all the fence post holes, you’re ready to move on to the next step: setting the fence posts securely in the ground.
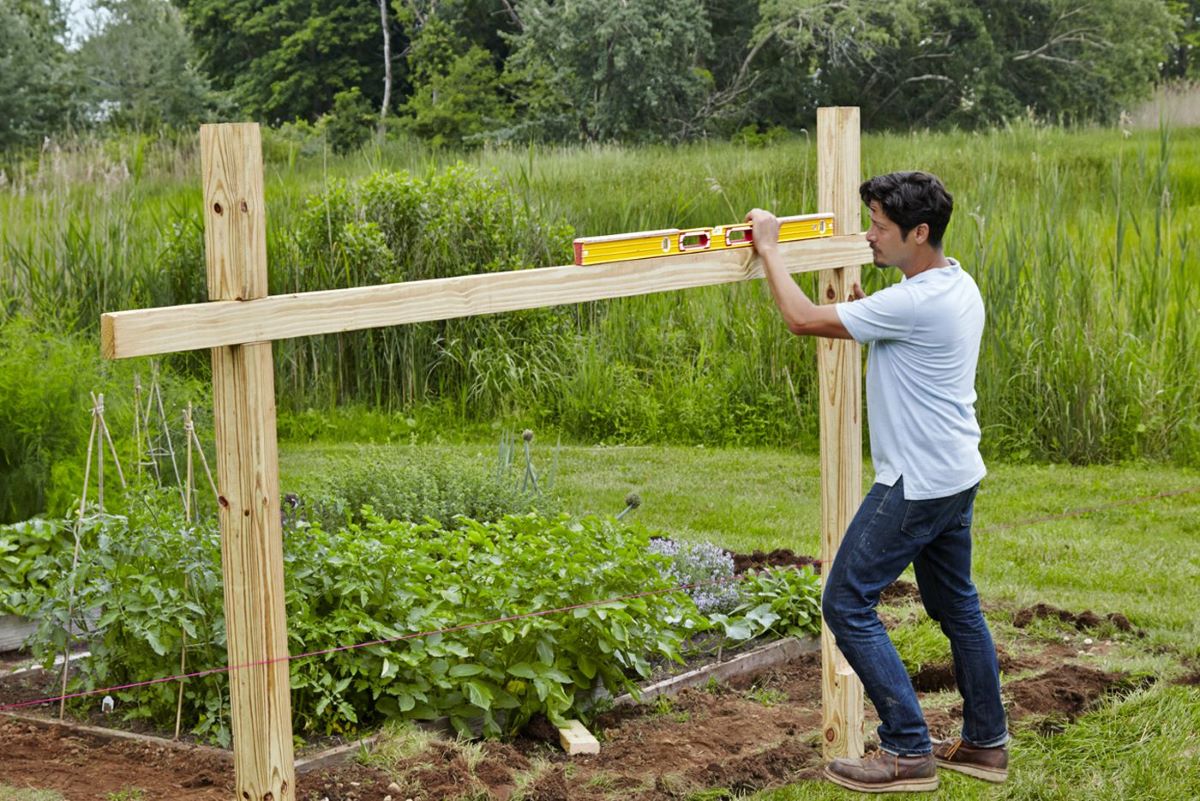
Step 6: Set Fence Posts
Setting the fence posts properly is essential for the stability and longevity of your garden fence. The exact method of setting the posts will depend on the type of fence you are installing and the materials you are working with. Here is a general guide on how to set fence posts:
- Prepare the holes: Before setting the posts, ensure that the holes are free from any debris or loose soil. This will provide a solid foundation for the posts.
- Insert the post: Place the first fence post in the first hole, ensuring that it is level and plumb. Gradually fill the hole with concrete or gravel, tamping it down as you go to prevent any air pockets from forming. Repeat this step for each post, checking the level and alignment each time.
- Secure the post: While the concrete or gravel is still wet, brace the post in position using temporary supports such as 2×4 boards or stakes. This will keep the post upright and stable during the curing process. Adjust the position of the post as needed to ensure it is perfectly vertical and aligned with the fence line.
- Cure the concrete: Follow the manufacturer’s instructions for curing the concrete properly. This may involve watering the concrete periodically or covering it to protect it from excessive moisture or direct sunlight. Allow sufficient time for the concrete to set and harden before moving on to the next step.
- Remove temporary supports: Once the concrete has cured, remove the temporary supports holding the posts in place. Check the stability of each post and make any necessary adjustments to ensure they are securely set.
- Repeat for remaining posts: Repeat the process of setting the fence posts for each remaining post hole. Take your time to ensure that each post is properly aligned and secure before moving on to the next step.
It’s important to note that some types of fences may require specific post installation techniques. For example, if you’re installing a wooden fence, you may need to pre-drill holes in the posts to prevent splitting. Additionally, some fence posts may require additional bracing or structural support based on the height and material of the fence.
When setting the fence posts, consider the recommended post spacing for your specific type of fence to ensure optimal stability and support throughout the entire fence structure.
Once all the fence posts are securely set, you’re ready to move on to the next step: installing the fence panels or boards.
When putting up a garden fence, make sure to properly measure and mark the area, use sturdy materials like metal or pressure-treated wood, and secure the fence posts deep into the ground for stability.
Read more: How To Put Up A Wood Fence
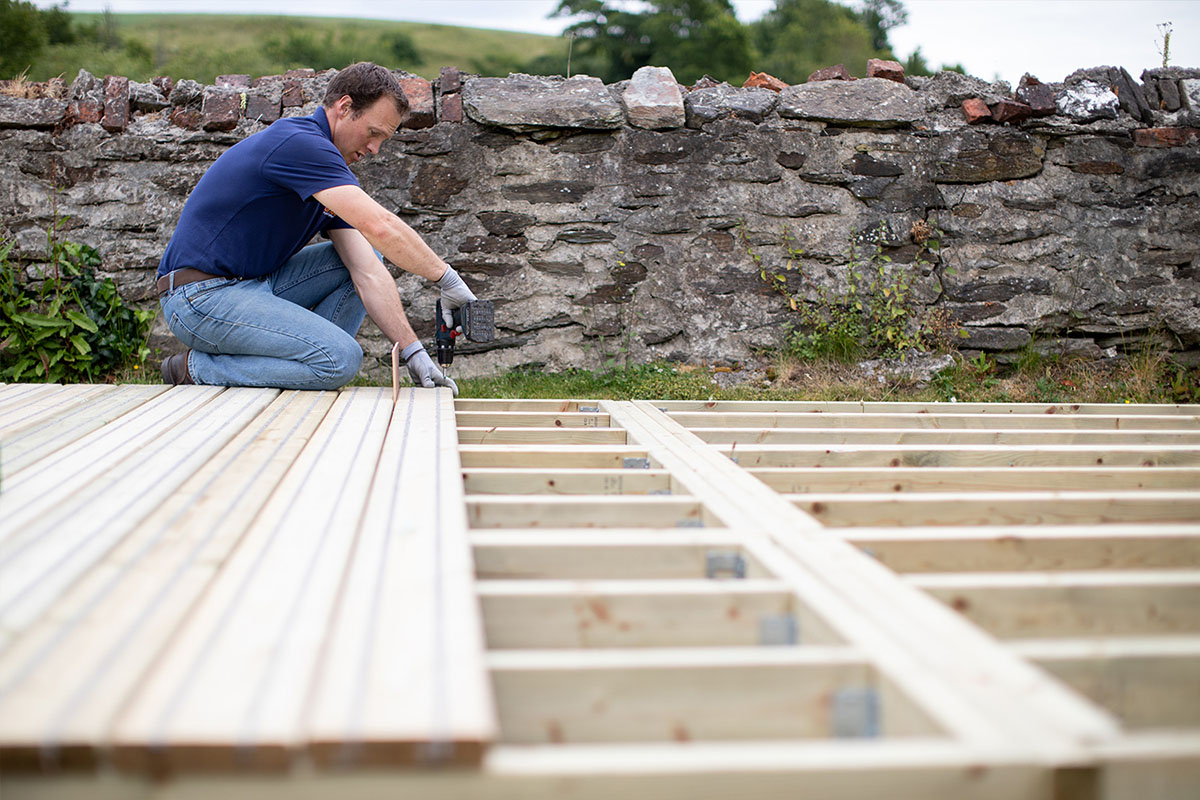
Step 7: Install Fence Panels or Boards
With the fence posts set in place, it’s time to move on to installing the fence panels or boards. This step will vary depending on the type of fence you are installing, such as a wooden fence, vinyl fence, or chain-link fence. Here is a general guide on installing fence panels or boards:
- Measure and cut the fence panels or boards (if needed): Depending on the length of your fence line and the width of your panels or boards, you may need to trim them to fit properly. Use a saw or appropriate cutting tool to make any necessary adjustments.
- Position the first panel or board: Start at one end of the fence line and position the first fence panel or board against the first two posts. Ensure that it is level and aligns with the desired height and spacing.
- Attach the panel or board to the posts: Use appropriate fasteners, such as screws or nails, to securely attach the fence panel or board to the posts. Place the fasteners through the pre-drilled holes (if applicable) or directly into the material of the panel or board. Repeat this process for each attachment point on the panel or board.
- Check for level and alignment: As you progress along the fence line, use a level to ensure that each panel or board is properly aligned and level with the previous one. Adjust as necessary to maintain a straight and uniform appearance.
- Continue installing the remaining fence panels or boards: Repeat the process of positioning, attaching, and checking for level and alignment for each fence panel or board. Take your time to ensure that each one is securely fastened and positioned correctly.
- Install any gate(s) (if applicable): If your fence design includes a gate, follow the manufacturer’s instructions for installing it properly. Ensure that it is level, aligned with the fence, and functioning smoothly.
During the installation process, it’s important to maintain consistency in the spacing between panels or boards to create a cohesive and visually appealing result. Use spacers or a measuring tape to ensure an even gap between each panel or board.
Once all the fence panels or boards are installed, step back and inspect the fence line for any visible imperfections or areas that require adjustment. Make any necessary adjustments before progressing to the next step, which involves securing the fence panels or boards to the posts.
Step 8: Secure Fence Panels/Boards to Posts
After installing the fence panels or boards, the next step is to securely attach them to the fence posts. This will ensure that the panels or boards remain in place and provide the necessary support for your garden fence. Here’s how to secure the fence panels or boards to the posts:
- Position the fasteners: Determine the appropriate locations for attaching the fence panels or boards to the posts. These locations may vary depending on the type of fence and the specific design. Mark the positions for the fasteners using a pencil or marker.
- Choose the right fasteners: Select the appropriate fasteners for your fence panels or boards and the type of material they are made of. For wooden fences, use corrosion-resistant screws or nails. For vinyl or metal fences, use specialized fasteners that are compatible with the material.
- Pre-drill (if necessary): Depending on the type of material and the size of the fasteners, you may need to pre-drill holes in the fence panels or boards. This will prevent splitting or cracking when inserting the fasteners. Use a drill bit that is slightly smaller in diameter than the fasteners.
- Attach the fasteners: Securely fasten the fence panels or boards to the posts using the chosen fasteners. Make sure to align the holes in the panels or boards with the marked positions on the posts. Use a screwdriver, drill, or hammer to drive the fasteners into place. Repeat this process for each attachment point on the fence.
- Check for stability: After securing the fence panels or boards to the posts, check for any signs of instability or loose connections. Gently shake the fence panels or boards to ensure they are securely and firmly attached to the posts. Make any necessary adjustments or add additional fasteners if needed.
- Inspect for any gaps or misalignments: Step back and visually inspect the fence line for any visible gaps or misalignments between the panels or boards. These can be adjusted by shifting or repositioning the panels or boards and adding extra fasteners as needed to create a seamless and uniform appearance.
Ensuring that the fence panels or boards are properly secured to the posts is essential for the overall stability and longevity of your garden fence. Take your time during this step to ensure that each attachment point is secure and able to withstand external forces such as wind or pressure.
Once you have checked and confirmed that the fence panels or boards are securely fastened to the posts, you can proceed to the final step – adding the finishing touches to your garden fence.
Step 9: Add Finishing Touches
Now that your garden fence is installed and the panels or boards are securely attached to the posts, it’s time to add the finishing touches that will enhance the overall appearance and functionality of your fence. Here are some finishing touches to consider:
- Apply a protective finish: If you have a wooden fence, consider applying a protective finish such as stain, paint, or sealant. This will help protect the wood from the elements, prevent rot and decay, and enhance its visual appeal. Make sure to choose a finish that is specifically designed for outdoor use and matches your desired aesthetic.
- Install post caps: Adding decorative post caps to your fence posts can give your garden fence a polished and attractive look. Post caps not only provide a finishing touch but can also protect the top of the posts from moisture and prolong their lifespan. Choose caps that complement the style and material of your fence.
- Adjust gate hardware: If your fence includes a gate, ensure that the gate hardware is properly adjusted for smooth operation. Make any necessary adjustments to the hinges, latches, or locks to ensure that the gate opens and closes securely and without any difficulty.
- Landscaping and plantings: Consider incorporating landscaping elements around your garden fence to enhance its visual appeal. Planting flowers, shrubs, or climbing vines along the fence line can soften its appearance and create a harmonious blend between the fence and your garden. Choose plants that are suitable for your climate and will thrive in the given conditions.
- Maintain and inspect: Regularly inspect your garden fence for any signs of damage, wear, or shifting. Address any issues promptly to ensure the fence remains in good condition. Trim any vegetation that may be growing close to the fence to prevent damage or interference.
- Add lighting: If you want to extend the functionality and visibility of your garden fence, consider installing outdoor lighting fixtures. These can enhance the ambiance of your outdoor space while providing additional security and safety during the nighttime hours. Choose lighting options that are weather-resistant and energy-efficient.
By adding these finishing touches, you can elevate the overall look and functionality of your garden fence, turning it into a focal point of your outdoor space. Regular maintenance and care will also help keep your fence in top condition and ensure its longevity.
With the addition of these finishing touches, your garden fence installation is complete. Take a step back and admire the result of your hard work and attention to detail. Enjoy the privacy, security, and enhanced beauty that your newly installed garden fence brings to your outdoor space.
Conclusion
Congratulations on successfully installing your garden fence! By following the step-by-step guide provided in this article, you have transformed your outdoor space, adding privacy, security, and aesthetic appeal. With careful planning, proper materials, and attention to detail, you have created a boundary that defines your property and enhances the overall value of your home.
Throughout the installation process, you determined the purpose of your fence, chose the right type of fence for your needs, gathered the necessary materials and tools, measured and marked the boundary, dug the fence post holes, set the fence posts securely, installed the fence panels or boards, secured them to the posts, and added the finishing touches that elevate the appearance and functionality of your garden fence.
Remember to regularly inspect and maintain your garden fence to ensure it remains in optimal condition. This includes addressing any repairs or adjustments needed, applying protective finishes when necessary, and keeping vegetation trimmed to prevent damage. With proper care, your garden fence will continue to serve its purpose for many years to come.
Enjoy the benefits of your new garden fence, whether it’s providing a private oasis for relaxation, ensuring the safety of your property, or adding a touch of charm to your outdoor space. Your garden fence is not only a practical addition but also a reflection of your personal style and taste.
If you ever decide to change or update your garden fence in the future, you now have the knowledge and experience to do so. Remember to adapt the techniques and processes outlined in this guide to suit the specific requirements of your new fence project.
Thank you for taking the time to read this comprehensive guide on how to put up a garden fence. We hope it has provided valuable insights and guidance throughout your fence installation journey. May your garden fence bring joy, security, and beauty to your outdoor space for years to come!
Frequently Asked Questions about How To Put Up Garden Fence
Was this page helpful?
At Storables.com, we guarantee accurate and reliable information. Our content, validated by Expert Board Contributors, is crafted following stringent Editorial Policies. We're committed to providing you with well-researched, expert-backed insights for all your informational needs.


0 thoughts on “How To Put Up Garden Fence”