Articles
How To Tile A Shower Floor Slope
Modified: August 26, 2024
Looking for articles on how to tile a shower floor slope? Check out our comprehensive guide for step-by-step instructions and expert tips to achieve a perfectly leveled and water-efficient shower floor.
(Many of the links in this article redirect to a specific reviewed product. Your purchase of these products through affiliate links helps to generate commission for Storables.com, at no extra cost. Learn more)
Introduction
When it comes to renovating a bathroom, one of the key elements that can transform the space is the shower floor. A properly tiled shower floor not only adds beauty and style to the bathroom but also ensures proper drainage and prevents water damage. One crucial aspect of tiling a shower floor is creating a slope to direct water towards the drain. This slope ensures that water flows efficiently and doesn’t accumulate on the floor, minimizing the risk of leaks and mold growth.
If you’re planning to tile a shower floor and want to learn how to create the perfect slope for proper drainage, you’ve come to the right place. In this guide, we will walk you through the step-by-step process of tiling a shower floor slope, from preparing the subfloor to cleaning and sealing the tiles. So let’s dive in and transform your bathroom with a beautifully tiled shower floor that functions flawlessly.
Key Takeaways:
- Properly preparing the subfloor, creating a precise slope, and waterproofing the shower floor are crucial for a successful and long-lasting tiled shower floor. Attention to detail is key for a beautiful and functional result.
- Tiling a shower floor slope requires meticulous steps, from installing the drain to grouting and sealing the tiles. With patience and care, you can transform your bathroom into a stunning and durable space.
Read more: How To Remove Shower Floor Tile
Step 1: Preparing the Subfloor
Before you begin tiling a shower floor slope, it’s important to ensure that the subfloor is properly prepared. This step is crucial in creating a strong and stable base for the tiles. Here’s how to prepare the subfloor:
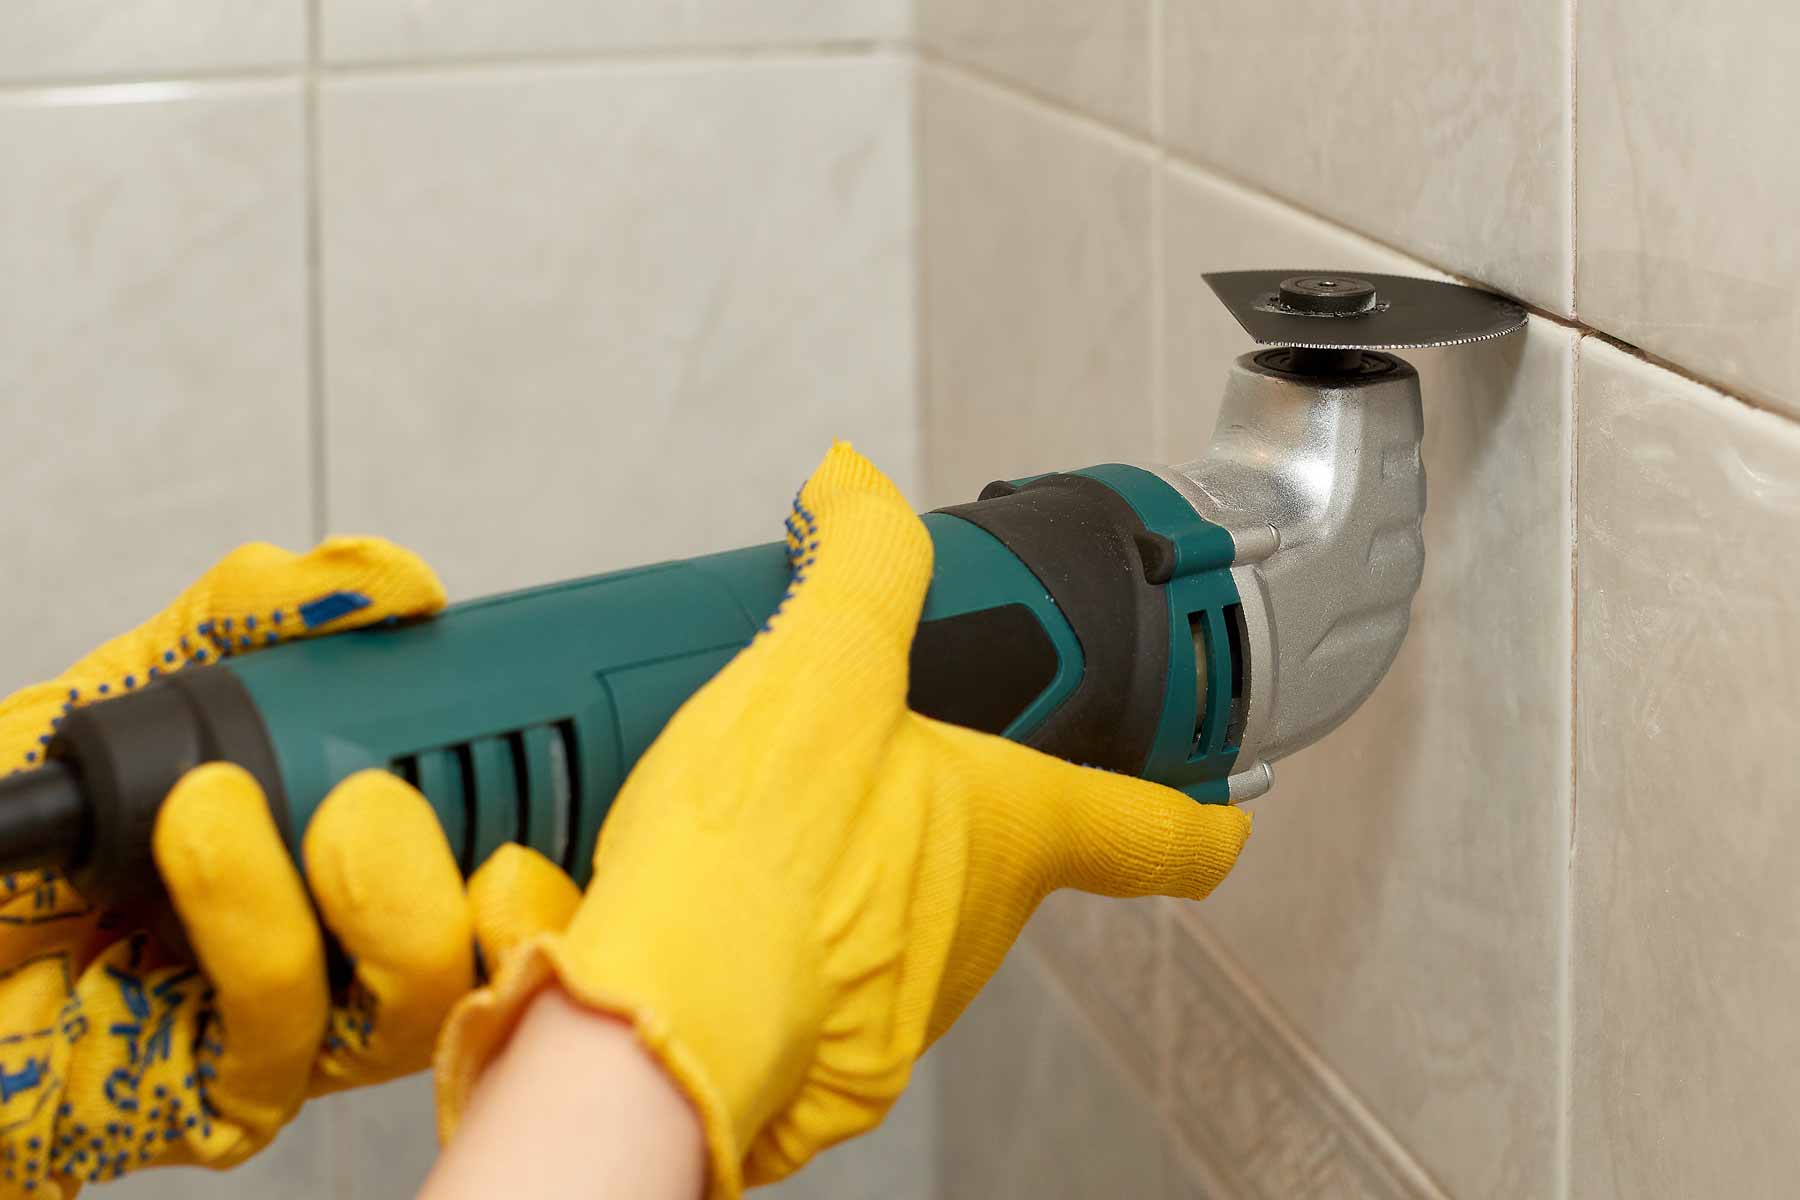
- Remove the old flooring: If there is an existing floor covering in the shower area, such as tiles or vinyl, remove it carefully using a pry bar and hammer. Make sure to remove any adhesive or residue from the subfloor as well.
- Check the subfloor condition: Inspect the subfloor for any signs of damage, such as rot or water stains. If you notice any issues, repair or replace the damaged sections before proceeding.
- Clean the subfloor: Thoroughly clean the subfloor, removing any dust, dirt, or debris. This will ensure a clean surface for the mortar to adhere to.
- Level the subfloor: Check if the subfloor is level using a level tool. If any uneven areas are found, use a leveling compound to fill in the gaps and create a smooth, even surface.
- Apply a waterproof membrane: To further protect the subfloor from moisture, apply a waterproofing membrane over the entire shower floor area. This will provide an additional layer of protection against leaks and water damage.
By properly preparing the subfloor, you are laying the foundation for a successful shower floor tiling project. Taking the time to complete this step will ensure that your tiles adhere well and that your shower floor is durable and long-lasting.
Step 2: Creating the Slope
Creating a slope in the shower floor is essential to ensure proper drainage. This slope allows water to flow towards the drain, preventing standing water and minimizing the risk of leaks. Follow these steps to create the slope for your shower floor:
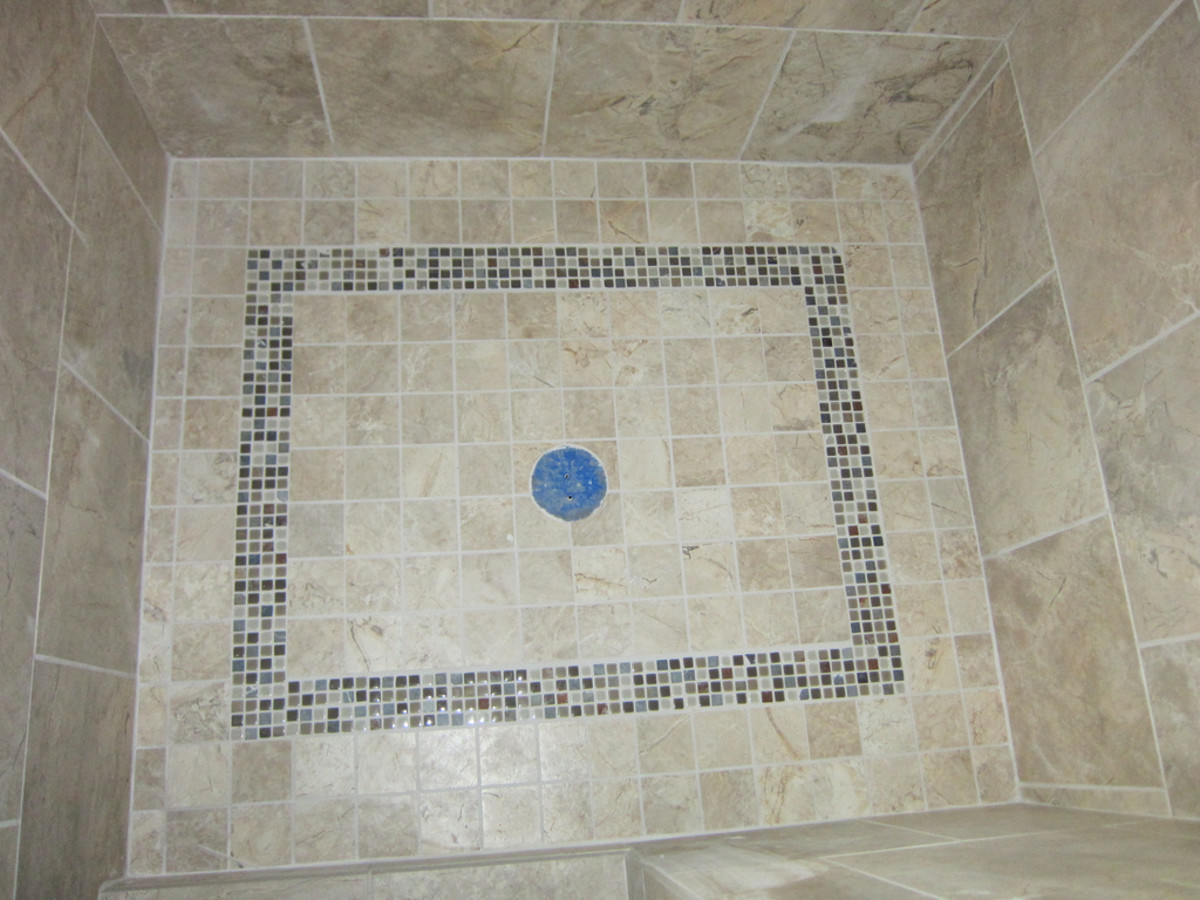
- Identify the drain location: Determine the exact location of the drain in your shower floor. This will serve as your reference point for creating the slope.
- Mark the slope lines: Use a level and a pencil to mark the slope lines on the subfloor. These lines will indicate the gradual incline towards the drain. Start from the outer edges of the shower floor and draw lines towards the drain location.
- Mix mortar: Prepare the mortar mixture according to the manufacturer’s instructions. The mortar will be used to build up the slope on the shower floor.
- Start at the drain: Begin at the drain and work your way towards the outer edges of the shower floor. Apply a layer of mortar along the marked slope lines, using a trowel to shape it and create the desired incline.
- Smooth and level the mortar: Use a screed or a straight edge tool to smooth and level the mortar, ensuring a consistent slope. This step is crucial for proper water drainage.
- Check the slope: Use a level to verify that the slope is even and there are no low or high spots. Adjust the mortar as needed to achieve a smooth and consistent slope.
- Allow the mortar to cure: Follow the manufacturer’s instructions for the curing time of the mortar. Allow it to properly set and harden before proceeding to the next steps.
By creating a proper slope in the shower floor, you are ensuring that water flows efficiently towards the drain. This reduces the risk of water damage and helps maintain a clean and functional shower space. Take your time during this step to ensure an accurate and well-constructed slope for your shower floor.
Step 3: Waterproofing the Shower Floor
To protect your shower floor from water damage and ensure its longevity, it is crucial to apply a waterproofing membrane. This membrane acts as a barrier, preventing water from seeping into the subfloor and causing issues such as mold and structural damage. Follow these steps to properly waterproof your shower floor:
- Clean the slope: Before applying the waterproofing membrane, make sure the slope created in the previous step is clean and free from any debris or dust.
- Choose a waterproofing membrane: There are different types of waterproofing membranes available, such as liquid membranes and sheet membranes. Choose the one that best suits your needs and follow the manufacturer’s instructions for application.
- Apply the waterproofing membrane: Start by applying the membrane along the perimeter of the shower floor, including the walls and the area around the drain. Use a paintbrush or a roller to coat the surface evenly. Make sure to cover the entire slope and any corners or edges.
- Overlap seams: If you are using a sheet membrane, ensure that the seams overlap properly to create a watertight seal. Use a waterproofing tape or adhesive to secure the seams and prevent any water from seeping through.
- Allow the membrane to dry: Follow the manufacturer’s instructions for drying time. It is important to allow the waterproofing membrane to fully dry and cure before moving on to the next steps.
- Inspect for any gaps or imperfections: Once the membrane is dry, inspect the surface for any gaps or imperfections. If you find any, apply an additional layer of membrane to ensure complete coverage.
By properly waterproofing your shower floor, you are protecting it from moisture-related issues and increasing its lifespan. This step is essential for maintaining a dry and healthy bathroom environment and preventing costly repairs down the line.
Step 4: Installing the Drain
Installing the drain properly is vital for the functionality and effectiveness of your tiled shower floor. The drain ensures that the water is efficiently directed towards the plumbing system, preventing water pooling and potential leaks. Follow these steps to install the drain in your shower floor:
- Prepare the drain hole: Use a hole saw to create a hole in the subfloor at the marked drain location. Make sure the hole is the correct size and aligns with the drain’s specifications.
- Apply the drain flange: Apply a layer of waterproofing adhesive on the underside of the drain flange. Place the flange into the drain hole, ensuring it sits flush with the subfloor.
- Tighten the drain flange: Use the appropriate wrench or tool to tighten the screws on the drain flange, securing it in place. Check that the flange is level and snugly fit.
- Connect the drain pipe: Attach the drain pipe to the drain flange, ensuring a tight and secure connection. Use plumbing adhesive or teflon tape to seal any joints or connections.
- Test the drain: Before proceeding with further steps, it’s important to test the drain for any leaks. Pour some water into the drain and observe if there are any signs of water escaping or pooling.
- Apply a layer of mortar around the drain: To ensure stability and to create a smooth transition between the drain and the shower floor, apply a layer of mortar around the drain flange. Use a trowel to shape the mortar and create a neat finish.
- Allow the mortar to cure: Follow the manufacturer’s instructions for the curing time of the mortar. It is important to allow the mortar around the drain to fully set before continuing with the tiling process.
By correctly installing the drain, you are ensuring efficient water drainage and preventing potential leaks. Take your time during this step to ensure a proper and secure connection, as this is crucial for the functionality and longevity of your tiled shower floor.
When tiling a shower floor slope, make sure to use a waterproof membrane to prevent water damage. This will ensure that the slope remains intact and the tiles stay in place.
Read more: How To Clean Shower Floor Tile
Step 5: Applying the Mortar
Once the subfloor, slope, and drain are prepared, it’s time to apply the mortar layer that will support and bond the tiles to the shower floor. Follow these steps to apply the mortar effectively:
- Mix the mortar: Prepare the mortar mixture according to the manufacturer’s instructions. Make sure to use the appropriate ratio of water to mortar mix for the best consistency.
- Start from the drain: Begin at the drain and work your way towards the outer edges of the shower floor. Apply a layer of mortar onto the slope, using a trowel to spread it evenly and make it approximately 1/4 inch thick.
- Use the notched trowel: After applying the initial layer of mortar, use a notched trowel to create grooves in the mortar. This will help with the adhesion of the tiles and ensure a stronger bond.
- Work in small sections: It’s important to work in small sections to prevent the mortar from drying out before you place the tiles. This will ensure a better bond between the tiles and the mortar layer.
- Install the tiles: Place the tiles onto the mortar layer, starting from the drain and working your way towards the walls. Press the tiles firmly into the mortar, ensuring they are aligned and level.
- Check for level and spacing: Use a level to check that the tiles are even and properly aligned. Also, ensure that there is consistent spacing between the tiles for grouting.
- Adjust and clean excess mortar: As you place the tiles, you may need to adjust their position and clean any excess mortar that squeezes up between them. Use a damp sponge or cloth to remove any excess mortar before it sets.
Applying the mortar layer properly ensures a strong foundation for the tiles and guarantees a durable and long-lasting shower floor. Take your time during this step to ensure an even and consistent layer of mortar to achieve the best results.
Step 6: Setting the Tiles
Setting the tiles onto the mortar is the next crucial step in tiling a shower floor. This step requires precision and attention to detail to ensure the tiles are correctly placed and aligned. Follow these steps to set the tiles effectively:
- Apply tile adhesive: Using a trowel, apply a thin layer of tile adhesive directly onto the mortar bed. This will create a strong bond between the tiles and the shower floor.
- Start from the drain: Begin setting the tiles from the drain and work your way outward towards the walls. This ensures that the tiles are placed in the correct order and alignment.
- Press the tiles into place: Carefully press each tile into the adhesive, ensuring it is level and aligned with the surrounding tiles. Use a slight twisting motion to fully embed the tile into the adhesive.
- Use tile spacers: Place tile spacers between each tile to create consistent spacing. These spacers will be removed later before grouting.
- Check for level and alignment: Periodically use a level to check that the tiles are even and properly aligned. Adjust the tiles as needed to ensure a professional finish.
- Trim tiles if necessary: If you encounter any areas that require trimmed tiles, use a tile cutter or tile saw to cut them to the desired size and shape.
- Continue setting the tiles: Repeat the process of applying adhesive, setting the tiles, and checking for level and alignment until the entire shower floor is tiled.
Properly setting the tiles ensures that they are securely adhered to the shower floor, creating a beautiful and functional surface. Take your time during this step to ensure a precise and visually pleasing tile installation that will last for years to come.
Step 7: Grouting the Tiles
Grouting is the process of filling the gaps between the tiles to create a seamless and finished look for your shower floor. It not only enhances the appearance of the tiles but also helps to protect them from water penetration. Follow these steps to grout the tiles effectively:
- Choose the grout: Select a grout color that complements your shower design and matches the spacing between the tiles. Ensure that you choose a grout that is suitable for wet areas.
- Mix the grout: Follow the manufacturer’s instructions to properly mix the grout to the correct consistency. Use a trowel or a mixing paddle to blend the grout and water or liquid additive.
- Apply the grout: Scoop a generous amount of grout onto a rubber float and spread it diagonally across the tiles, ensuring that the gaps between the tiles are completely filled. Press the grout into the gaps and remove any excess from the tile surface.
- Clean the tiles: After applying the grout, wait for a few minutes to allow it to set slightly. Then, using a damp sponge or cloth, gently wipe away the excess grout from the tile surface before it fully dries.
- Tool the grout lines: Use a grout tool or a rounded edge to shape and smooth the grout lines. This will create a professional and polished finish for your shower floor.
- Allow the grout to cure: Follow the manufacturer’s instructions for the curing time of the grout. Avoid stepping on or using the shower during this time to allow the grout to fully set and harden.
- Seal the grout: Applying a grout sealer is an optional but recommended step. It helps to protect the grout from staining and water damage, extending its lifespan and maintaining its appearance over time.
Grouting the tiles is the final step in completing your shower floor tiling project. It adds the finishing touch and ensures that your tiles are securely in place while creating a visually appealing and easy-to-maintain surface.
Step 8: Cleaning and Sealing the Tiles
After completing the grouting process, it’s important to properly clean and seal the tiles to protect them and maintain their appearance. This final step will ensure that your shower floor is not only beautiful but also resistant to stains and water damage. Here’s how to clean and seal the tiles effectively:
- Clean the tiles: Use a mild tile cleaner and a non-abrasive scrub brush or sponge to thoroughly clean the tiles. Pay attention to the grout lines as well, removing any residue or stains.
- Rinse the tiles: After cleaning, rinse the tiles with clean water to remove any cleaning solution residue. Ensure that all traces of the cleaner are thoroughly removed.
- Dry the tiles: Use a clean, dry towel or cloth to dry the tiles and the grout lines completely. It’s essential to remove any excess moisture to prevent mold or mildew growth.
- Apply the sealer: Choose a high-quality tile and grout sealer that is appropriate for your specific type of tiles. Follow the manufacturer’s instructions to apply the sealer evenly over the tiles and grout lines.
- Allow the sealer to dry and cure: Allow the sealer to dry and cure according to the manufacturer’s instructions. This process typically takes several hours, so ensure that the shower is not used during this period.
- Test for water repellency: Once the sealer has dried, conduct a water repellency test by pouring a small amount of water on the tiles. If the water beads up on the surface, the sealer is effective. If not, apply an additional coat of sealer as needed.
- Maintain the tiles: Regularly clean and maintain your shower floor tiles according to the manufacturer’s recommendations. Avoid using harsh chemicals or abrasive cleaners that can damage the sealer or the tiles.
Cleaning and sealing the tiles is a crucial step in maintaining the longevity and appearance of your shower floor. By following these steps, you can enjoy a clean, protected, and visually appealing tiled shower floor for years to come.
Conclusion
Congratulations! You have successfully learned the step-by-step process of tiling a shower floor slope. By following these guidelines, you can transform your bathroom into a beautiful and functional space while ensuring proper water drainage and protection against moisture-related issues.
During the process, you have learned about the importance of preparing the subfloor, creating a slope, waterproofing the shower floor, installing the drain, applying the mortar, setting the tiles, grouting, and finally, cleaning and sealing the tiles. Each step plays a critical role in achieving a professionally tiled shower floor that is both visually appealing and long-lasting.
Remember, attention to detail is key throughout the entire process. Take your time to properly prepare the subfloor, create the slope, and ensure a precise tile installation. Proper waterproofing and sealing will safeguard your shower floor from moisture damage, while cleaning and maintenance will keep it looking its best for years to come.
Now that you have the knowledge and understanding of how to tile a shower floor slope, you can confidently tackle this project and enjoy the rewards of a beautiful and functional shower space. So roll up your sleeves, gather your tools, and get ready to transform your bathroom into a luxurious oasis.
Happy tiling!
Frequently Asked Questions about How To Tile A Shower Floor Slope
Was this page helpful?
At Storables.com, we guarantee accurate and reliable information. Our content, validated by Expert Board Contributors, is crafted following stringent Editorial Policies. We're committed to providing you with well-researched, expert-backed insights for all your informational needs.


0 thoughts on “How To Tile A Shower Floor Slope”