
Articles
How To Put Tile On Floor
Modified: December 7, 2023
Learn the step-by-step process of how to put tile on the floor with our informative articles. Gain the knowledge and skills to successfully tackle your next flooring project.
(Many of the links in this article redirect to a specific reviewed product. Your purchase of these products through affiliate links helps to generate commission for Storables.com, at no extra cost. Learn more)
Introduction:
When it comes to renovating your home, few things can transform a space like a beautifully tiled floor. Whether you’re looking to upgrade your kitchen, bathroom, or any other room, learning how to put tile on the floor is a valuable skill that can save you money and give you the satisfaction of completing a home improvement project on your own.
Tiling a floor may seem like a daunting task, but with the right tools, materials, and a little bit of know-how, you can achieve professional-looking results. In this step-by-step guide, we’ll walk you through the process of laying tile on a floor, from preparing the surface to applying grout and everything in between.
Before we dive into the details, it’s important to note that tiling a floor requires some physical labor and attention to detail. It’s a project that requires patience and precision, but the end result is well worth the effort. So, roll up your sleeves, put on your DIY hat, and let’s get started on transforming your space with a stunning tiled floor!
Key Takeaways:
- Transform your space with a stunning tiled floor by following step-by-step instructions, from preparing the surface to applying grout. Embrace the process and infuse your personal style for a unique result.
- Achieve professional-looking results by carefully measuring, cutting, and laying tiles with precision. Proper maintenance and sealing will preserve the beauty and durability of your tiled floor for years to come.
Read more: What To Put Under Tile Floor
Step 1: Gather Supplies
Before you can begin tiling your floor, you’ll need to gather all the necessary supplies and materials. Here’s a list of tools and materials you’ll need to have on hand:
Tools Needed:
- Tile cutter or wet saw
- Notched trowel
- Margin trowel
- Grout float
- Tile spacers
- Level
- Measuring tape
- Chalk line
- Sponge
- Buckets
- Mixing paddle
- Grout brush or toothbrush
Materials Needed:
- Tile adhesive or thinset mortar
- Grout
- Waterproof membrane (if applicable)
- Tile spacers
- Grout sealer
- Clean rags or towels
Having the right tools and materials will ensure that your tiling project goes smoothly. Make sure that you have everything on the list before you start, as it can be frustrating to realize you’re missing a critical tool or material midway through the project.
It’s also a good idea to invest in high-quality tools. While they may cost a bit more upfront, they will save you time and frustration in the long run. Quality tools will give you more precise cuts, better adhesion, and an overall better finish for your tiled floor.
Now that you have all your supplies and materials ready, it’s time to move on to the next step: preparing the floor.
Step 2: Prepare the Floor
Before you can start tiling your floor, it’s important to properly prepare the surface to ensure a smooth and durable installation. This involves removing any existing flooring and making sure the subfloor is clean and level.
1. Remove Existing Flooring:
The first step in preparing the floor is to remove any existing flooring. This could include carpet, vinyl, laminate, or even old tile. Use a pry bar, scraper, or other appropriate tools to carefully remove the flooring material. Make sure to remove all adhesive residue and clean the surface thoroughly.
2. Clean and Level the Subfloor:
Once the existing flooring is removed, clean the subfloor to remove any dirt, dust, or debris. Sweep or vacuum the area to ensure it’s free from any loose particles. Next, check the subfloor for any irregularities or uneven spots. Use a level to identify any high or low areas.
If you find any uneven spots, you’ll need to level the subfloor before proceeding. You can use a self-leveling compound to fill in low spots and create a flat surface. Follow the manufacturer’s instructions for mixing and applying the compound. Allow it to dry completely before moving on to the next step.
By properly preparing the floor, you’ll create a solid foundation for your tiles. This not only ensures a professional-looking installation but also helps prevent any future issues such as cracked or loose tiles.
Now that the floor is prepped and ready, it’s time to move on to the next step: planning the layout.
Step 3: Plan the Layout
Planning the layout is a crucial step in ensuring a visually appealing and well-proportioned tile installation. By taking the time to measure and mark the center point of the floor and dry laying the tiles, you can achieve a balanced and symmetrical look.
1. Measure and Mark the Center Point:
Start by measuring the length and width of the room. Divide each measurement in half to find the center point. Use a tape measure to measure and mark the center point on the floor. This will serve as your starting point for laying the tiles.
2. Dry Lay the Tiles:
Before you start applying adhesive and permanently affixing the tiles to the floor, it’s a good idea to do a dry lay. This means placing the tiles on the floor without any adhesive to get a sense of how they will fit and look.
Begin at the center point and lay out a row of tiles in one direction. Use tile spacers to create equal spacing between the tiles. Use a level to ensure that the tiles are aligned and evenly spaced. Continue laying out the rest of the tiles, making any necessary adjustments to ensure a balanced and cohesive layout.
During the dry lay process, pay attention to any cuts that need to be made to fit around obstacles such as cabinets, doorways, or fixtures. Mark these areas on the tiles and set them aside for cutting later.
Dry laying the tiles allows you to visualize the final result and make any necessary adjustments before committing with adhesive. This step is especially critical for ensuring that the tiles are laid out in a way that minimizes cuts and creates a harmonious pattern or design.
Now that you’ve planned the layout, it’s time to move on to the next step: mixing the thinset.
Step 4: Mix the Thinset
Mixing the thinset is an essential step in the tiling process. Thinset mortar is a type of adhesive that is used to bond the tiles to the floor. By following the instructions and properly preparing the thinset mixture, you’ll ensure a strong and durable bond between the tiles and the floor.
1. Read the Instructions:
Before you start mixing the thinset, it’s crucial to carefully read the manufacturer’s instructions on the packaging. Different thinset products may have specific mixing ratios and requirements, so make sure to follow the instructions closely to achieve the best results.
Pay attention to the recommended water-to-thinset ratio, mixing time, and any other specific instructions such as soaking or pre-mixing requirements. This will ensure that the thinset mixture is properly prepared for optimal adhesion.
2. Prepare the Thinset Mixture:
Once you’ve read and understood the instructions, it’s time to prepare the thinset mixture. Start by pouring the appropriate amount of water into a clean bucket. Slowly add the thinset powder while stirring continuously with a mixing paddle or a margin trowel.
Continue mixing until the thinset has a smooth and uniform consistency, without any lumps or dry patches. The mixture should be thick enough to hold its shape, but not too dry or too wet. If needed, adjust the consistency by adding more water or thinset powder, following the manufacturer’s recommendations.
After preparing the thinset mixture, let it rest for a few minutes to allow the ingredients to fully activate. Avoid mixing a large batch of thinset all at once, as it can harden quickly and become unusable. Instead, mix smaller amounts that you can work with within the recommended open time of the thinset.
By carefully reading the instructions and properly preparing the thinset mixture, you’ll ensure that the adhesive is well-mixed and ready for use. This will result in a strong bond between the tiles and the floor, ensuring a long-lasting and reliable installation.
Now that the thinset is mixed and ready, it’s time to move on to the next step: applying thinset and laying the tiles.
Before starting to put tile on the floor, make sure the surface is clean, level, and free of any debris. Use a good quality mortar or adhesive to ensure the tiles adhere properly and last longer.
Read more: How Thick Are Floor Tiles
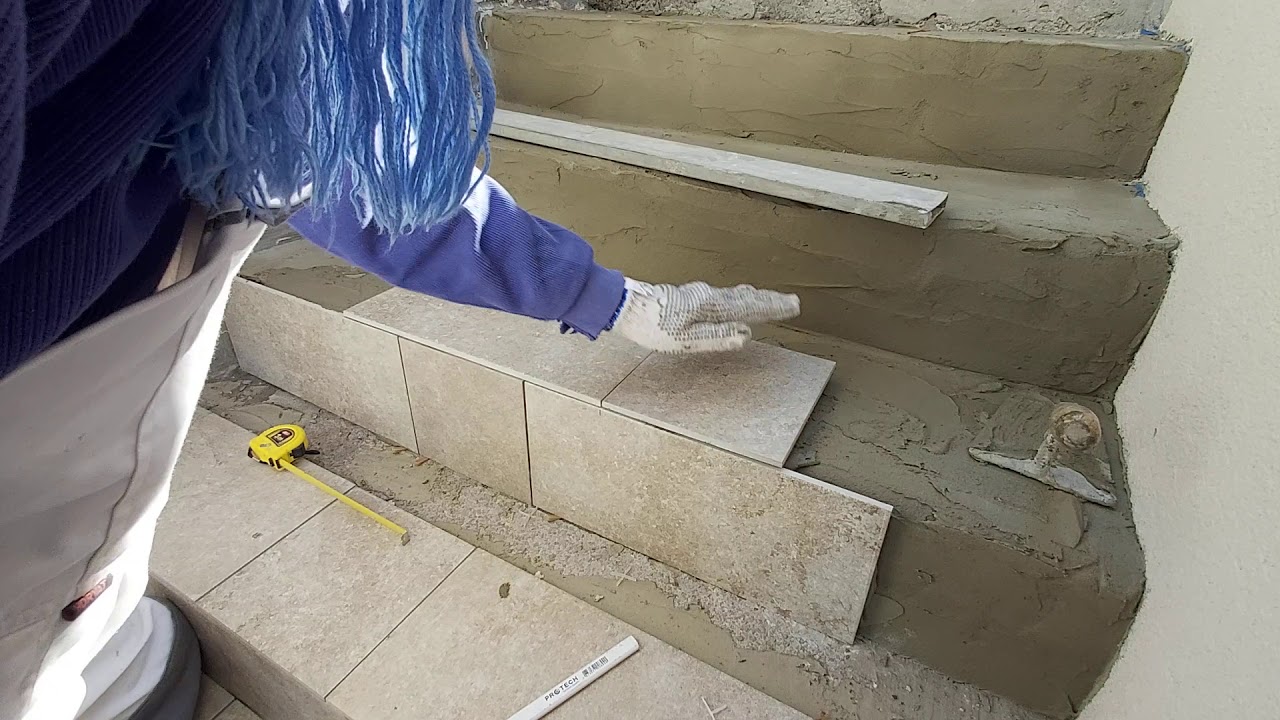
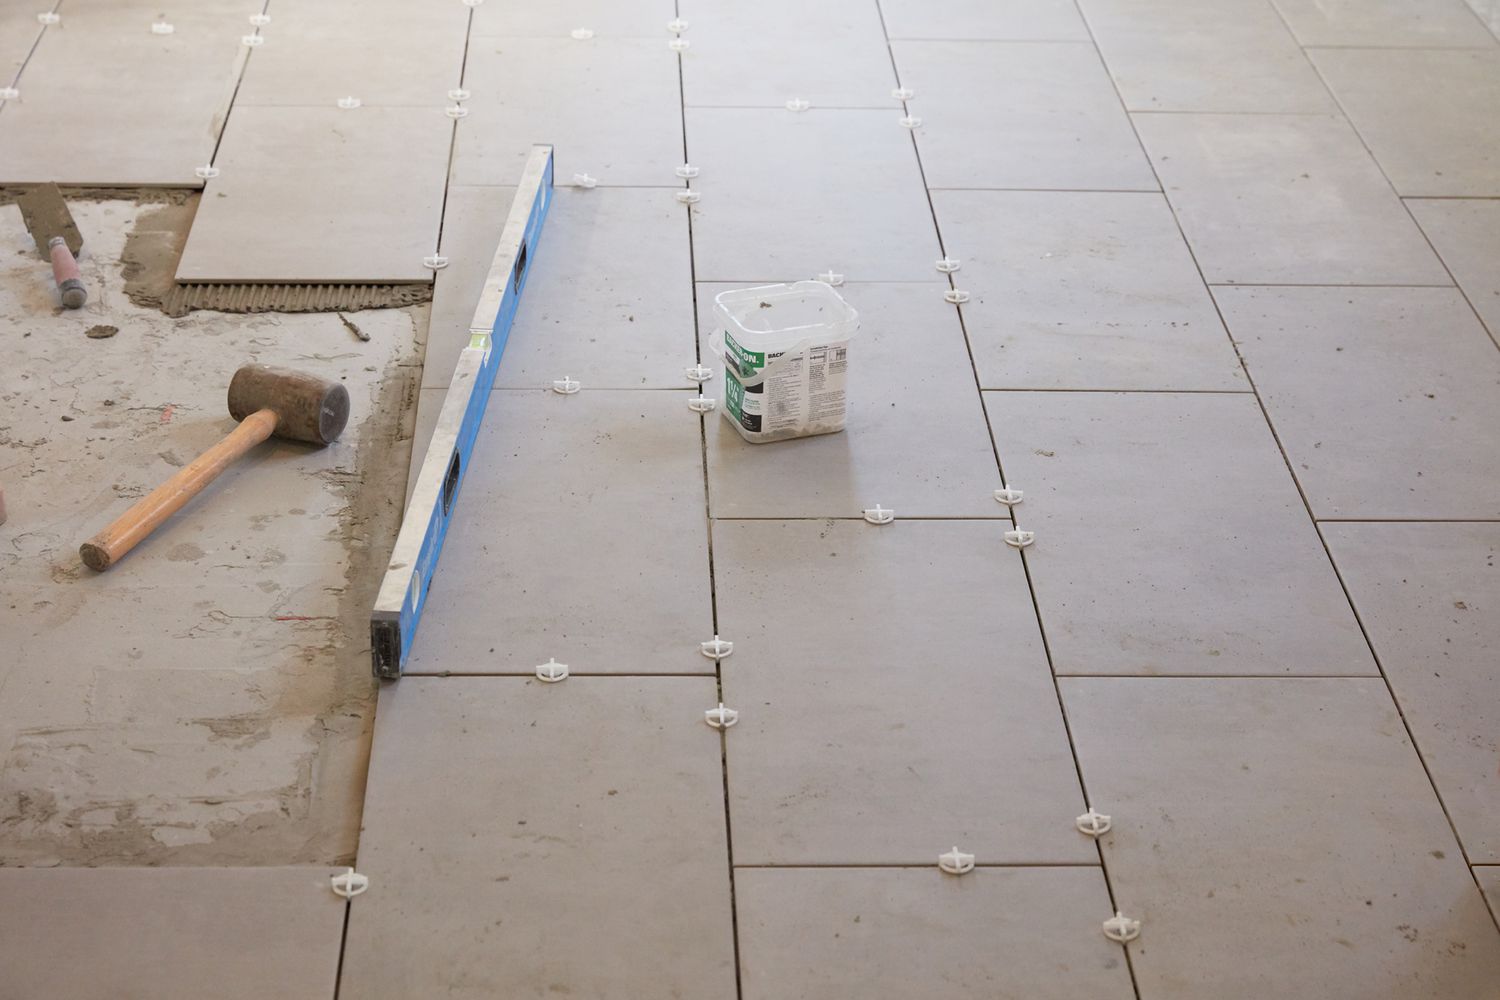
Step 5: Apply Thinset and Lay Tiles
Now that you have your thinset mixture prepared, it’s time to start applying it and laying the tiles. This step is where your hard work and planning come together as you bring your vision of a beautifully tiled floor to life.
1. Start at the Center Point:
Begin at the center point that you marked during the layout planning phase. Using a notched trowel, spread a layer of thinset onto the floor at the center point. Hold the trowel at a slight angle and apply even pressure to create grooves in the thinset.
Starting at the center allows you to work outwards in a symmetrical manner, ensuring a balanced tile placement. It also allows you to easily adjust the layout if needed.
2. Spread Thinset and Lay the First Tile:
With the thinset applied, now it’s time to lay the first tile. Press the tile into the thinset, wiggling it slightly to ensure good contact and proper adhesion. Use a level to check that the tile is flush with the adjacent tiles and adjust if necessary.
Use tile spacers to maintain consistent spacing between the tiles and create grout lines according to your desired width. Make sure to remove any excess thinset that may squeeze out from between the tiles.
3. Continue Laying the Rest of the Tiles:
Working from the center point, continue to spread thinset and lay the remaining tiles one at a time. Use the tile spacers to maintain consistent spacing and a level to ensure a flat and even surface.
As you work, periodically check that the tiles are aligned and level, making any necessary adjustments. Pay attention to the layout and pattern to ensure a visually pleasing result.
Remember to work in small sections, as thinset can dry quickly. Spread only as much thinset as you can comfortably tile within the recommended open time of the adhesive. This will ensure that the tiles adhere properly and stay in place.
By starting at the center point and working your way outwards, carefully spreading the thinset, and laying the tiles with precision, you’ll create a beautifully tiled floor that adds elegance and functionality to your space.
Now that the tiles are in place, it’s time to move on to the next step: cutting tiles to fit.
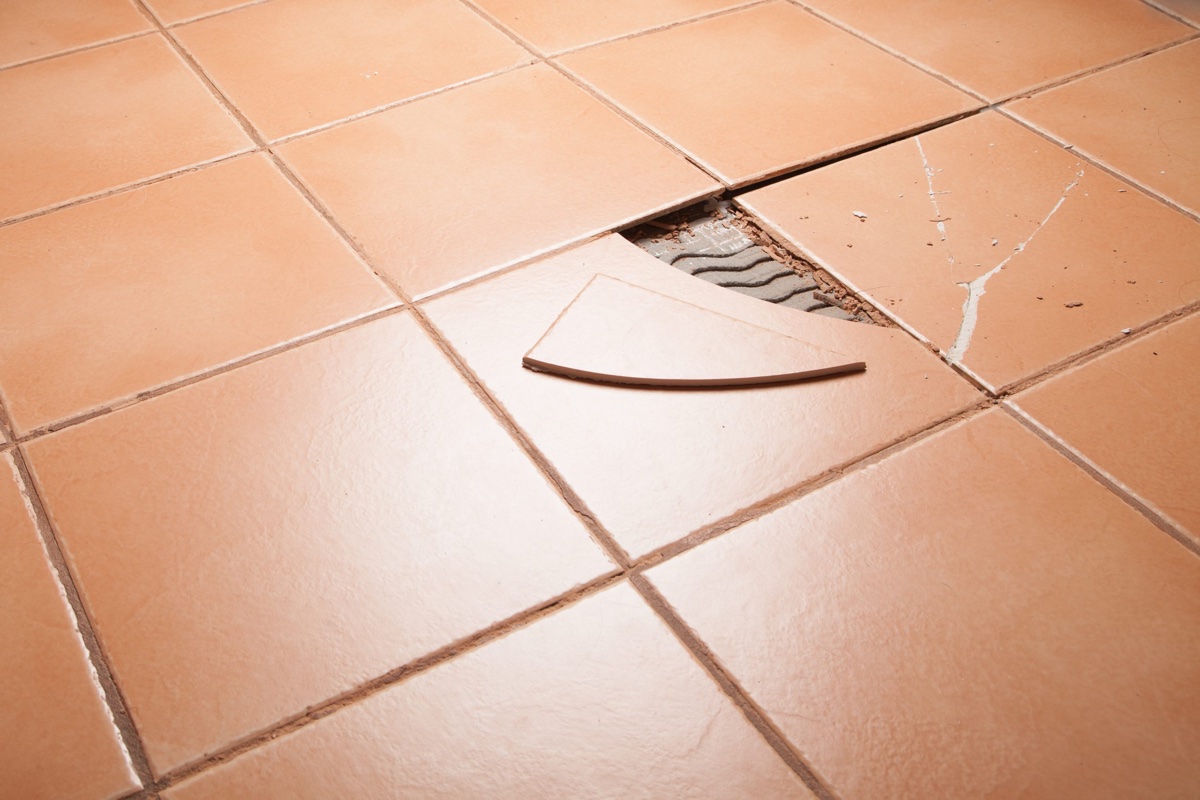
Step 6: Cut Tiles to Fit
Unless you’re fortunate enough to have a perfectly square or rectangular room, chances are you’ll need to cut some tiles to fit around edges, corners, or obstacles. Cutting tiles to fit can seem intimidating, but with the right tools and approach, you can achieve precise and clean cuts.
1. Measure and Mark the Tiles:
Before you start cutting, carefully measure and mark the tiles that need to be cut. Use a measuring tape to measure the space where the tile needs to fit, and transfer those measurements onto the tile itself. A pencil or marker can be used to make these marks.
Double-check your measurements and make sure the marks are accurate. It’s better to take your time at this stage to ensure an exact fit.
2. Use a Wet Saw or Tile Cutter to Cut Tiles:
There are different tools you can use to cut tiles, but the two most common options are a wet saw or a tile cutter. A wet saw is a machine with a diamond-coated blade that cuts through tiles with water cooling to prevent overheating. A tile cutter is a handheld tool that scores and breaks tiles along a straight line.
If you’re using a wet saw, place the tile on the cutting table, aligning the marked line with the saw blade. Slowly and steadily push the tile into the blade to make the cut. Follow proper safety precautions, such as wearing safety goggles and gloves, when using a wet saw.
If you’re using a tile cutter, align the marked line with the scoring wheel. Apply firm and even pressure to score the tile along the line. Then, use the breaker bar on the tile cutter to snap the tile along the scored line.
For more complex cuts, such as curved or irregular shapes, you may need to use tools like a tile nipper, tile file, or a grinder with a diamond blade. These tools allow for more precise and intricate cuts.
Remember to take your time when cutting tiles, and always wear protective gear when operating power tools. Practice on a few spare or scrap tiles before making cuts on your actual project tiles.
By carefully measuring and marking the tiles and using the appropriate cutting tools, you’ll be able to fit tiles seamlessly around edges, corners, and obstacles, resulting in a polished and professional-looking tiled floor.
Now that the tiles are cut to fit, it’s time to move on to the next step: applying grout.
Step 7: Apply Grout
Now that the tiles are securely in place, it’s time to apply grout to fill the gaps between them. Grout not only enhances the visual appeal of your tiled floor but also helps to prevent moisture and dirt from seeping between the tiles. By choosing the right grout and applying it correctly, you’ll complete the final step towards a finished and polished look.
1. Choose the Right Grout:
There are various types of grout available, including sanded grout, unsanded grout, epoxy grout, and more. The type of grout you choose will depend on the width of your grout lines and the specific requirements of your project. Follow the manufacturer’s recommendations to ensure you select the appropriate grout for your tile installation.
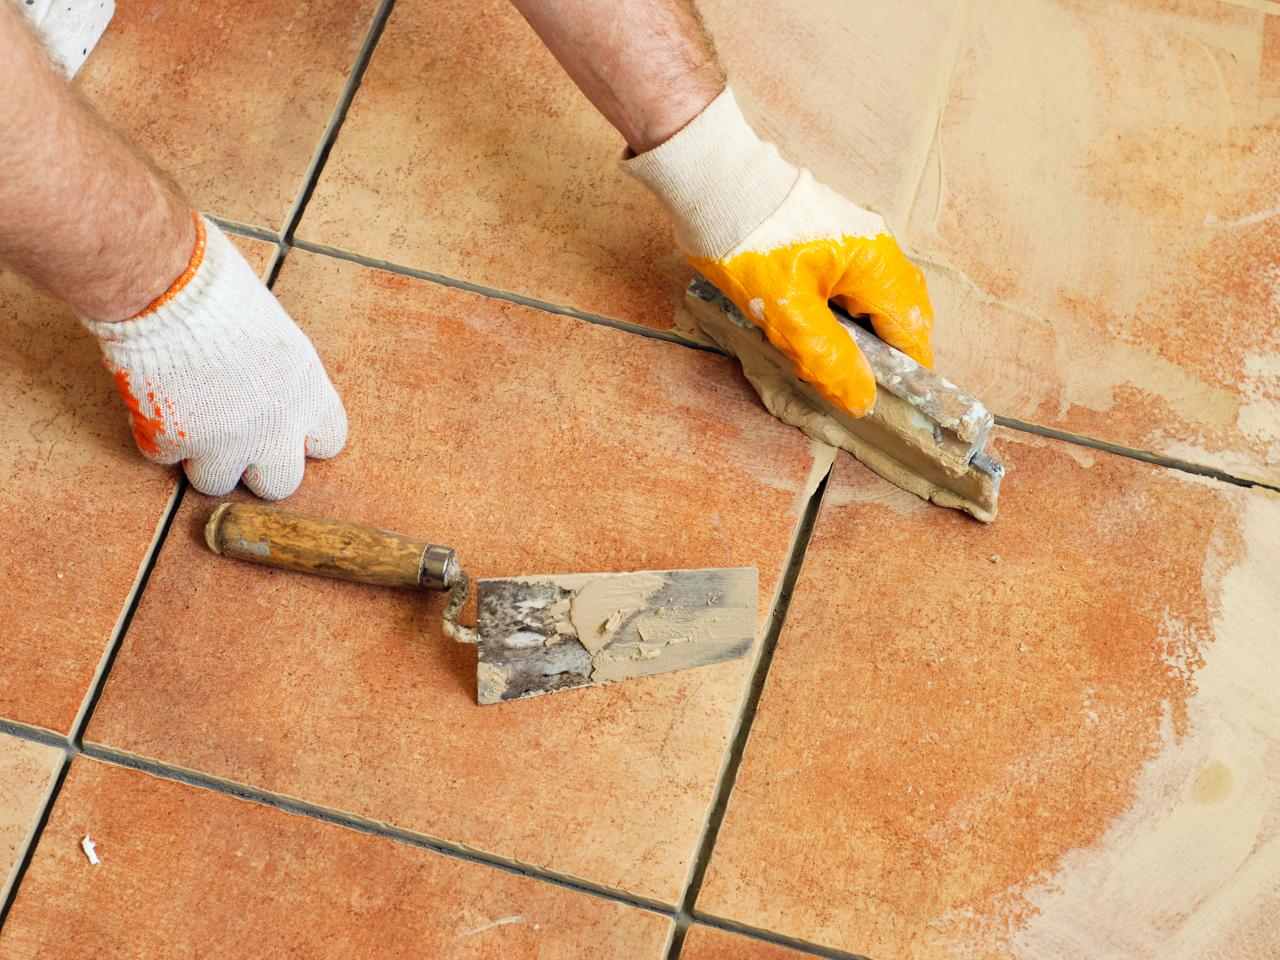
2. Mix and Apply the Grout:
Start by reading the instructions provided by the grout manufacturer. Follow the recommended water-to-grout ratio and thoroughly mix the grout in a clean bucket. A grout float can be used to apply the grout to the tile surface, pressing it into the spaces between the tiles.
Hold the float at a 45-degree angle and use it to spread the grout diagonally across the tiles, ensuring that the gaps are completely filled. Work in small sections, as applying grout to a large area at once may cause it to dry too quickly.
Once the grout is applied, use the edge of the float to remove excess grout from the tile surfaces. Hold the float at a low angle and scrape diagonally across the tiles to avoid removing too much grout from the gaps. This will create a level and smooth grout surface.
Allow the grout to partially dry for the amount of time specified in the manufacturer’s instructions. Then, use a damp sponge to wipe away any haze or residue from the tile surfaces. Rinse the sponge regularly in clean water and continue wiping until the tiles are clean and the grout lines are defined and neat.
After completing the grouting process, allow the grout to dry and cure according to the manufacturer’s recommendations. This usually takes a few days. Once dried, you can apply a grout sealer to protect the grout from stains and make it easier to clean in the future.
By choosing the right grout and applying it with care, you’ll achieve a professional and finished look for your tiled floor. The grout not only enhances the overall appearance but also contributes to the durability and longevity of your tile installation.
Now that the grout is applied, it’s time to move on to the final step: cleaning and maintenance.
Step 8: Clean and Maintain
Congratulations! You’ve successfully laid your tiles and applied the grout. Now, it’s time to give your tiled floor the finishing touches by cleaning up any excess grout and implementing proper maintenance practices to keep it looking great for years to come.
1. Clean Excess Grout:
After the grout has dried, you may notice a thin film or haze on the surface of the tiles. This is caused by leftover grout residue and needs to be removed to reveal the true beauty of your tiled floor. Use a soft, damp sponge or a clean cloth to gently wipe away the excess grout.
Be sure to use a gentle motion to avoid dislodging or damaging the grout. Rinse the sponge or cloth frequently and change the water as needed. Take your time and ensure that all traces of excess grout are removed before proceeding.
2. Seal and Maintain the Tiled Floor:
Sealing the grout is an essential step in maintaining the quality and appearance of your tiled floor. Grout is porous and can absorb dirt, stains, and moisture if left unsealed. Applying a grout sealer provides a protective barrier and makes it easier to clean and maintain your tiled floor.
Follow the manufacturer’s instructions to select an appropriate grout sealer and apply it to the grout lines. Use a brush or sponge applicator to evenly distribute the sealer over the entire grout surface. Allow the sealer to penetrate the grout and wipe away any excess sealer from the tiles.
In terms of maintenance, regularly sweep or vacuum the tiled floor to remove any loose dirt or debris. Avoid using abrasive cleaners or harsh chemicals that can damage the tiles or the grout. Instead, use a mild, pH-neutral cleaner specifically designed for tiles and grout.
It’s also a good practice to periodically reseal the grout to ensure its continued protection. The frequency of resealing will depend on the type of grout and sealer used, as well as the amount of foot traffic in the area. Follow the manufacturer’s recommendations for resealing intervals.
By cleaning excess grout and implementing proper maintenance practices, your tiled floor will stay beautiful and durable for years to come. Regular cleaning and sealing will help to preserve the integrity of the grout and contribute to the long-lasting quality of your tiled floor.
With the completion of Step 8, you have successfully learned how to put tile on the floor!
Follow these steps and enjoy the sense of accomplishment that comes with transforming your space with a stunning tiled floor.
Read more: How Much To Tile A Floor
Conclusion
Congratulations! You’ve reached the end of this comprehensive guide on how to put tile on the floor. By following the step-by-step instructions and tips provided, you now have the knowledge and confidence to tackle your own tiling project and create a beautiful, professionally finished floor.
Laying tile on a floor may initially seem like a daunting task, but with the right tools, materials, and a little patience, anyone can achieve impressive results. Remember to prepare the floor properly by removing existing flooring, cleaning, and leveling the subfloor. Take the time to plan the layout, ensuring symmetry and balance. Mix and apply the thinset carefully, and lay the tiles with precision. Cut tiles to fit around edges and obstacles, and apply grout to fill the gaps. Finally, clean and maintain your tiled floor to preserve its beauty and longevity.
Throughout this process, it’s important to strike a balance between accuracy and creativity. While precision is crucial for achieving a professional-looking result, don’t be afraid to infuse your personal style and creativity into the design. Experiment with different tile patterns, colors, and textures to create a truly unique and inviting space.
Remember, practice makes perfect. If you’re new to tiling, start with a small area or a less visible space to gain confidence and refine your technique. Over time, you’ll become more comfortable with the process and be able to tackle more complex projects.
Lastly, enjoy the journey. Tiling a floor is a rewarding experience that allows you to transform a space and add value to your home. Embrace the process and take pride in your work. The satisfaction of completing a tiling project and admiring the finished floor will make all your efforts worthwhile.
So, grab your tools, gather your supplies, and get ready to embark on your tiling adventure. With the knowledge gained from this guide, you have the power to create a stunning tiled floor that will become the centerpiece of any room.
Good luck, and happy tiling!
Frequently Asked Questions about How To Put Tile On Floor
Was this page helpful?
At Storables.com, we guarantee accurate and reliable information. Our content, validated by Expert Board Contributors, is crafted following stringent Editorial Policies. We're committed to providing you with well-researched, expert-backed insights for all your informational needs.


0 thoughts on “How To Put Tile On Floor”