Home>Articles>Our Guide To Removing And Replacing Tile Floors With Hardwood
Articles
Our Guide To Removing And Replacing Tile Floors With Hardwood
Modified: August 28, 2024
Learn how to remove and replace tile floors with hardwood in our comprehensive guide. Find helpful articles and tips to make your flooring project a success.
(Many of the links in this article redirect to a specific reviewed product. Your purchase of these products through affiliate links helps to generate commission for Storables.com, at no extra cost. Learn more)
Introduction
Are you tired of the cold, hard surface of your tile floors? Maybe you’re looking to update the look of your home with a touch of warmth and elegance. Removing your tile flooring and replacing it with hardwood can be a transformative project that not only enhances the aesthetic appeal of your space but also adds value to your property.
However, tackling a tile-to-hardwood flooring conversion can seem like a daunting task. There are several steps involved in the process, from removing the existing tile to preparing the subfloor and installing the new hardwood planks. But fear not! In this comprehensive guide, we will walk you through each step, providing you with the knowledge and confidence you need to undertake this project.
Before we dive into the nitty-gritty details, it’s essential to note that removing and replacing tile floors with hardwood is a significant undertaking that requires time, effort, and attention to detail. It’s crucial to approach this project with a well-thought-out plan and the right tools.
Throughout this guide, we will provide you with expert tips and advice to ensure your tile-to-hardwood transition is a smooth and successful one. So, let’s get started with step one: preparing for the project.
Key Takeaways:
- Transform your space by replacing tile floors with hardwood using our comprehensive guide. From preparation to finishing touches, achieve stunning results with confidence and expertise.
- Prioritize safety, follow manufacturer’s instructions, and seek professional help as needed to successfully remove and replace tile floors with hardwood. Enjoy the warmth and beauty of your new flooring!
Read more: DIY Guide To Installing Hardwood Floors
Step 1: Preparing for the Project
Before you begin the process of removing your tile floors and replacing them with hardwood, it’s important to take the time to prepare for the project. Proper preparation will not only make the process smoother but also help you avoid any potential pitfalls along the way.
Here are some key steps to take when preparing for the tile-to-hardwood flooring conversion:
- Assess your existing tile flooring: Before you can start the removal process, it’s essential to evaluate the condition of your current tile flooring. Check for any loose or damaged tiles and make a note of any repairs that need to be addressed before proceeding with the project. This evaluation will also help you determine the thickness of your tile flooring, which is important when selecting the right hardwood flooring.
- Gather the necessary tools and materials: Removing tile flooring and installing hardwood requires specific tools and materials. Some common tools you will need include a hammer, pry bar, chisel, scraper, and a floor scraper. Additionally, you will need safety gear such as goggles, gloves, and a mask to protect yourself during the removal process. It’s also important to have the hardwood flooring and underlayment ready for installation.
- Set a budget and timeline: Like any home improvement project, it’s crucial to establish a budget and timeline for your tile-to-hardwood conversion. Determine how much you’re willing to spend on materials and labor, and set realistic expectations for the project’s completion. Setting a budget and timeline will help you stay organized and focused throughout the process.
- Clear the room: Before you can start removing the tile flooring, it’s important to clear the room of any furniture or obstacles. This will allow you to have a clean and open space to work in. Take the time to find alternative storage options for your belongings until the project is complete.
- Protect surrounding areas: During the removal process, there is a possibility of dust and debris spreading to other areas of your home. To minimize potential damage, it’s a good idea to cover nearby surfaces, furniture, and fixtures with plastic sheeting or drop cloths. This will help protect them from any debris or accidental damage during the removal and installation process.
By thoroughly preparing for the tile-to-hardwood project, you can ensure a smoother and more efficient transition. Once you have completed these steps, you’re ready to move on to step two: removing the tile flooring.
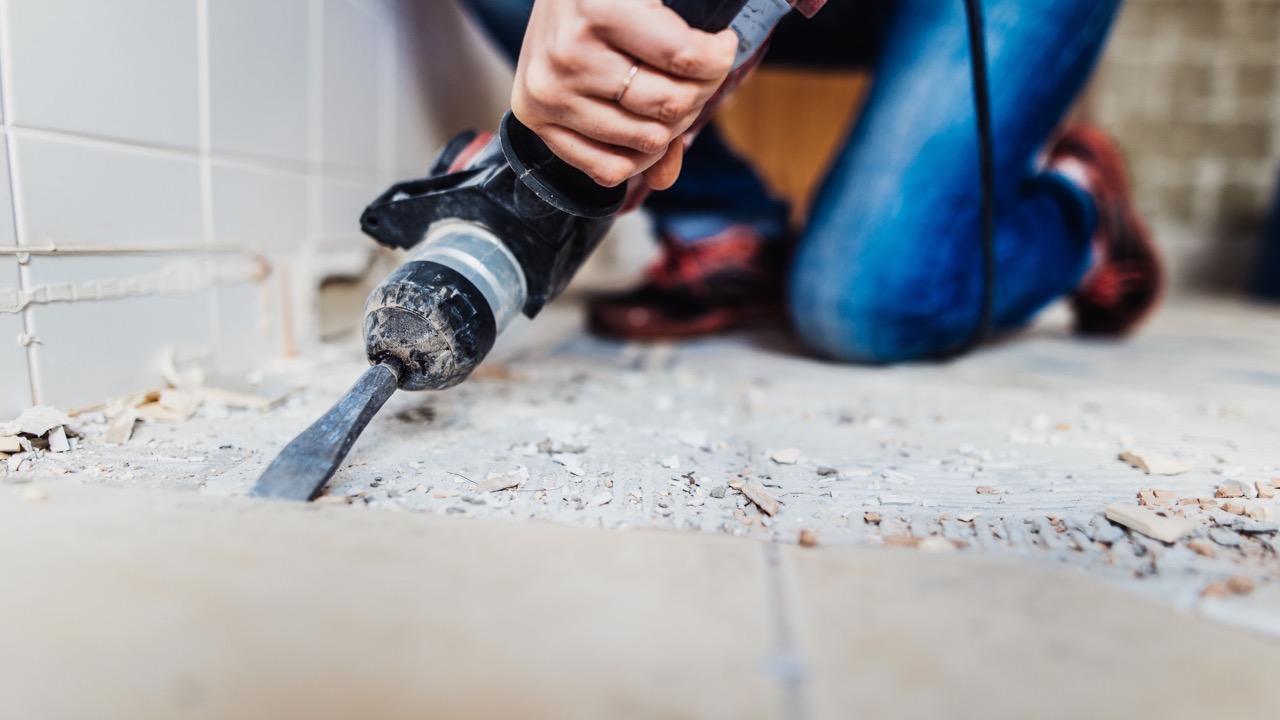
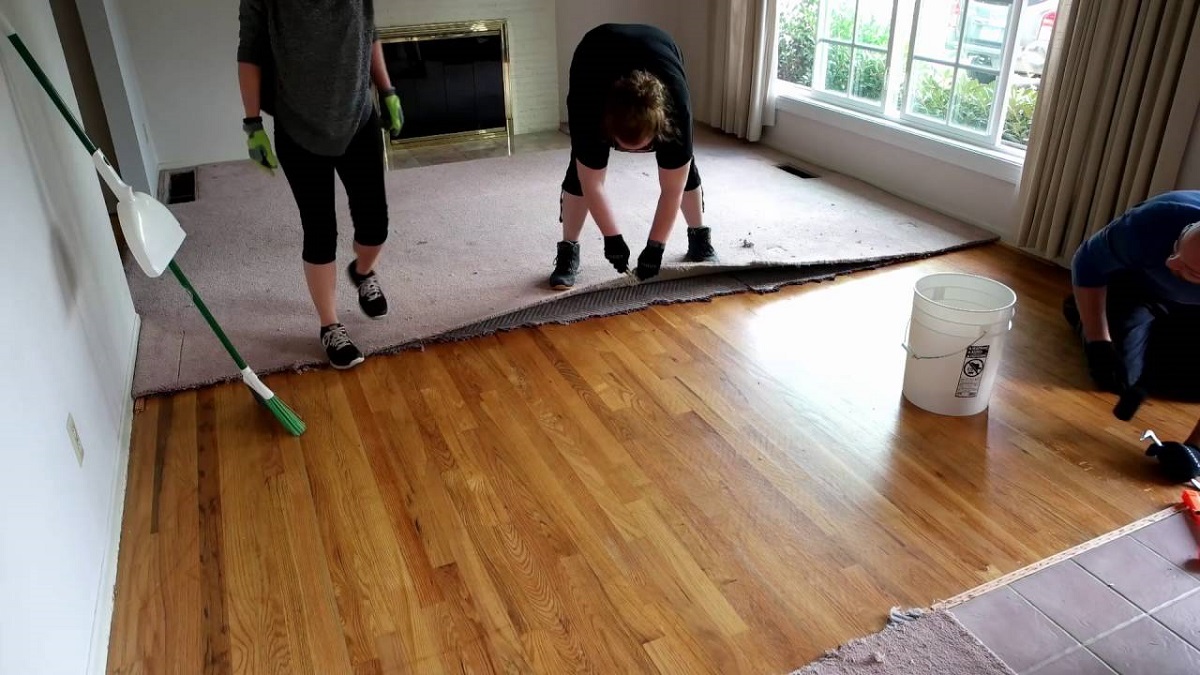
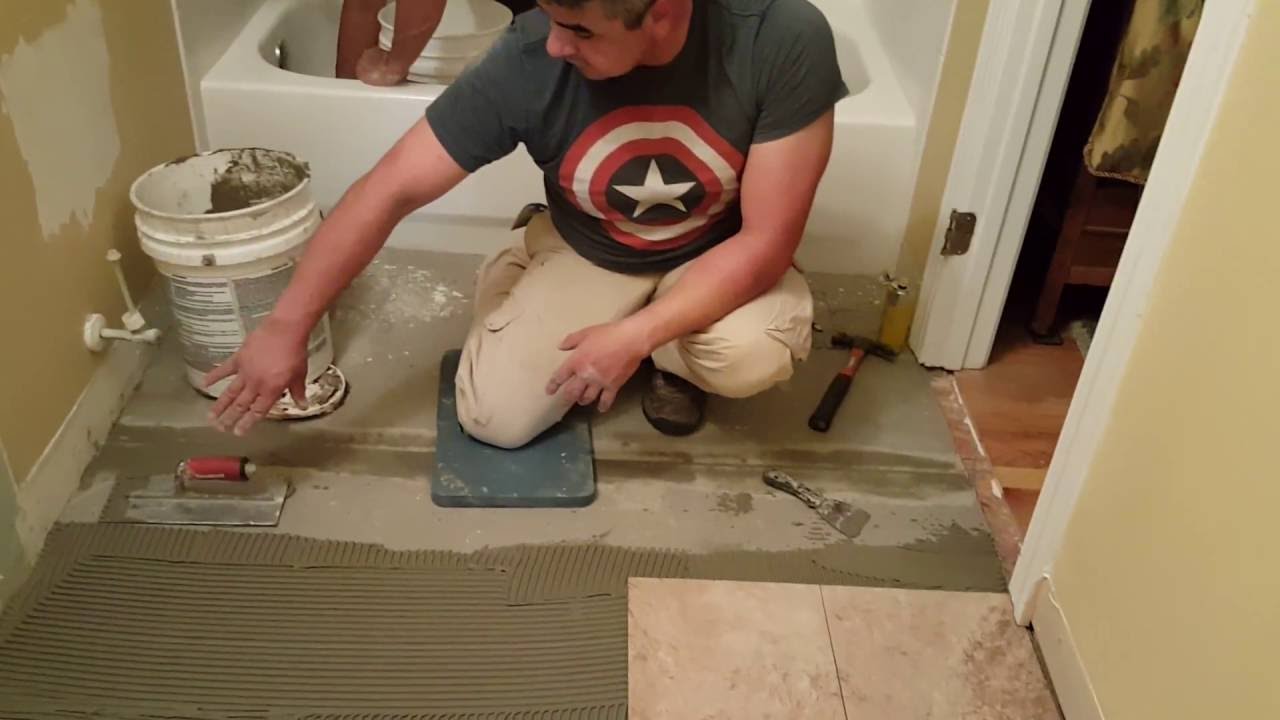
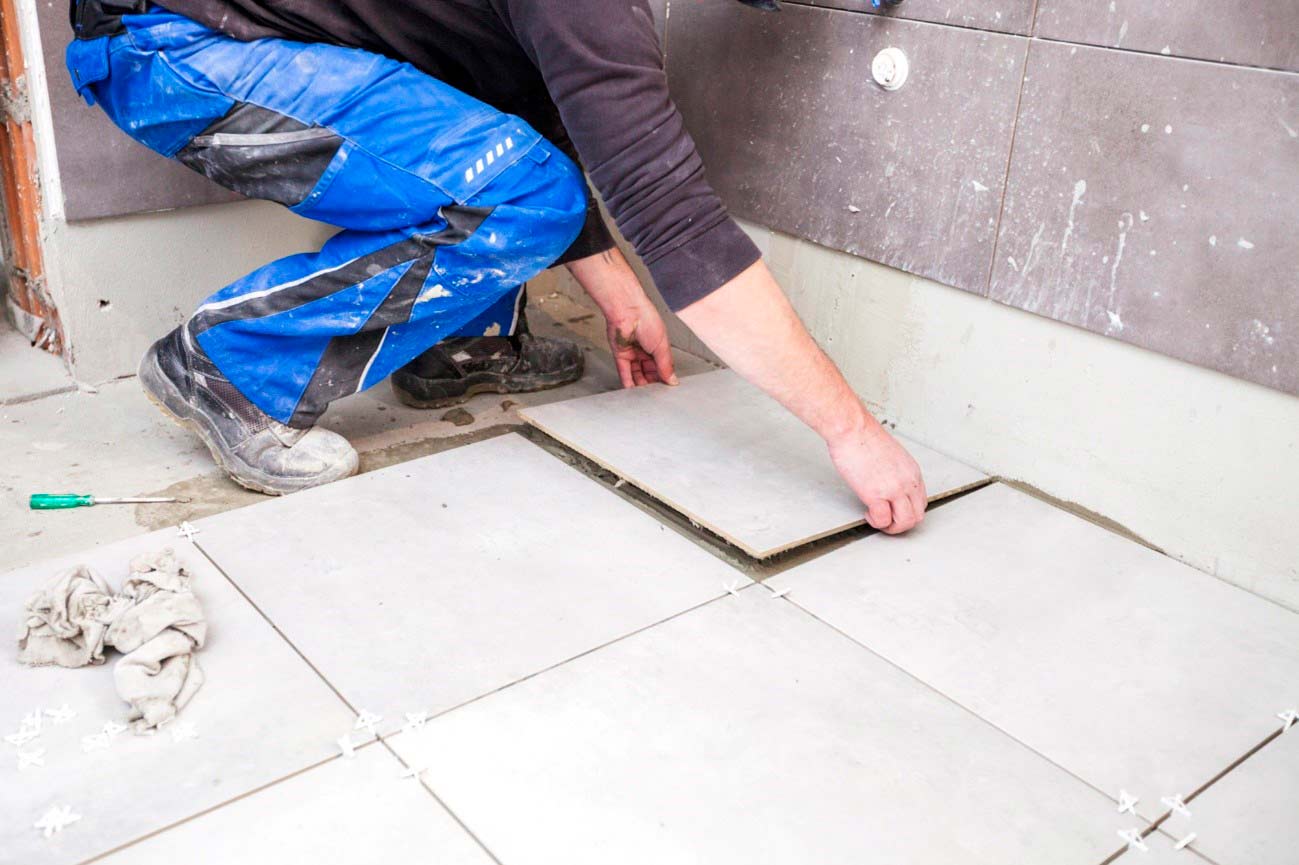
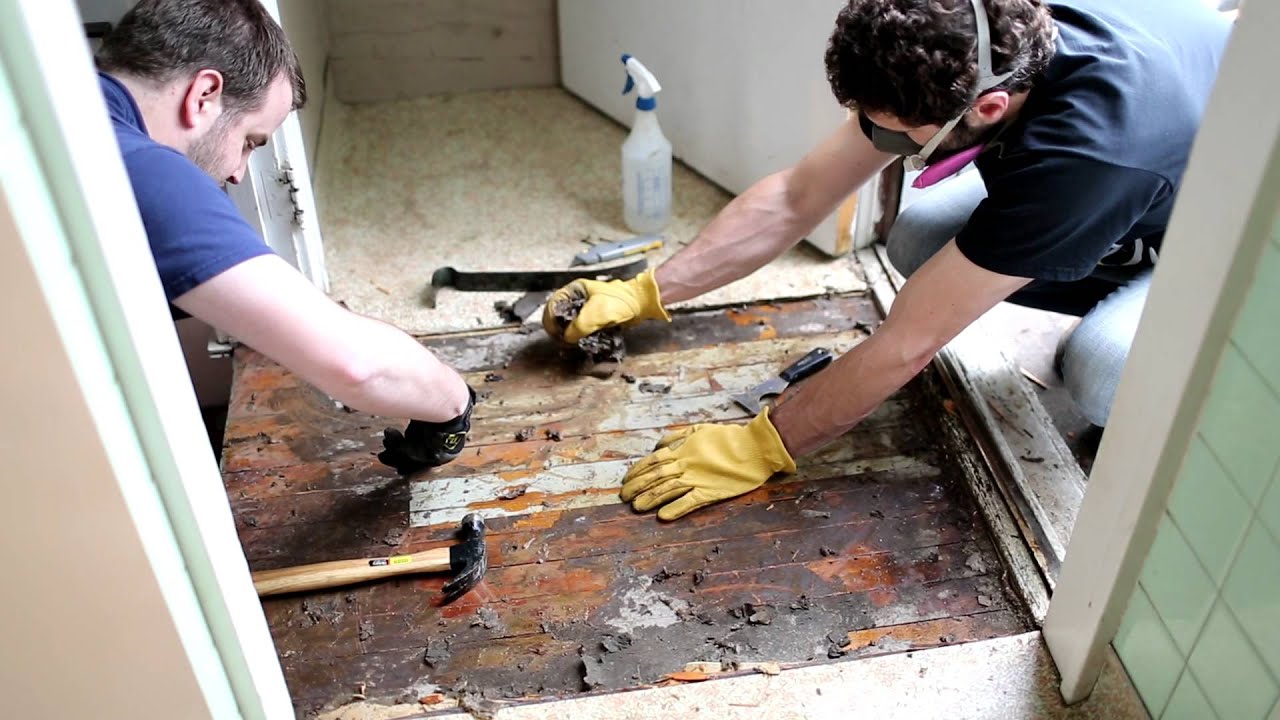
Step 2: Removing the Tile Flooring
Now that you have prepared for the project, it’s time to roll up your sleeves and start removing the existing tile flooring. This step requires careful attention and the right tools to ensure a successful removal process.
Here are the essential steps to follow when removing tile flooring:
- Start by removing baseboards: Before you can begin removing the tiles, start by removing the baseboards. Use a pry bar or a putty knife to gently pry the baseboards away from the wall. This will prevent any damage to the baseboards during the tile removal process.
- Protect yourself: Safety should always be a top priority when taking on a DIY project. Wear safety goggles, gloves, and a mask to protect yourself from any sharp fragments, dust, or debris that may be released during the removal process.
- Work in sections: To make the task more manageable, divide the floor into smaller sections. Start from one corner of the room and systematically work your way across. This will help you maintain a methodical and organized approach to the removal process.
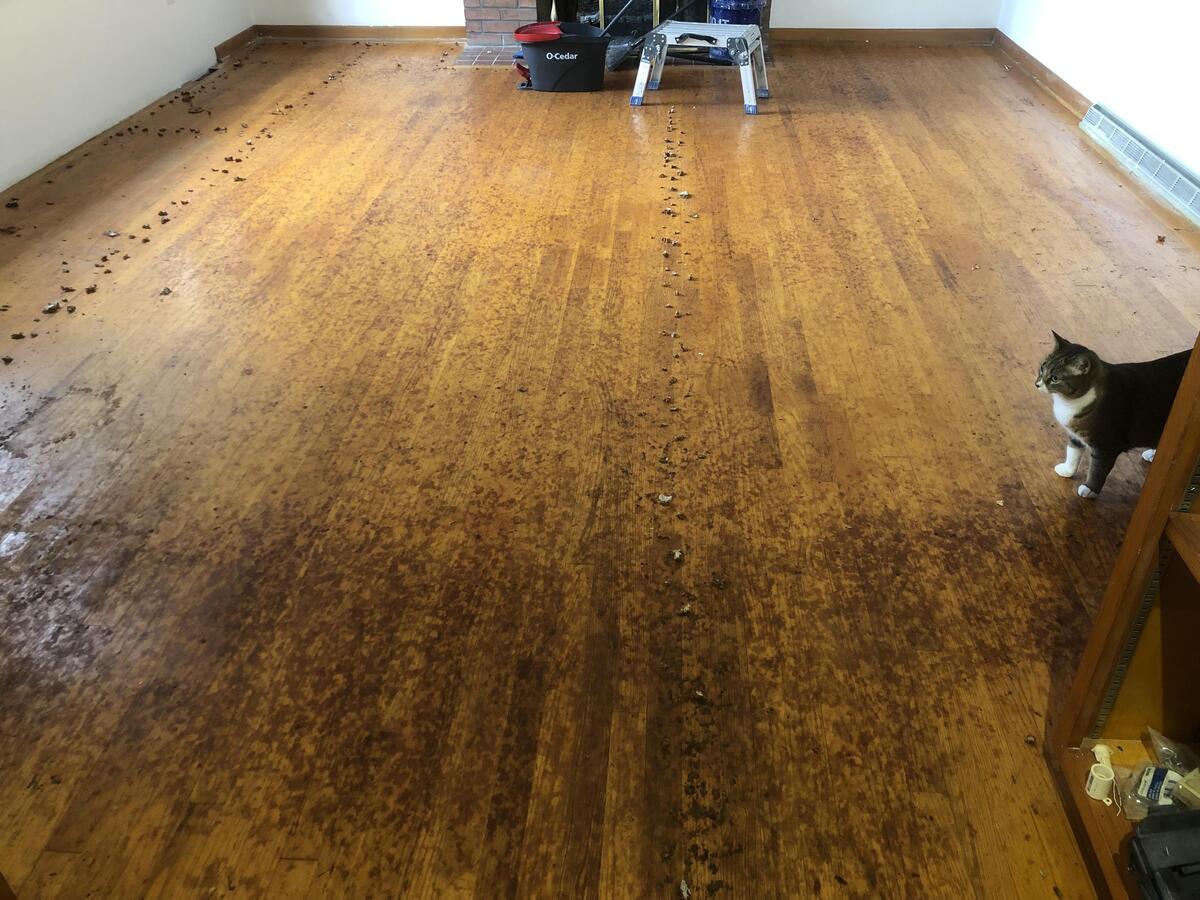
- Break the tiles: Use a chisel or a hammer and gently tap it against the tiles to break them. Be cautious not to damage the subfloor beneath the tile. Start at the center of each tile and work your way towards the edges. The broken tiles can be removed using a scraper or a pry bar.
- Remove the adhesive: Once the tiles are removed, you will likely find adhesive or mortar residue on the subfloor. Use a scraper or a floor scraper to remove the adhesive. Be patient and thorough in this step to ensure a clean and level surface for your hardwood flooring.
- Clean the subfloor: After removing the adhesive, thoroughly clean the subfloor to remove any remaining debris or dust. This will ensure a smooth and secure installation of the new hardwood flooring.
Removing the tile flooring can be a time-consuming process, but with patience and proper technique, you can successfully remove the tiles and prepare the subfloor for the next steps. Once you have completed this step, you are ready to move on to step three: preparing the subfloor.
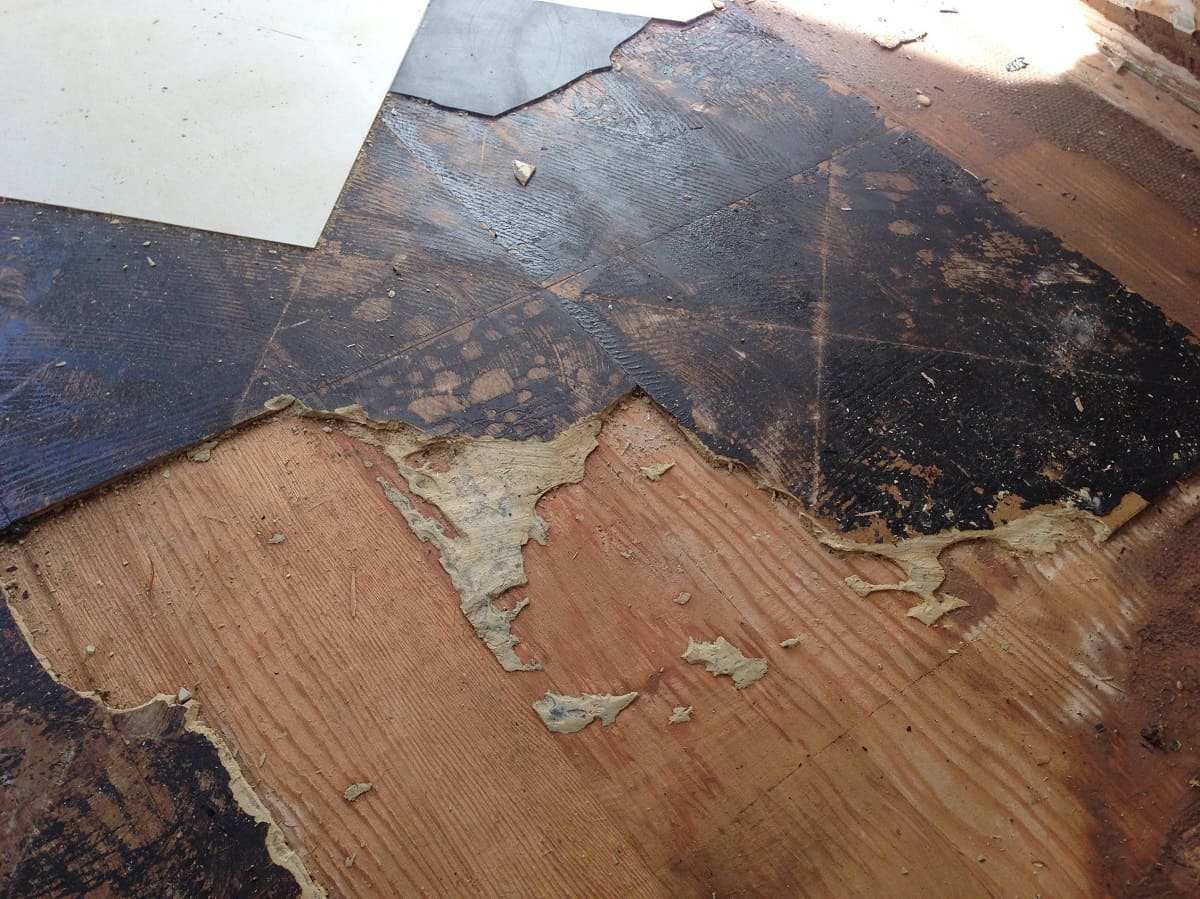
Step 3: Preparing the Subfloor
Now that you have successfully removed the tile flooring, it’s time to shift your focus to preparing the subfloor for the installation of the new hardwood flooring. This step plays a crucial role in ensuring a stable and durable foundation for your hardwood floors.
Follow these steps to properly prepare the subfloor:
- Inspect the subfloor: Take the time to thoroughly inspect the subfloor for any damage or imperfections. Look for any loose or squeaky areas, as well as any uneven sections. It’s important to address these issues before proceeding with the installation.
- Repair or replace damaged sections: If any sections of the subfloor are damaged or uneven, it’s important to repair or replace them. This may involve using screws to secure loose sections or replacing damaged plywood. Ensuring a level and sturdy subfloor is essential for a successful installation.
- Address moisture issues: Moisture can be a significant concern when it comes to hardwood flooring. Check the humidity levels in the room and address any excessive moisture issues before proceeding. This may involve using a moisture barrier or installing a dehumidifier in the room.
- Install an underlayment: To provide added insulation and protection for your hardwood floors, it’s recommended to install an underlayment. This helps to create a moisture barrier and reduces noise transmission. Follow the manufacturer’s instructions to properly install the underlayment over the subfloor.
- Level the subfloor: If you notice any uneven areas on the subfloor, it’s crucial to level them before installing the hardwood flooring. This can be done using a self-leveling compound or by adding plywood underlayment to create a level surface.
By taking the time to properly prepare the subfloor, you are setting the stage for a successful installation of your new hardwood flooring. Once you have completed these steps, you are ready to move on to step four: choosing and preparing the hardwood flooring.
When removing tile floors, be sure to wear protective gear such as gloves and goggles to prevent injury from sharp edges and flying debris.
Step 4: Choosing and Preparing the Hardwood Flooring
Now that the subfloor is prepared, it’s time to choose the hardwood flooring that will transform your space. The selection process involves considering factors such as the type, color, finish, and grade of the hardwood. Additionally, proper preparation of the hardwood is essential to ensure a smooth installation.
Follow these steps to choose and prepare your hardwood flooring:
- Choose the right type of hardwood: There are various types of hardwood to choose from, including oak, maple, cherry, and walnut. Consider factors such as the durability, grain, and color when selecting the type of hardwood that best suits your needs and preferences. Each type of hardwood has its own unique characteristics and benefits.
- Select the color and finish: Hardwood flooring comes in a range of colors and finishes. Consider the overall aesthetic of your space and choose a color and finish that complements your existing décor. From natural finishes to stained options, there are plenty of choices to create the desired look for your home.
- Calculate the amount of hardwood needed: Measure the area of the room to determine the square footage of hardwood flooring required. It’s always a good idea to add a little extra to account for any mistakes or future repairs. Consult with a flooring professional or use a flooring calculator to ensure you have the correct amount of hardwood.
- Allow the hardwood to acclimate: Once you have purchased the hardwood flooring, it’s important to allow it to acclimate to the environment in which it will be installed. This involves leaving the flooring in the room for a few days to adjust to the temperature and humidity levels. Acclimating the hardwood helps prevent any expansion or contraction issues after installation.
- Inspect and prepare the hardwood: Before installing the hardwood, inspect each piece for any defects or damage. Remove any damaged pieces and ensure that the remaining pieces are clean and free from any debris. Additionally, check the manufacturer’s instructions for any specific preparation steps required for the particular type of hardwood flooring you have chosen.
- Read the installation instructions: Each type of hardwood may have specific installation instructions provided by the manufacturer. Take the time to thoroughly read and understand these instructions before beginning the installation process. This will ensure that you follow the correct techniques and avoid any mistakes.
By carefully choosing and preparing your hardwood flooring, you can create a beautiful and long-lasting floor that enhances the overall aesthetic of your space. Once you have completed these steps, you are ready to move on to step five: installing the hardwood flooring.
Read more: DIY Guide To Refinishing Hardwood Floors
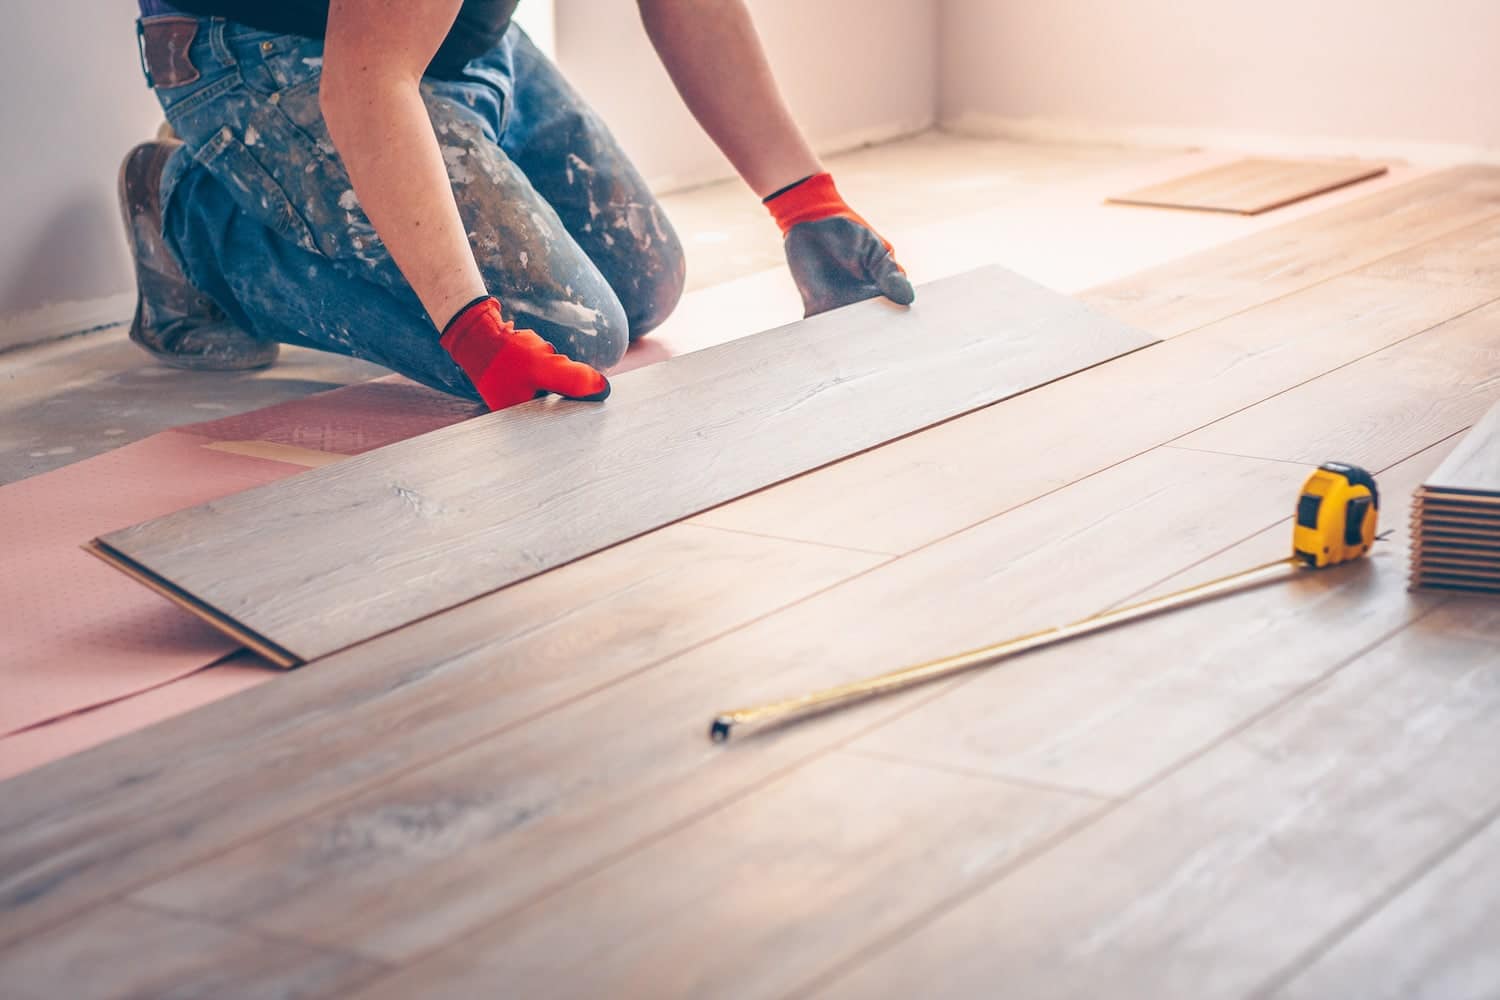
Step 5: Installing the Hardwood Flooring
Now that you have chosen and prepared your hardwood flooring, it’s time to move on to the exciting step of installing the hardwood. Proper installation is crucial to ensure a visually appealing and durable finished floor. Follow these steps to successfully install your hardwood flooring:
- Start from a straight and square reference line: Before laying down the first row of hardwood planks, establish a straight and square reference line. This ensures that your flooring is installed in a straight and aligned manner. Use a chalk line or a laser level to mark the reference line on the subfloor.
- Begin with the first row: Start by laying the first row of hardwood planks along the reference line. Leave a small expansion gap between the planks and the walls to allow for natural expansion and contraction. Use a pneumatic nailer or a flooring stapler to securely fasten the planks to the subfloor.
- Continue with the subsequent rows: As you work your way across the room, continue to lay down each row of hardwood planks, ensuring they are tightly fit together. Stagger the joints between planks to create a visually appealing pattern and enhance the stability of the floor. Use a tapping block and a mallet to ensure a snug fit between the planks.
- Address obstacles: During the installation process, you may encounter obstacles such as doorways, vents, or irregularly shaped areas. Use a jigsaw or a coping saw to carefully cut the planks to fit around these obstacles. Take your time and measure accurately to ensure a seamless and professional-looking installation.
- Leave expansion gaps: It’s important to remember to leave expansion gaps around the perimeter of the room, as well as transitions between different flooring materials. These gaps allow for natural movement of the hardwood and reduce the risk of buckling or warping. Cover the gaps with baseboards or appropriately sized moldings.
- Follow manufacturer’s guidelines: Different types of hardwood may have specific installation guidelines provided by the manufacturer. It’s essential to closely follow these guidelines to ensure a proper installation. This includes acclimation periods, adhesive or nail placement, and any specific maintenance requirements.
Installing hardwood flooring requires precision and attention to detail, but with the right tools and techniques, you can achieve a stunning and long-lasting result. Once you have completed the installation process, you are ready for the final step: adding the finishing touches.
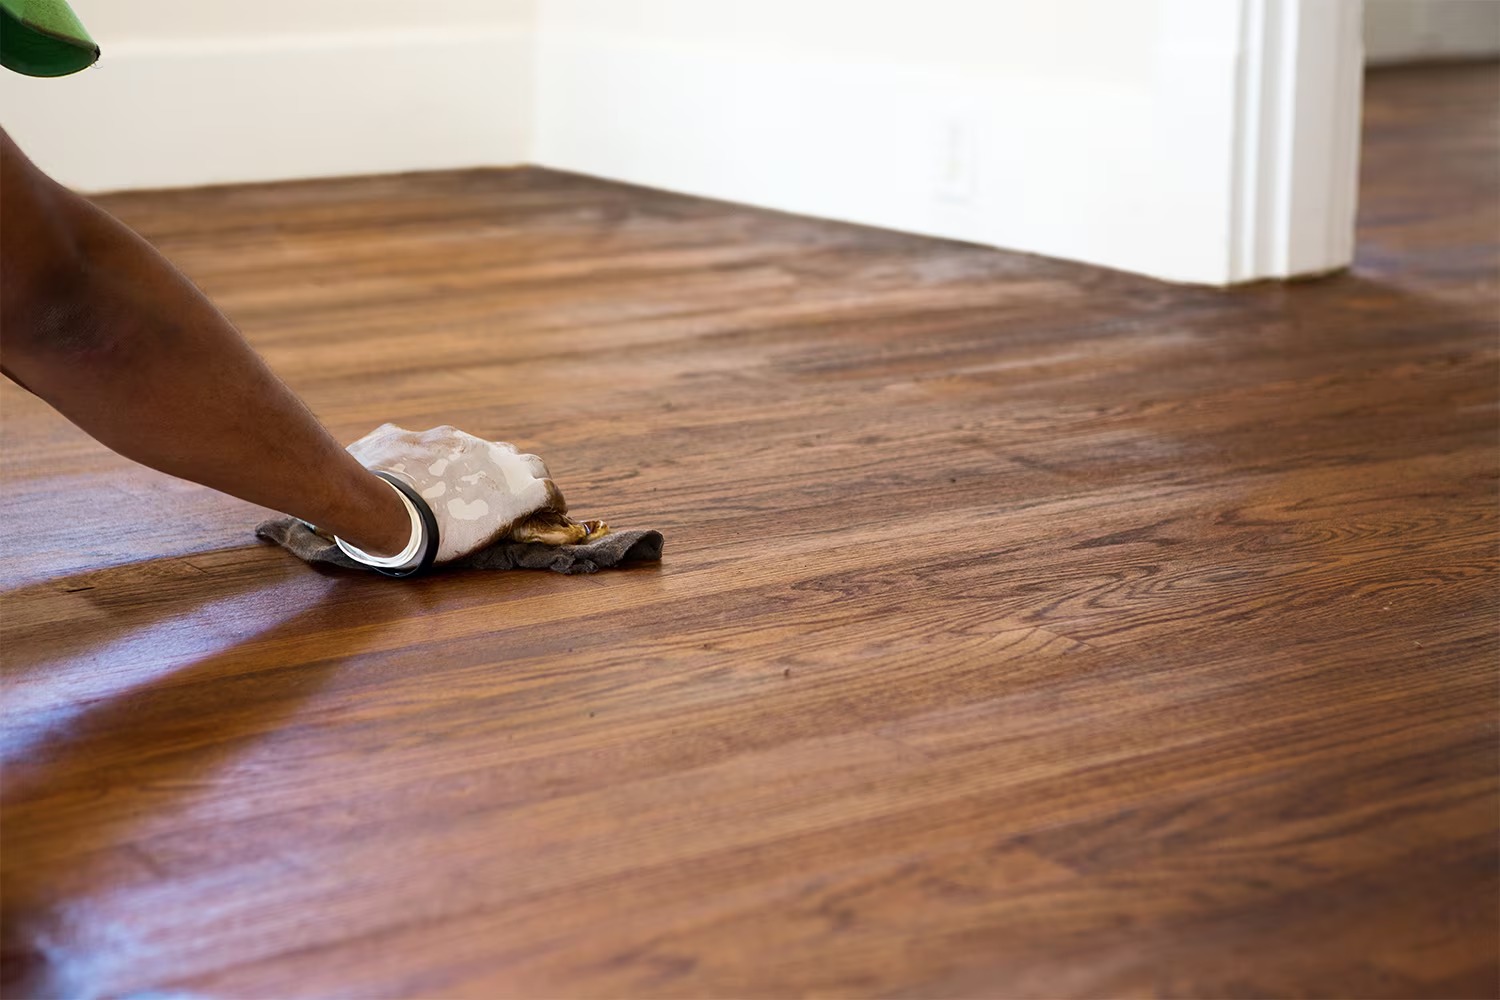
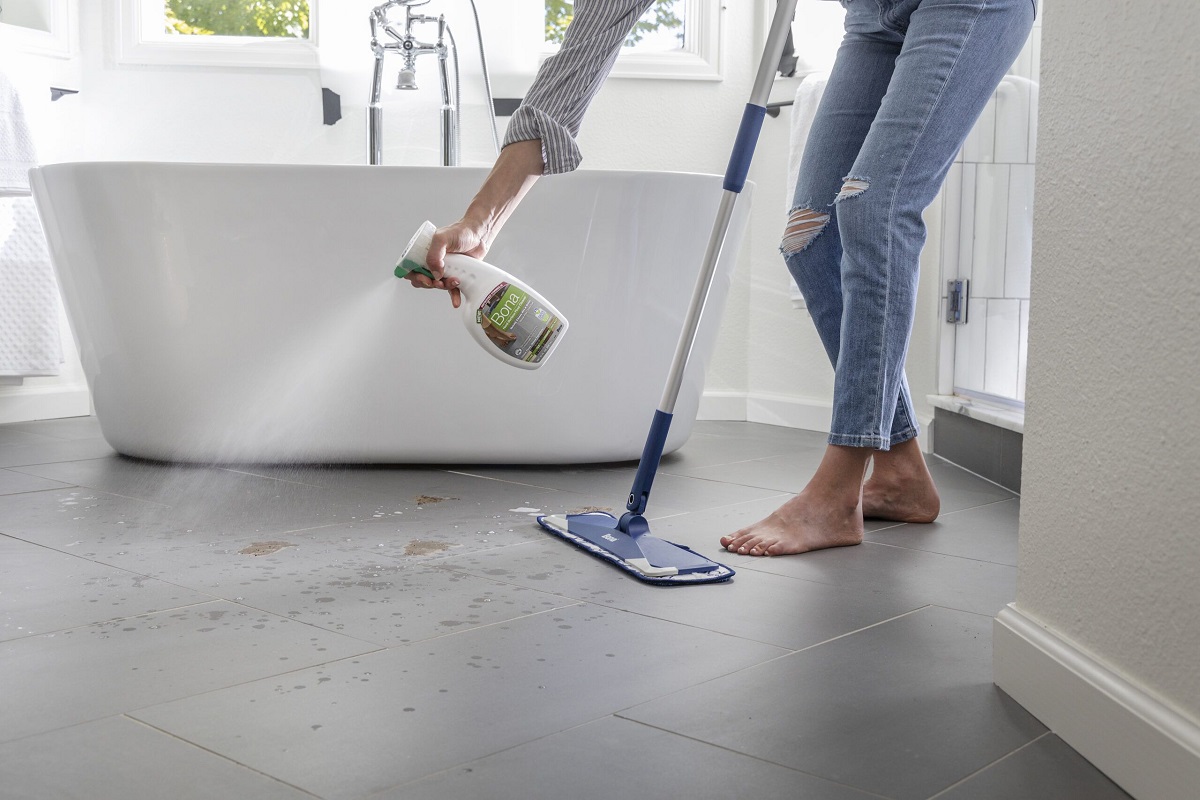
Step 6: Finishing Touches
Congratulations! You have successfully installed your hardwood flooring. Now it’s time to add the finishing touches that will take your new floor to the next level of beauty and functionality. These final touches will complete the project and ensure that your hardwood flooring remains in excellent condition for years to come.
Here are some essential finishing touches to consider:
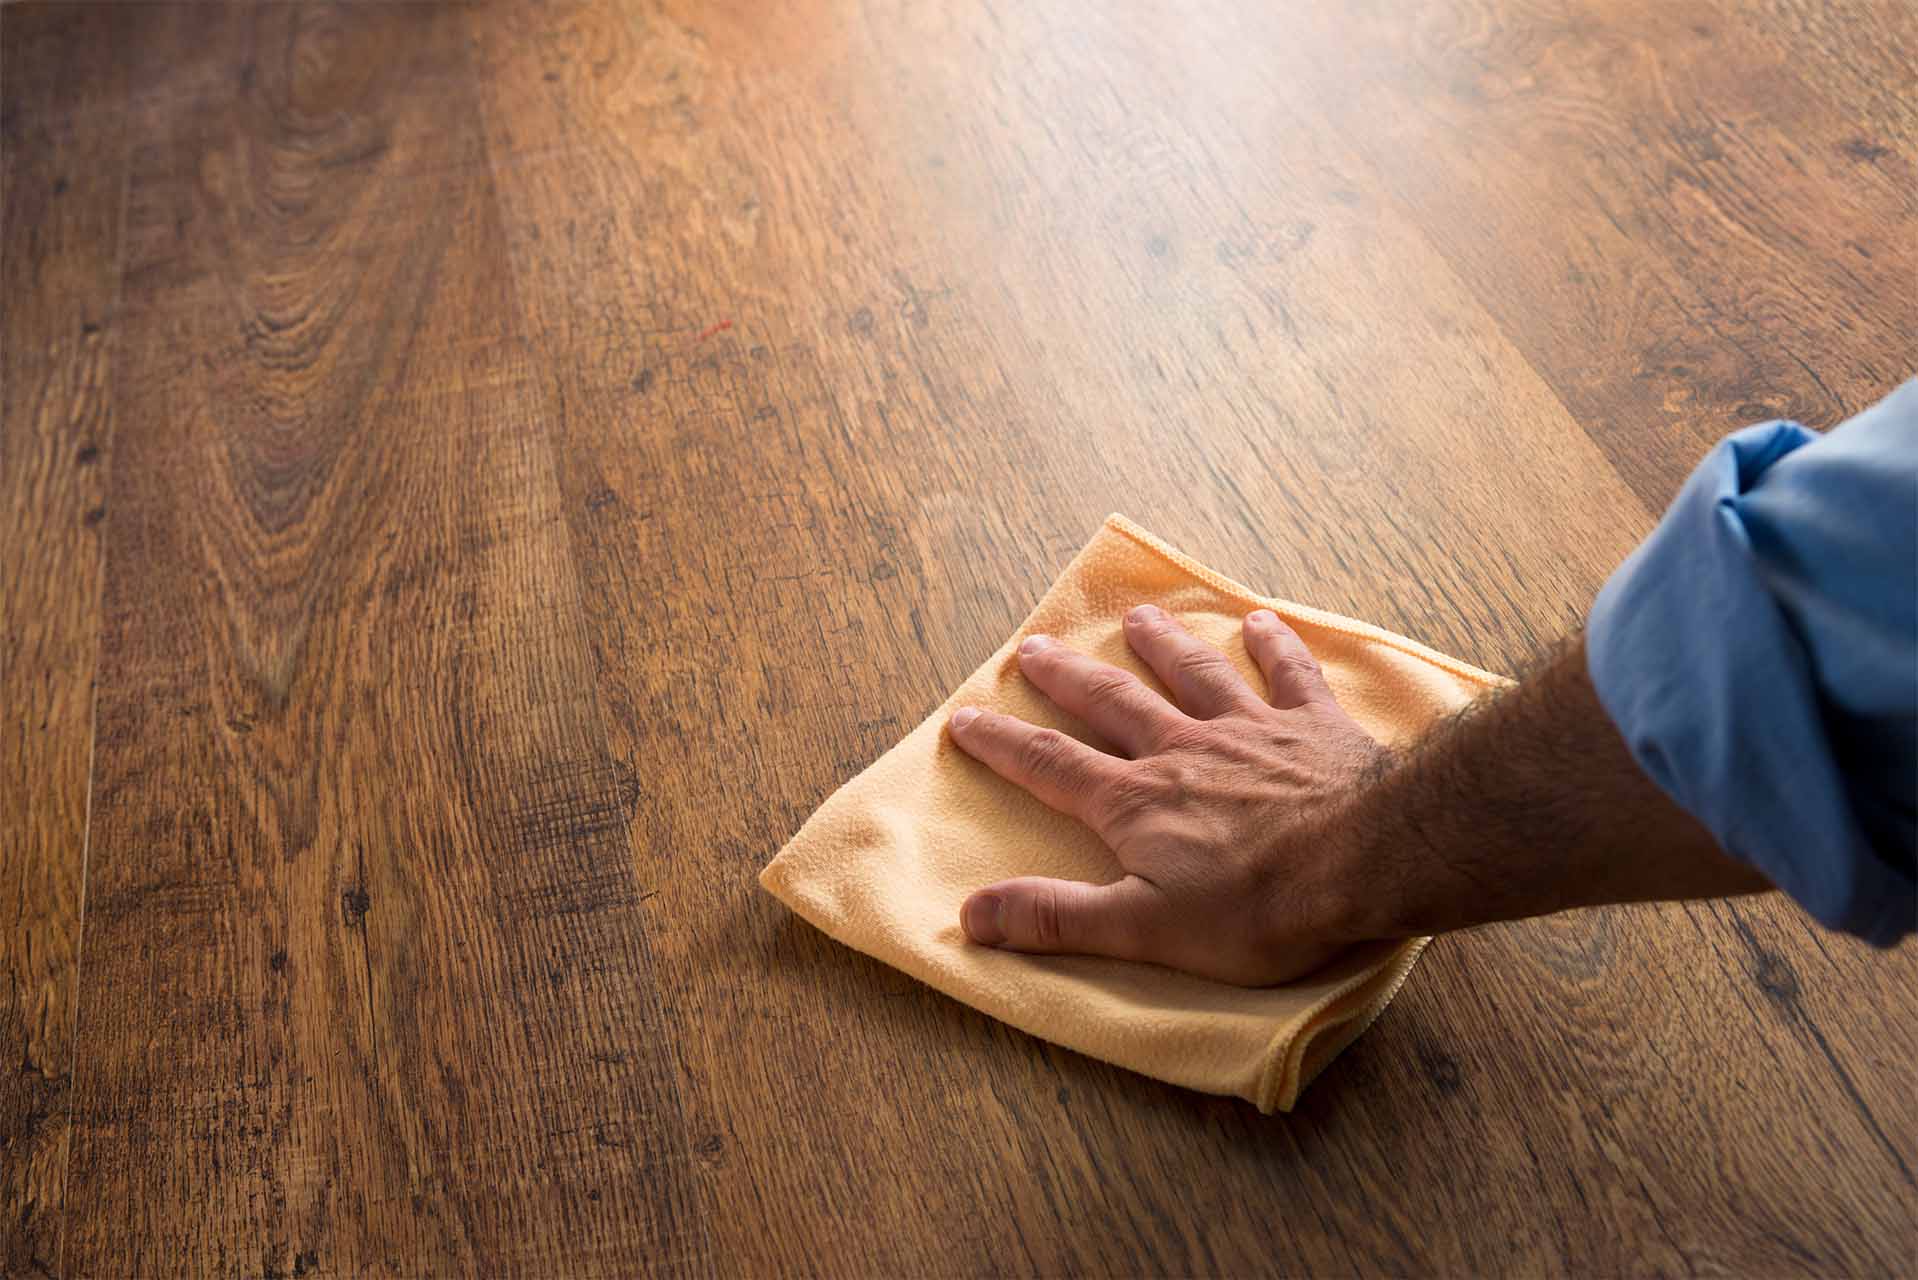
- Clean the floor: Before you start adding any additional elements, thoroughly clean the hardwood flooring to remove any dust or debris. Use a soft broom, vacuum with a hardwood floor attachment, or a microfiber mop to gently sweep or wipe the surface.
- Apply a protective finish: To protect your hardwood flooring from scratches, stains, and daily wear and tear, consider applying a protective finish. There are different options available, including polyurethane, oil-based finishes, and water-based finishes. Follow the manufacturer’s instructions for application and drying times.
- Add baseboards and trim: Install baseboards or trim around the perimeter of the room to cover the expansion gaps and create a polished look. Choose baseboards or trim that complement the style and color of your hardwood flooring.
- Place floor mats and rugs: To enhance the comfort and longevity of your hardwood flooring, consider placing floor mats or rugs in high-traffic areas and entryways. These will help protect the floor from dirt, debris, and moisture, as well as add a decorative touch to your space.
- Install furniture protectors: Prevent scratches and indentations caused by furniture by applying furniture protectors to the legs or bottoms of chairs, tables, and other furniture pieces. Felt pads or adhesive protectors are readily available and easy to apply.
- Maintain the hardwood flooring: Regular maintenance is essential for keeping your hardwood flooring looking pristine. Follow the manufacturer’s guidelines for cleaning and maintenance, which may include using specific cleaning solutions, avoiding harsh chemicals, and using soft microfiber mops or cleaning pads.
By taking care of these finishing touches, you can ensure the longevity and beauty of your newly installed hardwood flooring. Regular cleaning, maintenance, and proper protection will help your floors withstand the test of time and continue to be a stunning feature in your home.
With Step 6 completed, you have successfully transformed your space by removing and replacing tile floors with hardwood. Enjoy the warmth, beauty, and durability of your new hardwood flooring for many years to come!
Hopefully, this comprehensive guide has provided you with the knowledge and confidence to tackle this project. Always remember to prioritize safety, follow manufacturer’s instructions, and seek professional help as needed. Happy flooring!
Conclusion
Removing and replacing tile floors with hardwood is a significant project that can completely transform the look and feel of your space. By following the steps outlined in this comprehensive guide, you can successfully navigate through each stage of the process and achieve stunning results.
From preparing for the project to selecting the right hardwood flooring, and from removing the tile to installing the hardwood, each step plays a critical role in ensuring a smooth and successful transition. Taking the time to properly prepare the subfloor, choose high-quality hardwood, and carefully install and finish the flooring will result in a beautiful, durable, and long-lasting floor that adds value to your home.
Throughout the project, it is important to prioritize safety, follow manufacturer’s instructions, and seek professional assistance when necessary. Remember to take the time to properly prepare the subfloor, select high-quality materials, and ensure a meticulous installation process. These efforts will pay off with a breathtaking hardwood floor that you can enjoy for years to come.
Regular maintenance and care are essential for preserving the beauty and longevity of your hardwood flooring. Follow the manufacturer’s guidelines for cleaning, maintenance, and protection, which will help you maintain the floor’s appearance and integrity over time.
We hope that this comprehensive guide has provided you with the knowledge and confidence to undertake the project of removing and replacing tile floors with hardwood. By following these steps and tips, you can create a space that showcases timeless beauty, warmth, and elegance. Enjoy your newly transformed space!
Frequently Asked Questions about Our Guide To Removing And Replacing Tile Floors With Hardwood
Was this page helpful?
At Storables.com, we guarantee accurate and reliable information. Our content, validated by Expert Board Contributors, is crafted following stringent Editorial Policies. We're committed to providing you with well-researched, expert-backed insights for all your informational needs.


0 thoughts on “Our Guide To Removing And Replacing Tile Floors With Hardwood”