Articles
How To Remove Smoke Detector From The Ceiling
Modified: August 22, 2024
Learn how to safely remove a smoke detector from your ceiling with our informative articles. Proper removal techniques and precautions discussed.
(Many of the links in this article redirect to a specific reviewed product. Your purchase of these products through affiliate links helps to generate commission for Storables.com, at no extra cost. Learn more)
Introduction
Welcome to the comprehensive guide on how to remove a smoke detector from the ceiling. Whether you are replacing an old smoke detector or simply need to access the wiring, this step-by-step tutorial will walk you through the process. While it might seem like a daunting task, with the right tools and a little know-how, you can safely and efficiently remove a smoke detector without causing any damage. So, let’s dive in and get started!
Smoke detectors are an essential component of any home’s safety system, as they provide early warning in the event of a fire. Over time, however, smoke detectors can wear out or become outdated, necessitating their removal and replacement. Additionally, you may need to remove a smoke detector temporarily to replace its batteries or inspect the wiring behind it.
Before proceeding with the removal process, it’s important to ensure your safety. Ensure that the power to the smoke detector is turned off to prevent any electrical hazards. Also, gather the necessary tools, including a ladder, screwdriver, and possibly wire cutters or strippers, depending on the type of wiring involved. Once you have taken these precautions and gathered the required tools, you are ready to begin the removal process.
Throughout this guide, we will outline each step in detail, ensuring that you understand the process and can confidently remove the smoke detector from the ceiling. From turning off the power and removing the cover to disconnecting the wiring and unscrewing the mounting bracket, we will cover it all. Additionally, we will guide you on how to inspect the wiring and connections and provide options for installing a new smoke detector or replacing the battery.
It’s important to note that smoke detectors play a critical role in safeguarding your home and loved ones, so it is recommended to have a functioning smoke detector at all times. If you are removing a smoke detector permanently, make sure to install a suitable replacement as soon as possible.
Now that we have covered the introduction, let’s move on to the first step: turning off the power to the smoke detector.
Key Takeaways:
- Safely and efficiently remove a smoke detector from the ceiling by following step-by-step instructions, ensuring proper disconnection of wiring and reinstallation for home safety.
- Regularly test and maintain smoke detectors to ensure optimal functionality, including battery replacement and following manufacturer’s guidelines for safety and peace of mind.
Read more: How To Remove A Smoke Detector
Step 1: Turn off the Power
The first step in removing a smoke detector from the ceiling is to turn off the power. This is crucial to ensure your safety and prevent any electrical accidents during the removal process.
Start by locating the circuit breaker panel in your home. This panel is usually found in the basement, utility room, or garage. If you are unsure about the location, consult your home’s electrical plan or ask a professional electrician for assistance.
Once you have located the circuit breaker panel, open the panel door. Inside, you will find a series of switches or breakers labeled with the different rooms or areas of your home.
Look for the label that corresponds to the smoke detector you want to remove. It may be labeled as “Smoke Detector,” “Fire Alarm,” or something similar. Flip the switch or push the breaker to the “Off” position for that specific area.
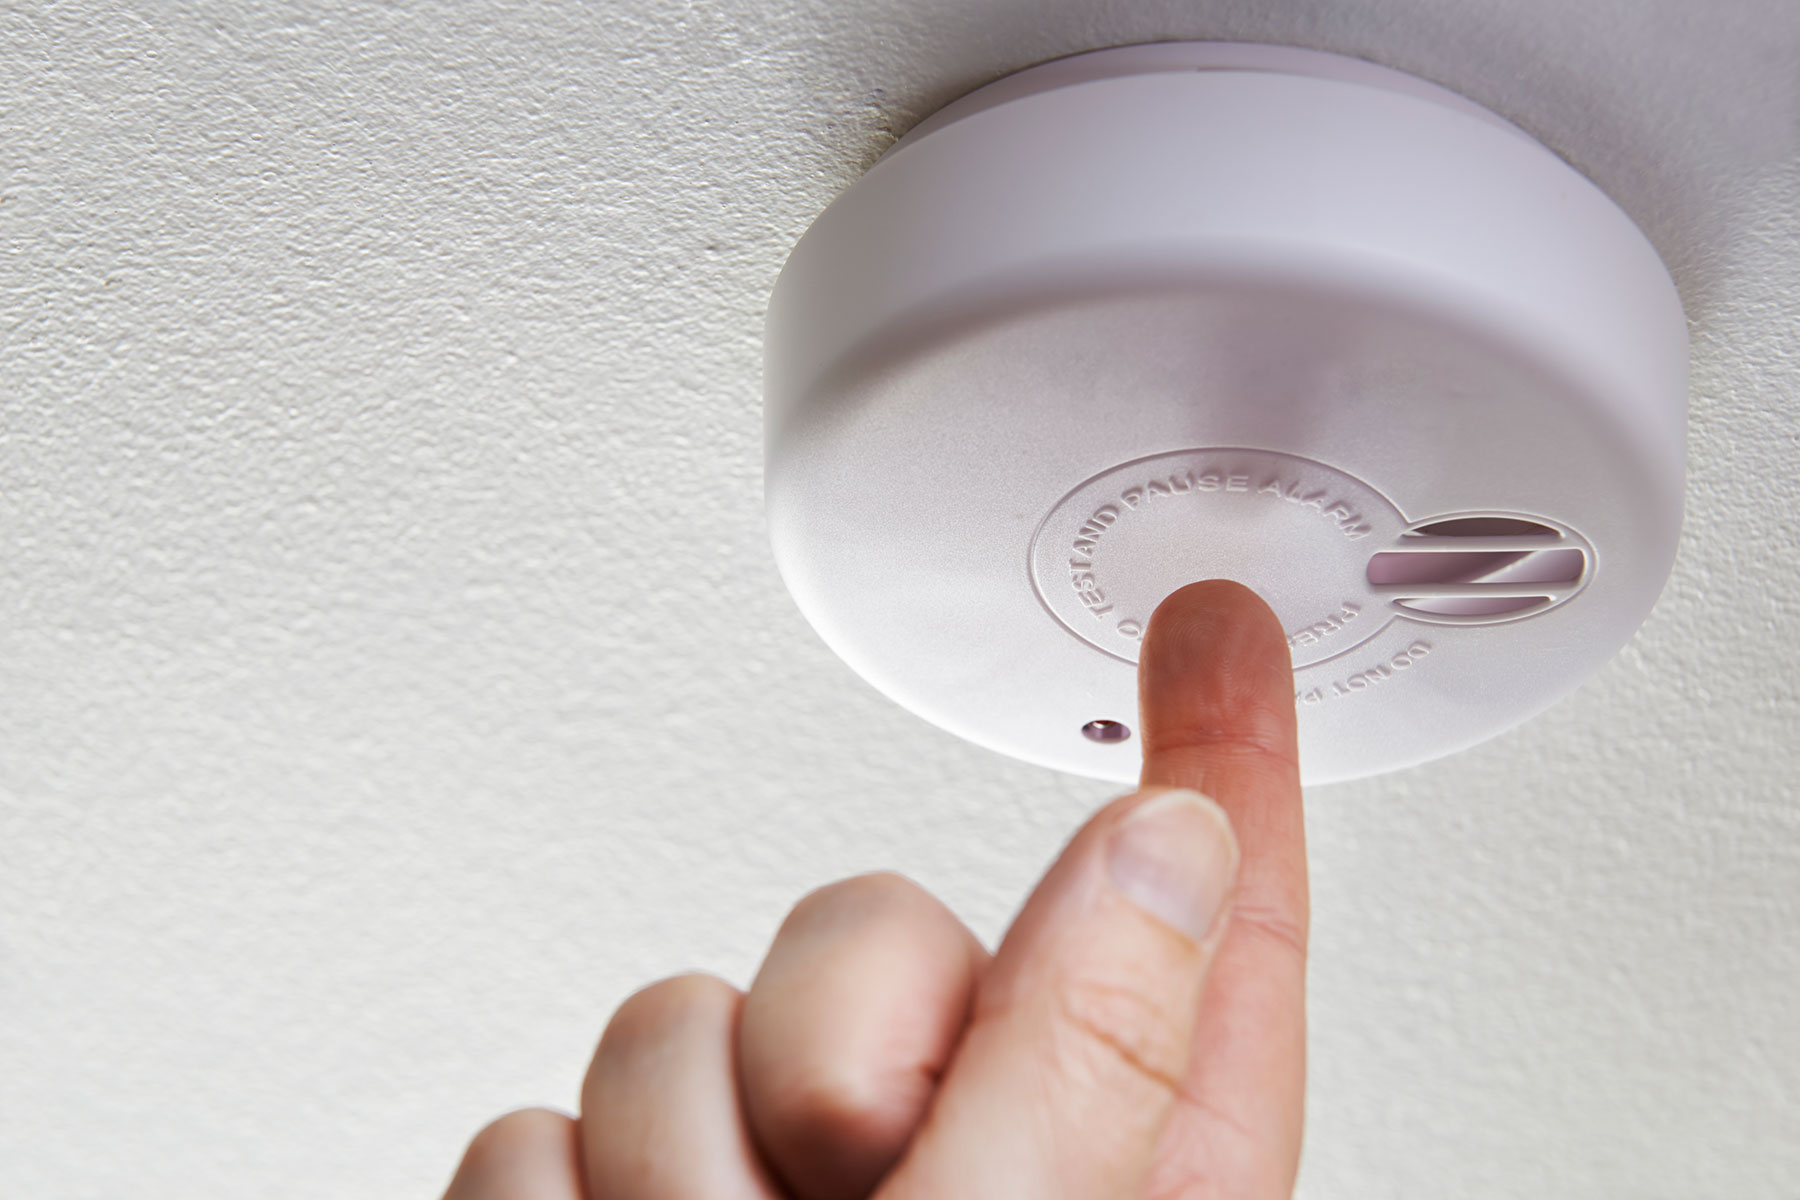
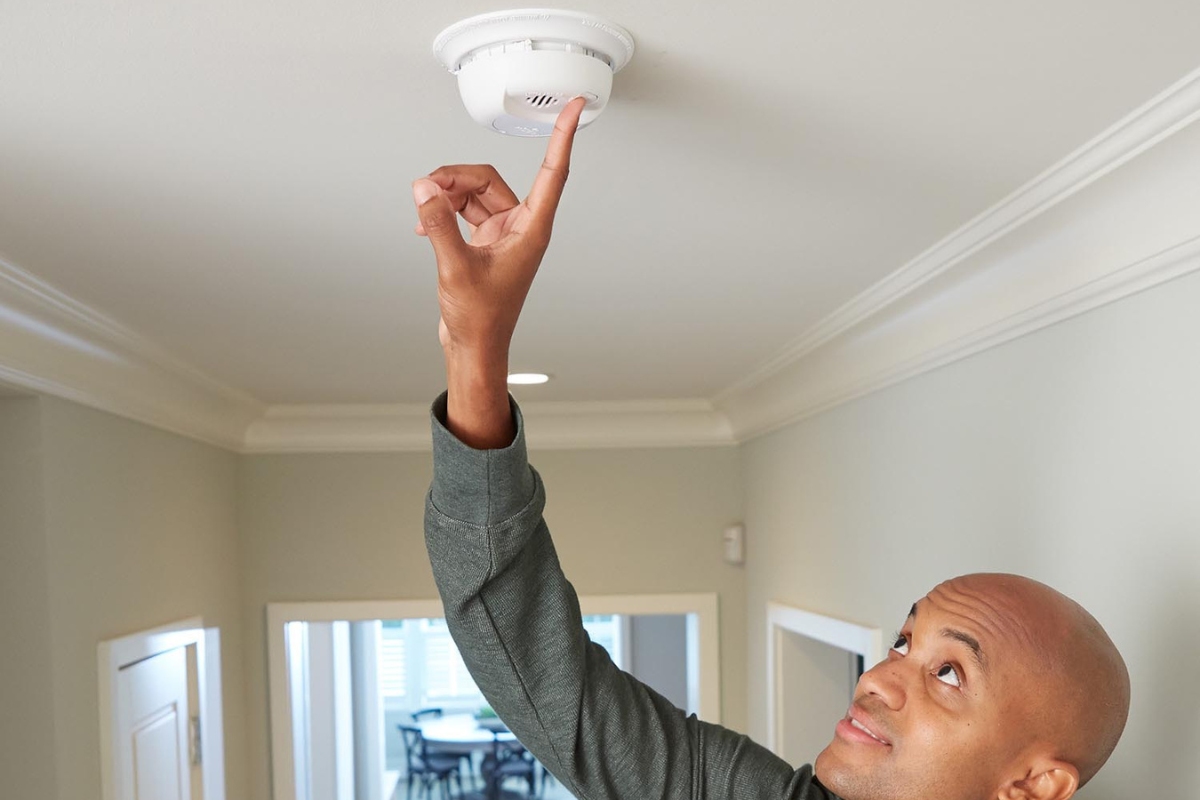
After turning off the power, it is essential to verify that the smoke detector has been completely disabled. To do this, press the test button on the smoke detector. If it does not emit any sound or flash any lights, then the power has been successfully turned off. If you hear a sound or see the smoke detector activate, it means that the power is still on, and you should go back to the circuit breaker panel to double-check the switch.
Keep in mind that some smoke detectors may be hardwired into the home’s electrical system and have a backup battery in case of a power outage. In such cases, the test button may still produce a sound or flash lights, but rest assured that the power is indeed off as long as the circuit breaker is switched off.
Now that the power is turned off and the smoke detector is disabled, you can proceed to the next step: removing the cover.
Step 2: Remove the Cover
With the power turned off and the smoke detector disabled, it’s time to remove the cover. The cover is typically held in place by screws or tabs and needs to be removed to access the internal components of the smoke detector.
First, inspect the smoke detector cover to determine how it is secured. In most cases, you will find one of two types of covers: screw-on or snap-on.
If you have a screw-on cover, you will need a screwdriver that matches the type and size of screws used. Typically, a Phillips head screwdriver is commonly used, but it’s always a good idea to double-check the screw type before proceeding.
Using the appropriate screwdriver, carefully unscrew the screws securing the cover. Keep the screws in a safe place, as you will need them later when reattaching the cover.
If your smoke detector has a snap-on cover, you will need to locate the tabs or latches that hold it in place. These are usually found along the sides or corners of the cover. Gently press or squeeze the tabs to release them, allowing you to remove the cover easily.
Once you have loosened the screws or released the tabs, carefully lift the cover off the smoke detector. Be cautious not to pull or tug on any wires connected to the smoke detector.
Set the cover aside in a safe place where it won’t get damaged or lost. It’s a good idea to keep the screws or tabs with the cover so that everything is together when it’s time to reassemble the smoke detector.
Now that the cover has been removed, you can proceed to the next step: disconnecting the wiring.
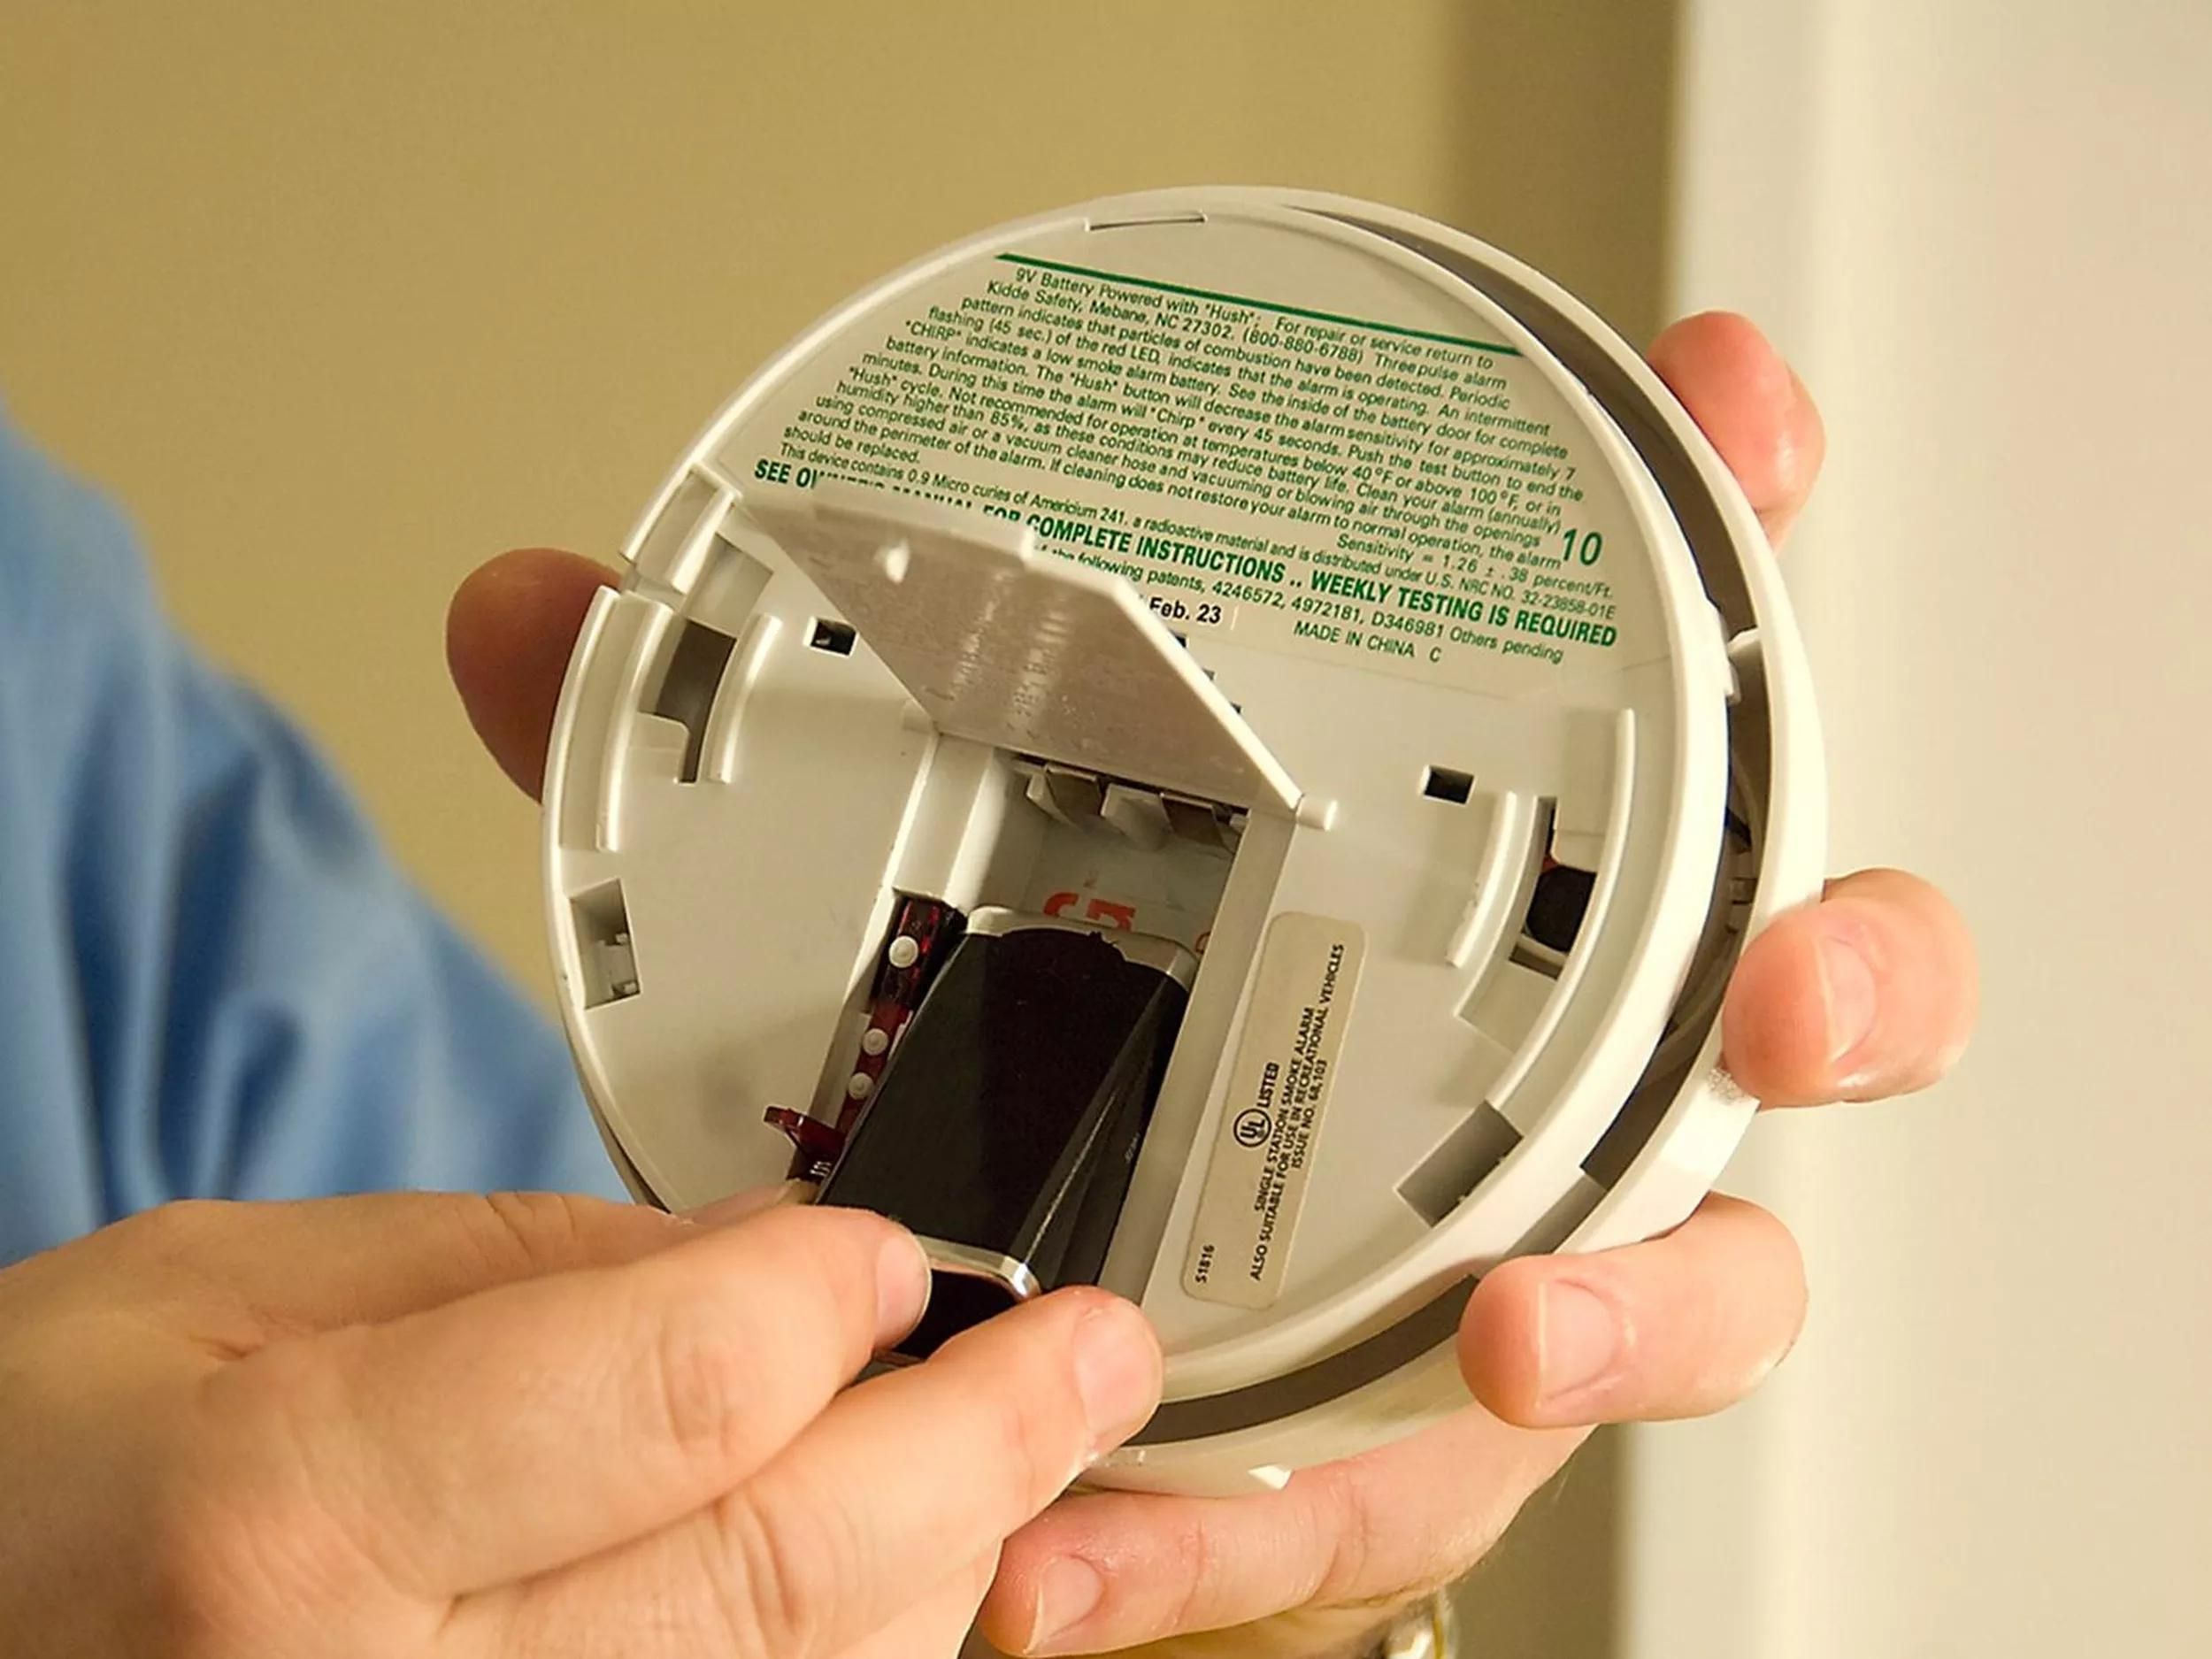
Step 3: Disconnect the Wiring
After removing the cover, the next step in removing a smoke detector from the ceiling is to disconnect the wiring. This step is crucial as it ensures that the smoke detector is completely detached from the electrical system of your home.
Before proceeding, it’s essential to reiterate the importance of safety. Ensure that the power to the smoke detector has been turned off at the circuit breaker panel, as discussed in Step 1. Double-check that there is no power flowing to the smoke detector by pressing the test button.
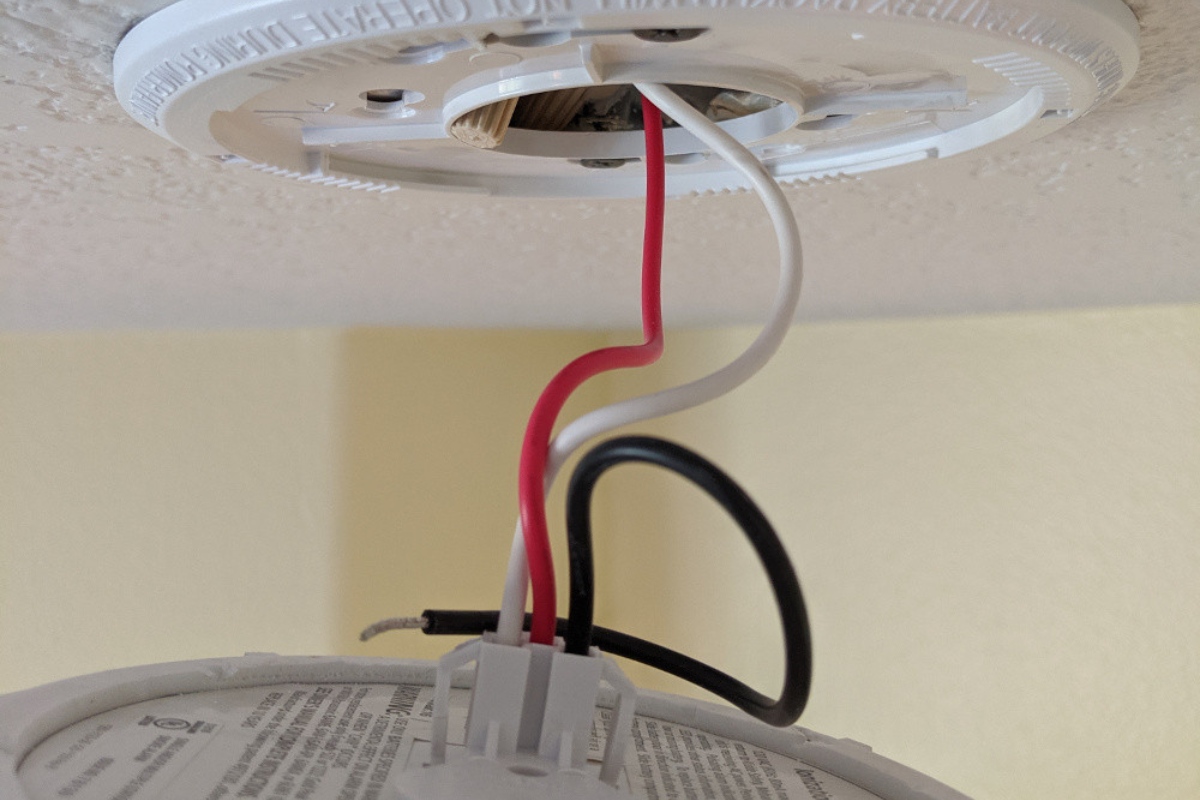
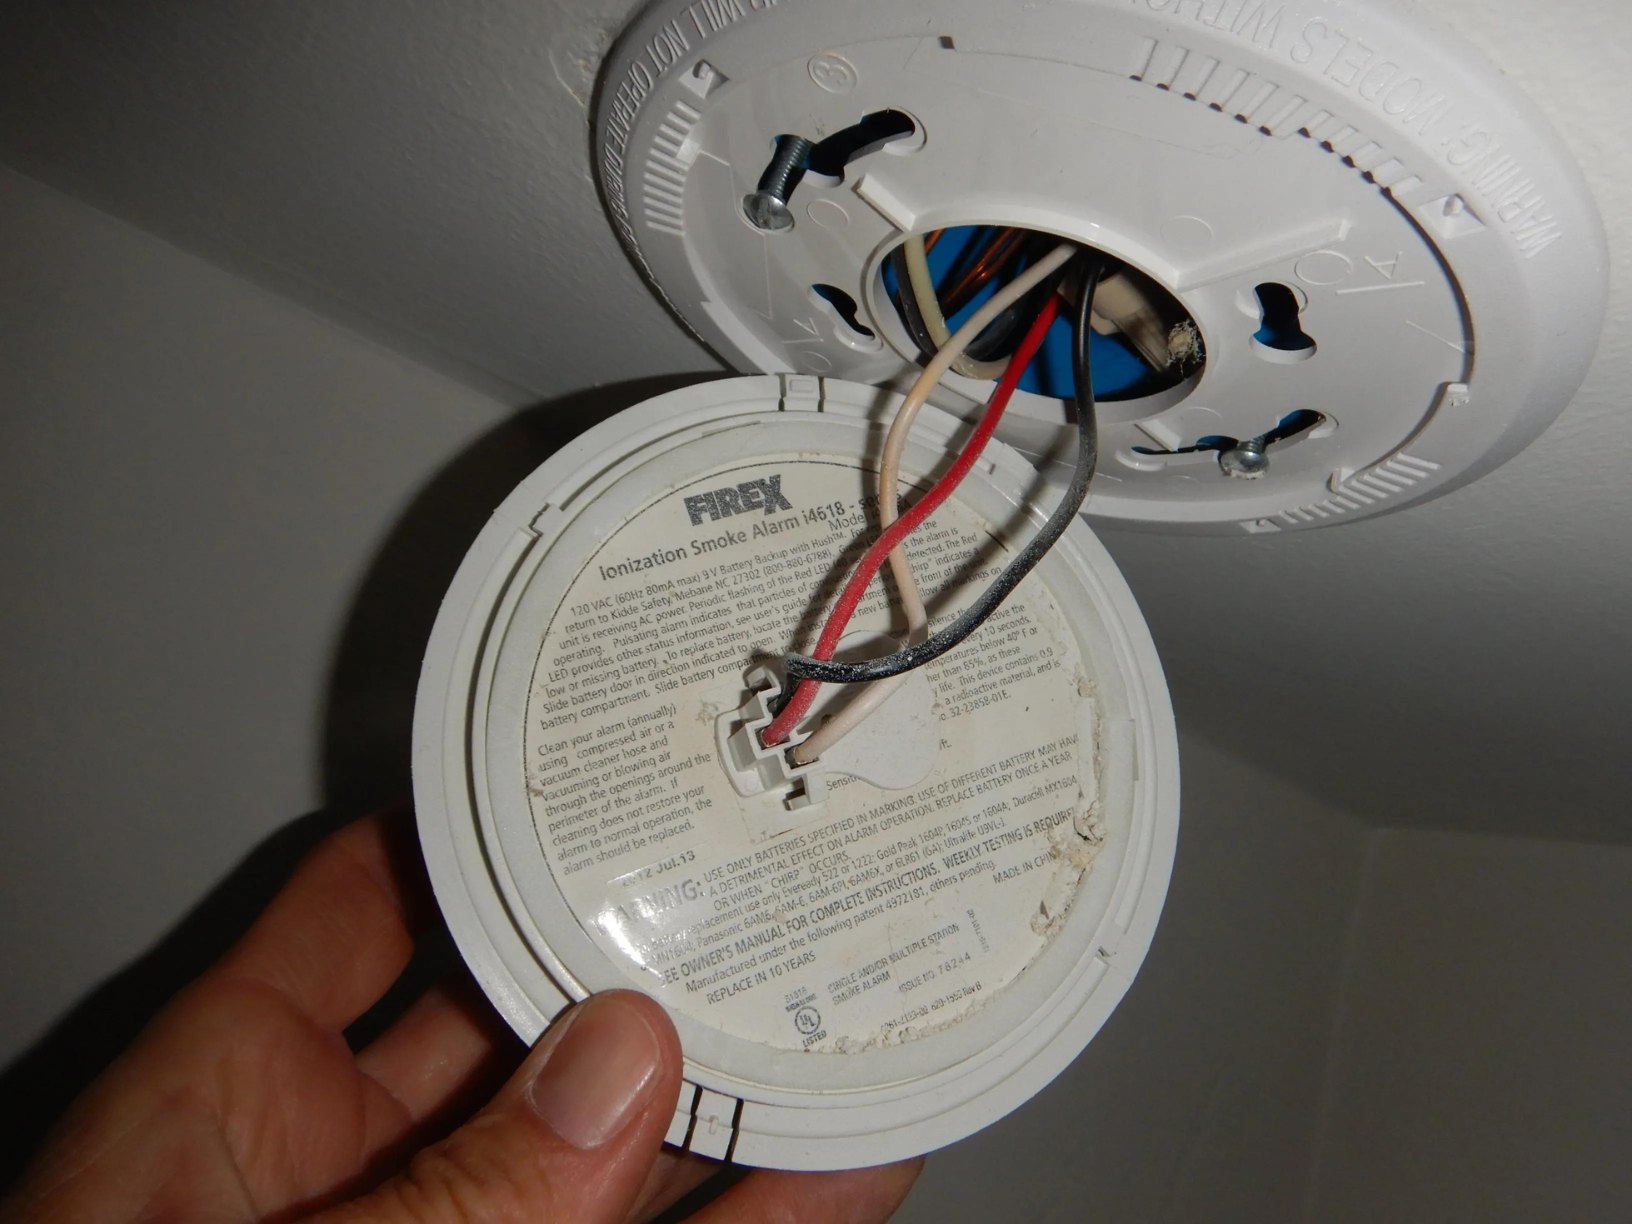
Once you are confident that the power is off, locate the wires connected to the smoke detector. The number and colors of these wires may vary depending on the model and installation type.
Inspect the wires and identify how they are connected to the smoke detector. It is common to find two or three wires – black (or hot/live), white (neutral), and green or bare (ground).
Using a screwdriver, loosen the screws or terminals that secure the wires to the smoke detector. In some cases, you may need to use wire cutters or strippers to remove any wire connectors or caps.
Unscrew or detach each wire carefully, taking note of their respective positions or markings. It can be helpful to label the wires or take a picture for reference, especially if you are removing multiple smoke detectors or have complex wiring.
After disconnecting all the wires, make sure to carefully tuck them away, ensuring that they do not touch any exposed metal or come in contact with each other. This step is crucial to prevent any electrical shorts or accidents while you continue with the removal process.
With the wiring safely disconnected, you can move on to the next step: unscrewing the mounting bracket.
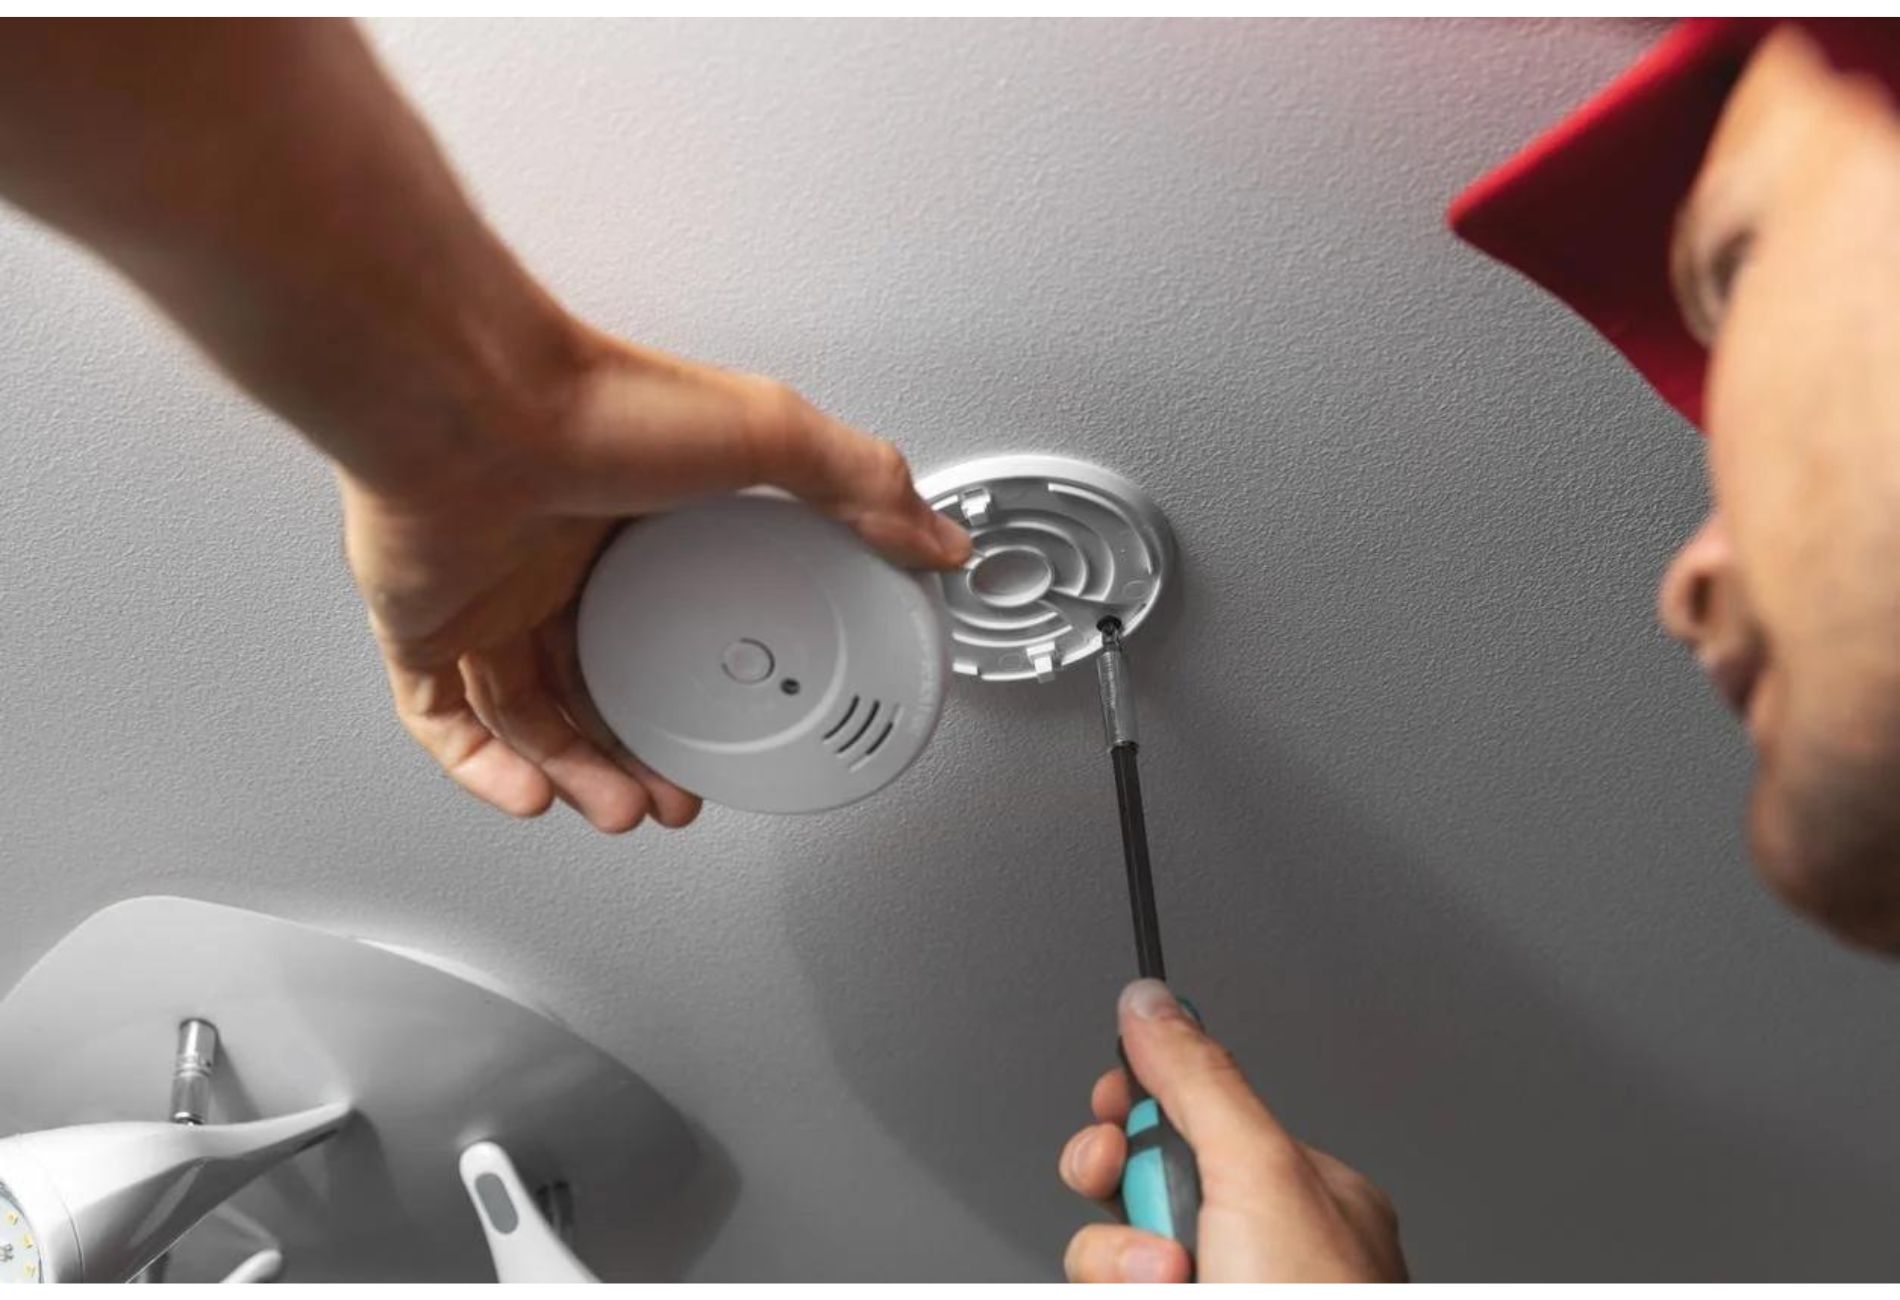
Step 4: Unscrew the Mounting Bracket
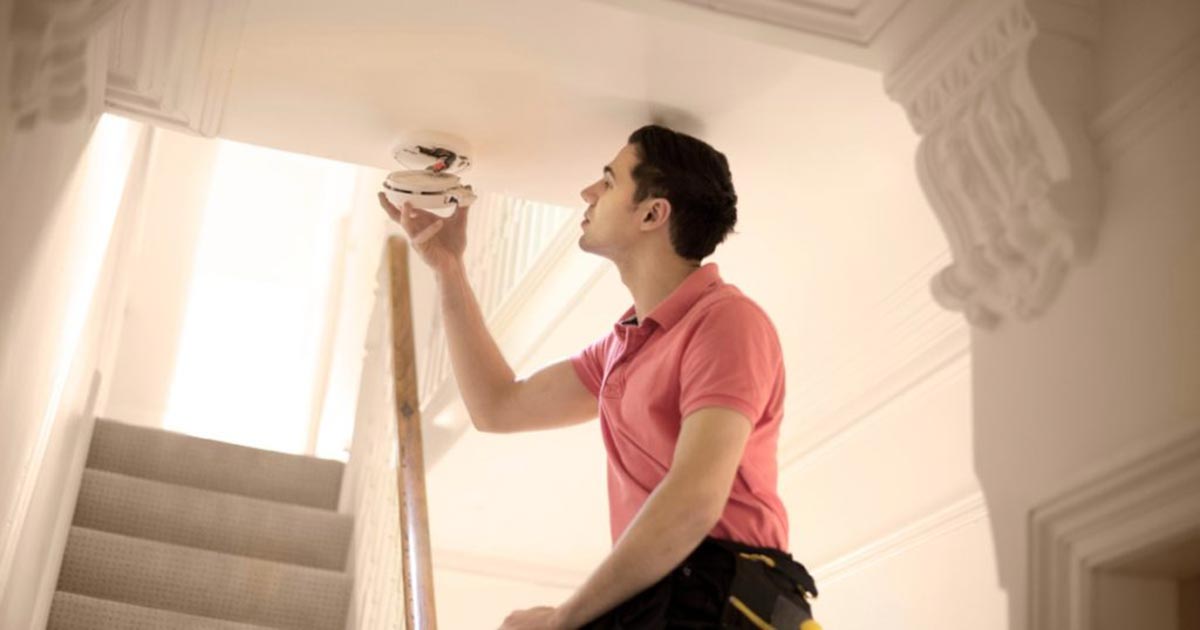
Now that the wiring is disconnected, it’s time to remove the mounting bracket that holds the smoke detector in place. The mounting bracket is typically attached to the ceiling or wall, depending on the installation type.
Before proceeding, make sure you have a sturdy ladder or step stool to safely reach the smoke detector. Ensure that the ladder is stable and secure before climbing up.
Inspect the mounting bracket and identify the screws or clips that are securing it to the ceiling or wall. Depending on the model and installation method, you may find one or multiple screws holding the bracket in place.
Using a suitable screwdriver, carefully unscrew the screws counterclockwise to loosen them. Be cautious not to drop the screws or let them fall into the ceiling or wall cavity as it may be difficult to retrieve them.
If your smoke detector uses clips instead of screws, locate the tabs or levers on the sides of the mounting bracket. Gently press or release these tabs to disengage the clips from the ceiling or wall.
Once the screws are fully loosened or the clips are disengaged, carefully remove the mounting bracket from the ceiling or wall. Set it aside in a safe place as you may need to reuse it if you are replacing the smoke detector.
With the mounting bracket removed, you have successfully completed this step. You are now ready to move on to the next step: detaching the smoke detector from the ceiling.
Read more: How To Remove A Nest Smoke Detector
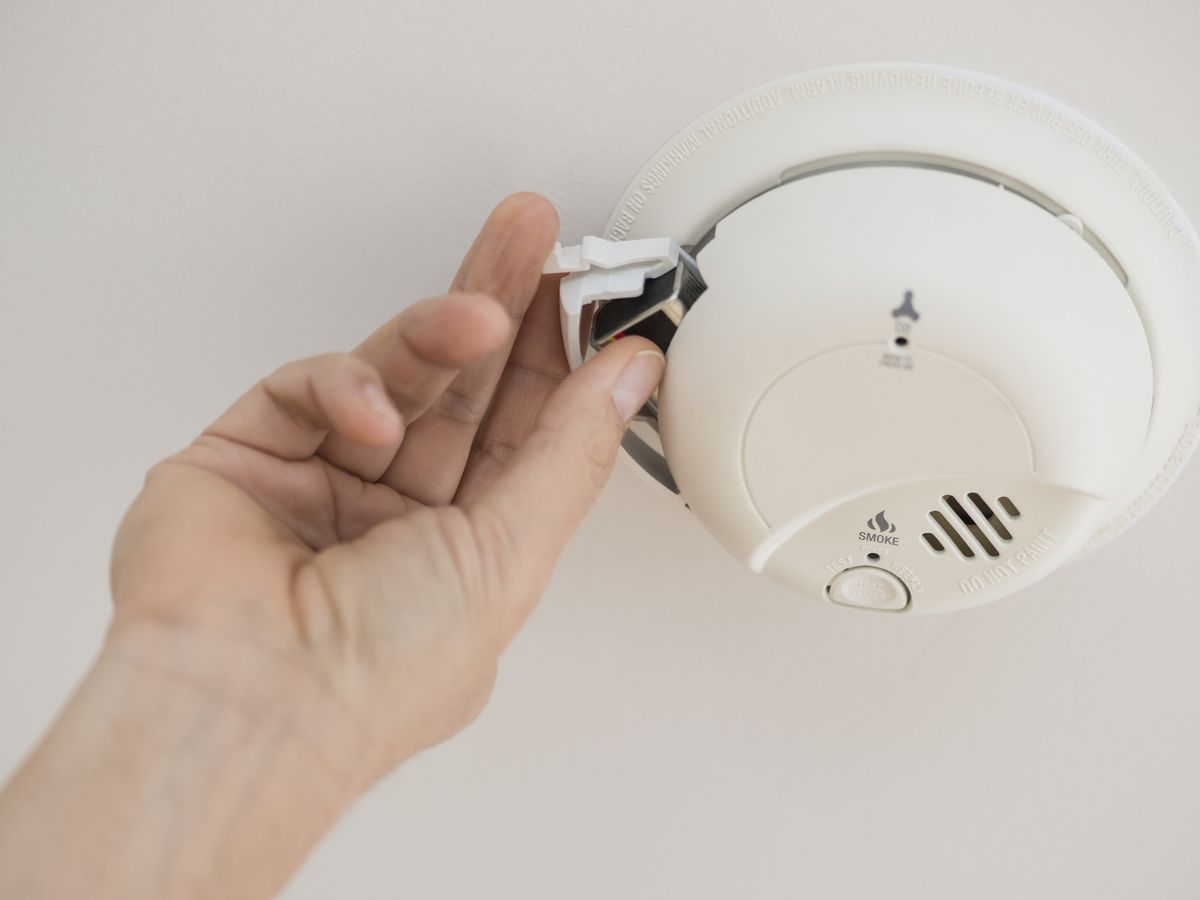
Step 5: Detach the Smoke Detector from the Ceiling
Now that the mounting bracket is removed, you can proceed with detaching the smoke detector from the ceiling. This step will require careful handling to avoid any damage to the smoke detector or the surrounding area.
Start by gently twisting or rotating the smoke detector counterclockwise to release it from the mounting bracket. Most smoke detectors are designed to lock into place on the bracket, so you may need to apply a slight amount of pressure while twisting.
As you rotate the smoke detector, be mindful of any wires that may still be connected. If you encounter resistance while twisting, double-check that all wires are fully disconnected and tucked away from the smoke detector.
Once the smoke detector is loosened from the mounting bracket, you should be able to carefully lower it down from the ceiling. Pay attention to any remaining wires or cables to ensure they do not get caught or tangled during the process.
Place the smoke detector on a safe and stable surface, such as a table or countertop, to prevent any accidental damage. Take this opportunity to inspect the smoke detector for any signs of damage, corrosion, or wear and tear.
If you are planning to reinstall the same smoke detector or if it is a hardwired unit, you may need to keep the wires connected and feed them through the mounting bracket for reinstallation later. However, if you are replacing the smoke detector, you can fully detach and remove the wires from the device.
Now that you have successfully detached the smoke detector from the ceiling, you can proceed to the next step: inspecting the wiring and connections.
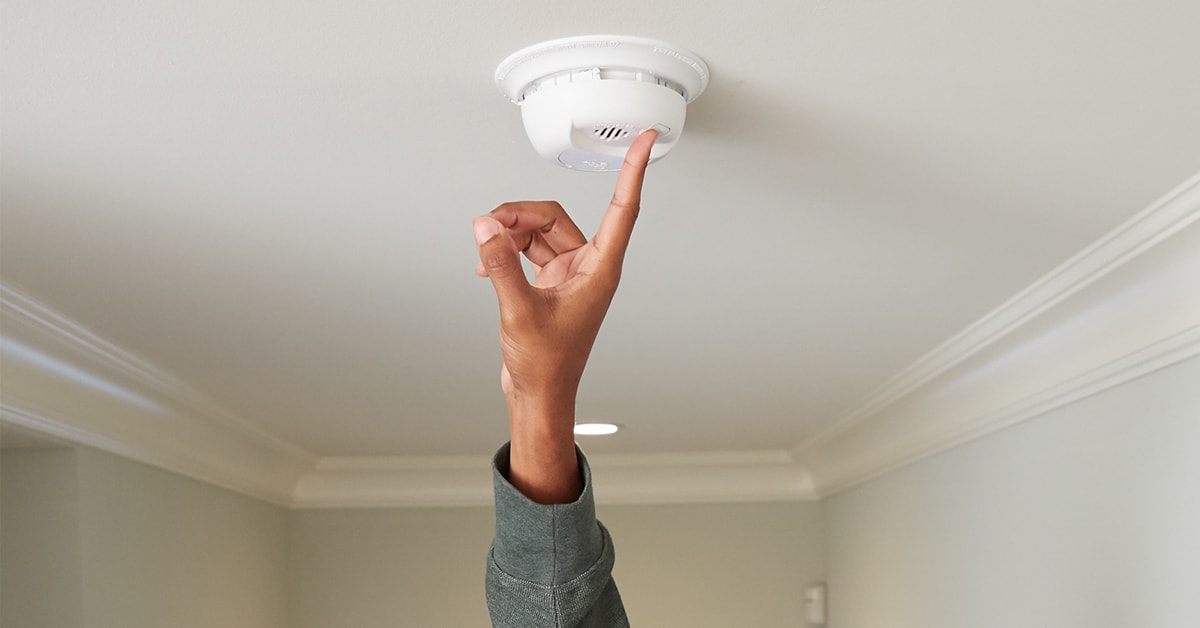
Before removing a smoke detector from the ceiling, make sure to turn off the power to the unit at the circuit breaker. Then, twist the detector counterclockwise to release it from the mounting bracket and disconnect the wires.
Step 6: Inspect the Wiring and Connections
After detaching the smoke detector from the ceiling, it’s important to take the time to inspect the wiring and connections. This step allows you to ensure that everything is in good condition and properly connected before proceeding with any further steps.
Begin by examining the wires that were connected to the smoke detector. Check for any signs of fraying, damage, or loose connections. If you notice any issues, it’s essential to address them before installing a new smoke detector or reconnecting the existing one.
If there are any loose wire connectors or caps, use wire cutters or strippers to trim away any damaged portions and re-make the connections. Make sure that each wire is securely attached and properly insulated.
Inspect the wire ends for any signs of corrosion or oxidation. It’s a good idea to clean the wire ends if necessary, using a wire brush or fine-grit sandpaper. This will help ensure a good electrical connection when the wires are reconnected to the new smoke detector or the existing one.
Additionally, check the mounting bracket where the smoke detector was attached. Look for any signs of damage or wear that may affect the stability and secure installation of the new smoke detector. If needed, clean or replace the mounting bracket to ensure a proper fit.
Take this opportunity to examine the smoke detector itself. Look for any visible issues, such as cracked or broken components, discolored housing, or excessive dust accumulation. If you notice any significant problems, it is recommended to replace the smoke detector with a new one.
By thoroughly inspecting the wiring, connections, and the smoke detector, you can ensure that your smoke detection system is in good working condition. This step is crucial in maintaining the safety of your home and ensuring that the smoke detector operates effectively.
Once you have inspected the wiring and connections, you can move on to the next step: installing a new smoke detector or replacing the battery.
Step 7: Install a New Smoke Detector or Replace the Battery
After inspecting the wiring and connections, it’s time to move on to the next step: installing a new smoke detector or replacing the battery.
If you are replacing an old smoke detector with a new one, carefully follow the manufacturer’s instructions for installation. Different models may have specific requirements, so it’s important to familiarize yourself with the guidelines provided.
Start by aligning the new smoke detector with the mounting bracket or installation plate on the ceiling. Ensure that it is oriented correctly, typically with the text or labels facing down and the sensor chamber facing outwards.
Gently twist or rotate the smoke detector clockwise to lock it into place on the mounting bracket. Apply slight pressure as needed to ensure a secure fit.
If your smoke detector is battery-operated and only requires a battery replacement, locate the battery compartment on the smoke detector. Open the compartment as per the manufacturer’s instructions and remove the old battery.
Insert a fresh battery into the compartment, ensuring that it is properly aligned with the positive (+) and negative (-) terminals. Close the battery compartment securely.
For hardwired smoke detectors, you will need to reconnect the wires to the appropriate terminals. Follow the manufacturer’s instructions carefully to ensure the correct wire placement.
After installing a new smoke detector or replacing the battery, test the unit to ensure it is functioning correctly. Press the test button on the smoke detector, and you should hear a loud alarm or a series of beeps, indicating that the smoke detector is operational.
It’s important to note that smoke detectors should be tested regularly, even after installation or battery replacement, to ensure they are functioning properly.
With a new smoke detector installed or a fresh battery in place, you can proceed to the next step: reattaching the smoke detector to the ceiling.
Step 8: Reattach the Smoke Detector to the Ceiling
Now that you have installed a new smoke detector or replaced the battery, it’s time to reattach the smoke detector to the ceiling. This step ensures that the smoke detector is securely mounted, allowing it to function properly in detecting smoke or fire.
Start by carefully aligning the smoke detector with the mounting bracket or installation plate on the ceiling. Ensure that the screw holes or tabs on the smoke detector line up with the corresponding features on the bracket.
Gently rotate or twist the smoke detector clockwise to lock it back into place on the mounting bracket. Apply slight pressure as needed to ensure a secure fit. You should feel the smoke detector click or lock into position.
Once the smoke detector is securely attached, give it a slight tug to ensure that it is properly mounted and won’t come loose easily.
If your smoke detector has a snap-on cover, it’s time to reattach the cover as well. Align the tabs or latches on the cover with the corresponding slots on the smoke detector and gently press or snap it back into place.
If your smoke detector has a screw-on cover, retrieve the screws that were removed earlier and use a screwdriver to secure the cover back onto the smoke detector. Tighten the screws securely, but be careful not to overtighten and risk damaging the cover or the smoke detector housing.
Once the smoke detector is reattached and the cover is in place, give it another gentle tug to ensure that everything is secure.
With the smoke detector properly reattached to the ceiling, you are ready for the final step: restoring the power.
Before turning the power back on, double-check that all wires are tucked away properly and there are no signs of exposed wires or loose connections.
Once you are confident that everything is in order, you can proceed to the next step: restoring the power to the smoke detector.
Step 9: Restore the Power
After successfully reattaching the smoke detector to the ceiling, the final step is to restore the power to the smoke detector. This allows it to receive electrical power or activate the backup battery if needed.
Before proceeding, take a moment to ensure that all connections are secure, the cover is properly attached, and there are no signs of damage or loose components.
Once you are confident that everything is in order, proceed to the circuit breaker panel where you turned off the power earlier.
Locate the circuit breaker switch corresponding to the area where the smoke detector is installed. Flip the switch or push the breaker back to the “On” position to restore power to the smoke detector.
Now that the power is restored, you can perform a final test to ensure that the smoke detector is functioning correctly. Press the test button on the smoke detector, and you should hear the alarm sound or a series of beeps to indicate that it is working properly.
If the smoke detector does not emit any sound or does not respond to the test button, double-check the power connection and the battery (if applicable). If the issue persists, consult the manufacturer’s troubleshooting guide or consider contacting a professional for assistance.
With the power restored and the smoke detector tested, you have successfully completed the process of removing, inspecting, and reattaching a smoke detector to the ceiling.
Remember that smoke detectors play a crucial role in alerting you to potential fires, so it’s important to regularly test and maintain them. Follow the manufacturer’s recommendations for testing frequency and battery replacement to ensure that your smoke detectors are always in optimal working condition.
By following these steps and taking the necessary precautions, you can ensure the safety of your home and loved ones by maintaining a properly functioning smoke detection system.
Thank you for following this comprehensive guide on how to remove a smoke detector from the ceiling. Stay safe!
Conclusion
In conclusion, removing a smoke detector from the ceiling may seem like a daunting task, but with the right knowledge and precautions, it can be done safely and efficiently. Throughout this comprehensive guide, we have walked you through the step-by-step process of removing a smoke detector, from turning off the power to reattaching it securely.
We started by emphasizing the importance of safety and ensuring the power is turned off before beginning the removal process. We then proceeded to remove the cover, disconnect the wiring, unscrew the mounting bracket, detach the smoke detector from the ceiling, inspect the wiring and connections, install a new smoke detector or replace the battery, reattach the smoke detector to the ceiling, and finally, restore the power.
By following these steps and taking the necessary precautions, you can successfully remove a smoke detector from the ceiling without causing any damage or compromising safety. However, it’s important to note that proper maintenance and testing of smoke detectors are essential for the ongoing safety of your home.
Remember to test your smoke detectors regularly, replace batteries as needed, and follow the manufacturer’s guidelines for maintenance and replacement. Smoke detectors are a vital part of your home’s safety system, providing early warning in the event of a fire and helping save lives.
If you are unsure about any aspect of removing a smoke detector from the ceiling or if you have any concerns about your home’s smoke detection system, it’s always best to consult a qualified professional or electrician for assistance. They can provide guidance and ensure the safe removal and installation of smoke detectors.
Thank you for reading this guide, and we hope it has provided you with the knowledge and confidence to remove and maintain smoke detectors in your home. Stay safe and be proactive in protecting your loved ones and property from the risks of fire.
Frequently Asked Questions about How To Remove Smoke Detector From The Ceiling
Was this page helpful?
At Storables.com, we guarantee accurate and reliable information. Our content, validated by Expert Board Contributors, is crafted following stringent Editorial Policies. We're committed to providing you with well-researched, expert-backed insights for all your informational needs.


0 thoughts on “How To Remove Smoke Detector From The Ceiling”