Articles
How To Fix Ceiling Nail Pops
Modified: August 16, 2024
Learn how to fix ceiling nail pops with our informative articles. These step-by-step guides will help you tackle the problem and restore your ceilings to their original condition.
(Many of the links in this article redirect to a specific reviewed product. Your purchase of these products through affiliate links helps to generate commission for Storables.com, at no extra cost. Learn more)
Introduction
Nail pops on ceilings can be a frustrating problem for homeowners. These unsightly bumps occur when the nails that secure the drywall to the ceiling joists start to push out, creating a pop or bulge in the surface. Not only are nail pops an eyesore, but they can also indicate underlying issues with the structure of your ceiling.
In this article, we will explore the causes of ceiling nail pops and provide you with a step-by-step guide on how to fix them. We will also discuss the tools and materials you will need for the job, as well as some tips and precautions to ensure a successful repair.
Ceiling nail pops can occur in both new and older homes. In new construction, nail pops may develop as the house settles and the wood framing contracts and expands with changes in humidity and temperature. In older homes, nail pops can be a result of age, poor construction techniques, or even the natural settling of the house over time.
While nail pops may seem like a minor issue, it is important to address them promptly. If left untreated, they can worsen over time, causing the drywall to crack or even separate from the ceiling joists. Additionally, nail pops can indicate excessive movement in the ceiling, which may require further investigation and repairs to prevent more serious damage.
Fixing ceiling nail pops involves a few simple steps, but it does require some time and effort. You will need basic hand tools, such as a hammer, screwdriver, and putty knife, as well as some additional materials like drywall compound, sandpaper, and ceiling texture. With the right tools and a little bit of patience, you can restore your ceiling to its original smooth and seamless appearance.
In the following sections, we will walk you through the process of fixing ceiling nail pops in detail. We will cover everything from assessing the damage to patching the holes, sanding and preparing the surface, applying the texture or finish, and finally painting the ceiling.
Before we begin, it is important to note that if you feel uncomfortable or unsure about any step of the process, it is recommended to consult a professional contractor or handyman to ensure the job is done safely and correctly. Now, let’s get started on fixing those pesky ceiling nail pops!
Key Takeaways:
- Addressing ceiling nail pops promptly is crucial to prevent further damage, and understanding the causes and following a step-by-step repair process can help restore the stability and aesthetics of your ceiling.
- Prioritize safety, take your time, and ensure proper preparation and application techniques when fixing ceiling nail pops to achieve a professional-looking repair and maintain the structural integrity of your ceiling.
Read more: How To Fix Bathroom Ceiling
What are ceiling nail pops?
Ceiling nail pops are a common issue that many homeowners encounter. They refer to the visible protrusion or bulge in the ceiling surface caused by the nails that secure the drywall popping out. Instead of remaining flush with the surface, the nails push through the drywall, creating a noticeable bump or crack. Not only are nail pops unsightly, but they can also be a sign of structural problems in the ceiling.
Nail pops can occur in both new and older homes. In new construction, nail pops may develop as the house settles and the wood framing contracts and expands with changes in humidity and temperature. This movement can cause the nails to loosen and push out of the drywall. In older homes, nail pops can be attributed to a variety of factors, including age, poor construction techniques, or the natural settling of the house over time.
One of the main reasons for ceiling nail pops is the improper installation of drywall. When drywall sheets are being installed, nails or screws are used to secure the panels to the ceiling joists. If the nails are not properly driven into the joists and instead hit an empty space or go too far into the drywall, they lose their holding power. Over time, the pressure from gravity and fluctuations in temperature and humidity can cause the nails to slowly back out of the drywall, resulting in nail pops.
Another factor contributing to nail pops is the use of low-quality construction materials. Cheap or inferior nails may not have the necessary strength to hold the drywall securely in place. Additionally, if the drywall was not installed with enough screws or nails to adequately support its weight, it can increase the likelihood of nail pops occurring.
Nail pops can also be caused by excessive movement in the ceiling. This movement can be due to a variety of factors, such as settling of the house, structural issues, or even vibrations from nearby construction or heavy machinery. When the ceiling moves, the nails lose their grip on the drywall, leading to nail pops.
It is important to address ceiling nail pops as soon as they become apparent. Not only can they be visually unappealing, but they can also lead to further damage if left untreated. Nail pops can cause cracks in the drywall, which can weaken the overall structure of the ceiling and potentially lead to more significant issues down the line. By fixing nail pops promptly, you can restore the stability and aesthetics of your ceiling and prevent any further damage from occurring.
In the next section, we will discuss how to assess the extent of the damage caused by nail pops and gather the necessary tools and materials for the repair process.
Why do ceiling nail pops occur?
Ceiling nail pops are a common occurrence in many homes, but have you ever wondered why they happen? Understanding the reasons behind these pesky nail pops can help you prevent them in the future and address them effectively when they do occur.
1. Structural movement: One of the main reasons for ceiling nail pops is the natural movement of your home’s structure. Over time, houses settle and shift due to changes in temperature, humidity, and even the weight distribution of the building. This movement can put stress on the nails holding the drywall in place, causing them to loosen and eventually pop out.
2. Improper installation: In some cases, nail pops can be traced back to poor installation techniques. If the initial installation of drywall was not done properly, it can lead to nail pops down the line. This can include using inadequate or low-quality nails, improper spacing between nails, or failing to drive the nails securely into the joists.
3. Moisture and humidity: Moisture is another common contributor to nail pops. Excess moisture can weaken the drywall, causing it to expand and contract, which puts additional stress on the nails. Areas with high levels of humidity, such as bathrooms or kitchens, are particularly susceptible to nail pops.
4. Settling of the house: As mentioned earlier, houses naturally settle over time. This settling process can cause the walls and ceiling to shift slightly, leading to movement in the drywall. The shifting can cause the nails to come loose and pop out from the surface.
5. Vibrations and impact: Vibrations from nearby construction, heavy machinery, or even just everyday activities in the house can contribute to nail pops. The constant vibrations can cause the nails to gradually loosen and eventually pop out.
To prevent or minimize the occurrence of nail pops, there are a few steps you can take:
– Use high-quality materials: Invest in good quality nails or screws that are designed for use with drywall. These will have better holding power and are less likely to pop out over time.
– Proper installation: Ensure that the drywall is installed correctly by using the right techniques and spacing the nails or screws properly. This will help to distribute the weight evenly and reduce the likelihood of nail pops.
– Allow for proper ventilation: Proper ventilation in areas prone to moisture, such as bathrooms and kitchens, can help reduce the moisture levels and minimize the chance of nail pops.
– Regular inspections: Regularly inspect your ceilings for any signs of nail pops or other issues. Catching them early can prevent them from escalating into more serious problems.
By understanding the causes of nail pops and taking proactive measures, you can effectively address and prevent them, keeping your ceilings looking smooth and flawless for years to come.
Assessing the damage
Before you begin the process of fixing ceiling nail pops, it is important to assess the extent of the damage. This will help you determine the appropriate approach for repairs and ensure a successful outcome.
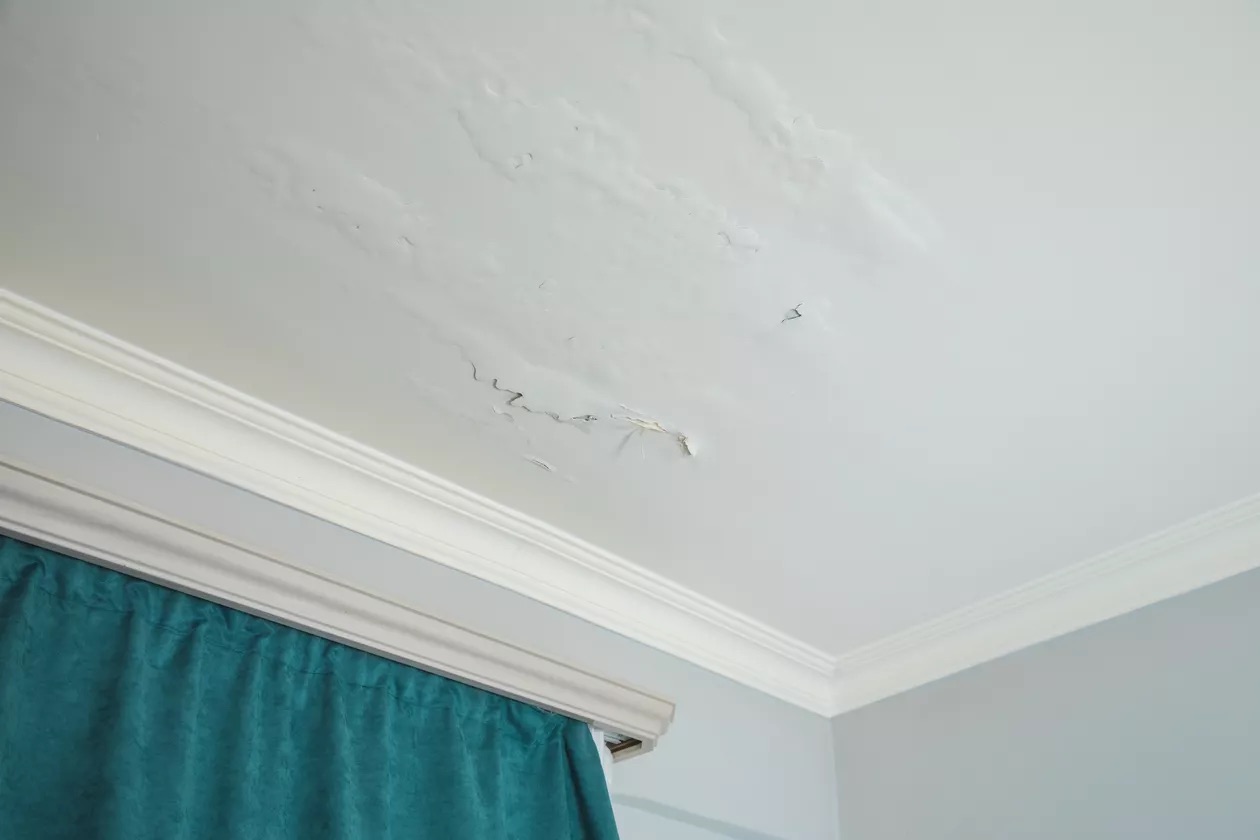
1. Visual inspection: Start by closely examining the affected area of the ceiling. Look for visible signs of nail pops, such as raised bumps or cracks in the drywall. Some nail pops may be more obvious, while others may be smaller and require a closer look. Take note of the number of nail pops and their distribution across the ceiling.
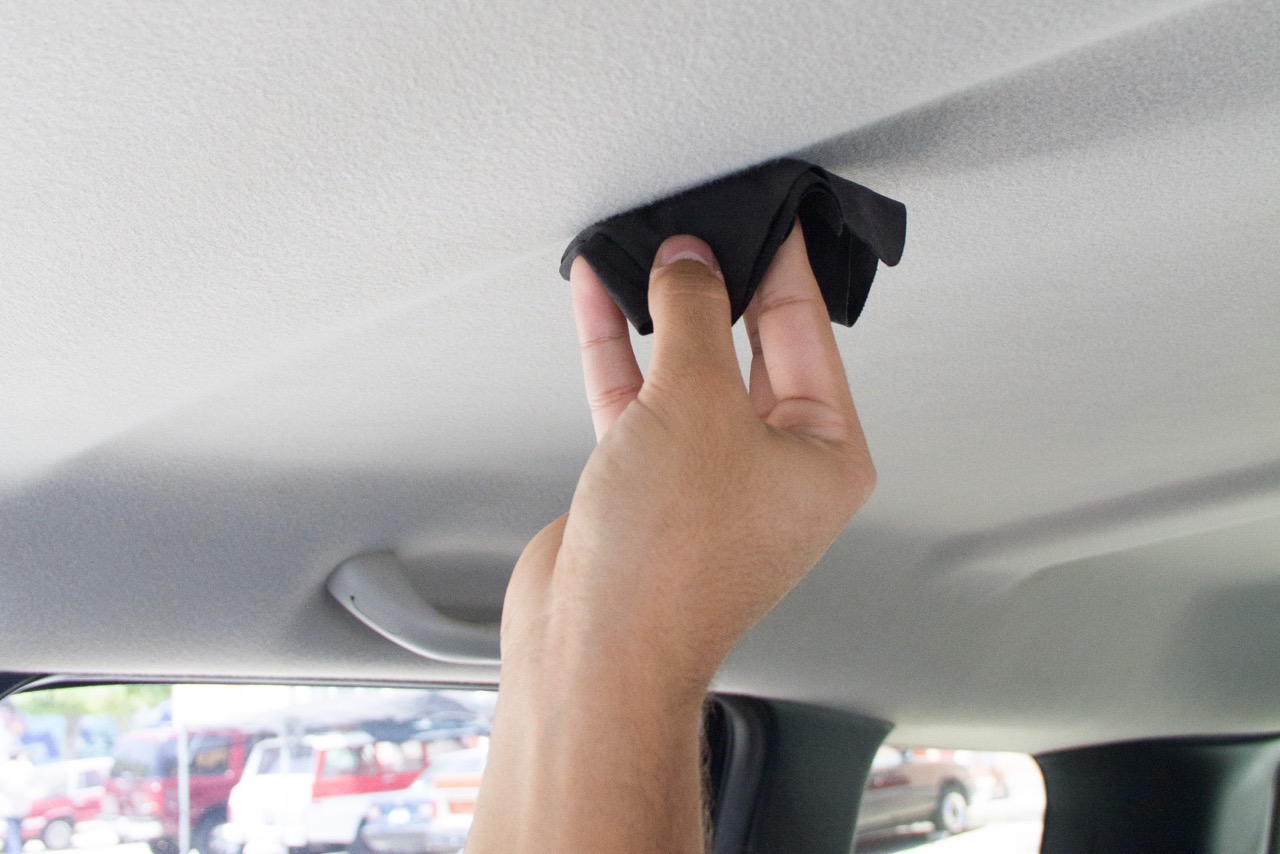
2. Pressure test: To check for loose nails that have yet to pop through the surface, run your hand or a gentle amount of pressure across the ceiling. If you feel any areas that are slightly more flexible or give in, it may indicate that there are loose nails beneath the surface.
3. Tap test: Lightly tap the surface of the ceiling around the areas where you suspect nail pops. Listen for any hollow or different sounds, as this could indicate that the drywall is loose or damaged in those areas.
4. Check for cracks: Nail pops can often lead to cracks in the drywall. Examine the surrounding area of the nail pops for any visible cracks or damage. Cracks may be small and hairline, or they may be more pronounced, depending on the severity of the issue.
5. Structural assessment: Take a broader look at the overall condition of the ceiling. If you notice significant sagging, uneven surfaces, or other signs of more severe structural issues, it may be necessary to consult a professional contractor or engineer for further evaluation.
By thoroughly assessing the damage, you can determine the best course of action for repairing the nail pops. In some cases, simple cosmetic fixes may be sufficient, while in other instances, additional measures may need to be taken to address underlying structural issues.
It is important to note that if you are unsure about any aspect of the assessment or if you notice extensive damage, it is recommended to consult a professional contractor or handyman. They will have the expertise to evaluate the situation accurately and provide appropriate guidance for repairs.
Once you have assessed the damage and are ready to proceed, the next step is to gather the necessary tools and materials for the repair process. Proper preparation will ensure a smoother and more efficient repair job.
Tools and materials needed
Before you start fixing ceiling nail pops, it’s important to gather the necessary tools and materials. Having everything prepared beforehand will help streamline the process and ensure you have what you need to complete the repair effectively. Here is a list of the tools and materials you will need:
Tools:
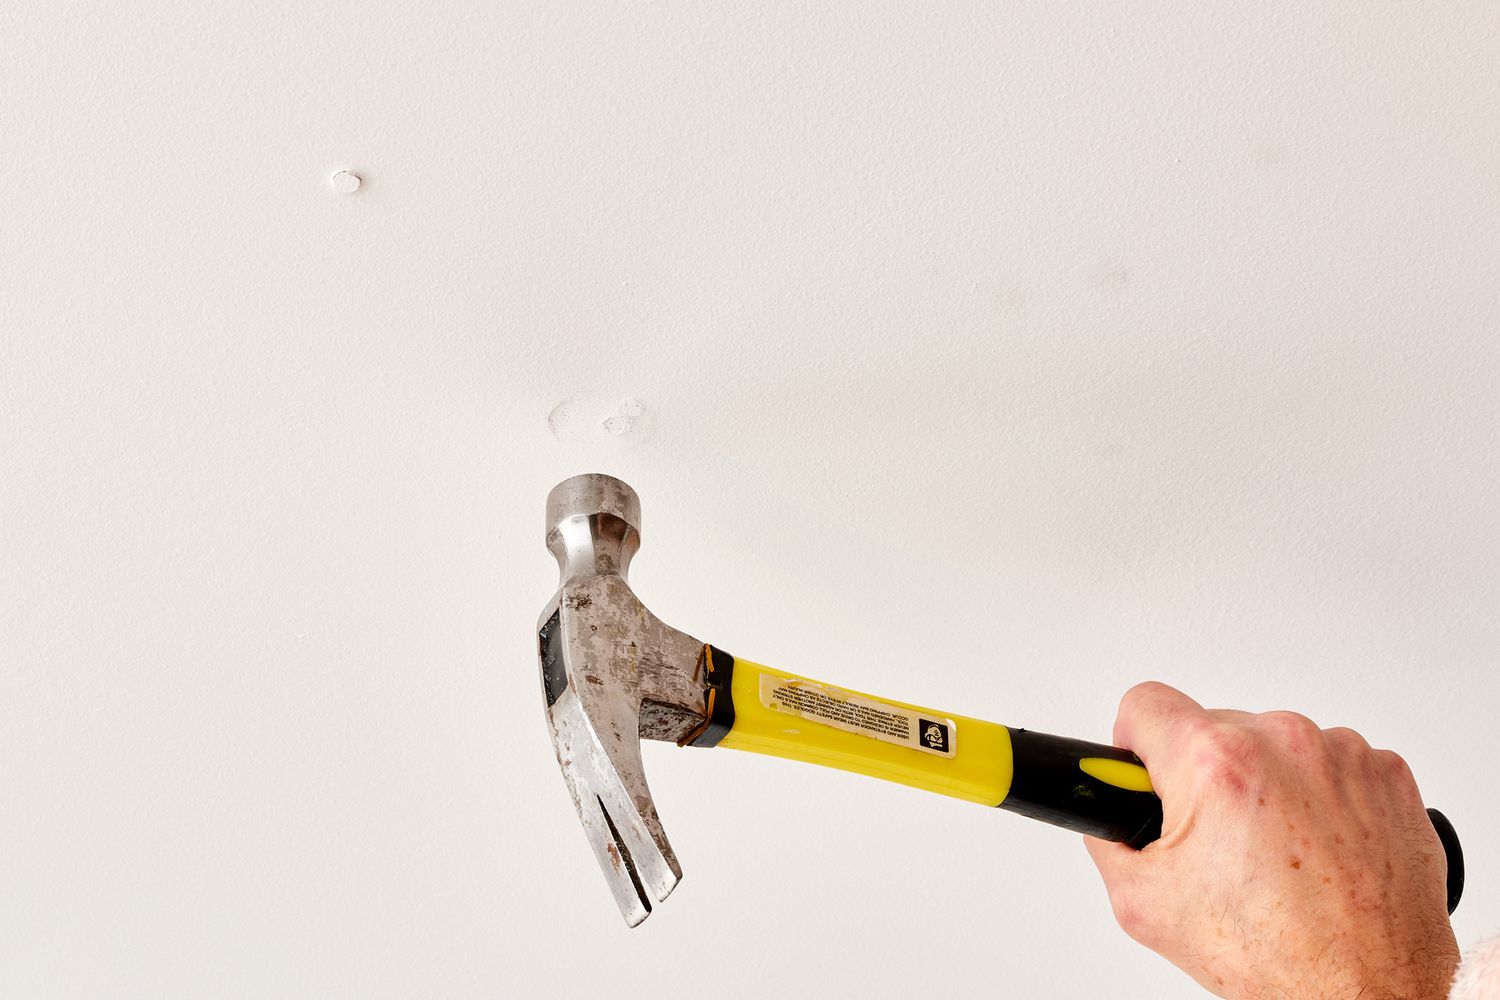
1. Hammer: A standard hammer will be used to drive the popped nails back into the ceiling joists.
2. Screwdriver or power drill: A screwdriver or power drill with a screwdriver bit can be used as an alternative to a hammer, especially if the nails were originally installed with screws. This will allow you to securely fasten the screws into the joists.
3. Putty knife: A putty knife is essential for scraping off any loose or excess drywall compound during the repair process. It can also be used for applying the compound later on.
4. Drywall saw or utility knife: A drywall saw or utility knife will be necessary for cutting out any damaged or cracked sections of the drywall. This will ensure a clean and precise repair.
5. Taping knife: A taping knife is used to apply and smooth out the drywall compound during the patching process. It helps create a seamless transition between the repaired area and the existing ceiling.
6. Sandpaper or sanding block: Sandpaper or a sanding block will be needed to smooth the patched areas and prepare the surface for painting. Use a fine-grit sandpaper for best results.
Materials:
1. Drywall compound: Also known as joint compound or “mud,” drywall compound is used to fill in the nail holes and create a smooth surface. Make sure to select a lightweight or all-purpose compound for ease of application.
2. Drywall tape: Drywall tape helps reinforce the repair and prevent cracks from reappearing. It is applied over the filled nail holes and helps create a stronger bond.
3. Sanding sponge or sanding block: A sanding sponge or sanding block can be used to smooth the patched areas and ensure a seamless finish.
4. Ceiling texture: If your ceiling has a textured finish, you will need to match the existing texture when making repairs. You can purchase pre-mixed ceiling texture or use a texture spray can for smaller repairs.
5. Paint and primer: Once the repairs are complete and the surface is smooth, you will need paint and primer to finish the job. Choose the desired paint color and a primer suitable for ceilings.
6. Drop cloth or plastic sheeting: To protect your floors and furniture, lay down a drop cloth or plastic sheeting in the work area to catch any debris or spills.
By having all the necessary tools and materials at hand, you can ensure a smoother and more efficient repair process. Now that you’re ready, let’s move on to the step-by-step guide for fixing ceiling nail pops.
Read more: How To Fix Bubble In Ceiling
Step-by-step guide to fixing ceiling nail pops
Fixing ceiling nail pops may seem like a daunting task, but with the right approach and attention to detail, you can successfully repair them. Follow this step-by-step guide to tackle the job effectively:
1. Gather your tools and materials: Before you begin, make sure you have all the necessary tools and materials mentioned in the previous section. Having everything prepared will save you time and make the process smoother.
2. Protect the area: Lay down a drop cloth or plastic sheeting to protect your floors and furniture from any debris or spills during the repair process.
3. Locate the popped nails: Carefully inspect the affected area of the ceiling and identify the popped nails. Use a marker or pencil to mark their locations.
4. Secure the nails: Using a hammer or screwdriver, gently tap the popped nails back into place. If the nails are loose and won’t hold securely, remove them and replace them with new nails or screws driven into the ceiling joists.
5. Patch the nail holes: Apply a thin layer of drywall compound or joint compound over each fixed nail hole, covering it completely. Use a putty knife to feather the edges of the compound for a smooth blend with the surrounding surface.
6. Apply drywall tape: While the compound is still wet, press a strip of drywall tape over the filled nail holes. Smooth it out to remove any air bubbles or wrinkles. This will help reinforce the repair and prevent future cracks from forming.
7. Apply additional coats of compound: After the initial coat has dried, apply one or two more thin layers of compound over the tape and nail holes, feathering the edges with the putty knife. Allow each coat to dry completely before proceeding.
8. Sand and smooth: Use fine-grit sandpaper or a sanding block to smooth the patched areas. Take care to blend the edges with the surrounding ceiling for a seamless finish. Wipe away any dust with a clean cloth.
9. Apply texture (if necessary): If your ceiling has a textured finish, match the existing texture by applying ceiling texture with a sprayer or texture brush. Follow the manufacturer’s instructions and allow the texture to dry completely.
10. Prime and paint: Apply a coat of primer to the patched area and the surrounding ceiling, allowing it to dry according to the manufacturer’s instructions. Once the primer has dried, apply the desired paint color to the repaired area, feathering the edges for a seamless blend.
11. Final inspection: Once the paint has dried, inspect the repaired area for any imperfections. Touch up as necessary to ensure a flawless finish.
By following these steps, you can effectively fix ceiling nail pops and restore the smooth and seamless appearance of your ceiling. Remember to take your time, work patiently, and pay attention to detail for the best results. In the next sections, we will discuss patching the holes, sanding and preparing the surface, applying the texture or finish, and finally painting the ceiling.
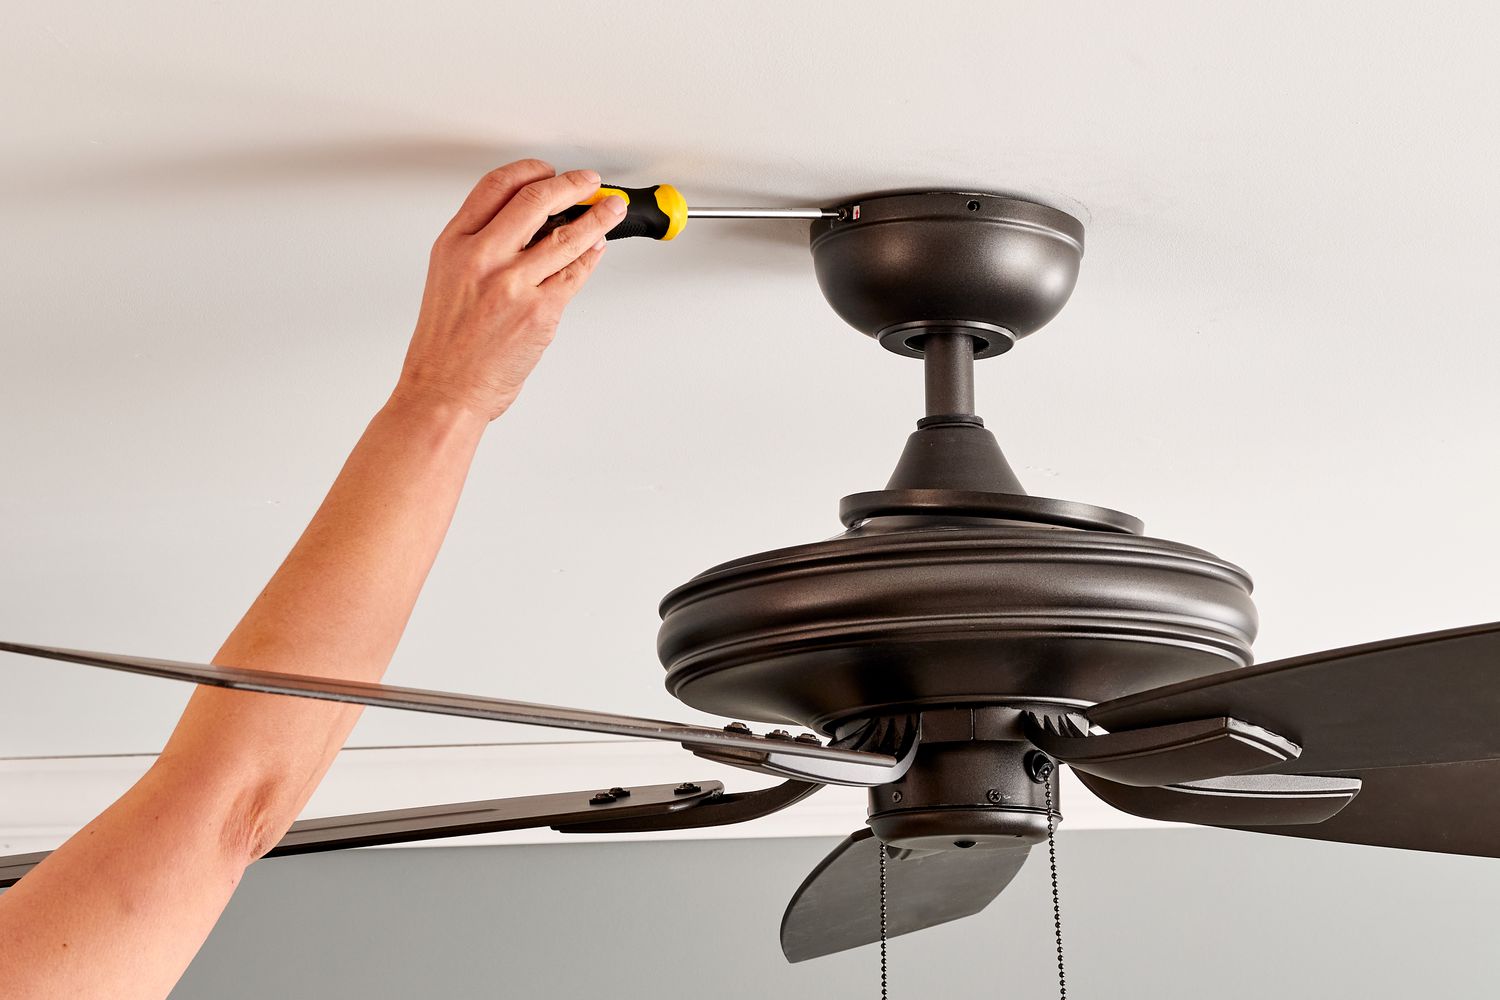
Use a screwdriver to gently tap the popped nail back into place. Then, drive a new screw next to the nail to secure the drywall and prevent future pops.
Patching the holes
After securing the popped nails and assessing the damage, the next step in fixing ceiling nail pops is to patch the holes left behind. Patching the holes will create a smooth surface and ensure a strong foundation for the repairs. Follow these steps to effectively patch the nail holes:
1. Clean the area: Before beginning the patching process, clean the area around the popped nail holes. Remove any loose debris, dust, or flaking drywall compound. You can use a brush or a vacuum cleaner with a brush attachment to gently clean the surface.
2. Fill the nail holes: Using a putty knife, apply a small amount of drywall compound or joint compound to fill each nail hole. Press the compound firmly into the hole to ensure it completely fills the space. Overfill the holes slightly to account for shrinkage during drying.
3. Smooth and blend: With the putty knife, smooth out each filled nail hole, ensuring the compound is level with the surrounding ceiling. Feather the edges of the compound to blend it seamlessly into the surface. Take care not to apply too much pressure, as this can cause the compound to sink or become uneven.
4. Remove excess compound: Once the holes are filled and smoothed, use the putty knife to scrape off any excess compound from the surrounding area. The goal is to create a flush and smooth surface.
5. Allow the compound to dry: Follow the manufacturer’s instructions on the drying time for the compound. Typically, it will take a few hours for the compound to dry completely. Make sure to give it ample time to dry before moving on to the next steps.
6. Inspect the patches: Once the compound is dry, inspect the patched nail holes for any imperfections. If there are any uneven spots or areas that require further filling, apply an additional layer of compound and repeat the smoothing process. Allow it to dry completely before proceeding.
By following these steps, you can effectively patch the nail holes and create a strong and smooth surface for the next stages of the repair process. Once the patches are dry and you’re satisfied with the results, it’s time to move on to sanding and preparing the surface for painting.
Sanding and preparing the surface
After patching the nail holes, the next step in fixing ceiling nail pops is to sand and prepare the surface. Sanding will help smooth out any unevenness and create a seamless transition between the repaired areas and the rest of the ceiling. Follow these steps to effectively sand and prepare the surface:
1. Gather your materials: Before you begin, make sure you have sandpaper or a sanding block with a fine-grit (around 120-220 grit) for best results. You will also need a clean cloth to wipe away dust.
2. Start sanding: Begin sanding the patched areas using light pressure. Use a circular or back-and-forth motion to smooth out the surface. Be careful not to oversand, as this may create new indentations or unevenness.
3. Blend the edges: Pay special attention to blending the edges of the patched areas with the surrounding ceiling. This will create a seamless transition and help disguise the repair. Gradually feather out the sanding towards the surrounding undamaged area for a consistent finish.
4. Check the smoothness: Periodically stop sanding to check the smoothness of the patched areas. Run your hand over the surface to see if it feels even and smooth. If there are any rough spots or unevenness, continue sanding until the desired texture is achieved.
5. Clean up the dust: Once you are satisfied with the smoothness of the surface, use a clean cloth to wipe away any dust or particles created from sanding. It’s important to remove all debris before moving on to the next steps to ensure a clean surface for painting.
6. Inspect the surface: Take a step back and inspect the entire ceiling surface, focusing on the repaired areas. Check for any remaining imperfections or unevenness. If necessary, lightly sand those areas again to achieve the desired smoothness.
By following these steps, you can effectively sand and prepare the surface for painting. It’s important to take your time during this process to ensure that the repaired areas seamlessly blend with the rest of the ceiling. Once the surface is smooth and free of dust, it’s time to move on to applying the texture or finish.
Applying the texture or finish
Applying the texture or finish to your ceiling is an important step in fixing nail pops as it helps blend the repaired areas with the rest of the ceiling. The texture creates a cohesive look and disguises any imperfections. Follow these steps to effectively apply the texture or finish:
1. Determine the existing texture: Before applying the new texture, take a close look at your ceiling to determine the type of texture that is already present. Common ceiling textures include popcorn, knockdown, swirl, or smooth.
2. Choose the appropriate texture: Once you know the existing texture, choose the appropriate texture product to match it. You can find pre-mixed texture compounds or opt for a texture spray can for smaller repairs.
3. Practice on a test surface: If you are new to applying texture, it’s a good idea to practice on a small, inconspicuous test surface before applying it to the repaired areas. This will help you get a feel for the application process and ensure that you achieve the desired result.
4. Protect the surrounding areas: Before applying the texture, use painter’s tape or plastic sheeting to cover any areas that you want to keep clean and free of texture. This will help prevent overspray and make clean-up easier.
5. Apply the texture: Follow the instructions provided on the texture product for the best application technique. Generally, you will hold the texture can or use a texture sprayer at a consistent distance from the ceiling and create a pattern by moving your hand in a controlled manner. If using a pre-mixed compound, apply it with a texture brush or trowel according to the desired texture pattern.
6. Blend with the existing texture: To ensure a seamless blend, try to match the application pattern and thickness of the existing ceiling texture. This will help the repaired areas blend in with the rest of the ceiling.
7. Allow the texture to dry: Follow the manufacturer’s instructions for the drying time of the texture product. It typically takes a couple of hours or more for the texture to dry completely. Make sure to allow ample drying time before proceeding to the next step.
By following these steps, you can effectively apply the texture or finish to your ceiling, ensuring that the repaired areas blend in with the rest of the surface. Once the texture is dry, it’s time to move on to the final step: painting the ceiling.
Read more: How To Store Popped Popcorn
Painting the ceiling
After fixing the nail pops, patching the holes, sanding, and applying the texture, the final step in the repair process is painting the ceiling. Painting not only enhances the appearance of your ceiling but also provides a protective finish. Follow these steps to effectively paint your ceiling:
1. Choose the paint color: Select a paint color that complements your room’s decor and personal preferences. Consider factors such as lighting, room size, and desired ambiance when choosing the paint color.
2. Prepare the room: Before painting, clear the room of furniture or cover it with drop cloths to protect it from paint drips or splatters. Remove any light fixtures, ceiling fans, or other objects that could get in the way or hinder the painting process.
3. Prepare the surface: Ensure that the repaired areas are clean and free of any dust or debris. Using a damp cloth or sponge, gently wipe the ceiling surface to remove any remaining dust from sanding.
4. Prime the ceiling: Applying a primer to the ceiling is recommended, especially if you have repaired significant areas or if there are stains or discoloration present. Priming helps create an even surface and enhances the adherence of the paint. Follow the manufacturer’s instructions for the drying time of the primer.
5. Start painting: Begin painting by cutting in around the edges of the ceiling using a brush. This involves painting along the corners and edges where the ceiling meets the walls. Use a brush with a comfortable grip and edges that will allow you to get into tight spaces.
6. Roll the ceiling: Once the edges are painted, use a roller with a long extension pole to paint the rest of the ceiling. Start from one corner and work your way across the surface in small sections. Apply the paint in smooth, overlapping strokes, using a consistent amount of pressure and speed.
7. Apply multiple coats: Depending on the desired coverage and the type of paint you are using, you may need to apply multiple coats. Allow each coat to dry completely before applying the next. Follow the manufacturer’s instructions for the drying time between coats.
8. Inspect the finished result: Once the paint has dried, inspect the entire ceiling surface for any imperfections, such as streaks, missed spots, or uneven coverage. Touch up as necessary to ensure a uniform and smooth finish.
9. Clean up: Clean your brushes, rollers, and any other painting tools using warm soapy water or the appropriate cleaning solution. Properly dispose of any used paint cans or materials according to local regulations.
By following these steps, you can effectively paint your ceiling, completing the repair process and giving your room a fresh and polished look. Painting the ceiling after fixing the nail pops not only brings everything together but also helps protect the surface for years to come. Now sit back, relax, and enjoy the transformed space!
Tips and precautions
While fixing ceiling nail pops can be a relatively straightforward process, there are some tips and precautions to keep in mind to ensure a successful repair and maintain safety. Consider the following tips and precautions:
1. Safety first: Before starting any repair work, make sure to wear appropriate safety gear, such as safety goggles to protect your eyes from debris, a dust mask to prevent inhalation of dust particles, and gloves to protect your hands.
2. Take your time: Patience is key when fixing nail pops. Rushing the process can lead to uneven repairs or other mistakes. Take your time to properly secure the nails, patch the holes, sand, and apply the texture or finish. This will result in a more professional and durable repair.
3. Test the texture: If you are unsure about the texture or finish, it’s a good idea to practice on a small test surface first. This will give you an opportunity to experiment with application techniques and ensure that the texture matches the rest of the ceiling.
4. Blend the patched areas: To create a seamless blend, pay attention to feathering the edges of the patching compound and texturing to blend with the existing ceiling surface. This will help the repaired areas blend in and appear natural.
5. Allow for drying time: Follow the manufacturer’s instructions for the drying time of the materials used, such as drywall compound, texture, primer, and paint. Rushing the drying process can compromise the quality of the repair.
6. Use proper lighting: Ensure you have adequate lighting when assessing the damage, patching the holes, sanding, and painting. Proper lighting will help you identify imperfections and achieve a more even paint finish.
7. Maintain a clean work area: As you work, periodically clean up any debris or dust to maintain a clean and tidy work area. This will prevent debris from interfering with the repairs or ending up in the fresh paint.
8. Consider professional help: If you feel unsure about any step of the process or if you have extensive damage or structural issues, it is advisable to seek professional help. They have the expertise to address more complex repairs and ensure the job is done safely and effectively.
9. Regularly inspect your ceilings: To catch nail pops and other issues early, make it a habit to inspect your ceilings periodically. By being proactive, you can address any problems promptly and prevent further damage.
10. Keep extra paint: It’s a good idea to keep some extra paint from the initial painting job for future touch-ups. This way, you will have a perfect color match if you ever need to repair a nail pop or other minor damage in the future.
By following these tips and taking necessary precautions, you can successfully fix ceiling nail pops and achieve a professional-looking repair. Remember to prioritize safety, take your time, and ensure proper preparation and application techniques for the best results.
Conclusion
Fixing ceiling nail pops may seem like a daunting task, but with the right knowledge and approach, it is a manageable DIY project. By understanding the causes of nail pops and following the step-by-step guide provided, you can effectively repair these unsightly bumps in your ceiling.
Assessing the extent of the damage, gathering the necessary tools and materials, and taking your time throughout the process are essential for achieving a successful repair. By securing the popped nails, patching the holes, sanding, applying the texture or finish, and finally painting the ceiling, you can restore its smooth and seamless appearance.
Remember to prioritize safety by wearing appropriate protective gear and taking necessary precautions. While the steps may vary depending on the specific type of texture and paint used, the fundamental principles remain the same. It’s also important to inspect your ceilings regularly and address any issues promptly to prevent further damage and ensure the longevity of your repairs.
If you feel unsure or have extensive damage or structural concerns, it is always wise to seek professional help. Consulting a contractor or handyman can provide you with expert guidance and ensure the job is done safely and effectively.
By successfully fixing ceiling nail pops, you not only enhance the aesthetic of your living space but also maintain the structural integrity of your ceiling. Remember to keep some extra paint for future touch-ups and to perform regular inspections to catch any potential issues early on.
Now that you have the knowledge and steps needed to fix ceiling nail pops, it’s time to roll up your sleeves and give your ceiling the attention it deserves. With patience, attention to detail, and the right tools, you can achieve a smooth and flawless ceiling surface that will enhance the overall beauty of your home. So, get started and enjoy the rewarding process of transforming your ceiling back to its pristine condition.
Frequently Asked Questions about How To Fix Ceiling Nail Pops
Was this page helpful?
At Storables.com, we guarantee accurate and reliable information. Our content, validated by Expert Board Contributors, is crafted following stringent Editorial Policies. We're committed to providing you with well-researched, expert-backed insights for all your informational needs.


0 thoughts on “How To Fix Ceiling Nail Pops”