Articles
How To Remove A Nest Smoke Detector
Modified: October 19, 2024
Learn how to safely and effectively remove a Nest smoke detector in this informative article. Explore step-by-step instructions and expert tips for a hassle-free process.
(Many of the links in this article redirect to a specific reviewed product. Your purchase of these products through affiliate links helps to generate commission for Storables.com, at no extra cost. Learn more)
Introduction
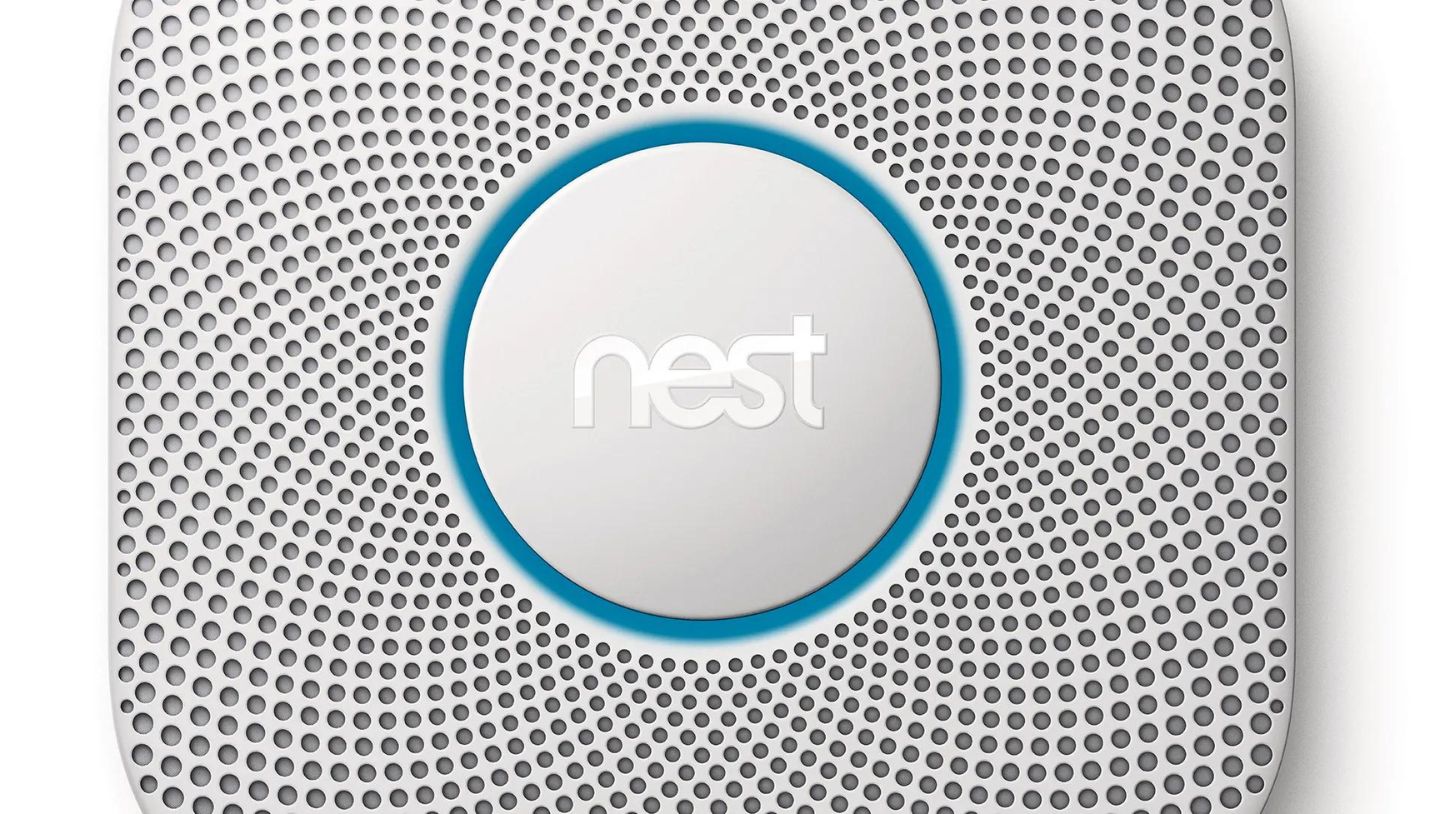
Welcome to this comprehensive guide on how to remove a Nest smoke detector! Nest smoke detectors are innovative devices that provide the utmost protection in detecting and alerting you to the presence of smoke or carbon monoxide in your home. However, there might come a time when you need to remove a Nest smoke detector, whether it’s for maintenance, relocation, or replacement.
In this article, we will walk you through the step-by-step process of safely removing a Nest smoke detector from your home. From turning off the power to disconnecting the wiring and removing the mounting bracket, we’ll cover all the necessary steps to ensure a smooth and hassle-free removal process.
Before we begin, it’s important to note that safety should always be your top priority when working with electrical equipment. If you don’t feel comfortable or confident in completing these steps on your own, it’s recommended to seek professional assistance. Now, let’s dive into the process of removing a Nest smoke detector!
Key Takeaways:
- Prioritize safety when removing a Nest smoke detector by turning off the power, disconnecting wiring, and seeking professional assistance if needed. Maintain home aesthetics by filling holes and consider installing a new detector for continued safety.
- Follow step-by-step instructions to safely remove a Nest smoke detector, ensuring a smooth and hassle-free process. Consider the option of installing a new smoke detector for ongoing protection and peace of mind.
Read more: How To Remove A Smoke Detector
Step 1: Turn Off Power to the Smoke Detector
The first and most crucial step in removing a Nest smoke detector is to turn off the power to the device. This ensures your safety and prevents any electrical accidents during the removal process.
To turn off the power to the smoke detector, follow these steps:
- Locate the circuit breaker panel in your home. Typically, it’s located in the basement, utility room, or garage.
- Open the circuit breaker panel door.
- Look for the breaker that corresponds to the smoke detector you want to remove. It may be labeled “Smoke Detector” or have a specific designation.
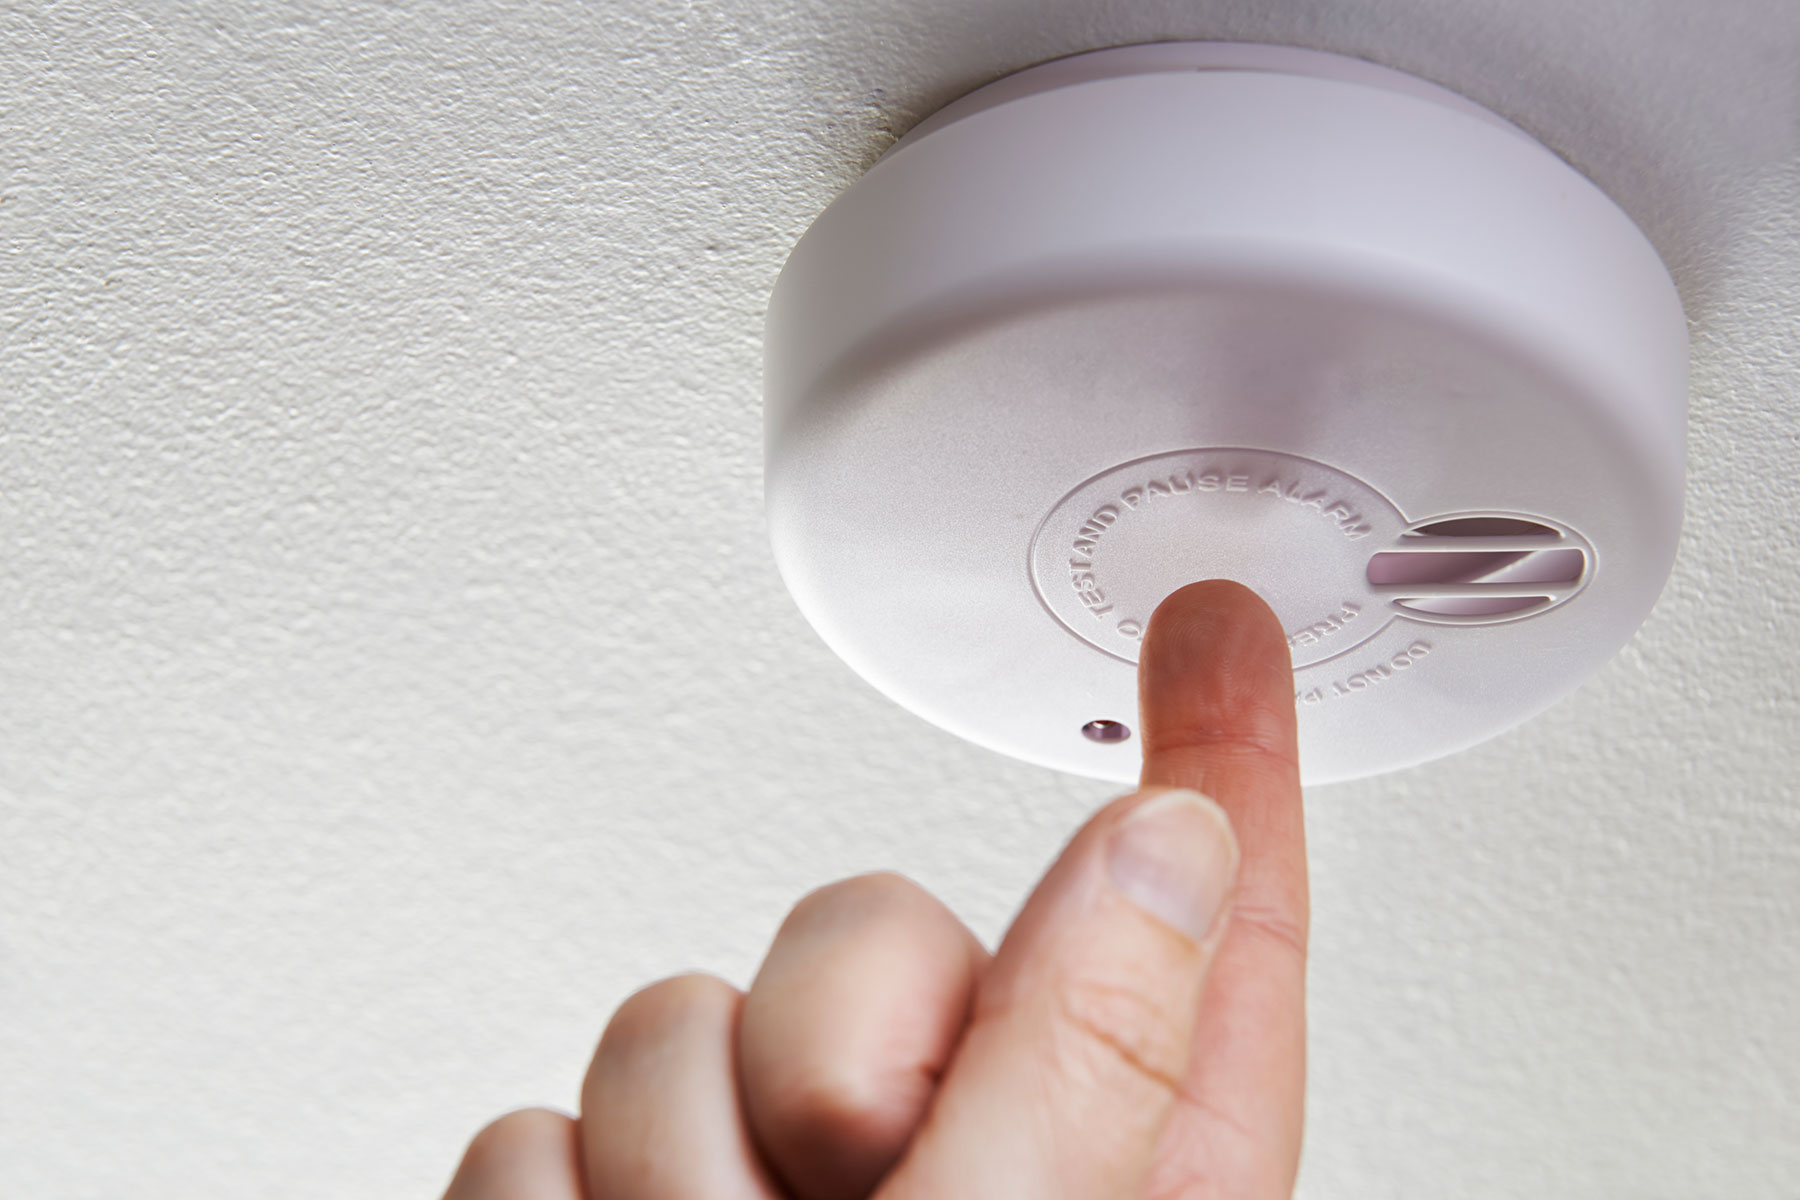
- Flip the switch of the breaker to the “Off” position. This will cut off the power supply to the smoke detector. Confirm that the smoke detector is no longer operational by pressing the test button. If the smoke detector does not beep or light up, it means the power has been successfully turned off.
- Use a non-contact voltage tester to double-check that there is no electrical current running to the smoke detector. Place the tester near the smoke detector and ensure that it does not detect any voltage.
It’s crucial to take these precautions to minimize any risks associated with working with electrical equipment. Remember, safety should always come first when dealing with electricity.
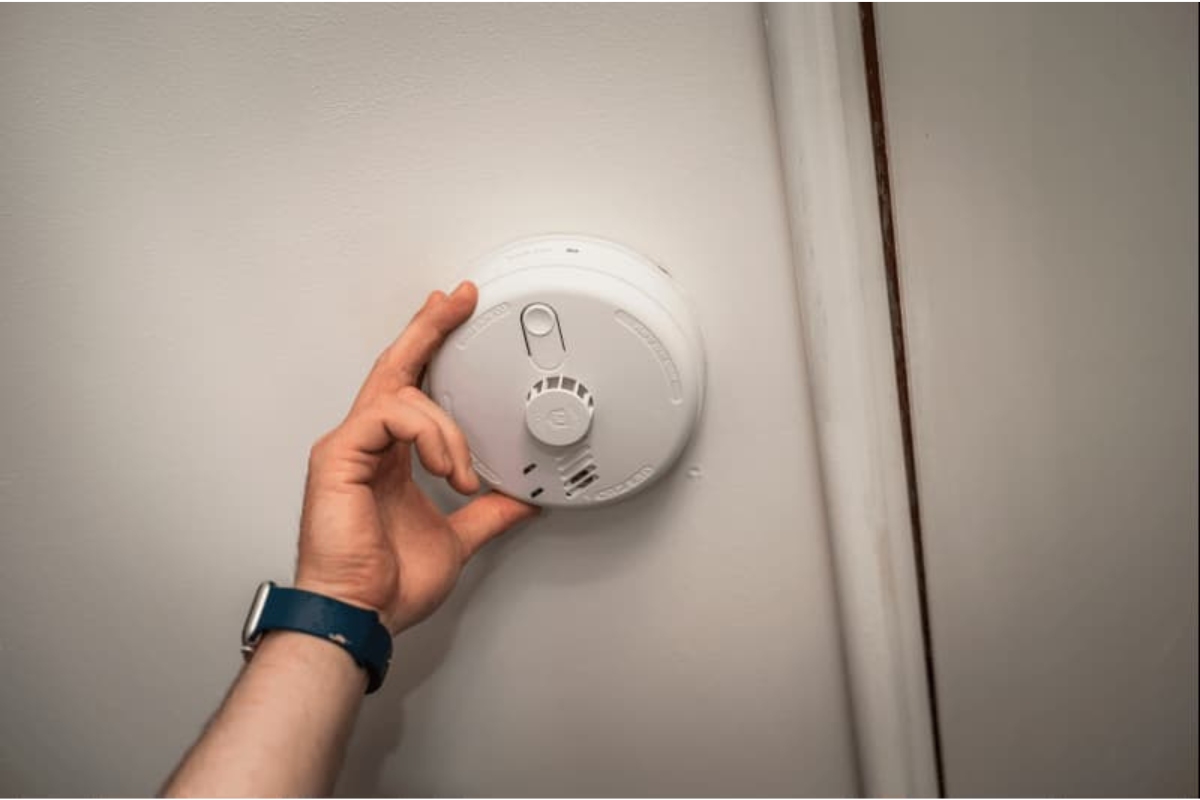
Step 2: Remove the Faceplate of the Smoke Detector
Once you’ve turned off the power to the Nest smoke detector, the next step is to remove the faceplate of the smoke detector. This will give you access to the internal components of the device.
Follow these steps to remove the faceplate:
- Locate the tab or latch on the side of the smoke detector faceplate.
- Gently press or push the tab or latch with your fingers. This will release the locking mechanism of the faceplate.
- While holding the tab or latch, carefully pull the faceplate away from the smoke detector. Be cautious not to apply too much force, as you don’t want to damage the device or the wall.
- If the faceplate doesn’t come off easily, double-check for any hidden screws or additional locking mechanisms that may be securing it in place. Some models may require you to remove screws or twist the faceplate counterclockwise to release it.
Once you’ve successfully removed the faceplate, set it aside in a safe location. You may want to clean the faceplate before reinstalling it or dispose of it if you’re replacing the smoke detector entirely.
With the faceplate removed, you now have a clear view of the smoke detector’s internal components, making it easier to proceed with the next steps.
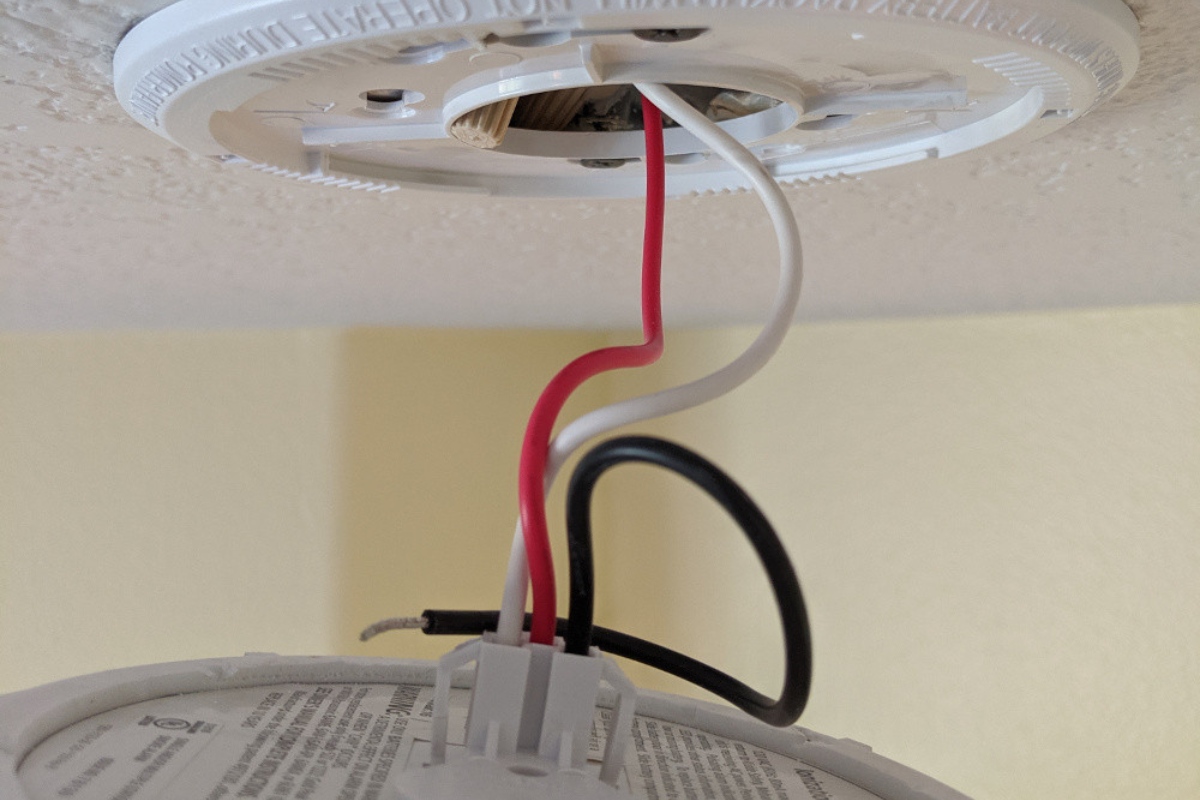
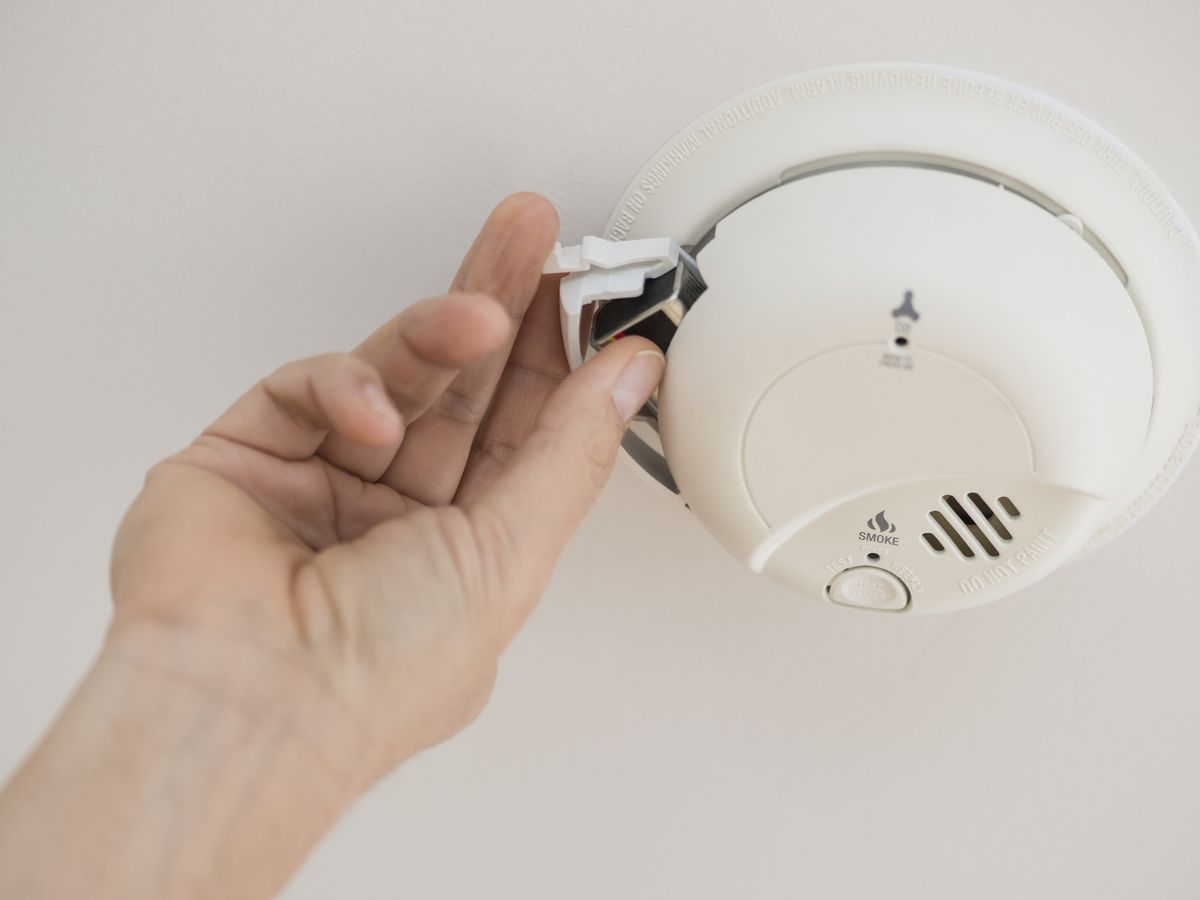
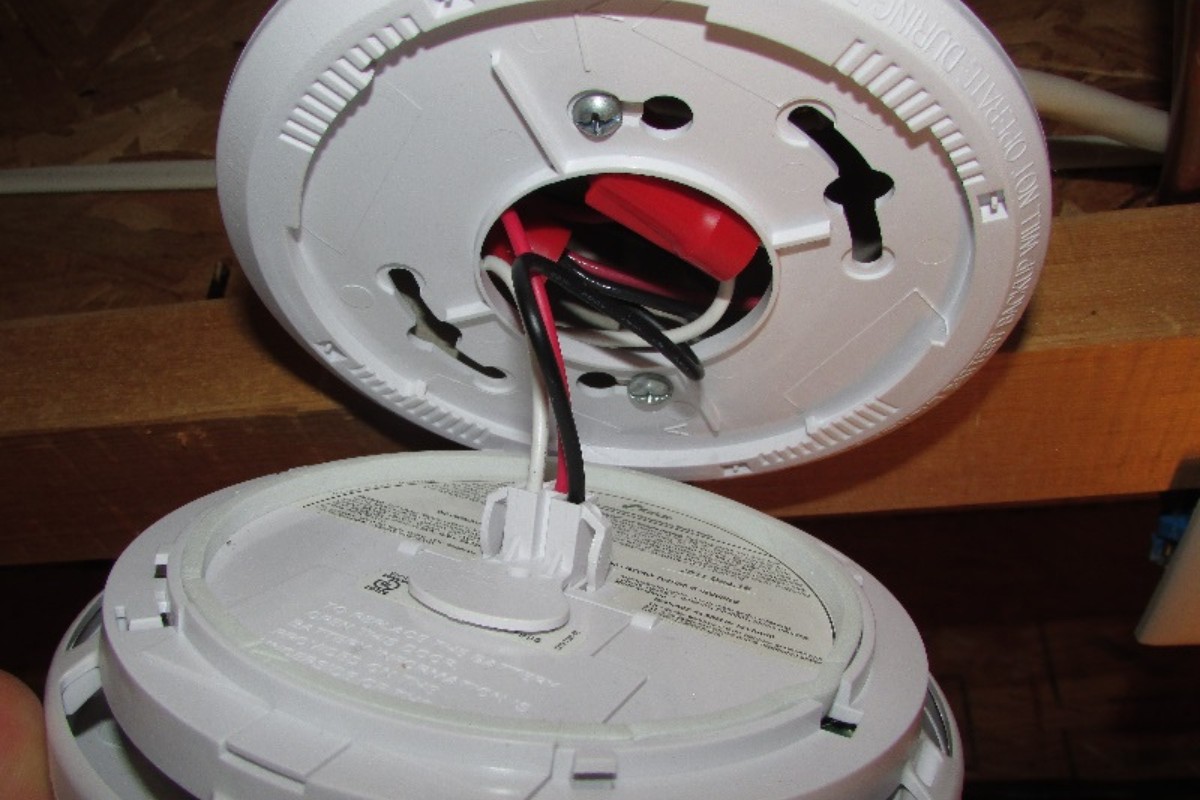
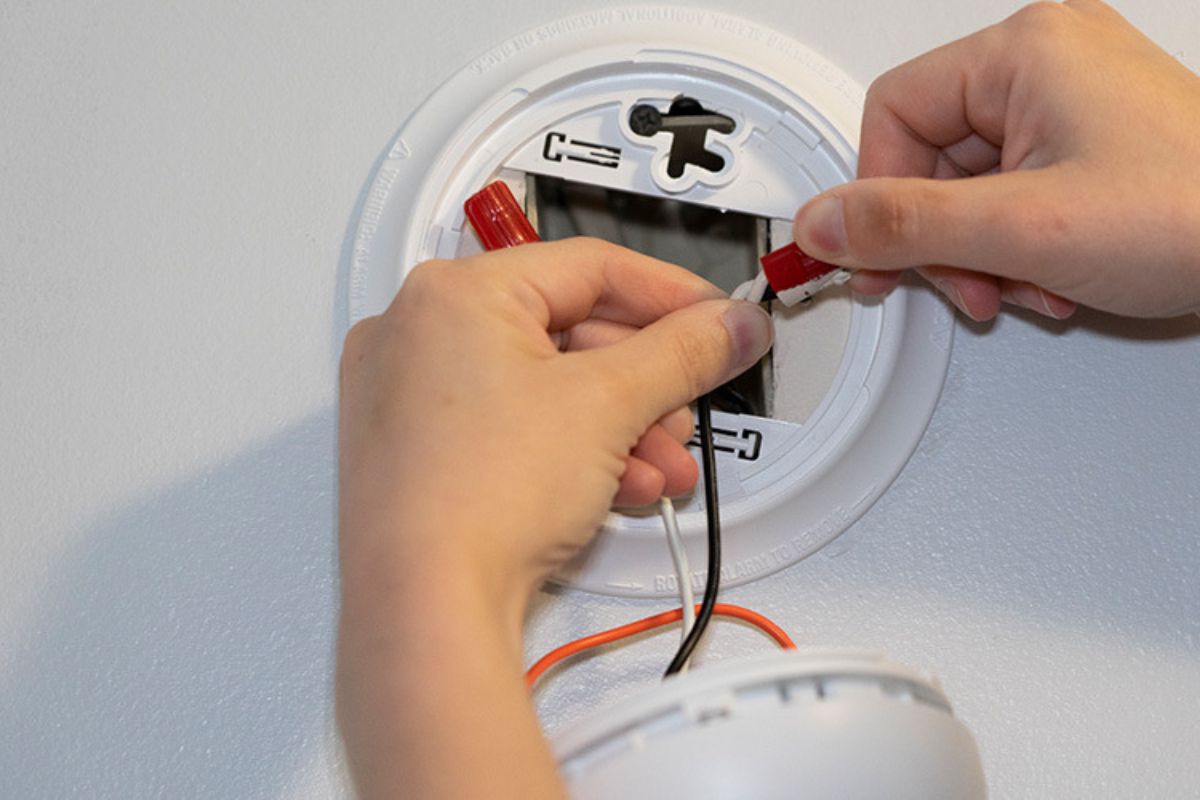
Step 3: Disconnect the Wiring from the Smoke Detector
After removing the faceplate, the next step in removing a Nest smoke detector is to disconnect the wiring from the device. This will free the smoke detector from its electrical connections, allowing you to remove it safely.
Follow these steps to disconnect the wiring:
- Observe the wiring connected to the back of the smoke detector. Take note of the wire colors and their corresponding terminals.
- Using a screwdriver, loosen the terminal screws that secure the wiring to the smoke detector. Rotate the screws counterclockwise to loosen them. Be careful not to damage the wires in the process.
- Gently pull the wires out of the terminal slots. You may need to use some force, but be cautious not to yank or pull too hard, as this could damage the wires or the smoke detector.
- Once the wires are disconnected, carefully tuck them back into the wall or ceiling to keep them out of the way and prevent any potential hazards.
It’s important to remember the wire colors and their corresponding terminals when disconnecting the wiring. This will be helpful when installing a new smoke detector or when reattaching the wiring to a different device.
By disconnecting the wiring, you have successfully separated the Nest smoke detector from its electrical connections, bringing you one step closer to removing it completely.
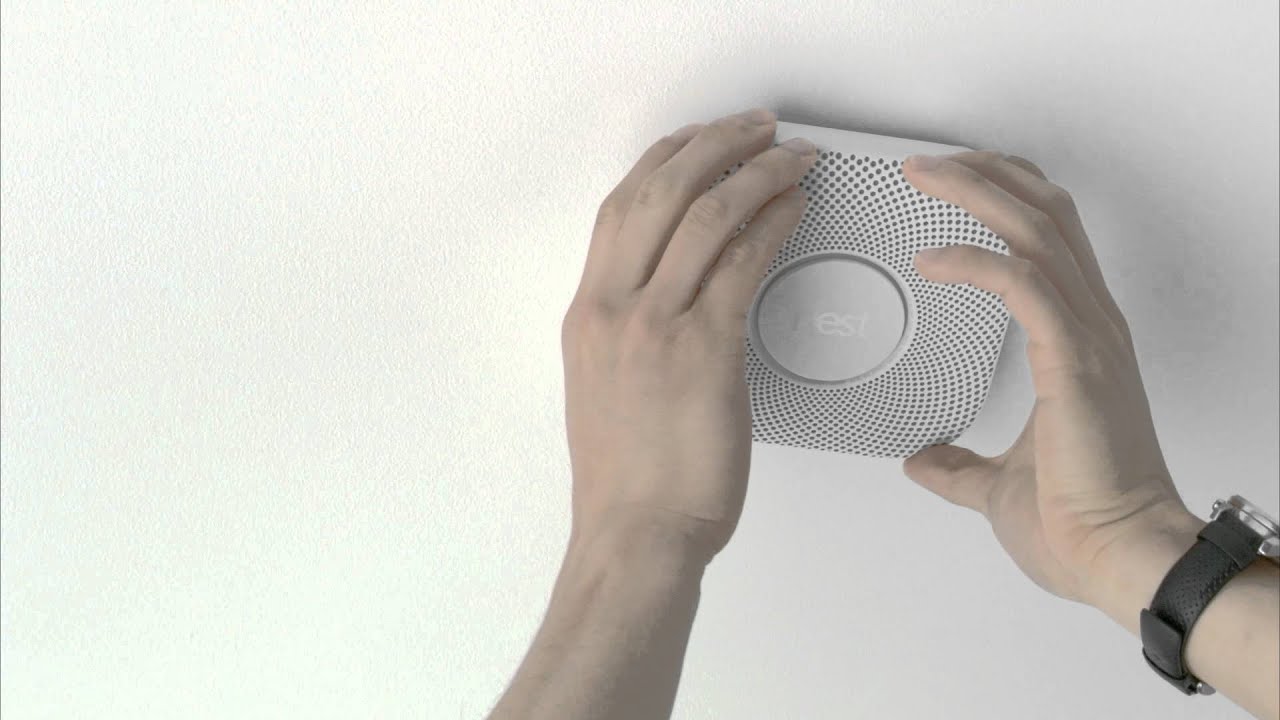
Before removing a Nest smoke detector, make sure to turn off the power to the device at the circuit breaker. Then, twist the smoke detector counterclockwise to release it from the mounting bracket.
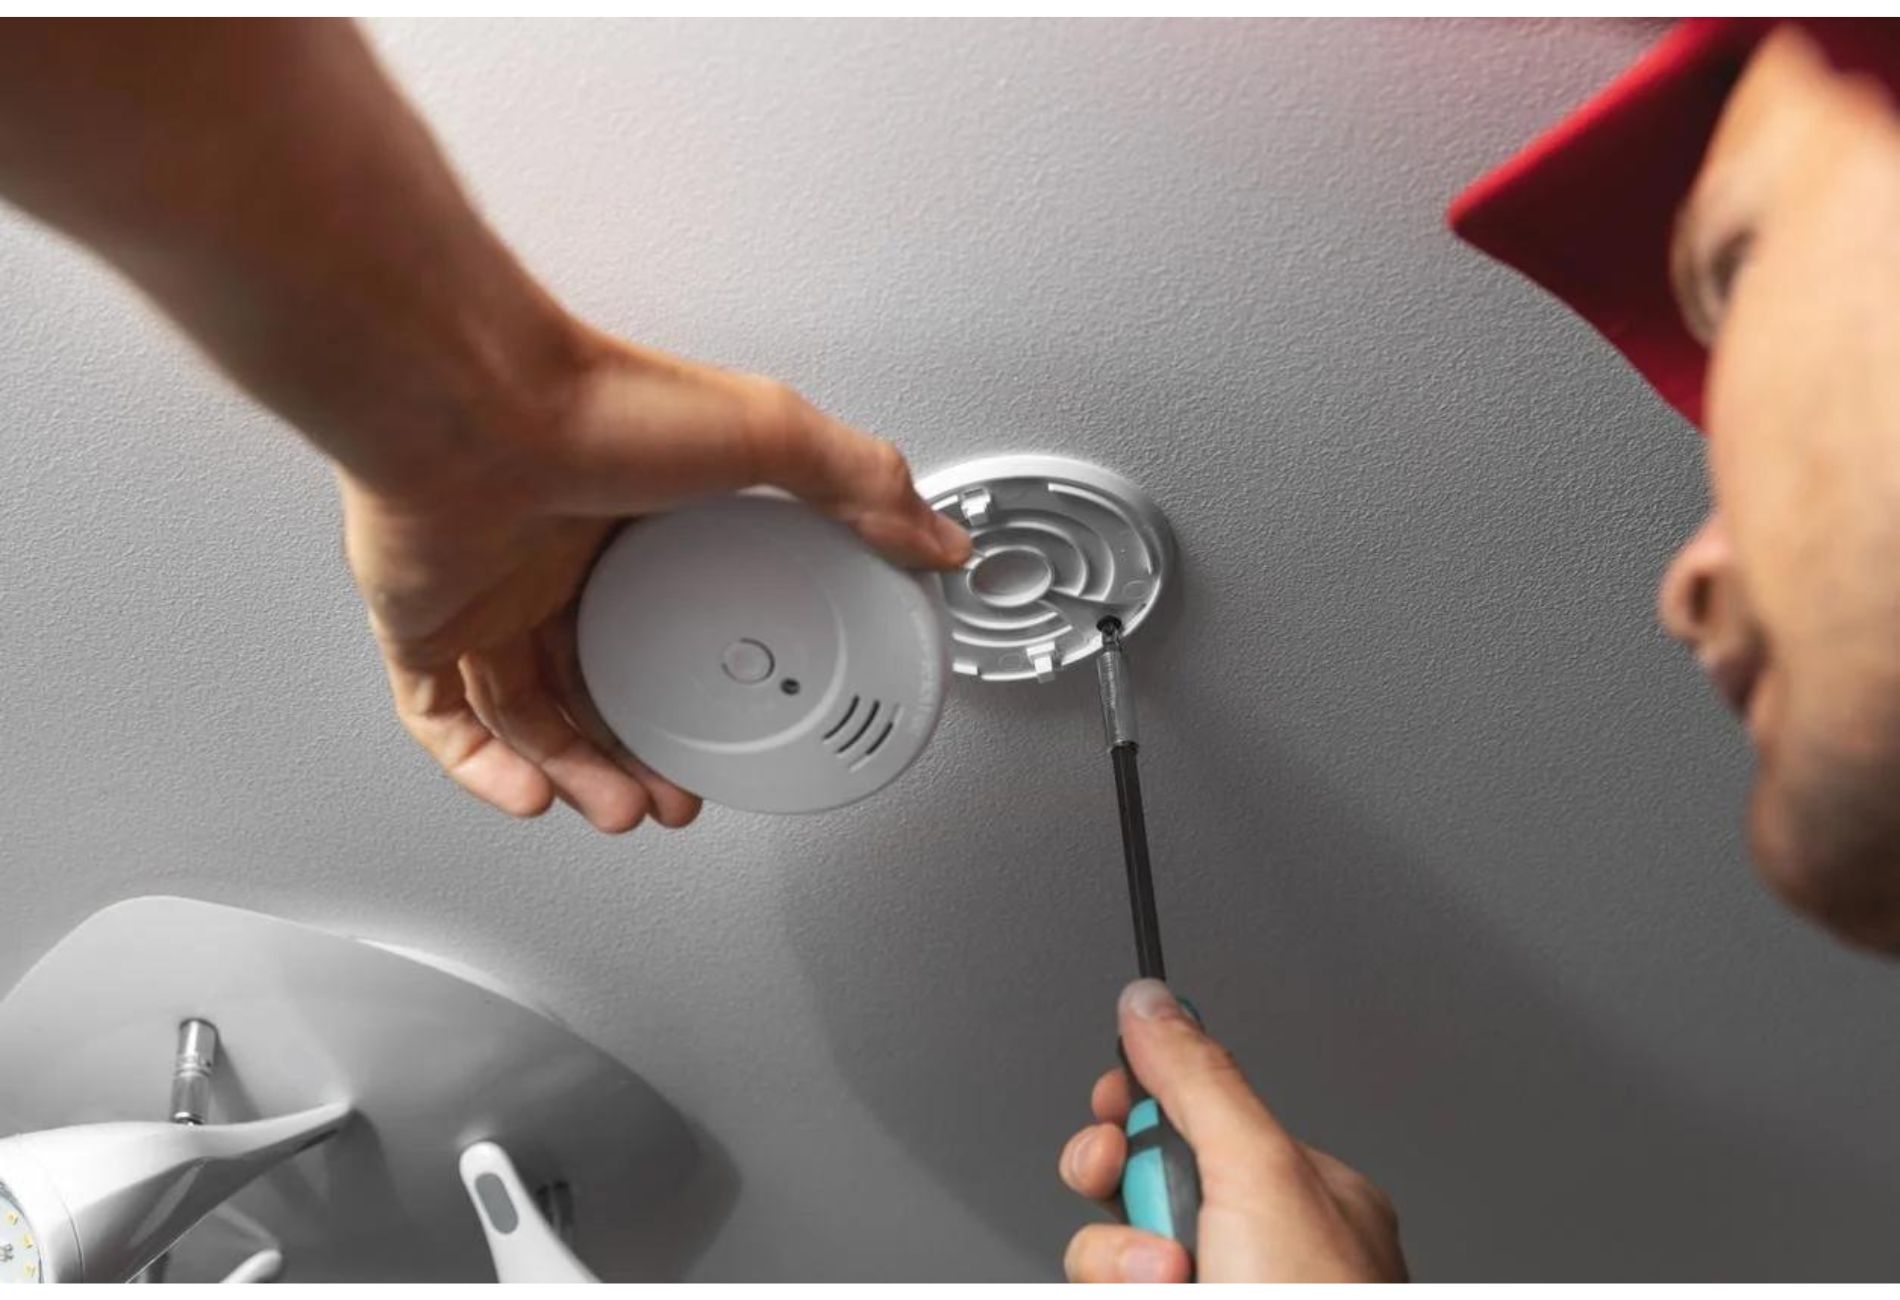
Step 4: Remove the Smoke Detector Mounting Bracket
With the wiring disconnected, the next step in removing a Nest smoke detector is to remove the mounting bracket that holds the device in place. The mounting bracket is typically attached to the wall or ceiling and secures the smoke detector.
Follow these steps to remove the smoke detector mounting bracket:
- Inspect the mounting bracket to identify the method of attachment. It may be secured with screws, adhesive, or a twist-lock mechanism.
- If the mounting bracket is secured with screws, use a screwdriver to unscrew them in a counterclockwise direction. Set the screws aside in a safe place, as you may need them if you choose to install a new smoke detector or relocate the existing one.
- If the mounting bracket is attached with adhesive, gently pry it away from the wall or ceiling using a flat-edged tool, such as a putty knife. Apply gradual and even pressure to avoid damaging the surface underneath.
- If the mounting bracket has a twist-lock mechanism, rotate it counterclockwise to detach it from the wall or ceiling. Be cautious not to force it or twist it too hard, as this could cause damage.
- Once the mounting bracket is removed, inspect the area for any remaining adhesive or debris. Clean the surface if necessary, ensuring a smooth and clean installation for a new smoke detector or any future upgrades.
By removing the smoke detector mounting bracket, you have successfully detached the Nest smoke detector from its fixed position, preparing it for removal entirely.
If you plan to install a new smoke detector or relocate the existing one, you can keep the mounting bracket for future use. Otherwise, you can safely dispose of it.
Read also: 10 Superior Nest Smoke Detector for 2025
Step 5: Fill Holes or Patch Wall
After removing the smoke detector mounting bracket, you may notice holes or damage on the wall or ceiling where the bracket was attached. To ensure a clean and seamless finish, it’s important to fill these holes or patch the wall.
Here are the steps to fill holes or patch the wall:
- If the holes are small, you can use a spackling compound or lightweight filler. Apply the filler to the holes using a putty knife or a small spatula. Smooth the filler into the holes and scrape off any excess for a level surface.
- If the holes are larger or if there’s significant damage to the wall, you may need to use a patching material, such as a drywall patch or joint compound. Follow the manufacturer’s instructions to prepare the patching material and apply it to the damaged area. Use a putty knife to smooth the patch and feather the edges for a seamless blend with the surrounding wall.
- Allow the filler or patching material to dry according to the manufacturer’s instructions. This usually takes a few hours or overnight.
- Once the filler or patch is fully dry, sand the repaired area gently with fine-grit sandpaper. This will smooth any rough edges and create a seamless finish.
- Finally, wipe away any dust or debris from sanding and clean the area with a damp cloth. Depending on the wall’s finish, you may need to touch up the paint to match the surrounding area. Use matching paint or consider repainting the entire wall for a uniform look.
By filling holes or patching the wall, you’ll restore the wall’s appearance and ensure that there are no noticeable traces of the removed smoke detector or mounting bracket. It’s always a good idea to maintain the aesthetics of your home even when making changes to its features.
Once the wall is repaired and repainted, it’ll be ready for any future installations or to simply serve as a smooth and clean surface.
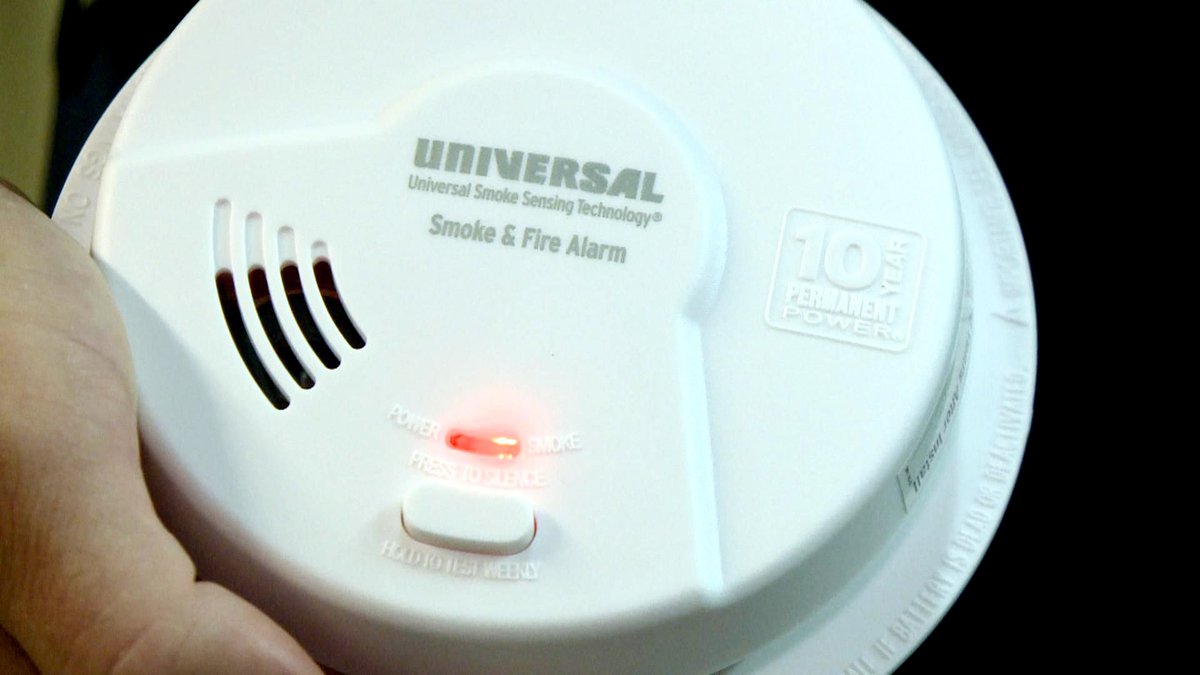
Step 6: Install a New Smoke Detector (Optional)
If you’re removing a Nest smoke detector for maintenance or replacement purposes, you may want to consider installing a new smoke detector in its place. This step is optional, but it can provide continued safety and peace of mind for your home.
If you choose to install a new smoke detector, follow these steps:
- Before proceeding, ensure that the power to the particular electrical circuit is still turned off. This is crucial to avoid any accidents while installing the new smoke detector.
- Check the compatibility of the new smoke detector with your electrical system and wiring. Read the manufacturer’s instructions to ensure proper installation.
- If necessary, attach a new mounting bracket to the wall or ceiling. Follow the manufacturer’s instructions for the specific model you’re installing.
- Connect the electrical wiring to the new smoke detector. Match the wire colors to their corresponding terminals and tighten the terminal screws securely.
- Attach the new smoke detector to the mounting bracket. Follow the manufacturer’s instructions for proper installation and locking mechanism.
- Double-check all the connections and ensure a snug fit between the smoke detector and the mounting bracket.
- Turn the power back on at the circuit breaker panel and test the new smoke detector to ensure it is functioning correctly.
Remember, if you’re unsure about the installation process or want to ensure everything is done correctly, it’s always recommended to consult a professional electrician for assistance.
Installing a new smoke detector not only ensures the safety of your home but also ensures that you have the latest technology and features to detect potential fire or carbon monoxide hazards.
Once installed, make sure to familiarize yourself with the new smoke detector’s features and test it regularly to ensure it continues to function properly.
Conclusion
In conclusion, removing a Nest smoke detector can be a straightforward process when following the appropriate steps. By turning off the power, removing the faceplate, disconnecting the wiring, removing the mounting bracket, filling holes or patching the wall, and optionally installing a new smoke detector, you can safely and effectively remove a Nest smoke detector from your home.
However, it’s crucial to prioritize safety throughout the entire process. Always turn off the power at the circuit breaker panel, use caution when handling electrical wiring, and seek professional assistance if you’re uncertain or uncomfortable with any step of the process.
Whether you’re removing a Nest smoke detector for maintenance, relocation, or replacement, it’s important to consider the aesthetics of your home as well. Fill any holes or patch the wall to ensure a seamless and clean finish, ensuring that your home looks its best even after removing the smoke detector.
If you opt to install a new smoke detector, make sure it’s compatible with your electrical system and follow the manufacturer’s instructions for proper installation. This will ensure continued safety in your home and provide peace of mind knowing that you have the latest technology to detect potential fire or carbon monoxide hazards.
Remember, safety should always be the top priority when working with electrical equipment. When in doubt, consult a professional electrician for guidance and assistance.
We hope this comprehensive guide has provided you with the necessary information and steps to successfully remove a Nest smoke detector from your home. Stay safe and continue to prioritize the well-being of your household.
Frequently Asked Questions about How To Remove A Nest Smoke Detector
Was this page helpful?
At Storables.com, we guarantee accurate and reliable information. Our content, validated by Expert Board Contributors, is crafted following stringent Editorial Policies. We're committed to providing you with well-researched, expert-backed insights for all your informational needs.

0 thoughts on “How To Remove A Nest Smoke Detector”