Home>Articles>How To Remove Drawers From Craftsman Tool Chest
Articles
How To Remove Drawers From Craftsman Tool Chest
Modified: May 6, 2024
Learn how to easily remove drawers from your Craftsman tool chest with these step-by-step articles. Simplify your workspace organization and maximize productivity!
(Many of the links in this article redirect to a specific reviewed product. Your purchase of these products through affiliate links helps to generate commission for Storables.com, at no extra cost. Learn more)
Introduction
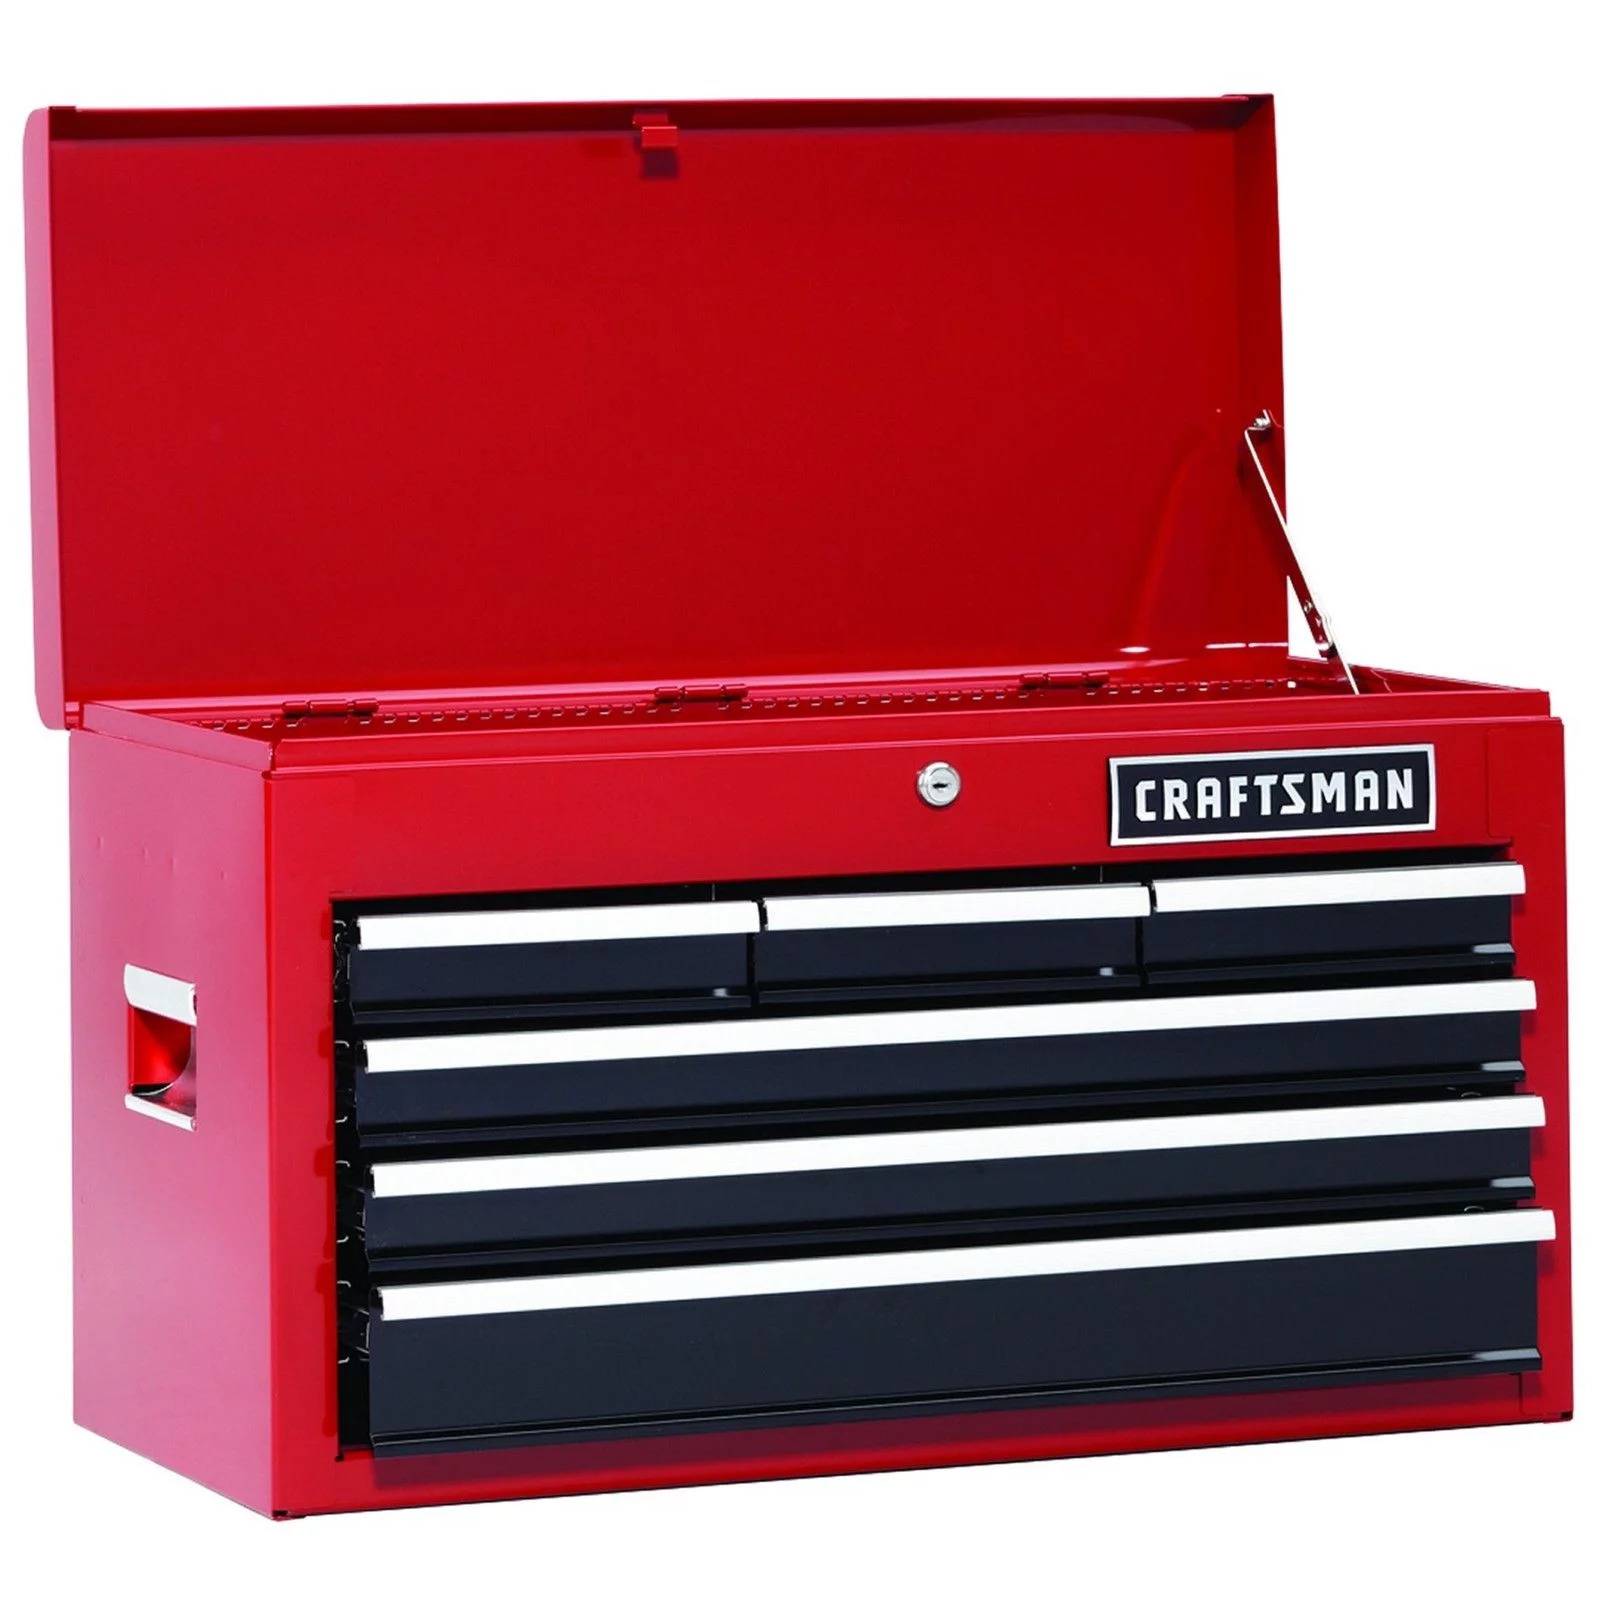
Welcome to this article on how to remove drawers from a Craftsman tool chest. Craftsman tool chests are popular among DIY enthusiasts and professionals alike, thanks to their durability and functionality. However, there may come a time when you need to remove the drawers for various reasons, such as cleaning, repair, or reorganizing your tools.
In this guide, we will walk you through the step-by-step process of removing drawers from your Craftsman tool chest. We will discuss the tools and materials you will need, as well as the proper technique to ensure a smooth and hassle-free removal process.
Removing the drawers from your tool chest may seem like a daunting task, but with the right approach, it can be a simple and straightforward process. So, let’s get started and learn how to remove the drawers safely and efficiently.
Key Takeaways:
- Safely and efficiently remove drawers from your Craftsman tool chest by following step-by-step instructions. Organize, clean, and reassemble for optimal functionality and workspace organization.
- Gather necessary tools, empty drawers, locate release tabs, and pull out drawers evenly to prevent damage. Clean and reorganize workspace for a productive DIY experience.
Read more: How To Remove Drawer Craftsman Tool Chest
Step 1: Gather necessary tools and materials
Before you begin removing the drawers from your Craftsman tool chest, it’s important to gather all the necessary tools and materials. This ensures that you have everything you need within reach, making the process smoother and more efficient.
Here are the tools and materials you will need:
- Screwdriver: Depending on your Craftsman tool chest model, you may need a Phillips or flathead screwdriver for certain steps.
- Work gloves: Protect your hands from sharp edges or any potential injuries during the removal process.
- Soft cloth or towel: Use a soft cloth or towel to lay the tools or parts on when you remove them from the drawer.
- Optional: Cleaning supplies – If you plan on cleaning your drawers or the chest itself, gather the appropriate cleaning supplies such as mild soap, water, and a sponge or rag.
Take a moment to gather these items before proceeding to the next step. Having everything on hand will help you save time and minimize interruptions during the drawer removal process.
Step 2: Empty the drawers
Now that you have gathered all the necessary tools and materials, it’s time to empty the drawers of your Craftsman tool chest. This step is crucial to ensure that the drawers are not too heavy or cumbersome to remove.
Here’s how to empty the drawers:
- Start with the top drawer: Open the top drawer of your Craftsman tool chest and remove all the tools and items inside. Place them on a soft cloth or towel to keep them organized and prevent any damage.
- Work your way down: Once you have emptied the top drawer, move on to the next drawer and repeat the process. Continue this step until all the drawers are empty.
Take care to handle your tools and items with caution. Some tools may have sharp edges or heavy parts, so be mindful of your safety while emptying the drawers. In addition, it’s a good opportunity to assess the condition of your tools and check for any damage or wear that may require maintenance or replacement in the near future.
By emptying the drawers beforehand, you will make the removal process easier and prevent any mishaps or accidents that could occur if the drawers were still loaded with tools and items. Now that the drawers are empty, let’s move on to the next step of removing the drawers from your Craftsman tool chest.
Step 3: Remove the contents of the top drawer
Before we proceed with removing the top drawer from your Craftsman tool chest, we need to take a moment to organize and remove any additional components or dividers that may be in the drawer.
Follow these steps to remove the contents of the top drawer:
- Remove any tool organizers or dividers: If your top drawer has any tool organizers or dividers, carefully remove them and set them aside. These can typically be lifted out or have screws that need to be loosened.
- Organize the tools: Take a moment to organize the tools and items that were inside the top drawer. You may want to place similar tools together or group them based on your preference.
- Place the tools on a soft cloth or towel: Lay out the tools on a soft cloth or towel to protect them from any scratches or damage while you proceed with removing the drawer.
By taking the time to remove additional components and organize your tools, you will have a clearer workspace and reduce the risk of misplacing any smaller items during the drawer removal process.
Now that the contents of the top drawer are organized and set aside, we can move on to the next step of removing the drawer itself.
Step 4: Locate the drawer release tabs or levers
Before you can remove the drawer from your Craftsman tool chest, you need to locate the drawer release tabs or levers. These are the mechanisms that secure the drawer in place and need to be disengaged in order to free the drawer from the chest.
Here’s how to locate the drawer release tabs or levers:
- Inspect the sides of the drawer: Look closely at the sides of the drawer to locate any visible release tabs or levers. These may be in the form of small buttons, levers, or even recessed handles that need to be pulled or pushed.
- Check the front or back of the drawer: Some Craftsman tool chests have release mechanisms located at the front or back of the drawer. Look for any visible tabs or levers in these areas.
- Refer to the user manual: If you’re having difficulty finding the release tabs or levers, consult the user manual that came with your Craftsman tool chest. The manual will provide specific instructions and illustrations on where to locate these mechanisms.
Take your time to locate the drawer release tabs or levers in order to avoid any unnecessary force or damage to the drawer or the tool chest. Each model of Craftsman tool chest may have different methods and locations for the release mechanisms, so it’s essential to double-check before proceeding to the next step.
Once you have successfully identified the drawer release tabs or levers, you’re ready to move on to the next step of removing the drawer from your Craftsman tool chest.
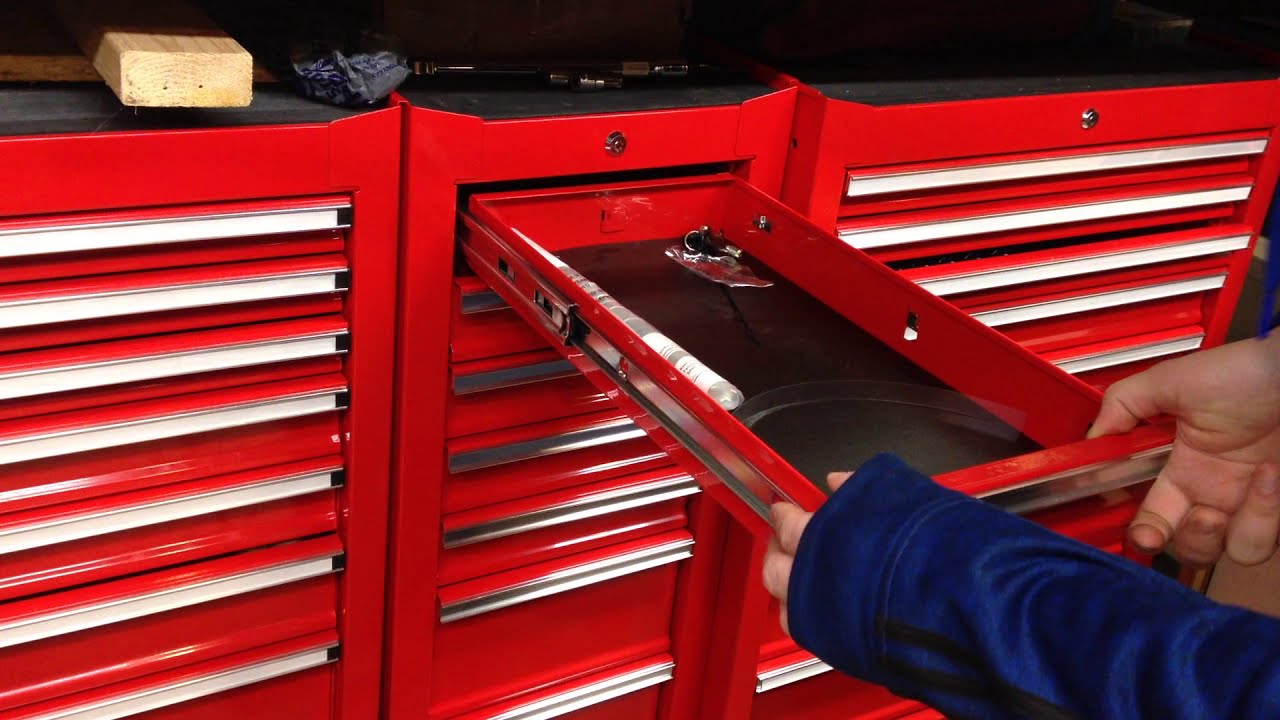
To remove drawers from a Craftsman tool chest, start by fully extending the drawer. Then, locate the release tabs on each side of the drawer slides and push them in while pulling the drawer out.
Step 5: Press or lift the release tabs/levers
Now that you have located the drawer release tabs or levers on your Craftsman tool chest, it’s time to disengage them to free the drawer. The exact method of disengaging the release mechanisms may vary depending on the model of your tool chest. However, the general approach is either to press or lift the release tabs/levers.
Here’s how to proceed:
- If the release mechanism is a button or tab: Press the button or tab located on the side, front, or back of the drawer. Apply firm but gentle pressure to disengage the mechanism.
- If the release mechanism is a lever or handle: Lift the lever or handle found on the sides, front, or back of the drawer. Pull the lever upwards or towards you to release the drawer.
Remember to refer to the user manual if you’re unsure of the specific method for your Craftsman tool chest. The manual will provide detailed instructions and illustrations to guide you through the process.
Once you have successfully pressed or lifted the release tabs/levers, you should feel the drawer become unlocked or disengaged from the chest. You’re now ready to move on to the next step of actually removing the drawer from your Craftsman tool chest.
Proceed cautiously and avoid using excessive force. If you encounter any resistance or difficulty, double-check the release mechanism and ensure it’s fully disengaged before proceeding. Taking your time and being gentle will help prevent any accidental damage to the drawer or the tool chest.
Step 6: Pull the drawer out slowly and evenly
With the release tabs or levers engaged, you are now ready to remove the drawer from your Craftsman tool chest. It’s important to approach this step with care to ensure a smooth and steady removal process.
Follow these steps to properly pull the drawer out:
- Position yourself in front of the drawer: Stand or kneel in front of your Craftsman tool chest, facing the drawer that you intend to remove.
- Use both hands for support: Place one hand on each side of the drawer, ensuring a firm grip and support.
- Apply even pressure: Slowly and evenly pull the drawer towards you. Avoid jerking or yanking the drawer, as this can cause damage or strain the mechanisms.
- Watch for any obstacles: Keep an eye out for any wires, cords, or other objects that may be connected to the drawer. Gently maneuver around these obstacles to prevent any damage or disconnection.
- Continue pulling until the drawer is fully removed: As you pull the drawer out, guide it straight and steadily to prevent it from tipping or falling. Continue pulling until the drawer is fully removed from the tool chest.
By pulling the drawer out slowly and evenly, you minimize the risk of accidents or damage to the drawer or the tool chest. It’s crucial to maintain control and be aware of your surroundings throughout the process.
It’s worth noting that some Craftsman tool chests may have multiple release mechanisms on each side of the drawer. If this is the case, ensure that all the mechanisms are disengaged before attempting to pull the drawer out.
Congratulations! You have successfully removed the drawer from your Craftsman tool chest. Now, let’s move on to the next step to repeat this process for any remaining drawers.
Step 7: Repeat steps 3-6 for each drawer
Now that you have successfully removed the first drawer from your Craftsman tool chest, it’s time to repeat the process for the remaining drawers. By following the same steps, you can safely and efficiently remove each drawer one by one.
Here’s how to proceed:
- For each drawer, begin by removing any additional components or dividers. This includes any tool organizers or dividers that need to be lifted out or have screws loosened.
- Organize the tools and items in each drawer, just as you did with the top drawer. Take a moment to lay them out on a soft cloth or towel.
- Locate the release tabs or levers for each drawer. These may be located on the sides, front, or back, depending on the model of your Craftsman tool chest.
- Press or lift the release tabs/levers for each drawer to disengage the mechanisms.
- Pull each drawer out slowly and evenly, using both hands for support. Be mindful of any obstacles and maneuver around them with caution.
By repeating these steps for each drawer, you ensure a methodical and well-organized removal process. Taking your time with each drawer will help prevent any mishaps or damage to your tools or the tool chest itself.
As you remove each drawer, you may find it helpful to label or categorize the tools and items to maintain organization and make it easier to reassemble everything later. This will save you time and effort when it’s time to put the drawers back in the tool chest.
Continue with this step until you have successfully removed all the drawers from your Craftsman tool chest. You’re almost done! Let’s move on to the next step to prepare for cleaning and reorganizing the workspace.
Step 8: Clean and reorganize the workspace
Now that you have removed all the drawers from your Craftsman tool chest, it’s a perfect opportunity to clean and reorganize your workspace. This step is essential for maintaining a tidy and efficient work area.
Follow these steps to clean and reorganize your workspace:
- Clean the tool chest: Using a mild soap and water solution or a suitable cleaner, wipe down the interior and exterior of your Craftsman tool chest. Pay special attention to any dirt, dust, or grease buildup. This will not only make your tool chest look fresh but also help prolong its lifespan.
- Clean the drawers: If desired, clean the empty drawers with a soft cloth or sponge and mild soap solution. Remove any debris or residue that may have accumulated inside the drawers.
- Inspect and organize your tools: Take this opportunity to inspect your tools for any damage or wear. Clean them as necessary, and consider repackaging them in an organized manner. You might want to group similar tools together or categorize them based on their function.
- Reassemble the drawers: Once your tool chest and drawers are clean and dry, carefully reassemble the drawers back into the chest. Slide them back into place, ensuring that the release tabs or levers engage properly.
- Reorganize your workspace: As you put the tools back into the drawers, think about how you can optimize your workspace. Consider placing frequently used tools in easily accessible drawers and organizing your tools in a functional and logical manner.
Taking the time to clean and reorganize your workspace will result in a more enjoyable and productive experience the next time you use your Craftsman tool chest. It will also help you locate tools quickly and maintain an organized and efficient workflow.
With your workspace cleaned and reorganized, you have successfully completed the process of removing and reassembling the drawers from your Craftsman tool chest. Congratulations!
Remember, regular maintenance and organization of your tools and workspace will contribute to their longevity and usability. Enjoy using your Craftsman tool chest for all your DIY projects and professional endeavors!
Conclusion
Removing drawers from your Craftsman tool chest may seem like a daunting task at first, but with the right approach and guidance, it can be a straightforward process. By following the step-by-step instructions provided in this article, you now have the knowledge and skills to safely and efficiently remove the drawers from your tool chest.
We started by gathering the necessary tools and materials, ensuring that we have everything within reach. Emptying the drawers was the next step, allowing us to work with lighter and easier-to-handle drawers.
Then, we walked through the process of removing the contents of the top drawer and locating the drawer release tabs or levers. By pressing or lifting these mechanisms, we disengaged them and prepared for the actual removal of the drawers.
Pulling the drawers out slowly and evenly was crucial to prevent any damage or accidents. By following this approach for each drawer and repeating the process, you successfully removed all the drawers from your Craftsman tool chest.
Afterward, you had the opportunity to clean and reorganize your workspace. Cleaning the tool chest itself, as well as the drawers, helps maintain their longevity and aesthetic appeal. Inspecting and organizing your tools allows for easier access and a more efficient workflow.
By reassembling the drawers and reorganizing your workspace, you set the stage for future projects and tasks. An organized and clean workspace contributes to a more enjoyable and productive work environment.
In conclusion, removing drawers from your Craftsman tool chest is a task that can be accomplished with the right knowledge and preparation. By following the step-by-step instructions outlined in this article, you can successfully remove, clean, and reassemble the drawers, ensuring optimal functionality and organization for your tool chest.
Remember to keep safety in mind throughout the process, and consult the user manual for your specific tool chest model if you encounter any difficulties or have additional questions.
Enjoy your newly acquired knowledge and continue utilizing your Craftsman tool chest to tackle various projects with ease!
Now that you've mastered removing drawers from your Craftsman tool chest, why not enhance your workspace further? Up next, dive into our guide on the best solutions for organizing your tools. Whether you're a professional or a weekend warrior, proper storage is key to efficiency. For fans of the Craftsman brand, don't miss our exclusive picks of superb tool chests designed to streamline any project. Keep your tools secure, sorted, and ready for action with these top recommendations!
Frequently Asked Questions about How To Remove Drawers From Craftsman Tool Chest
Was this page helpful?
At Storables.com, we guarantee accurate and reliable information. Our content, validated by Expert Board Contributors, is crafted following stringent Editorial Policies. We're committed to providing you with well-researched, expert-backed insights for all your informational needs.


0 thoughts on “How To Remove Drawers From Craftsman Tool Chest”