Articles
How To Remove Drawers From Snap On Tool Chest
Modified: August 16, 2024
Learn how to easily remove drawers from your Snap On tool chest with these helpful step-by-step articles. Perfect for DIY enthusiasts and tool lovers alike!
(Many of the links in this article redirect to a specific reviewed product. Your purchase of these products through affiliate links helps to generate commission for Storables.com, at no extra cost. Learn more)
Introduction
Welcome to this guide on how to remove drawers from a Snap-on tool chest. Snap-on tool chests are known for their durability and functionality, but occasionally you may need to remove the drawers for various reasons, such as repair, cleaning, or reorganization. While it may seem like a daunting task, with the right tools and approach, removing the drawers can be a straightforward process.
In this article, we will walk you through the steps required to safely remove the drawers from your Snap-on tool chest. We will cover everything from gathering the necessary tools to reassembling the drawers back into the tool chest. So, let’s get started!
Key Takeaways:
- Safely remove drawers from your Snap-on tool chest by gathering the right tools, preparing your workspace, and carefully removing drawer stops and slides. Follow these steps for a smooth and efficient process.
- After reassembling the drawers, your Snap-on tool chest will be ready for use. Remember to work carefully, take your time, and exercise caution to avoid any damage to your tool chest or injury to yourself.
Read more: How To Get Drawers Out Of Snap On Tool Box
Step 1: Gathering the necessary tools
Before you begin removing the drawers from your Snap-on tool chest, it’s important to gather all the necessary tools to ensure a smooth and efficient process. Here are the tools you will need:
- A screwdriver or Allen wrench (depending on the type of screws or bolts used)
- A flashlight (optional, but can be helpful for better visibility)
- A soft cloth or towel (to protect the surface of the tool chest)
- Gloves (to protect your hands from any sharp edges or debris)
Once you have gathered these tools, you are ready to move on to the next step.
Step 2: Preparing the workspace
Before you start removing the drawers from your Snap-on tool chest, it’s important to prepare your workspace to ensure a safe and organized process. Here’s what you need to do:
- Choose a well-lit and spacious area: Find a location with sufficient lighting that allows you to easily see the tool chest and work comfortably.
- Clear the surrounding area: Remove any items or obstacles that could get in the way of accessing the tool chest or interfere with the drawer removal process.
- Protect the floor: Lay down a soft cloth or towel to protect the floor or workbench surface from any scratches or damage that may occur during the removal process.
- Put on gloves: Wear gloves to protect your hands from any sharp edges or debris that may be present when working with the tool chest and its drawers.
By preparing your workspace properly, you’ll create a safe and organized environment that will make the removal process much easier and more efficient.
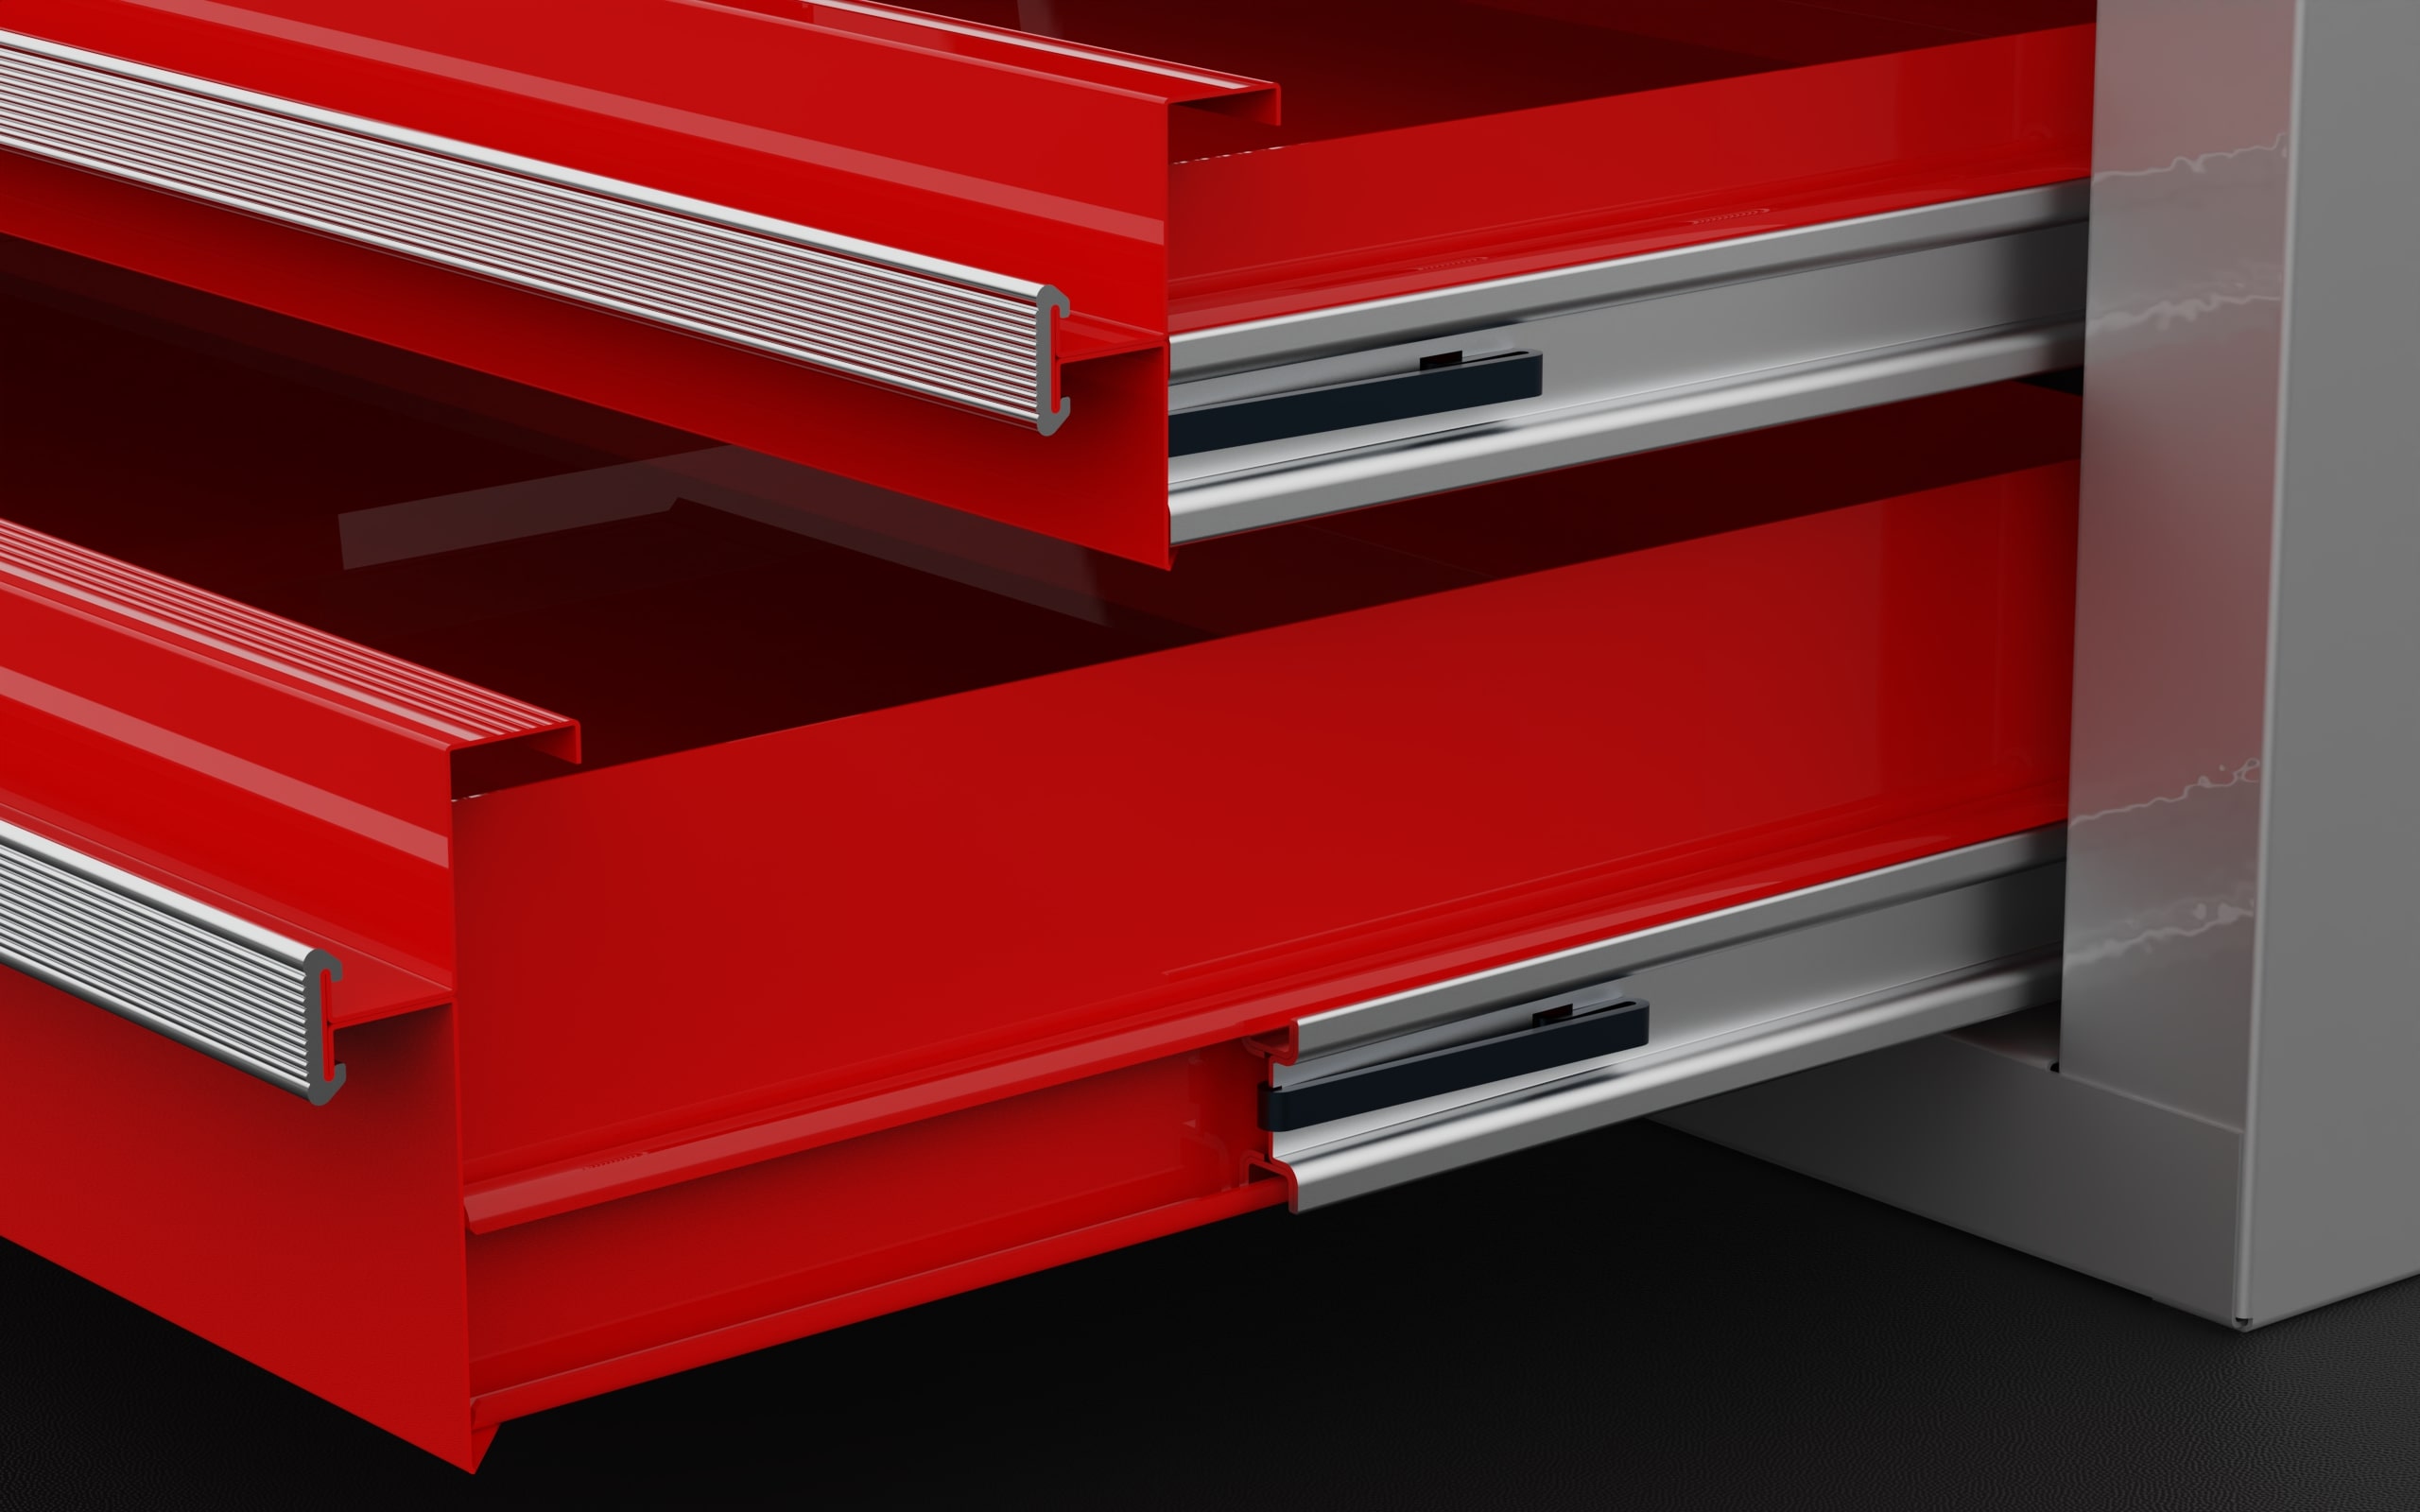
Step 3: Removing the drawer stops
The next step in removing the drawers from your Snap-on tool chest is to remove the drawer stops. Drawer stops are mechanisms that prevent the drawers from accidentally sliding out too far or falling out. Here’s how to remove them:
- Locate the drawer stops: Examine the sides of the drawer slides, typically near the front or back, for any visible stops or attachment points.
- Use a screwdriver or Allen wrench: Depending on the type of stops used in your tool chest, you may need a screwdriver or Allen wrench to loosen and remove the screws or bolts holding the stops in place.
- Remove the stops: Carefully unscrew or unbolt the stops from the drawer slides one by one. Make sure to keep these screws or bolts in a safe place, as you will need them later when reassembling the drawers.
- Repeat for all drawers: If your tool chest has multiple drawers, repeat this process for each drawer set until all the stops have been removed.
Once you have removed the drawer stops, you are ready to move on to the next step of removing the drawer slides.
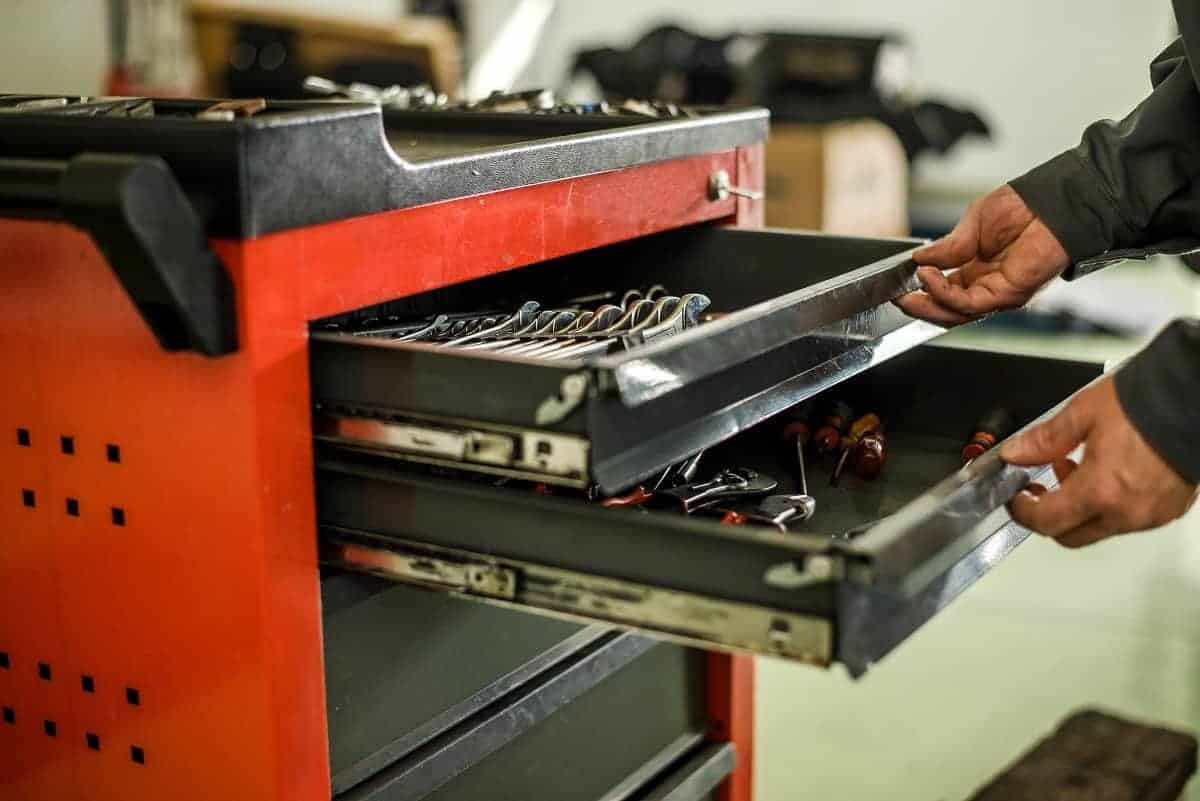
To remove drawers from a Snap On tool chest, first, open the drawer fully. Then, locate the release tabs on each side of the drawer slides and push them in while pulling the drawer out.
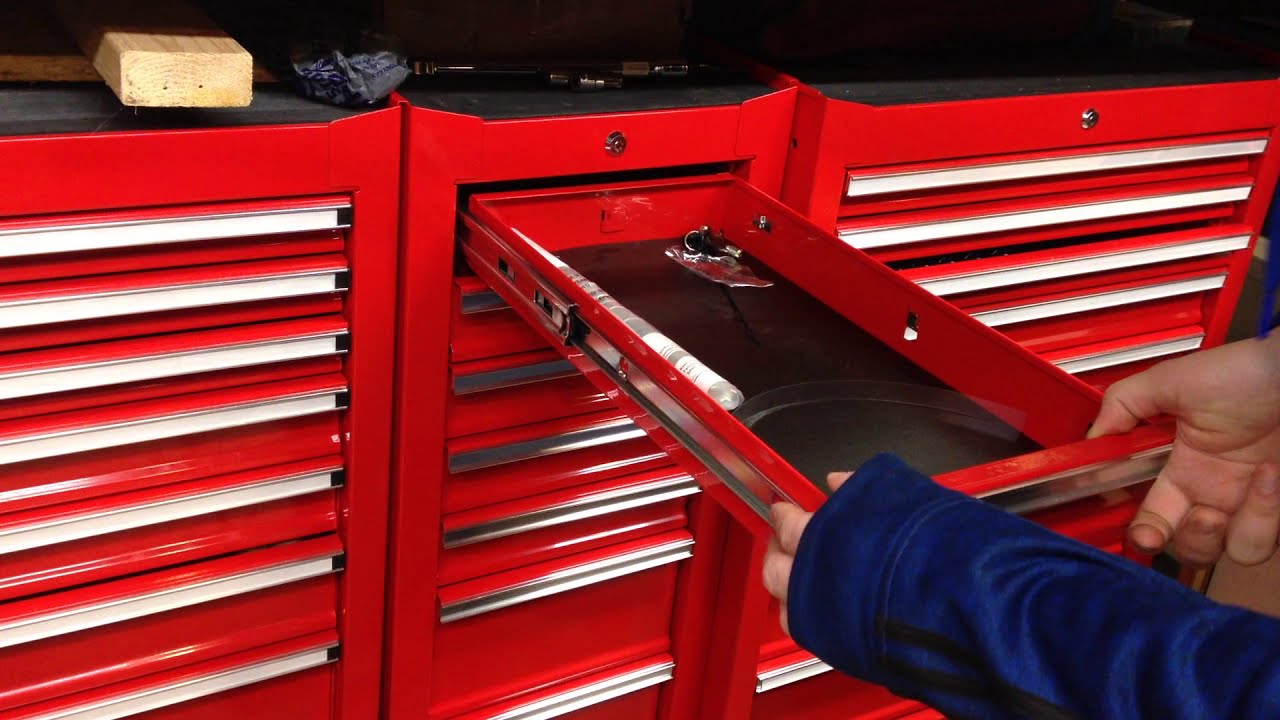
Step 4: Removing the drawer slides
After removing the drawer stops, the next step is to remove the drawer slides. The drawer slides are the metal tracks that allow the drawers to slide in and out of the tool chest smoothly. Follow these steps to remove them:
- Extend the drawer fully: Open the drawer as far as it will go to expose the entire length of the drawer slides.
- Examine the drawer slides: Take a close look at the drawer slides to identify how they are attached to the drawer and the tool chest. Look for any screws, bolts, or other fasteners holding the slides in place.
- Remove the mounting screws or bolts: Use a screwdriver or Allen wrench to remove the screws or bolts on both sides of the drawer slides. Typically, there will be two or three screws/bolts on each side.
- Gently slide the drawer slides out: With the screws or bolts removed, carefully slide the drawer slides out of their tracks. Be cautious not to bend or damage the slides in the process.
- Repeat for all drawers: If your tool chest has multiple drawers, repeat this process for each drawer until all the drawer slides have been removed.
Once you have successfully removed the drawer slides, it’s time to move on to the final step of actually removing the drawer from the tool chest.
Step 5: Removing the drawer from the tool chest
Now that you have removed the drawer stops and drawer slides, it’s time to remove the drawer from the Snap-on tool chest. Follow these steps to safely and effectively remove the drawer:
- Empty the drawer: Before removing the drawer, make sure it is completely empty of any tools or items that could fall out or get damaged during the process.
- Position yourself properly: Stand in front of the tool chest and firmly grip the sides of the drawer with both hands.
- Lift and tilt the drawer: While maintaining a firm grip on the drawer, lift it slightly to clear the drawer slides, and then tilt it slightly upwards.
- Slide the drawer out: Once the drawer is tilted, carefully slide it out of the tool chest’s frame. Be mindful of any wires or cables that may be connected to the back of the drawer.
- Set the drawer aside: Place the detached drawer on a clean and secure surface, such as the floor or a work table, ensuring it is safe from any potential damage.
- Repeat for all drawers: If your tool chest has multiple drawers, repeat this process for each drawer until all the drawers have been removed.
With the drawer successfully removed, you can now proceed to the final step of reassembling the tool chest drawers.
Step 6: Reassembling the tool chest drawers
After completing the necessary repairs, cleaning, or reorganization, it’s time to reassemble the drawers back into your Snap-on tool chest. Follow these steps to ensure a proper reassembly:
- Position the drawer slides: Align the drawer slides with the corresponding tracks on the tool chest frame. Make sure they are properly aligned for a smooth sliding motion.
- Insert the drawer slides: Carefully slide the drawer slides into the tracks, ensuring they glide smoothly without any obstructions or misalignments.
- Secure the drawer slides: Once the drawer slides are properly inserted, use the screws or bolts you removed earlier to secure them in place. Make sure to tighten them sufficiently, but avoid over-tightening.
- Replace the drawer stops: Take the drawer stops you removed earlier and reattach them to the designated attachment points on the drawer slides. Ensure they are secured tightly to prevent accidental drawer removal.
- Test the drawers: Before considering the reassembly complete, test each drawer by sliding them in and out to check for smooth movement and proper alignment.
- Repeat for all drawers: If you have multiple drawers, repeat this reassembly process for each one until all the drawers are securely back in place.
With the drawers reassembled, your Snap-on tool chest is now ready for use. Congratulations on successfully removing and reassembling the drawers!
Conclusion
Removing drawers from your Snap-on tool chest may seem like a daunting task, but with the right tools and knowledge, it can be a straightforward process. By following the steps outlined in this guide, you can safely remove the drawers for repair, cleaning, or reorganization.
We started by gathering the necessary tools, such as a screwdriver or Allen wrench, flashlight, soft cloth or towel, and gloves. These tools will aid in the process and keep you safe while working on your tool chest.
Next, we prepared the workspace by choosing a well-lit and spacious area, clearing the surrounding area of obstacles, protecting the floor with a cloth or towel, and wearing gloves to protect our hands.
We then proceeded to remove the drawer stops, carefully unscrewing or unbolting them from the drawer slides. This allowed us to move on to removing the drawer slides themselves by loosening the mounting screws or bolts and sliding them out of their tracks.
With the drawer stops and slides removed, we were ready to remove the drawer from the tool chest. By emptying the drawer, positioning ourselves properly, lifting and tilting the drawer, and sliding it out, we safely detached the drawer from the tool chest’s frame.
Finally, after completing any necessary repairs or cleaning, we reassembled the drawers back into the tool chest. This involved aligning and inserting the drawer slides, securing them with screws or bolts, and reattaching the drawer stops. We also tested the drawers to ensure proper movement and alignment.
By following these steps, you can confidently remove and reassemble the drawers in your Snap-on tool chest whenever necessary. Remember to work carefully, take your time, and exercise caution to avoid any damage to your tool chest or injury to yourself.
We hope this guide has been helpful in guiding you through the process of removing drawers from your Snap-on tool chest. Now, you can make the necessary repairs or reorganize your tools with ease. Happy working!
Now that you've mastered removing drawers from your Snap On tool chest, why not explore the best setups for organizing all your tools? Our next article delves into the top tool storage solutions for 2024, perfect for both professional mechanics and DIY enthusiasts. Discover practical, efficient ways to keep your workshop tidy and your tools easily accessible. Don’t miss out on this essential read for optimizing your workspace!
Frequently Asked Questions about How To Remove Drawers From Snap On Tool Chest
Was this page helpful?
At Storables.com, we guarantee accurate and reliable information. Our content, validated by Expert Board Contributors, is crafted following stringent Editorial Policies. We're committed to providing you with well-researched, expert-backed insights for all your informational needs.


0 thoughts on “How To Remove Drawers From Snap On Tool Chest”