Articles
How To Repair A LM30 Laser Level
Modified: December 7, 2023
Learn effective techniques and step-by-step instructions on how to repair your LM30 laser level with our comprehensive articles. Enhance your DIY skills and save money today!
(Many of the links in this article redirect to a specific reviewed product. Your purchase of these products through affiliate links helps to generate commission for Storables.com, at no extra cost. Learn more)
Introduction
The LM30 Laser Level is a widely used tool in construction and surveying, known for its accuracy and ease of use. This precision instrument helps professionals and DIY enthusiasts achieve precise leveling and alignment for a range of projects. However, like any electronic device, the LM30 Laser Level may encounter issues that require repair. Understanding how to troubleshoot and fix common problems can save you time and money.
In this article, we will provide you with a comprehensive guide on repairing the LM30 Laser Level. We will walk you through the common issues that can occur with this tool, the necessary preparations, tools, and materials needed for the repair, as well as a step-by-step guide to guide you through the repair process. Additionally, we will include safety precautions to ensure that you can carry out the repair safely.
Whether you are a professional who relies on your LM30 Laser Level for your work or a dedicated DIY enthusiast using it for home improvement projects, this article will equip you with the knowledge and skills to address minor issues with your LM30 Laser Level. So, let’s dive in and learn how to repair your LM30 Laser Level effectively!
Key Takeaways:
- Mastering the repair process for the LM30 Laser Level empowers professionals and DIY enthusiasts to restore functionality, save time, and maintain accuracy for leveling and alignment tasks.
- Prioritizing safety, attention to detail, and proper documentation throughout the repair journey ensures a successful and hassle-free experience, optimizing the performance and longevity of the LM30 Laser Level.
Read more: How To Use ToughBuilt 30 Ft. Laser Level
Overview of LM30 Laser Level
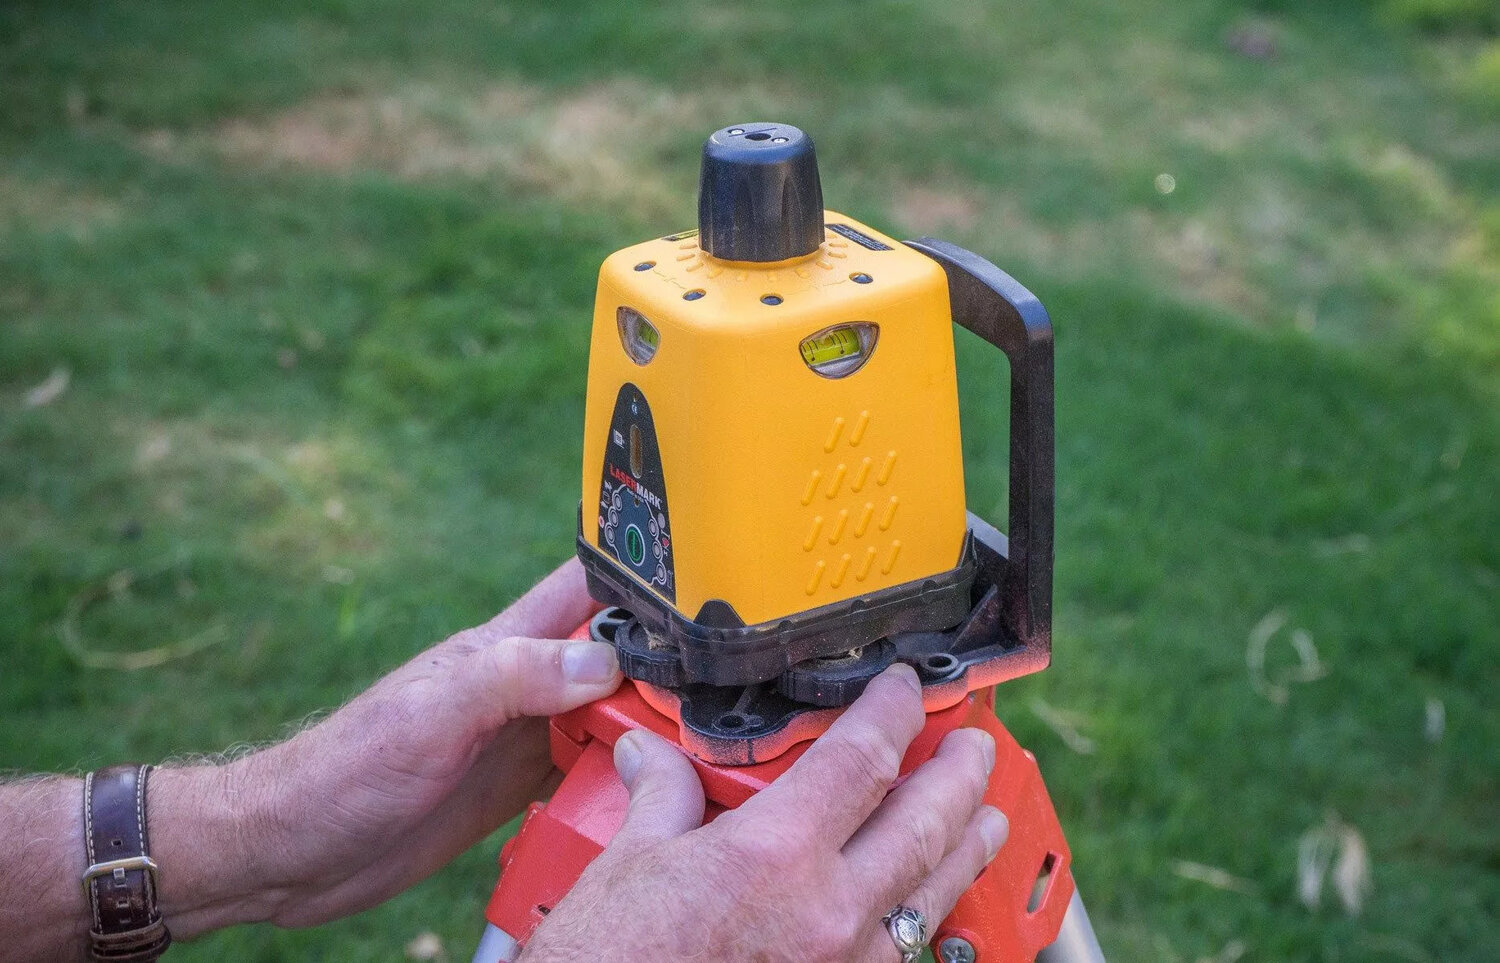
The LM30 Laser Level is a versatile tool that is widely used in the construction and surveying industries. It is designed to project a highly visible laser beam onto surfaces, providing accurate leveling and alignment. With its compact size and portability, the LM30 Laser Level is suitable for both indoor and outdoor applications.
One of the key features of the LM30 Laser Level is its self-leveling capability. This means that it automatically adjusts its position to ensure that the laser beam remains level, even on uneven surfaces. This feature eliminates the need for manual adjustments and ensures precise measurements.
The LM30 Laser Level offers a range of functionalities to meet various needs. It typically includes both horizontal and vertical leveling modes, allowing for a wide range of leveling and alignment tasks. Some models may also include additional features such as plumb point projection, scan mode, and slope functionality, further expanding its versatility.
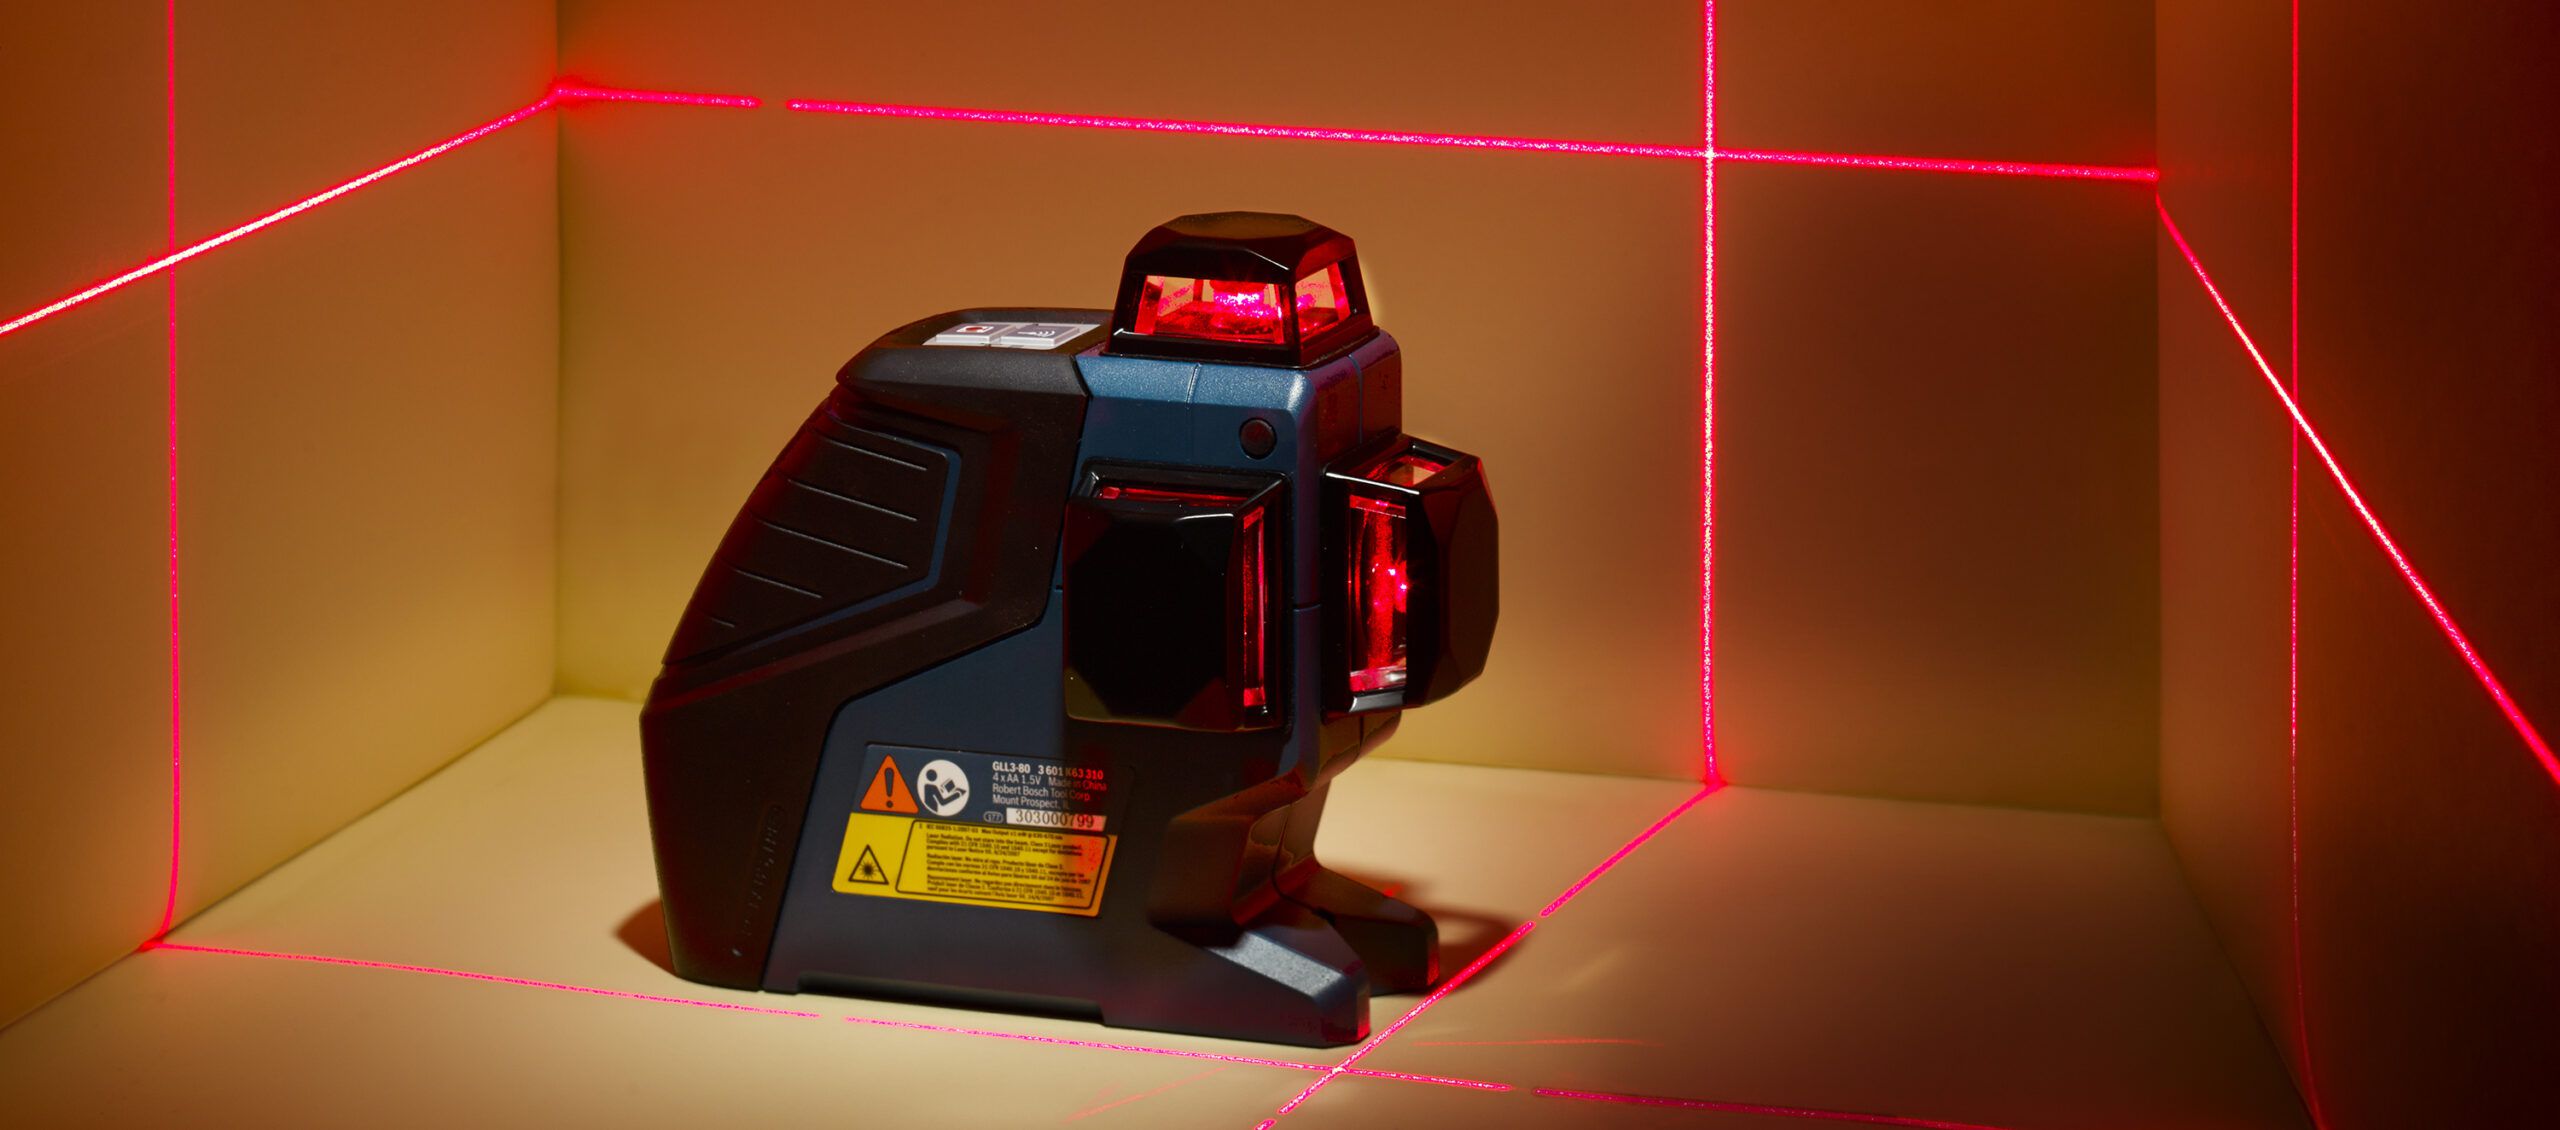
The LM30 Laser Level is known for its high accuracy and reliability. It uses advanced laser technology to project a bright laser beam that is easily visible, even in brightly lit environments. This allows users to work with confidence, knowing that their measurements will be accurate and reliable.
In addition to its accuracy, the LM30 Laser Level is designed for ease of use. It typically features intuitive controls and a clear display, making it simple for users to operate. The compact and lightweight design allows for easy portability, making it convenient to use in various locations.
Overall, the LM30 Laser Level is a highly efficient and reliable tool that can greatly assist in leveling and alignment tasks. Its self-leveling capability, range of functionalities, and ease of use make it a popular choice among professionals and DIY enthusiasts alike.
Common Issues with LM30 Laser Level
While the LM30 Laser Level is a reliable tool, there are a few common issues that users may encounter. Understanding these issues can help you identify and address any problems that arise with your LM30 Laser Level. Here are some of the common issues:
- Power Failure: One of the most common issues is a power failure. If your LM30 Laser Level fails to turn on or experiences intermittent power loss, it may be due to a faulty battery or power connection. Checking the battery and ensuring a secure power connection can help resolve this issue.
- Laser Alignment Problems: Another common issue is laser misalignment. If the laser beam appears dim, flickers, or is not aligned properly, it can affect the accuracy of your readings. This issue may be caused by a dirty lens or a misaligned laser diode. Cleaning the lens and recalibrating the laser can help resolve this issue.
- Inaccurate Readings: Sometimes, the LM30 Laser Level may provide inaccurate readings. This can be caused by several factors, such as an uneven or unstable surface, improper calibration, or a damaged leveling mechanism. Ensuring a stable surface, recalibrating the device, or repairing or replacing the leveling mechanism can help address this issue.
- Broken Components: Over time, certain components of the LM30 Laser Level may become damaged or worn out. This can include buttons, switches, or the housing. Broken components can affect the overall functionality of the device. Repairing or replacing the damaged components can help restore the full functionality of the LM30 Laser Level.
- Water Damage: If the LM30 Laser Level comes into contact with water or moisture, it can cause damage to the electronic components. Water damage can result in malfunctions or complete failure of the device. Drying the device thoroughly and inspecting for any damage is crucial in addressing this issue.
It’s important to note that attempting to repair complex issues or disassembling the LM30 Laser Level without proper knowledge and expertise may further damage the device. In such cases, it is advisable to seek professional assistance or contact the manufacturer for guidance.
By being aware of these common issues and troubleshooting steps, you can effectively address minor problems with your LM30 Laser Level and ensure its continued functionality and accuracy for your leveling and alignment needs.
Preparation for Repair
Before diving into the repair process, it’s essential to make the necessary preparations to ensure a smooth and successful repair of your LM30 Laser Level. Here are some steps to follow:
- Read the User Manual: Begin by carefully reading the user manual that came with your LM30 Laser Level. The manual will provide valuable information about the device’s specifications, troubleshooting tips, and safety precautions. Familiarize yourself with the instructions and guidelines to ensure you understand the proper usage and repair procedures.
- Identify the Problem: Determine the specific issue you are experiencing with your LM30 Laser Level. It could be a power failure, laser misalignment, inaccurate readings, broken components, or water damage. Identifying the problem will help you focus on the appropriate repair steps and necessary tools.
- Gather the Tools and Materials: Once you have identified the problem, gather the necessary tools and materials for the repair. This can include screwdrivers, pliers, cleaning solution, lint-free cloth, replacement parts (if needed), and any other specific tools recommended in the user manual.
- Prepare a Clean and Organized Work Area: Find a clean and well-lit work area where you can comfortably disassemble and repair your LM30 Laser Level. Clear off any clutter and lay down a soft mat or towel to prevent scratches or damage to the device. Having an organized work area will make the repair process more efficient.
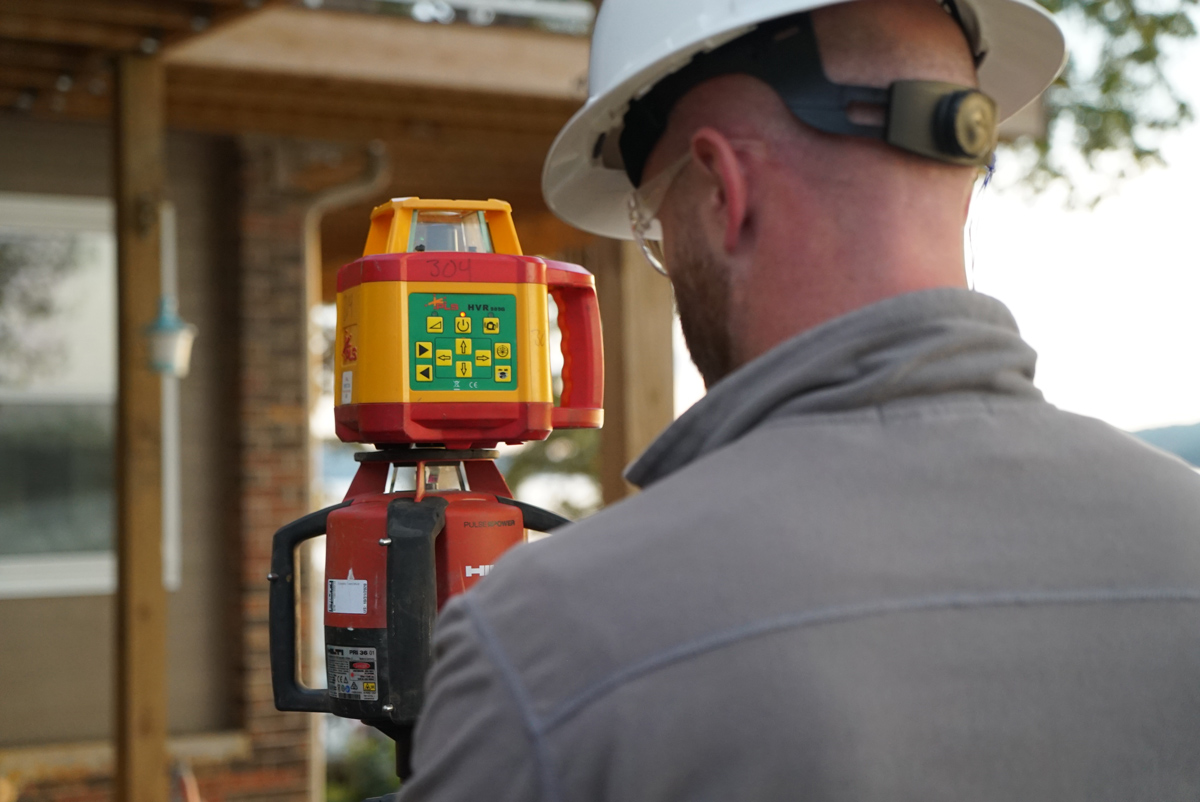
- Protective Measures: Wear appropriate protective gear, such as safety glasses and gloves, to protect yourself during the repair process. This is especially important when handling sharp objects, electrical components, or cleaning chemicals.
- Secure a Backup or Replacement: If your LM30 Laser Level is essential for your work or project, consider securing a backup or replacement device in case the repair takes longer than anticipated or if the device is irreparable.
- Take Notes and Photos: As you disassemble the LM30 Laser Level, take notes or photos of each step. This will help you remember the proper order and placement of components during reassembly.
Taking the time to properly prepare for the repair process ensures that you have the necessary tools, knowledge, and work environment to successfully address the issues with your LM30 Laser Level. It also minimizes the risk of further damage and increases the chances of a successful repair. So, gather your tools and materials, set up your work area, and let’s get started with the repair process!
Tools and Materials Needed
Repairing your LM30 Laser Level requires the use of specific tools and materials to effectively address the identified issues. Here is a list of essential tools and materials you will need for the repair:
Read more: How To Level A Laser Level Tripod
Tools:
- Screwdriver Set: A set of screwdrivers with various sizes and types will be necessary to remove screws and disassemble the LM30 Laser Level.
- Pliers: A pair of pliers will be helpful for gripping and extracting any stubborn or hard-to-reach screws or components.
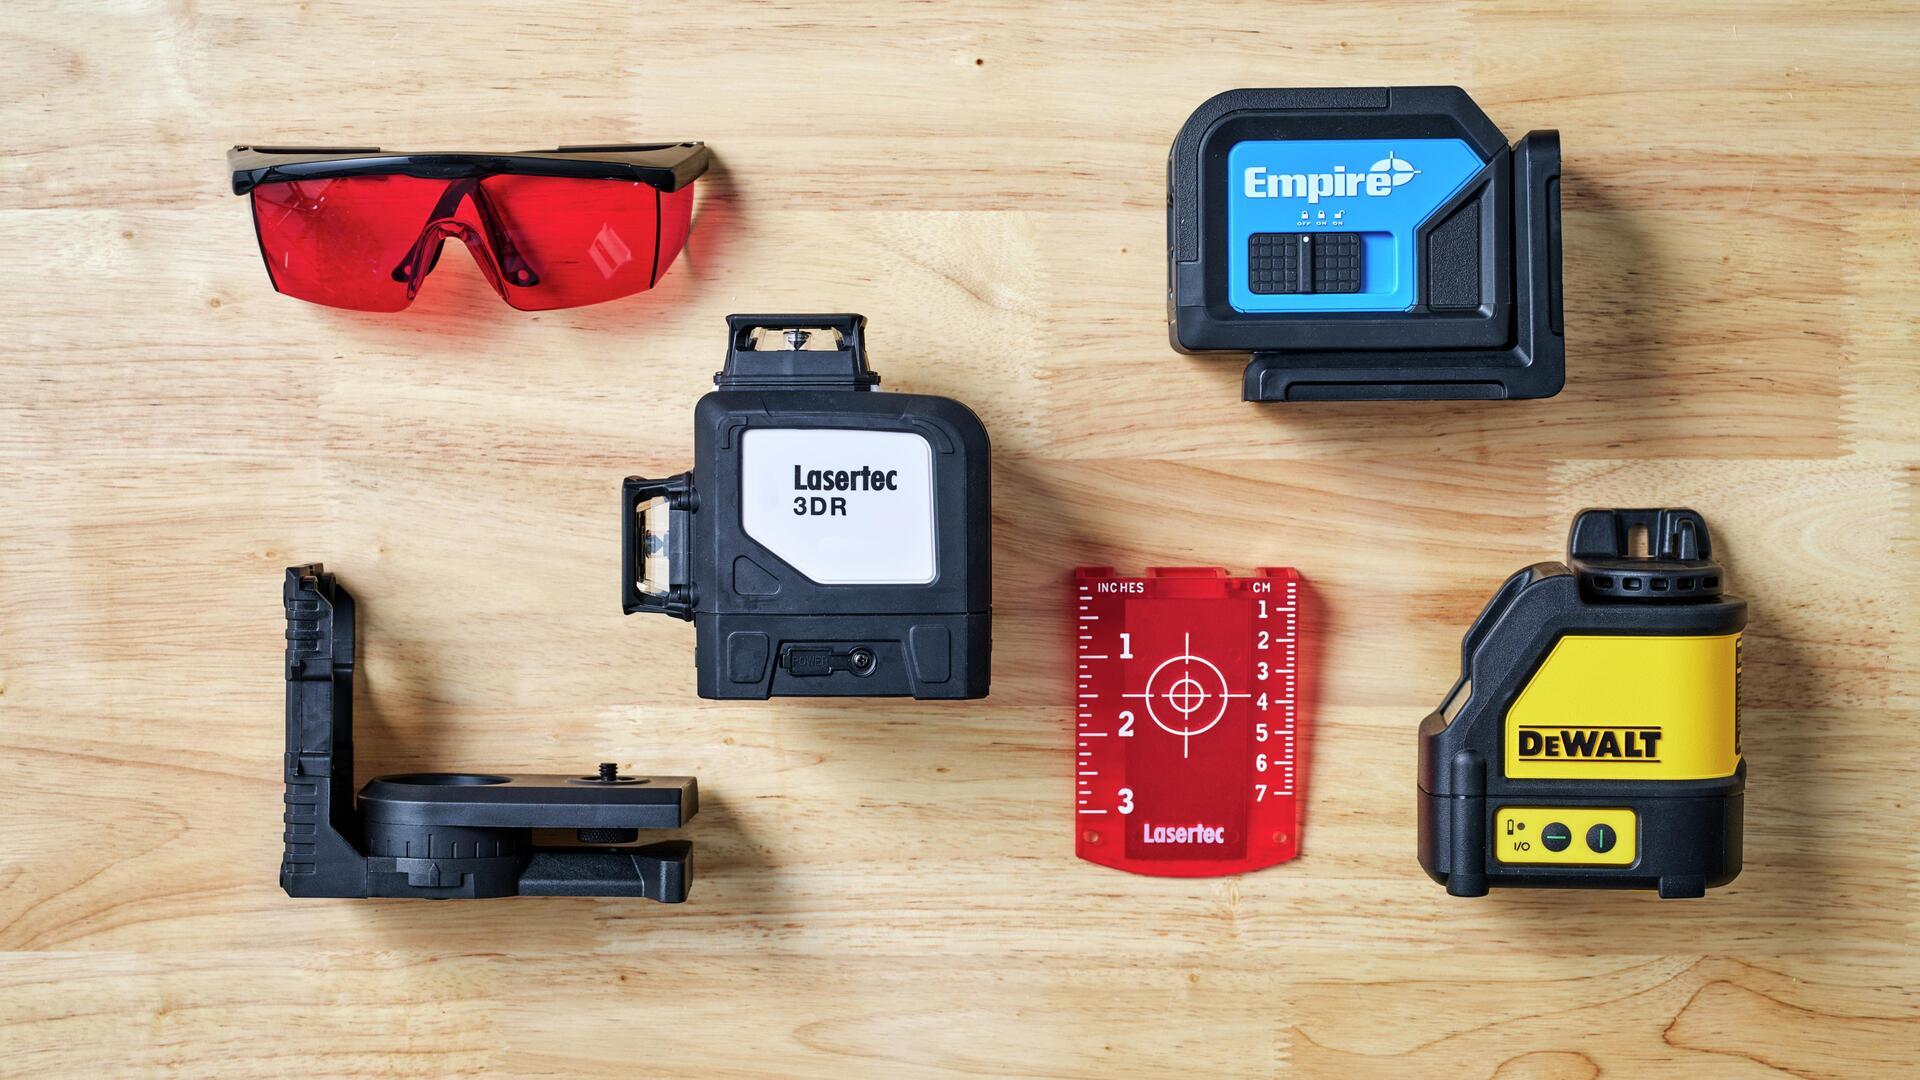
- Cleaning Solution: A mild cleaning solution or isopropyl alcohol will be needed to clean the lens and other components of the LM30 Laser Level.
- Lint-Free Cloth: A lint-free cloth or microfiber cloth will be used to wipe and remove any dust, dirt, or fingerprints from the lens or other delicate parts.
- Calibration Tools: Depending on the issue, you may need specialized calibration tools to check and adjust the accuracy of the LM30 Laser Level. Refer to the user manual or manufacturer’s recommendations for the specific calibration tools required.
- Multimeter: A digital multimeter can be useful for troubleshooting electrical connectivity issues and testing voltage levels.
- Replacement Parts: If you have identified specific damaged or broken components, you may need to have replacement parts on hand. These could include buttons, switches, housings, or other specialized parts. Ensure that the replacement parts are compatible with your LM30 Laser Level model.
Materials:
- Batteries: If the power issue is related to the batteries, have a set of fresh batteries available for testing and replacement if necessary.
- Cleaning Supplies: Alongside the cleaning solution, gather cotton swabs or soft brushes for delicate cleaning and a can of compressed air to blow dust or debris out of hard-to-reach areas.
- Electrical Tape: Electrical tape can be useful for securing wires or repairing minor electrical issues.
- Lubricant: If the repair involves the adjustment or replacement of moving parts, a light lubricant can help ensure smooth operation.
- Documentation: Keep a notepad or notebook handy to take notes during the disassembly and repair process. Additionally, taking photos at each stage can serve as useful references during reassembly.
Having the right tools and materials readily available will make the repair process more efficient and increase the chances of successfully addressing the issues with your LM30 Laser Level. Make sure to gather all the necessary tools and materials before proceeding with the repair steps.
Step-by-Step Guide for Repairing LM30 Laser Level
Now that you’re prepared with the necessary tools and materials, let’s dive into the step-by-step guide for repairing your LM30 Laser Level. Follow these instructions carefully to effectively address the identified issues:
- Step 1: Disassembling the LM30 Laser Level
Begin by carefully removing any visible screws from the device using the appropriate screwdriver. Take note of where each screw is located as you will need to reassemble the device later. Gently separate the housing to access the internal components. Take caution not to force or damage any delicate parts during the disassembly process. - Step 2: Inspecting and Cleaning the Laser Components
Once the device is disassembled, inspect the laser components for any signs of dirt, dust, or damage. Use a lint-free cloth or soft brush along with a mild cleaning solution or isopropyl alcohol to carefully clean the lens, laser diode, and other relevant parts. Ensure that all components are clean and free from any obstructions or debris. - Step 3: Repairing or Replacing Damaged Parts
If you have identified any damaged or broken components, this is the time to repair or replace them. Use the appropriate tools to carefully detach the damaged part and replace it with the new one. Take note of any specific instructions or guidelines provided by the manufacturer or user manual for the proper replacement procedure. - Step 4: Testing the LM30 Laser Level
Once all repairs and replacements are complete, reassemble the LM30 Laser Level by aligning the housing and securely fastening the screws. Carefully turn on the device and test its functionality. Check for proper power supply, laser alignment, and accurate readings. If necessary, perform any calibration procedures recommended by the manufacturer to ensure optimal performance.
It’s important to note that the specific repair steps may vary depending on the issue you are facing and the model of your LM30 Laser Level. Always refer to the user manual or manufacturer’s instructions for any specific guidelines or procedures.
Remember to work carefully, taking your time to ensure that each step is executed correctly. If you are unsure about any part of the repair process or encounter difficulties, it is advisable to seek professional assistance or contact the manufacturer for support.
By following this step-by-step guide, you can effectively repair your LM30 Laser Level and restore its functionality for your leveling and alignment needs.
Disassembling the LM30 Laser Level
The first step in repairing your LM30 Laser Level is to disassemble the device. This will allow you to access the internal components and identify any issues that need attention. Follow these steps to safely disassemble your LM30 Laser Level:
- Gather the necessary tools: Before starting the disassembly process, gather the appropriate screwdriver(s) that fit the screws securing the housing of your LM30 Laser Level. Having a variety of screwdrivers on hand can help ensure you have the right size for each screw.
- Power off the device: Make sure the LM30 Laser Level is turned off and the power supply is disconnected. This step is crucial to avoid the risk of electrical shock or accidental laser exposure during the disassembly process.
- Locate and remove the screws: Carefully examine the housing of the LM30 Laser Level to locate the screws that hold it together. Using the appropriate screwdriver, remove each screw one by one. Remember to keep the screws in a safe place or use a magnetic tray to avoid misplacing them.
- Separate the housing: Once all the screws are removed, gently separate the housing of the LM30 Laser Level. Use caution as some models may have clips or additional securing mechanisms that require careful manipulation to avoid damage.
- Take note of the disassembly process: As you disassemble the LM30 Laser Level, take notes or photos to document the order and orientation of the components. This will be helpful during the reassembly process to ensure that everything is correctly put back together.
- Inspect the internal components: With the housing removed, you can now inspect the internal components of the LM30 Laser Level. Look for any obvious signs of damage, loose connections, or worn-out parts. Take note of any issues you observe to guide your repair process.
- Handle components with care: Throughout the disassembly process, it’s important to handle the delicate components of the LM30 Laser Level with care. Avoid applying excessive force or pulling on wires, as this can cause damage. If you encounter any resistance while disassembling, double-check for hidden screws or securing mechanisms before proceeding.
Disassembling the LM30 Laser Level provides you with the access needed to inspect and troubleshoot the internal components. Remember to work in a clean and well-lit area, taking your time to ensure that each step is performed accurately. By following these steps, you’ll be ready to move on to the next phase of the repair process.
When repairing a LM30 laser level, start by checking the batteries and cleaning the lens. If the issue persists, consult the user manual for troubleshooting tips or contact the manufacturer for support.
Inspecting and Cleaning the Laser Components
Once you have successfully disassembled your LM30 Laser Level, the next step is to inspect and clean the laser components. This process involves examining the lens, laser diode, and other relevant parts to ensure they are free from dirt, dust, or damage. Follow these steps to effectively inspect and clean the laser components:
- Prepare the cleaning materials: Before beginning the inspection and cleaning process, gather the necessary materials. You will need a mild cleaning solution or isopropyl alcohol, a lint-free cloth or microfiber cloth, cotton swabs or soft brushes, and a can of compressed air.
- Examine the lens: Start by examining the lens of the LM30 Laser Level. Look for any smudges, fingerprints, or dirt that may affect the clarity of the laser beam. If you notice any debris on the lens, it’s essential to clean it properly.
- Clean the lens: Dip a cotton swab or soft brush into the mild cleaning solution or isopropyl alcohol. Gently wipe the lens in a circular motion to remove any dirt or smudges. Avoid using excessive force or abrasive materials that could scratch the lens. Once cleaned, use a lint-free cloth to wipe away any residue.
- Inspect the laser diode: Move on to inspecting the laser diode, which is responsible for emitting the laser beam. Check for any visible damage or misalignment that could affect the performance of the laser level.
- Clean the laser diode: If the laser diode appears dirty or dusty, use a soft brush or compressed air to remove any debris. Be careful not to dislodge or damage the diode during the cleaning process.
- Check other components: Take this opportunity to inspect other components of the laser module, such as mirrors or filters, for any signs of damage or contamination. Clean these components if necessary, using the appropriate cleaning method and materials.
- Blow out dust and debris: To ensure that all internal components are free from dust or debris, use a can of compressed air to blow out any hard-to-reach areas. This will help keep the laser module clean and functioning optimally.
- Reassembly considerations: As you complete the cleaning process, be mindful of the reassembly process. Take note of the orientation and position of the components you cleaned to ensure proper reassembly later on.
Inspecting and cleaning the laser components of your LM30 Laser Level is essential for maintaining its accuracy and performance. By following these steps and using proper cleaning techniques, you can ensure that your laser level is free from debris and ready for the next phase of the repair process.
Repairing or Replacing Damaged Parts
After inspecting and cleaning the laser components of your LM30 Laser Level, it’s time to address any damaged parts that may have been identified during the inspection. Repairing or replacing these components is crucial for restoring the functionality and accuracy of the laser level. Follow these steps to effectively repair or replace the damaged parts:
- Identify the damaged parts: Referencing your observations from the inspection, pinpoint the specific components that are damaged or need repair. This could include buttons, switches, circuit boards, or other specialized parts.
- Obtain replacement parts: If you have determined that certain components need replacement, source the appropriate replacement parts from the manufacturer or authorized suppliers. Make sure to order parts that are compatible with your LM30 Laser Level model.
- Disconnect any electrical connections: Before starting the repair process, ensure that the LM30 Laser Level is powered off and disconnected from any power source. If the damaged parts are connected to any wires or electrical connections, carefully disconnect them to avoid causing further damage.
- Repairing damaged parts: For components that can be repaired, assess the extent of the damage and decide on the appropriate repair method. This could involve soldering, replacing small components, or using electrical tape to secure loose connections. Follow proper repair techniques and safety precautions for each specific repair.
- Replacing damaged parts: If the damaged parts cannot be repaired, carefully remove them from the LM30 Laser Level using the appropriate tools. Replace them with the new components you obtained, following any manufacturer or user manual instructions for proper installation. Take note of the proper orientation and positioning of the replacement parts.
- Testing the repaired or replaced parts: Once the repair or replacement is complete, double-check all connections and ensure that the repaired or replaced parts are secure. Power on the LM30 Laser Level and perform a functionality test to verify that the repaired or replaced parts are functioning correctly.
- Document the repair process: Throughout the repair process, document the steps you took and any specific details or adjustments made. This documentation will be useful for future reference or in case you need to reassemble or repair the LM30 Laser Level again.
It’s important to approach the repair process with care and attention to detail. If you are unsure about any repair techniques or encounter difficulties, it is advisable to seek professional assistance or contact the manufacturer for guidance.
By effectively repairing or replacing the damaged parts of your LM30 Laser Level, you can restore its functionality and ensure accurate measurements for your leveling and alignment needs.
Testing the LM30 Laser Level
After completing the repair or replacement of any damaged parts in your LM30 Laser Level, the next step is to thoroughly test the device. Testing will allow you to verify the functionality and accuracy of the laser level before putting it back into regular use. Follow these steps to effectively test your LM30 Laser Level:
- Reassemble the device: If you had fully disassembled the LM30 Laser Level during the repair process, carefully reassemble all the components following the proper order and orientation. Ensure that all screws are tightly secured but avoid over-tightening to prevent damage to the housing or internal components.
- Power on the device: Once the device is reassembled, connect it to a power source and turn it on. Check that the power supply is stable, and the display or indicator lights on the laser level are functioning as expected.
- Check for laser alignment: Place the LM30 Laser Level on a stable surface and observe the projected laser beam. Make sure that the laser is correctly aligned and forms a straight line. Any misalignment should be addressed before proceeding with further testing.
- Test the leveling functionality: Use the leveling feature of the LM30 Laser Level to ensure that it accurately self-levels on a flat surface. Verify that the leveling mechanism functions properly and that the laser beam remains level throughout the testing process.
- Verify accuracy of readings: Test the LM30 Laser Level by measuring known distances or checking for plumb and square alignments. Compare the readings obtained from the laser level with the expected values to evaluate its accuracy. If there are significant deviations, recalibrate the device as necessary or verify if there are any remaining issues that require attention.
- Perform additional functionality tests: If your LM30 Laser Level has additional functionalities such as scan mode or slope functionality, test these features to ensure they are working properly. Refer to the user manual for instructions on using these functions and verify that they operate smoothly and accurately.
- Document the testing results: Throughout the testing process, document the results, including any issues or discrepancies observed. This documentation will be valuable for future reference and troubleshooting.
It’s important to conduct thorough testing to ensure that your repaired LM30 Laser Level is fully functional and provides accurate measurements. If further issues or inaccuracies persist during testing, consider seeking professional assistance or contacting the manufacturer for further guidance.
By carefully testing your LM30 Laser Level, you can verify that the repairs or replacements were successful and have confidence in its accuracy and reliability for your leveling and alignment tasks.
Safety Precautions for Repairing the LM30 Laser Level
When repairing the LM30 Laser Level, it is essential to prioritize safety to prevent accidents, injuries, or further damage to the device. Adhering to proper safety precautions will ensure a smooth and secure repair process. Here are some safety precautions to keep in mind:
- Power off and disconnect: Before you begin any repair work, make sure the LM30 Laser Level is powered off and disconnected from any power source. This eliminates the risk of electrical shock during the repair process.
- Protective gear: Wear appropriate protective gear, such as safety glasses and gloves, to prevent eye injuries from debris or chemicals and to protect your hands from sharp edges or electrical components.
- Work in a well-ventilated area: Ensure that your work area is properly ventilated to minimize exposure to any fumes or vapors that may be emitted during the repair process.
- Proper tool usage: Use the appropriate tools for disassembling, repairing, and reassembling the LM30 Laser Level. Ensure that your tools are in good condition and that you are familiar with their proper usage to avoid accidents or damage to the device.
- Avoid direct laser exposure: Take utmost care to prevent direct exposure to the laser beam during the repair process. The laser used in LM30 Laser Level devices can cause eye injury or skin burns. Always avoid looking directly into the laser beam and ensure it is not pointed at anyone.
- Handle electronic components with care: When handling electronic components or circuit boards, avoid excessive force or bending that could lead to damage. Use anti-static precautions, such as grounding yourself and using an anti-static mat or wrist strap, to protect sensitive electronic components from electrostatic discharge.
- Follow manufacturer’s guidelines: Refer to the user manual or manufacturer’s instructions for specific guidelines and precautions related to repairing the LM30 Laser Level. These guidelines may include specifications for specific repair procedures, recommended safety precautions, and any warnings or restrictions related to the device.
- Know your limits: If you are unsure about any repair processes or techniques, it is best to seek professional assistance or contact the manufacturer for guidance. Attempting complex repairs without proper knowledge or expertise may lead to further damage or potentially dangerous situations.
- Keep a clean work area: Maintain a clean and organized work area to avoid misplacing small components, causing accidental damage, or creating additional hazards. Ensure that your work area is clear of clutter and obstacles that could interfere with the repair process.
- Take breaks as needed: If you are working on a complex or time-consuming repair, remember to take breaks when necessary. Fatigue can lead to accidents or errors, so it is essential to maintain focus and concentration throughout the repair process.
By following these safety precautions, you can minimize the risks associated with repairing the LM30 Laser Level and ensure your personal safety as well as the integrity of the device. Prioritizing safety will contribute to a successful and hassle-free repair experience.
Read more: How To Work A Water Level Or Laser Level
Conclusion
Repairing the LM30 Laser Level can be a rewarding endeavor, allowing you to restore its functionality and prolong its lifespan. By following the step-by-step guide provided in this article, you have gained the knowledge and skills to address common issues that may arise with your LM30 Laser Level. From disassembling the device to inspecting and cleaning the components, repairing or replacing damaged parts, and testing its functionality, you have learned the essential techniques required for successful repair.
Throughout the repair process, it is crucial to prioritize safety by following the recommended safety precautions and using proper protective gear. This will help prevent accidents and ensure a secure and efficient repair experience.
Remember, if you encounter any difficulties during the repair process or are unsure about any step, it is always wise to seek professional assistance or contact the manufacturer for guidance. They can offer expertise and help resolve complex issues that may require specialized knowledge.
By effectively repairing your LM30 Laser Level, you can save time and money while maintaining the accuracy and reliability of this essential tool. Whether you are a professional in the construction industry or a dedicated DIY enthusiast, having a functional LM30 Laser Level will continue to serve you well in your leveling and alignment tasks.
As you embark on your LM30 Laser Level repair journey, remember to proceed with care, patience, and attention to detail. Document the repair process, take notes, and keep a clean work area to ensure a smooth experience. With the proper knowledge and tools at hand, you can confidently address common issues and get your LM30 Laser Level back in working order.
By taking the time to repair and maintain your LM30 Laser Level, you are investing in its longevity and optimizing its performance. So, gather your tools, follow the steps outlined in this article, and enjoy the benefits of a fully repaired LM30 Laser Level for all your leveling and alignment needs!
Frequently Asked Questions about How To Repair A LM30 Laser Level
Was this page helpful?
At Storables.com, we guarantee accurate and reliable information. Our content, validated by Expert Board Contributors, is crafted following stringent Editorial Policies. We're committed to providing you with well-researched, expert-backed insights for all your informational needs.


0 thoughts on “How To Repair A LM30 Laser Level”