Articles
How To Repair Crumbling Basement Walls
Modified: May 6, 2024
Looking for articles on how to repair crumbling basement walls? Find expert advice and step-by-step instructions to fix your basement walls and prevent further damage.
(Many of the links in this article redirect to a specific reviewed product. Your purchase of these products through affiliate links helps to generate commission for Storables.com, at no extra cost. Learn more)
Introduction
Having a crumbling basement wall can be a homeowner’s worst nightmare. Not only can it compromise the structural integrity of your home, but it can also lead to water damage, mold growth, and other costly repairs. However, with the right knowledge and tools, you can repair and reinforce your crumbling basement walls.
In this article, we will explore the signs of crumbling basement walls, the causes of this issue, as well as step-by-step instructions on how to repair and prevent further damage. We will also discuss the materials and tools you will need for the repairs and provide tips on how to properly prepare your basement walls before starting the repair process.
Whether you are dealing with small cracks or significant damage, this article will guide you through the process of repairing your basement walls and help you ensure the long-term stability and safety of your home.
So, let’s dive in and learn how to restore your crumbling basement walls!
Key Takeaways:
- Identifying signs of crumbling basement walls and addressing them promptly can prevent extensive damage, ensuring the safety and stability of your home. Regular inspections and proactive measures are crucial for maintaining a secure environment.
- Proper preparation, effective repair techniques, and preventive measures are essential for restoring and reinforcing crumbling basement walls. Seeking professional assistance for extensive repairs or structural issues can ensure the long-term durability of your home.
Read more: How To Repair Basement Walls
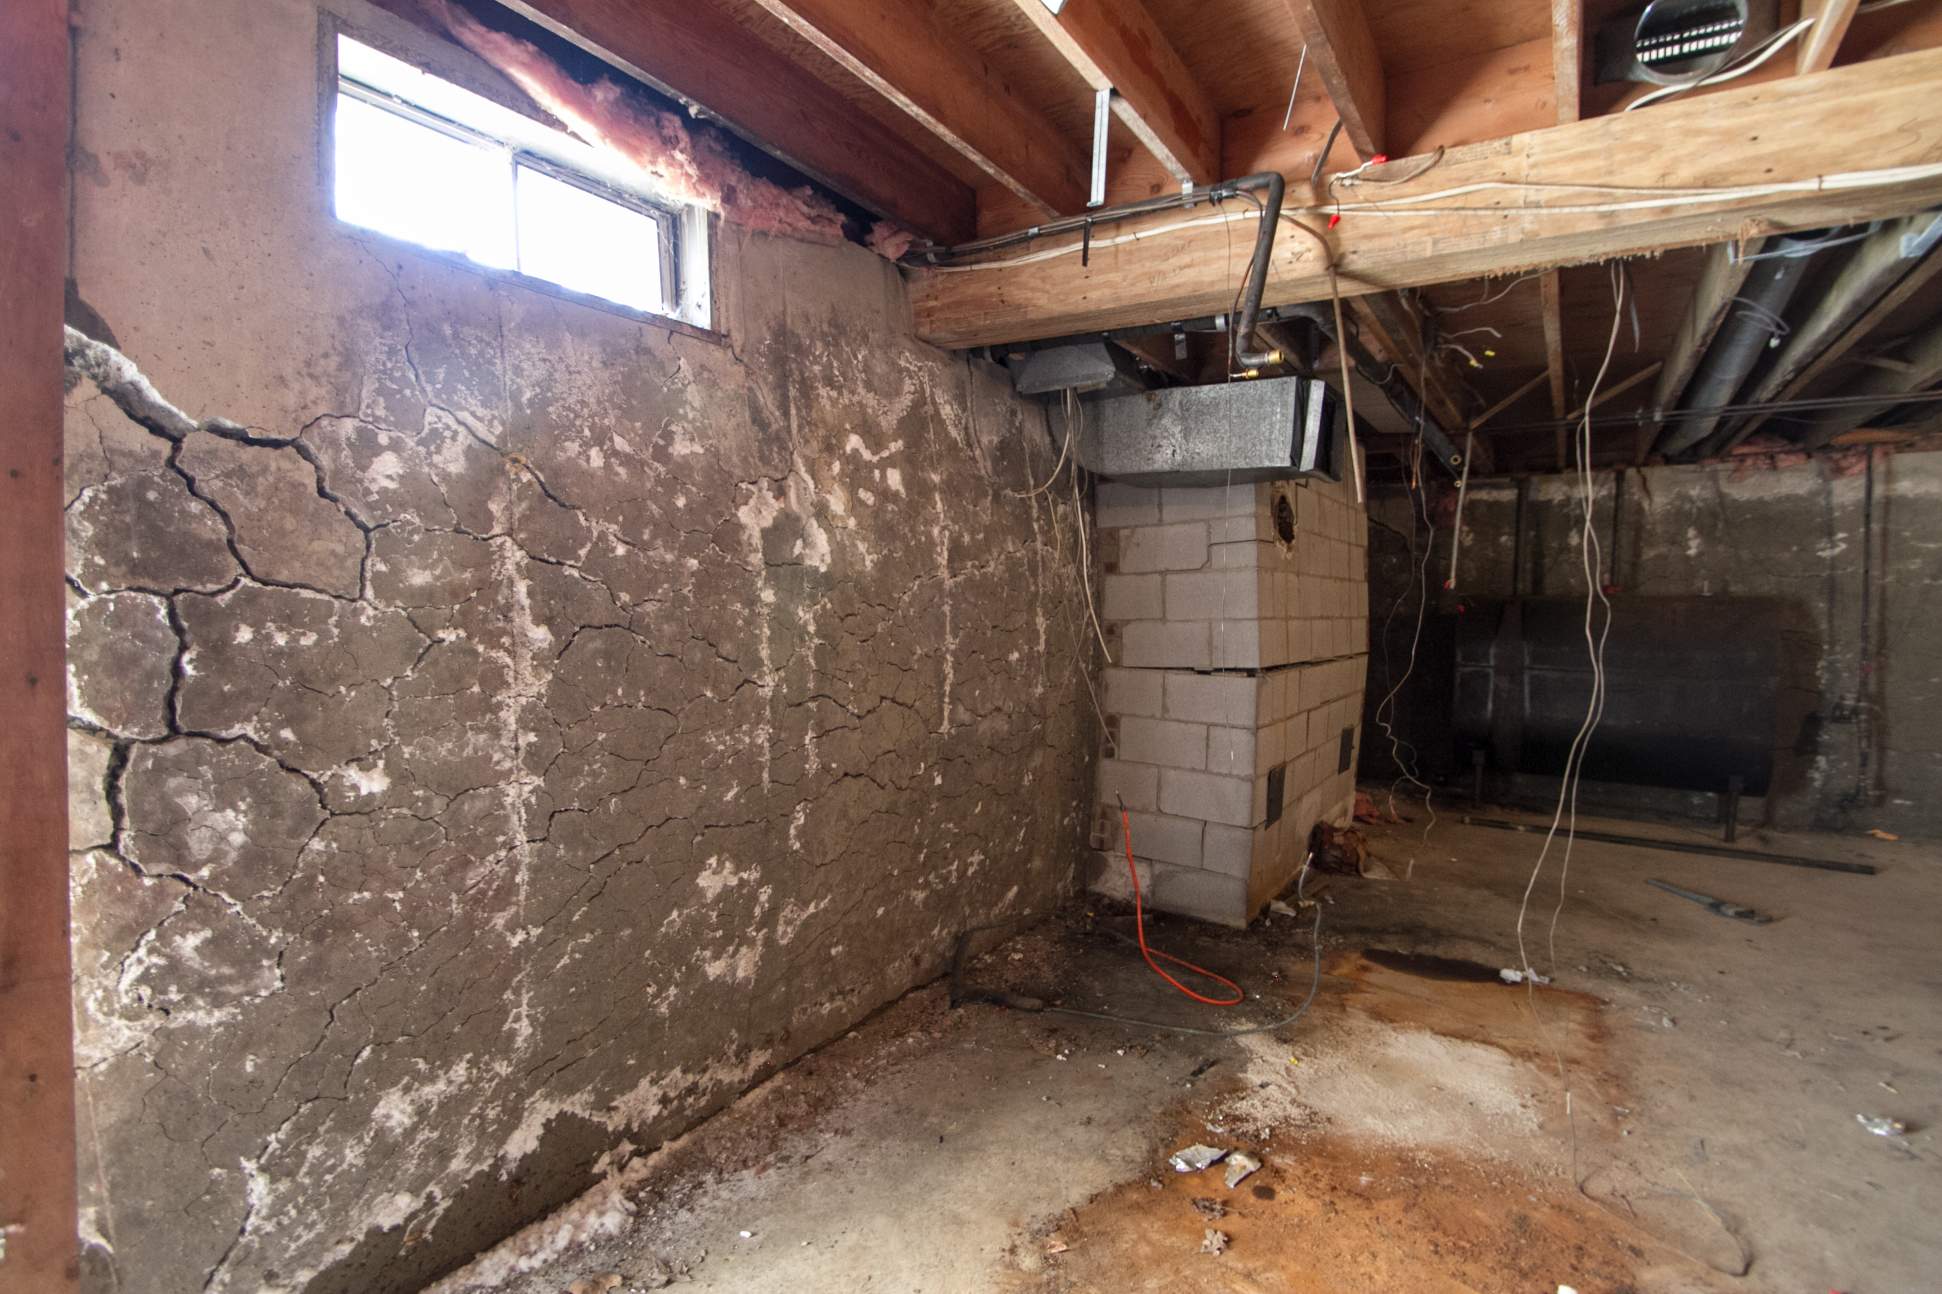
Signs of Crumbling Basement Walls
Identifying the signs of crumbling basement walls is crucial in addressing the issue promptly and preventing further damage to your home. Here are some common signs to look out for:
- Visible cracks: Cracks that appear in your basement walls are one of the most obvious signs of deterioration. These cracks may start as small hairline fractures but can widen over time, indicating structural issues.
- Bowed or bulging walls: If your basement walls have a noticeable inward or outward curve, it is a clear indication of wall instability. This can occur due to excessive soil pressure, poor construction, or water damage.
- Water intrusion: Frequent water leaks or dampness in your basement could suggest a compromised wall structure. Water can seep through cracks or gaps in the walls, leading to further deterioration and potentially causing mold and mildew growth.
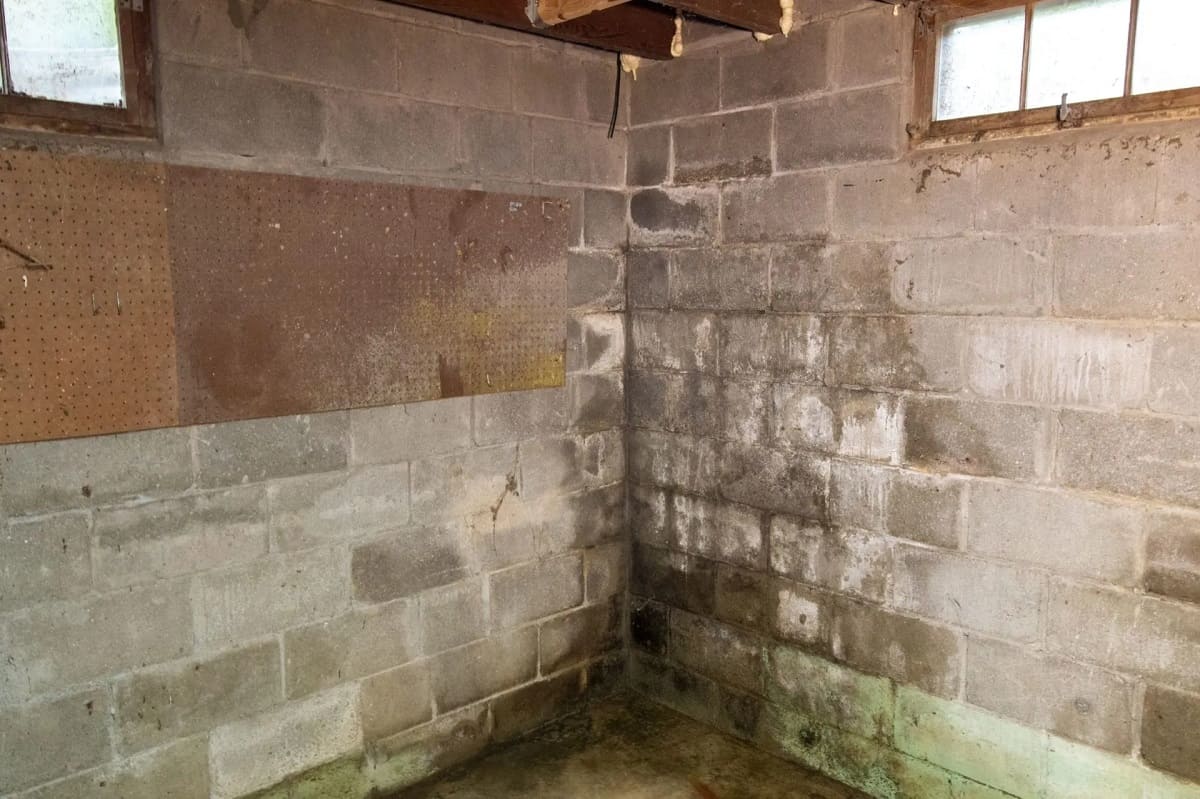
- Crumbling or deteriorating mortar: If you notice that the mortar between the bricks or blocks in your basement walls is deteriorating or crumbling away, it could be a sign of weakened structural integrity.
- Sagging or uneven floors: A sinking or uneven basement floor is often an indirect clue that your walls are experiencing instability or damage. The shifting foundation can result in uneven floors or gaps between the floor and the base of the walls.
It is important to note that these signs may not always indicate crumbling walls directly, as other factors like settling or poor construction practices can also contribute to these issues. However, if you notice any of these signs, it is advisable to consult a professional to assess the condition of your basement walls.
By being vigilant and proactive in identifying these signs, you can address the crumbling of your basement walls early on, saving yourself from potentially extensive repairs and ensuring the safety and stability of your home.
Causes of Crumbling Basement Walls
Crumbling basement walls can have various underlying causes, and understanding these factors is essential to effectively address the issue. Here are the common causes of crumbling basement walls:
- Water damage: One of the primary culprits behind deteriorating basement walls is water intrusion. When excess moisture seeps into the walls through cracks or gaps, it can weaken the materials and lead to crumbling. Water damage can result from poor drainage, high water table, or plumbing leaks.
- Hydrostatic pressure: Hydrostatic pressure refers to the pressure exerted by groundwater against the basement walls. When the water table rises, it can put immense pressure on the walls, causing them to crack or bow. The continuous pressure can eventually lead to the crumbling of the walls.
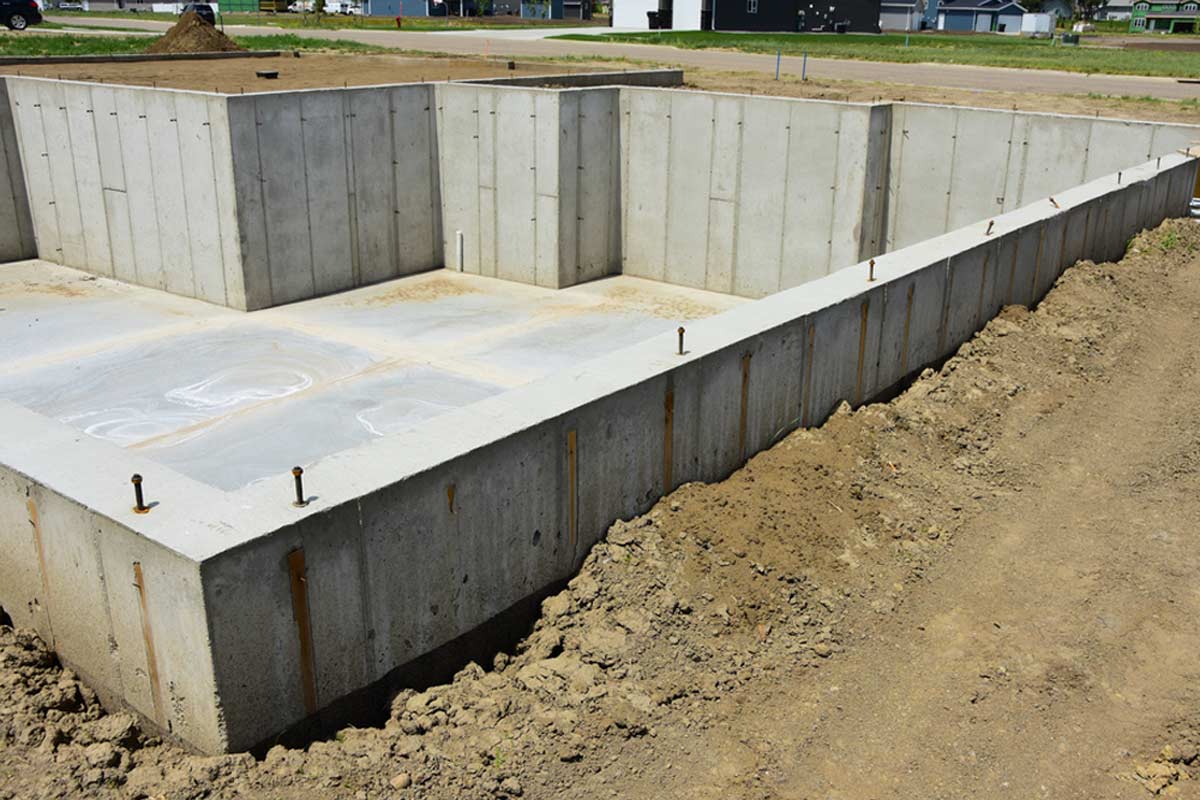
- Poor construction: Inadequate construction practices can contribute to the deterioration of basement walls. If the walls were not built with proper reinforcement or the materials used were of poor quality, they may be more susceptible to crumbling over time.
- Soil settlement and shifting: The natural movement of the soil, such as settlement or shifting, can put stress on basement walls. This movement can occur due to changes in moisture content, freezing and thawing cycles, or improperly compacted soil during construction. Over time, this stress can cause cracks and compromise the structural integrity of the walls.
- High humidity and condensation: Excessive humidity levels in the basement can lead to condensation on the walls, promoting the growth of mold and mildew. The continuous presence of moisture can deteriorate the walls and contribute to crumbling.
- Chemical reactions: Certain chemical reactions, such as the reaction between sulfur compounds in the soil and the cement in the walls, can cause the materials to break down and crumble. This is more common in areas with high levels of sulfates in the soil.
It is worth noting that multiple causes can often contribute to the deterioration of basement walls. Identifying the specific causes affecting your walls will help in determining the appropriate repair methods and implementing preventive measures.
By addressing the root causes and taking necessary steps to mitigate them, you can effectively repair and reinforce your crumbling basement walls, ensuring the long-term stability and durability of your home.
Assessing the Damage
Before you begin the repair process for your crumbling basement walls, it’s important to assess the extent of the damage. This will help you determine the appropriate repair methods and materials needed. Follow these steps to assess the damage:
- Inspect the walls: Carefully examine the walls for any visible cracks, bulges, or areas of crumbling. Take note of the size and extent of the damage.
- Measure the cracks: Use a ruler or measuring tape to measure the width and length of any cracks in the walls. This will determine the severity of the damage.
- Check for water seepage: Look for signs of water seepage or moisture on the walls, such as dampness, water stains, or mold growth. This will indicate any underlying water issues that need to be addressed during the repair process.
- Assess the structural integrity: Determine if the walls are bowing or sagging. Use a level to check if the walls are straight or if they have shifted. This will help you identify any serious structural issues that require immediate attention.
- Take photographs: Document the damage by taking clear photographs of the affected areas. This will serve as a reference for comparison during and after the repair process.
Based on your assessment, you can determine whether the damage is minor or requires professional intervention. Minor cracks or small areas of crumbling can often be repaired using DIY methods, while significant structural issues or extensive damage may require the expertise of a contractor or structural engineer.
Remember to prioritize safety during the assessment process. If you notice any signs of serious structural damage or if you’re unsure of how to proceed, consult a professional to ensure proper evaluation of the damage and appropriate repair solutions.
By thoroughly assessing the damage, you can make informed decisions about the repair methods and materials needed to restore your crumbling basement walls and protect the overall integrity of your home.
Materials and Tools Needed for Repairs
Repairing your crumbling basement walls requires the right materials and tools to ensure a successful and long-lasting restoration. Here is a list of the essential items you will need:
Read more: How To Fix A Bowing Basement Wall
Materials:
- Epoxy injection or polyurethane foam for crack repair
- Hydraulic cement or mortar mix for patching holes
- Reinforcing mesh or rebar for reinforcement
- Waterproofing sealant or membrane
- Masonry cleaner for surface preparation
- Paint or finish for aesthetics
- Safety equipment, including gloves, safety glasses, and a dust mask
Tools:
- Hammer and chisel for removing loose debris
- Wire brush for cleaning the affected areas
- Masonry trowel for applying the repair materials
- Caulking gun for injecting the epoxy or foam
- Drill with a masonry bit for creating holes for injection
- Level and measuring tape for accuracy
- Paintbrush or roller for applying the finish
- Safety equipment, including a hard hat and sturdy footwear
These are the basic materials and tools you will need for most basement wall repair projects. However, depending on the specific nature and severity of the damage, you may require additional specialized materials or equipment. It’s crucial to assess the extent of the damage and consult with professionals if you’re uncertain about the specific requirements for your repair.
Remember to prioritize safety while working on your basement wall repairs. Always wear appropriate safety gear and follow the manufacturer’s instructions when using any chemicals or equipment.
By gathering the necessary materials and tools, you will be well-prepared to tackle the repair process and restore your crumbling basement walls effectively.
Preparation before Starting the Repair
Before you begin the repair process for your crumbling basement walls, it’s essential to properly prepare the area to ensure successful and long-lasting results. Here are the key steps to take in the preparation phase:
1. Clear the workspace:
Remove any furniture, appliances, or storage items from the affected area to create a clear and accessible workspace. This will prevent obstacles or potential damage during the repair process.
Read more: How To Repair Cracks In Basement Wall
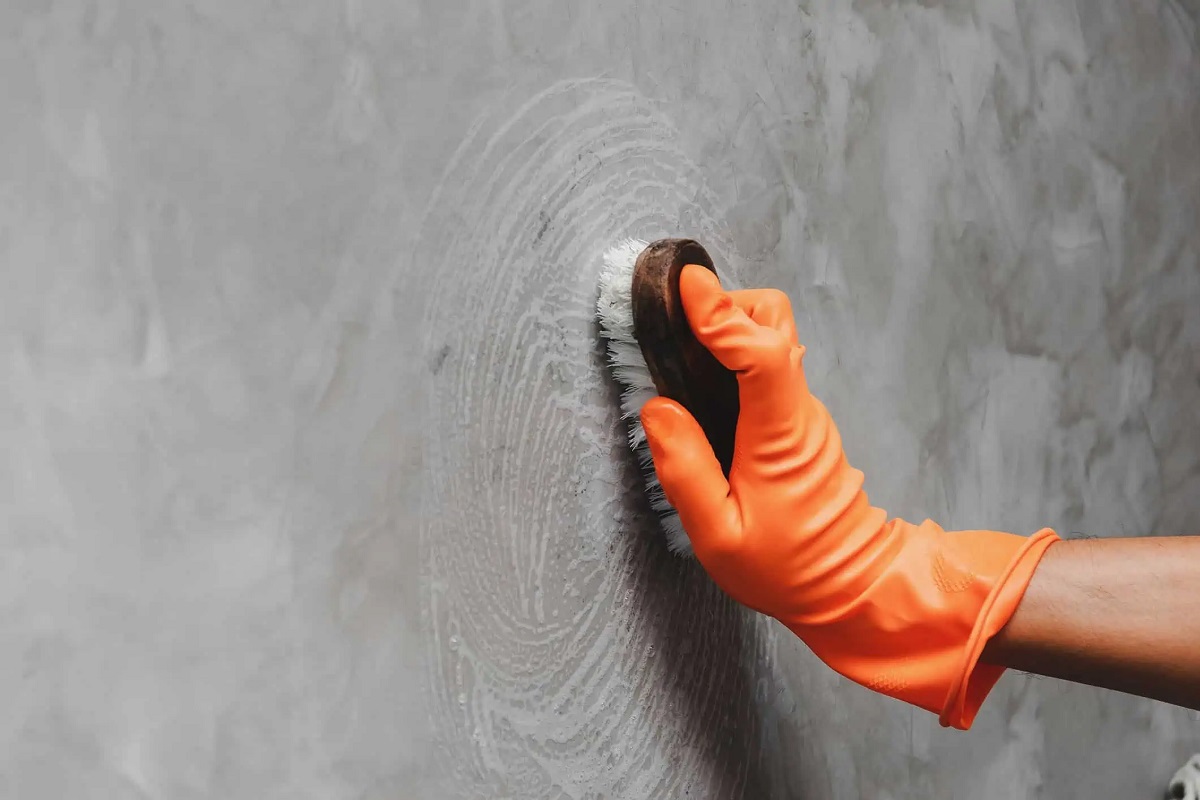
2. Clean the walls:
Thoroughly clean the walls to remove any dirt, loose debris, or old coatings. Use a wire brush or a masonry cleaner to scrub the surface, ensuring a clean and smooth base for the repair materials to adhere to. Rinse the walls with water and allow them to dry completely before proceeding.
3. Secure the perimeter:
Protect the surrounding area by covering the floor and adjacent surfaces with drop cloths or plastic sheets. This will prevent any accidental spills or damage to the surrounding surfaces during the repair process.
4. Address water issues:
If you have identified water issues or water seepage in your basement, it’s important to address these problems before proceeding with the repairs. Fix any leaks, improve drainage systems, or consider installing a sump pump to prevent future water damage to your repaired walls.
5. Prepare the repair materials:
Read and follow the instructions provided with the repair materials. Mix any necessary mortar or cement according to the manufacturer’s guidelines. Ensure that you have all the necessary materials and tools readily available for the repair process.
Read more: How To Fix A Crumbling Brick Wall
6. Put on safety gear:
Prioritize safety by wearing appropriate protective gear, including gloves, safety glasses, a dust mask, and sturdy footwear. This will help protect you from any potential hazards or exposure to harmful substances.
By thoroughly preparing the area before starting the repair, you can ensure a smooth and efficient process. Adequate preparation will also help to maximize the effectiveness of the repair materials and contribute to a successful restoration of your crumbling basement walls.
Repairing Cracks in Basement Walls
Cracks in basement walls are a common issue that can lead to further deterioration if left unaddressed. Repairing these cracks is crucial to restore the structural integrity of your walls and prevent water intrusion. Here is a step-by-step guide on how to repair cracks in basement walls:
1. Clean and Prep the Crack:
Begin by cleaning the crack using a wire brush or a masonry cleaner to remove any loose debris or contaminants. Ensure that the crack is free of dirt, dust, and old repair materials. Use a damp cloth or sponge to wipe the crack and let it dry.
2. Inject Epoxy or Polyurethane Foam:
For hairline cracks, use a low-viscosity epoxy injection. Fill a syringe or a cartridge with the epoxy and apply it directly into the crack, starting from the bottom and working your way up. Allow the epoxy to fill the crack completely, ensuring a tight seal.
For wider cracks, use a polyurethane foam injection. Follow the manufacturer’s instructions to mix and load the foam into a cartridge or dispenser gun. Inject the foam into the crack, again starting from the bottom and moving upward, until the crack is filled.
3. Smooth and Level:
After injecting the epoxy or foam, use a putty knife or a trowel to smooth and level the surface. Remove any excess material and ensure that the crack is flush with the surrounding wall. Allow the epoxy or foam to cure according to the manufacturer’s instructions.
4. Sand and Paint:
If necessary, sand down any rough spots or protrusions once the epoxy or foam has fully cured. This will help create a seamless finish. Finally, apply a coat of paint or finish to blend the repaired area with the rest of the wall and provide additional protection.
Keep in mind that the specific steps and materials may vary depending on the type and size of the crack. It’s important to refer to the manufacturer’s instructions and follow best practices for the repair materials you are using.
By repairing cracks in your basement walls promptly, you can prevent further damage and ensure the stability and durability of your home.
Patching Small Holes in Basement Walls
Small holes in basement walls can be unsightly and can also compromise the integrity of the structure. Patching these holes is essential to restore the appearance and strength of the walls. Here is a step-by-step guide on how to patch small holes in basement walls:
1. Clean and Prep the Hole:
Begin by cleaning the hole using a wire brush or a masonry cleaner to remove any loose debris, dust, or old repair materials. Ensure that the hole is free of dirt and contaminants. Use a damp cloth or sponge to wipe the area around the hole and let it dry completely.
Read more: When To Worry About Cracks In Basement Walls
2. Fill the Hole with Hydraulic Cement:
Prepare the hydraulic cement mixture according to the manufacturer’s instructions. Mix the cement with water until it reaches a thick, paste-like consistency. Use a trowel or putty knife to apply the hydraulic cement directly into the hole. Press the cement firmly into the hole, ensuring it fills the entire space.
3. Smooth and Level the Patch:
After filling the hole, use the flat edge of the trowel or putty knife to smooth and level the surface. Remove any excess material and ensure the patch is flush with the surrounding wall. Work quickly, as hydraulic cement sets and hardens rapidly.
4. Allow the Patch to Cure:
Allow the hydraulic cement patch to cure according to the manufacturer’s instructions. The curing time may vary but typically takes a few hours. Avoid any contact or disturbance of the patched area during this time.
5. Sand and Paint:
Once the patch has fully cured, lightly sand down any rough spots or protrusions for a smooth finish. This will help the patched area blend seamlessly with the rest of the wall. Finally, apply a coat of paint or finish that matches the surrounding wall to enhance the aesthetics and provide additional protection.
It is important to note that the size and depth of the hole may require additional steps or materials. For larger or more complex holes, consult a professional or refer to specific repair guides for a more comprehensive approach.
By properly patching small holes in your basement walls, you can maintain the structural integrity and appearance of your home, ensuring a safe and visually pleasing environment.
Read more: How To Finish Basement Walls
Rebuilding and Reinforcing Damaged Basement Walls
When basement walls have experienced significant damage or deterioration, rebuilding and reinforcing may be necessary to ensure the stability and safety of your home. Here is a step-by-step guide on how to rebuild and reinforce damaged basement walls:
1. Assess the Extent of Damage:
Begin by thoroughly assessing the damage to determine the scope of the repair. Look for signs of severe cracking, bulging, or crumbling. If the damage is extensive or compromises the structural integrity, it is advisable to consult a structural engineer or a professional contractor for an expert opinion.
2. Remove Damaged Portions:
If required, remove the damaged portions of the walls using a hammer and chisel. Be cautious when removing the material to avoid causing further damage. Remove any loose debris and clean the area to create a solid foundation for the rebuilding process.
3. Reinforce with Rebar or Mesh:
To reinforce the rebuilt sections, install a reinforcing mesh or rebar. Place the mesh or rebar into the wet mortar or concrete mixture, ensuring it is properly embedded and positioned horizontally and vertically. This will provide additional strength and stability to the rebuilt walls.
Read more: How To Drylok Basement Walls
4. Mix and Apply Mortar or Concrete:
Prepare the mortar or concrete mixture according to the manufacturer’s instructions. Use a trowel or masonry trowel to apply the mixture to the damaged areas, filling in the gaps and rebuilding the walls. Smooth the surface with the trowel for an even finish.
5. Allow Proper Curing Time:
Allow the mortar or concrete to cure and harden as per the manufacturer’s instructions. This may take several days, so be patient and avoid any disturbance or contact with the repaired walls during this time.
6. Waterproof the Walls:
Once the rebuilt sections have cured, apply a waterproof sealant or membrane to the basement walls. This will provide an extra layer of protection against moisture and help prevent future damage. Follow the manufacturer’s guidelines for application and drying time.
Rebuilding and reinforcing damaged basement walls is a complex process, and it is recommended to seek professional assistance for extensive repairs or structural issues. A professional will ensure that the rebuilding process is carried out correctly and in compliance with building codes and regulations.
By properly rebuilding and reinforcing damaged basement walls, you can restore the structural integrity of your home and create a safe and secure environment for years to come.
Waterproofing the Repaired Basement Walls
After repairing and rebuilding your basement walls, it is crucial to take steps to waterproof them. Waterproofing will protect the walls from moisture infiltration, preventing future damage and ensuring the longevity of the repairs. Here is a step-by-step guide on how to waterproof the repaired basement walls:
Read more: How To Paint Basement Walls
1. Clean and Prepare the Walls:
Before applying any waterproofing products, ensure that the repaired walls are clean and free of debris. Use a wire brush or masonry cleaner to remove any loose particles or contaminants. Rinse the walls with water and allow them to dry completely.
2. Choose the Waterproofing Sealant:
There are different types of waterproofing sealants available, such as liquid-based sealants or waterproofing paints. Consider factors such as the level of water resistance required and the specific product recommendations for your type of basement walls. Select a high-quality sealant that is designed for below-grade applications.
3. Apply the Waterproofing Sealant:
Follow the manufacturer’s instructions for the chosen sealant and apply it to the repaired walls using a brush or roller. Start from the top and work your way down, ensuring complete coverage. Pay extra attention to the areas that are most vulnerable to water infiltration, such as corners, joints, and around windows or plumbing penetrations.
4. Allow Proper Drying Time:
Allow the waterproofing sealant to dry completely as per the manufacturer’s instructions. This may take several hours or even days depending on the product. Avoid any contact with the walls during this time to prevent damage to the freshly applied sealant.
Read more: How To Parge Basement Walls
5. Test the Waterproofing:
Once the sealant has dried, perform a water test to ensure its effectiveness. Splash some water onto the repaired walls and observe if the water beads up and rolls off. If the water is absorbed or penetrates the walls, additional layers of sealant may be required in those areas.
6. Maintain the Waterproofing Barrier:
Regular maintenance is crucial to preserve the effectiveness of the waterproofing barrier. Inspect the walls periodically for any signs of wear or damage, such as cracks or peeling sealant. Repair or reapply the waterproofing sealant as needed to maintain optimum protection.
By waterproofing the repaired basement walls, you create a barrier against moisture infiltration, preventing potential damage and ensuring the long-term integrity of your home. Proper waterproofing can help maintain a dry and healthy basement environment for you and your family.
Preventive Measures for Future Wall Damage
Once you have repaired and reinforced your basement walls, it’s important to take preventive measures to avoid future damage and ensure the long-term stability and integrity of your walls. Here are some key preventive measures to consider:
1. Proper Drainage:
Ensure that your home’s drainage system is functioning effectively to prevent water accumulation around the foundation. Clean gutters and downspouts regularly and direct rainwater away from the house using downspout extensions or a proper grading system.
Read more: How To Frame Out Basement Walls
2. Maintain Consistent Moisture Levels:
Avoid excessive moisture levels in your basement by properly managing interior humidity. Use dehumidifiers or ventilation systems to control moisture levels. Consider installing a moisture barrier, such as a vapor barrier or waterproofing membrane, on the interior walls to prevent moisture infiltration.
3. Address Exterior Issues:
Inspect your home’s exterior for any cracks in the foundation or gaps around windows and doors. Seal any openings to prevent water intrusion. Ensure that the ground outside slopes away from the foundation to promote proper drainage.
4. Regular Inspections:
Periodically inspect the basement walls for any signs of cracks, water damage, or deterioration. Catching any issues early on can help prevent them from becoming more severe and costly. Look for signs of moisture or leaks and promptly address them to prevent further damage.
5. Professional Assessments:
Consider seeking professional assessments and consultations for regular inspections or when you notice any significant changes in your basement walls. A professional can identify potential issues and provide guidance on the best preventive measures specific to your situation.
Read more: How To Repair Crumbling Foundation
6. Maintain Proper Grading:
Ensure that the soil around your home is properly graded to direct water away from the foundation. This helps prevent hydrostatic pressure on the basement walls. Do periodic checks and regrade the soil if necessary.
7. Avoid Excessive Moisture Sources:
Avoid storing items that may cause excessive moisture in the basement, such as wet or damp materials. Keep the basement well-ventilated and consider using a sump pump or drain tile system to manage any water accumulation.
By implementing these preventive measures, you can significantly reduce the risk of future basement wall damage. Regular maintenance and vigilance are key to ensuring the long-term stability and protection of your home.
Conclusion
Crumbling basement walls can be a worrisome issue for homeowners, compromising the structural integrity of their homes and potentially leading to costly repairs. However, with the right knowledge and proactive measures, it is possible to repair and prevent further damage to basement walls.
In this article, we explored the signs of crumbling basement walls, identified the common causes of this issue, and provided comprehensive steps for assessing the damage. We also discussed the essential materials and tools needed for repairs and highlighted the importance of proper preparation before starting the repair process.
We delved into specific repair techniques for cracks and small holes in basement walls, as well as rebuilding and reinforcing damaged walls. Additionally, we covered the vital step of waterproofing the repaired walls to prevent future moisture infiltration. Lastly, we emphasized the importance of implementing preventive measures to avoid future wall damage.
Repairing crumbling basement walls requires careful attention to detail and adherence to best practices, and in some cases, it may be necessary to seek professional assistance for extensive repairs or structural issues. Regular inspections and maintenance are key to catching any issues early on and preventing further damage.
By being proactive in addressing basement wall concerns, homeowners can safeguard their homes, ensure the stability and durability of the structure, and create a safe and secure environment for themselves and their families.
Remember, if you are uncertain about the severity of the damage or feel overwhelmed by the repair process, it is always wise to consult with professionals who can offer expert guidance and assistance.
With proper repairs, maintenance, and preventive measures in place, homeowners can rest assured that their basement walls will remain strong, sturdy, and resistant to future deterioration for years to come.
Now that you've got the know-how to tackle crumbling basement walls, why stop there? Homes often signal deeper issues through less obvious signs. For anyone suspecting broader structural problems, gaining clarity on whether comprehensive foundation repair is needed could be vital. Dive into our detailed guide on assessing your home's foundation integrity. With practical advice wrapped in easy-to-follow steps, you'll learn to spot crucial warning signs and understand the necessary actions to maintain your home's safety and value.
Frequently Asked Questions about How To Repair Crumbling Basement Walls
Was this page helpful?
At Storables.com, we guarantee accurate and reliable information. Our content, validated by Expert Board Contributors, is crafted following stringent Editorial Policies. We're committed to providing you with well-researched, expert-backed insights for all your informational needs.

0 thoughts on “How To Repair Crumbling Basement Walls”