Articles
How To Replace A Skylight Dome
Modified: August 21, 2024
Learn how to replace a skylight dome with our informative articles. Get step-by-step instructions and tips for a successful replacement.
(Many of the links in this article redirect to a specific reviewed product. Your purchase of these products through affiliate links helps to generate commission for Storables.com, at no extra cost. Learn more)
Introduction
Welcome to our comprehensive guide on how to replace a skylight dome. Skylights are a fantastic addition to any home, offering natural light, ventilation, and a beautiful view of the sky. However, over time, the skylight dome may become damaged or deteriorate, requiring replacement. In this article, we will walk you through the step-by-step process of safely and efficiently replacing a skylight dome.
Before diving into the procedure, it’s important to emphasize the significance of safety precautions. Working at heights can be hazardous, so it is vital to take the necessary safety measures to protect yourself and others. This includes using proper personal protective equipment (PPE), such as safety harnesses, gloves, and goggles, and ensuring the work area is secure and free from potential hazards. Now, let’s begin!
Key Takeaways:
- Prioritize safety by using proper protective equipment, securing the work area, and working with a partner to minimize risks when replacing a skylight dome. Safety measures are crucial for a successful and injury-free project.
- Thoroughly assess the damage, gather necessary tools and materials, and follow step-by-step installation procedures to ensure a seamless and efficient skylight dome replacement. Proper preparation and attention to detail lead to a successful outcome.
Read also: 8 Amazing Skylight Dome For 2025
Step 1: Safety Precautions
Prior to starting any work, it is crucial to prioritize safety. Below are some important safety precautions to follow when replacing a skylight dome:
- Use proper personal protective equipment (PPE): Always wear appropriate protective gear, including safety goggles, gloves, and a hard hat. This will help safeguard against any potential injuries.
- Secure the work area: Make sure the area where you will be working is clear of any debris or obstacles. Use caution tape or barricade the area to prevent others from entering and to minimize the risk of accidents.
- Work with a partner: It is highly recommended to have someone assist you during the replacement process. They can provide additional support, help steady ladders, and call for help in case of an emergency.
- Use a stable ladder or scaffolding: Ensure the ladder or scaffolding you use is stable and securely positioned. Follow the manufacturer’s instructions for proper setup and always maintain three points of contact while ascending or descending the ladder.
- Check the weather conditions: Avoid performing the replacement during inclement weather conditions, such as strong winds or heavy rain. Slippery surfaces can increase the risk of accidents.
- Disconnect any power sources: If there are any electrical connections near the skylight, ensure that the power is turned off before starting the replacement process. This will prevent any potential electrical hazards.
- Follow manufacturer’s guidelines: Familiarize yourself with the specific instructions provided by the skylight manufacturer. Adhering to these guidelines will help ensure a safe and successful replacement.
Remember, safety should always be the top priority when working at heights. By taking the necessary precautions and following proper procedures, you can minimize the risk of accidents and injuries during the skylight dome replacement process.
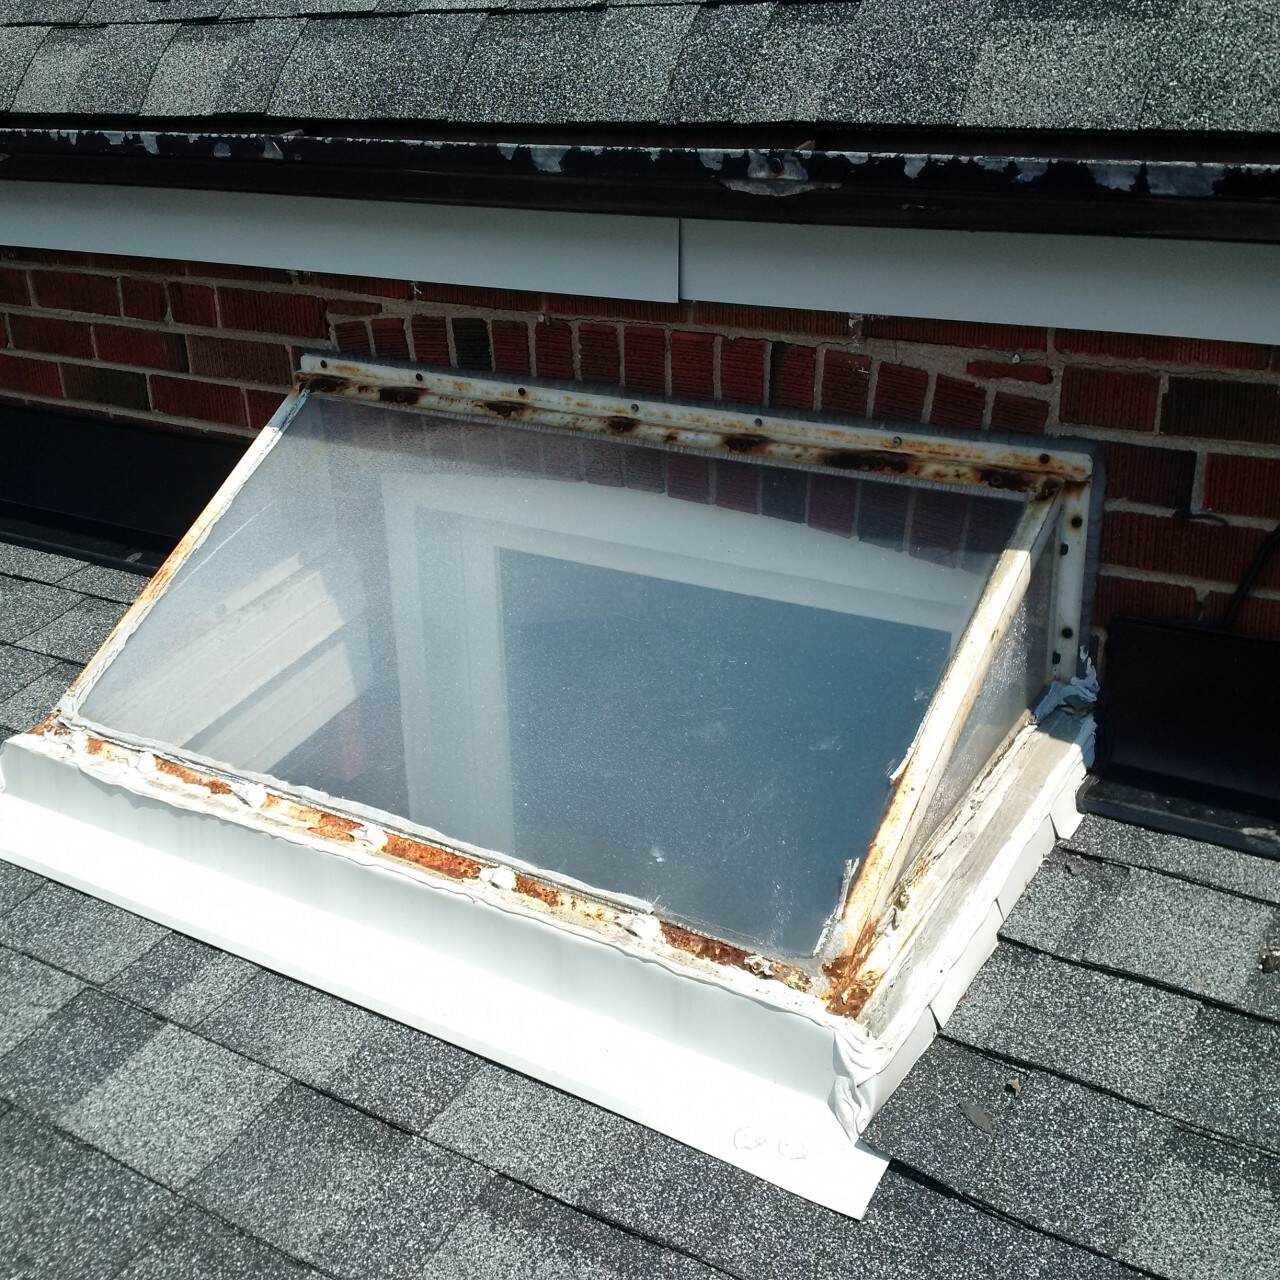
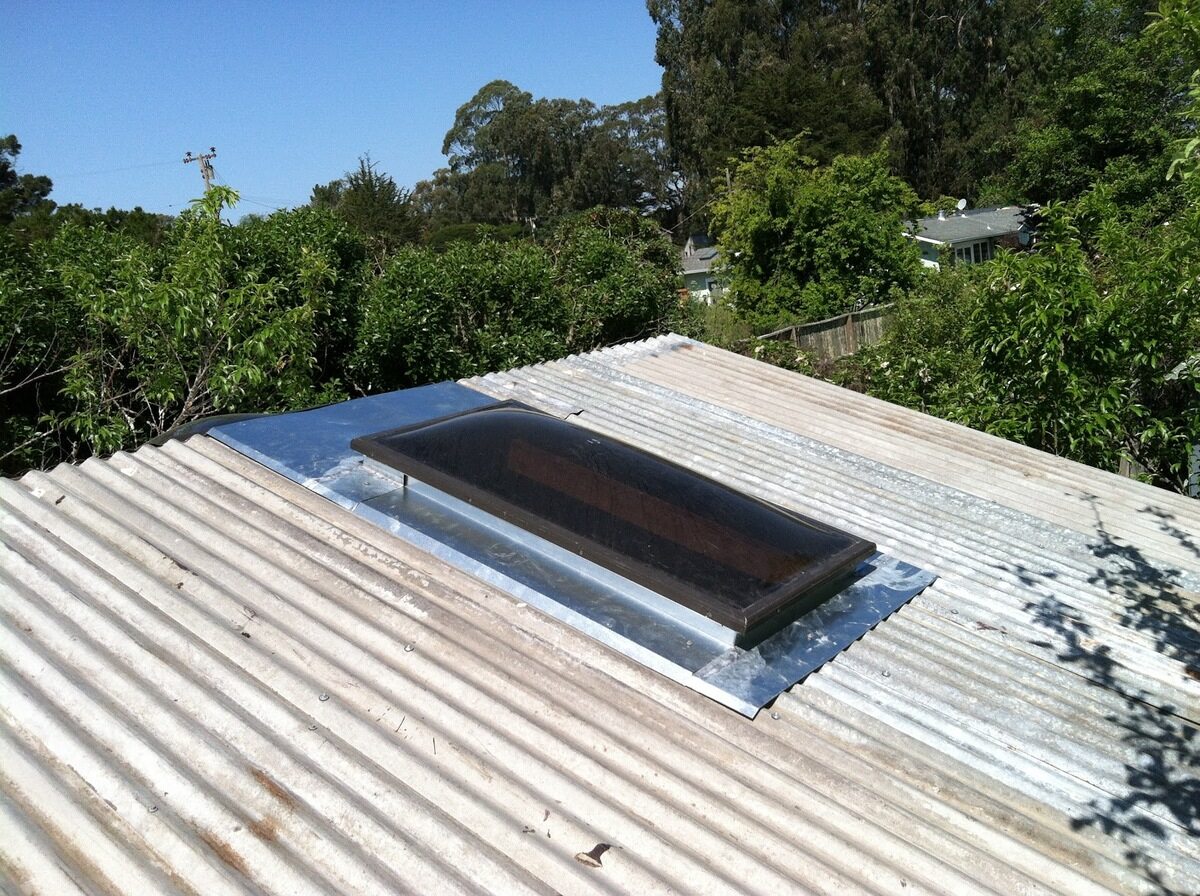
Step 2: Assessing the Damage
Once you have taken the necessary safety precautions, the next step is to assess the damage to the skylight dome. This will help determine the extent of the repair or replacement needed. Follow these steps to assess the damage:
- Inspect the skylight dome: Carefully examine the skylight dome for any cracks, leaks, or signs of deterioration. Look for discoloration or water stains on the surrounding ceiling, as this may indicate a leak.
- Check for loose or damaged fasteners: Inspect the screws or fasteners that hold the skylight dome in place. Make sure they are secure and not corroded or damaged. A loose or damaged fastener can compromise the integrity of the skylight.
- Examine the frame and flashing: Assess the condition of the skylight frame and flashing around it. Look for any signs of rust, decay, or damage. Damaged flashing can cause water to seep into the skylight, leading to leaks.
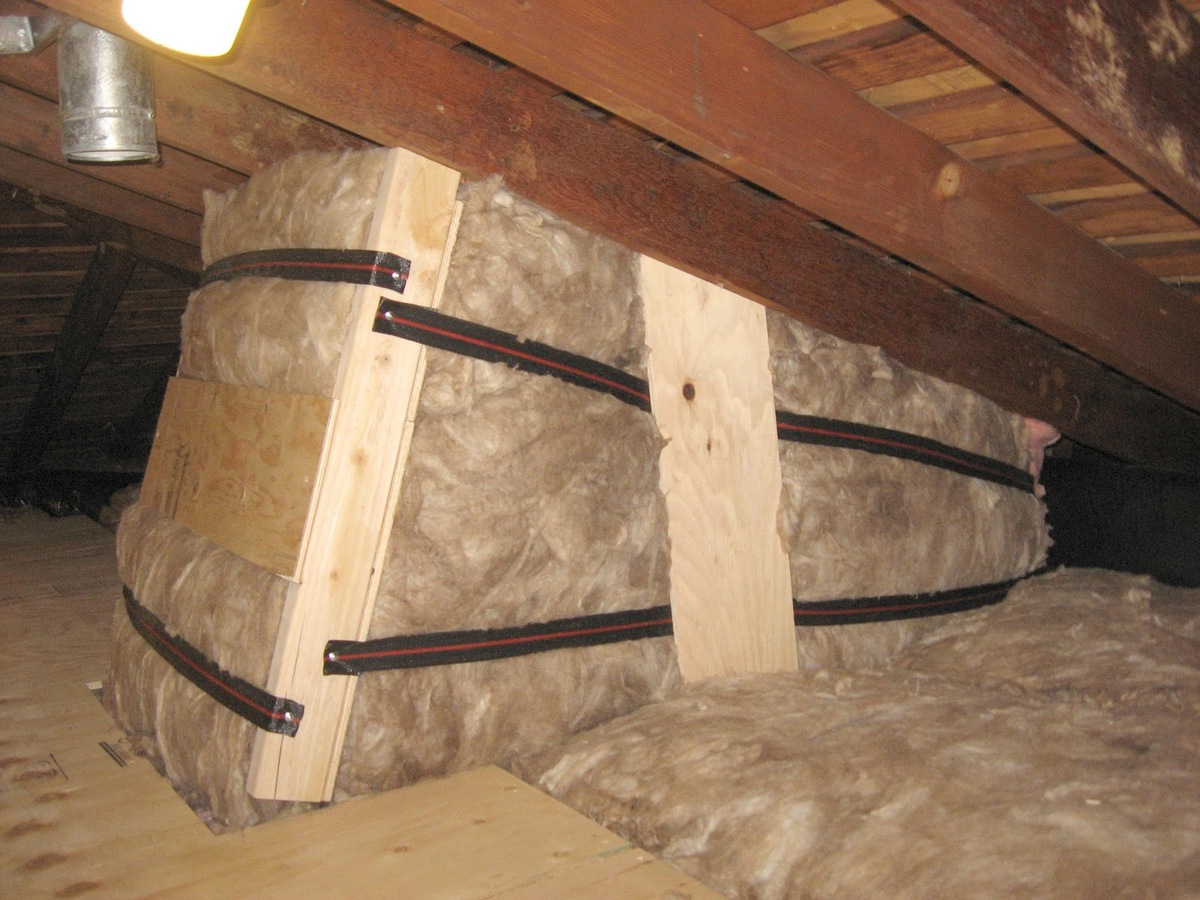
- Consider energy efficiency: If your skylight is old or outdated, it may be worth considering a replacement for energy efficiency purposes. Newer skylights are designed with improved insulation properties and can help reduce energy consumption.
- Take measurements: Measure the dimensions of the skylight dome to ensure you purchase the correct size for replacement. Take note of any specific features, such as a manual crank or motorized operation, which may require additional considerations.
By thoroughly assessing the damage to your skylight dome, you will have a clear understanding of the scope of the replacement project. This assessment will guide your decision-making process and help you choose the appropriate materials for the replacement.
Step 3: Gathering the Necessary Tools and Materials
Before starting the skylight dome replacement, it’s essential to gather all the necessary tools and materials. Having everything you need on hand will ensure a smooth and efficient process. Here are the tools and materials you will need:
Tools:
- Hammer
- Screwdriver (flathead and Phillips)
- Utility knife
- Tape measure
- Caulking gun
- Drill
- Safety goggles
- Gloves
- Ladder or scaffolding
Read more: How To Replace RV Skylight
Materials:
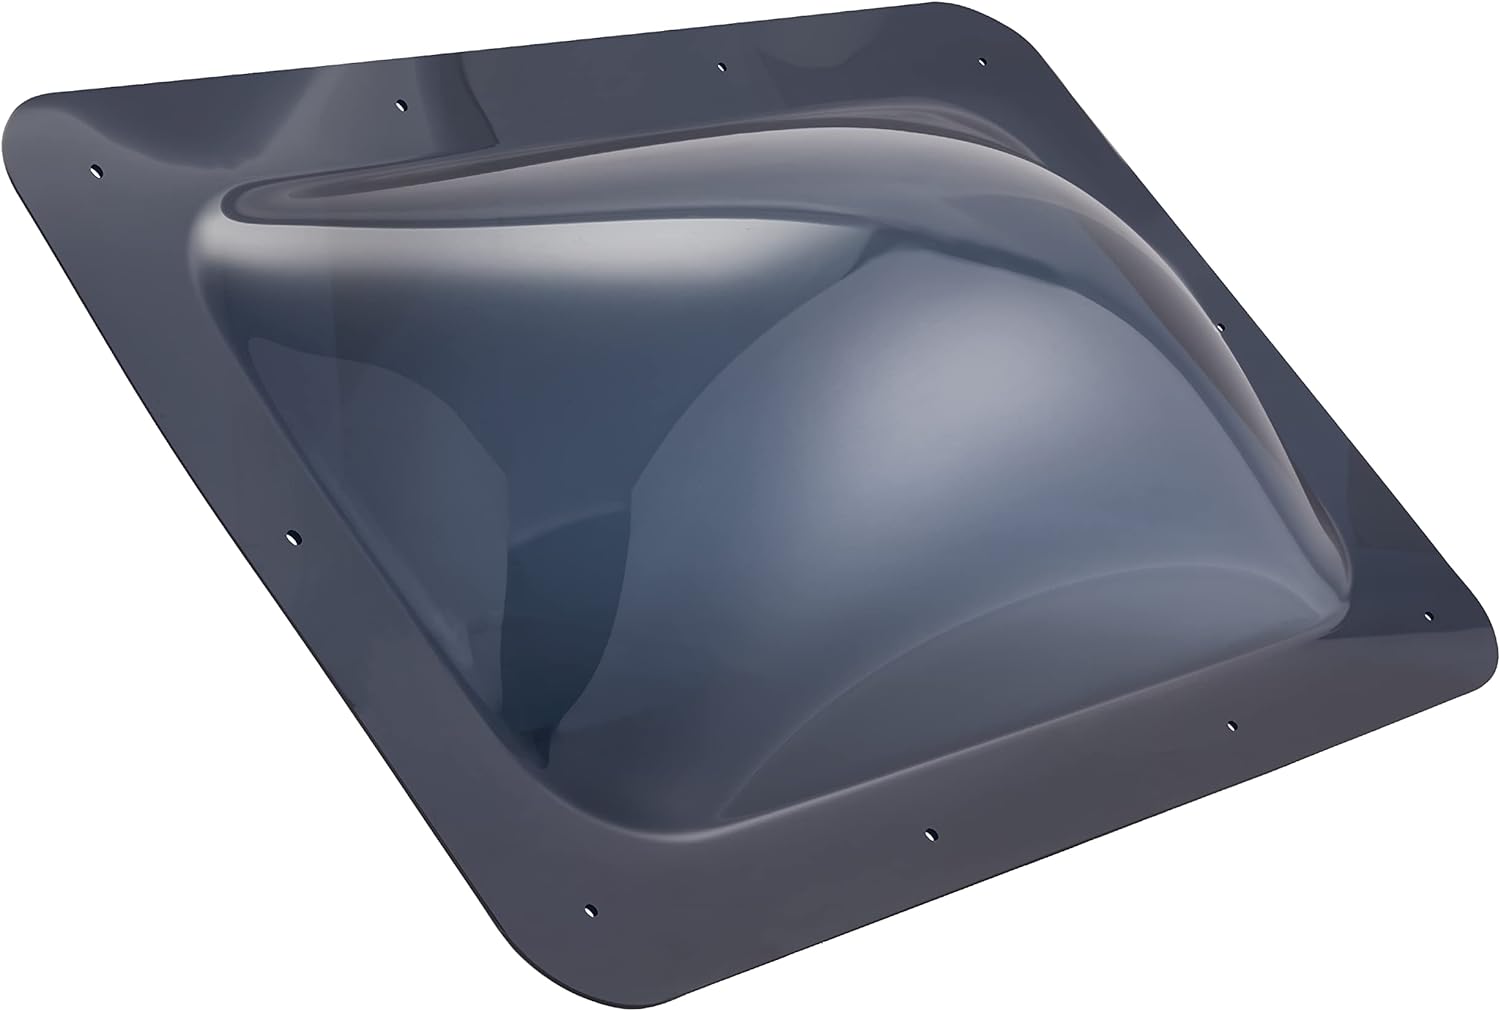
- New skylight dome
- Replacement screws or fasteners
- Flashing tape or sealant
- Waterproof roofing caulk
- Weather-resistant sealant or adhesive
Make sure to choose high-quality materials that are specifically designed for skylight installation. It’s also important to select a skylight dome that matches your existing skylight frame’s dimensions. Consult the manufacturer’s guidelines or seek professional advice if you’re unsure about the specific materials required.
Having all the tools and materials ready beforehand will save you time and ensure you’re fully prepared for the skylight dome replacement. Additionally, it will help prevent any unnecessary disruptions or delays during the process.
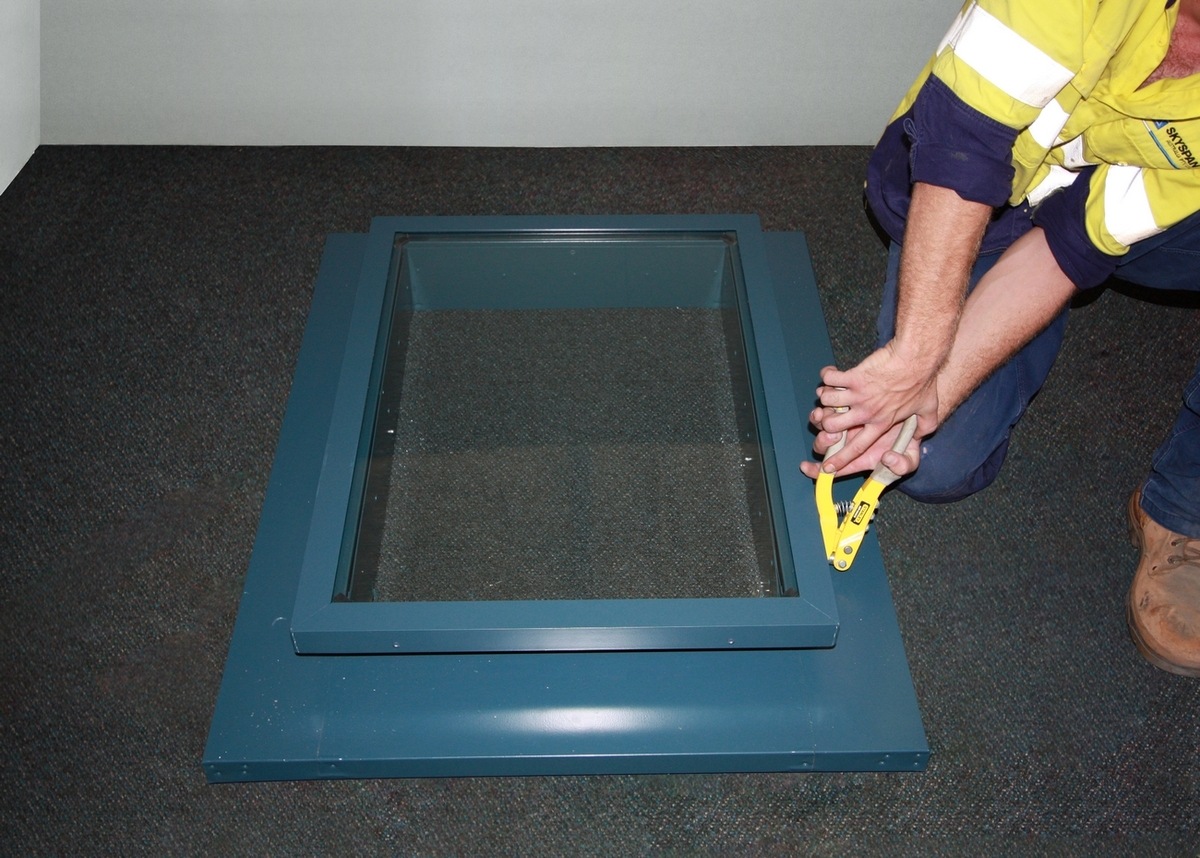
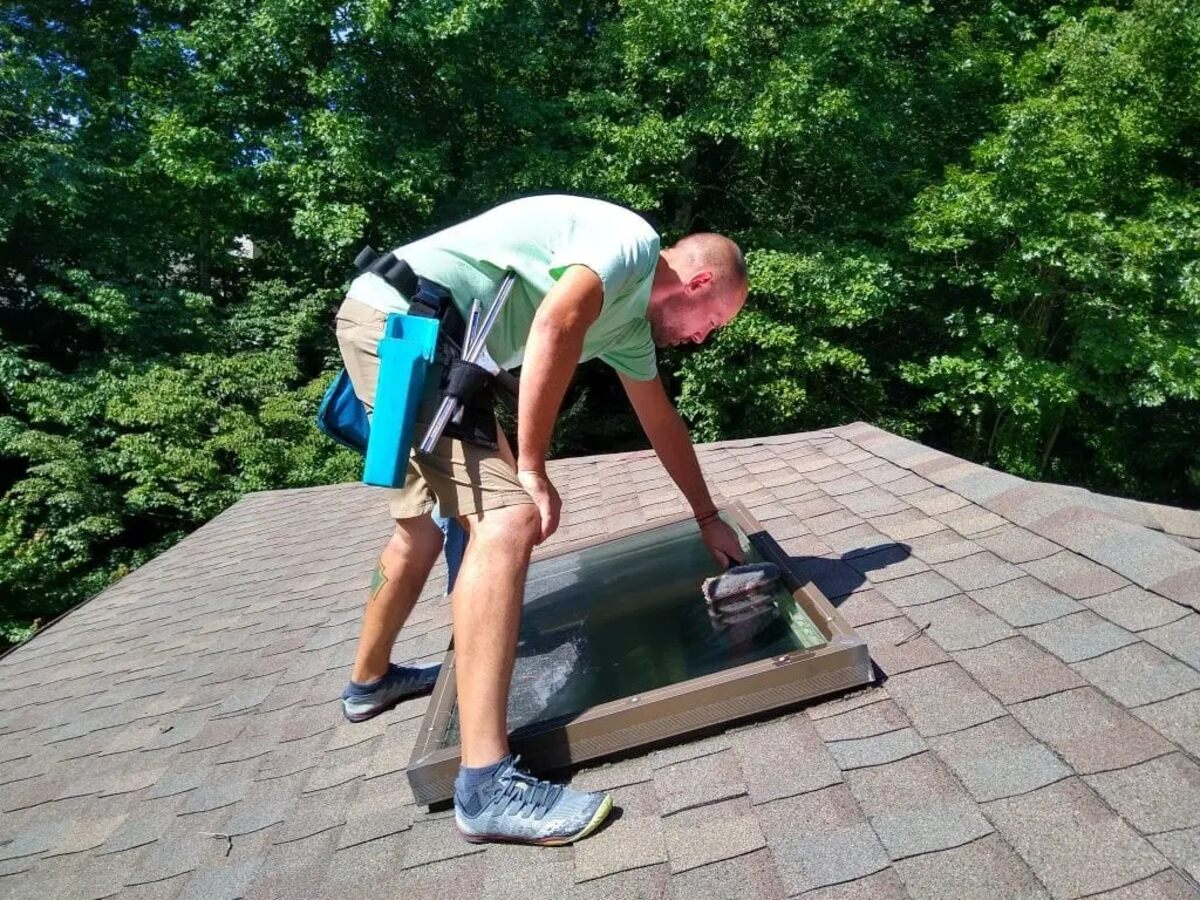
Step 4: Removing the Old Skylight Dome
With the necessary tools and materials gathered, it’s time to remove the old skylight dome. Follow these steps to ensure a proper and safe removal:
- Access the skylight: Set up a stable ladder or scaffolding to reach the skylight. Ensure that the area is clear of any obstructions that may hinder your movement.
- Loosen the screws or fasteners: Use a screwdriver to carefully loosen the screws or fasteners that secure the skylight dome to the frame. Keep the screws and fasteners in a safe place, as you may need them for the new installation.
- Remove the old dome: Gently lift the old skylight dome away from the frame, taking care not to damage any surrounding materials. If the dome is stuck, use a utility knife to carefully cut through any existing caulk or sealant to enable removal.
- Clean the frame: Thoroughly clean the skylight frame, removing any debris, dirt, or old caulk. This will ensure a clean and smooth surface for the new skylight dome installation.
- Inspect for damage: Take a moment to inspect the skylight frame and surrounding area for any signs of damage. Address any issues before proceeding with the installation of the new skylight dome.
Properly removing the old skylight dome is essential to ensure a seamless installation of the new one. Take your time and be cautious during this step to avoid any accidental damage to the frame or surrounding materials.
Now that the old skylight dome has been successfully removed, we can move on to preparing the skylight frame for the installation of the new dome.
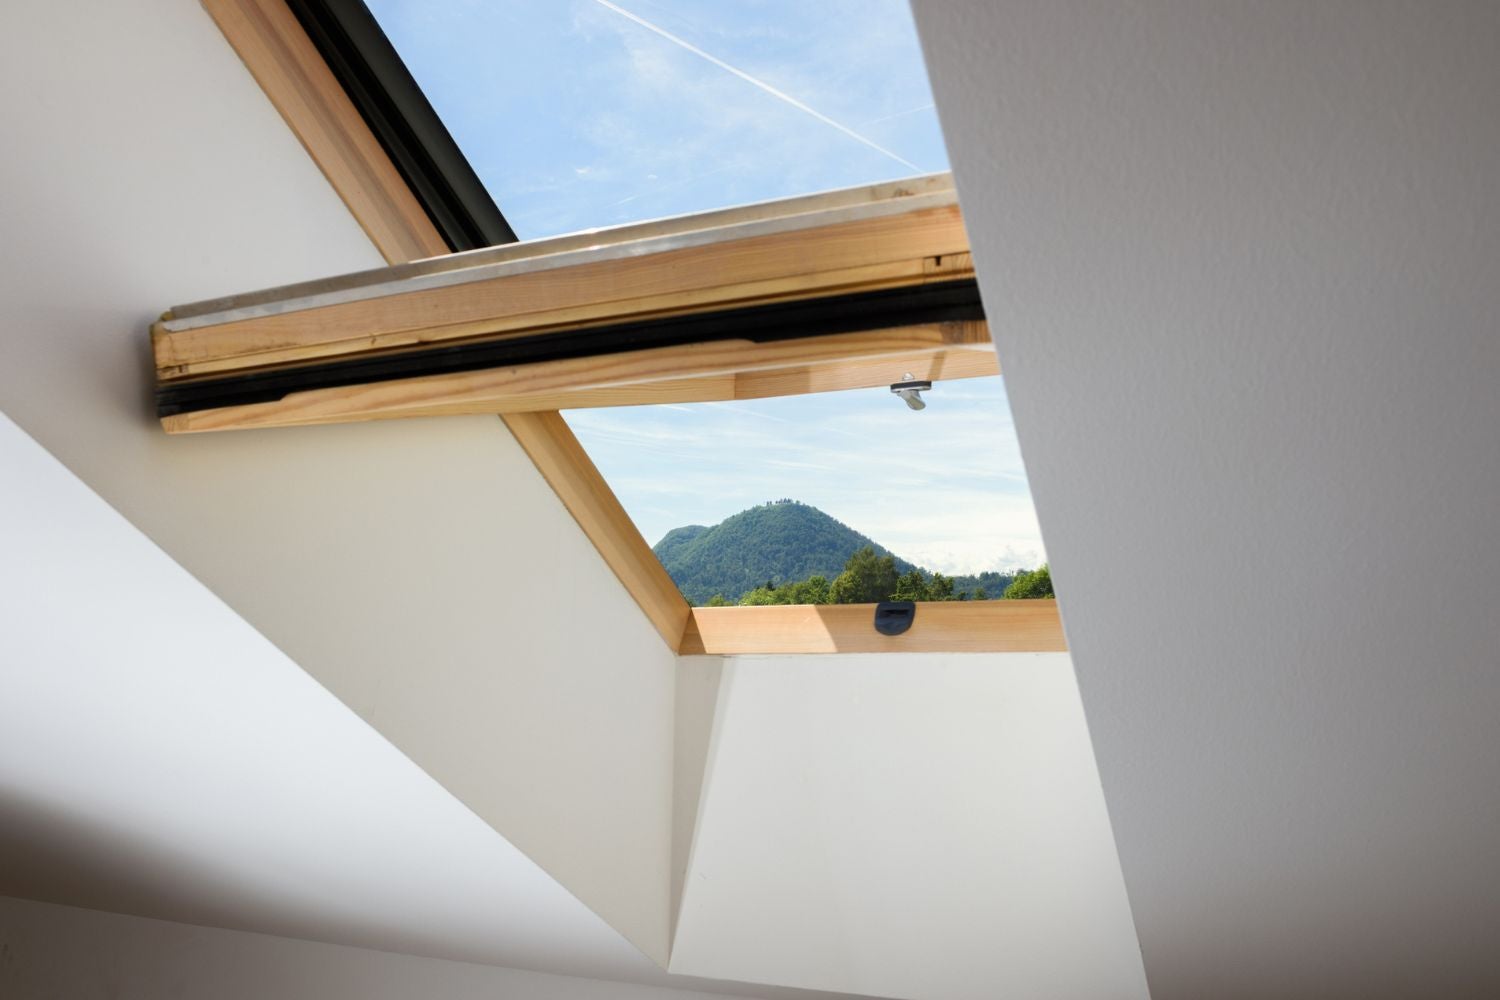
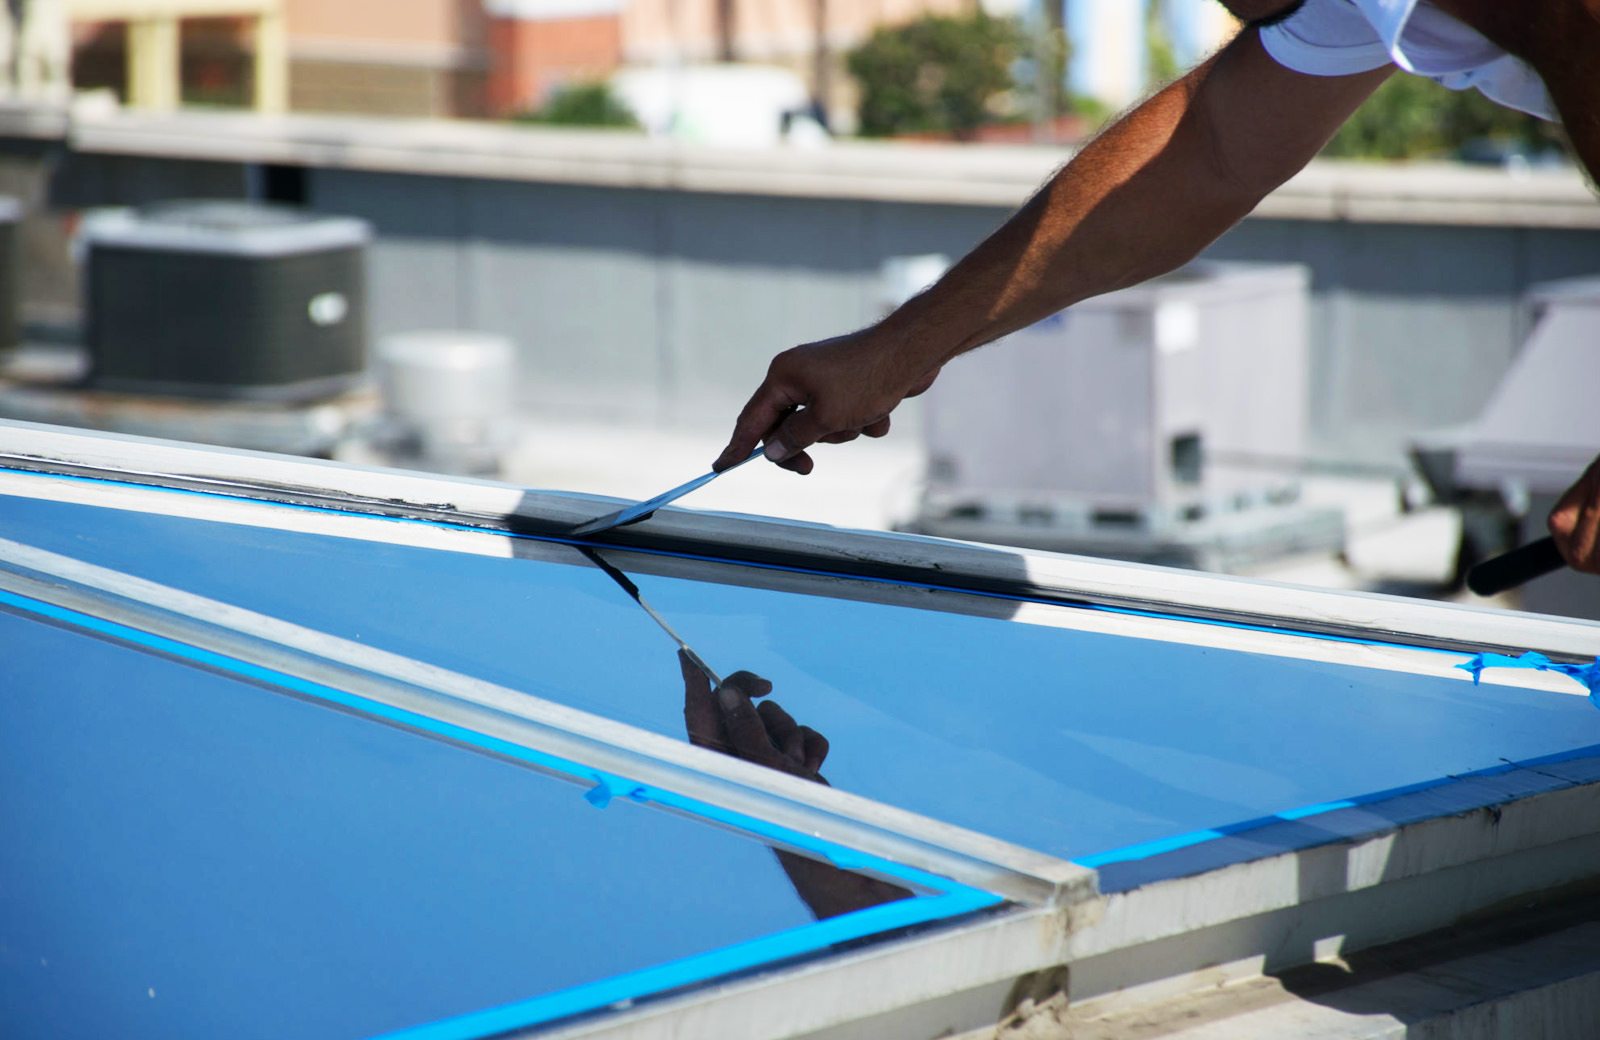
Step 5: Cleaning and Preparing the Skylight Frame
After removing the old skylight dome, it’s time to clean and prepare the skylight frame for the installation of the new dome. Follow these steps to ensure a smooth and successful installation:
- Clean the frame: Use a soft cloth or sponge and a mild detergent to clean the skylight frame. Remove any dirt, debris, or old caulk that may have accumulated over time. Rinse the frame thoroughly and allow it to dry completely before proceeding.
- Inspect for damage: Take a close look at the skylight frame to check for any signs of damage, such as cracks, rust, or decay. If you notice any issues, address them accordingly before proceeding with the installation.
- Apply new sealant: Using a caulking gun, apply a fresh bead of waterproof roofing caulk along the edges of the skylight frame. This will help create a watertight seal between the frame and the new skylight dome.
- Position the flashing: Depending on the type of skylight and the manufacturer’s instructions, you may need to install flashing tape or sealant around the skylight frame. This helps to prevent water infiltration and promotes proper drainage.
- Ensure a level and secure frame: Use a level to ensure that the skylight frame is perfectly horizontal and vertical. Make any necessary adjustments to ensure a secure and stable installation.
By thoroughly cleaning and preparing the skylight frame, you are setting the foundation for a successful installation of the new skylight dome. Taking the time to carefully inspect and address any damage will help ensure the longevity and effectiveness of your skylight system.
Now that the skylight frame is clean and prepared, we can move on to the exciting step of installing the new skylight dome!
When replacing a skylight dome, make sure to measure the existing dome accurately before purchasing a new one to ensure a proper fit.
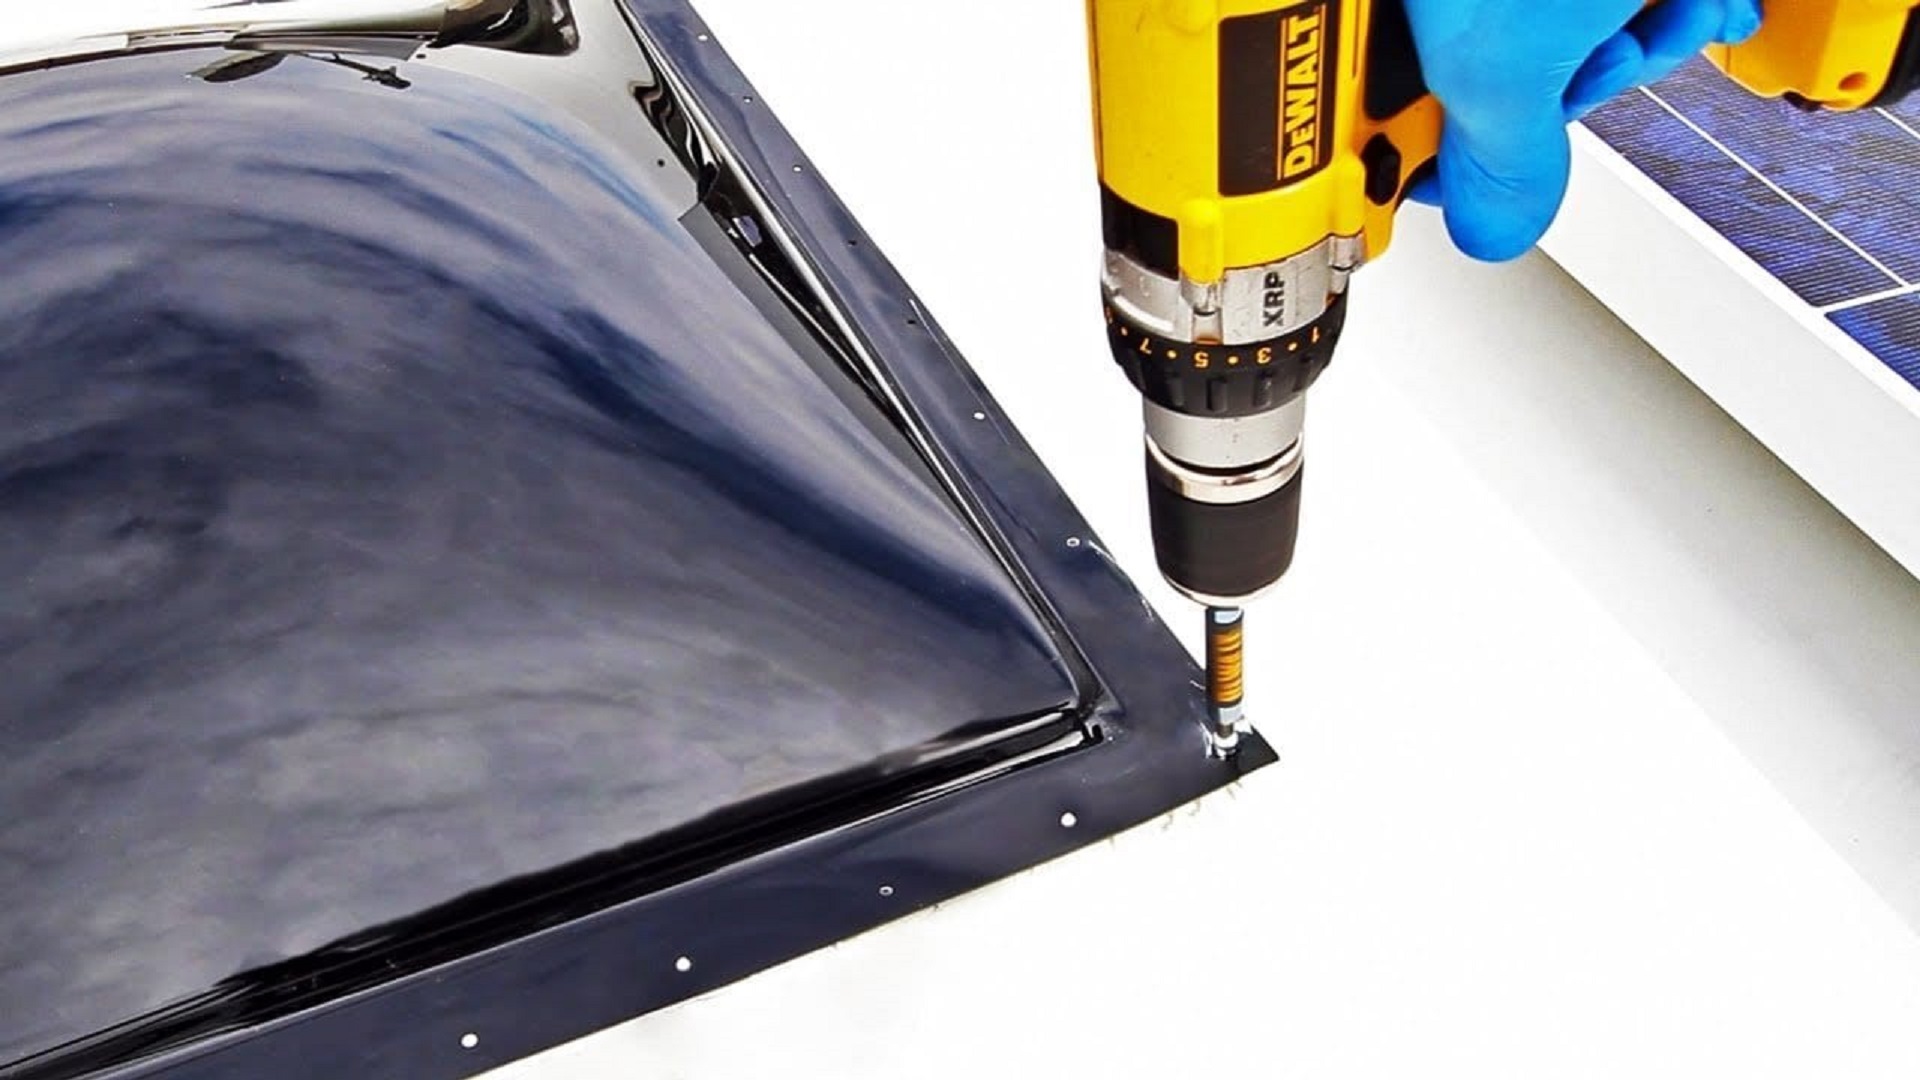
Step 6: Installing the New Skylight Dome
Now that the skylight frame is clean and prepared, it’s time to install the new skylight dome. Follow these steps for a successful installation:
- Place the new skylight dome: Carefully position the new skylight dome onto the prepared skylight frame. Ensure that it aligns properly and sits securely in place.
- Attach the dome to the frame: Referencing the manufacturer’s instructions, use the provided screws or fasteners to secure the skylight dome to the frame. Ensure that they are tightened firmly but not overly tightened to avoid damaging the dome or frame.
- Check for proper fit: Inspect the newly installed skylight dome to ensure that it fits snugly and evenly on the frame. Any gaps or unevenness may indicate improper installation.
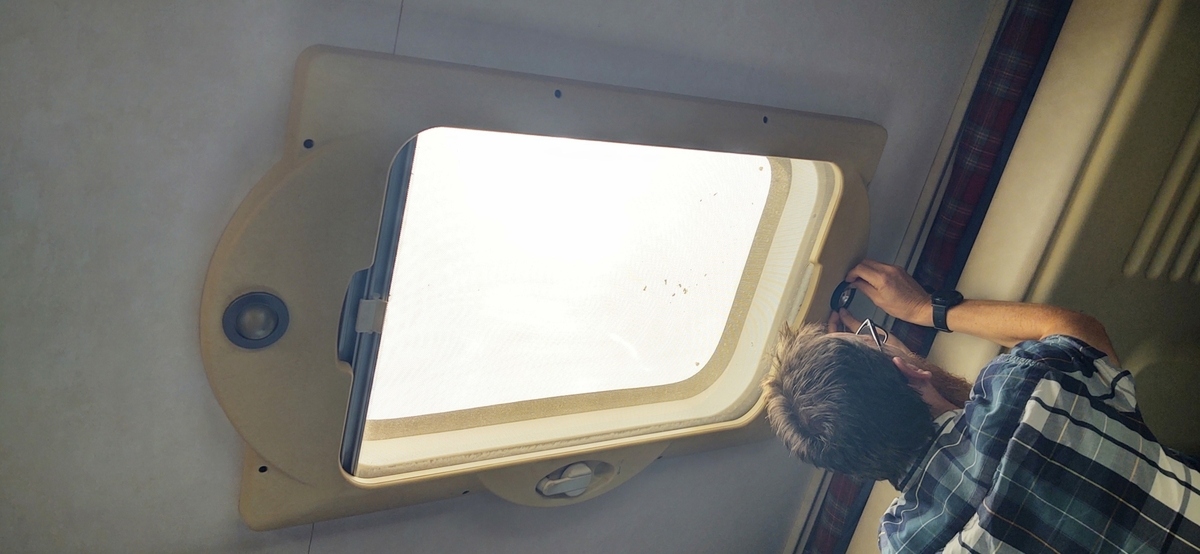
- Test the functionality: If your skylight has any motorized or manual opening mechanisms, test them to ensure proper operation. Make sure that the dome opens and closes smoothly without any obstructions.
During the installation process, it’s important to take your time and follow the instructions provided by the manufacturer. A proper and secure installation will ensure the functionality and longevity of your skylight dome.
Now that the new skylight dome is installed, we can move on to the next step of securing it in place for added stability and weather resistance.
Read more: How Much Is It To Replace A Skylight
Step 7: Securing the Skylight Dome in Place
Once the new skylight dome is installed, it’s important to secure it in place for added stability and weather resistance. Follow these steps to ensure a secure and well-protected skylight:
- Use additional fasteners: In addition to the screws or fasteners provided by the manufacturer, consider using extra fasteners for added security. Depending on the skylight type and installation requirements, you may need to use additional screws or clips to hold the dome firmly in place.
- Apply weather-resistant sealant: Use a weather-resistant sealant or adhesive around the edges of the skylight dome to create a tight seal. This will help prevent any water infiltration, drafts, or leaks.
- Check for proper sealing: Thoroughly inspect the skylight dome and frame to ensure that there are no gaps or areas where water could seep through. Apply additional sealant if necessary to achieve a proper and watertight seal.
- Verify stability: Give the skylight dome a gentle shake to test its stability. It should feel firmly in place with no wobbling or movement. If there is any instability, recheck the installation and make any necessary adjustments.
By securely fastening the skylight dome and sealing it properly, you will enhance its durability and resistance against harsh weather conditions. This will help maintain a dry, well-insulated, and comfortable environment within your home.
Now that the skylight dome is securely in place, we can move on to the final step of adding the finishing touches and sealing any remaining gaps.
Step 8: Finishing Touches and Sealing
In the final step of replacing a skylight dome, it’s time to add the finishing touches and ensure a proper seal to protect against weather elements. Follow these steps to complete the installation:
- Trim any excess sealant: Use a utility knife to carefully trim any excess sealant or adhesive around the edges of the skylight dome. This will give it a clean and neat appearance.
- Check for gaps: Inspect the entire skylight assembly for any remaining gaps or openings. Apply additional sealant as needed to ensure a complete and watertight seal.
- Inspect the interior: Check the interior side of the skylight for any gaps or damage. Use a waterproof roofing caulk to fill in any gaps or cracks in the ceiling around the skylight opening.
- Test for leaks: After completing the installation and sealing, test the skylight for any potential leaks. Spray water on the skylight from the outside and check for any signs of water entering the interior. If you notice any leaks, address them immediately.
- Clean and restore: Once you are satisfied with the installation and sealing, clean the skylight and the surrounding area. Remove any dirt or debris from the outside of the dome and tidy up the interior space.
By paying attention to the finishing touches and ensuring a proper seal, you can enjoy the benefits of a well-protected and aesthetically pleasing skylight. Regularly inspect the skylight for any signs of damage or deterioration and perform maintenance as needed to prolong its lifespan.
Congratulations! You have successfully replaced your skylight dome and have enhanced the natural light, ventilation, and beauty of your home.
Remember, if you feel uncomfortable performing the skylight replacement yourself or if the skylight requires specialized expertise, it’s always a good idea to consult with a professional to ensure a safe and proper installation.
Conclusion
Replacing a skylight dome can revitalise your living space by bringing in natural light, improving ventilation, and enhancing the aesthetic appeal of your home. By following the step-by-step guide outlined in this article, you can confidently undertake the skylight replacement process while prioritising safety and achieving a successful outcome.
Throughout this guide, we emphasised the importance of safety precautions, such as using the proper personal protective equipment, securing the work area, and following manufacturer’s guidelines. These measures are essential to ensure the well-being of those involved in the project.
We also discussed the significance of assessing the damage and gathering the necessary tools and materials before beginning the replacement. Proper assessment allows you to make informed decisions and select the appropriate materials for the job, while having all the necessary tools at hand ensures a smooth and efficient process.
The installation process itself involved removing the old skylight dome, cleaning and preparing the skylight frame, installing the new skylight dome, securing it in place, and adding the finishing touches and seals. Each step contributes to the overall stability, functionality, and weather resistance of the skylight.
Lastly, we highlighted the importance of regular maintenance and inspection to ensure the long-term performance and durability of the skylight. Keeping an eye out for any signs of damage or leaks and addressing them promptly will help preserve the integrity of your skylight and prevent further problems down the line.
Whether you decide to take on the skylight replacement yourself or seek the assistance of a professional, this comprehensive guide provides you with the knowledge and understanding necessary to carry out a successful skylight dome replacement project.
Remember, a well-installed and properly maintained skylight dome can bring beauty and functionality to your home, allowing you to enjoy the benefits of natural light and ventilation for years to come.
Frequently Asked Questions about How To Replace A Skylight Dome
Was this page helpful?
At Storables.com, we guarantee accurate and reliable information. Our content, validated by Expert Board Contributors, is crafted following stringent Editorial Policies. We're committed to providing you with well-researched, expert-backed insights for all your informational needs.


0 thoughts on “How To Replace A Skylight Dome”