
Articles
How To Run Outdoor Conduit
Modified: October 31, 2024
Looking for articles on how to run outdoor conduit? Find step-by-step guides and expert tips that will help you with outdoor conduit installations.
(Many of the links in this article redirect to a specific reviewed product. Your purchase of these products through affiliate links helps to generate commission for Storables.com, at no extra cost. Learn more)
Introduction
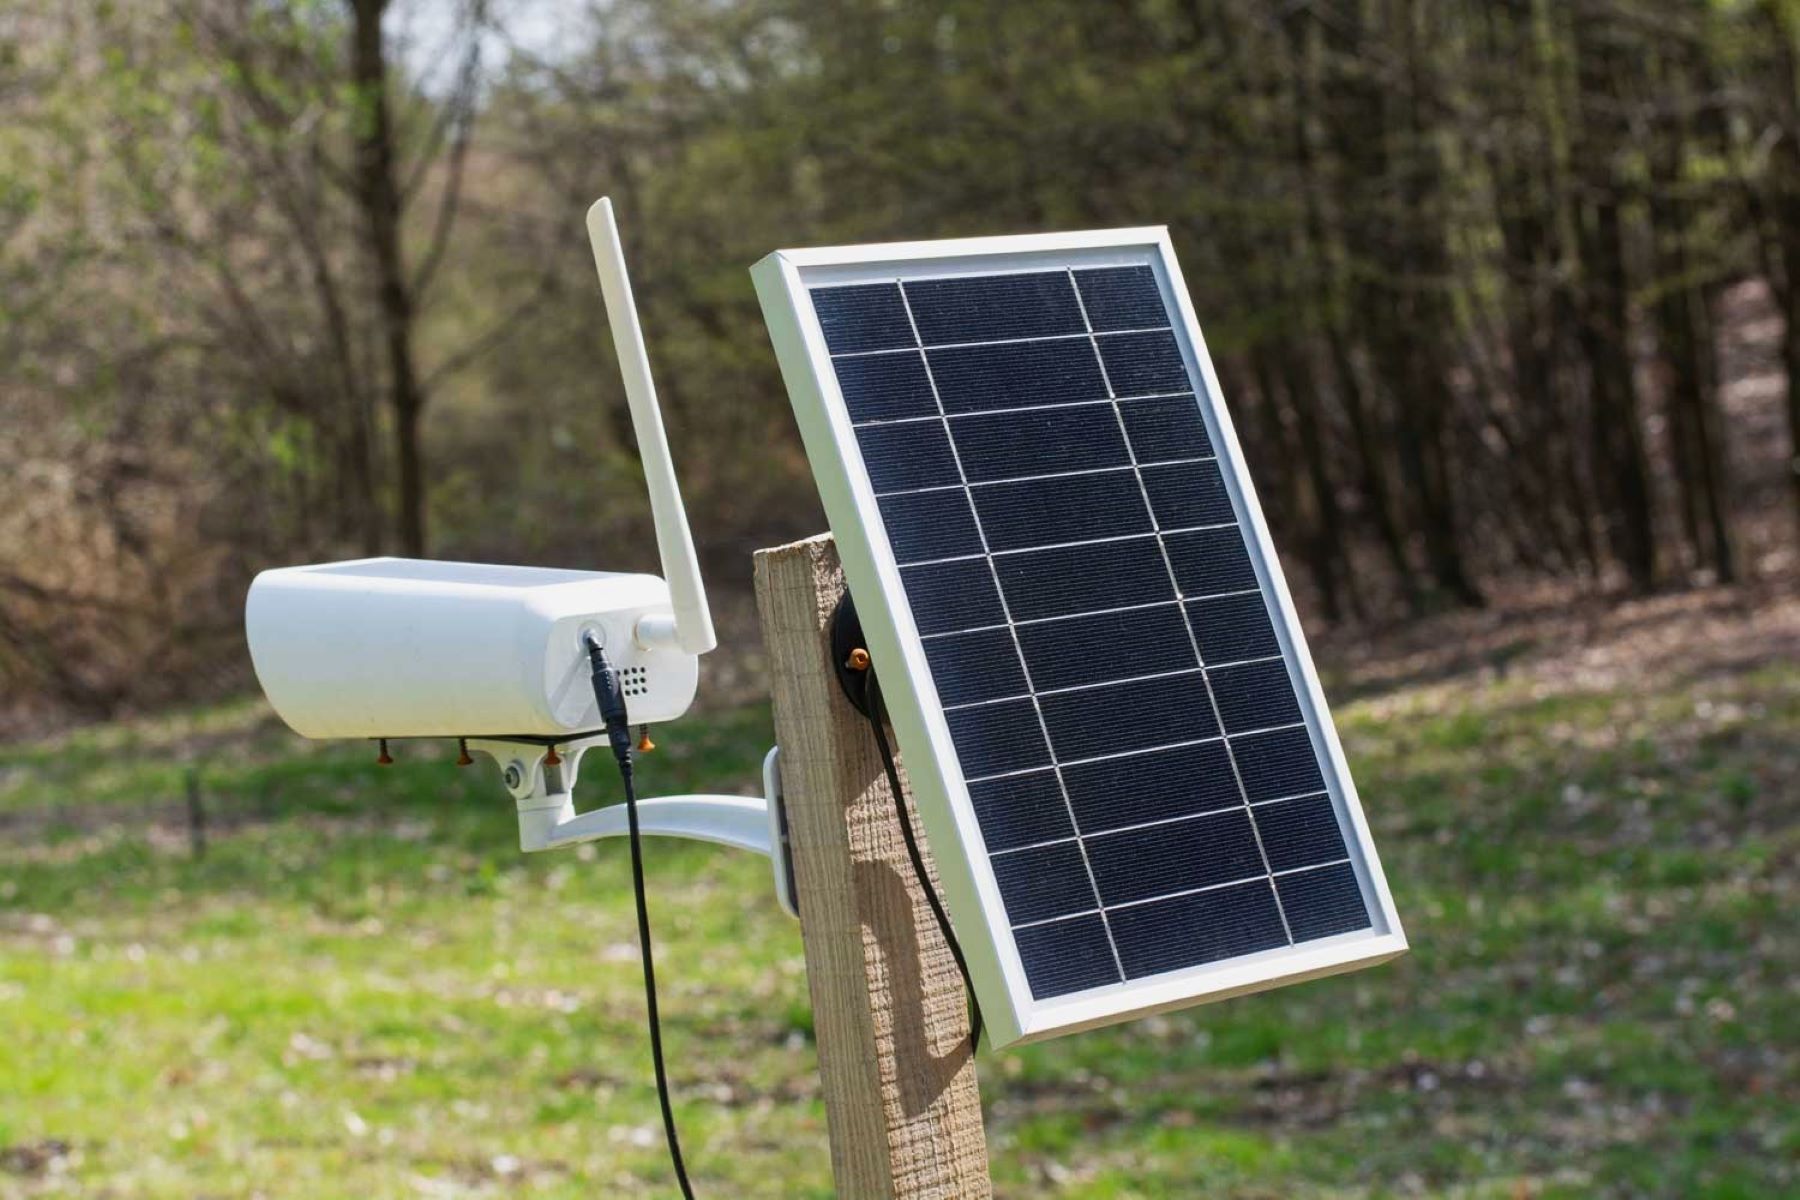
Running outdoor conduit is essential for safely and efficiently routing electrical wires and cables in various settings, such as residential, commercial, or industrial areas. Whether you are installing a new electrical system or making repairs or upgrades, proper conduit installation is crucial to protect the wires from physical damage, moisture, and other environmental factors.
In this article, we will guide you through the step-by-step process of running outdoor conduit, ensuring that you have a clear understanding of each stage and the necessary tools and materials. By following these instructions, you will be able to install a conduit system that meets safety regulations and provides reliable electrical connections.
Before we dive into the details, it’s important to note that electrical work can be dangerous if not handled with caution. If you are not familiar with electrical installations, or if the project involves complex wiring, it is recommended to hire a qualified electrician. Safety should always be the top priority when working with electricity.
Key Takeaways:
- Proper planning, selection of materials, and thorough testing are crucial for a successful outdoor conduit installation. Prioritize safety, follow local regulations, and consult a professional if needed to ensure a reliable electrical system.
- Securing, protecting, and maintaining the conduit system are essential for its longevity and optimal performance. Attention to detail, proper backfilling, and thorough cleanup contribute to a safe and efficient outdoor conduit installation.
Read more: How To Run An Electrical Conduit
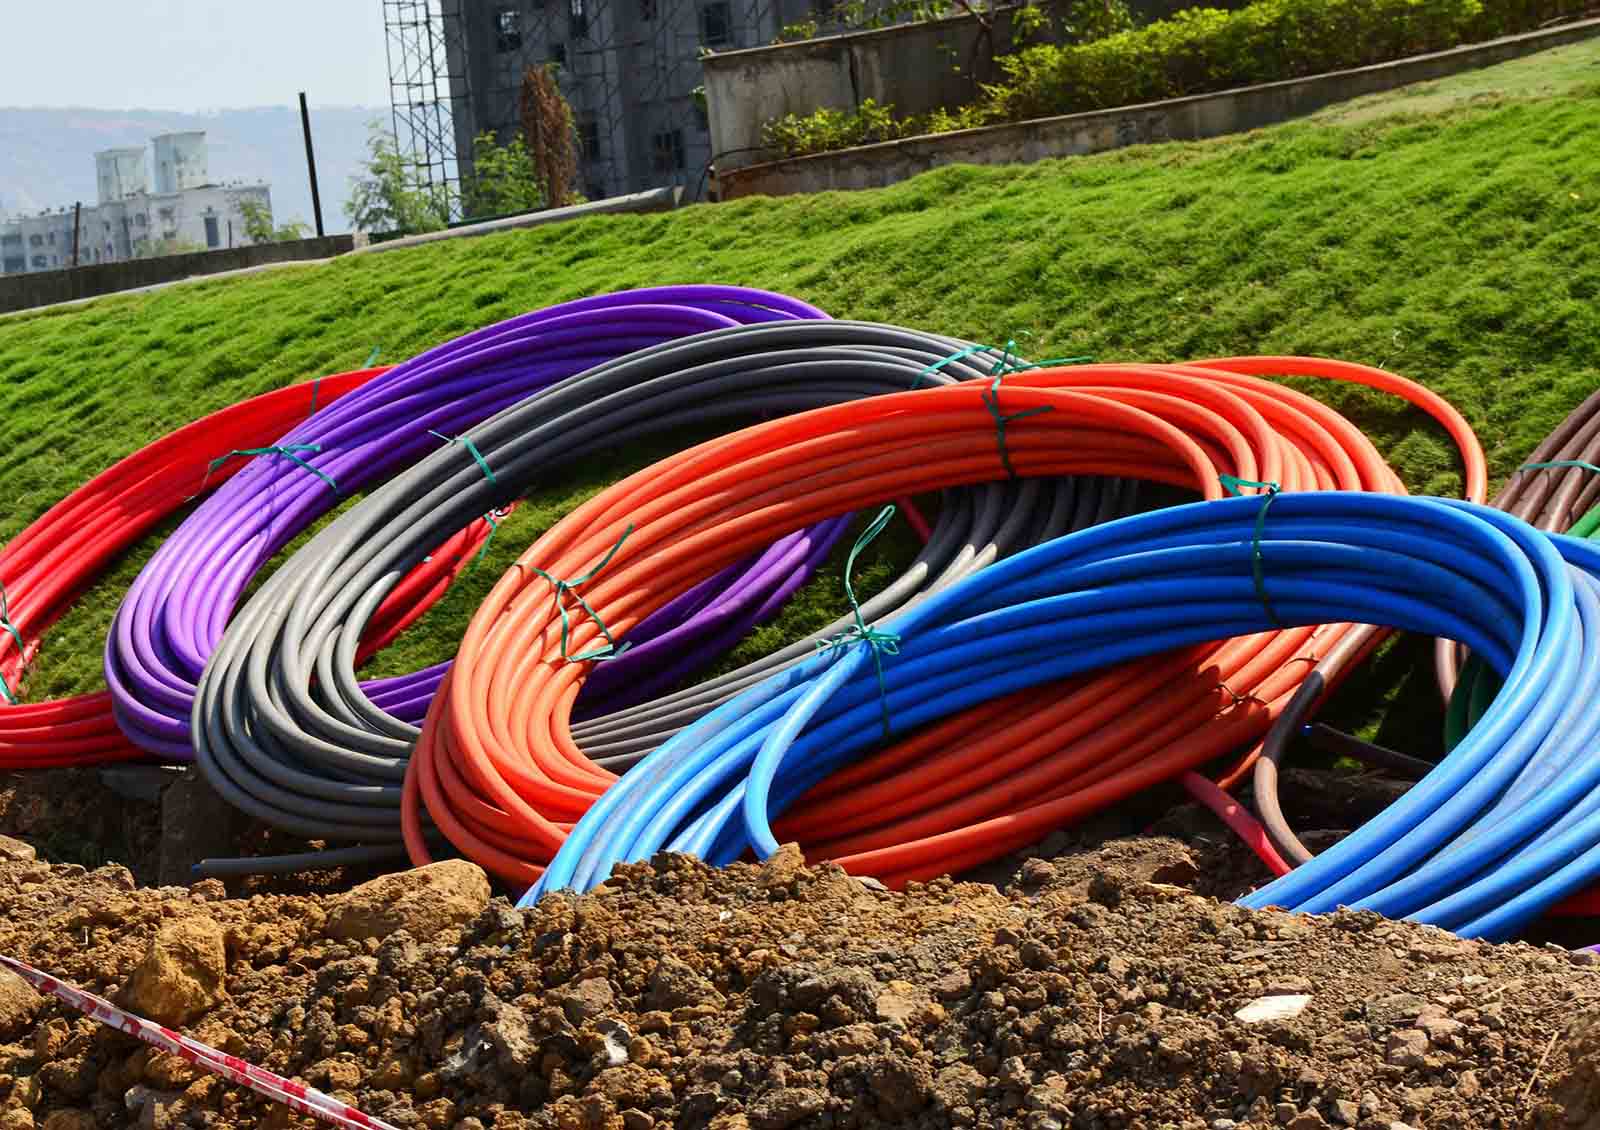
Selecting the Conduit
The first step is to select the appropriate conduit for your specific needs. Conduit is available in various materials, including PVC, metal, and flexible options like liquid-tight conduit. Factors such as the location, type of wiring, and the environment will help determine the best conduit material for your project.
PVC conduit is commonly used for residential and light commercial applications due to its affordability and ease of installation. Metal conduit, such as rigid steel or aluminum, is more durable and provides better protection against physical damage. Flexible conduit is often used when flexibility is required, such as in outdoor areas with frequent movement or vibration.
Consider the size of the conduit as well. The National Electrical Code (NEC) provides guidelines on conduit sizing based on the number and size of wires. Ensure that the chosen conduit can accommodate the required wires comfortably.
Gathering the Required Tools and Materials
Before you begin the installation, gather all the necessary tools and materials. This will save you time and ensure a smooth workflow throughout the project. Here’s a list of common tools and materials you may need:
- Conduit of the appropriate size and material
- Pipe cutter
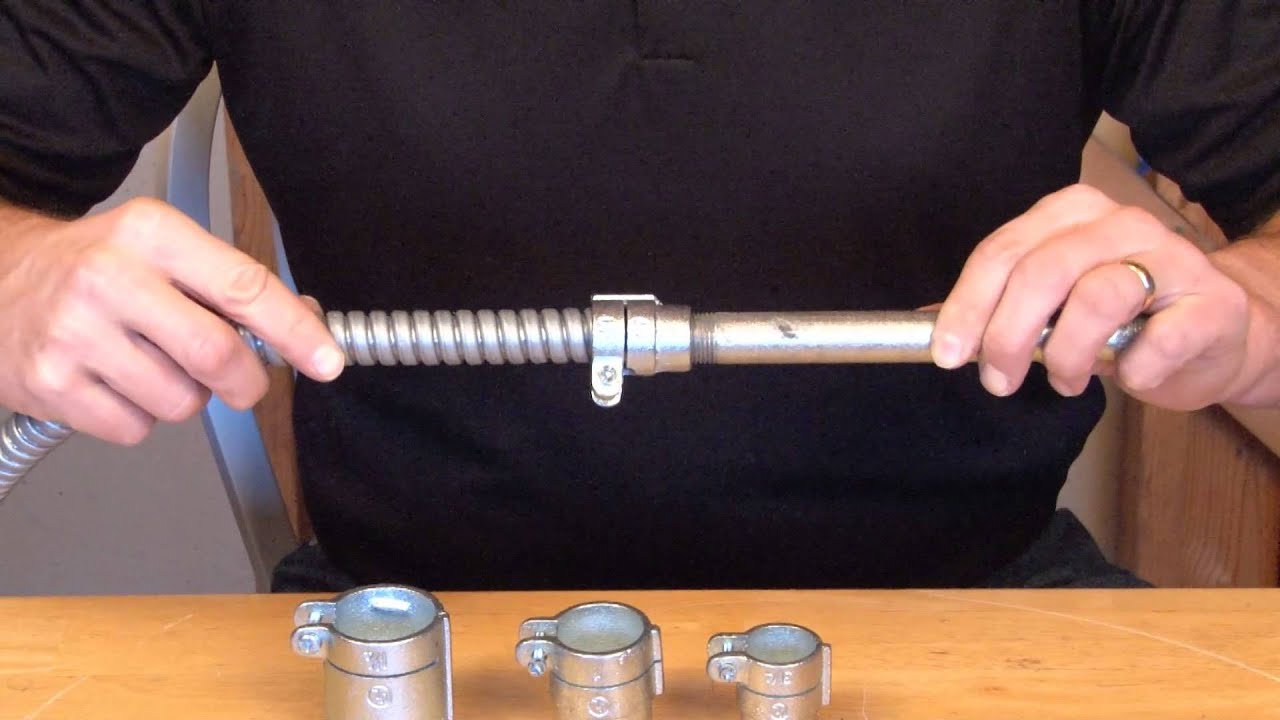
- Conduit bender (if using metal conduit)
- Conduit straps or hangers
- Conduit connectors and fittings
- Wire pulling tools (such as fish tape or pulling grips)
- Conduit cement or glue (for PVC conduit)
- Trenching tools (such as a shovel or trencher)
- Level
- Tape measure
- Safety equipment (gloves, safety glasses, etc.)
Having these tools and materials ready will ensure a smooth and efficient installation process.
Key Takeaways:
- Proper planning, selection of materials, and thorough testing are crucial for a successful outdoor conduit installation. Prioritize safety, follow local regulations, and consult a professional if needed to ensure a reliable electrical system.
- Securing, protecting, and maintaining the conduit system are essential for its longevity and optimal performance. Attention to detail, proper backfilling, and thorough cleanup contribute to a safe and efficient outdoor conduit installation.
Read more: How To Run An Electrical Conduit
Selecting the Conduit
The first step in running outdoor conduit is selecting the appropriate conduit material for your specific project. The conduit material you choose will depend on several factors, including the location, type of wiring, and the environment in which it will be installed.
One of the most commonly used materials for outdoor conduit is PVC (polyvinyl chloride). PVC conduit is popular for residential and light commercial applications due to its affordability and ease of installation. It is resistant to moisture and corrosion, making it suitable for outdoor use. PVC conduit is available in various sizes, and it can be easily cut with a pipe cutter to fit the desired length.
If you require a more durable option, metal conduit may be the best choice. Metal conduit, such as rigid steel or aluminum, provides excellent protection against physical damage. It is commonly used in industrial or high-traffic areas where the conduit may be exposed to more rigorous conditions. Metal conduit typically requires the use of a conduit bender to shape the conduit around corners and bends.
Flexible conduit is another option to consider when running outdoor conduit. This type of conduit is made of a flexible material, such as PVC or metal, and it is suitable for areas that require more flexibility or where the conduit needs to be maneuvered around obstacles. Liquid-tight conduit is a specific type of flexible conduit that provides protection against moisture and is often used for outdoor applications.
When selecting the conduit, it is important to consider the size that will best accommodate the wires you will be routing. The National Electrical Code (NEC) provides guidelines on conduit sizing based on the number and size of wires within the conduit. Ensure that the chosen conduit is large enough to comfortably accommodate the required wires, allowing room for any future additions or modifications.
Consulting with a qualified electrician or referring to local building codes can help you determine the appropriate conduit material and size for your project. It is important to ensure compliance with safety regulations and to choose a conduit that will provide sufficient protection for the electrical wires.
Gathering the Required Tools and Materials
Before you start running outdoor conduit, it’s important to gather all the necessary tools and materials to ensure a smooth and efficient installation process. Having everything at hand will save you time and prevent interruptions during the project. Here is a list of common tools and materials you will need:
- Conduit: Select the appropriate conduit material (such as PVC or metal) and size for your project.
- Pipe cutter: A pipe cutter will be necessary to cut the conduit to the desired lengths. Make sure the cutter is suitable for the type of conduit you are using.
- Conduit bender: If you are working with metal conduit and need to make bends and corners, a conduit bender is essential. Choose a bender that matches the size of the conduit you are using.
- Conduit straps or hangers: These are used to secure the conduit to walls or other structural surfaces. Ensure that they are suitable for the size of conduit you are using.
- Conduit connectors and fittings: You will need connectors and fittings to join sections of conduit, make turns, and connect the conduit to electrical boxes or other components. Select connectors and fittings compatible with your chosen conduit type and size.
- Wire pulling tools: Depending on the complexity of your project, you may need wire pulling tools such as fish tape or pulling grips to help guide the wires through the conduit. These tools make the installation process smoother and prevent the wires from getting stuck or damaged.
- Conduit cement or glue: If you are using PVC conduit, you will need conduit cement or glue to securely bond the conduit fittings. Follow the manufacturer’s instructions for proper application.
- Trenching tools: If you are burying the conduit underground, you will need trenching tools such as a shovel or trencher to dig the trenches. The depth and width of the trenches will depend on local building codes and the size of the conduit.
- Level: A level will help ensure that the conduit is installed properly and aligned correctly.
- Tape measure: Accurate measurements are crucial for cutting the conduit to the correct lengths and for planning the conduit route. Use a tape measure or a ruler to obtain precise measurements.
- Safety equipment: Always prioritize safety when working with electrical installations. Wear gloves, safety glasses, and other appropriate safety gear to protect yourself from potential hazards.
By gathering these tools and materials before you start the project, you will have everything you need to install the outdoor conduit efficiently and effectively. It’s always a good idea to double-check that you have all the necessary items before you begin.
Read more: How To Run PVC Conduit
Planning the Conduit Route
Before running outdoor conduit, it’s crucial to plan the route that the conduit will take. Proper planning will ensure that the conduit is installed in the most efficient and effective manner, avoiding obstacles and optimizing the electrical wiring system. Here are some steps to follow when planning the conduit route:
- Identify the starting and ending points: Determine where the conduit will begin and end. This could be from an electrical panel to an outdoor fixture or from one point outdoors to another.
- Consider the path: Evaluate the most direct and feasible path for the conduit. Take into account any obstacles or structures that may be in the way, such as walls, fences, trees, or other structures. It’s important to choose a path that minimizes the amount of conduit required and avoids potential damage or interference.
- Check local regulations: Consult local building codes and regulations to ensure compliance when planning the conduit route. This may include requirements for burial depth, conduit materials, or the need for conduit sleeves in certain areas.
- Measure and mark: Use a tape measure or ruler to measure the distance between the starting and ending points. Mark the path of the conduit on the ground or walls using chalk or a marker to ensure accuracy during installation.
- Account for bends and corners: If the conduit route requires bends or corners, plan for them accordingly. Consider using conduit fittings and connectors designed for making turns to ensure a smooth transition.
- Ensure accessibility: It’s important to plan the conduit route in a way that allows for easy access and maintenance, if needed, in the future. If the conduit needs to be buried, consider installing conduit access points or junction boxes at strategic locations for convenient access to the wiring.
- Review the plan: Once you have mapped out the conduit route, review the plan to ensure it meets your specific requirements. Double-check for any potential issues or adjustments that may need to be made before proceeding with the installation.
Remember, careful planning of the conduit route is crucial to ensure a successful installation. It helps avoid complications, minimizes the amount of conduit required, and maximizes the efficiency of the electrical wiring system. Take the time to plan the conduit route properly before moving on to the next steps of the installation process.
Digging Trenches for the Conduit
Once you have planned the conduit route, the next step in running outdoor conduit is digging trenches to accommodate the conduit. The trenches will protect the conduit from physical damage and provide a safe and secure pathway for the electrical wires. Here’s how to dig trenches for the conduit:
- Review local regulations: Check with local building codes and regulations to determine the required depth and width for the conduit trenches. These requirements can vary depending on the location and the type of conduit being used.
- Mark the trench lines: Using the conduit route plan as a guide, mark the path of the trenches on the ground. Use chalk or a marker to ensure clear visibility.
- Prepare the area: Clear the area of any obstructions, such as rocks, roots, or debris, to make the trenching process easier.
- Start digging: Using a shovel or trenching tool, begin digging the trenches along the marked lines. Dig to the required depth, ensuring that it is sufficient to accommodate the conduit and comply with local regulations.
- Maintain a consistent depth: As you dig the trenches, make sure to maintain a consistent depth to ensure the conduit is installed smoothly and level. Use a level to periodically check the depth and make adjustments if necessary.
- Watch out for utilities: Before digging, call your local utility company to identify the location of any underground utilities, such as gas lines or water pipes. Avoid digging in those areas to prevent accidents and damage.
- Create gradual slopes: If the conduit route requires the trenches to go up or down slopes, create gradual slopes rather than steep angles. This will make it easier to install the conduit and minimize the risk of damage.
- Remove excess soil: As you dig the trenches, place the excess soil in a designated area nearby. This will make it easier to backfill the trenches after the conduit is installed.
- Clean the trenches: Once the trenches are dug, remove any loose soil, rocks, or debris from the bottom to ensure a clean and smooth surface for installing the conduit.
Remember to take precautions and work safely while digging the trenches. Wear protective gear, such as gloves and safety glasses, and be mindful of proper lifting techniques to avoid strain or injury. Also, be cautious of any potential hazards or underground utilities in the area.
By following these steps, you will be ready to move on to the next stage of the outdoor conduit installation process: installing the conduit.
When running outdoor conduit, make sure to use weatherproof fittings and seal all connections with silicone to prevent water damage.
Installing the Conduit
After digging the trenches for the conduit, the next step is to install the conduit itself. Proper installation is crucial for creating a secure pathway for the electrical wires and ensuring the longevity and efficiency of the conduit system. Here’s how to install the conduit:
- Cut the conduit: Measure the lengths of conduit needed for each section of the trench. Use a pipe cutter to make clean, straight cuts. Ensure the cuts are precise to fit the conduit securely.
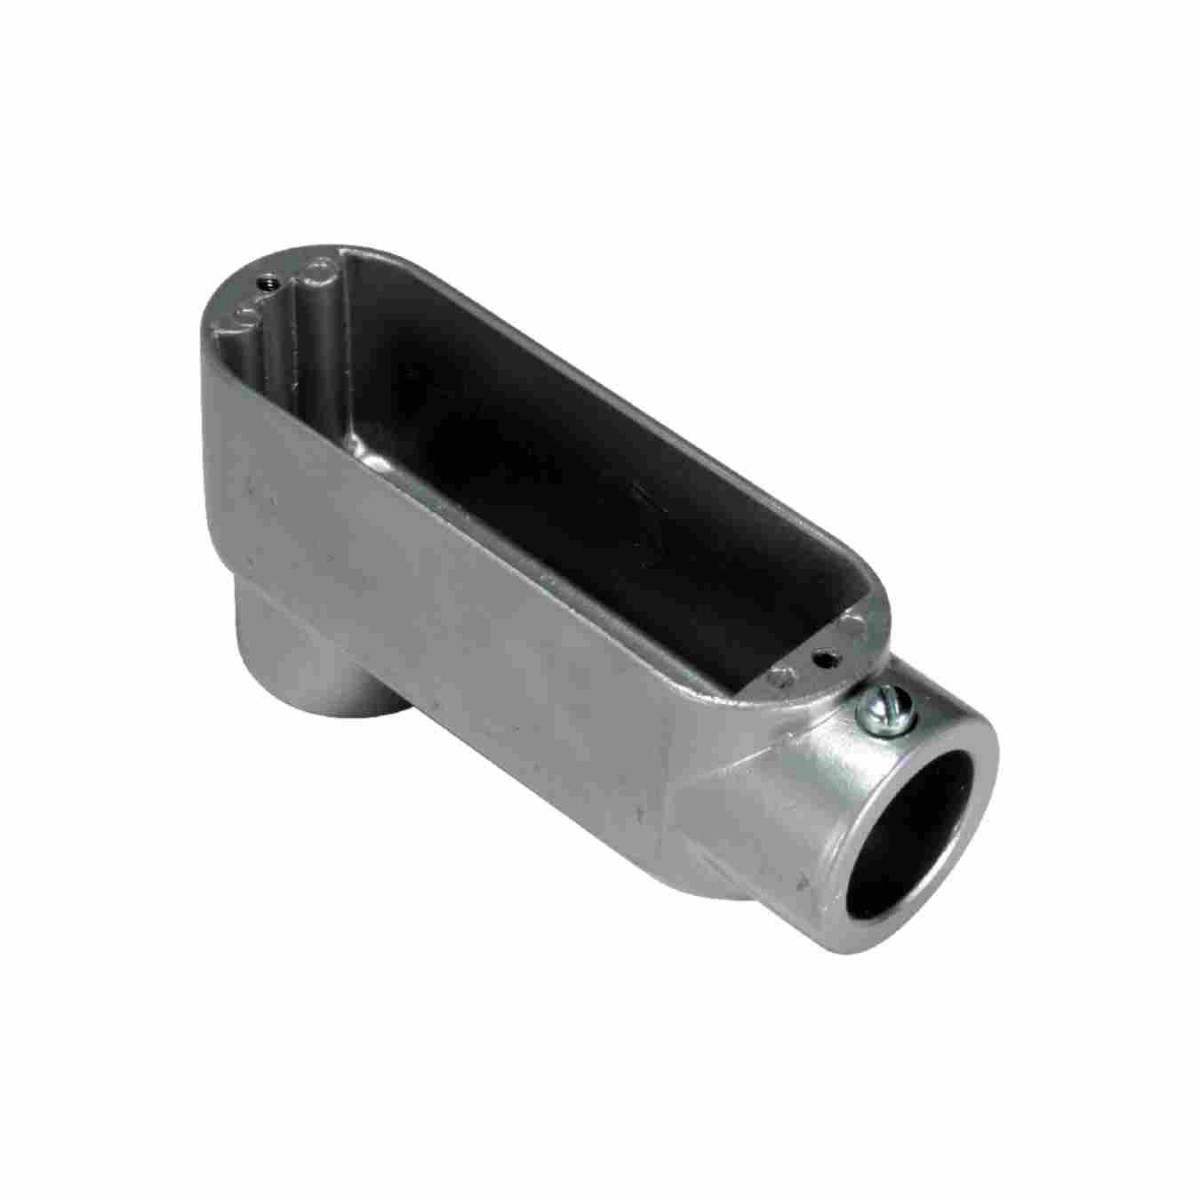
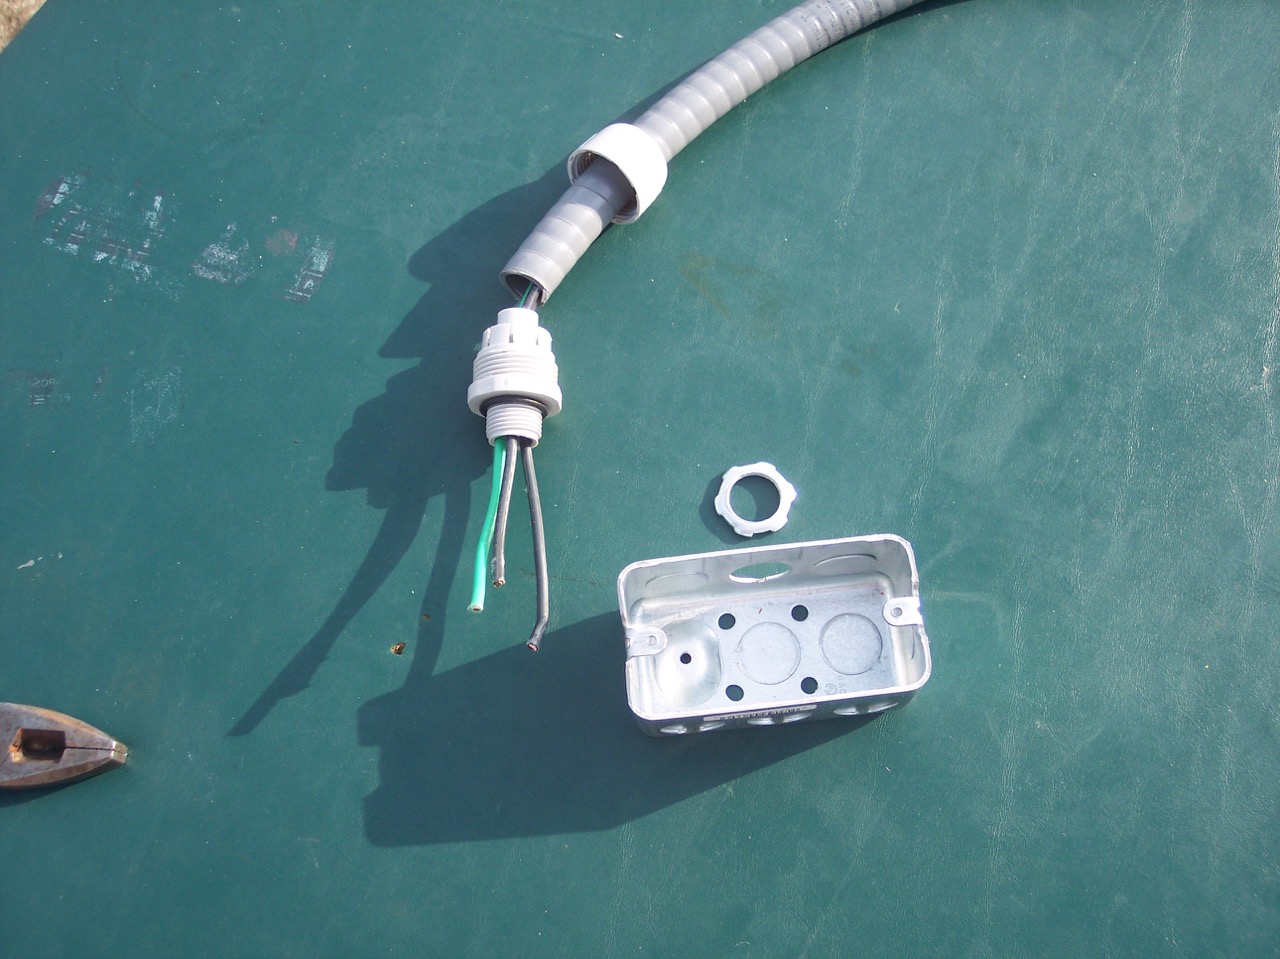
- Attach connectors and fittings: If the conduit route requires turns, corners, or connections to electrical boxes or other components, install the appropriate connectors and fittings. Follow the manufacturer’s instructions to ensure a proper and secure connection.
- Insert the conduit: Place the conduit into the trench, taking care not to damage the conduit or disturb the soil. Push the conduit firmly into place, ensuring it is level and aligned correctly along the designated path.
- Secure the conduit: Use conduit straps or hangers to secure the conduit to walls, structures, or other support surfaces. Place the straps or hangers at regular intervals to prevent excessive movement or sagging.
- Make smooth transitions: If the conduit route requires changes in direction or elevation, use conduit fittings or sweeps to create smooth transitions. These fittings will allow the wires to pass through the conduit easily and reduce the risk of damage or obstruction.
- Connect the conduit sections: If the conduit route spans multiple sections or lengths, connect them using conduit connectors. Make sure to tighten the connectors securely to create a stable and continuous conduit pathway.
- Ensure proper clearance and bending radius: Make sure the conduit has adequate clearance from other objects or obstacles. Additionally, ensure that the conduit bends follow the minimum bending radius guidelines specified by the conduit manufacturer. This will prevent damage to the wires and maintain the integrity of the conduit system.
- Inspect the installation: Once the conduit is installed, inspect the entire system for any signs of damage, improper alignment, or obstructions. Make any necessary adjustments or corrections before proceeding to the next stage.
Take your time during the installation process to ensure that each section of conduit is properly installed and secured. Double-check the alignment, connections, and clearance to ensure a successful installation.
Now that the conduit is installed, the next steps will involve securing and protecting the conduit to ensure its longevity and the safety of the electrical wiring system.
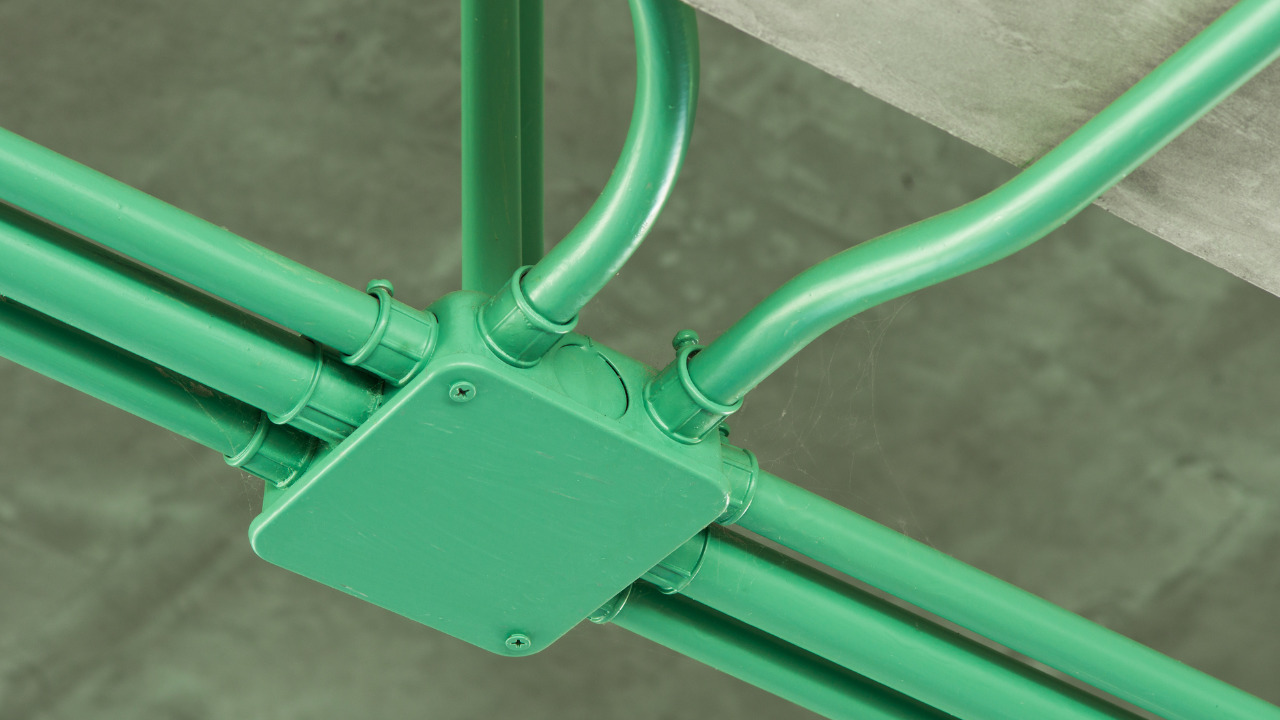
Securing and Protecting the Conduit
Once the conduit is installed, it’s essential to secure and protect it to ensure the longevity and safety of the electrical wiring system. Proper securing and protection will prevent damage to the conduit and wires and minimize the risk of accidents or interruptions. Here are the steps to secure and protect the conduit:
- Ensure proper support: Check that the conduit is adequately supported along its entire length. Use conduit straps, hangers, or clamps to secure the conduit to walls, structures, or other support surfaces. This will prevent excessive movement or sagging.
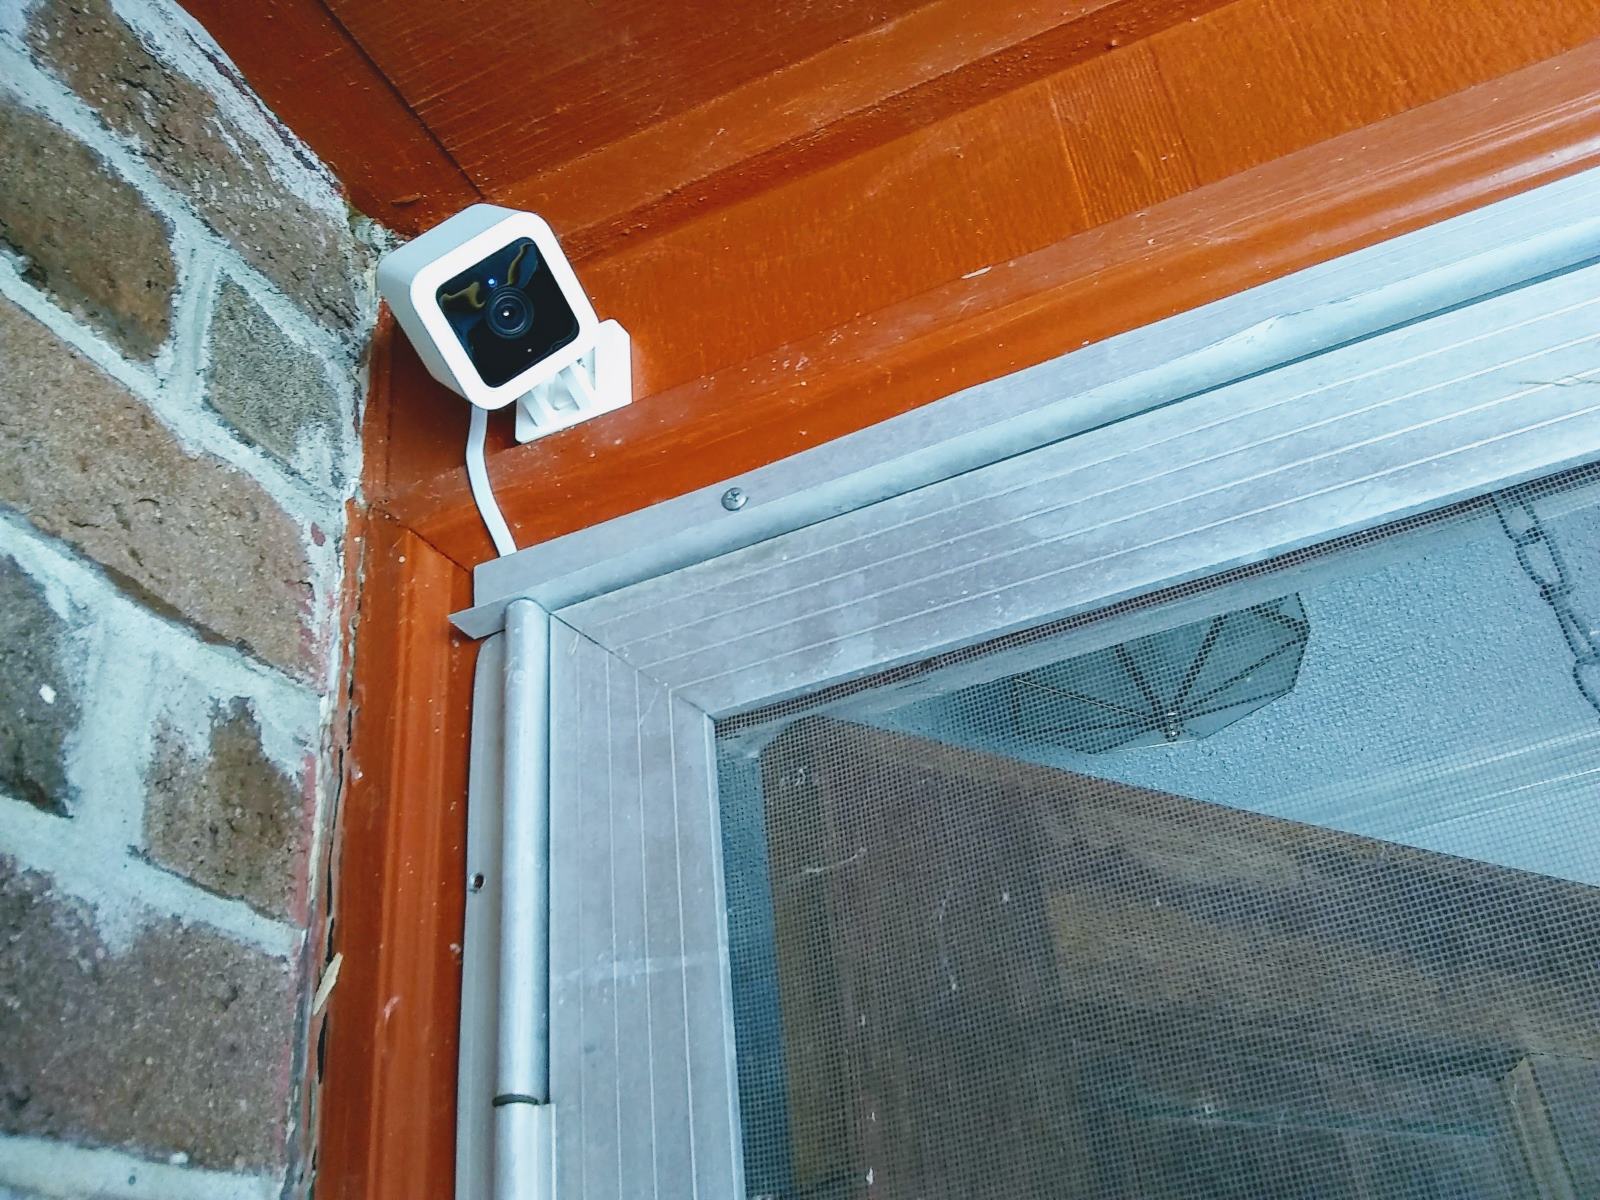
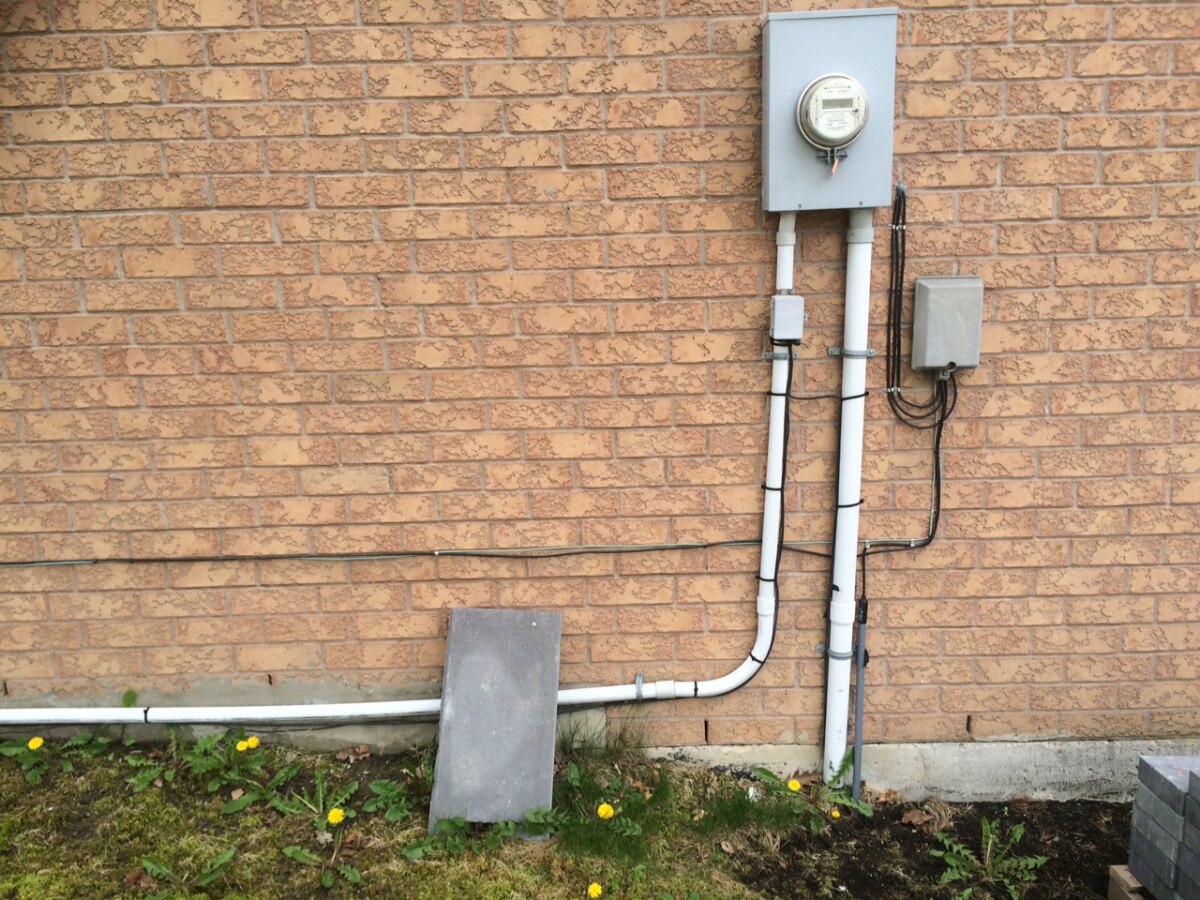
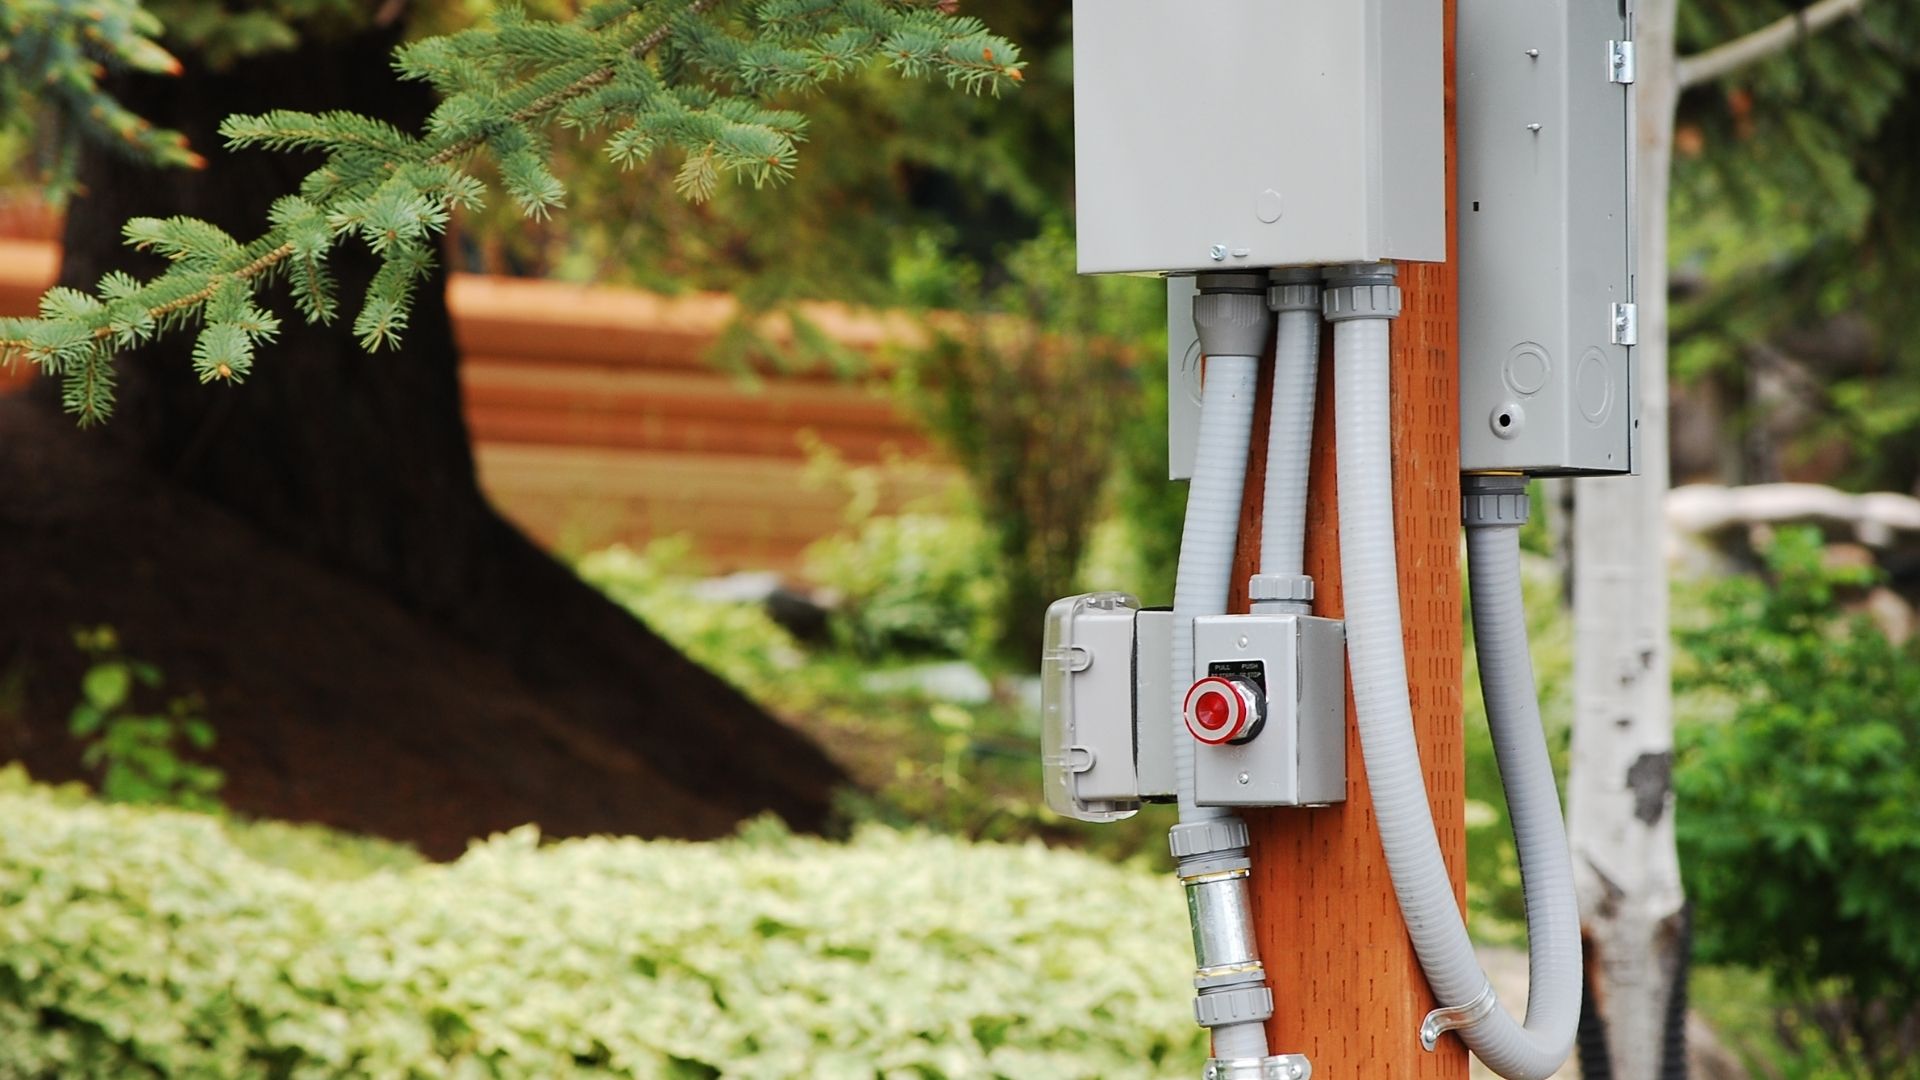
- Protect against physical damage: Depending on the location and environment, the conduit may be at risk of physical damage. Install conduit sleeves or rigid conduit where necessary to provide extra protection, especially in areas with high traffic or potential for impact.
- Seal open ends: If the conduit ends are open, cap them with PVC or metal conduit caps. This will prevent debris or moisture from entering the conduit and affecting the wires inside.
- Waterproof the connections: If the conduit is exposed to moisture or water, use waterproof conduit fittings or connectors. These fittings create a seal that protects the connection points from water infiltration, reducing the risk of corrosion or electrical shorts.
- Inspect for gaps or damage: Regularly inspect the conduit system for any gaps, loose fittings, or signs of damage. Repair or replace any damaged sections promptly to maintain the integrity of the system.
- Label the conduit: Use labels or markers to indicate the purpose or destination of each conduit section. This will help with future maintenance, repairs, or upgrades, as well as troubleshooting if any issues arise.
- Protect from extreme temperatures: In areas with extreme temperatures, consider using insulation or insulation tape to protect the conduit and wires from heat or cold. This will help maintain optimal conditions within the conduit system.
- Consider additional protection: Depending on the environment, additional protection such as conduit guards, protective covers, or barriers may be necessary. These measures can help safeguard the conduit from external factors like UV rays, chemicals, or physical impact.
By properly securing and protecting the conduit, you ensure a reliable and durable electrical wiring system. Regular maintenance and inspections are also important to address any issues promptly and maintain the overall performance of the conduit installation.
Next, we will discuss the process of connecting wires inside the conduit.
Read more: How To Run Conduit Under Sidewalk
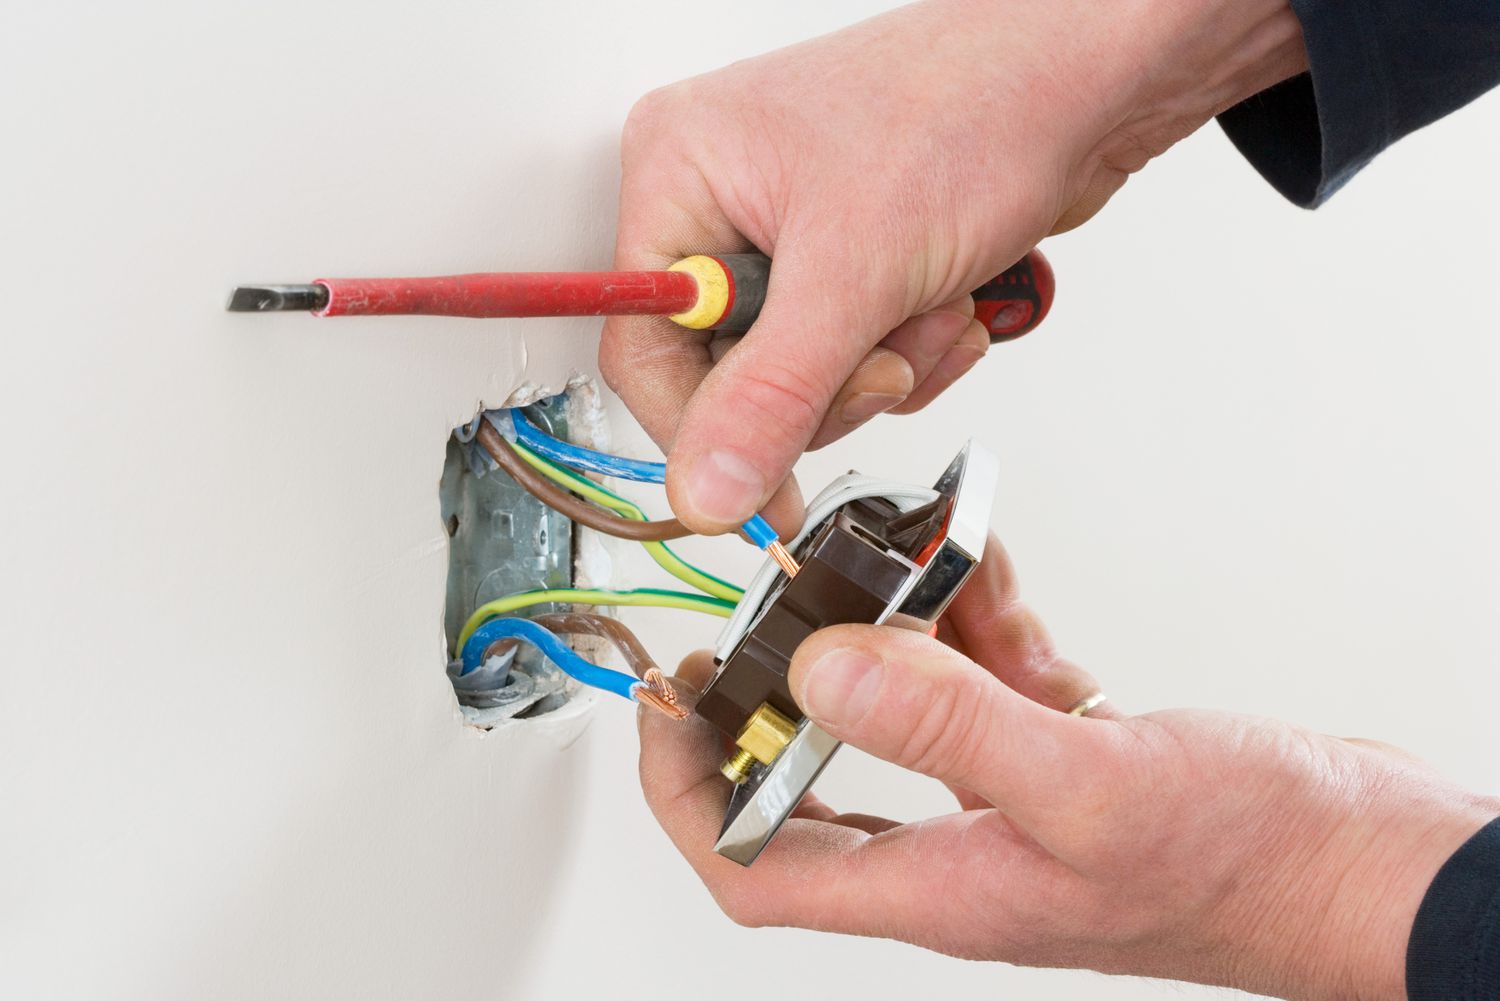
Connecting Wires Inside the Conduit
After securing and protecting the conduit, the next step in running outdoor conduit is connecting the wires inside. Properly connecting the wires is crucial for ensuring a safe and efficient electrical system. Follow these steps to connect wires inside the conduit:
- Prepare the wires: Strip the outer insulation of the wires to expose the conductor. Use wire strippers to carefully remove the insulation, ensuring that you do not damage the conductor.
- Route the wires: Carefully guide the wires through the conduit, following the conduit route that you planned and installed. Use wire pulling tools such as fish tape or pulling grips to help maneuver the wires through longer or complex sections.
- Group and organize the wires: If you are running multiple wires through the conduit, group them together based on their purpose or destination. Use zip ties or cable ties to secure the wires together in an organized manner.
- Connect the wires: Depending on the specific wiring requirements, connect the wires according to the appropriate methods. This may involve using wire nuts, crimp connectors, or terminal blocks. Follow the manufacturer’s instructions and ensure proper and secure connections.
- Label the wires: To facilitate future maintenance or troubleshooting, label each wire with its corresponding purpose or destination. This will make it easier to identify and work with the wires when needed.
- Test the connections: After connecting the wires, use a voltage tester or multimeter to test the connections and ensure that they are functioning properly. This step will help verify that all the wires are correctly connected and can carry electricity as intended.
- Secure the wires inside the conduit: Use cable ties or conduit straps to secure the wires inside the conduit at regular intervals. This will prevent them from shifting or rubbing against the inside of the conduit, minimizing the risk of damage or interference.
- Verify compliance with electrical codes: It is essential to ensure that the wiring inside the conduit meets the requirements of local electrical codes. Follow the regulations regarding wire size, color coding, grounding, and any other applicable guidelines.
Take your time and work carefully when connecting the wires inside the conduit. Be sure to double-check all connections and test their functionality before proceeding to the next stage of the conduit installation process.
Next, we will discuss the important step of testing the conduit system to ensure it is functioning correctly.
Testing the Conduit System
Testing the conduit system is a crucial step in running outdoor conduit to ensure that the electrical wiring is properly installed and functioning correctly. Conducting thorough tests will help identify any potential issues or errors. Here are the steps to test the conduit system:
- Turn off the power: Before conducting any tests, always ensure that the power to the conduit system is turned off. This step is crucial for your safety and to prevent any damage or accidents during the testing process.
- Inspect the connections: Perform a visual inspection of all the connections inside the conduit. Ensure that they are tight, secure, and properly installed. Check for any loose or exposed wires or any signs of potential damage.
- Perform a continuity test: A continuity test checks for proper electrical conductivity throughout the conduit system. Use a multimeter or continuity tester to test the connectivity between different wires, connections, and components. This test will help identify any open circuits, breaks, or faulty connections.
- Check for voltage drop: High voltage drop can indicate a problem within the conduit system. Use a voltage meter or multimeter to measure the voltage at different points within the system. Compare the measured voltages to the expected values to ensure that there are no significant voltage drops or fluctuations.
- Test circuit integrity: Test the integrity of each circuit within the conduit system. Turn on the power and use a circuit tester to verify that each circuit functions as expected. This includes checking that switches, outlets, and other electrical components connected to the conduit system are working correctly.
- Verify grounding: Ensure that the grounding system within the conduit system is properly installed and functioning as required. Test the grounding path using a ground continuity tester to ensure that there is a solid connection to earth ground.
- Perform insulation resistance test: An insulation resistance test measures the insulation resistance between the wires and the conduit system. Use a high-voltage insulation resistance tester to verify that the insulation is intact and provides sufficient isolation between the wires and the conduit. This test helps identify any potential faults or damage to the insulation.
- Record and document: Keep a record of the test results, including any measurements, observations, or issues that were identified during the testing process. This documentation will help you troubleshoot and make any necessary repairs or adjustments in the future.
If any issues or abnormalities are discovered during the testing process, consult with a qualified electrician to address and resolve them before continuing with the operation of the conduit system.
Once you have successfully tested the conduit system and confirmed that it is functioning correctly, the next step is to backfill the trenches to complete the installation.
Backfilling the Trenches
After completing the conduit installation and testing, the next step in running outdoor conduit is backfilling the trenches. Backfilling involves filling the excavated trenches with soil or other suitable materials to restore the surface to its original condition. Here’s how to properly backfill the trenches:
- Remove any debris: Before backfilling, make sure the trenches are free of any debris or obstacles that could hinder the process. Clear away rocks, roots, or excess soil to create a clean workspace.
- Consider the type of soil: Take into account the type of soil you are working with. If the soil is loose or sandy, you may need to use a compactor to ensure proper compaction and stability once backfilled.
- Backfill in layers: Start by adding a layer of soil to cover the bottom of the trenches. Compact the soil in this initial layer using a tamper or compactor to eliminate any air pockets or voids.
- Add more layers: Continue adding more layers of soil and compacting each layer until the trench is completely filled. Aim to achieve uniform compaction throughout the backfilled area.
- Smooth the surface: Once the backfilling is complete, smooth the surface with a rake or shovel to create an even and visually appealing finish. This will also help with drainage and prevent water from accumulating in low spots.
- Reinstate landscaping: If any landscaping or vegetation was disrupted during the trenching process, take the opportunity to reinstate them. Fill in any gaps with soil, replant grass or plants, and restore the area to its original state.
- Consider erosion control: Depending on the location and terrain, consider implementing erosion control measures to prevent soil erosion or sediment runoff. This can include installing erosion control blankets, grass reinforcement meshes, or planting vegetation to stabilize the soil.
- Dispose of excess soil: If you have excess soil leftover from backfilling, dispose of it responsibly in accordance with local regulations. You may be able to reuse the soil for other projects or find an appropriate disposal facility.
- Inspect the backfilled area: Take the time to inspect the backfilled area for any signs of settling or soil erosion. If necessary, add more soil and compact it to rectify any unevenness or voids.
Proper backfilling of the trenches is crucial for maintaining the stability and integrity of the conduit installation. It ensures that the conduit and wires are securely protected and minimizes the risk of damage or collapse in the future.
With the trenches successfully backfilled, we are nearing the completion of the outdoor conduit installation process. The final step involves adding the finishing touches and conducting a cleanup of the work area.
Finishing Touches and Cleanup
After backfilling the trenches and completing the conduit installation, it’s time to add the finishing touches and perform a thorough cleanup of the work area. These final steps will ensure that the outdoor conduit installation is complete and ready for use. Here’s what you need to do:
- Inspect the conduit system: Before proceeding with the finishing touches, thoroughly inspect the conduit system one last time. Ensure that all connections are secure, there are no exposed wires, and everything is in proper working order.
- Secure the conduit ends: If the conduit ends are open, seal them with appropriate conduit caps or plugs. This will add an extra layer of protection from moisture, debris, and potential pests.
- Apply conduit markings: Use appropriate labels or markers to clearly identify and mark the purpose or destination of each conduit. This labeling will facilitate future maintenance, repairs, or modifications to the electrical system.
- Perform a cleanup: Remove any tools, debris, or excess materials from the work area. Dispose of waste and leftover materials in accordance with local regulations. Leave the work area clean, safe, and ready for use.
- Restore landscaping: If any landscaping or vegetation was disturbed during the installation process, take the time to restore it. Replant grass, flowers, or other vegetation, and ensure that the area looks aesthetically pleasing.
- Update documentation: Update your records and documentation with any pertinent information related to the conduit installation, including the location of the conduits, the types of fittings used, and any other relevant details. This documentation will be valuable for future reference and maintenance.
- Conduct a final inspection: Once the finishing touches and cleanup are complete, conduct a final inspection of the entire conduit system and the surrounding area. Verify that everything is in order, and make any necessary adjustments or corrections.
- Keep maintenance in mind: Throughout the finishing touches and cleanup process, consider ongoing maintenance requirements. Plan for regular inspections, cleaning, and maintenance of the conduit system to ensure its continued functionality and longevity.
By adding the finishing touches and performing a thorough cleanup, your outdoor conduit installation is now complete. The conduit system is ready for use, providing a safe and reliable pathway for electrical wires and ensuring optimal electrical performance.
Remember to keep your documentation and records easily accessible for future reference or any necessary repairs or modifications. Regular maintenance, inspections, and repairs will help prolong the lifespan of the conduit system and ensure the safety of your electrical installations.
Congratulations on successfully running outdoor conduit, and enjoy the benefits of a well-installed electrical system!
Read more: How To Run Electrical Conduit Underground
Conclusion
Running outdoor conduit is an essential task in ensuring the safe and efficient routing of electrical wires and cables. By following the steps outlined in this guide, you can successfully install conduit in outdoor settings, whether it’s for residential, commercial, or industrial applications.
Throughout the process, it’s important to prioritize safety by wearing appropriate protective gear and following local electrical codes and regulations. If you are unsure or uncomfortable with any aspect of the installation, it is always advisable to consult a qualified electrician.
From selecting the right conduit material and gathering the necessary tools and materials to planning the conduit route, digging trenches, installing the conduit, connecting the wires, testing the system, and backfilling the trenches, each step plays a crucial role in creating a reliable and secure conduit system.
Additionally, securing and protecting the conduit, performing thorough testing, and conducting a final cleanup are essential for maintaining the integrity and functionality of the installation. It’s equally important to keep accurate documentation for future reference and to ensure compliance with maintenance and safety requirements.
By completing these steps carefully and attentively, you will have a properly installed outdoor conduit system that provides a robust and durable electrical infrastructure. This will enable a safe and efficient transmission of electricity, ultimately meeting your specific needs and ensuring the longevity of your electrical system.
Remember, if you have any doubts or concerns during the installation process, consult with a professional electrician to ensure a successful and compliant outdoor conduit installation.
With this comprehensive guide, you are equipped with the knowledge and understanding to confidently run outdoor conduit. Now, go forth and embark on your conduit installation journey, and enjoy the benefits of a well-designed and properly installed electrical system!
Now that you've mastered running outdoor conduit, why stop there? Extend your DIY prowess with our guide on how to seamlessly integrate conduit within walls. Whether you're renovating or simply enhancing your space, mastering this skill ensures safe, effective electrical layouts hidden neatly out of sight. Ready to tackle your next project? Dive into our detailed tutorial and get all the know-how you need.
Frequently Asked Questions about How To Run Outdoor Conduit
Was this page helpful?
At Storables.com, we guarantee accurate and reliable information. Our content, validated by Expert Board Contributors, is crafted following stringent Editorial Policies. We're committed to providing you with well-researched, expert-backed insights for all your informational needs.

0 thoughts on “How To Run Outdoor Conduit”