Articles
How To Run Conduit Under Sidewalk
Modified: August 28, 2024
Learn how to run conduit under a sidewalk with our informative articles. Get step-by-step instructions and expert tips for a successful installation.
(Many of the links in this article redirect to a specific reviewed product. Your purchase of these products through affiliate links helps to generate commission for Storables.com, at no extra cost. Learn more)
Introduction
Running conduit under a sidewalk can be a challenging task, but with the right knowledge and tools, it’s a project that you can complete successfully. Whether you’re installing electrical wiring for outdoor lighting or laying down irrigation pipes, running conduit under a sidewalk allows you to keep your cables and pipes hidden, protecting them from potential damage.
In this article, we will guide you through the process of running conduit under a sidewalk step by step. We will cover everything from understanding conduit installation to assesssidewalkconstruction, choosing the right conduit, making the trench, and sealing the conduit properly. By following these guidelines, you can ensure a safe and efficient installation process.
Before you start, it’s crucial to note that running conduit under a sidewalk may require some physical effort and precise planning. It’s always a good idea to consult with professionals or check local building codes to ensure compliance and safety. Without further ado, let’s dive into the details and get started on your conduit installation project.
Key Takeaways:
- Proper planning, understanding conduit installation, and assessing sidewalk construction are crucial for a successful conduit installation under a sidewalk. Prioritize safety, comply with regulations, and consult professionals for a smooth and efficient project.
- Carefully choosing the right conduit, planning the route, making a trench, running the conduit, sealing it, and reinstating the sidewalk are essential steps for a professional and long-lasting conduit installation. Regular maintenance, future considerations, and adherence to regulations ensure optimal functionality and safety.
Read more: How To Run An Electrical Conduit
Understanding Conduit Installation
Before you start running conduit under a sidewalk, it’s important to understand the basics of conduit installation. Conduit is a protective tube that houses and conceals electrical or plumbing wires. It provides a safe and organized pathway for cables and pipes, protecting them from damage caused by weather conditions, impact, or other external factors.
There are different types of conduit materials available, including PVC, metal, and flexible conduit. PVC conduit is commonly used for electrical applications, while metal conduit is often preferred for more durable installations. Flexible conduit, also known as “liquid-tight” conduit, is a flexible and versatile option that can be bent and shaped to fit different installation needs.
When running conduit under a sidewalk, it’s essential to choose the appropriate size and type of conduit based on the specific requirements of your project. Consider factors such as the number and size of cables or pipes that need to pass through, the environmental conditions, and any relevant building codes in your area.
Proper installation of conduit includes securing it firmly in place to prevent movement or damage over time. It should be adequately supported along the entire length, especially when being laid under a sidewalk. This helps to ensure that the conduit remains intact and functional for years to come.
Additionally, it’s crucial to consider the depth at which the conduit will be installed. This can vary depending on the specific regulations in your area. Generally, conduit should be buried at a depth that provides protection from accidental damage caused by digging or other construction activities.
By understanding the fundamentals of conduit installation, you’ll be well-equipped to proceed with running conduit under a sidewalk. With the appropriate conduit material, proper support, and adherence to regulations and safety practices, you can ensure a successful and long-lasting installation.
Tools and Materials Required
Before you begin running conduit under a sidewalk, gather the necessary tools and materials to ensure a smooth installation process. Here is a list of some essential items you will need:
Tools:
- Shovel – for digging the trench
- Measuring tape – to accurately measure the distance
- Trenching shovel or pickaxe – for breaking up the soil
- Level – to ensure the conduit is installed at the correct depth
- Conduit cutter – for cutting the conduit to the desired lengths
- Wire pulling tools – to assist with pulling cables or wires through the conduit
- Hammer – for securing fasteners and anchors
- Utility knife – for trimming conduit or making adjustments
Materials:
- Conduit – choose the appropriate type and size based on your project requirements
- Conduit connectors – to securely join sections of conduit together
- Fasteners – such as straps or clamps to secure the conduit in place
- Duct sealant – to seal any openings or joints in the conduit
- Sand or gravel – for backfilling the trench and providing stability to the conduit
- Concrete mix – if necessary for reinstating the sidewalk
- Safety equipment – including gloves, safety glasses, and a dust mask
Having these tools and materials readily available will streamline the conduit installation process. Be sure to gather everything before you start, as it will save you time and frustration.
Remember to prioritize safety throughout the installation process. Wear appropriate protective gear and use tools correctly to minimize the risk of accidents or injuries. If you are unsure about how to use any of the tools, consult the manufacturer’s instructions or seek guidance from a professional.
With the necessary tools and materials at hand, you’re now ready to move forward with running conduit under the sidewalk.
Read more: How To Run Outdoor Conduit
Preparing for the Project
Before you begin running conduit under a sidewalk, it’s crucial to prepare for the project to ensure a successful and efficient installation. Here are some key steps to follow:
1. Research and gather information:
Start by researching local building codes and regulations related to conduit installation. This will help you understand any specific requirements or restrictions you need to adhere to. Additionally, gather information about the types of utilities that may be buried under the sidewalk to avoid potential conflicts during the installation.
2. Create a detailed plan:
Measure the distance you need to cover and plan the route for your conduit installation. Identify the entry and exit points, taking into account any obstacles such as trees or existing structures. Mark out the planned route on the ground to guide you during the installation process.
3. Call utility locating services:
Before digging, contact the local utility locating services to mark the locations of underground utility lines. This will help you avoid accidentally damaging any utility lines during the excavation process. It’s important to do this even if you’re confident that there are no utilities in the area, as it’s better to be safe than sorry.
Read more: How To Run PVC Conduit
4. Obtain necessary permits:
Check with your local municipality or building department to determine if you need any permits for the conduit installation project. Some areas may require permits for any type of construction work, even if it’s on your own property. Make sure to comply with all permitting requirements to avoid any potential legal issues.
5. Gather the required tools and materials:
Refer back to the previous section on tools and materials required and ensure you have everything on hand. This will save you time and allow for a smoother installation process.
6. Notify neighbors:
If your conduit installation project may impact your neighbors, it’s considerate to inform them in advance. Let them know about the project’s timeline and any temporary inconveniences they might experience, such as noise or limited sidewalk access.
By taking these preparatory steps, you’ll be setting yourself up for success with your conduit installation project. Planning and gathering the necessary information and materials will help you proceed with confidence and reduce the likelihood of any unexpected issues along the way.
Locating Utility Lines
Before you start digging the trench for your conduit installation, it’s crucial to locate and mark the underground utility lines to prevent accidental damage. Here are some steps to follow when locating utility lines:
Read more: How To Run Electrical Conduit Underground
1. Contact utility locating services:
The first step is to contact the local utility locating services. These services specialize in identifying and marking the locations of underground utility lines. You can usually reach them by dialing the national 811 hotline, which is a free service available in the United States. Provide them with the details of your project and the area you intend to dig.
2. Wait for utility marking:
After contacting the utility locating services, they will send professionals to your location to mark the utility lines. This process usually takes a few days, so make sure to plan your project accordingly. Avoid digging until all utility lines have been clearly marked.
3. Follow the markings:
Once the utility lines have been marked, it’s important to respect and follow the markings. The markings are typically made using colored flags or paint, with each color representing a specific utility. Common markings include orange for communication lines, yellow for gas lines, and red for electric lines. Be cautious and avoid digging within the designated area of any marked utilities.
4. Hand dig near utility lines:
When it comes to digging near utility lines, it’s best to use a hand digging method to minimize the risk of accidental damage. Use a small shovel or hand tools to carefully excavate the soil around the marked utility lines. This allows you to maintain better control and avoid any potential mishaps.
Read more: How To Run A Cable Under A Carpet
5. Take extra precautions:
Even if the utility lines have been marked, it’s always a good idea to exercise caution and be aware that the markings may not be entirely accurate or up to date. Look for any signs of utility infrastructure, such as manhole covers or utility boxes, and adjust your digging accordingly to avoid causing any damage.
By following these steps and properly locating utility lines before starting your conduit installation, you can minimize the risk of accidents and avoid costly repairs. Ensuring the safety and integrity of utility lines is crucial, so take the time to locate and respect them before proceeding with your project.
Assessing Sidewalk Construction
Before you proceed with running conduit under a sidewalk, it’s important to assess the construction of the sidewalk itself. Understanding the composition and condition of the sidewalk will help you plan and execute the conduit installation effectively. Here are some key factors to consider when assessing sidewalk construction:
1. Sidewalk Material:
Different types of materials are used for constructing sidewalks, including concrete, asphalt, pavers, or a combination of these. Understanding the material composition will guide you in determining the most appropriate method for running conduit. Concrete is the most common material used for sidewalks and may require additional steps for cutting and reinstating after the conduit installation.
2. Thickness and Depth:
Assessing the thickness and depth of the sidewalk is crucial for planning the conduit installation. Measure the thickness of the sidewalk to determine how much depth you need to excavate for running the conduit. This information will help you in deciding the best approach for cutting and reinstating the sidewalk later.
Read more: How To Run Drainage Pipe Under A Driveway
3. Presence of Reinforcement:
Some sidewalks may include reinforcement materials, such as steel bars or wire mesh. These reinforcements provide additional strength and stability to the sidewalk. However, they can present challenges when cutting or drilling to create a pathway for the conduit. Be cautious and ensure you have the appropriate tools and methods to work around any reinforcement present.
4. Curbs and Obstacles:
Take note of any curbs or other vertical obstacles along the path of the conduit installation. These may require additional planning and adjustments during the installation process. Assess how the conduit will transition from the sidewalk to the curb or any other structures and plan accordingly. It’s important to maintain a smooth and uninterrupted pathway for the conduit.
5. Surface Condition:
Inspect the overall condition of the sidewalk surface. Look for cracks, unevenness, or other signs of damage that may impact the conduit installation. Properly assess the areas that may need to be repaired or restored after the conduit is installed to ensure a safe and visually appealing sidewalk.
By carefully assessing the construction of the sidewalk, you can develop a clear understanding of what to expect during the conduit installation process. This knowledge will allow you to plan and execute the installation with precision, ensuring minimal disruption to the sidewalk while maintaining its structural integrity.
Choosing the Right Conduit
When running conduit under a sidewalk, selecting the appropriate conduit is crucial for the successful and efficient installation. The right conduit will protect your cables or pipes and ensure reliable performance in various weather conditions. Here are some factors to consider when choosing the right conduit:
1. Material:
There are different conduit materials available, and the choice depends on the specific application. Common options include PVC, metal, and flexible conduit. PVC conduit is widely used for electrical applications due to its durability, affordability, and resistance to moisture. Metal conduit, such as galvanized steel or aluminum, provides superior strength and protection, making it suitable for more rugged installations. Flexible conduit, also known as “liquid-tight” conduit, offers versatility and is ideal for applications that require movement or bending.
2. Size:
Conduit comes in various sizes, and selecting the right size is essential for accommodating the cables or pipes that will run through it. Consider the diameter and the number of cables or pipes you need to pass through the conduit. Ensure that there is sufficient space to accommodate any expansion or additions that you may plan for in the future.
3. Environmental Considerations:
Take into account the specific environmental conditions in which the conduit will be installed. Consider factors such as exposure to sunlight, humidity, temperature variations, and the presence of chemicals or corrosive substances. Choose a conduit material that is resistant to these environmental factors to ensure long-lasting performance.
4. Compliance with Regulations:
Check local building codes and regulations to ensure that the chosen conduit meets the required standards. Some regions may have specific regulations regarding fire resistance, insulation, or grounding. Adhering to these regulations will ensure compliance and safety in your conduit installation.
5. Future Accessibility:
Consider future accessibility needs when selecting conduit. If you anticipate the need for future repairs or upgrades, choose a conduit that allows for easy access and modification. Some conduit options have removable covers or access points that facilitate maintenance and troubleshooting.
By carefully considering these factors, you can choose the right conduit for your project. It’s always recommended to consult with professionals or experts in conduit installation to ensure that you select the most suitable conduit for your specific needs.
Planning the Conduit Route
When running conduit under a sidewalk, careful planning of the conduit route is essential to ensure a smooth and efficient installation. Planning the conduit route involves considering factors such as the entry and exit points, avoiding obstacles, and maintaining a safe and functional pathway for the cables or pipes. Here are some steps to help you plan the conduit route effectively:
1. Determine entry and exit points:
Identify the locations where the conduit will enter and exit the sidewalk. These points will depend on the specific requirements of your project. Consider factors such as the desired location of the utilities on either side of the sidewalk and the most efficient route for the cables or pipes.
2. Evaluate potential obstacles:
Assess the area surrounding the sidewalk to identify potential obstacles that may impact the conduit installation. Look for trees, existing structures, or other underground utilities that you need to avoid or work around. Take note of any curbs, pathways, or landscaping features that may require adjustments in the conduit route.
Read more: How To Edge Grass Along Sidewalk
3. Ensure a safe pathway:
Plan the conduit route in a way that ensures the safe and unobstructed passage of the cables or pipes. Avoid sharp turns or bends that could make it difficult to pull the cables or pipes through the conduit. Strive for a straight and smooth pathway while considering the depth and elevation changes along the conduit route.
4. Consider future accessibility:
Think about future accessibility needs when planning the conduit route. If you anticipate the need for future repairs, additions, or modifications, incorporate access points or junction boxes into the route. This will make it easier to access and work on the conduit system in the future.
5. Consult local regulations and guidelines:
Check local building codes and regulations to ensure compliance with any specific requirements for the conduit route. Some areas may have regulations regarding the distance between utilities, minimum burial depth, or the use of specific materials. Adhering to these guidelines will help ensure a safe and legal conduit installation.
By following these steps and carefully planning the conduit route, you can minimize potential challenges and ensure a successful installation. Take the time to consider all the relevant factors and consult with professionals if needed to ensure accuracy and efficiency in your conduit installation project.
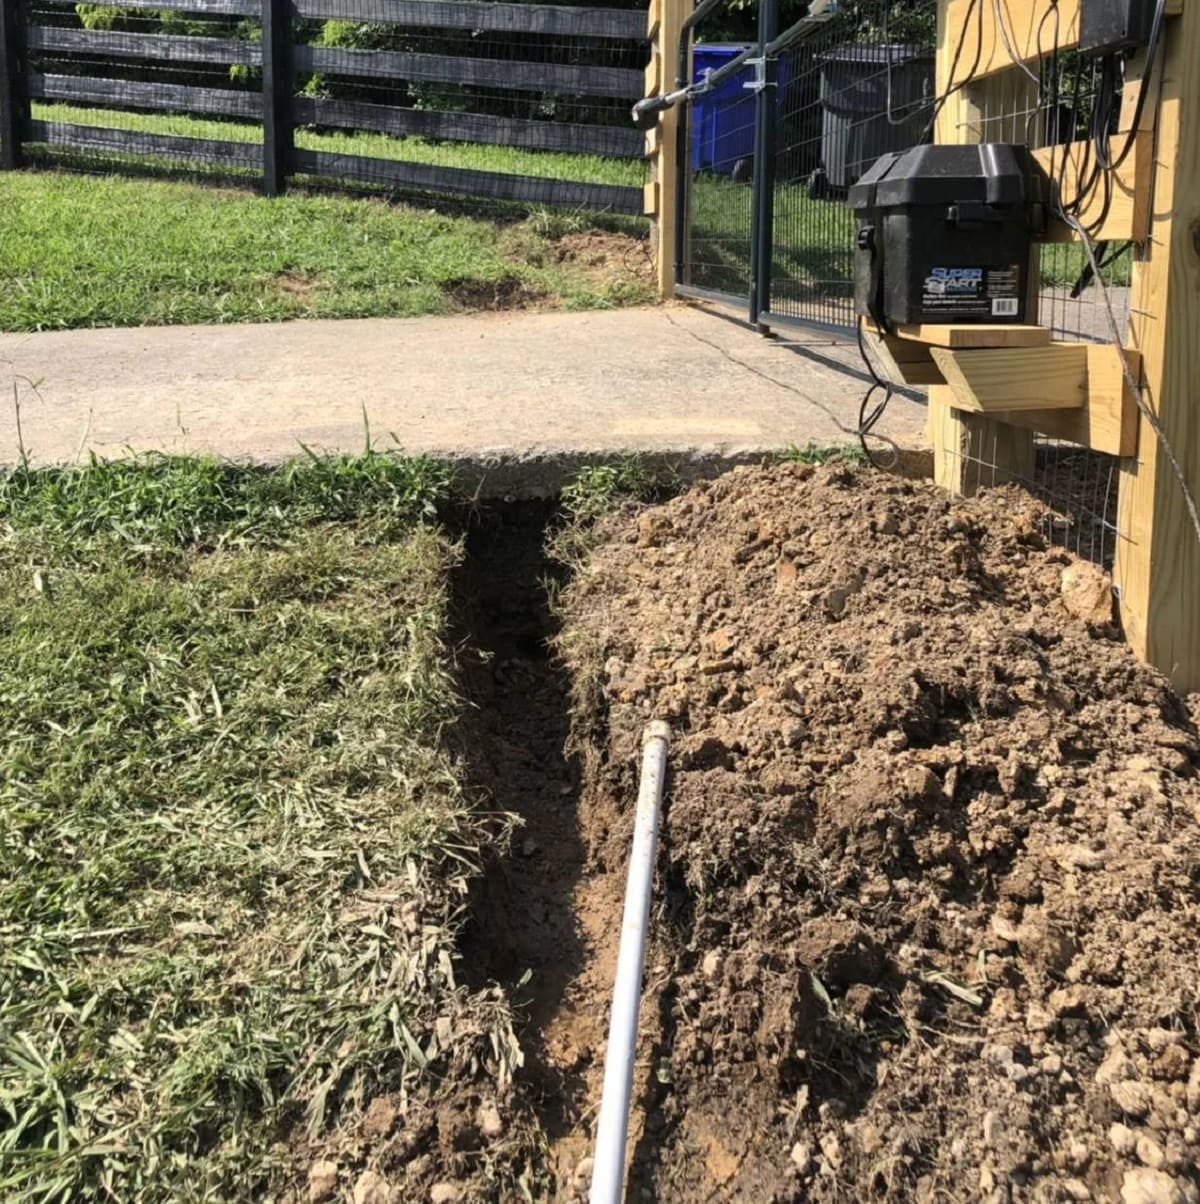
Making a Trench
Creating a trench is a crucial step in running conduit under a sidewalk. The trench provides the pathway for the conduit and allows for proper installation and protection of the cables or pipes. Here are some steps to follow when making a trench:
Read more: Which Types Of Conduit Bodies Are Used To Provide A Pull Point On A Straight Conduit Run?
1. Mark the trench boundaries:
Using marking spray or string, clearly define the boundaries of the trench along the planned conduit route. This will act as a guide and help you maintain a straight and consistent trench width.
2. Dig the trench:
Use a shovel or trenching tool to dig the trench along the marked boundaries. Start by removing the top layer of sod or grass and then gradually dig deeper to the required depth. Ensure that the width of the trench is wide enough to accommodate the conduit and allow for proper backfilling and compaction later on.
3. Maintain a consistent depth:
While digging the trench, it is important to maintain a consistent depth. Use a level or measuring tape to ensure that the bottom of the trench is level and even. This will allow for proper installation and positioning of the conduit.
4. Check for clearance:
As you dig the trench, periodically check for any potential obstacles or utility lines that may be encountered. If you come across an obstacle or utility line, adjust the trench route accordingly to avoid them. Be cautious and hand dig near any utility lines to prevent accidental damage.
Read more: How To Remove Grass From The Sidewalk
5. Remove excess soil:
While digging the trench, pile the excess soil on a tarp or in a designated area away from the trench. This will make it easier for backfilling later on. Keep in mind that you will need to backfill the trench after the conduit is installed, so set aside enough soil for this purpose.
6. Smooth the trench bottom:
Once the trench is dug to the required depth and with a consistent bottom, use a shovel or hand tools to smooth out the bottom surface. Removing any rocks, debris, or roots will provide a clean and even base for laying the conduit.
Creating a properly excavated trench is essential for a successful conduit installation. Taking the time to carefully dig the trench and ensuring that it is the correct width and depth will lay the foundation for a smooth conduit installation process.
Running the Conduit
Once the trench is prepared, it’s time to run the conduit under the sidewalk. This step involves carefully positioning and securing the conduit within the trench. Follow these steps to ensure a successful conduit installation:
1. Cut the conduit:
Measure the length of conduit needed to span the distance between the entry and exit points under the sidewalk. Use a conduit cutter or saw to make clean, straight cuts. If multiple sections of conduit are required, use conduit connectors to securely join them together.
Read more: How To Get Grass Out Of Sidewalk Cracks
2. Position the conduit in the trench:
Carefully place the conduit into the prepared trench, ensuring that it is aligned along the planned route. Make sure the conduit sits at the desired depth and is level within the trench. Take into consideration any elevation changes or curves in the conduit route and adjust the positioning accordingly.
3. Secure the conduit:
Use conduit straps or clamps to secure the conduit at regular intervals along its length. This will prevent the conduit from shifting or moving over time. Ensure the straps or clamps are tightly fastened to hold the conduit firmly in place.
4. Pull cables or pipes through the conduit:
If you’re installing electrical wiring or plumbing pipes, it’s time to pull them through the conduit. Use wire pulling tools or lubrication, if necessary, to make the process smoother. Take care to prevent any excessive bending or kinking of the cables or pipes as you pull them through.
5. Seal the conduit:
Once the cables or pipes are in place, seal the conduit to protect them from external elements. Apply duct sealant or waterproofing compound at each end of the conduit and any open joints or access points. This will help prevent moisture, dirt, or pests from entering the conduit and causing damage to the cables or pipes.
Read more: How To Connect Conduit To Flexible Conduit
6. Test the conduit:
Before backfilling the trench and completing the installation, it’s advisable to test the conduit to ensure proper functionality. Check for any issues with cable or pipe connections and verify that the conduit is serving its intended purpose effectively. Make any necessary adjustments or fixes before proceeding.
Running the conduit under the sidewalk requires attention to detail and proper installation techniques. By following these steps and ensuring that the conduit is securely positioned and sealed, you can successfully complete this critical stage of the installation process.
Sealing the Conduit
After running the conduit under the sidewalk, it is essential to properly seal it to ensure the protection and longevity of the cables or pipes. Sealing the conduit will mitigate the risk of water infiltration, prevent the entry of pests, and maintain the integrity of the installation. Here are the steps to effectively seal the conduit:
1. Clean the conduit:
Before applying any sealant, it is important to ensure that the conduit is clean and free from any debris or moisture. Use a cloth or brush to remove any dirt or dust from the inside of the conduit. This will help the sealant adhere properly and provide an effective protective barrier.
2. Choose the appropriate sealant:
Select a sealant that is specifically designed for conduit sealing applications. There are various types of sealants available, including duct sealant or waterproof compound. Choose a sealant that is compatible with the materials of the conduit and capable of withstanding the environmental conditions the conduit will be exposed to.
3. Apply the sealant:
Carefully follow the manufacturer’s instructions for applying the sealant. Start by applying the sealant at each end of the conduit, ensuring that all openings and joints are properly covered. Use a putty knife or your fingers to spread the sealant evenly and create a tight seal. Pay attention to any access points or removable covers on the conduit and ensure they are sealed adequately.
4. Check for gaps or leaks:
Once the sealant is applied, inspect the conduit for any gaps or leaks. Look for areas where the sealant may have missed or not properly adhered. Use additional sealant to fill in any gaps, ensuring a complete and watertight seal. Take the time to thoroughly check the entire length of the conduit to ensure that it is properly sealed.
5. Let the sealant cure:
Allow the sealant to cure and dry fully as per the manufacturer’s instructions. This will ensure that it forms a durable and long-lasting seal. Avoid any disturbances or contact with the sealed conduit during this curing period to allow for proper adhesion and effectiveness of the sealant.
6. Conduct a final inspection:
After the sealant has cured, conduct a final inspection to ensure that the conduit is adequately sealed. Check for any signs of leakage or gaps and address them promptly. This will provide peace of mind and ensure the overall integrity of the conduit installation.
Properly sealing the conduit is vital for maintaining the functionality and reliability of the cables or pipes running through it. By following these steps and using the appropriate sealant, you can effectively protect the conduit and ensure the protection of your cables or pipes in the long term.
Reinstating the Sidewalk
Once the conduit installation is complete, it’s important to properly reinstate the sidewalk to ensure its structural integrity and visual appeal. Here are the steps to follow when reinstating the sidewalk:
1. Preserve the removed materials:
If you removed any sections of the sidewalk during the conduit installation, carefully set aside those materials for later use. This will allow you to maintain the original aesthetic and ensure a seamless transition between the existing sidewalk and the reinstated section.
2. Prepare the area:
Clean up the trench area by removing any debris or excess soil. Ensure that the bottom of the trench is level and compacted. Use a tamper or compactor to create a stable base for the reinstated sidewalk.
3. Reinstall the sidewalk sections:
Carefully place the preserved sidewalk sections back into their original positions. Align them with the surrounding sidewalk to maintain a consistent appearance. Ensure they are level and stable before proceeding.
Read more: How To Cut Conduit
4. Mix and pour concrete:
If necessary, mix a new batch of concrete according to the manufacturer’s instructions. Pour the concrete into the trench to fill the gaps around the reinstated sidewalk sections. Use a trowel to smoothen the surface and create a flush connection between the existing sidewalk and the newly poured concrete.
5. Allow the concrete to cure:
Let the poured concrete cure according to the recommended curing time provided by the manufacturer. During this period, ensure that the area is protected from foot traffic or any disturbances.
6. Finishing touches:
Apply a concrete sealant or finish on the reinstated concrete as needed to protect it from moisture and enhance its appearance. This will help maintain the integrity and durability of the sidewalk for years to come.
7. Clean up:
Remove any excess concrete or debris from the area and clean the surrounding sidewalk. Dispose of any waste materials according to local regulations and guidelines.
By properly reinstating the sidewalk, you can ensure that it remains safe, functional, and visually appealing. Following these steps will help you seamlessly integrate the reinstated section with the existing sidewalk, providing a professional and polished finish to your conduit installation project.
Read more: How To Cut Conduit
Final Tips and Considerations
As you wrap up your conduit installation project under the sidewalk, here are some final tips and considerations to keep in mind to ensure a successful and safe completion:
1. Safety first:
Throughout the entire process, prioritize safety. Wear appropriate personal protective equipment (PPE), such as gloves, safety glasses, and a dust mask, to protect yourself from any potential hazards. Take necessary precautions when digging near utility lines and ensure that all electrical or plumbing work follows proper code and safety standards.
2. Consult professionals when needed:
If you are uncertain about any aspect of the conduit installation, do not hesitate to consult professionals in the field. Electricians, plumbers, or experienced contractors can provide valuable guidance and expertise to ensure the project is completed correctly and safely.
3. Consider expansion or future needs:
Anticipate future needs and consider adding additional conduits or allowing space for future expansion. Planning ahead can save you time and effort if you decide to add more cables or pipes in the future or make modifications to your existing systems.
Read more: How To Cut Conduit
4. Regular maintenance and inspections:
Perform regular inspections and maintenance checks on the conduit system to ensure it remains in optimal condition. Periodically check for any signs of damage, such as cracks, leaks, or wear, and address them promptly to prevent further issues or potential hazards.
5. Follow local regulations and building codes:
Adhere to local regulations and building codes throughout the entire conduit installation process. Obtain any necessary permits, ensure compliance with requirements for conduit depth, materials, and installation procedures. Failing to comply with these regulations can lead to legal and safety issues.
6. Keep records and documentation:
Maintain records and documentation of the conduit installation, including any permits, approvals, and inspection reports. These records will be useful for future reference and can help you demonstrate compliance with regulations or assist with any future repairs or modifications.
7. Regularly review and update conduit systems:
Periodically review and update your conduit systems as needed. As technology advances and your needs change, it may be necessary to upgrade or replace the conduit and the cables or pipes running through it to accommodate new requirements effectively.
By following these final tips and considerations, you can ensure the longevity, functionality, and safety of your conduit installation under the sidewalk. Completing the project with careful attention to detail will result in a successful installation that will serve you well for years to come.
Read more: How To Cut Conduit
Conclusion
Running conduit under a sidewalk can be a challenging but rewarding project. With proper planning, careful execution, and adherence to safety guidelines, you can successfully install conduit to hide and protect your cables or pipes. By following the steps outlined in this article, you can ensure a smooth and efficient conduit installation process.
Throughout the project, it is important to prioritize safety, consult professionals when needed, and comply with local regulations and building codes. Taking the time to properly assess sidewalk construction, choose the right conduit, plan the route, make a trench, run the conduit, seal it, and reinstate the sidewalk will result in a clean and professional installation.
Regular maintenance and inspections, along with future considerations for expansion or modifications, will help you keep your conduit system in optimal condition. It’s always a good idea to stay updated with changing technology and make necessary upgrades as needed.
Remember, while the process may seem daunting, don’t hesitate to seek guidance from professionals or experts if you require assistance. By doing so, you can ensure that the conduit installation is done correctly and efficiently.
Running conduit under a sidewalk allows you to hide and protect your cables or pipes, contributing to a safer and more aesthetically pleasing environment. With careful planning, attention to detail, and a commitment to safety, you can achieve a successful conduit installation that will serve you well for years to come.
Frequently Asked Questions about How To Run Conduit Under Sidewalk
Was this page helpful?
At Storables.com, we guarantee accurate and reliable information. Our content, validated by Expert Board Contributors, is crafted following stringent Editorial Policies. We're committed to providing you with well-researched, expert-backed insights for all your informational needs.
0 thoughts on “How To Run Conduit Under Sidewalk”