Articles
How To Run An Electrical Conduit
Modified: October 20, 2024
Discover helpful articles on how to run electrical conduit efficiently and safely. Learn essential tips and techniques for successful conduit installation.
(Many of the links in this article redirect to a specific reviewed product. Your purchase of these products through affiliate links helps to generate commission for Storables.com, at no extra cost. Learn more)
Introduction
Running electrical conduit is a critical step in any electrical installation project. Electrical conduit serves as a protective casing for electrical wires, ensuring safety and convenience. Whether you are wiring a new building or adding electrical outlets to an existing one, understanding how to properly run electrical conduit is essential.
This article will guide you through the step-by-step process of running electrical conduit, from planning and design to final installation. By following these instructions, you will be able to successfully install electrical conduit and ensure the smooth operation of your electrical system.
Key Takeaways:
- Proper planning and design are essential for running electrical conduit. Carefully assess the building layout, consider accessibility, and plan for future expansion to ensure a smooth and efficient installation process.
- Thorough testing and finalization are crucial for a successful electrical conduit installation. Verify connections, test continuity and voltage, and ensure proper grounding to guarantee a safe and reliable electrical system.
Read more: How To Run Electrical Conduit Underground
Materials Needed
Before you begin, gather the necessary materials to complete the electrical conduit installation. Here is a list of items you will need:
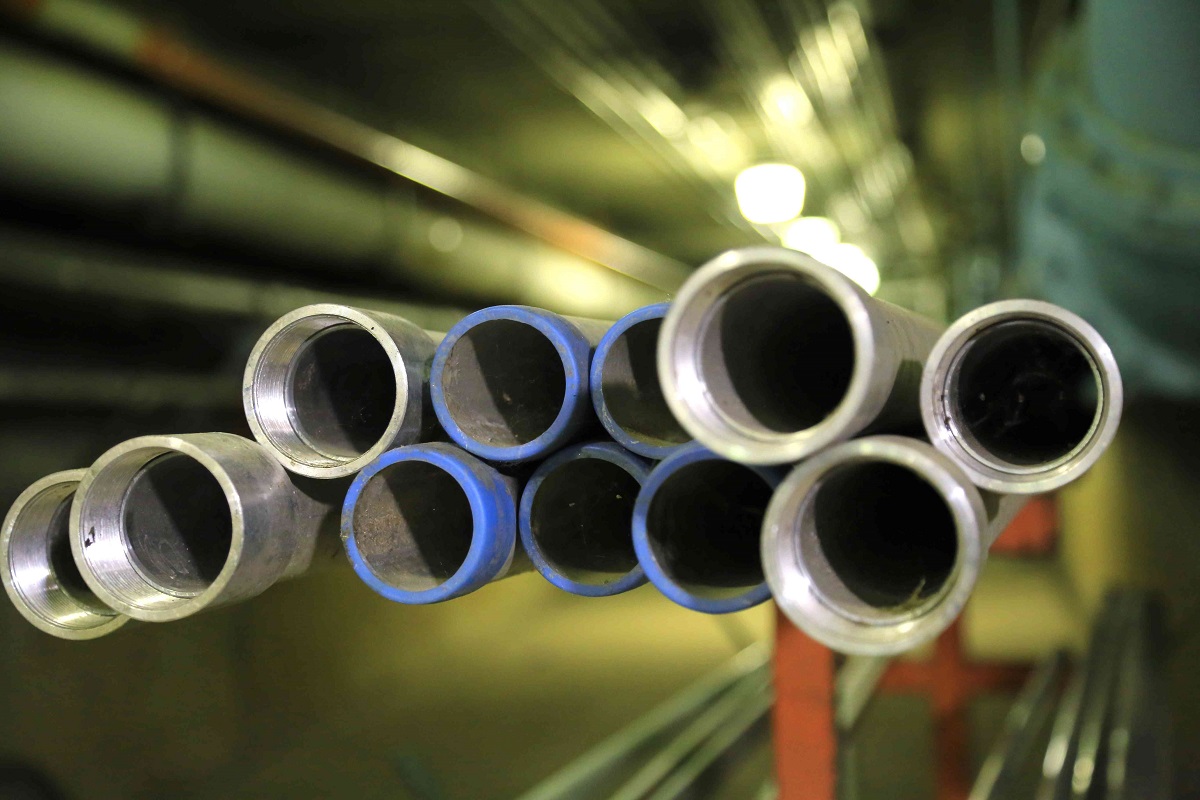
- Electrical conduit piping: Choose the appropriate type and size of conduit for your specific installation. Common types include PVC conduit for indoor installations and weatherproof metal conduit for outdoor installations.
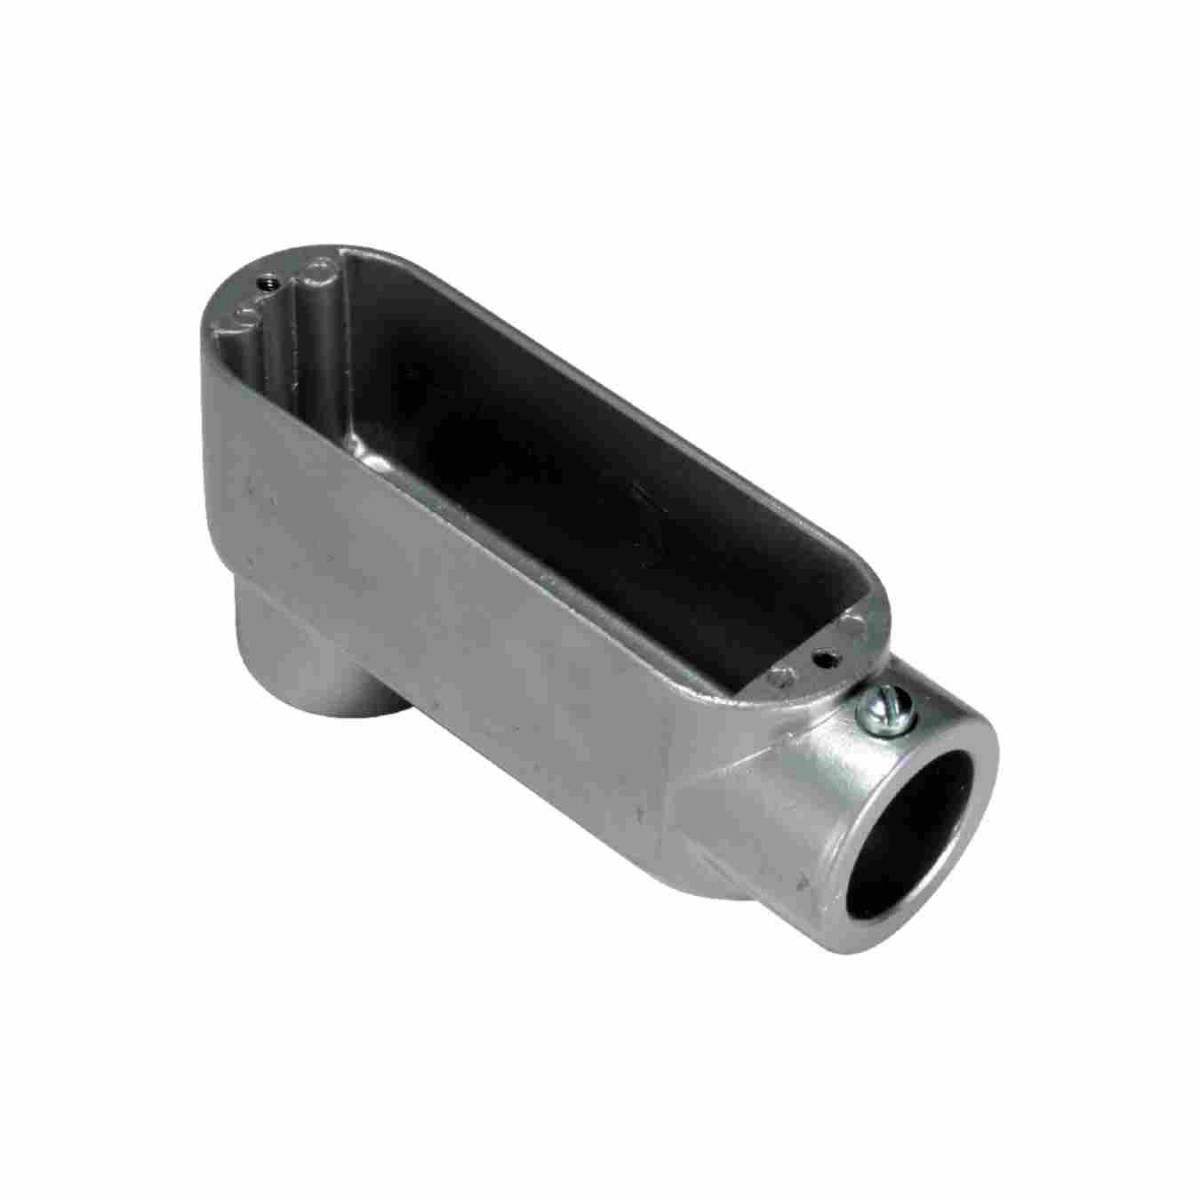
- Conduit fittings: These fittings are used to connect and secure the conduit pieces together. Examples include couplings, elbows, tees, and connectors.
- Conduit straps: These straps are used to secure the conduit to walls or ceilings. They come in various sizes and materials, such as plastic or metal.
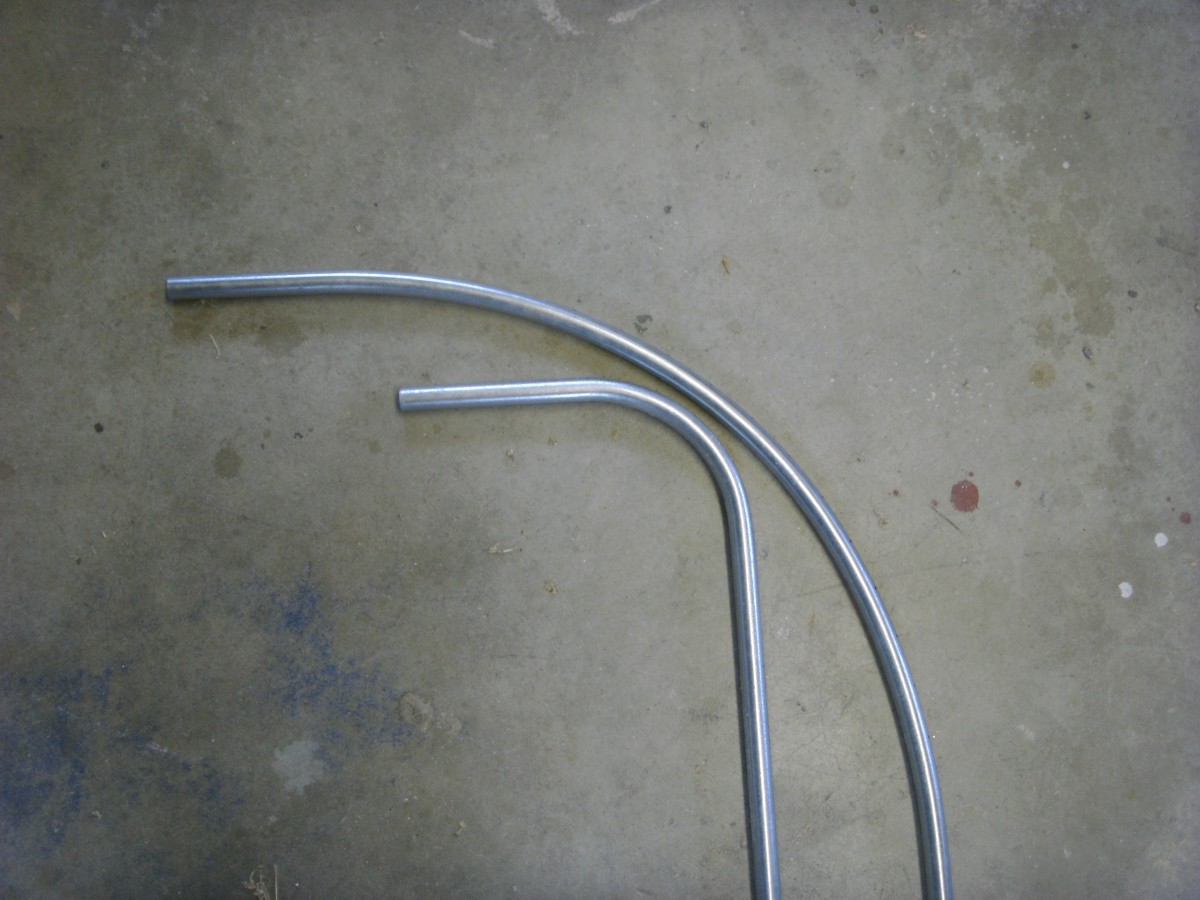
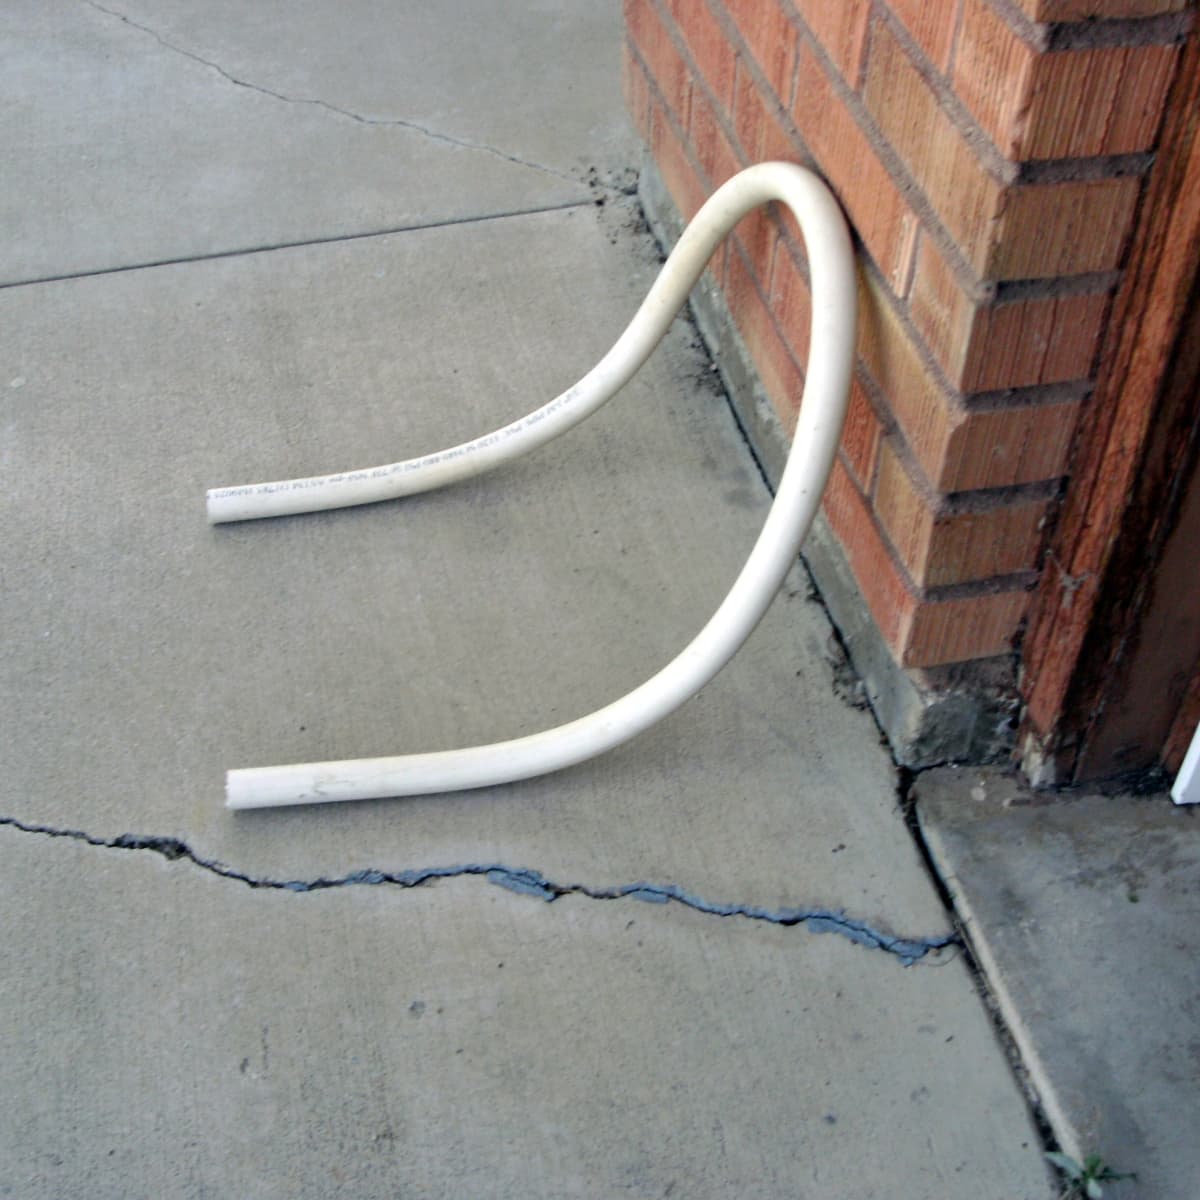
- Conduit bending tools: Depending on the shape and direction of the conduit pathway, you may need conduit benders to create bends in the conduit.
- Drill and hole saws: A power drill and suitable hole saws are necessary for drilling holes in walls or any other surfaces where the conduit will pass through.
- Fish tape or wire pulling tools: These tools are used to pull wires through the conduit. They ensure that the wires pass smoothly through the conduit without getting stuck.
- Wire cutters and strippers: These tools are essential for cutting and stripping the insulation from the electrical wires.
- Electrical wires: Select the appropriate gauge and type of wire for your specific electrical needs. Ensure they meet local electrical codes and regulations.
- Tape measure and level: These tools will help you accurately measure and mark the conduit pathway, ensuring precise installation.
- Safety gear: Always prioritize safety by wearing gloves, safety goggles, and appropriate clothing to protect yourself from any potential hazards during the installation process.
Having these materials ready before you begin will save you time and ensure a smooth installation process. Now that you have gathered all the necessary materials, you can move on to the planning and design stage.
Step 1: Planning and Design
Before you start running electrical conduit, it’s crucial to carefully plan and design your installation. This step will help you determine the most efficient and effective pathway for the conduit, taking into consideration factors such as building layout, electrical load requirements, and accessibility.
Here are some key considerations for the planning and design phase:
- Assess the building layout: Take a thorough look at the building where you will be installing the conduit. Identify the areas where you need electrical outlets or where power will be needed. Measure the distances between these points to determine the lengths of conduit required.
- Check local codes and regulations: Research the electrical codes and regulations in your area to ensure that your conduit installation complies with all the necessary requirements. This includes determining the appropriate conduit size for the electrical load and the minimum depth for buried conduits.
- Consider accessibility: Think about how easily you can access the conduit in case of future maintenance or repairs. Avoid running conduit in hard-to-reach areas or areas where it may be obstructed by other structures.
- Plan for expansion: If you anticipate the need for future electrical expansion, such as adding additional outlets or devices, consider running extra conduit to accommodate these future additions.
- Create a pathway: Based on the building layout and electrical requirements, map out the pathway for the conduit. Mark the locations where the conduit will enter and exit walls, ceilings, or floors. Use a tape measure and level to ensure accurate measurements and straight lines.
By carefully planning and designing your electrical conduit installation, you will save time and minimize potential errors or rework. Once you have completed the planning stage, you can move on to gathering the necessary tools for the installation process.
Step 2: Gathering Tools
Once you have finalized the planning and design for your electrical conduit installation, it’s time to gather the necessary tools. Having the right tools on hand will ensure a smooth and efficient installation process.
Here are the essential tools you will need:
- Power drill: A power drill is necessary for drilling holes in walls, floors, or ceilings where the conduit will pass through. Make sure you have the appropriate drill bits for the material you are drilling into.
- Hole saws: Hole saws are specialized drill bits that create perfectly-sized holes for conduit fittings to pass through. Choose hole saws with diameters that match the size of the conduit you are using.
- Conduit bender: If your conduit installation requires bends, you will need a conduit bender to shape the conduit. Choose a bender that matches the size of your conduit and has the proper bending angle markings.
- Fish tape or wire pulling tools: These tools are used to guide and pull the electrical wires through the conduit. Fish tapes are long, flexible rods that can navigate through the conduit, while wire pulling tools can be attached to the wires and pulled through the conduit.
- Wire cutters and strippers: Wire cutters are used to cut the electrical wires to the desired length, while wire strippers remove the insulation from the ends of the wires.
- Tape measure and level: Use a tape measure to accurately measure conduit lengths and plan the layout. A level will help ensure that the conduit is installed straight and level.
- Conduit fittings: Depending on the design of your conduit pathway, you will need various conduit fittings such as couplings, elbows, tees, and connectors. Make sure to have the appropriate fittings for your installation.
- Conduit straps: These straps are used to secure the conduit to walls, ceilings, or other surfaces. Choose straps that match the size of your conduit and the material of the surface where you will be mounting them.
- Safety gear: Always prioritize safety by wearing gloves, safety goggles, and appropriate clothing to protect yourself from any potential hazards during the installation process.
Make sure all your tools are in good working condition and easily accessible before you begin the installation. Having these tools ready will streamline the process and ensure a successful electrical conduit installation. With your tools gathered, you can now move on to marking the pathway for the conduit.
s
Step 3: Marking Pathway
Before you start drilling holes and installing conduit, it is important to mark the pathway where the conduit will be installed. This ensures accurate placement and helps avoid any potential obstacles during the installation process.
Follow these steps to mark the pathway for the electrical conduit:
- Start at the electrical panel: Begin by identifying the location of the electrical panel where the conduit will originate from. This is typically the main source of power for the building.
- Determine the endpoint: Identify the endpoint where the conduit will terminate, such as outlets, switches, or other electrical devices.
- Map out the pathway: Using a tape measure and level, measure and mark the pathway for the conduit. This includes marking the spots where the conduit will enter and exit walls, ceilings, or floors.
- Avoid obstacles: Pay attention to any obstacles that may be in the way, such as plumbing, ductwork, or other utility lines. Adjust the pathway as needed to avoid these obstacles.
- Consider accessibility: Ensure that the conduit pathway is easily accessible for future maintenance or repairs. Avoid running conduit in areas with restricted access or where it may be obstructed by other structures.
- Double-check measurements: Verify all measurements before proceeding. Use the tape measure and level to ensure straight lines and accurate distances between entry and exit points.
By carefully marking the pathway, you will have a clear guide to follow during the installation process. This will help ensure that the conduit is installed in the desired locations and reduce the likelihood of mistakes or rework.
Now that you have marked the pathway, you can move on to the next step: drilling holes for the conduit.
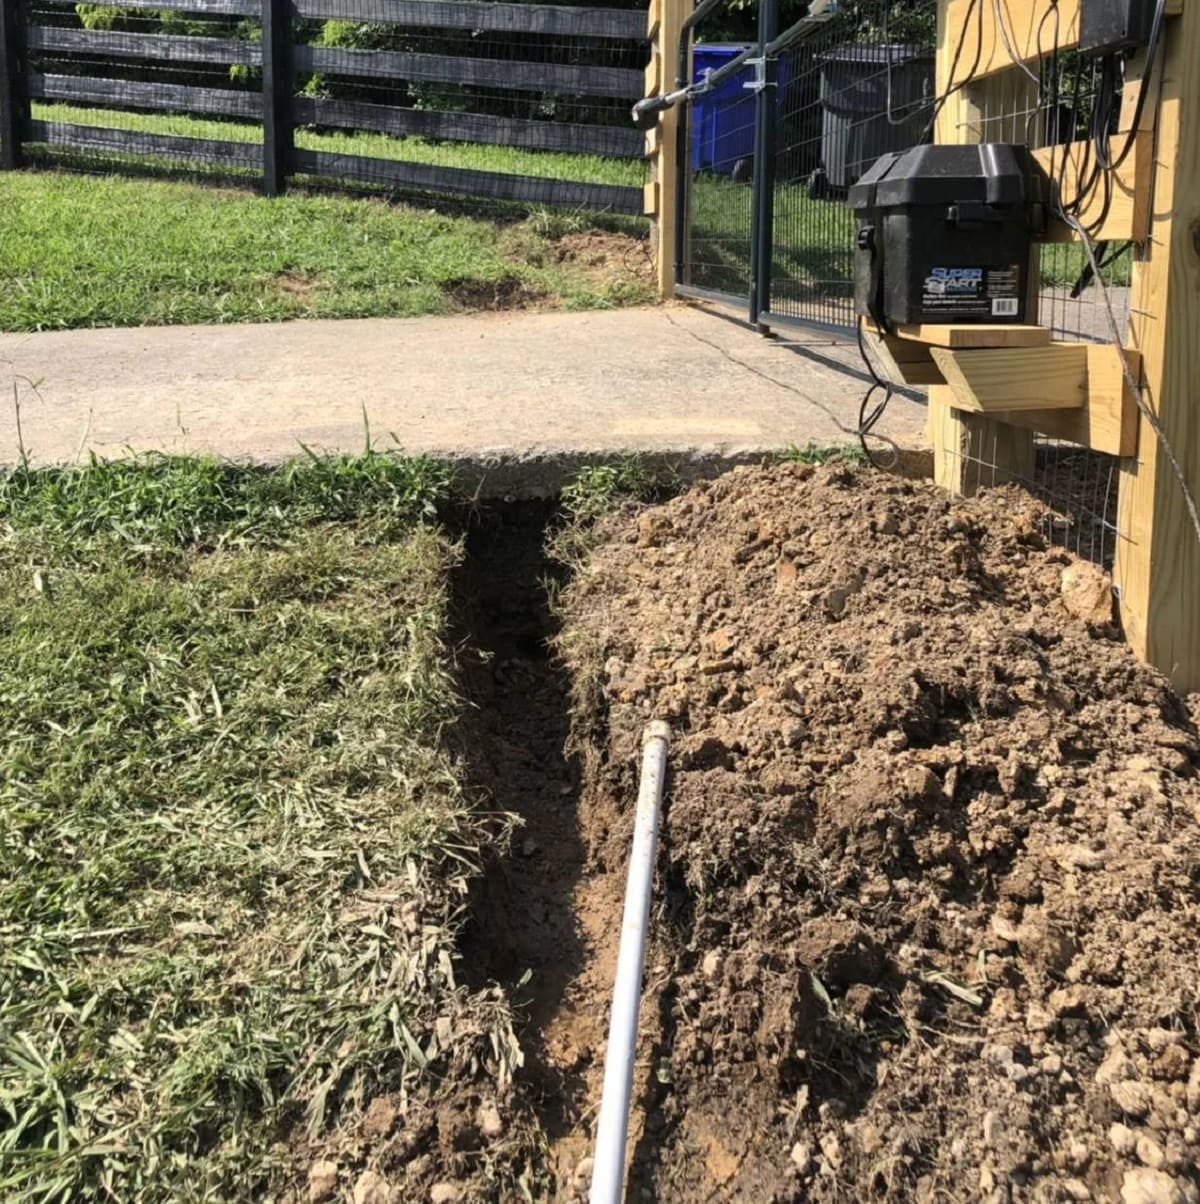
Step 4: Drilling Holes
Once you have marked the pathway for the electrical conduit, it’s time to drill holes in the walls, ceilings, or floors where the conduit will pass through. Drilling precise and properly sized holes is crucial to ensure a smooth installation process.
Follow these steps to drill holes for the electrical conduit:
- Put on safety gear: Before you begin drilling, make sure to wear safety goggles and gloves to protect yourself from any potential hazards.
- Choose the right drill bit: Select a drill bit that matches the size of the conduit you are using. This will allow for a snug fit and ensure the conduit can easily pass through the hole.
- Mark the drilling locations: Using the marks you made during the pathway marking step, indicate the precise spots where you need to drill the holes. Double-check the measurements to ensure accuracy.
- Position the drill: Hold the drill perpendicular to the surface and position the drill bit at the marked spot.
- Start drilling: Apply steady pressure and begin drilling. Use a moderate speed to prevent overheating or damage to the drill bit.
- Drill to the required depth: Drill the hole to the necessary depth to accommodate the conduit size and ensure a flush fit.
- Clean the debris: Remove any debris or dust from the drilled holes using a vacuum or a brush. This will ensure a clean and clear pathway for the conduit.
Repeat these steps for each hole that you need to drill along the conduit pathway. Take your time and maintain accuracy to avoid any mistakes that could hinder the installation process. After drilling all the necessary holes, you are ready to move on to the next step: installing the electrical conduit.
When running electrical conduit, always make sure to use the correct size and type for the specific application. This will ensure proper protection for the wiring and compliance with electrical codes.
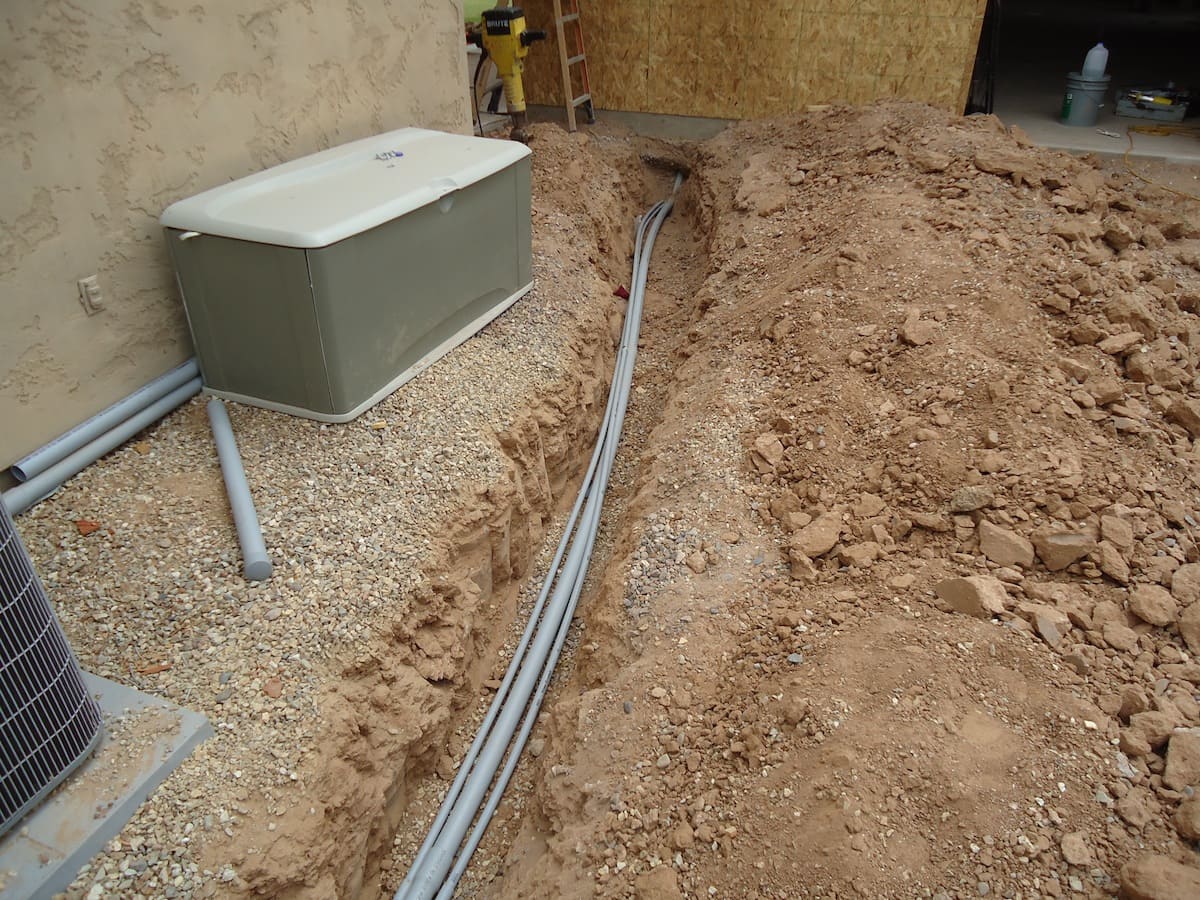
Step 5: Installing Conduit
After drilling the holes, it’s time to start installing the electrical conduit. This step involves placing the conduit in the drilled holes and securing it properly.
Follow these steps to install the electrical conduit:
- Measure the conduit lengths: Measure and cut the conduit pieces to the appropriate lengths, ensuring they fit between the entry and exit points along the pathway.
- Insert conduit into the holes: Insert one end of the conduit into the first drilled hole. Gently push it through until it extends out of the other side.
- Guide the conduit through subsequent holes: If the conduit needs to pass through multiple holes, guide it carefully along the defined pathway to the next hole.
- Ensure proper alignment: Align the conduit in a straight and level manner as you pass it through each drilled hole. Use a level to verify its alignment.
- Make adjustments as needed: If there are any obstacles or obstructions along the pathway, make necessary adjustments to ensure the conduit can pass through smoothly.
- Properly seat the conduit: Once the conduit is in place, ensure that it is firmly seated in each drilled hole. It should fit snugly and not move or shift when gently pulled.
Repeat these steps for each conduit piece, connecting them together to create a continuous pathway. Use appropriate conduit fittings, such as couplings, elbows, or tees, to connect the conduit pieces as needed.
Remember to follow local electrical codes and regulations regarding the depth of conduit burial, minimum bend radius, and securing methods. This will help ensure a safe and compliant installation.
Now that the conduit is installed, you can proceed to the next step: connecting the conduit pieces together.
Step 6: Connecting Conduit Pieces
Once you have installed the electrical conduit along the designated pathway, the next step is to connect the conduit pieces together. Properly connecting the conduit ensures a secure and continuous conduit pathway for your electrical wiring.
Follow these steps to connect conduit pieces:
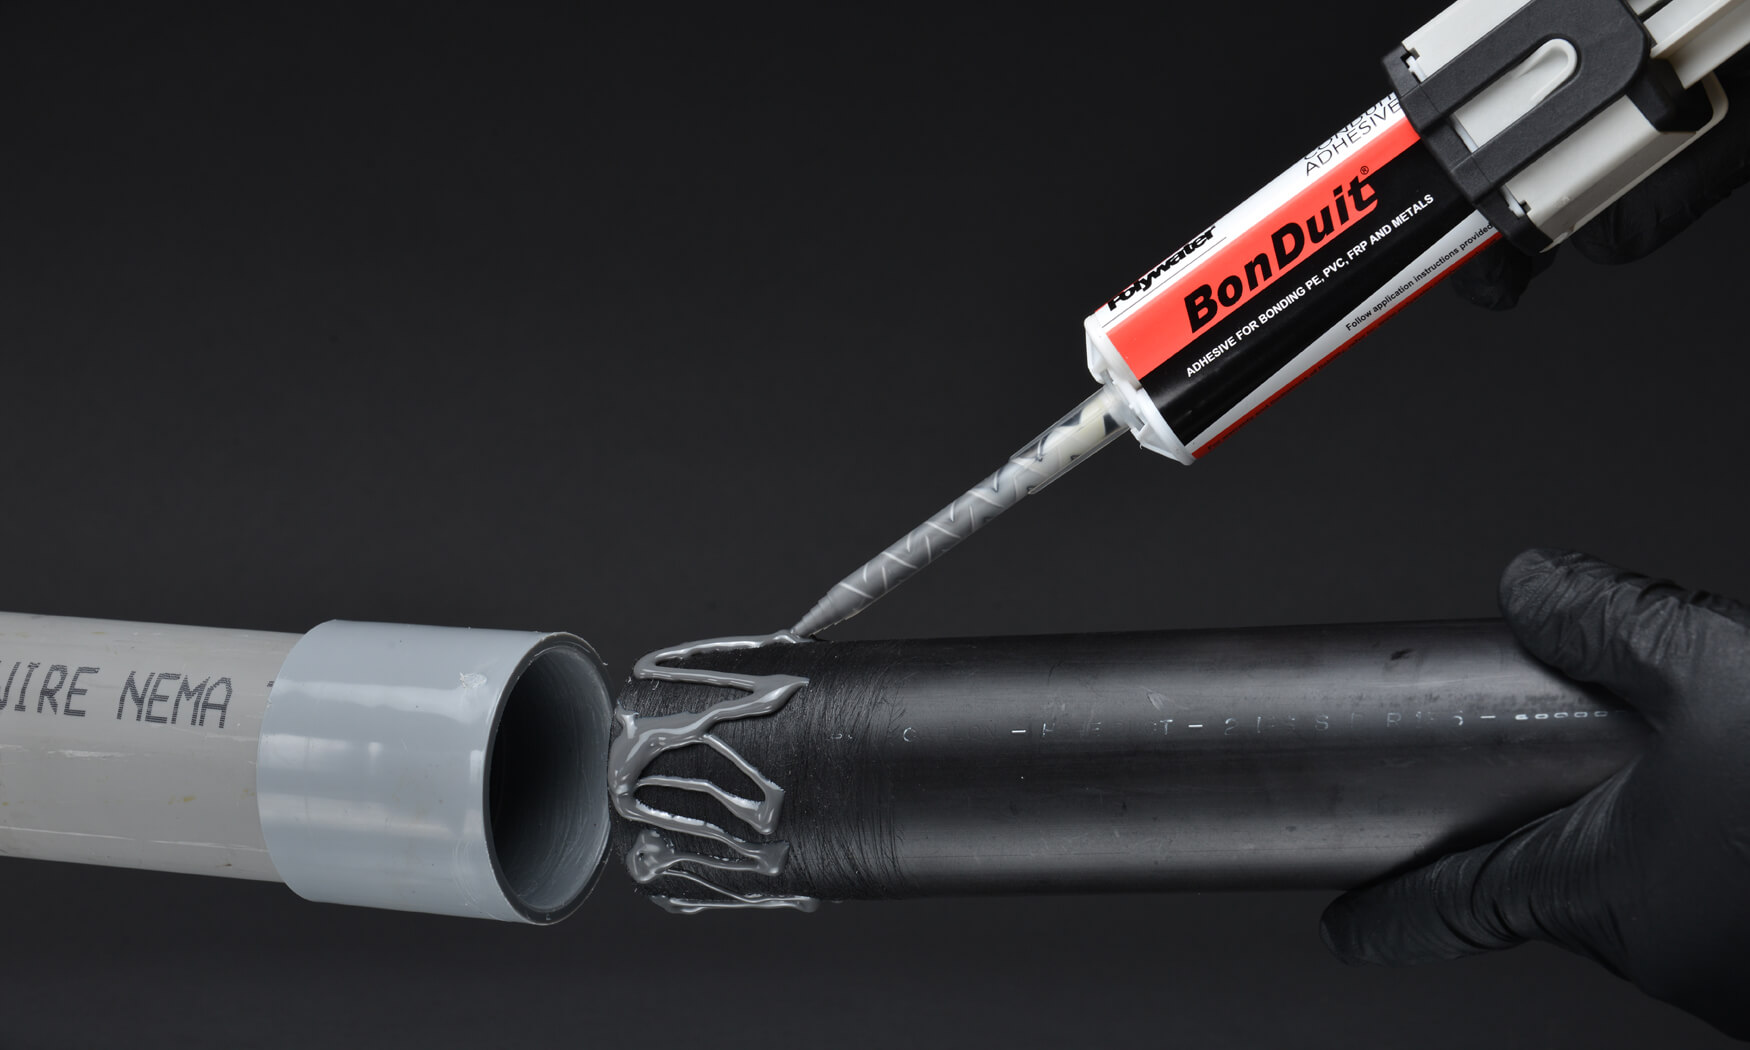
- Prepare the conduit ends: Use a utility knife or deburring tool to remove any sharp edges or burrs from the cut ends of the conduit. This will help facilitate a smooth and secure connection.
- Apply lubricant (if necessary): If you are using PVC conduit, apply a small amount of lubricant to the inside of the conduit ends. This will make it easier to slide the fittings onto the conduit.
- Choose the appropriate fittings: Select the appropriate conduit fittings based on the type and size of conduit you are using. Common fittings include couplings, connectors, elbows, and tees.
- Insert the fittings: Slide one end of the fitting onto the conduit and push it in until it is fully seated. Make sure it fits snugly and does not come loose.
- Connect the conduit pieces: Insert the other end of the fitting into the corresponding end of the adjacent conduit piece. Push it in firmly until it is fully seated.
- Secure the fittings: Use the appropriate method to secure the fittings, such as tightening the screws on a coupling or using solvent cement for PVC conduits. Follow the manufacturer’s instructions for the specific fittings you are using.
- Check the connection: Verify that the conduit pieces are securely connected and there are no gaps or loose fittings. A proper connection ensures the integrity of the conduit pathway.
Repeat these steps for each connection point along the conduit pathway, ensuring a continuous and secure conduit system. Take your time to ensure accurate connections, as improperly connected conduit may cause problems with wire installation and future maintenance.
With the conduit pieces securely connected, you can now move on to the next step: securing the conduit to walls or other surfaces.
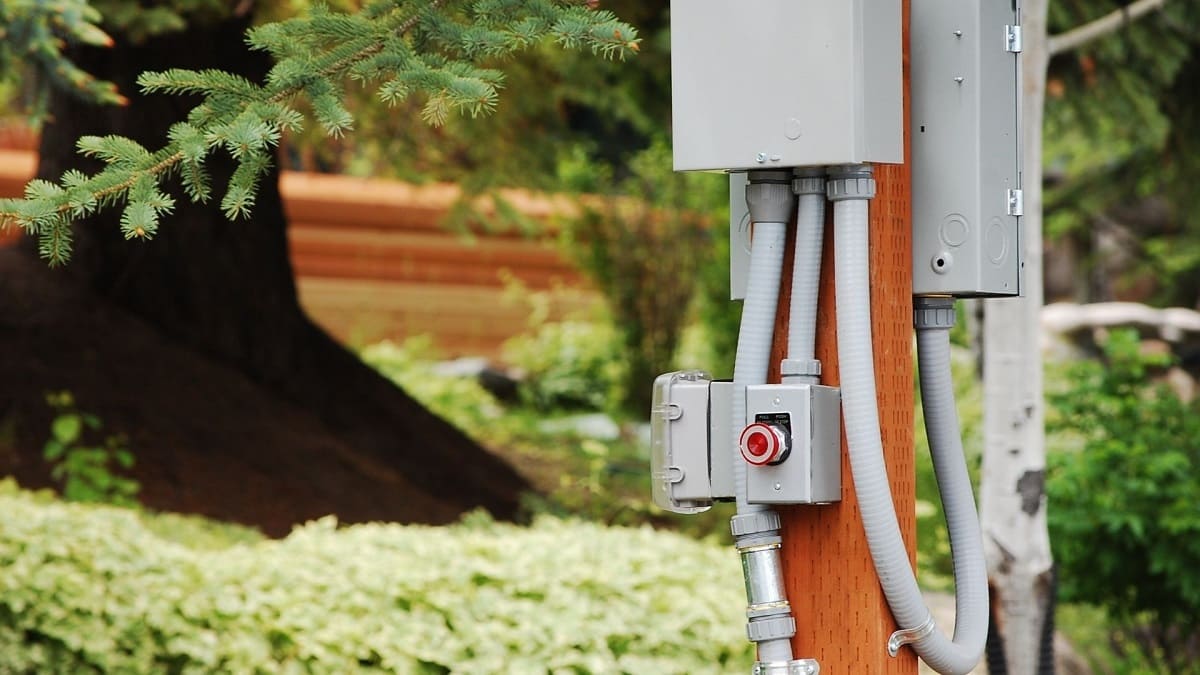
Step 7: Securing Conduit
Securing the conduit is an important step in the installation process, as it ensures that the conduit remains in place and is protected from movement or damage. Properly securing the conduit helps maintain the integrity of the electrical system and reduces the risk of accidents or tripping hazards.
Follow these steps to secure the conduit:
- Choose the appropriate conduit straps: Select conduit straps that match the size and material of your conduit. These straps are available in various sizes and can be made of plastic or metal.
- Determine the spacing: Decide on the spacing between each conduit strap. This will depend on local codes and regulations, as well as the weight and size of the conduit.
- Mark the strap locations: Use a tape measure and level to mark the locations where the straps will be installed. Make sure they are evenly spaced and aligned with the conduit.
- Install the straps: Attach the conduit straps to the mounting surface using screws or other appropriate fasteners. Ensure that the straps are securely fastened and that the conduit fits snugly inside.
- Verify stability: Once the straps are installed, verify that the conduit is stable and does not move or shift when gently pulled. This ensures that the conduit remains securely in place.
- Adjust as needed: If there are any issues with stability or alignment, make necessary adjustments by loosening the straps and repositioning them. Ensure that the conduit is properly supported and aligned.
It’s important to follow local electrical codes and regulations regarding conduit strapping requirements. These codes may vary, so it’s crucial to adhere to the guidelines set forth by your local authority or jurisdiction.
By properly securing the conduit, you ensure the stability and safety of your electrical system. Once the conduit is securely in place, you can proceed to the next step: installing the wires.
Read more: How To Run Outdoor Conduit
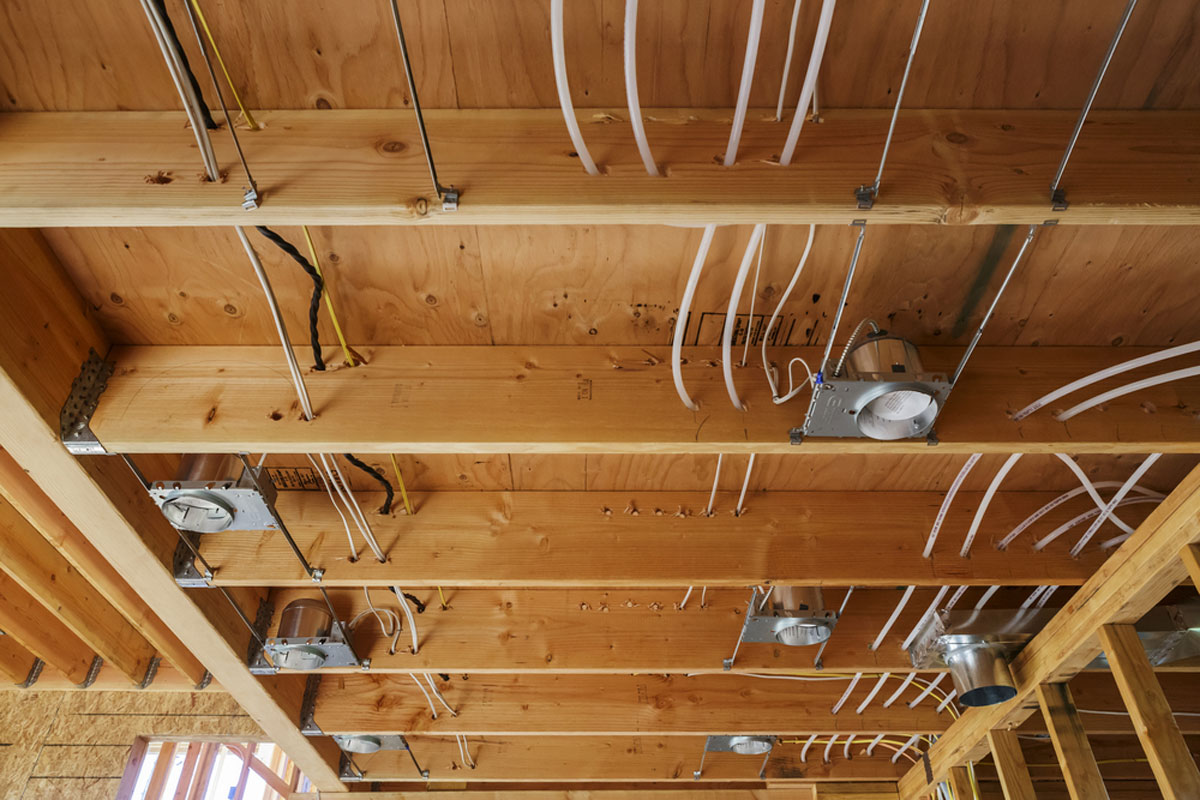
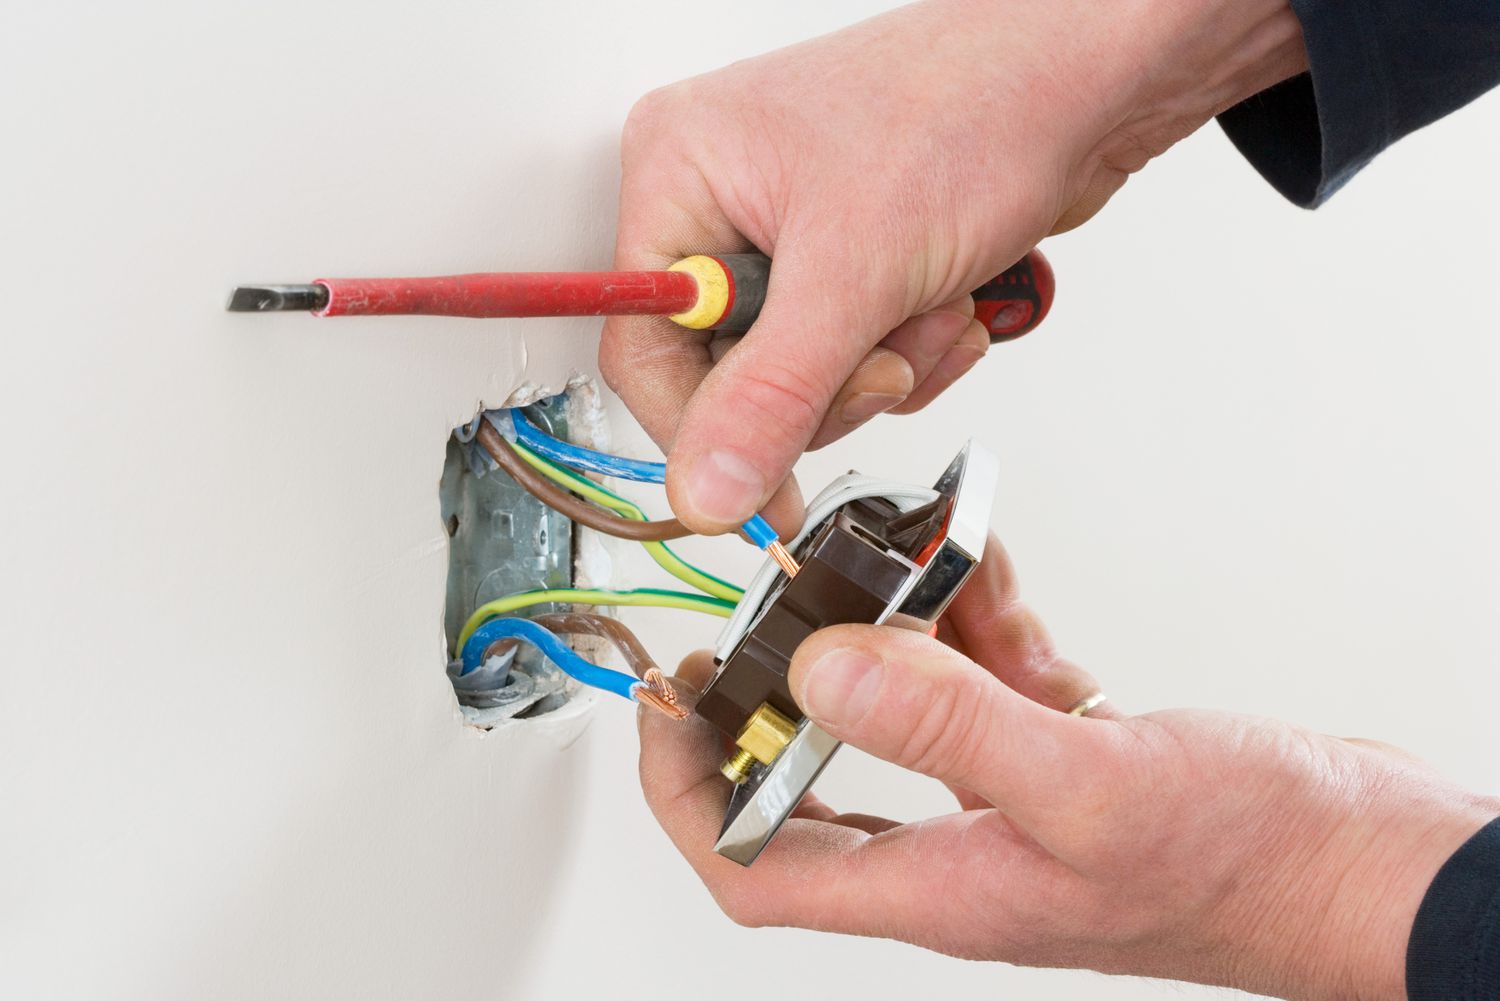
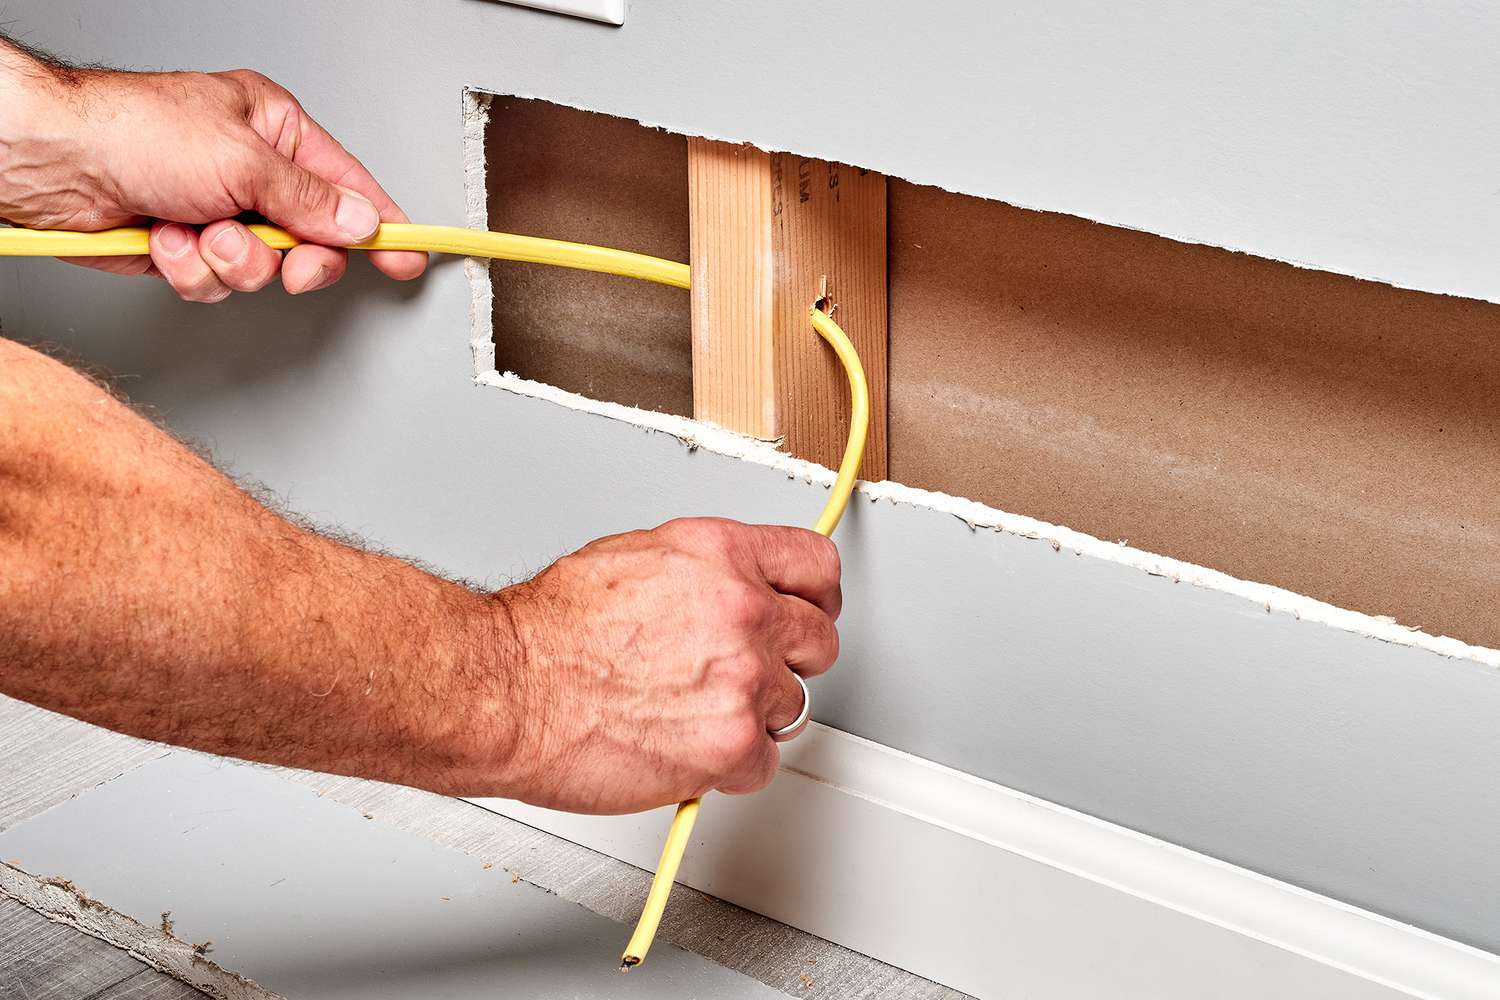
Step 8: Installing Wires
With the conduit properly installed and secured, the next step is to install the electrical wires. This step involves carefully feeding the wires through the conduit to provide power or connectivity to various electrical devices or outlets.
Follow these steps to install the wires:
- Prepare the wires: Strip the insulation from the ends of the wires using wire strippers. Make sure to expose the appropriate length of wire for connection.
- Attach a pulling tool: If you have a long conduit run or multiple bends, attach a fish tape or wire pulling tool to the wires. This will help guide the wires through the conduit smoothly.
- Feed the wires into the conduit: Starting at the entry point, carefully feed the wires into the conduit alongside the pulling tool. Apply consistent pressure to prevent the wires from getting tangled or snagged.
- Pull the wires through the conduit: As you feed the wires, have a helper gently pull the pulling tool from the exit point. This will guide the wires through the conduit, ensuring they pass through without resistance.
- Ensure proper alignment: As the wires pass through the conduit, make sure they are aligned and do not get twisted or tangled. Use the fish tape or pulling tool to adjust and straighten the wires if necessary.
- Connect the wires: Once the wires are fully fed through the conduit, connect them to their respective endpoints, such as outlets, switches, or junction boxes. Follow proper wiring practices and adhere to local electrical codes.
- Secure the wires: Use electrical tape or wire clips to secure the wires at appropriate intervals, ensuring they are neatly organized and free from any potential hazards.
Take your time during the wire installation process to avoid any damage to the wires or the conduit. If you encounter any obstacles or difficulties, use additional pulling tools, such as lubricant or conduit lubricant, to ease the wire’s passage through bends or tight spots.
Once the wires are properly installed and connected, you can move on to the final step: testing and finalizing the electrical conduit installation.
Step 9: Testing and Finalizing
After completing the installation of the electrical conduit and the wires, it is crucial to thoroughly test the system to ensure proper functionality and safety. This final step involves testing the electrical connections and conducting comprehensive checks to finalize the installation.
Follow these steps to test and finalize your electrical conduit installation:
- Turn off the power: Before conducting any tests, ensure that the power to the electrical system is turned off at the main electrical panel.
- Inspect the connections: Inspect all the electrical connections, including those within junction boxes, outlets, switches, and other devices. Ensure that all connections are properly tight and secure.
- Test continuity: Use a multimeter or continuity tester to check for continuity in the wires and connections. This ensures that the wires are intact and properly connected.
- Verify proper grounding: Check the grounding of the electrical system to ensure it meets local electrical codes. Securely connect the ground wires to grounding electrodes or grounding bus bars as required.
- Conduct voltage tests: With the power turned back on, conduct voltage tests using a multimeter to verify proper voltage levels at different points of the system.
- Test all electrical devices: Test each electrical device in the system, such as outlets, switches, and fixtures, to ensure they are functioning correctly and providing power as intended.
- Verify circuit performance: Test the circuits to verify that they can handle the expected electrical load without tripping breakers or causing any electrical issues.
- Secure and finalize the installation: Once all the tests have been successfully completed, secure the electrical connections by ensuring outlet covers, switch plates, and junction box covers are properly installed. Secure the conduit in place using the appropriate straps or fasteners.
- Cleanup: Remove any debris or materials leftover from the installation process and clean up the work area to ensure a safe and tidy environment.
By thoroughly testing and finalizing the electrical conduit installation, you can be confident that your electrical system is operating correctly and in accordance with safety standards. If any issues or concerns arise during the testing phase, consult a qualified electrician to address them promptly.
With the testing and finalization complete, your electrical conduit installation is now finished. You can enjoy a safe and reliable electrical system for your building.
Conclusion
Installing electrical conduit is a crucial step in any electrical project, ensuring the safe and efficient operation of your electrical system. By following the step-by-step process outlined in this article, you can successfully run electrical conduit and provide a secure pathway for your wires.
Starting with careful planning and design, you can determine the most efficient pathway for the conduit and gather the necessary materials and tools. From there, marking the pathway and drilling holes allows you to create the infrastructure needed for the conduit installation.
Installing the conduit itself involves connecting the pieces, securing them in place, and then feeding the wires through the conduit. With the wires properly installed and connected, it’s crucial to conduct thorough testing to ensure the functionality and safety of the electrical system.
By taking the time to properly install and test the electrical conduit, you can have confidence in the reliability and longevity of your electrical system. It is important to adhere to local electrical codes and regulations throughout the entire installation process.
Remember, if you have any doubts or concerns during the installation process, it is always advisable to consult with a qualified electrician who can provide guidance and assistance. Prioritizing safety and following best practices will help you successfully run electrical conduit and have a properly functioning electrical system for years to come.
Frequently Asked Questions about How To Run An Electrical Conduit
Was this page helpful?
At Storables.com, we guarantee accurate and reliable information. Our content, validated by Expert Board Contributors, is crafted following stringent Editorial Policies. We're committed to providing you with well-researched, expert-backed insights for all your informational needs.


0 thoughts on “How To Run An Electrical Conduit”