Articles
How To Run Electrical Conduit Underground
Modified: October 20, 2024
Learn valuable tips and techniques with our informative articles on how to effectively run electrical conduit underground.
(Many of the links in this article redirect to a specific reviewed product. Your purchase of these products through affiliate links helps to generate commission for Storables.com, at no extra cost. Learn more)
Introduction
Running electrical conduit underground is a common practice when it comes to electrical installations. It offers several advantages, including protection for the electrical wiring and a cleaner and more aesthetically pleasing look. Whether you are installing conduit for a residential or commercial project, it is important to understand the process and requirements to ensure a safe and efficient installation.
In this article, we will guide you through the steps of running electrical conduit underground. We will cover everything from choosing the right conduit to backfilling the trench, providing you with the knowledge and confidence to complete the project successfully.
Before we dive into the details, it’s crucial to understand the importance of using conduit for underground electrical wiring. Conduit acts as a protective housing for the wiring, shielding it from moisture, soil chemicals, and physical damage. It also allows for easier troubleshooting and future expansion, as it provides a clear pathway for adding or replacing wires.
Now, let’s explore the key considerations when choosing the right conduit for your project.
Key Takeaways:
- Proper planning, selection of the right conduit, meticulous installation, and thorough testing are essential for a successful underground electrical conduit installation. Following local codes and consulting professionals ensures a safe and efficient system.
- Backfilling the trench with care, documenting the process, and maintaining accurate records are crucial final steps in completing the underground conduit installation. Attention to detail and adherence to safety guidelines are paramount.
Read more: What Electrical Wire To Run Underground
Choosing the Right Conduit
When selecting the conduit for your underground electrical installation, it is important to consider factors such as the type of wiring, environment, and local building codes. Here are a few key points to keep in mind:
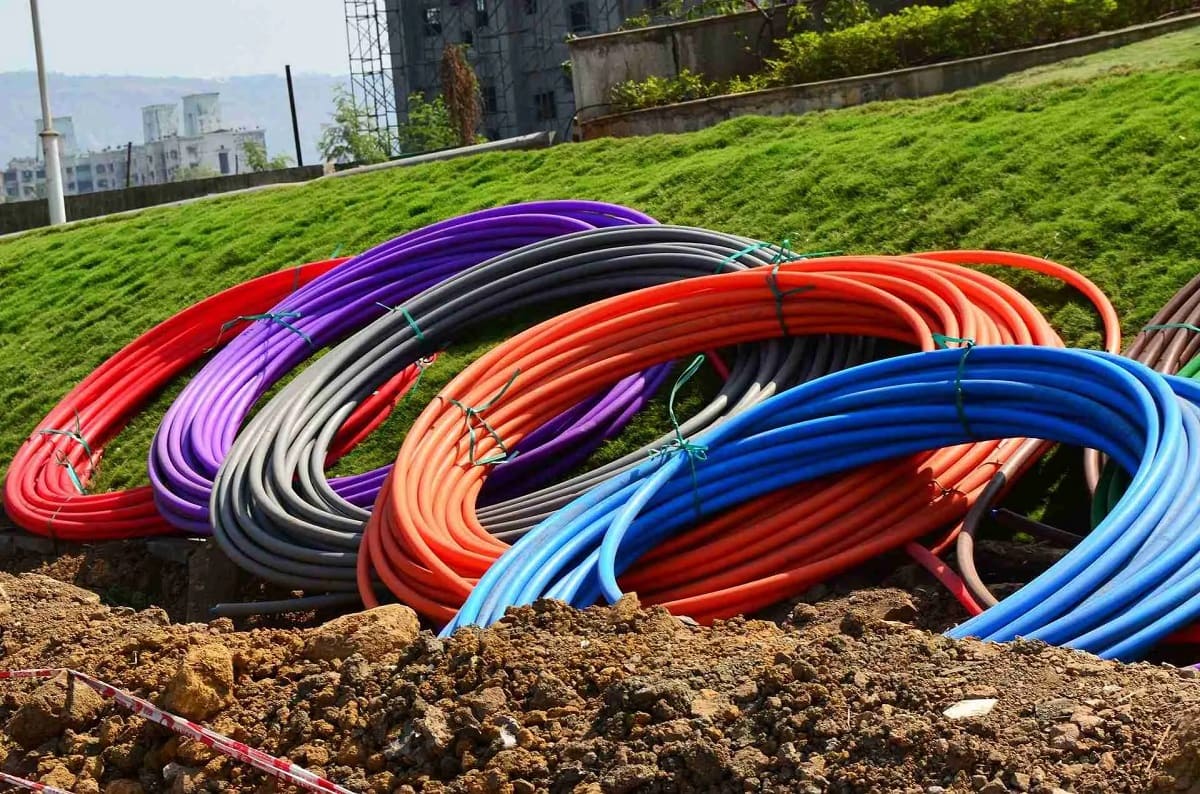
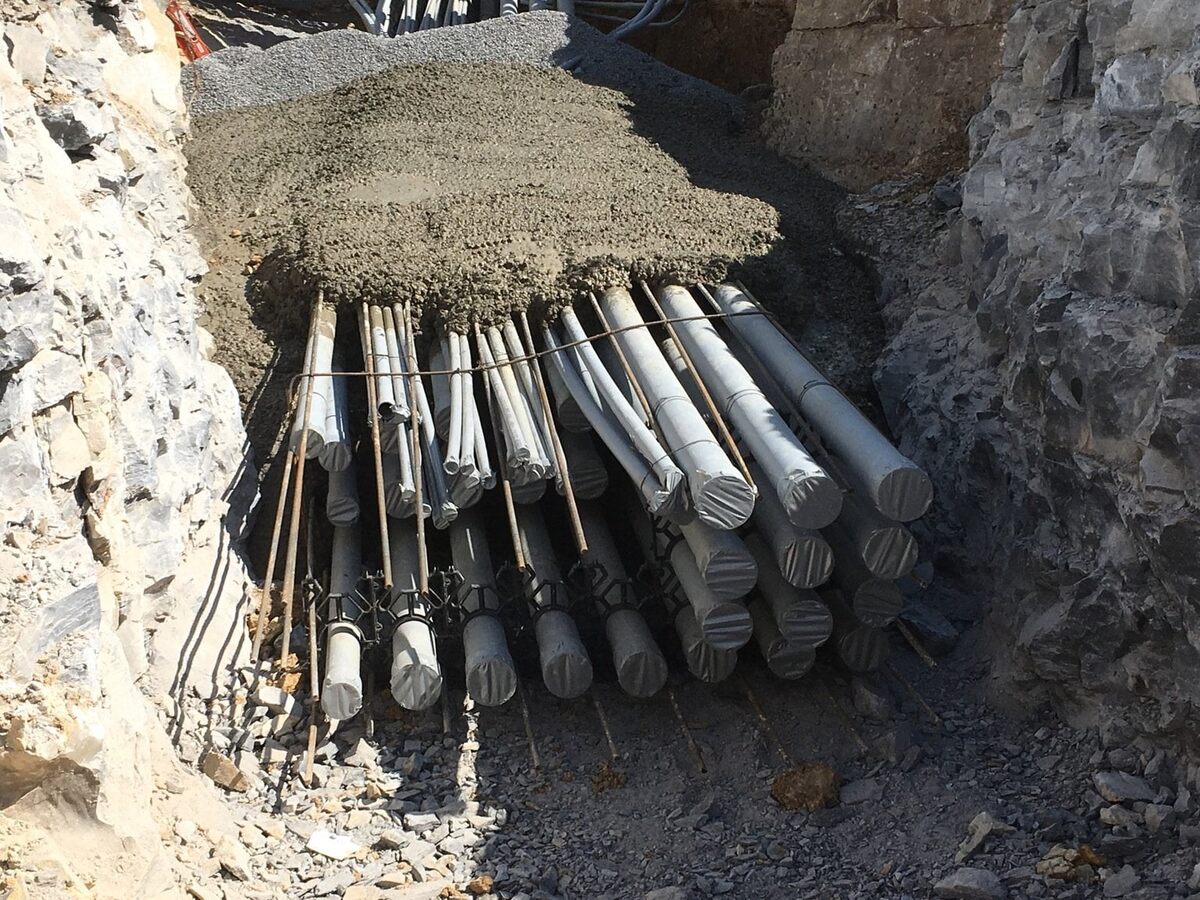
- Type of Conduit: There are various types of conduits available, including PVC, HDPE, and metal. PVC conduit is the most common choice for residential projects due to its affordability and durability. HDPE conduit is a good option for more demanding environments, as it provides enhanced protection against moisture, chemicals, and UV exposure. Metal conduits, such as rigid steel or aluminum, are often used in commercial and industrial applications where increased mechanical protection is required.
- Conduit Size: The size of the conduit depends on the number and size of the wires you will be running through it. Proper sizing is crucial to avoid overcrowding the conduit, which can lead to overheating and potential damage to the wiring. Consult the National Electrical Code (NEC) or local regulations to determine the minimum conduit size for your specific project.
- Grounding: It is important to ensure proper grounding for the conduit system. Depending on the conduit material, grounding options may vary. For metal conduits, grounding is typically achieved through the use of bonding bushings or grounding clamps. PVC and HDPE conduits do not conduct electricity, so grounding may not be necessary. However, local codes and regulations may dictate specific grounding requirements, so it is important to verify the guidelines applicable to your area.
- Accessibility: Consider the accessibility of the conduit system for maintenance and future modifications. If you anticipate the need for future additions or repairs, it may be beneficial to include pull boxes or junction boxes at strategic points along the conduit route. These access points allow for easier access to the wiring, reducing the need for extensive excavation in the future.
Remember to consult with a qualified electrician or follow local regulations to ensure compliance with electrical codes and safety standards when choosing the right conduit for your project. With the appropriate conduit selected, you are ready to move on to the next step – underground conduit installation requirements.
Underground Conduit Installation Requirements
Before you begin the installation of underground conduit, it is essential to be aware of the requirements and regulations that govern this process. Adhering to these guidelines ensures the safety and integrity of the electrical system. Here are some important installation requirements to keep in mind:
- Depth: The depth at which the conduit should be buried depends on the specific application and local codes. In general, the minimum burial depth for PVC and HDPE conduit is 18 inches for residential installations and 24 inches for commercial and industrial installations. For metal conduits, the burial depth may vary depending on the conduit size and local codes. Always consult with your local building department or an electrician to determine the appropriate burial depth for your project.
- Protection: It is crucial to protect the conduit from damage during and after the installation. To prevent accidental damage, consider using conduit sweeps or bends at turns rather than sharp angles. Additionally, installing a warning tape above the conduit can help identify its location and prevent accidental digging during future excavation work.
- Spacing and Separation: When running multiple conduits parallel to each other, it is important to maintain proper spacing and separation between them. This helps to prevent heat buildup and ensures ease of future maintenance. The recommended spacing between conduits depends on the conduit size and the number of conduits in the group. Refer to the NEC or local regulations for specific guidelines.
- Direction Changes: When changing the direction of the conduit run, use appropriate fittings, such as elbows and sweeps, to ensure smooth bends. Avoid sharp bends or kinks, as they can restrict wire pulling and increase the risk of damage to the wires. The maximum allowable bend radius for PVC and HDPE conduit is typically specified by the manufacturer and should be followed during installation.
- Sealing: To prevent water ingress and ensure the longevity of the conduit system, it is important to properly seal the conduit joints and entry points. This can be achieved using approved sealing compounds, such as silicone or waterproofing tape. Additionally, ensure the conduit ends are securely capped to prevent debris or water from entering the system.
By following these installation requirements, you can ensure a safe and reliable conduit system. Now, let’s move on to the tools and materials you will need for the underground conduit installation.
Required Tools and Materials
Before you begin the underground conduit installation, gather the necessary tools and materials to complete the job efficiently and effectively. Here is a list of the essential items you will need:
Tools:
- Trenching machine or shovel for excavation
- Tape measure and marking tools
- Hacksaw or PVC pipe cutter (for cutting conduit)
- Conduit bender or heat gun (for bending conduit)
- Screwdriver or wrench (for securing conduit fittings)
- Fish tape or cable pulling tools
- Cordless drill and appropriate drill bits
- Utility knife and wire strippers
- Sealing compounds, such as silicone or waterproofing tape
- Cable ties and mounting hardware
Read more: How To Run An Electrical Conduit
Materials:
- Electrical conduit (PVC, HDPE, or metal)
- Conduit fittings (elbows, sweeps, couplings, etc.)
- Cable connectors and fasteners
- Electrical wires and cables
- Conduit sealing compounds
- Conduit straps or clamps
- Pull boxes or junction boxes (if needed)
- Warning tape
- Trench backfill material (sand, gravel, or soil)
Having the right tools and materials on hand will make the installation process smoother and more efficient. It is important to ensure that all tools are in good working condition and that the materials meet the necessary electrical and building code requirements.
Once you have gathered your tools and materials, it’s time to mark the path for the conduit installation. This step will help guide you during the excavation process and ensure the conduit is installed in the desired location.
Marking the Path for Conduit Installation
Before beginning the excavation process, it is important to mark the path for the conduit installation. This step ensures that the conduit is installed in the desired location and helps guide you throughout the project. Here’s how to mark the path for conduit installation:
- Plan and Design: Determine the best route for the conduit based on your electrical needs and the layout of the area. Consider factors such as the proximity to power sources, structure accessibility, and future expansion plans. Sketch out the intended path on paper or utilize software tools to visualize the conduit placement. This plan will serve as a guide during the marking and excavation process.
- Measure and Mark: Use a tape measure to measure the path of the conduit installation. Take note of any obstacles, such as trees, landscaping features, or existing structures that may require the conduit to be routed around or under. Use marking tools, such as spray paint or flags, to mark the path directly on the ground. Ensure that the marked path aligns with your planned route and avoids any potential obstructions.
- Verify Underground Utilities: Before proceeding with the excavation, it is critical to verify the location of any existing underground utilities. Call your local utility company to request a utility locate service. This service will mark the location of underground utilities, such as water lines, gas lines, or communication cables, to prevent accidental damage during the excavation process. Respect these markings and adjust your conduit path if needed to avoid any conflicts.
- Consider Depth and Slope: While marking the path, take into account the proper burial depth of the conduit and any necessary slope for drainage. Verify the minimum burial depth required by local codes and adjust the path accordingly. Additionally, consider the natural slope of the land and plan the conduit route to accommodate proper water drainage to prevent pooling or water damage to the wiring.
- Mark Access Points: If you anticipate the need for future access to the conduit system, mark the locations where pull boxes or junction boxes will be installed. These access points will make it easier for future maintenance or modifications to the electrical system. Ensure that the access points are appropriately spaced and conveniently located for easy accessibility.
By taking the time to mark the path for the conduit installation, you will have a clear guide during the excavation process. This step helps minimize errors and ensures that the conduit is installed in the desired location. Now that the path is marked, it’s time to move on to the next step – excavating the trench.
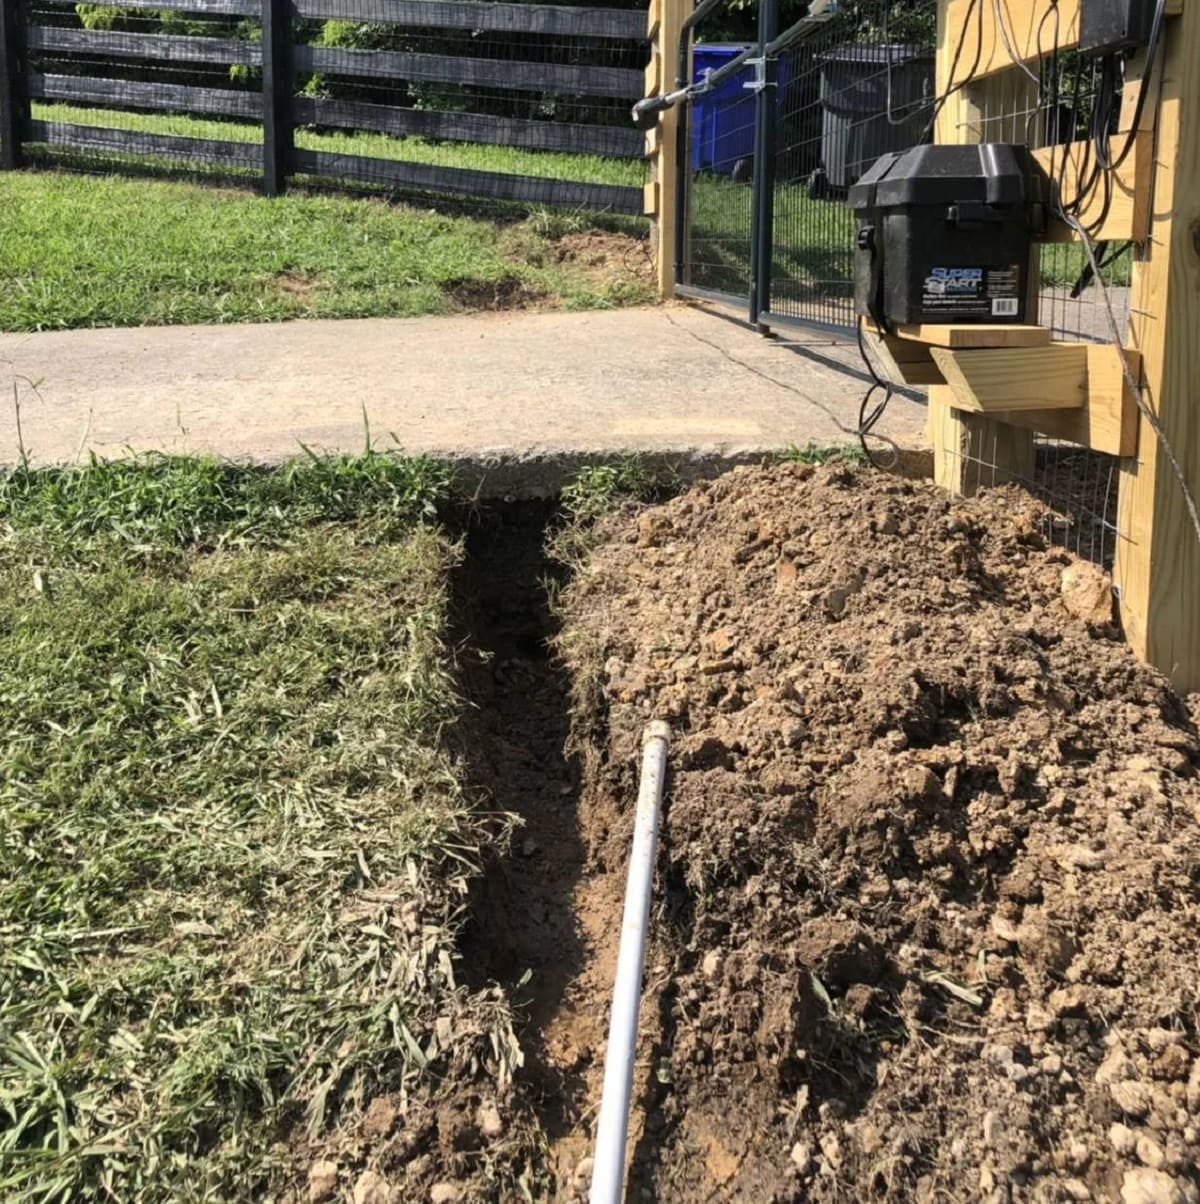
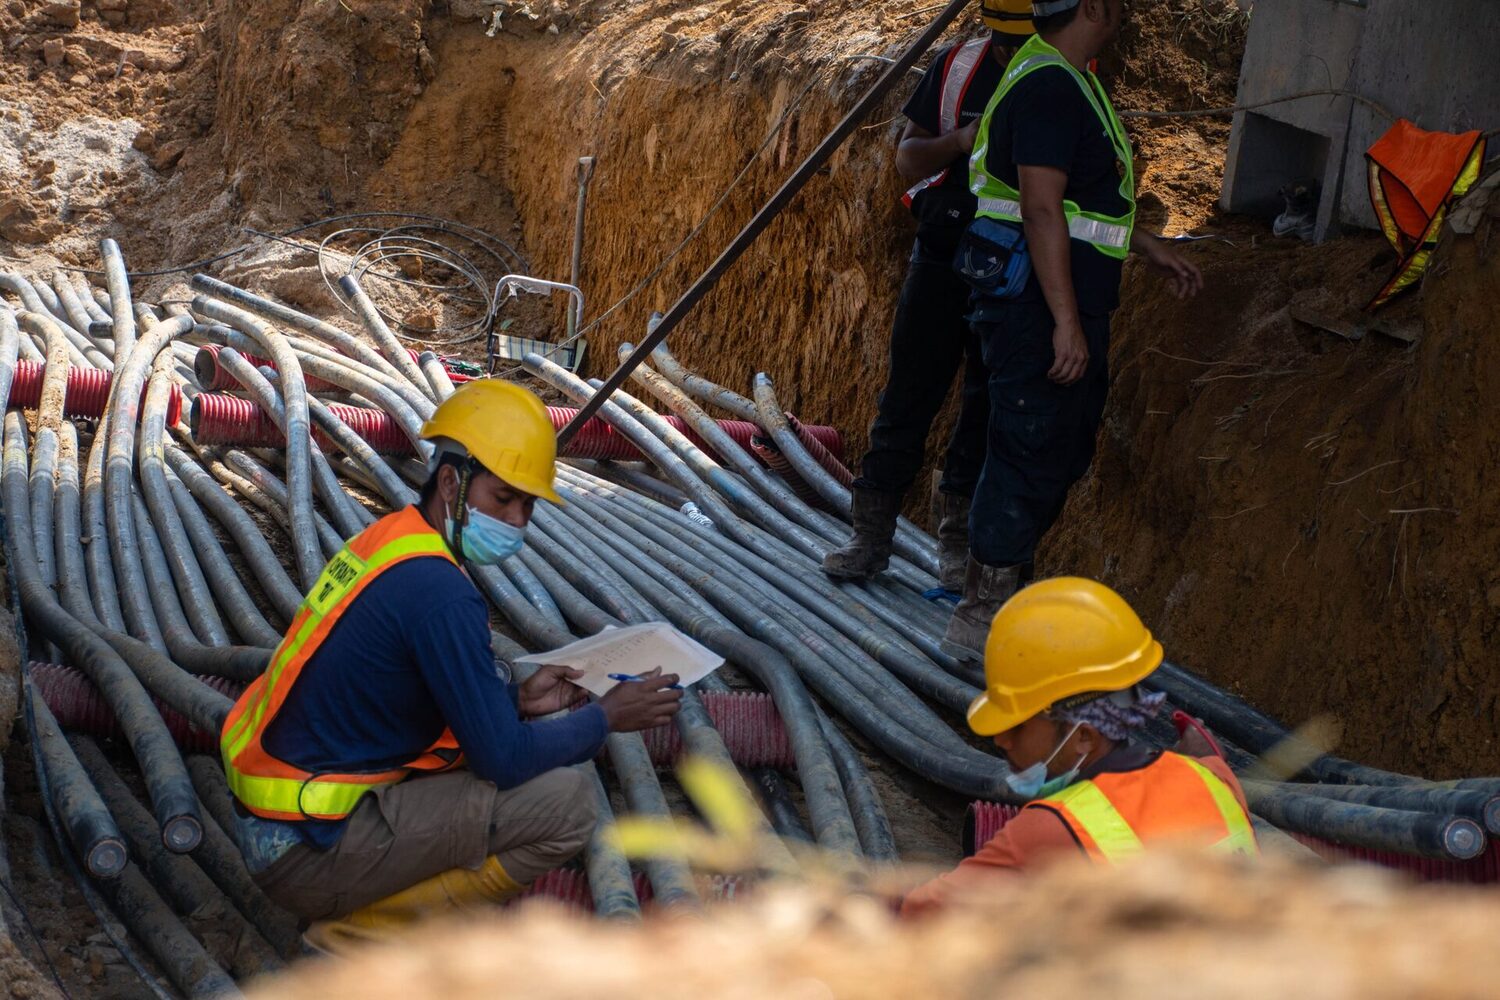
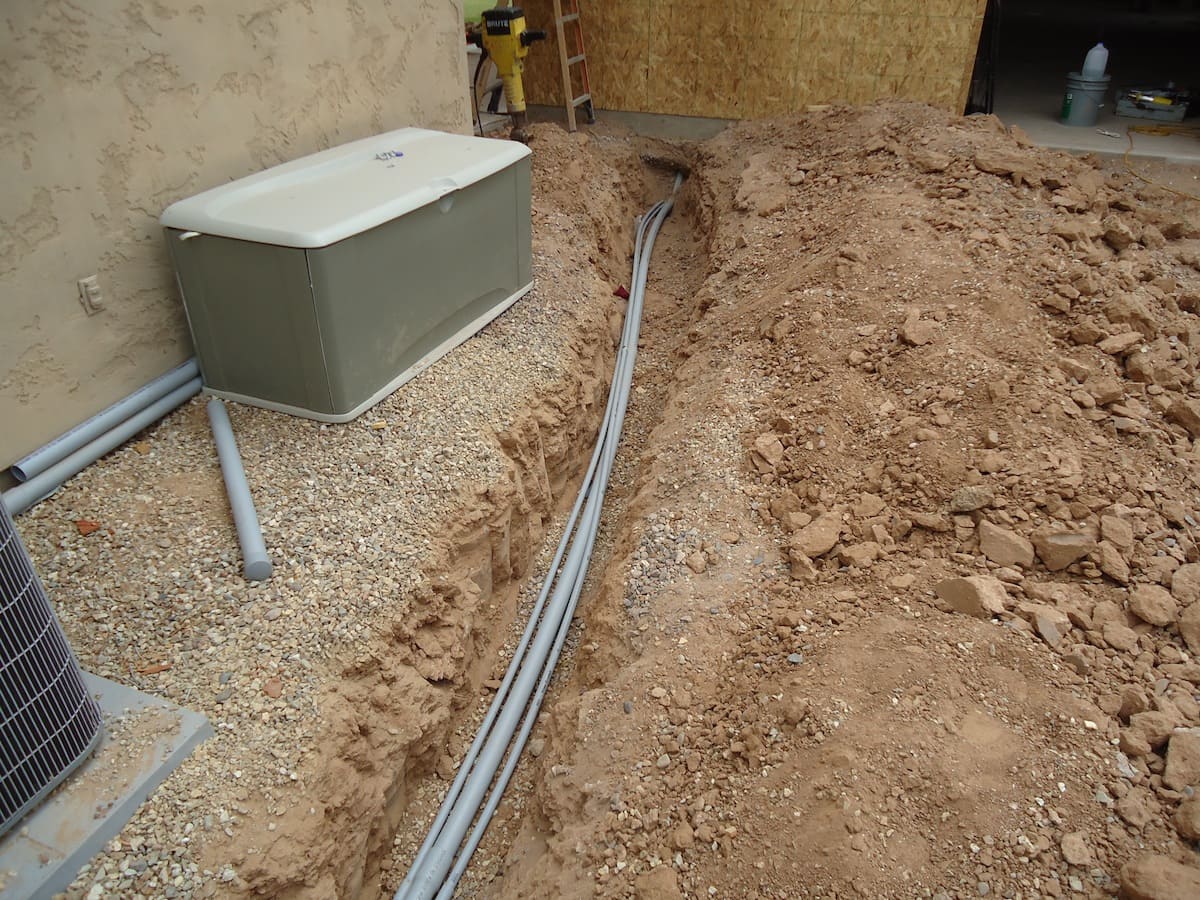
Excavating the Trench
Excavating the trench is a crucial step in the underground conduit installation process. It involves digging a trench along the marked path to accommodate the conduit. Proper excavation ensures that the conduit is buried at the appropriate depth and provides a secure and protected pathway for the electrical wiring. Here’s how to excavate the trench:
- Safety Precautions: Before starting any excavation work, it is important to prioritize safety. Check for any underground utilities using the markings provided by the utility locate service. Use caution when digging near these marked areas to avoid damaging utility lines. Additionally, wear protective gear, such as gloves and safety glasses, and be aware of any other potential hazards, such as uneven terrain or nearby construction work.
- Select the Right Tools: The tools you use for excavation will depend on the size and depth of the trench. If the trench is relatively shallow and the soil is loose, a simple shovel can suffice. However, for larger projects or compacted soil, a mechanical trenching machine or an excavator may be necessary. Choose the appropriate tool based on the project requirements and your level of experience and comfort with the equipment.
- Start Excavating: Begin digging the trench along the marked path using your chosen excavation tool. Start from one end and work your way to the other. Take care to maintain a consistent depth throughout the trench, ensuring it matches the required burial depth for the conduit. Use a tape measure or a depth stick to periodically check the depth of the trench and make necessary adjustments as you go.
- Trench Width: The width of the trench should be wide enough to accommodate the conduit and allow for proper backfilling. As a general guideline, the trench width should be approximately 6 to 8 inches wider than the diameter of the conduit. This extra space provides enough room for the conduit to be properly placed and secured. However, take into consideration any specific requirements or regulations that may apply in your area.
- Keep the Trench Clean: As you excavate the trench, make sure to remove any rocks, debris, or large clumps of soil. These obstructions can interfere with the placement of the conduit and potentially damage the wiring. Keeping the trench clean as you dig ensures a smooth and efficient installation process.
- Excavate to Required Length: Continue excavating the trench along the predetermined path until you reach the desired length or the endpoint of the installation. Remember to consider any turns or changes in direction specified in the conduit design. As you approach the endpoint, ensure that the trench maintains the proper depth and width, making any last-minute adjustments if necessary.
By following these steps, you can successfully excavate the trench for the underground conduit installation. Take your time to ensure accuracy and precision during this process, as it lays the foundation for a secure and properly installed conduit system. Once the trench is excavated, it’s time to proceed with the next step – laying the conduit.
Laying the Conduit
After excavating the trench, the next step in the underground conduit installation process is laying the conduit. This involves carefully placing and positioning the conduit along the trench path, ensuring proper alignment and support. Here’s how to lay the conduit:
- Prepare the Conduit: Before laying the conduit, make sure it is clean and free from any debris or dirt. If necessary, use a brush or cloth to wipe down the inside and outside of the conduit. Inspect the conduit for any damages or cracks that could affect its integrity. Replace any damaged sections before proceeding with the installation.
- Start at the Beginning: Begin laying the conduit at the starting point of the trench. Carefully lower the conduit into the trench, ensuring that it sits securely and evenly along the trench path. Use caution to avoid any bending or kinking of the conduit as you position it.
- Align the Conduit: As you lay the conduit, ensure that it is properly aligned with the marked path and any directional changes you have planned. Aligning the conduit accurately at each turn or bend will make it easier to pull the wires through later in the process.
- Cut Conduit if Needed: If the conduit extends beyond the desired endpoint or if you encounter any obstacles, you may need to cut the conduit to the appropriate length. Use a hacksaw or a PVC pipe cutter to make clean, straight cuts. Remember to measure and mark the conduit accurately before cutting to avoid any errors.
- Connect Conduit Sections: If you have multiple sections of conduit, you will need to connect them together using appropriate conduit fittings. Follow the manufacturer’s instructions for joining the specific type of conduit you are using. Ensure that the fittings are securely tightened to provide a stable and reliable connection.
- Support the Conduit: As you lay the conduit, use conduit straps or clamps to secure it to the ground and prevent any movement or sagging. Space the supports evenly along the length of the conduit, ensuring that they provide adequate support without creating excessive tension. Follow local codes and regulations regarding the spacing and type of support required.
- Maintain Proper Depth: As you lay the conduit, ensure that it remains at the required burial depth. Use a tape measure or depth stick to periodically check the depth and make adjustments if needed. Proper burial depth protects the wiring from damage and ensures compliance with electrical codes.
By following these steps, you can successfully lay the conduit in the trench. Take your time to ensure proper alignment and support, as these factors contribute to a secure and functional conduit system. Once the conduit is laid, the next step is connecting the conduit sections together.
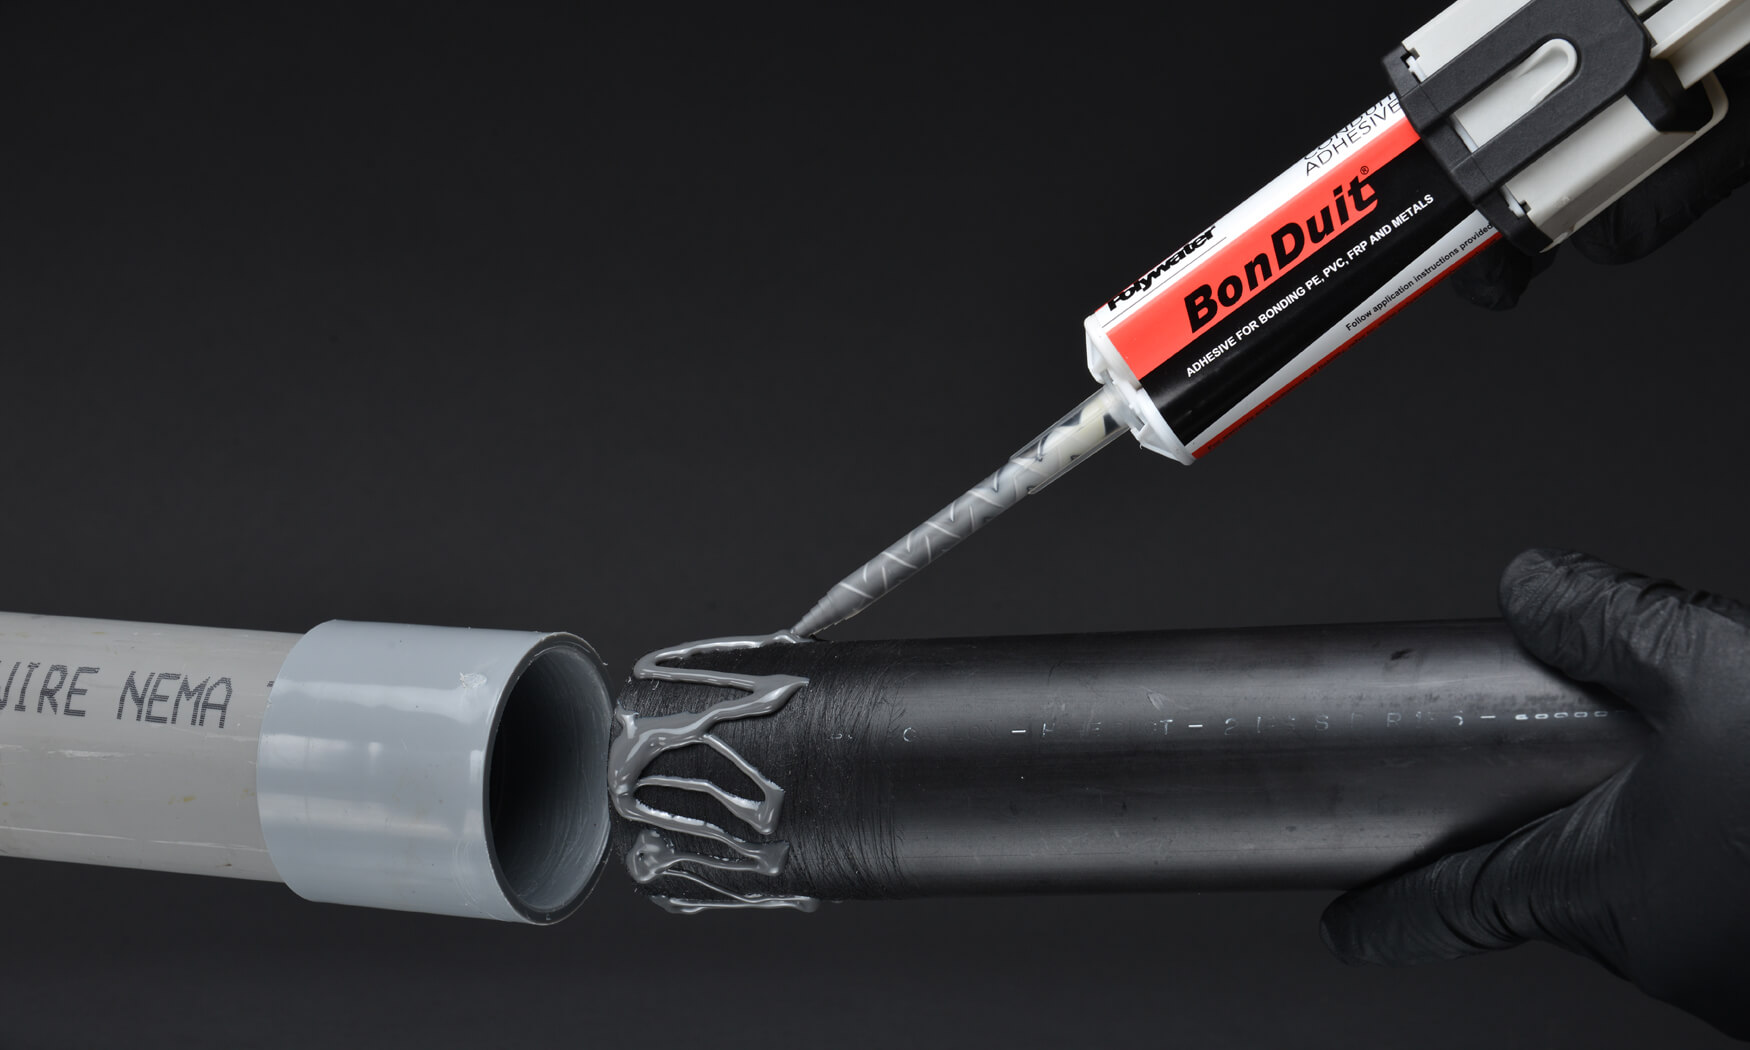
Connecting Conduit Sections
Once the conduit is laid along the trench, the next step in the installation process is connecting the conduit sections together. Properly connecting the conduit ensures a secure and continuous pathway for the electrical wiring. Here’s how to connect conduit sections:
- Prepare the Ends: Before joining the conduit sections, ensure that the ends are clean and free from any debris or dirt. Use a brush or cloth to wipe down the inside and outside of the conduit, removing any residue that could affect the connection. Inspect the ends for any damages or irregularities, and make any necessary repairs or replacements.
- Select the Appropriate Fittings: Depending on the type of conduit you are using, you will need to choose the appropriate fittings for joining the sections together. For PVC and HDPE conduit, solvent cement, compression couplings, or push-fit connectors are commonly used. For metal conduit, threaded connectors or couplings are typically used. Follow the manufacturer’s instructions for the specific type of fittings you are using.
- Apply Lubricant (if applicable): Some types of conduit fittings may require the use of lubricant for easier insertion. Check the manufacturer’s instructions to determine if lubricant is necessary. Apply a thin coat of lubricant to the inside of the fittings and on the ends of the conduit sections to aid in the connection process.
- Insert and Connect: With the fittings and lubricant ready, begin by inserting one end of the conduit into the fitting, following the manufacturer’s instructions for proper alignment. Push the conduit in until it reaches the stop point indicated on the fitting. Twist the conduit slightly to ensure a secure and tight fit. Repeat this process for the other end of the conduit section, connecting it to the adjacent fitting or section.
- Secure the Connections: Once the conduit sections are connected, use a screwdriver or wrench to tighten any locking mechanisms or fasteners on the fittings. Follow the manufacturer’s instructions for the specific type of fittings you are using. Ensure that the connections are secure but avoid overtightening, as this may cause damage or distortion to the conduit.
- Check for Proper Alignment: After securing the connections, visually inspect the conduit sections to ensure they are properly aligned. Check for any gaps or misalignments that could affect the integrity of the conduit system. Adjust the sections if necessary to achieve a straight and continuous pathway.
- Verify Electrical Continuity: If you are using metal conduit, it is important to verify the electrical continuity of the system. Use a continuity tester or a multimeter to ensure that there is a continuous pathway for electrical current from one section to another. Follow the manufacturer’s instructions for conducting the continuity test.
By following these steps, you can successfully connect the conduit sections for a secure and reliable conduit system. Proper connections contribute to the overall functionality and safety of the electrical installation. The next step in the process is securing the conduit to the ground.
When running electrical conduit underground, make sure to use PVC conduit for better protection against moisture and corrosion. Be sure to bury the conduit at the proper depth according to local building codes.
Securing Conduit to the Ground
After connecting the conduit sections, the next step in the underground conduit installation process is securing the conduit to the ground. This ensures the stability and support of the conduit system, preventing movement or damage. Here’s how to secure conduit to the ground:
- Choose the Right Supports: Select the appropriate conduit supports based on the type of conduit and local regulations. Common options include conduit straps, clamps, or hangers. These supports offer stability and prevent excessive movement or sagging of the conduit. Ensure that the supports are made of durable materials that can withstand outdoor conditions.
- Position the Supports: Place the conduit supports along the length of the conduit at regular intervals. Refer to local codes or regulations for specific spacing requirements. Generally, supports should be placed every 3 to 4 feet horizontally and every 10 feet vertically or when there is a significant change in elevation. Adjust the positioning of the supports as needed to ensure the conduit remains straight and secure.
- Attach the Supports: Use screws or appropriate fasteners to attach the conduit supports to the ground or nearby structures. Ensure the fasteners are securely tightened but avoid overtightening, which could damage the conduit or the support itself. Follow the manufacturer’s instructions or local regulations for the correct size and type of fasteners to use.
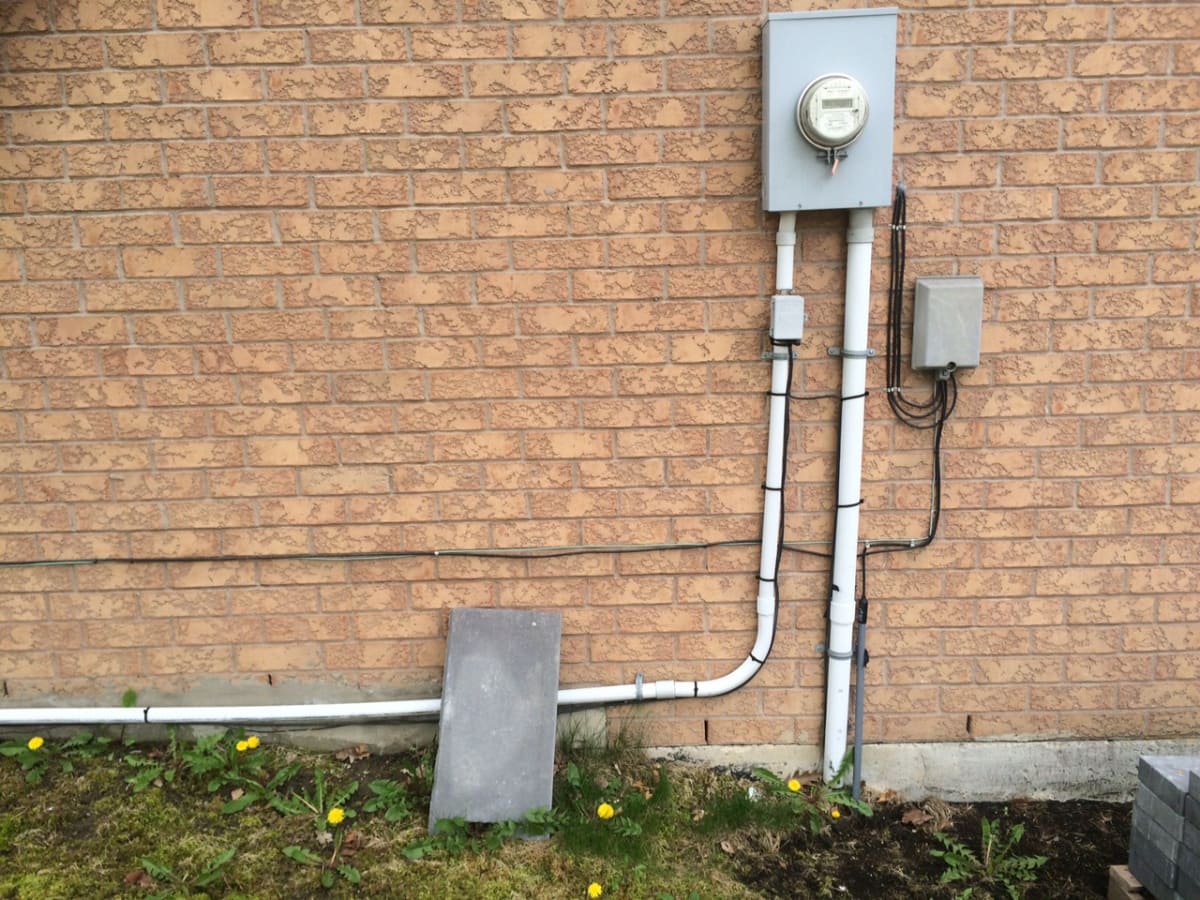
- Support Vertical Conduit: If you have vertical sections of conduit, such as those leading to above-ground structures or equipment, use additional supports to secure them. Attach these supports to the structure or equipment using appropriate hardware. Ensure that the vertical conduit is straight and securely anchored to prevent any swaying or instability.
- Check for Proper Alignment: After securing the conduit to the ground, visually inspect the entire length of the conduit to ensure that it remains straight and properly aligned. Check each support to ensure it is securely attached and providing adequate support. Make any necessary adjustments to ensure the conduit is properly supported and free from any excessive movement or sagging.
- Recheck Support Spacing: Double-check the spacing between conduit supports to ensure compliance with local codes or regulations. Consider any specific requirements for the type of conduit or the environment in which it is installed. Adjust the support spacing as needed to meet the necessary guidelines.
- Inspect for Obstacles: During the process of securing the conduit, inspect the surrounding area for any obstacles or potential hazards. Ensure that the conduit is clear of vegetation, debris, or any objects that could interfere with its function or cause damage.
By following these steps, you can ensure that the conduit is properly secured to the ground, providing stability and support for the electrical wiring. This step contributes to the overall safety and longevity of the conduit system. The next step in the installation process is pulling wires through the conduit.
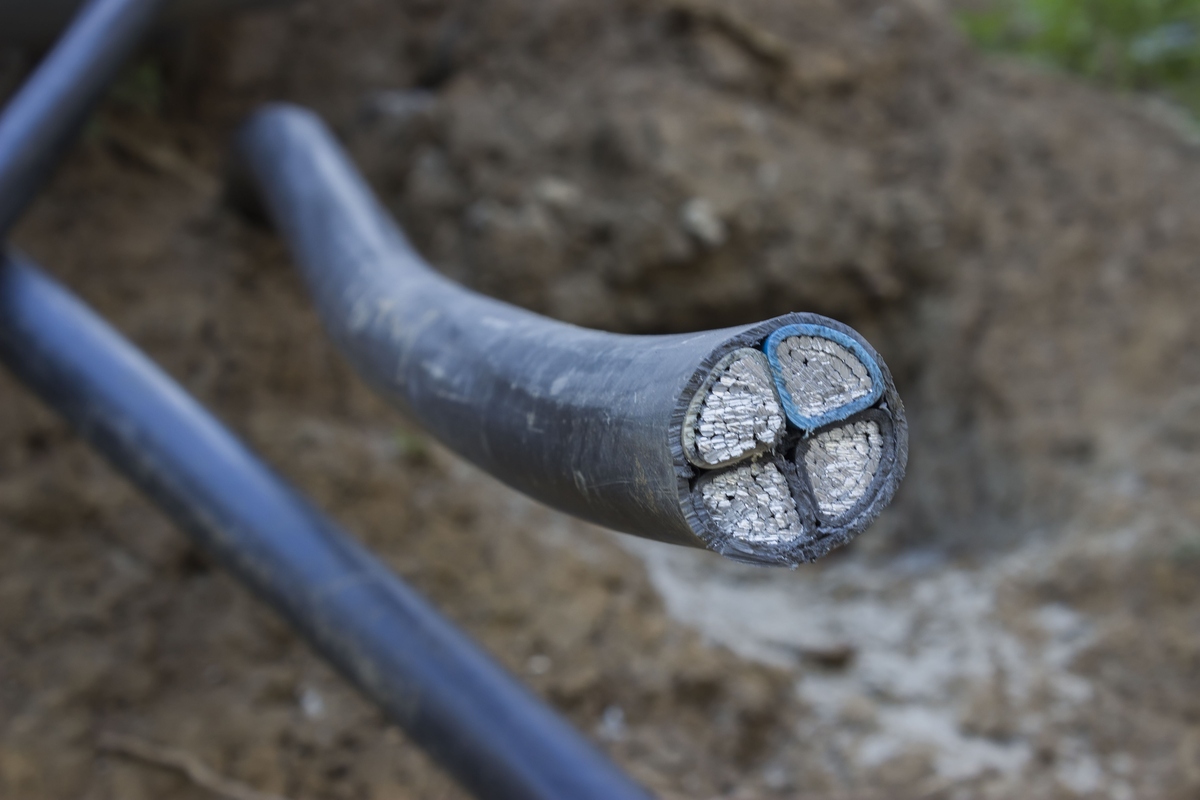
Pulling Wires Through the Conduit
Once the conduit is securely in place, the next step in the underground conduit installation process is pulling wires through the conduit. This step is crucial as it provides the electrical connectivity needed for your system. Here’s how to pull wires through the conduit:
- Prepare the Wires: Before pulling the wires, ensure they are the correct type and size for your electrical needs. Strip the ends of the wires to expose the necessary length of conductor. Remove any sheathing or insulation as required, leaving enough bare wire to make connections within junction boxes or devices.
- Use Lubrication (if needed): Depending on the length of the conduit run and the type of wire being pulled, you may need to apply a suitable lubricant to facilitate the pulling process. Apply the lubricant sparingly to minimize mess and ensure proper conductivity after installation. Consult the manufacturer’s instructions for the appropriate lubricant to use.
- Attach Wires to Pulling Device: To facilitate wire pulling, attach the wires to a suitable pulling device, such as a fish tape or cable puller, using wire connectors or tape. Securely fasten the wires to the pulling device to prevent dislodging during the pulling process.
- Start Pulling: Begin pulling the wires through the conduit by gently pushing the pulling device through one end of the conduit. Carefully guide the device as it travels along the conduit path, ensuring that the wires do not get caught or tangled. Use smooth and consistent movements to minimize strain on the wires and the conduit.
- Assess Wire Tension: As you pull the wires, periodically assess the tension to ensure it is not excessive. If you encounter significant resistance, stop pulling and reassess the situation. If necessary, apply additional lubrication or adjust the pulling technique to prevent any damage to the wires or the conduit.
- Properly Position Wires: Once the wires have been pulled through the entire length of the conduit, ensure they are positioned properly within junction boxes or electrical devices. Arrange and bundle the wires neatly to facilitate easy connections and minimize any unnecessary strain caused by excess wire length.
- Make Connections: After positioning the wires, make the necessary connections according to your electrical design. Follow proper electrical wiring techniques and adhere to local electrical codes to ensure safe and reliable connections. Use appropriate wire connectors, terminal blocks, or wire nuts to secure the wires together as required.
- Verify Wire Continuity: Once the connections are made, verify the continuity of the wires using a continuity tester or a multimeter. This ensures that the intended electrical path is maintained and there are no breaks or loose connections that could potentially compromise the electrical system.
By following these steps, you can successfully pull the wires through the conduit, completing the electrical connection for your system. Take your time and exercise caution to avoid any damage to the wires or the conduit during the pulling process. The next step in the installation process is sealing and testing the conduit system.
Sealing and Testing the Conduit System
After pulling the wires through the conduit, the next step in the underground conduit installation process is sealing and testing the conduit system. Proper sealing prevents water ingress and protects the wiring, while testing ensures the integrity and functionality of the electrical system. Here’s how to seal and test the conduit system:
- Sealing Conduit Joints: To prevent water from entering the conduit, seal the conduit joints using approved sealing compounds, such as silicone or waterproofing tape. Apply the sealing compound around the joints and evenly spread it to create a watertight seal. Follow the manufacturer’s instructions for the specific sealing compound you are using and ensure proper adhesion to the conduit material.
- Sealing Entry Points: Along with sealing the conduit joints, it is important to seal entry points where the conduit enters buildings or structures. Use appropriate sealing materials, such as weatherproof sealant or conduit entry seals, to ensure a tight seal and prevent water from seeping in.
- Testing Conduit System: Once the sealing is complete, it is essential to test the conduit system for continuity and proper grounding. Use a continuity tester or a multimeter to check that there is a continuous electrical path from one end of the conduit to the other. Test for proper grounding, especially if you are using metal conduit, by verifying the continuity between the conduit and the grounding system.
- Inspect for Damage or Defects: While testing the conduit system, inspect the entire system for any signs of damage, defects, or loose connections. Look for any visible wear and tear on the conduit, fittings, or wire insulation. Check that all connections are secure and properly tightened. Make any necessary repairs or adjustments to ensure the conduit system is in good working condition.
- Verify Wire Functionality: Along with continuity testing, verify the functionality of the wires within the conduit system. Check each wire to ensure it is properly connected and serving its intended purpose. Test for voltage or resistance using a multimeter or appropriate testing equipment, following proper safety precautions.
- Document the System: As part of your installation process, it is important to document the conduit system. Create a detailed diagram or schematic of the conduit routes, including any access points, junction boxes, or connections. Note the wire types, sizes, and the purpose of each wire within the system. This documentation will be helpful for future reference and maintenance.
- Label and Organize: Properly label and organize the conduit system to facilitate easier maintenance and troubleshooting. Use permanent markers or labels to identify the wires, junction boxes, or other components within the system. Arrange the wires in a neat and organized manner within junction boxes or device enclosures.
By following these steps, you can ensure a properly sealed and tested conduit system. Proper sealing protects the wiring from moisture and environmental elements, while testing ensures the functionality and safety of the electrical system. With the conduit system sealed and tested, the final step in the installation process is backfilling the trench.
Backfilling the Trench
After completing the installation, sealing, and testing of the conduit system, the final step in the underground conduit installation process is backfilling the trench. Backfilling involves filling the trench with soil or other suitable materials, ensuring proper support and stability for the conduit. Here’s how to backfill the trench:
- Clean the Trench: Before backfilling, remove any debris or excess soil from the trench. This will help ensure a smooth and even backfilling process. Use a shovel or other suitable tools to clear away any loose materials.
- Choose Backfill Material: Select the appropriate backfill material for the trench. In most cases, clean soil or compactable fill material is used for backfilling. Avoid using large rocks or clumps of soil that can exert pressure on the conduit and potentially damage it. Consult local codes and regulations to determine any specific requirements for backfill materials in your area.
- Backfill in Layers: Backfill the trench in layers, gradually filling the space surrounding the conduit. Add a layer of backfill material, such as soil, and compact it using a tamper or other suitable equipment. Ensure each layer is evenly distributed and compacted to provide stable support for the conduit. Continue the process until the trench is completely filled.
- Avoid Excessive Force: When backfilling, take care to avoid applying excessive force or pressure on the conduit. This can cause deformation or damage to the conduit and compromise its functionality. Use gentle and controlled movements when compacting the backfill material around the conduit.
- Reinstate Surface: Once the trench is filled and the conduit is properly supported, reinstate the surface above the trench. Smooth out the soil and ensure it is level with the surrounding area. If needed, water the backfilled area to aid in compaction and ensure proper settling of the soil.
- Restore Landscape: If you had to remove any plants or landscaping features for the installation, replant or restore them to their original positions. Take care to re-establish the aesthetics of the area by adding mulch, grass, or other landscaping elements.
- Inspect and Test: After the backfilling process is complete, visually inspect the area to ensure the trench has been properly filled and the conduit is not exposed. Verify the stability and integrity of the backfilled trench and the conduit system. Conduct final tests to confirm the continuity and functionality of the electrical wiring if necessary.
- Maintain Records: Document the details of the backfilling process, including the date, materials used, and any relevant information. Keep records of the installation and backfilling for future reference or potential maintenance needs.
By following these steps, you can successfully backfill the trench, completing the underground conduit installation process. Backfilling provides stability and support for the conduit while restoring the area to its original condition. With the trench properly filled, you can now enjoy the benefits of a safe and functional electrical system.
Please note that local codes and regulations may vary, so it’s important to consult with the appropriate authorities or seek guidance from a qualified electrician to ensure compliance with specific requirements in your area.
Conclusion
Running electrical conduit underground is a complex but essential process for any electrical installation. It provides protection for the wiring, ensures a clean and organized look, and allows for future expansion and maintenance. By following the step-by-step guide outlined in this article, you can successfully install underground conduit and create a safe and functional electrical system.
Choosing the right conduit, adhering to underground conduit installation requirements, and using the appropriate tools and materials are crucial for a successful installation. Additionally, marking the path for conduit installation, excavating the trench, laying the conduit, and connecting conduit sections are important steps that require careful attention to detail.
Securing the conduit to the ground, pulling wires through the conduit, sealing and testing the conduit system, and backfilling the trench complete the installation process. These steps ensure the stability, functionality, and long-term durability of the conduit system.
During each stage of the installation, it is essential to follow local codes, regulations, and safety guidelines. Additionally, consulting with a qualified electrician or other professionals can provide valuable insight and ensure compliance with specific requirements in your area.
By completing the underground conduit installation with precision and care, you can enjoy the benefits of a safe and efficient electrical system. Remember to maintain accurate documentation of the installation, including diagrams and records, for future reference and maintenance needs.
Thank you for reading this comprehensive guide to running electrical conduit underground. We hope it has provided you with the knowledge and confidence to tackle your own underground conduit installation project. If you have any further questions or need assistance, don’t hesitate to reach out to a qualified professional or electrical contractor.
Now that you've mastered running electrical conduit underground, why not expand your skills further? For those looking to extend power to outbuildings, our guide on how to run overhead electrical wire to your garage offers practical advice on setting up overhead wires safely and efficiently. Meanwhile, if indoor electrical improvements are on your agenda, our detailed instructions on how to install conduit in your wall will help you seamlessly integrate systems within walls, ensuring a clean and professional finish. Both articles provide essential know-how for your next home project.
Frequently Asked Questions about How To Run Electrical Conduit Underground
Was this page helpful?
At Storables.com, we guarantee accurate and reliable information. Our content, validated by Expert Board Contributors, is crafted following stringent Editorial Policies. We're committed to providing you with well-researched, expert-backed insights for all your informational needs.


0 thoughts on “How To Run Electrical Conduit Underground”