Articles
How To Run Conduit Through A Wall
Modified: May 6, 2024
Learn how to run conduit through a wall with this comprehensive guide. Our articles provide step-by-step instructions for a successful installation.
(Many of the links in this article redirect to a specific reviewed product. Your purchase of these products through affiliate links helps to generate commission for Storables.com, at no extra cost. Learn more)
Introduction
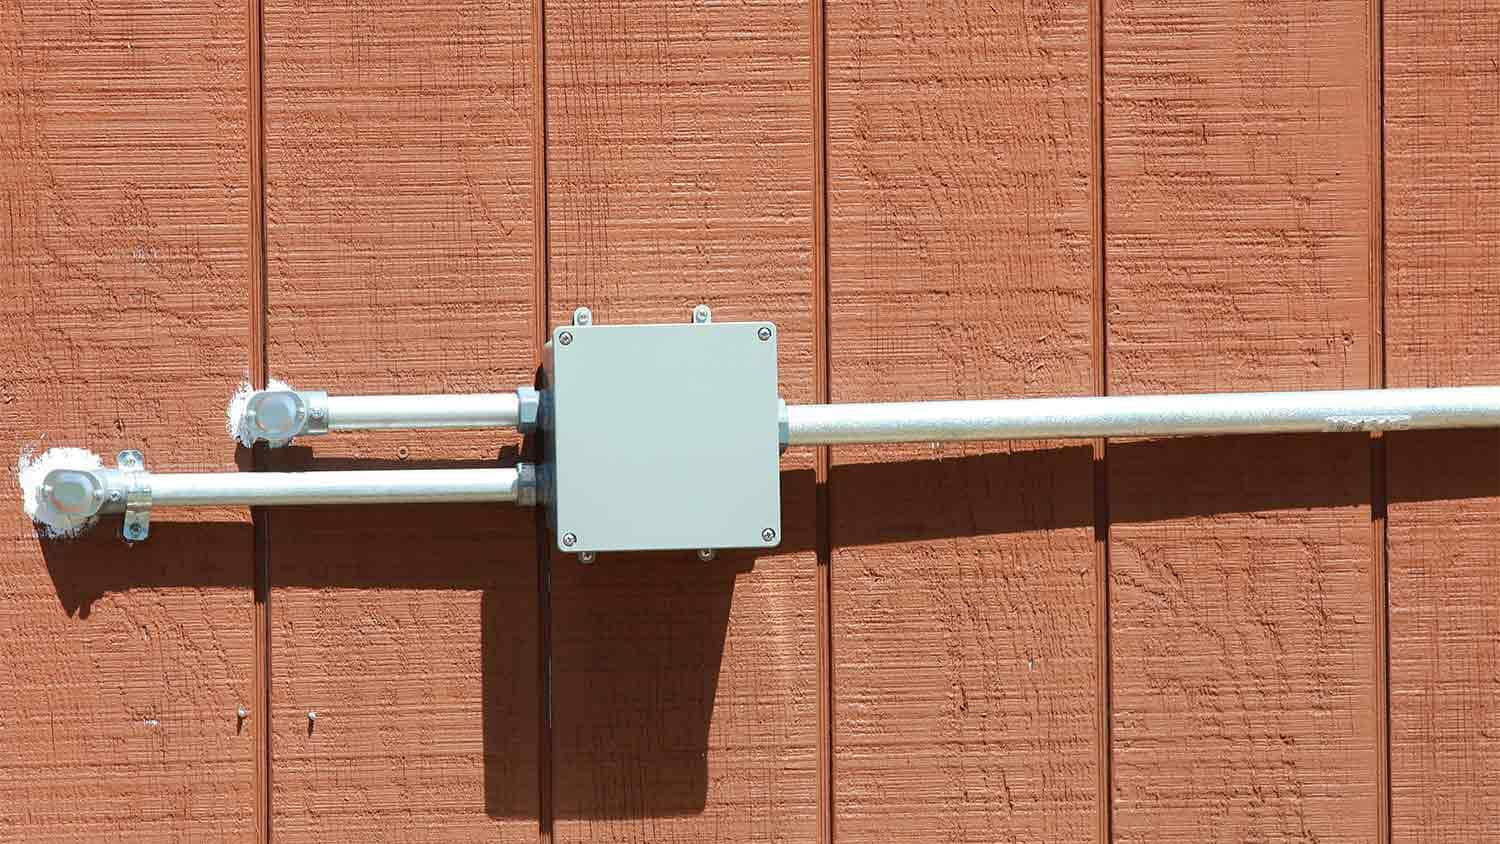
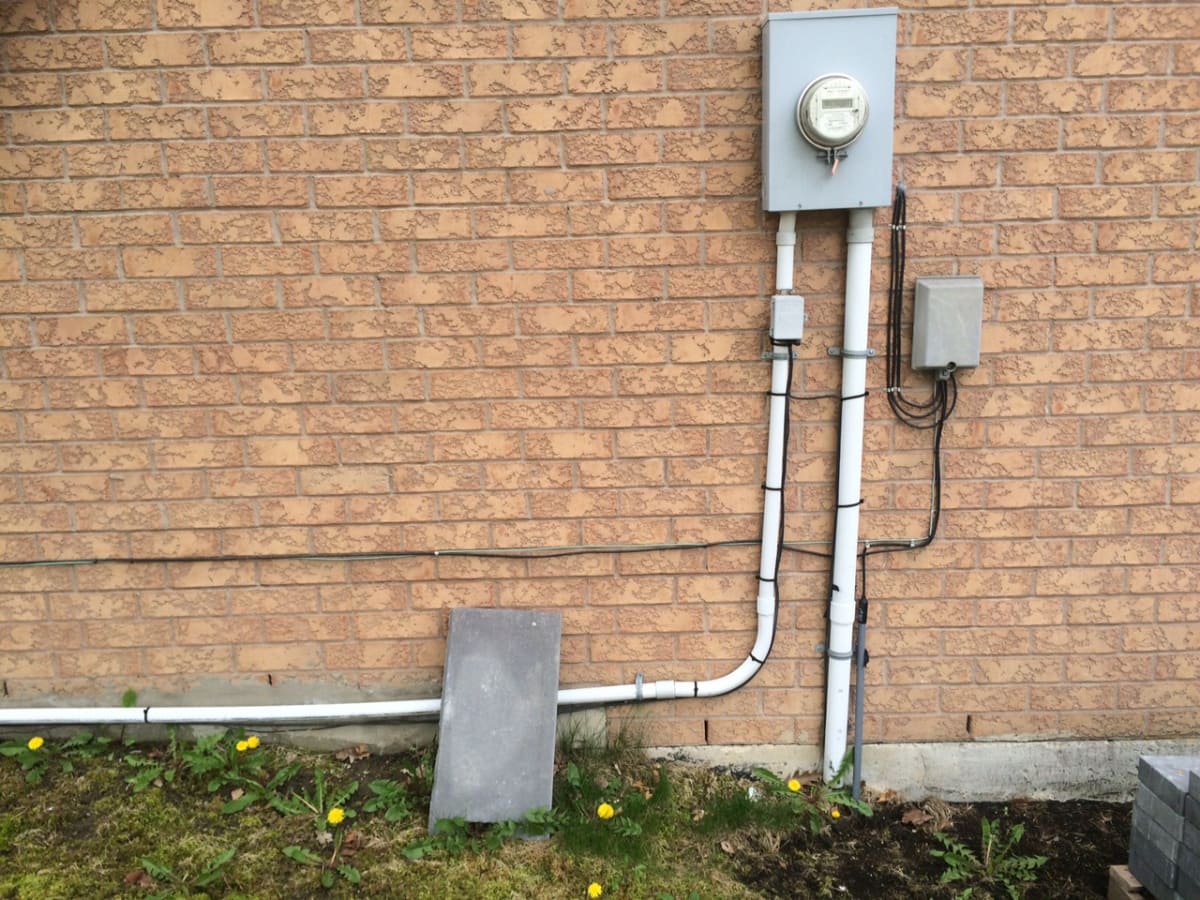
Running conduit through a wall is a crucial step when it comes to electrical or plumbing installations. The conduit serves as a protective housing for the wiring or pipes, ensuring they are safely tucked away and reducing the risk of damage or accidents. Whether you are a homeowner or a professional electrician or plumber, knowing how to run conduit through a wall is a valuable skill that can save you time and money.
This article will provide a comprehensive guide on how to run conduit through a wall, covering the necessary planning, materials, and installation steps. By following this guide, you will be able to tackle conduit installations with confidence and precision.
Key Takeaways:
- Proper planning, material selection, and precise installation are crucial for running conduit through a wall. Following the steps outlined in this guide ensures a successful and durable electrical or plumbing system.
- Testing the conduit installation is essential to verify functionality and address any issues early on. By prioritizing safety and attention to detail, you can confidently tackle conduit installations for your home or projects.
Read more: How To Run Electrical Wire Through Walls
Step 1: Planning and Preparation
Before diving into the installation process, proper planning and preparation are essential to ensure a smooth and successful conduit installation. Here are the key steps to follow:
- Assess your requirements: Start by determining the purpose of the conduit installation. Are you running electrical wiring or plumbing pipes? Consider the specific needs and regulations for your project before proceeding.
- Inspect the wall: Examine the wall where you intend to run the conduit. Look for any obstacles, such as studs, wiring, or plumbing lines already present. This will help you identify the best path for your conduit.
- Measure and mark: Use a measuring tape and a pencil to mark the entry and exit points for the conduit on the wall. Measure and mark the desired height and distance of the conduit from the floor or other reference points.
- Consider future needs: Anticipate any future needs for additional wiring or pipes. Allocating space for future expansion can save you the hassle of running new conduit later.
- Obtain permits if required: Depending on local regulations, you may need permits for certain electrical or plumbing work. Check with your local authorities to ensure compliance.
By carefully planning and preparing for your conduit installation, you will set a solid foundation for the rest of the process. This will help you minimize errors and ensure a successful installation.
Step 2: Choosing the Conduit Material
Choosing the right conduit material is crucial to ensure the durability and functionality of your installation. The material you select will depend on the specific needs of your project. Here are some common conduit materials:
- Steel conduit: Steel conduit is a sturdy and reliable option that provides excellent protection for electrical or plumbing installations. It is resistant to physical damage and can withstand exposure to extreme temperatures. However, steel conduit can be more challenging to work with due to its weight and the need for specialized tools.
- PVC conduit: PVC (polyvinyl chloride) conduit is a popular choice for electrical installations. It is lightweight, affordable, and easy to install. PVC conduit is also resistant to corrosion, making it suitable for outdoor applications. However, it may not be suitable for high-temperature environments.
- EMT conduit: EMT (electrical metallic tubing) conduit is a thin-walled steel tube that is easy to bend and manipulate. It is commonly used in electrical installations where flexibility is required. EMT conduit is affordable and easy to work with, but it may not offer as much protection as other materials.
- Rigid conduit: Rigid conduit, also known as galvanized steel conduit, is the most robust option available. It provides superior protection and is suitable for heavy-duty applications. Rigid conduit is commonly used in commercial and industrial installations.
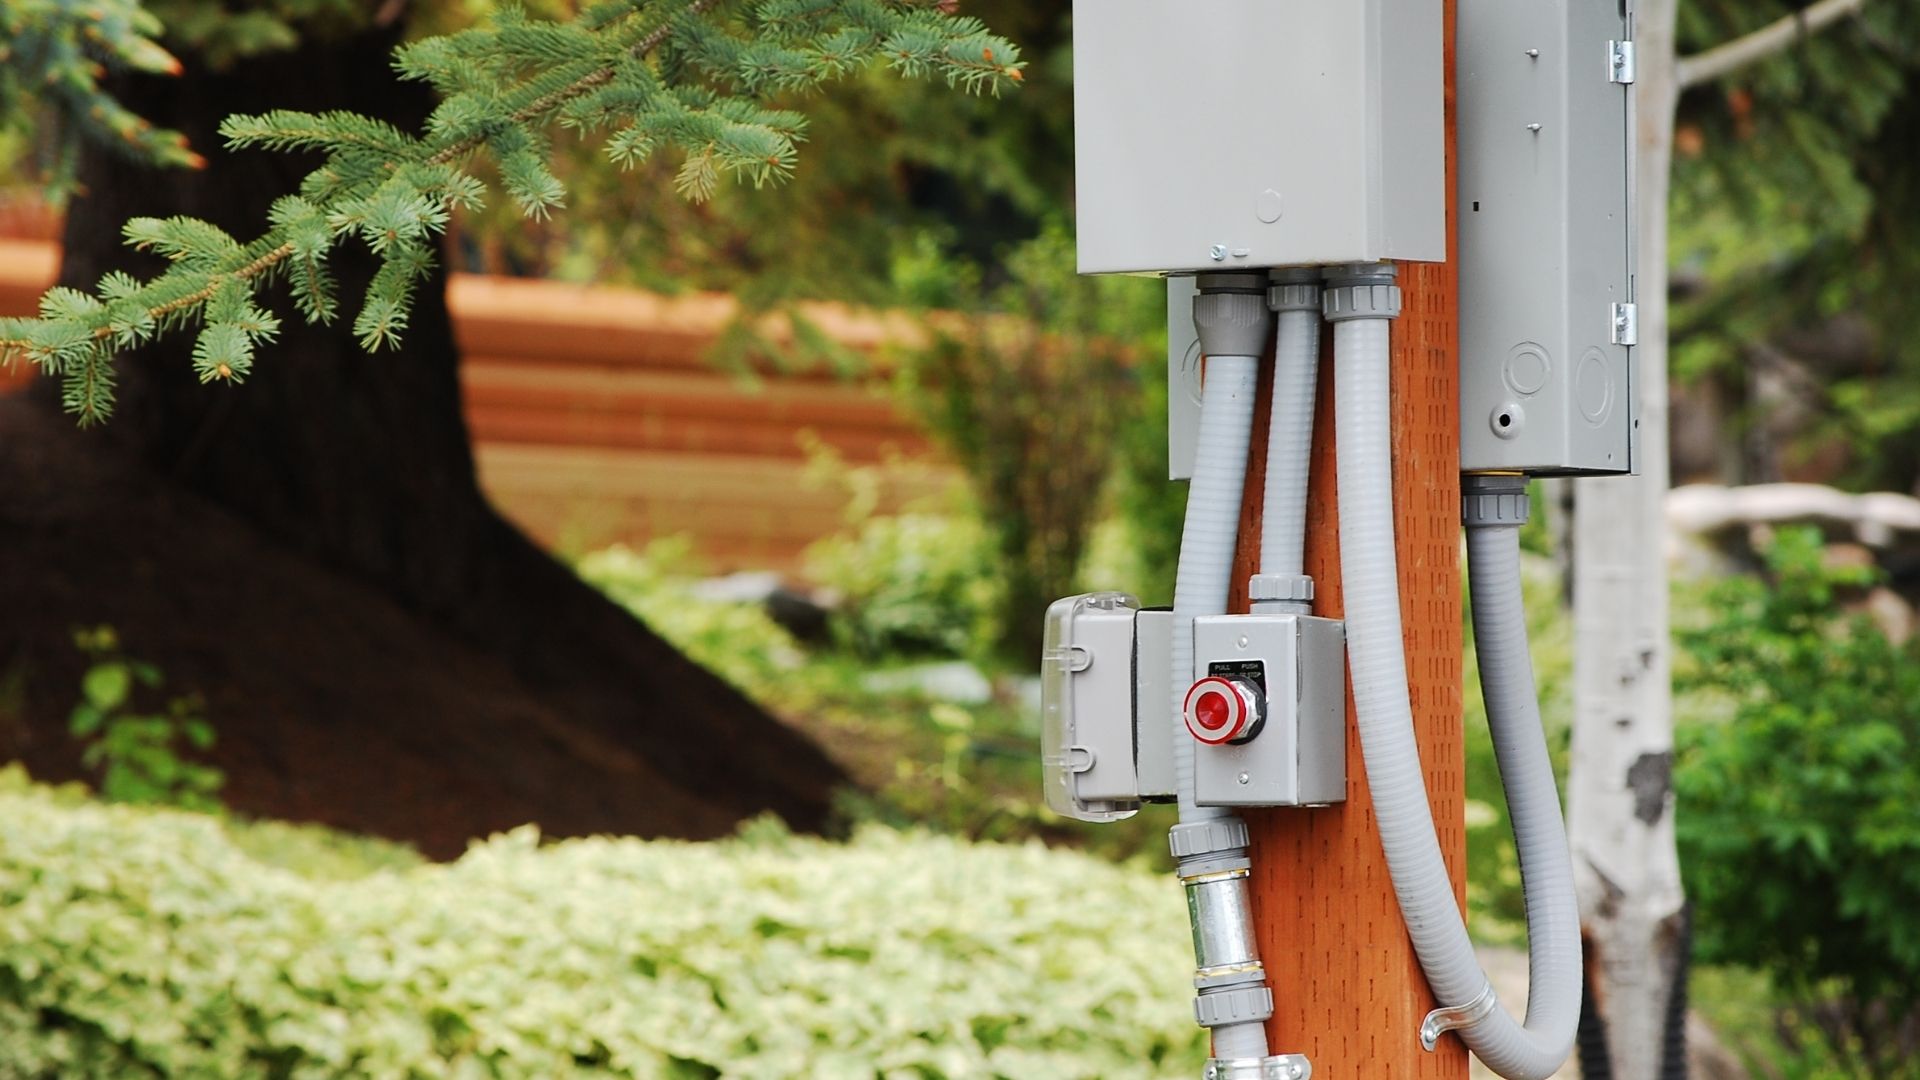
- Flexible conduit: Flexible conduit, typically made of plastic or metal, offers versatility and ease of installation in spaces where rigid conduit may not be feasible. It is commonly used for short runs or in areas with limited access.
Consider the specific requirements of your project, including the environment, the type of wiring or pipes, and any applicable building codes or regulations. Consult with a professional or conduct thorough research to determine the best conduit material for your needs.
Once you have selected the appropriate conduit material, you can proceed to the next step of determining the conduit path.
Step 3: Determining the Conduit Path
Once you have chosen the conduit material, the next step is to determine the path the conduit will take through the wall. Here’s how to go about it:
- Refer to your marked entry and exit points: Start by looking at the marks you made on the wall for the entry and exit points of the conduit. These points will serve as your reference as you determine the conduit’s path.
- Consider wall obstacles: Take into account any obstacles in the wall, such as studs, electrical wiring, or plumbing lines. You need to find a path that avoids these obstacles to ensure a smooth installation.
- Use a stud finder: If your wall contains studs, use a stud finder to locate and mark their positions. This will help you determine where you can safely drill holes for the conduit.
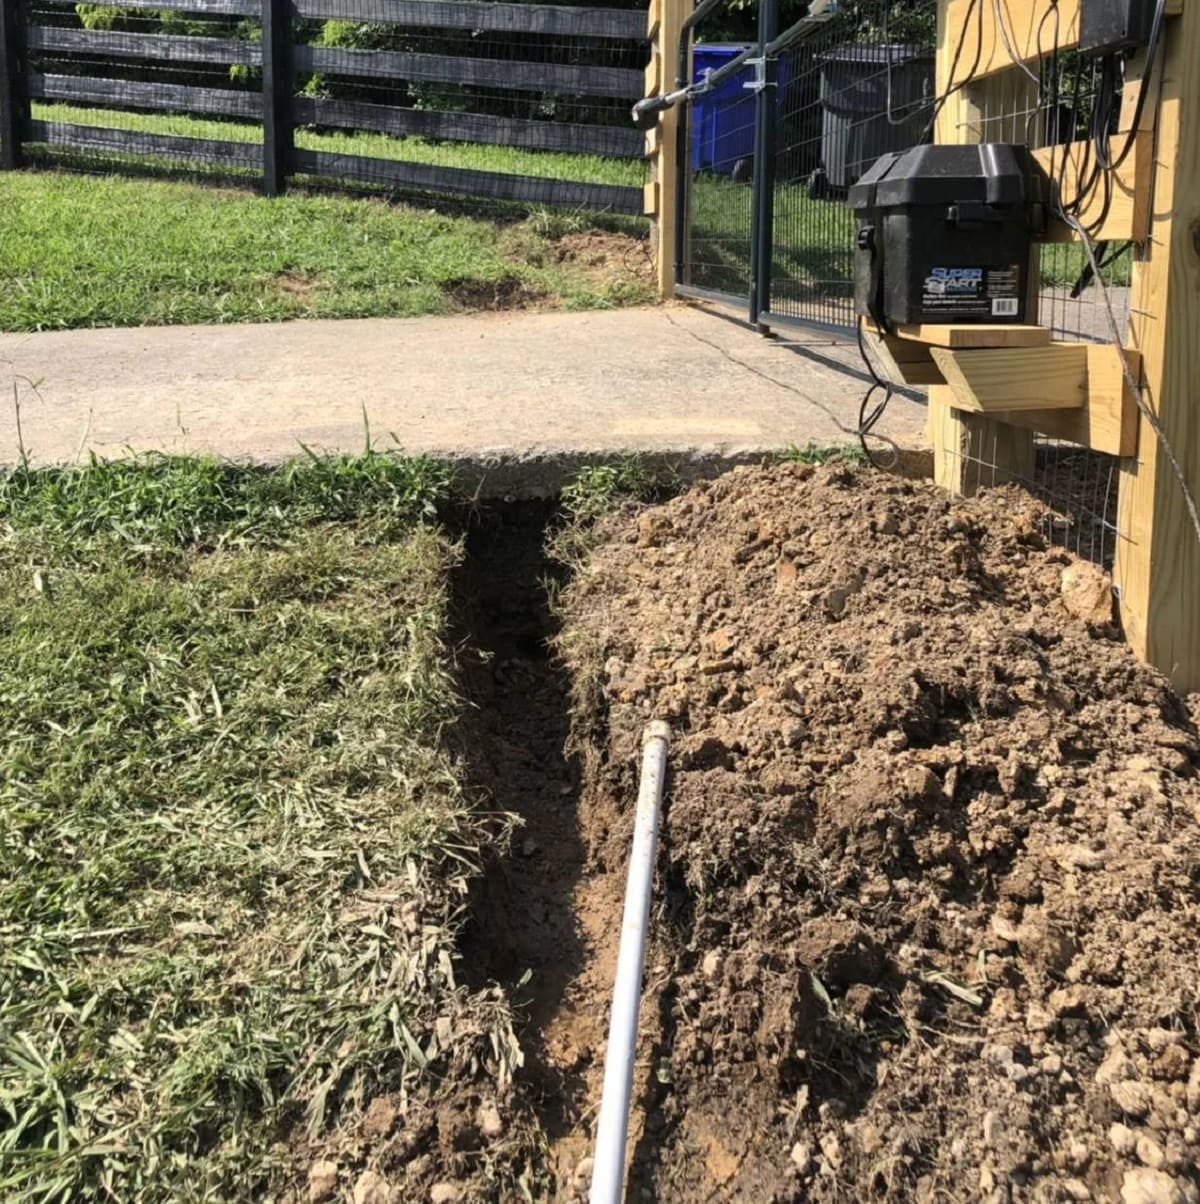
- Plan for straight and accessible runs: It is best to choose a path that involves straight runs as much as possible. Avoid excessive bends or sharp angles, as these can make it difficult to feed wires or pipes through the conduit in the future. Additionally, ensure that the conduit will be easily accessible for future maintenance or repairs.
- Consider aesthetic factors: If possible, consider the visual aesthetics of the conduit installation. Choose a path that minimizes its visibility or plan for ways to conceal the conduit, such as by using paintable conduit or routing it behind furniture or fixtures.
Take your time to carefully assess the wall and consider all the factors mentioned above. By planning the conduit’s path in advance, you can minimize complications and ensure a seamless installation process.
Step 4: Marking Reference Points on the Wall
Now that you have determined the path for your conduit, it is time to mark the reference points on the wall. These reference points will serve as your guide during the installation process. Here’s how to mark them:
- Start at the entry point: Begin by locating the entry point for the conduit on the wall. Use a pencil to make a small mark to indicate where the conduit will enter the wall.
- Measure and mark the desired height: Use a measuring tape to determine the desired height of the conduit from the floor or another reference point. Mark this measurement on the wall with a pencil.
- Measure and mark the exit point: Move along the determined path and measure the distance from the entry point to the exit point. Mark the exit point on the wall using a pencil.
- Double-check the marks: Take a step back and double-check the accuracy of your marks. Ensure they are aligned and appropriately positioned for the conduit installation.
- Label the marks: To avoid confusion during the installation, you can label the marks with reference numbers or symbols. This will help you keep track of the order and direction of the conduit.
Remember to handle your wall surfaces with care when marking the reference points. If you are unsure about making permanent marks, you can use removable tape or sticky notes instead.
By marking the reference points on the wall, you will have a clear visual guide throughout the installation process. This will help you maintain accuracy and ensure that the conduit is installed in the desired location.
Read more: How To Run Extension Cord Through Wall
Step 5: Drilling Holes for Conduit Entry and Exit
With the reference points marked on the wall, it’s time to drill the necessary holes for the conduit entry and exit. Properly drilling these holes is crucial for a successful conduit installation. Follow these steps:
- Choose the right drill bit: Select a drill bit that is appropriate for the size and material of your conduit. For smaller conduits, a standard twist bit may suffice. However, for larger conduits or if you are working with harder materials, such as steel, you may need a specialized drill bit.
- Secure the wall: To prevent any unwanted movement or damage, secure the wall with a clamp or by placing a piece of scrap wood behind it.
- Align the drill with the entry mark: Position the drill perpendicular to the wall and align the drill bit with the entry mark you made earlier.
- Start drilling: With the drill set to the appropriate speed, begin drilling the hole at a steady pace. Apply consistent pressure but avoid forcing the drill. Let the drill bit do the work.
- Drill through the wall: Continue drilling until the bit penetrates the wall and creates a hole of the required size for the conduit entry.
- Repeat for the exit point: Repeat the drilling process for the exit point, aligning the drill with the marked exit point and creating a hole of the necessary size.
- Clean any debris: Once the holes are drilled, use a brush or a vacuum to clean out any debris or dust from the holes. This will make it easier to install the conduit later.
Remember to work carefully and follow all safety precautions when drilling the holes. Ensure that the drill bit is sharp and in good condition to avoid any accidents or damage to the wall.
With the holes drilled, you are now ready to move on to the next step of installing the conduit through the wall.
When running conduit through a wall, be sure to use a stud finder to locate and avoid any structural supports. This will help ensure a safe and secure installation.
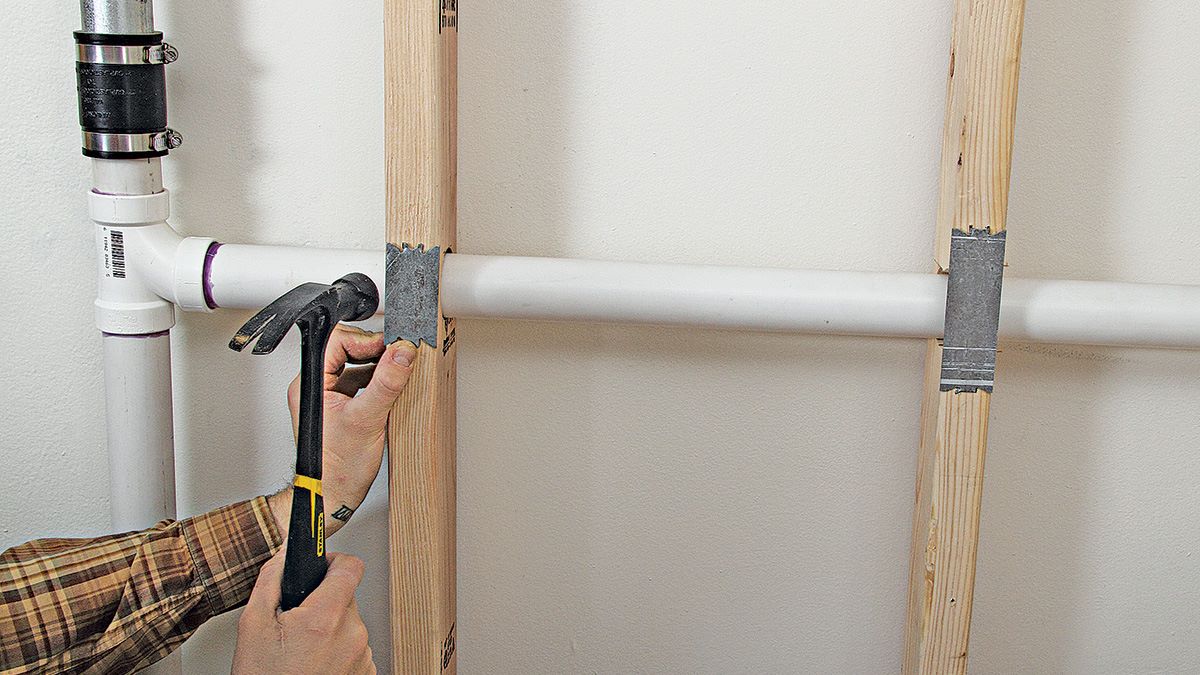
Step 6: Installing the Conduit Through the Wall
Now that you have drilled the entry and exit holes for the conduit, it’s time to install the conduit through the wall. Follow these steps for a successful installation:
- Measure the conduit length: Measure the distance between the entry and exit points on the wall. Add a few inches for flexibility and ease of installation.
- Cut the conduit: Using a saw or conduit cutter, cut the conduit to the measured length. Ensure a clean and straight cut.
- Thread the wires or pipes: If you are running electrical wires or plumbing pipes through the conduit, thread them through before installing the conduit. Take care to avoid any sharp bends or kinks.
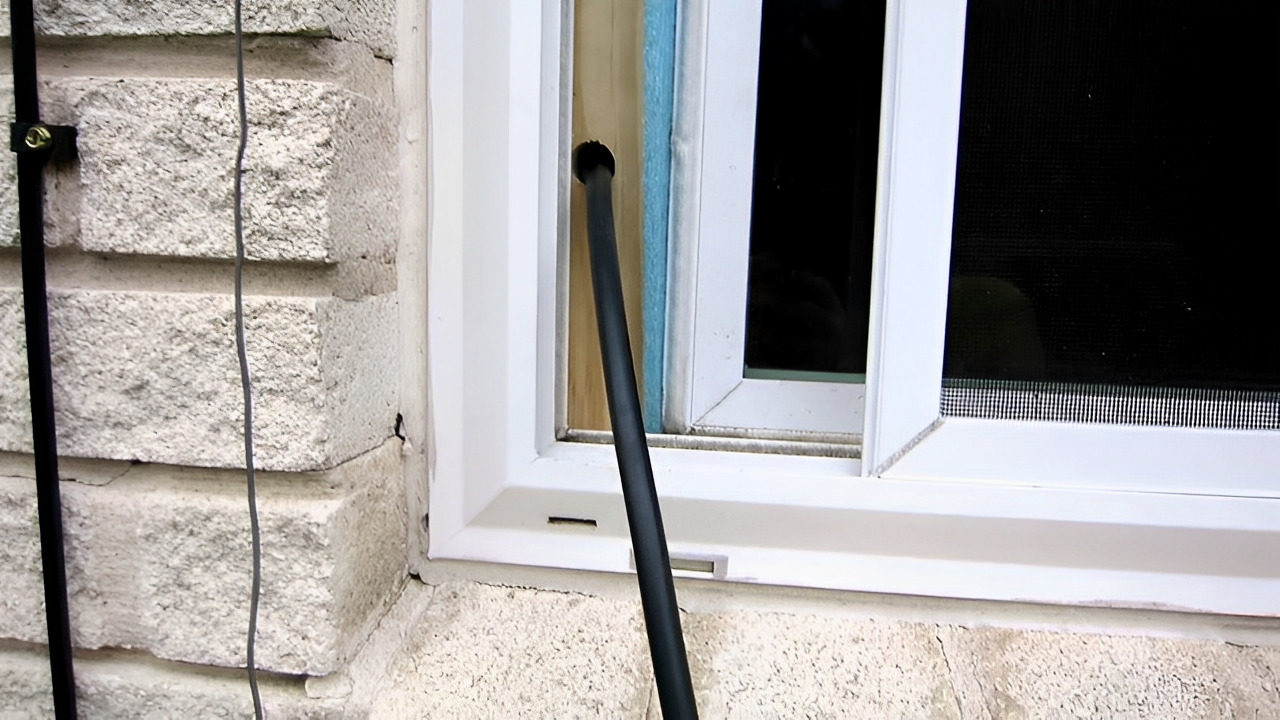
- Insert the conduit into the entry hole: Insert one end of the conduit into the entry hole in the wall. Gently push it into the hole until it reaches the other side.
- Guide the conduit through the wall: As you insert the conduit, guide it through the wall towards the exit hole. You may need to wiggle it gently or use a twisting motion to navigate any bends or obstacles.
- Ensure the conduit is properly aligned: Continuously check that the conduit is aligned with the reference marks on the wall and follow the desired path.
- Pull the conduit out of the exit hole: Once the conduit reaches the exit hole, pull it out from the wall, making sure it is fully extended.
During the installation process, be mindful of any obstacles or potential damage to the wires or pipes inside the conduit. Avoid excessive pulling or bending of the conduit to maintain the integrity of the installation.
Once the conduit is fully installed through the wall, you can move on to the next step of securing and supporting the conduit.
Step 7: Securing and Supporting the Conduit
After installing the conduit through the wall, it’s important to properly secure and support it to ensure its stability and longevity. Follow these steps to secure and support the conduit:
- Use conduit straps or clamps: Install conduit straps or clamps along the length of the conduit, starting from the entry point and ending at the exit point. These straps will help secure the conduit to the wall and prevent it from shifting or sagging over time.
- Space the straps evenly: Ensure that the straps are spaced evenly apart along the conduit. The recommended spacing is usually every 3 to 4 feet, but consult the manufacturer’s guidelines for specific recommendations.
- Secure straps to the wall: Use screws or other appropriate fasteners to secure the conduit straps to the wall. Make sure they are tightly secured for maximum support.
- Consider additional support: If the conduit is long or if it carries heavy loads, additional support may be necessary. This can be achieved by installing conduit hangers or supports in strategic locations along the conduit’s path.
- Route and secure any exposed sections: If there are any exposed sections of the conduit, such as along walls or ceilings, ensure that they are properly routed and secured as well. This will prevent unintentional damage and enhance the overall appearance of the installation.
By securing and supporting the conduit, you minimize the risk of damage and ensure its stability. This is particularly important if the conduit carries electrical wires or plumbing pipes, as any movement or strain can lead to performance issues or even safety hazards.
With the conduit securely in place, you can move on to the next step of sealing and finishing the wall openings.
Step 8: Sealing and Finishing the Wall Openings
Once you have installed the conduit and secured it in place, it’s time to seal and finish the wall openings around the conduit. This step is crucial to ensure a clean and professional-looking installation. Follow these steps:
- Inspect the wall openings: Take a close look at the entry and exit points of the conduit on the wall. Check for any gaps or uneven surfaces that need to be addressed.
- Apply caulk or sealant: Use a suitable caulk or sealant appropriate for the wall material to seal the openings around the conduit. Apply a generous bead of caulk around the edges of the openings to create a watertight seal.
- Smooth and level the caulk: Use a caulk smoothing tool or a moistened finger to smooth and level the caulk. This will create a clean and polished finish.
- Allow the caulk to dry: Follow the manufacturer’s instructions to allow the caulk to dry completely. This typically takes a few hours, but refer to the product label for specific drying times.
- Trim excess caulk: Once the caulk is fully dry, use a utility knife to carefully trim any excess caulk, ensuring a neat and tidy appearance.
- Paint or finish the wall: If desired, paint or finish the wall around the conduit to match the surrounding area. This will help blend the conduit installation seamlessly into the overall aesthetics of the space.
Sealing and finishing the wall openings around the conduit not only enhances the visual appeal of the installation but also prevents moisture or dust from entering the wall cavity. It provides a clean and professional finish that ensures the longevity of the conduit installation.
With the wall openings sealed and finished, you are now ready to move on to the final step: testing the conduit installation.
Read also: 12 Best Through Wall Conduit for 2024
Step 9: Testing the Conduit Installation
After completing the installation of the conduit, it is crucial to test its functionality to ensure everything is in proper working order. Testing the conduit installation will help uncover any potential issues or errors that need to be addressed. Follow these steps to test the conduit installation:
- Perform a visual inspection: Conduct a thorough visual inspection of the conduit installation. Check for any signs of damage, loose connections, or improper support. Verify that the conduit is properly secured and supported along its entire length.
- Check for obstructions: Make sure there are no obstructions inside the conduit that could impede the flow of wires or pipes. Use a flashlight to visually inspect the interior of the conduit from both the entry and exit points.
- Run wires or pipes through the conduit: If you haven’t done so already, run the necessary wires or pipes through the conduit. Ensure they fit properly without any excessive bending or strain.
- Test electrical connections: If the conduit is used for electrical wiring, test the connections to verify proper functionality. Use a multimeter or a voltage tester to check for continuity and ensure the wires are properly connected.
- Check plumbing flow: For conduit used for plumbing, check the flow of water through the pipes. Turn on the necessary faucets or fixtures and ensure there are no leaks or restrictions in the plumbing system.
- Verify functionality: Depending on the specific purpose of your conduit installation, test the devices, appliances, or systems connected to it. This could include switches, outlets, fixtures, or other equipment to ensure they are functioning correctly.
- Address any issues: If you encounter any issues or problems during the testing phase, troubleshoot and address them promptly. This may involve adjusting the conduit path, tightening connections, or seeking professional assistance if necessary.
Testing the conduit installation is vital to confirm that everything is in proper working order and to identify any potential issues early on. It ensures the safe and efficient operation of the electrical or plumbing systems connected to the conduit.
Once you have completed the testing phase and addressed any issues, you can rest assured that your conduit installation is functioning correctly and ready for use.
Conclusion
Congratulations! You have successfully learned how to run conduit through a wall. By following the steps outlined in this guide, you now have the knowledge and skills to tackle conduit installations for electrical or plumbing purposes with confidence.
Remember that careful planning and preparation are essential to ensure a smooth installation process. Take the time to assess your requirements, determine the conduit path, and choose the appropriate conduit material. Properly marking reference points on the wall, drilling holes, and installing the conduit are critical steps that must be executed with precision.
Securing and supporting the conduit, sealing and finishing the wall openings, and testing the conduit installation ensure the durability, functionality, and safety of the overall system. By paying attention to detail and addressing any issues that arise, you can ensure a successful conduit installation.
It is important to keep in mind that electrical and plumbing work can be complex and may require the assistance of a professional in some cases. If you are unsure or uncomfortable with any aspect of the conduit installation, it is always best to consult with a licensed electrician or plumber to ensure the job is completed safely and according to code.
With your newfound knowledge, you can confidently take on conduit installations for your home or projects. Whether you are running electrical wiring or plumbing pipes, the ability to run conduit through a wall is a valuable skill that can save you time, money, and potential headaches in the future.
Remember to always prioritize safety, follow industry best practices, and comply with local building codes and regulations. By doing so, you can successfully run conduit through walls and enjoy the benefits of a well-organized and efficient electrical or plumbing system.
Ready to tackle more DIY projects around your home? After mastering how to run conduit through a wall, you might want to extend your skills to setting up electrical wiring for your garage. For those who prefer a more detailed approach to wall work, getting a handle on conduit installation inside walls could be your next step. And if you're feeling particularly ambitious, why not dive into a variety of DIY home improvement tasks that can transform your space and save money? Each guide offers practical tips and straightforward advice to help you succeed.
Frequently Asked Questions about How To Run Conduit Through A Wall
Was this page helpful?
At Storables.com, we guarantee accurate and reliable information. Our content, validated by Expert Board Contributors, is crafted following stringent Editorial Policies. We're committed to providing you with well-researched, expert-backed insights for all your informational needs.


0 thoughts on “How To Run Conduit Through A Wall”