Articles
How To Mount A Ring Doorbell
Modified: August 31, 2024
Learn how to mount a Ring Doorbell with this informative article. Find step-by-step instructions and helpful tips to install your doorbell easily and securely.
(Many of the links in this article redirect to a specific reviewed product. Your purchase of these products through affiliate links helps to generate commission for Storables.com, at no extra cost. Learn more)
Introduction
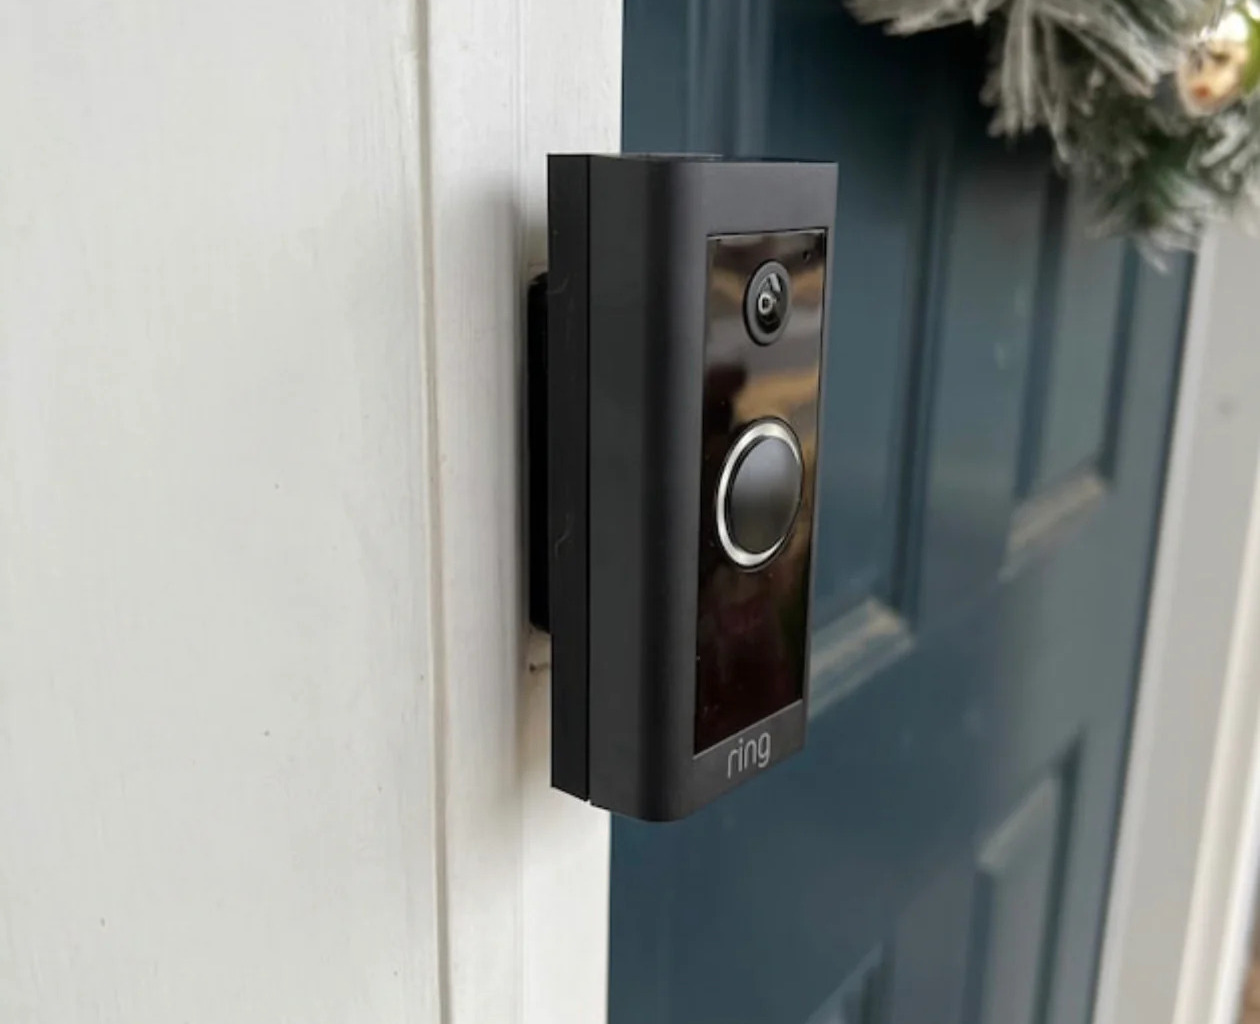
Welcome to our comprehensive guide on how to mount a Ring Doorbell! The Ring Doorbell is a popular smart home device that allows you to monitor your front door and receive notifications when someone is at your doorstep. Mounting the Ring Doorbell properly is crucial to ensure optimal functionality and security. In this article, we will walk you through the step-by-step process of mounting your Ring Doorbell with ease and precision.
Whether you are a DIY enthusiast or a beginner, this guide is designed to provide you with all the necessary information and instructions to mount your Ring Doorbell successfully. We will cover everything from gathering the required tools to adjusting the angle and securing the doorbell in place. So let’s get started and transform your front door into a smart and secure entryway!
Key Takeaways:
- Transform your front door into a smart and secure entryway by following our comprehensive guide on how to mount a Ring Doorbell. From gathering tools to configuring settings, you’ll be equipped for optimal performance and convenience.
- Enjoy the convenience of remote access, real-time notifications, and enhanced security with your newly mounted Ring Doorbell. Our step-by-step guide ensures a reliable and intelligent doorbell system for your front door.
Read also: 10 Amazing Ring Doorbell Mount for 2025
Step 1: Gather the Necessary Tools and Equipment
Before you begin the process of mounting your Ring Doorbell, you’ll need to gather the necessary tools and equipment. Having everything prepared beforehand will make the installation smoother and more efficient. Here’s a list of the items you’ll need:
- Ring Doorbell: The first and most important item on the list is, of course, the Ring Doorbell itself. Make sure you have the correct model and any additional components that may come with it.
- Screwdriver: Most Ring Doorbell models come with a screwdriver that is specifically designed for installation. If not, make sure you have a screwdriver with the appropriate head size for the screws included with your Ring Doorbell.
- Drill: Depending on your mounting surface, you may need a drill to create holes for the screws. Ensure that you have a compatible drill bit for the type of material you’ll be drilling into.
- Level: A level will help you ensure that your Ring Doorbell is properly aligned and mounted straight. You can use a traditional bubble level or a digital level on your smartphone.
- Tape Measure: It’s essential to measure the distance from the doorbell to other objects or features to ensure proper placement. A tape measure will come in handy for this task.
- Pencil or Marker: Having a pencil or marker nearby will allow you to mark the drill holes and make accurate measurements on the mounting surface.
- Optional: Drill Bits and Anchors: Depending on your mounting surface, you may need additional drill bits or anchors to secure the screws. Check the instructions provided with your Ring Doorbell for specific requirements.
By gathering all these tools and equipment beforehand, you’ll be well-prepared to tackle the installation process. Now that you have everything you need, let’s move on to the next step: choosing the ideal mounting location for your Ring Doorbell.
Step 2: Choose the Ideal Mounting Location
Selecting the right mounting location for your Ring Doorbell is crucial for optimal performance and visibility. It’s important to consider factors such as accessibility, Wi-Fi signal strength, and the field of view. Here are some guidelines to help you choose the ideal spot:
- Height and Accessibility: Ideally, the Ring Doorbell should be mounted at a height that allows for easy interaction and visibility. The recommended height is around 48 inches off the ground. This ensures that both adults and children can easily reach it.
- Wi-Fi Signal Strength: Ensure that the mounting location has a strong Wi-Fi signal. This will ensure a reliable connection between your Ring Doorbell and your smartphone or other devices. You can use the Ring app to check the signal strength in different areas around your front door.
- Field of View: Consider the field of view you want for your Ring Doorbell. It’s important to have a clear view of your front door and the surrounding area. Avoid mounting the doorbell in a location where it may be obstructed by walls, trees, or other objects.
- Wiring Accessibility: If you are using a wired Ring Doorbell, ensure that the mounting location provides easy access to existing wiring. This will simplify the installation process and prevent any potential issues with wiring connections.
- Personal Preferences: Take into account any personal preferences or specific requirements you may have. For example, if you want to capture a wider field of view, you may opt for a corner mount. If aesthetics are important to you, choose a location that complements the overall appearance of your front door area.
Once you’ve considered these guidelines, assess different areas around your front door that fulfill these criteria. Take your time to find the perfect spot that balances accessibility, signal strength, and visibility. Once you’ve chosen the location, we can move on to the next step: preparing the mounting surface.
Step 3: Prepare the Mounting Surface
Before mounting your Ring Doorbell, it’s crucial to prepare the mounting surface to ensure a secure and stable installation. Follow these steps to properly prepare the surface:
- Clean the Surface: Start by cleaning the area where you plan to mount the doorbell. Use a clean cloth or a mild detergent to remove any dirt, dust, or debris. A clean surface will promote better adhesion, especially if you’re using adhesive tape.
- Check the Surface Material: Determine the material of the mounting surface, as this will dictate the method of attaching the mounting bracket. Most commonly, mounting brackets are attached using screws and anchors. However, some surfaces may allow for adhesive tape or other alternative methods. Make sure you follow the manufacturer’s recommendations for your specific mounting surface.
-
Make Pilot Holes (if necessary): If you need to drill pilot holes for your screws, use a drill bit that matches the size of the screws provided with your Ring Doorbell. Mark the drill hole locations with a pencil or marker, ensuring that they align with the holes on the mounting bracket.
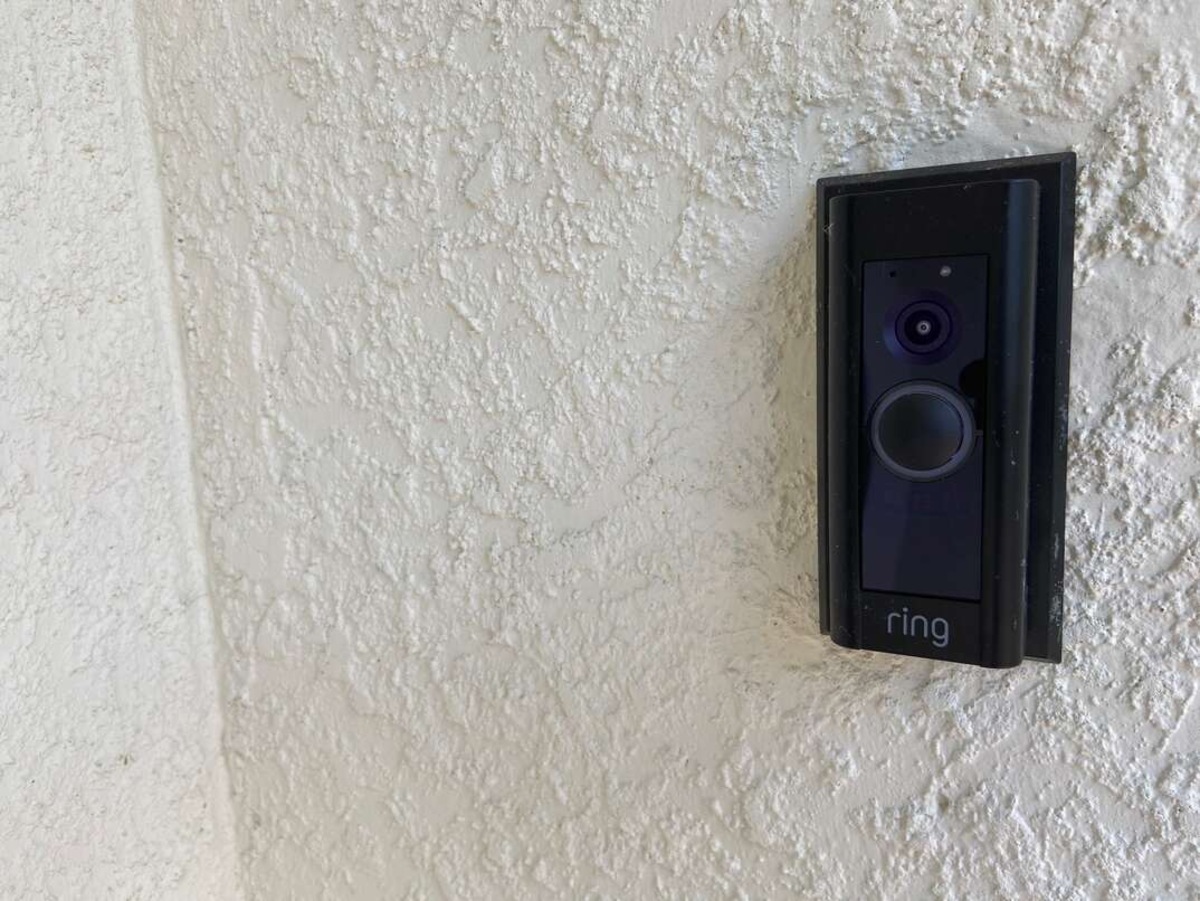
- Use Anchors (if necessary): For surfaces such as brick, concrete, or stucco, you may need to use anchors to secure the screws properly. Follow the instructions provided with your Ring Doorbell to determine the appropriate size and type of anchors for your mounting surface.
- Consider Using Adhesive Tape (if applicable): Some Ring Doorbell models come with adhesive tape as an alternative mounting option. If your mounting surface allows for it and you prefer not to use screws, carefully adhere the mounting bracket using the provided tape. Ensure that the surface is clean and dry before applying the adhesive tape for optimal adhesion.
By properly preparing the mounting surface, you’ll ensure a secure and stable installation for your Ring Doorbell. Take your time to clean the surface, check the material, and follow the appropriate method for your specific surface type. Once you’ve completed these steps, you’re ready to move on to the next step: attaching the mounting bracket.
Step 4: Attach the Mounting Bracket
Now that you have prepared the mounting surface, it’s time to attach the mounting bracket for your Ring Doorbell. The mounting bracket provides a stable base for the doorbell to be securely mounted. Follow these steps to attach the mounting bracket:
- Align the Bracket: Hold the mounting bracket against the prepared surface, ensuring that it is level and aligned according to your preferred mounting location. Use a level to double-check the alignment and adjust if necessary.
- Mark the Drill Holes: With the bracket in position, use a pencil or marker to mark the locations of the drill holes onto the mounting surface. Make sure the marks are visible and accurately correspond to the holes on the bracket.
- Drill Pilot Holes (if necessary): If you are using screws to attach the mounting bracket, drill pilot holes into the marked locations using a drill bit that matches the size recommended by the manufacturer. Be careful not to drill too deep – the pilot holes should be just deep enough to accommodate the screws.
- Attach the Mounting Bracket: Place the mounting bracket back onto the prepared surface, aligning the holes with the pilot holes or marker points. Secure the bracket by inserting the screws through the holes and into the pilot holes. Use a screwdriver to tighten the screws, ensuring that the bracket is firmly attached to the surface.
By following these steps, you will securely attach the mounting bracket for your Ring Doorbell. Ensure that the bracket is straight, level, and properly secured to provide a stable base for the doorbell. Once you have completed this step, it’s time to move on to the next: connecting the doorbell to existing wiring (if applicable).
Step 5: Connect the Doorbell to Existing Wiring (if applicable)
If you have a wired Ring Doorbell model, you may have the option to connect it to existing doorbell wiring for power. This step-by-step guide will walk you through the process of connecting your Ring Doorbell to the existing wiring:
- Turn Off Power: Before working with any electrical connections, make sure to turn off the power supply to your existing doorbell at the circuit breaker. This will ensure your safety during the installation process.
- Remove Existing Doorbell: If you have an existing doorbell, you’ll need to remove it from the mounting location. Carefully unscrew the wires connected to the doorbell and set it aside.
- Inspect Wiring: Take a close look at the wires connected to your existing doorbell. Make sure they are in good condition and not damaged. If you notice any frayed or exposed wires, use wire cutters to trim them back.
- Connect the Wires: On the Ring Doorbell’s mounting bracket, you’ll find terminals labeled for wiring connections. Typically, there will be two terminals – one for the front doorbell and one for the transformer. Strip the ends of the existing wires and connect them to the corresponding terminals on the Ring Doorbell’s mounting bracket. Follow the manufacturer’s instructions to ensure proper wiring connections.
- Secure the Wiring: Once the wires are connected, secure them in place using the provided wire clips or the screw terminals on the mounting bracket. This will prevent them from coming loose or getting damaged during installation.
Connecting your Ring Doorbell to existing wiring can provide a continuous power source, eliminating the need for frequent battery replacements. However, it’s essential to follow safety precautions and ensure that the power is turned off before working with any electrical connections. If you are unsure or uncomfortable working with electrical wiring, it is always recommended to consult a professional electrician.
Once you’ve successfully connected the doorbell to the existing wiring (if applicable), you’re ready to move on to the next step: mounting the Ring Doorbell.
When mounting a Ring Doorbell, make sure to choose a location that has a strong Wi-Fi signal and a clear view of the area you want to monitor. Also, use the provided level tool to ensure the doorbell is mounted straight.
Step 6: Mount the Ring Doorbell
Now that you have prepared the mounting surface and, if applicable, connected the Ring Doorbell to existing wiring, it’s time to mount the doorbell itself. Follow these steps to ensure a secure and accurate installation:
- Attach the Doorbell to the Bracket: Take your Ring Doorbell and align it with the mounting bracket. Carefully slide the doorbell onto the bracket until it clicks into place. Ensure that the doorbell is securely attached and does not wobble or move.
- Double-check the Alignment: Use a level to ensure that the Ring Doorbell is aligned properly. It should be straight and level with the mounting surface. Make any necessary adjustments by gently rotating the doorbell until it is perfectly aligned.
- Check for Proper Clearance: Verify that there is enough clearance around the doorbell to allow for the camera’s field of view. Ensure that there are no obstructions that could block the doorbell’s view or interfere with its functionality.
- Test the Stability: Before moving on, lightly shake the Ring Doorbell to ensure that it is securely mounted and does not move or become loose. If it feels unstable, readjust the mounting or screws as necessary to provide a more secure fit.
By following these steps, you will mount the Ring Doorbell securely and ensure that it is aligned correctly. Take your time to double-check the alignment and stability of the doorbell before moving on to the next step.
Speaking of the next step, let’s move on to Step 7: adjusting the angle and leveling the doorbell.
Step 7: Adjust the Angle and Level the Doorbell
After mounting your Ring Doorbell, it’s important to adjust the angle and level the doorbell to ensure optimal camera coverage and a professional appearance. Follow these steps to properly adjust the angle and level the doorbell:
- Open the Ring App: Open the Ring app on your smartphone and ensure that your Ring Doorbell is connected and recognized by the app. This will allow you to access the camera view and make adjustments.
- Access the Live View: Navigate to the Live View of your Ring Doorbell within the app. This will display the camera’s perspective and allow you to see what the doorbell is capturing.
- Adjust the Angle: Using the Live View, adjust the angle of the Ring Doorbell to capture the desired area. This may involve tilting the doorbell up, down, or sideways. Take into consideration the field of view and any specific areas you want to monitor, such as the front door or porch.
- Check for Optimal Coverage: Make sure the camera view covers the intended area without any blind spots. Test the field of view by walking in different directions and assessing the camera’s coverage. Make adjustments as needed to ensure maximum visibility.
- Level the Doorbell: Use a level to ensure that the Ring Doorbell is level from side to side. Adjust the positioning, if necessary, to achieve a level appearance. This will give your installation a polished and professional look.
- Test the Adjustments: Once you’ve made the necessary adjustments, test the functionality of the Ring Doorbell. Verify that the camera captures clear footage, the motion sensing works as expected, and the doorbell notifications are functioning correctly.
It’s essential to take your time during this step to achieve the desired camera angle and a level appearance. By making careful adjustments and testing the functionality, you’ll ensure that your Ring Doorbell performs optimally and captures the necessary footage for security and convenience.
With the angle and level adjusted, it’s time to move on to Step 8: installing the faceplate and securing the doorbell.
Step 8: Install the Faceplate and Secure the Doorbell
Installing the faceplate and securing the Ring Doorbell is the final step to complete the mounting process. Follow these steps to ensure a secure and polished installation:
- Remove the Faceplate: Start by removing the faceplate of your Ring Doorbell. This can usually be done by gently pulling it away from the device. Set the faceplate aside.
- Align the Faceplate: Align the holes on the faceplate with the corresponding screws or tabs on the back of the Ring Doorbell. Ensure that it is properly aligned and fits snugly against the device.
- Secure the Faceplate: Once the faceplate is aligned, press it firmly against the Ring Doorbell to secure it in place. Make sure it is flush against the device and that there are no gaps or loose sections.
- Tighten the Security Screws: If your Ring Doorbell model has security screws, use the provided screwdriver to tighten them. This will prevent unauthorized removal of the faceplate and ensure that the doorbell is secure.
- Test the Security: Give the Ring Doorbell a light tug to ensure that it is securely attached and that the faceplate does not come loose. If it feels stable and does not move, you have successfully installed and secured the doorbell.
By following these steps, you will complete the mounting process of your Ring Doorbell. Installing the faceplate ensures that the device is protected and gives it a finished look. It also provides an added layer of security by securing the device in place.
With the faceplate installed and the doorbell secured, you’re almost ready to start using your Ring Doorbell. Before that, however, make sure to complete Step 9: testing the doorbell and configuring the settings.
Read more: Why Is My Ring Doorbell Not Ringing
Step 9: Test the Doorbell and Configure the Settings
Now that you have successfully mounted and secured your Ring Doorbell, it’s time to test its functionality and configure the settings. Follow these steps to ensure that your doorbell is working correctly:
- Power On the Doorbell: If you have a battery-powered Ring Doorbell, insert the battery and power on the device. If you have a wired model, turn on the power at the circuit breaker.
- Connect to Wi-Fi: Ensure that your Ring Doorbell is connected to your home’s Wi-Fi network. Check the Ring app on your smartphone or follow the instructions provided to connect the doorbell to Wi-Fi. A stable connection is necessary for real-time notifications and remote access.
- Test the Doorbell Button: Press the doorbell button to test if it triggers the expected sound or chime. If you have a wireless chime accessory, make sure it is properly paired and rings when the doorbell button is pressed. If the doorbell doesn’t produce any sound, check the app’s settings and verify that audio alerts are enabled.
- Adjust Motion Sensitivity: Use the Ring app to adjust the motion sensitivity settings according to your preferences. This will determine how sensitive the doorbell is to detect motion and send alerts. Fine-tune the settings to avoid unnecessary alerts while ensuring that important events are captured.
- Set Up Notifications: Customize the notification settings in the Ring app to receive alerts and notifications on your smartphone or other devices. Decide if you want to receive real-time notifications, email notifications, or both. Adjust the settings to suit your needs and preferences.
- Configure Additional Features: Explore the Ring app to configure additional features and settings, such as video recording, two-way audio, and integration with other smart home devices. Take the time to familiarize yourself with the available options and personalize your Ring Doorbell experience.
By testing the doorbell and configuring the settings, you will ensure that your Ring Doorbell is fully set up and ready to enhance the security and convenience of your home. Take the time to adjust the motion sensitivity, educate yourself about the notification options, and explore the extended features provided by the Ring app.
With Step 9 complete, you have now successfully mounted, tested, and configured your Ring Doorbell. Enjoy the added peace of mind and convenience that comes with this smart home device!
Conclusion
Congratulations on successfully mounting your Ring Doorbell! By following the step-by-step guide provided in this article, you have learned how to gather the necessary tools, choose the ideal mounting location, prepare the mounting surface, attach the mounting bracket, connect the doorbell to existing wiring (if applicable), mount the doorbell, adjust the angle and level, install the faceplate, secure the doorbell, test its functionality, and configure the settings. You are now fully equipped with the knowledge and skills to ensure optimal performance and security for your Ring Doorbell.
The Ring Doorbell is an excellent addition to any home, providing convenience and peace of mind by allowing you to monitor your front door and receive notifications when someone is at your doorstep. With its easy installation process and versatile features, the Ring Doorbell offers an enhanced level of security and access control for both homeowners and renters.
To maintain the optimal performance of your Ring Doorbell, periodically check for firmware updates and follow any recommended maintenance procedures provided by the manufacturer. Regularly clean the camera lens to ensure clear image quality and remove any debris or obstructions that may interfere with its functionality.
Remember to always prioritize safety when working with electrical connections. If you have any doubts or concerns, it is recommended to consult a professional electrician who can assist you with the installation process.
Now that your Ring Doorbell is fully installed and configured, enjoy the convenience of remote access, real-time notifications, and enhanced security. Whether you’re at home or away, you can rest assured that you have a reliable and intelligent doorbell system keeping watch over your front door.
Thank you for choosing this comprehensive guide on how to mount a Ring Doorbell. We hope you found it informative and helpful. Happy monitoring and enjoy the benefits of your Ring Doorbell!
Frequently Asked Questions about How To Mount A Ring Doorbell
Was this page helpful?
At Storables.com, we guarantee accurate and reliable information. Our content, validated by Expert Board Contributors, is crafted following stringent Editorial Policies. We're committed to providing you with well-researched, expert-backed insights for all your informational needs.


0 thoughts on “How To Mount A Ring Doorbell”