Articles
How To Store Dry Beans In Mason Jars
Modified: October 20, 2024
Learn how to store dry beans in mason jars with our helpful articles. Keep your beans fresh and organized for long-term use.
(Many of the links in this article redirect to a specific reviewed product. Your purchase of these products through affiliate links helps to generate commission for Storables.com, at no extra cost. Learn more)
Introduction
Storing dry beans in mason jars is not only a practical and convenient way to keep them fresh, but it also adds a touch of rustic charm to your pantry storage. Mason jars have long been a staple in home preservation methods, and their durability and airtight seal make them ideal for storing various food items, including dry beans.
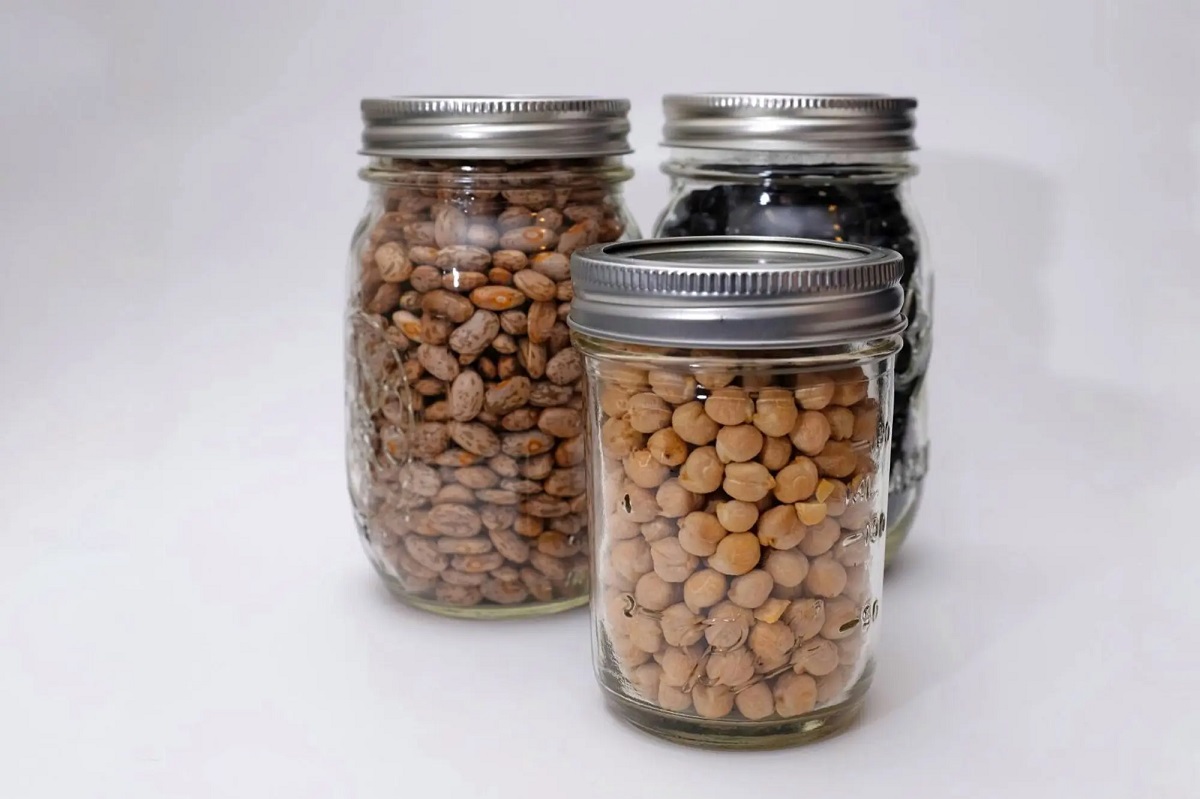
Dry beans, such as kidney beans, black beans, and chickpeas, are pantry essentials and a versatile ingredient in countless recipes. By properly storing them in mason jars, you can ensure their longevity, maintain their quality, and have a readily available supply to add to your favorite dishes.
In this article, we will guide you through the process of storing dry beans in mason jars, from choosing the right type of jars to properly sealing and storing them. We will also cover important tips for maintaining the freshness and usability of your stored beans, so you can enjoy their deliciousness for an extended period.
So, let’s dive in and discover the steps to store dry beans in mason jars, and how this method can revolutionize your pantry organization and cooking experience!
Key Takeaways:
- Store dry beans in mason jars for prolonged freshness, convenient portion control, and an eco-friendly pantry solution. Enjoy organized, visually appealing storage while reducing plastic waste.
- Ensure the longevity of your stored dry beans by choosing the right mason jars, proper cleaning, sealing, and pantry storage. Experiment with diverse recipes for delicious culinary creations.
Read more: How To Store Cooked Beans In Mason Jars
Why Store Dry Beans in Mason Jars?
Storing dry beans in mason jars offers several benefits compared to other storage methods. Here are a few reasons why you should consider using mason jars for your dry bean storage:
- Airtight Seal: Mason jars are designed to create an airtight seal, preventing moisture, oxygen, and pests from entering the jars and compromising the quality of the beans. This ensures that your dry beans stay fresh for a longer period.
- Prolonged Shelf Life: The airtight seal provided by mason jars helps to preserve the flavor, texture, and nutritional value of dry beans for an extended period. Properly stored dry beans can last up to a year or more, ensuring that you always have a readily available supply for your culinary adventures.
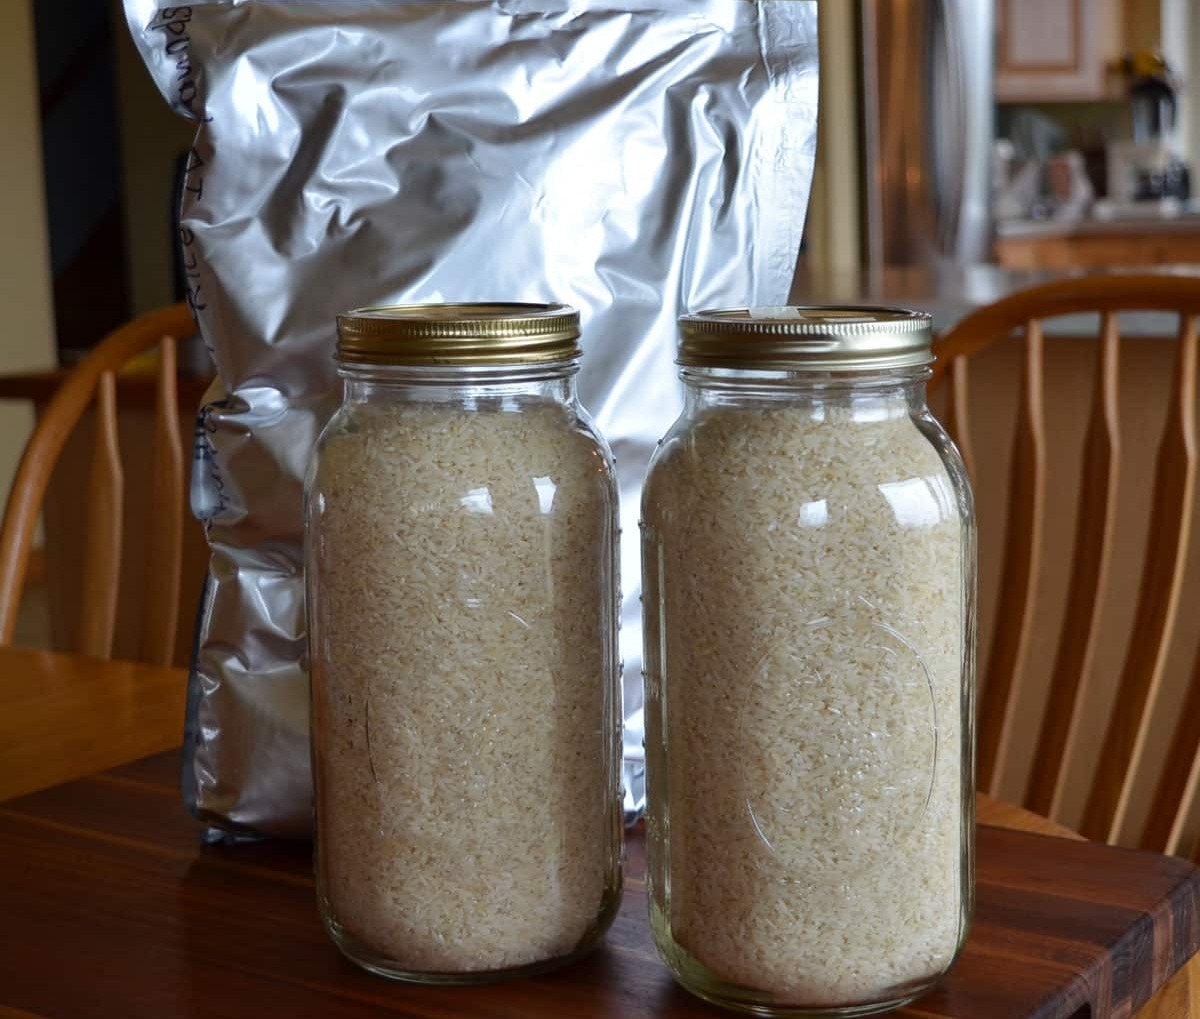
- Visual Appeal: Storing dry beans in mason jars adds a touch of beauty and organization to your pantry. The transparent glass allows you to see the beans at a glance, making it easy to identify and choose the beans you need for your recipes.
- Eco-Friendly Solution: Mason jars are reusable and eliminate the need for single-use plastic bags or containers. By using mason jars for dry bean storage, you contribute to reducing plastic waste and promoting sustainable living.
- Convenient Portion Control: Storing beans in smaller mason jars allows for portion control. You can measure out the exact amount of beans needed for a recipe without the hassle of opening and resealing larger containers. This helps to minimize waste and ensures you use the right amount every time.
Overall, storing dry beans in mason jars combines practicality, aesthetics, and sustainability. It helps you keep your pantry organized, extends the shelf life of your beans, and reduces waste. So, grab your mason jars and let’s get started with the process of storing dry beans!
Choosing the Right Type of Mason Jars
When it comes to storing dry beans in mason jars, choosing the right type of jars is crucial for maintaining the freshness and quality of your beans. Here are some factors to consider when selecting mason jars for dry bean storage:
- Size: Mason jars come in various sizes, including pint, quart, and half-gallon options. The size you choose depends on your storage needs and the quantity of dry beans you typically use. If you go through beans quickly, smaller pint-sized jars may be sufficient. However, if you use beans in larger quantities, quart or half-gallon jars may be more suitable.
- Wide Mouth vs. Regular Mouth: Mason jars are available in both wide mouth and regular mouth options. Wide-mouth jars have a larger opening, making them easier to fill and empty. They are also more suitable for storing larger beans, like chickpeas. Regular-mouth jars, on the other hand, are better for smaller beans, like black beans or lentils, as they prevent them from spilling out when you pour.
- Glass Type: Mason jars are typically made of either standard glass or tempered glass. Standard glass jars are suitable for general dry bean storage and are often more affordable. Tempered glass jars, such as those marketed as freezer-safe or with a higher resistance to thermal shock, are more durable and can withstand extreme temperatures. These jars are ideal if you plan to store beans in the freezer or if your pantry experiences fluctuating temperatures.
- Lid Type: Mason jars usually come with two-piece lids—metal lids and screw-on bands. Metal lids have a rubberized sealing compound that creates the airtight seal when properly tightened. Some brands also offer plastic lids as an alternative, which are convenient for everyday use but may not provide as secure of a seal for long-term storage.
- Brand: There are several reputable brands that produce quality mason jars, such as Ball, Kerr, and Weck. These brands offer a range of sizes and styles to choose from, ensuring you can find the jars that best suit your needs and preferences. It’s always a good idea to read reviews and select jars from trusted brands.
Consider your storage requirements, bean quantity, jar mouth size, glass type, lid preference, and brand reputation when choosing the right mason jars for storing dry beans. Taking these factors into account will help ensure that your beans stay fresh and well-preserved for an extended period of time.
Cleaning and Sterilizing the Mason Jars
Before storing dry beans in mason jars, it’s crucial to clean and sterilize the jars to ensure proper food safety and prevent any contamination. Here’s a step-by-step guide on how to clean and sterilize your mason jars:
- Wash the Jars: Start by washing the mason jars, lids, and screw-on bands with warm, soapy water. Use a bottle brush or sponge to scrub the jars thoroughly, both inside and outside. Rinse them well to remove any soap residue.
- Inspect for Damage: Examine the jars for any cracks, chips, or deformities. Do the same for the lids and screw-on bands. Discard any damaged jars or lids, as they can compromise the seal and safety of the stored beans.
- Sterilize the Jars: To ensure proper sterilization, there are a few methods you can choose from:
- Boiling Method: Place the washed jars, lids, and screw-on bands into a large pot filled with water. Make sure the jars are fully submerged. Bring the water to a rolling boil and let the jars boil for 10 minutes. Turn off the heat and allow them to cool in the pot before removing and drying them.
- Oven Method: Place the washed jars on a baking sheet and arrange the lids and screw-on bands separately. Preheat the oven to 250°F (121°C) and place the baking sheet with the jars, lids, and bands in the oven for 20 minutes. Remove them carefully using oven mitts, as they will be hot. Allow them to cool before using.
- Dishwasher Method: If your mason jars and lids are dishwasher-safe, you can run them through a hot and sanitizing cycle in your dishwasher. Ensure that the water temperature reaches at least 180°F (82°C) to achieve proper sterilization.
- Inspect for Contamination: Once the jars are cool, inspect them for any signs of contamination, such as residue or mold. If you notice any, wash the jars again with warm, soapy water or repeat the sterilization process.
- Dry the Jars: Allow the sterilized jars, lids, and screw-on bands to air dry completely on a clean drying rack or towel. Make sure there is no moisture remaining, as it can lead to mold growth and spoilage of the beans.
By following these cleaning and sterilization steps, you ensure that your mason jars are free from any contaminants and provide a safe environment for storing your dry beans. Once your jars are sterilized and dry, you’re ready to move on to preparing the dry beans for storage.
Preparing the Dry Beans for Storage
Properly preparing dry beans before storing them in mason jars is essential for ensuring their quality and longevity. Follow these steps to prepare your dry beans for storage:
- Inspect and Sort: Pour the dry beans onto a clean, flat surface and inspect them for any signs of damage, such as mold, discoloration, or insect infestation. Remove any beans that appear damaged or discolored. Then, sort the beans to remove any debris or foreign objects, like small stones or broken beans.
- Wash the Beans: Rinse the sorted beans under cold running water to remove any remaining dirt or dust. Gently rub the beans between your fingers or use a colander with small holes to ensure thorough cleaning.
- Soak the Beans: Place the washed beans in a large bowl or pot and cover them with water. The water level should be at least two inches above the beans. Allow the beans to soak overnight or for a minimum of 8-12 hours. Soaking helps to soften the beans, shorten the cooking time, and improve digestibility.
- Drain and Rinse: After soaking, drain the beans and rinse them under cold water to remove any leftover soaking liquid. Discard the soaking water, as it may contain anti-nutrients that could affect the flavor and digestion of the beans.
- Optional Pre-Cooking: Some people prefer to pre-cook the beans before storing them in mason jars. This step is not necessary but can help speed up the cooking process when using the beans. To pre-cook, place the drained and rinsed beans in a pot, cover them with water, and bring to a boil. Let them simmer for about 10-15 minutes, then drain and rinse again.
By inspecting, sorting, washing, soaking, and optionally pre-cooking your dry beans, you ensure that they are clean, free from debris, and ready for long-term storage. Once the beans are properly prepared, it’s time to move on to filling the mason jars with the dry beans.
Read more: How To Store Mason Jars
Filling the Mason Jars with Dry Beans
Now that your mason jars are clean and your dry beans are prepared, it’s time to fill the jars with the beans. Follow these steps to fill the mason jars properly:
- Select Your Filling Method: There are two common methods for filling mason jars with dry beans—ladling and funneling. Choose the method that works best for you.
- Ladling Method: With this method, use a ladle to scoop the prepared dry beans from a bowl or pot and transfer them directly into the mason jars. Fill each jar, leaving a bit of space at the top to allow for expansion.
- Funneling Method: If you prefer a more precise and mess-free filling process, use a wide-mouth funnel. Place the funnel securely on top of the mason jar, and carefully pour the beans into the jar, ensuring that they pass through the funnel without spillage.
- Fill the Jars Evenly: Distribute the beans evenly in each mason jar to ensure uniformity. Gently tap the jars on a flat surface to allow the beans to settle naturally. Avoid packing the beans too tightly, as this can reduce airflow and potentially lead to spoilage.
- Leave Head Space: When filling the jars, leave about 1 inch of headspace at the top. This space allows for expansion as the beans absorb moisture during cooking or if you choose to pre-soak them before cooking. It also provides room to create a proper seal.
- Wipe the Jar Rims: Before sealing the jars, use a clean, damp cloth or paper towel to wipe any bean particles or moisture from the rims of the jars. This step helps ensure a clean seal and prevents any potential contamination.
By following these steps, you can efficiently fill your mason jars with the prepared dry beans. Once your jars are filled, it’s time to seal them properly to maintain the freshness and longevity of the stored beans.
To store dry beans in mason jars, make sure the jars are clean and dry before filling them with the beans. Store the jars in a cool, dark place to maintain freshness.
Sealing the Mason Jars Properly
Properly sealing your mason jars is essential for keeping your stored dry beans fresh and free from moisture and air. Follow these steps to ensure that you seal the jars effectively:
- Place the Lids: Take the metal lids that came with your mason jars and place them on top of the jars, ensuring they are centered and aligned properly.
- Secure with Screw-On Bands: Once the lids are in place, carefully screw on the metal bands over the lids. Only tighten the bands until they are snug, but avoid overtightening, as this can hinder the jars’ ability to seal properly.
- Check for Proper Seal: After securing the screw-on bands, press down on the center of each lid. If you hear a popping sound and the lid stays down, it indicates a proper seal. If the lid pops back up, however, it suggests that the jar did not seal correctly, and you should immediately use the beans or reprocess them using a new lid.
- Label the Jars: To keep track of the contents and date of storage, consider labeling your jars. You can use small stickers, adhesive labels, or even a marker directly on the lid or jar. This labeling will help you easily identify the beans and ensure that you use the oldest ones first.
- Store the Jars Properly: Once sealed and labeled, store the filled mason jars in a cool, dark, and dry place, such as a pantry or cupboard. Avoid exposure to direct sunlight or high temperatures, as they can affect the quality of the beans. Proper storage conditions will help maintain the flavor, texture, and nutritional value of the stored beans.
By correctly sealing your mason jars and storing them in appropriate conditions, you can ensure that your dry beans remain fresh and of high quality for an extended period. With the jars properly sealed, you can confidently store them in your pantry and enjoy the convenience of readily available beans whenever you need them.
Storing Mason Jars in the Pantry
Properly storing your mason jars in the pantry is crucial to maintain the quality and longevity of the stored dry beans. Follow these guidelines to ensure the best conditions for storing your mason jars:
- Choose a Cool and Dry Location: Select a spot in your pantry that is cool, dry, and away from direct sunlight. Avoid areas near heat sources or appliances that generate heat, as excessive heat can decrease the shelf life of the stored beans.
- Keep Jars Upright: Store the mason jars in an upright position to prevent any leakage or spillage of the contents. Keeping them upright also helps maintain the intended seal and prevents any unnecessary exposure to air or moisture.
- Organize by Date: Arrange your jars in the pantry by date of storage, placing the oldest jars in front. This way, you’ll be able to use the beans in the order they were stored, ensuring that you rotate your stock and prevent any beans from going unused and expiring.
- Consider Shelving or Storage Racks: To maximize space and optimize organization, you may want to invest in shelving or storage racks designed specifically for mason jar storage. This will help keep your pantry tidy and allow for easy access to your beans.
- Monitor the Temperature: Regularly check the temperature in your pantry to ensure it remains within the ideal range. Aim for a temperature between 50°F (10°C) and 70°F (21°C) to maintain the quality and freshness of the stored beans.
By storing your mason jars in a cool and dry pantry, organizing them properly, and monitoring the temperature, you can preserve the quality and extend the shelf life of your dry beans. This ensures that you always have a readily available supply of delicious and nutritious beans for your cooking needs.
Checking for Spoilage and Shelf Life
Regularly inspecting your stored mason jars of dry beans is vital to ensure they remain fresh and safe to consume. Here are some tips for checking for spoilage and understanding the shelf life of your stored beans:
- Visual Inspection: Carefully examine the jars for any signs of spoilage, such as mold, discoloration, or an off smell. If you notice any abnormalities, it’s best to discard the beans to avoid consumption of potentially spoiled food.
- Check the Seal: Before using the beans, always check the seal of each mason jar. Gently press down on the center of the lid. If it pops up and makes a clicking sound, it indicates that the jar is no longer properly sealed. In such cases, do not use the beans, as the seal may have been compromised, and the beans may have spoiled.
- Understand Shelf Life: The shelf life of stored dry beans can vary depending on several factors, including the type of beans, storage conditions, and processing methods. In general, properly stored dry beans can remain usable for up to 1-3 years. However, the quality and flavor may begin to deteriorate over time.
- Rotate Your Stock: To ensure you consume the oldest beans first, practice a “first in, first out” system. When new jars of beans are added to your pantry, place them behind the existing ones to maintain the order of storage dates. This helps prevent beans from sitting unused and reaching their expiration date.
- Consider Storage Length: If you plan to store dry beans for an extended period, it’s recommended to store them in airtight containers in the freezer instead of the pantry. Freezing can help preserve the quality of beans for a longer time, although the texture may slightly change after thawing.
By regularly checking your stored mason jars for spoilage, understanding the shelf life of dry beans, and practicing proper rotation, you can ensure that you utilize your stored beans before they expire and maintain a fresh and flavorful supply in your pantry.
Read more: How To Store Blueberries In Mason Jars
Tips for Using Stored Dry Beans
When it comes to using stored dry beans from your mason jars, here are some helpful tips to ensure a successful cooking experience:
- Soaking Methods: Depending on the type of dry beans, it’s often recommended to soak them before cooking to help soften and reduce cooking time. There are two main soaking methods: overnight soaking and quick soaking. Overnight soaking involves covering the beans with water and letting them soak for 8-12 hours, while quick soaking involves bringing the beans to a boil, removing them from heat, and letting them sit for 1-2 hours.
- Cooking Times and Methods: Each type of bean has its own cooking time and method. Follow the instructions provided on the specific dry beans package or refer to reputable sources for accurate cooking times and techniques. Generally, beans are cooked by simmering them in water or broth until they have reached the desired tenderness.
- Seasoning for Flavor: Dry beans have a naturally earthy flavor that can benefit from seasoning. Consider adding ingredients like onions, garlic, herbs, spices, or even a ham hock or bacon to enhance the flavor profile. Experiment with different seasonings to create the perfect taste for your dishes.
- Batch Cooking and Freezing: Cook larger batches of beans and freeze the leftovers in smaller portions for future use. This can save time and effort in the long run and provide you with a convenient supply of cooked beans for quick recipes or meal preparation.
- Diversify Your Recipes: Don’t limit yourself to traditional bean recipes. Dry beans are incredibly versatile and can be used in various dishes, such as soups, stews, chili, salads, dips, and even desserts. Explore different cuisines and experiment with new recipes to make the most of your stored beans.
- Store Leftover Cooked Beans: If you have leftover cooked beans, store them in airtight containers in the refrigerator and use them within 3-5 days. They can be added to salads, wraps, or used as a protein-packed ingredient in various dishes.
By following these tips, you’ll be able to make the most out of your stored dry beans. Enjoy the delicious flavors and versatility that dry beans bring to your culinary creations!
Conclusion
Storing dry beans in mason jars is a practical and visually appealing method that allows you to keep your pantry well-organized while preserving the freshness and quality of your beans. With the right type of mason jars, proper cleaning and sterilization, and careful preparation and filling, you can ensure that your dry beans are well-preserved and readily available for your culinary adventures.
Choosing the appropriate mason jars, cleaning them thoroughly, and sterilizing them ensures a safe and clean storage environment for your beans. Sorting, washing, and pre-soaking the dry beans before filling the jars help in maintaining their quality and flavor. Properly sealing the mason jars with metal lids and screw-on bands ensures airtight storage and prevents spoilage.
Storing the sealed mason jars in a cool and dry pantry, organizing them for easy access, and checking for spoilage regularly are crucial steps to extend the shelf life of your stored beans. By following these practices, you can confidently use your stored dry beans, knowing that they are fresh, safe, and full of flavor.
When using your stored dry beans, consider soaking methods, cooking times, and seasoning options to bring out the best flavors. Batch cooking and freezing leftovers allow for convenient meal planning and quick recipe preparation. Don’t be afraid to experiment with different recipes and cuisines to fully enjoy the versatility of dry beans.
In conclusion, storing dry beans in mason jars is a fantastic way to ensure their longevity and have a well-organized pantry. By following proper storage techniques and utilizing creative ways to use your stored beans, you’ll have a steady supply of nutritious and flavorful ingredients for your favorite recipes. So, grab some mason jars and start preserving your dry beans today!
Frequently Asked Questions about How To Store Dry Beans In Mason Jars
Was this page helpful?
At Storables.com, we guarantee accurate and reliable information. Our content, validated by Expert Board Contributors, is crafted following stringent Editorial Policies. We're committed to providing you with well-researched, expert-backed insights for all your informational needs.


0 thoughts on “How To Store Dry Beans In Mason Jars”