Articles
How To Strap A Water Heater
Modified: October 31, 2024
Learn the step-by-step process of how to strap a water heater with our informative articles. Ensure the safety of your home and save money by following our expert advice on water heater installation.
(Many of the links in this article redirect to a specific reviewed product. Your purchase of these products through affiliate links helps to generate commission for Storables.com, at no extra cost. Learn more)
Introduction
When it comes to your home’s water heater, safety is of utmost importance. A securely strapped water heater not only reduces the risk of damage to your property, but it also safeguards against potential injury caused by a water heater tipping over during an earthquake or other seismic activity.
In this article, we will guide you on how to properly strap a water heater, step-by-step. By following these instructions and taking the necessary precautions, you can ensure your water heater is securely fastened, providing peace of mind for you and your family.
Before we dive into the steps, it’s worth mentioning that different areas may have specific building codes and regulations regarding water heaters. It’s important to familiarize yourself with any local requirements and make sure you comply with them to ensure the safety and legality of your installation.
Now, let’s get started on strapping your water heater to ensure it remains secure and stable.
Key Takeaways:
- Securely strapping your water heater is crucial for safety and stability. Follow the step-by-step guide to ensure proper installation and minimize the risk of damage or injury.
- Regularly inspect and maintain your water heater and its straps to extend its lifespan and enjoy a steady supply of hot water. Prioritize safety and compliance with local building codes.
Read more: How To Refill A Water Heater
Step 1: Gather Materials
Before you begin strapping your water heater, it’s crucial to gather all the necessary materials. This will ensure a smooth and efficient process. Here’s a list of the items you will need:
- Water heater straps kit: Look for a kit specifically designed for water heater strapping. These kits typically include the necessary brackets, straps, and screws.
- Drill: You will need a power drill to create holes for the brackets and straps.
- Level: To ensure your water heater remains evenly positioned, a level will come in handy.
- Tape measure: Accurate measurements are essential for proper installation. Use a tape measure to determine the required spacing and length of the straps.
- Screwdriver: Depending on the type of screws provided in your kit, you may need a screwdriver to attach the straps and brackets.
- Anchors (optional): If your water heater is not located near a wall stud, you may need anchors to secure the brackets.
Make sure to gather all the materials before you begin the installation process. This way, you won’t waste time searching for tools or hardware in the middle of the project.
Once you have all the necessary materials, move on to the next step: turning off the power to the water heater.
Step 2: Turn Off the Power
Before you start working on strapping your water heater, it is crucial to turn off the power supply. This step ensures your safety and prevents any potential accidents or electrical hazards. Here’s how to turn off the power to your water heater:
1. Electric Water Heater: Locate the breaker box in your home. Identify the circuit breaker labeled for your water heater. Switch it to the “Off” position to cut off the power supply.
2. Gas Water Heater: Locate the gas control valve on your water heater. Turn the knob to the “Off” position to shut off the gas flow. If you are unsure how to do this or are uncomfortable working with gas, it is advisable to seek the assistance of a professional.
Turning off the power prevents any accidental heating or activation of the water heater while you are working on securing it. Now that the power supply is off, you can proceed to the next step: draining the water heater.
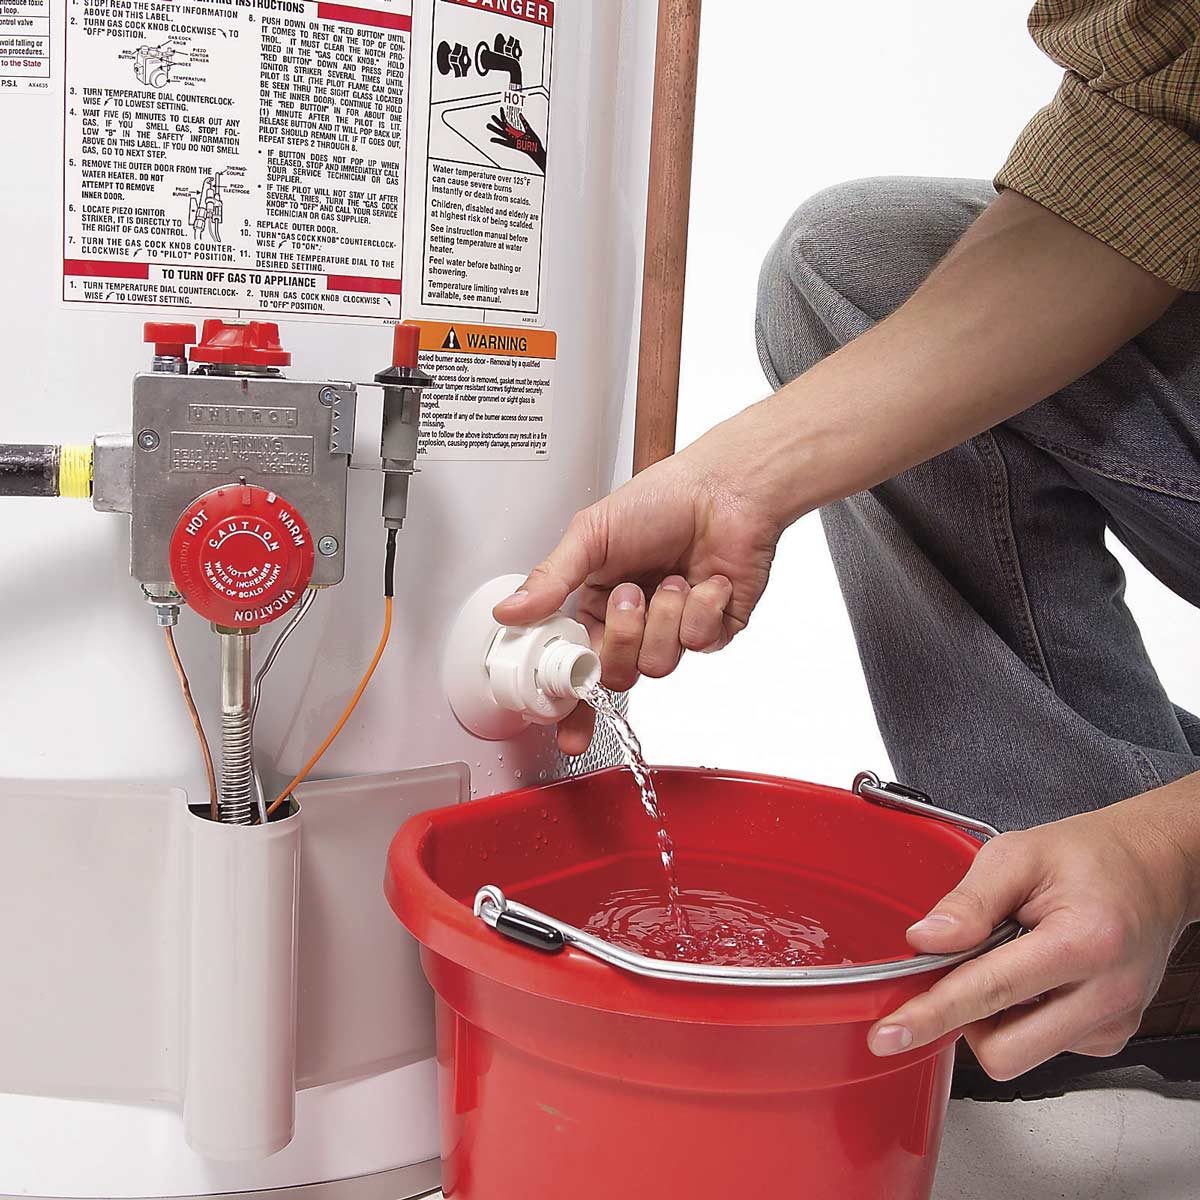
Step 3: Drain the Water Heater
Before you can proceed with securing your water heater, it’s important to drain it of any remaining water. Draining the water heater will make it lighter and easier to handle during the installation process. Here’s how to drain the water heater:
1. Locate the drain valve: The drain valve is usually located near the bottom of the water heater. It may be a brass or plastic valve with a threaded cap.
2. Connect a garden hose: Attach a garden hose to the drain valve. Make sure the other end of the hose is positioned where the water can safely drain.
3. Open the drain valve: Slowly turn the drain valve counterclockwise to open it. Be prepared for the water to gush out initially with some force.
4. Let the water drain: Allow the water to completely drain from the water heater. This process may take several minutes, depending on the size of your water heater and the water pressure.
5. Close the drain valve: Once all the water has been drained, you can close the drain valve by turning it clockwise.
Draining the water heater not only makes the installation process easier but also provides an opportunity to inspect the condition of the tank and remove any sediment or debris that may have accumulated over time.
Remember to exercise caution while draining the water heater, as the water can be hot. Use appropriate safety precautions and protective gear if needed. With the water heater drained, you can proceed to the next step: disconnecting the supply lines.
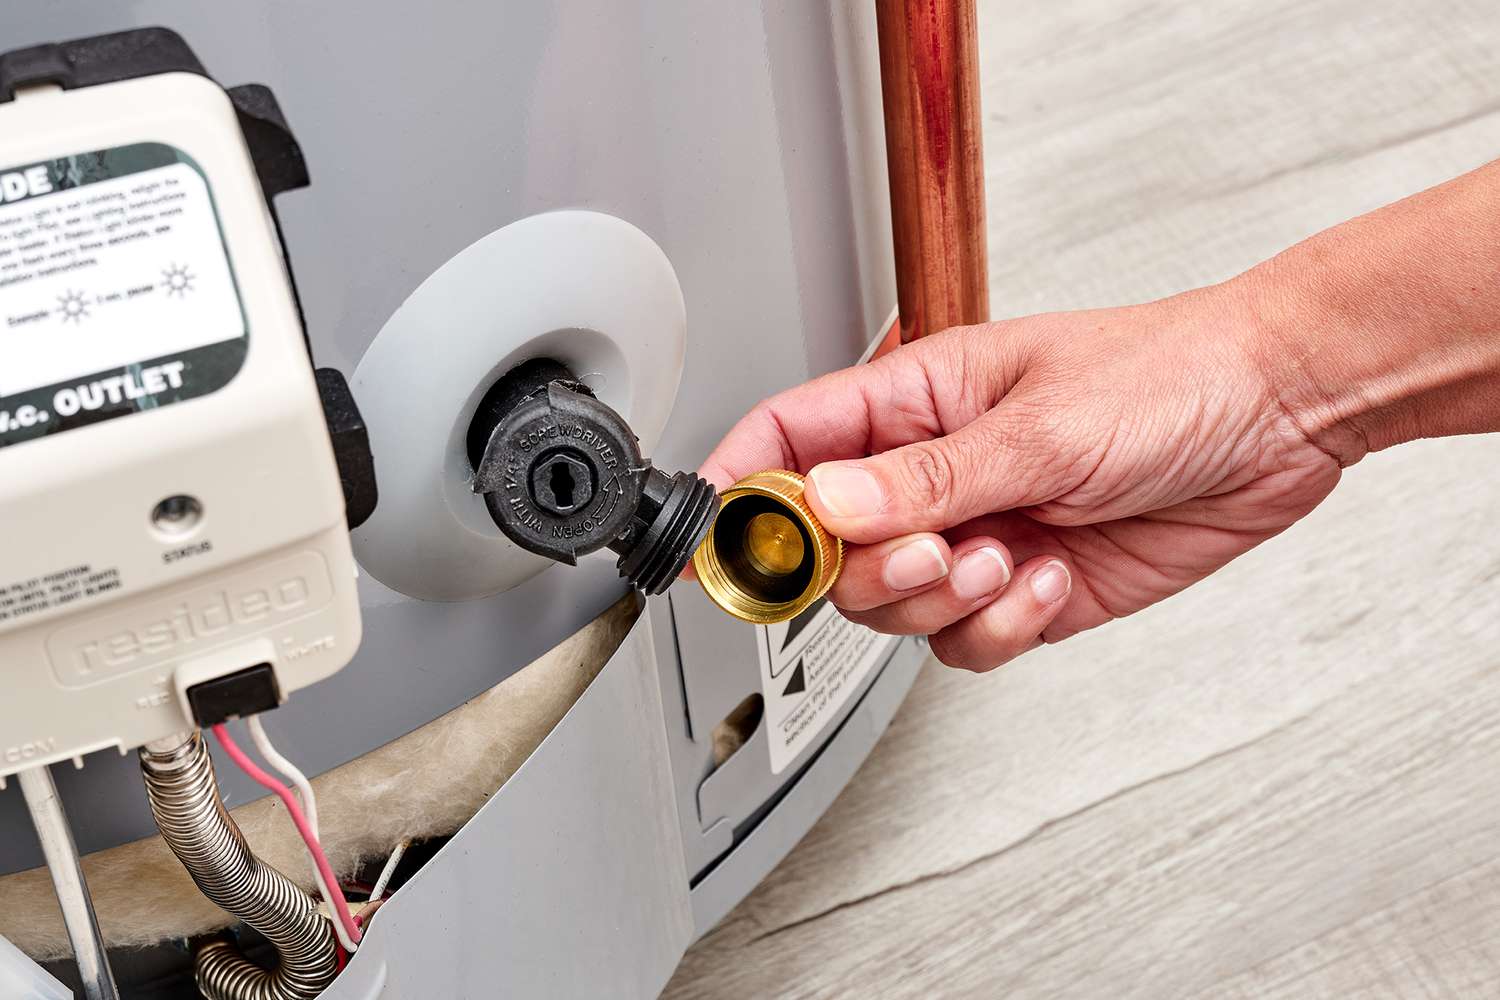
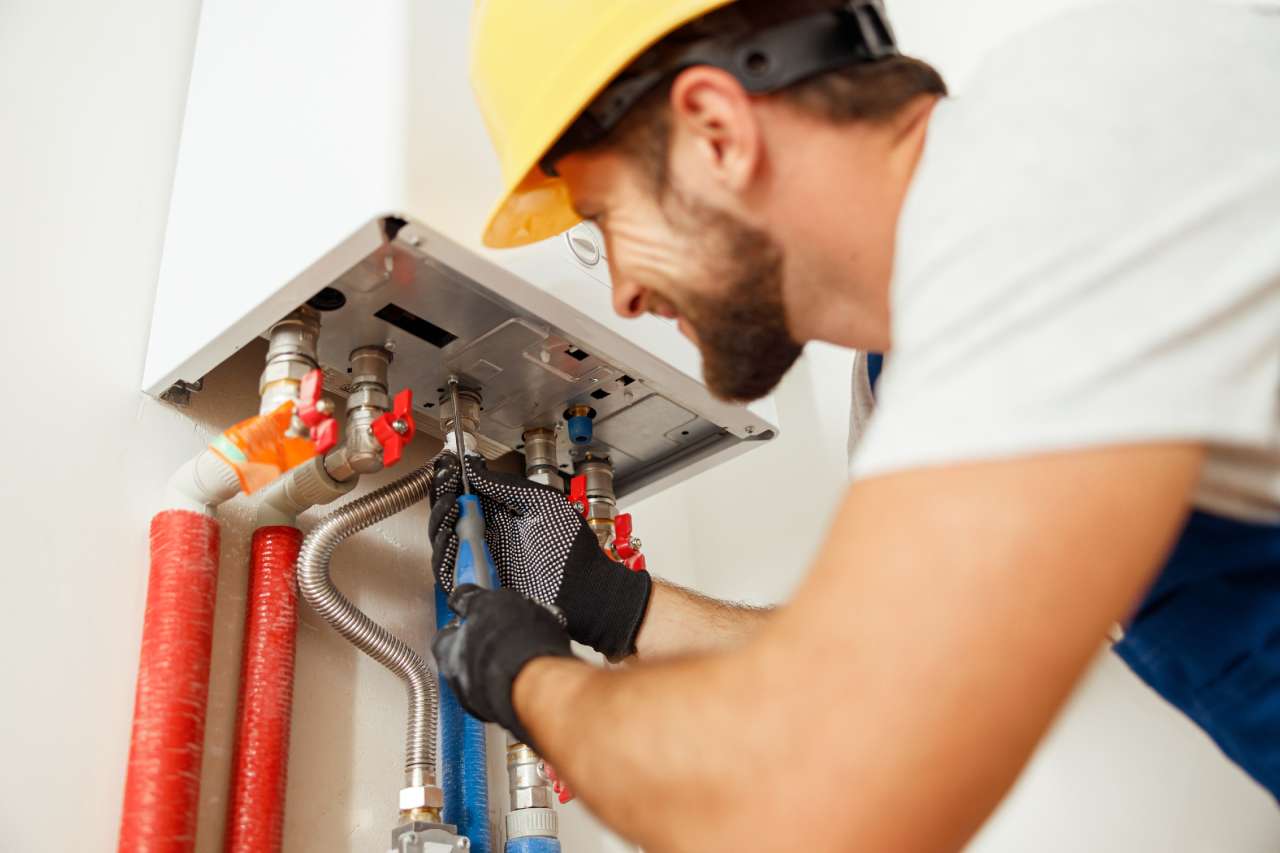
Step 4: Disconnect the Supply Lines
Now that your water heater is drained and the power is turned off, it’s time to disconnect the supply lines. This step will allow you to easily access the straps and brackets for installation. Here’s how to disconnect the supply lines:
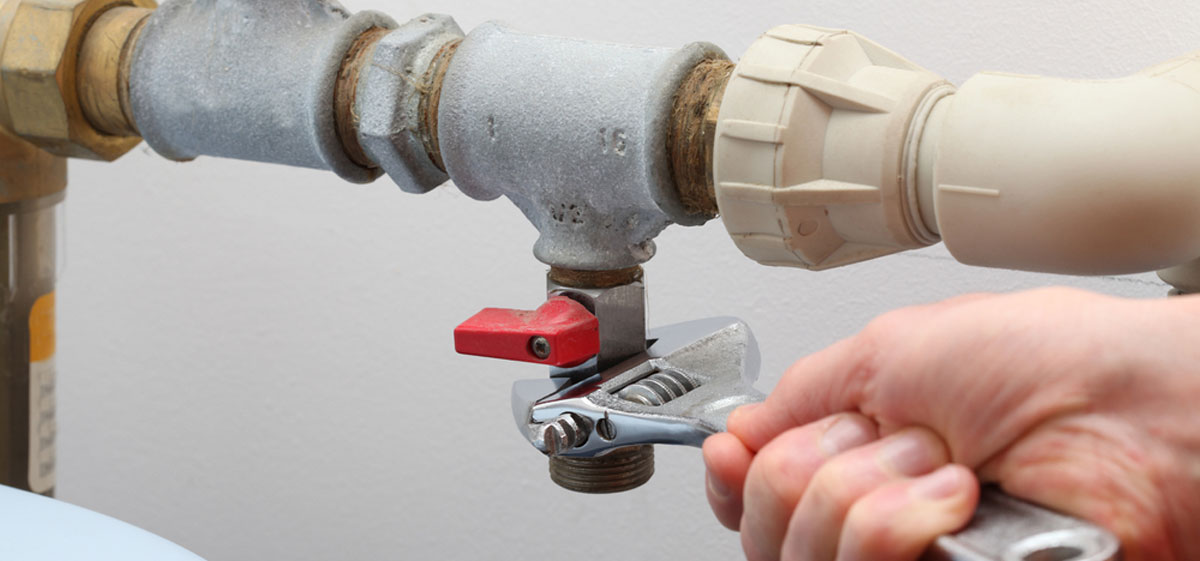
1. Turn off the water supply: Locate the shut-off valve on the cold water supply line that connects to your water heater. Turn the valve clockwise until it is fully closed. This will prevent water from flowing into the water heater during the installation process.
2. Disconnect the supply lines: Using an adjustable wrench or pliers, carefully loosen the nuts connecting the supply lines to the water heater. Start with the hot water line and then disconnect the cold water line. Be prepared for a small amount of water to spill out when disconnecting the lines.
3. Set the supply lines aside: Once the supply lines are disconnected, set them aside in a safe area where they won’t get damaged or cause any obstruction.
By disconnecting the supply lines, you create more space to work on securing the water heater. Remember to exercise caution while handling the supply lines and to have a towel or bucket on hand to catch any residual water. With the supply lines disconnected, you can move on to the next step: removing the old straps.
Read more: How To Disconnect Water Heater
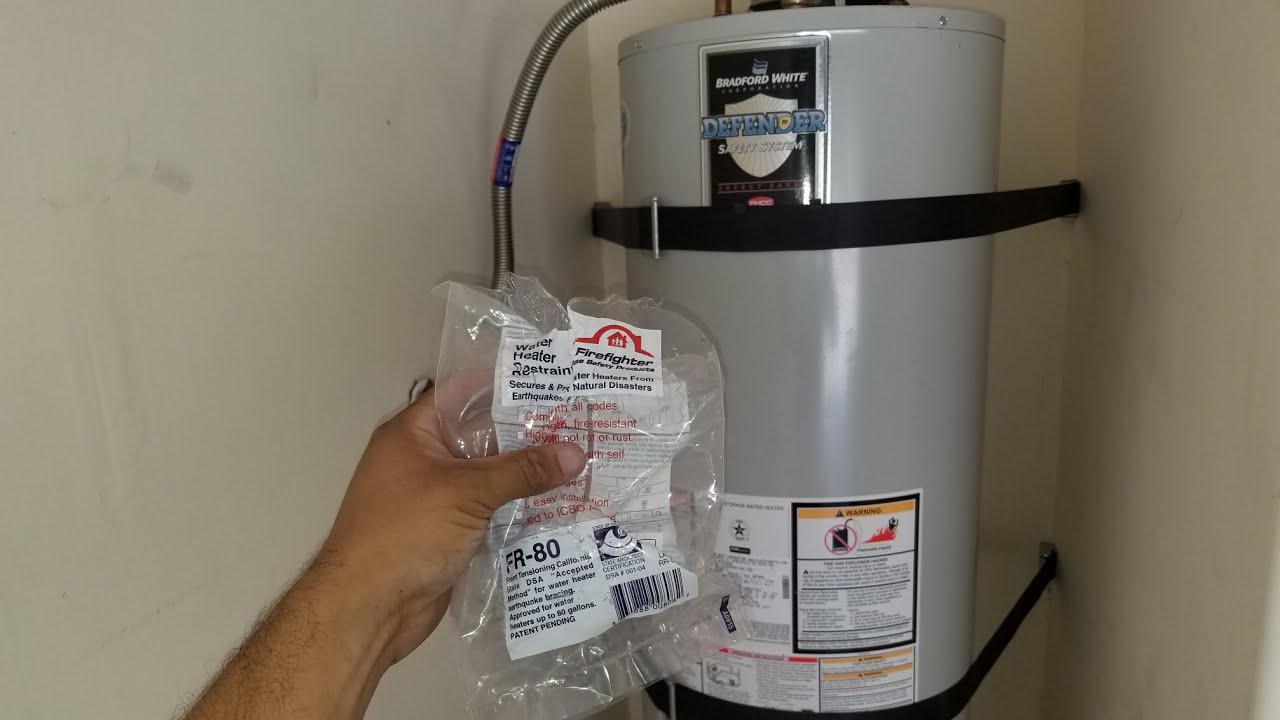
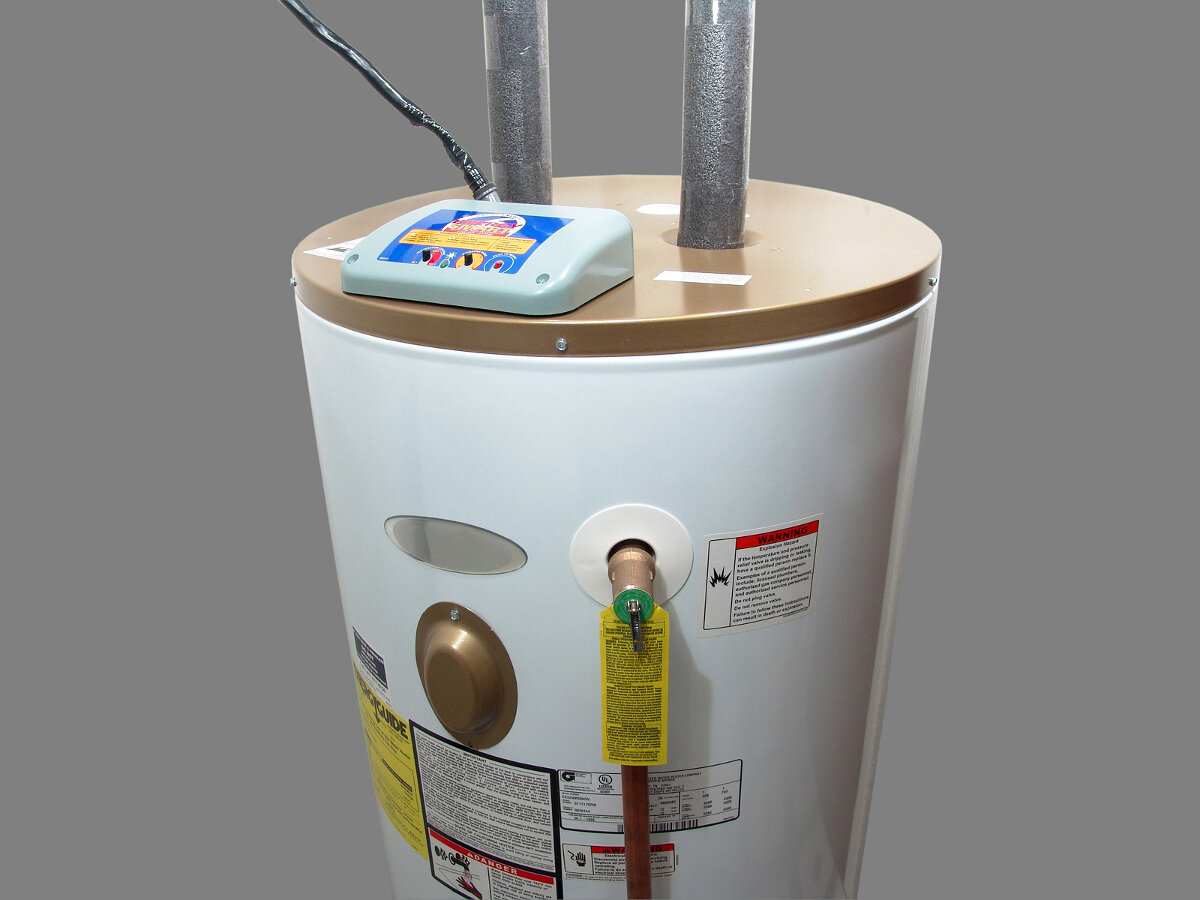
Step 5: Remove the Old Straps
With the supply lines disconnected, it’s now time to remove the old straps that may be securing your water heater. Removing the old straps will allow you to start fresh with the installation of the new straps. Here’s how to remove the old straps:
1. Inspect the existing straps: Take a close look at the current straps and brackets. Observe how they are secured and note any screws or fasteners used.
2. Unscrew the fasteners: Using a screwdriver or drill, carefully unscrew the fasteners that are securing the old straps to the water heater. Make sure to keep the screws and any accompanying hardware in a safe place for later use.
3. Remove the old straps: Once the fasteners are removed, gently detach and remove the old straps from the water heater. Be mindful not to damage any surrounding components or the water heater itself.
4. Inspect for damage: While removing the old straps, take the opportunity to inspect the water heater for any signs of damage or wear. Look for any cracks, leaks, or corrosion that may require additional attention or repairs.
By removing the old straps, you create a clean slate for the installation of the new straps. This step ensures that the water heater is properly secured and reduces the risk of any existing straps failing or causing instability. With the old straps removed, you are now ready for the next step: positioning the new straps.
When strapping a water heater, make sure to use heavy-duty metal strapping and secure it to wall studs or other structural supports to prevent tipping in case of an earthquake.
Step 6: Position the New Straps
Now that the old straps are removed, it’s time to position the new straps onto your water heater. Proper positioning is crucial to ensure optimal stability and support. Here’s how to position the new straps:
1. Determine the placement: Take a moment to determine where the new straps should be positioned. Typically, you’ll want to place the upper strap about one-third of the way down from the top of the water heater, and the lower strap about one-third of the way up from the bottom. This positioning helps distribute the weight evenly and provides adequate support.
2. Measure and mark: Use a tape measure to ensure accurate placement of the straps. Measure the distance between the water heater and the wall, and mark the locations where the straps will be installed. Make sure to leave room for any required brackets and clearance between the straps and the water heater.
3. Attach the brackets: Depending on the strap kit you have, you may need to attach brackets to the walls or floor. Follow the manufacturer’s instructions for proper bracket installation. Ensure the brackets are securely fastened to provide a stable anchor for the straps.
4. Position the upper strap: Take one of the straps and position it at the marked location on the upper portion of the water heater. Ensure the strap is parallel to the ground and centered on the water heater. Align it with the bracket on the wall and make sure it’s level.
5. Position the lower strap: Repeat the same process for the lower strap, positioning it at the marked location on the lower portion of the water heater. Again, ensure it’s parallel to the ground, centered on the water heater, and aligned with the bracket.
Proper positioning of the new straps is crucial for the stability and safety of your water heater. Take your time to ensure accurate measurements and alignment. Once the new straps are properly positioned, you can move on to the next step: securing the straps in place.
Step 7: Secure the Straps
With the new straps positioned on your water heater, it’s time to secure them in place. Securing the straps properly ensures that your water heater remains stable and securely fastened. Here’s how to secure the straps:
1. Attach the straps to the brackets: Depending on the type of strap kit you have, you may need to slide the straps into the brackets or use screws to attach them. Follow the manufacturer’s instructions for your specific strap kit. Make sure the straps are securely fastened to provide a strong support system.
2. Tighten the straps: Use a screwdriver or drill to tighten the straps. Be careful not to overtighten as this may damage the straps or the water heater. Ensure that the straps are snug and hold the water heater firmly in place, but still allow for a slight amount of movement.
3. Check for proper alignment: Once the straps are tightened, check their alignment and positioning again. Ensure that the straps are parallel to the ground, centered on the water heater, and aligned with the brackets. Adjust if necessary to achieve proper alignment.
4. Test the stability: Gently push and pull on the water heater to test its stability. The water heater should feel secured and not move excessively. If you notice any instability, recheck the straps and brackets for proper installation and alignment.
By securely fastening the straps, you provide crucial support to your water heater, reducing the risk of tipping or movement during seismic activity. Take your time to ensure proper installation and testing of the straps. Once the straps are securely in place, you can proceed to the next step: reconnecting the supply lines.
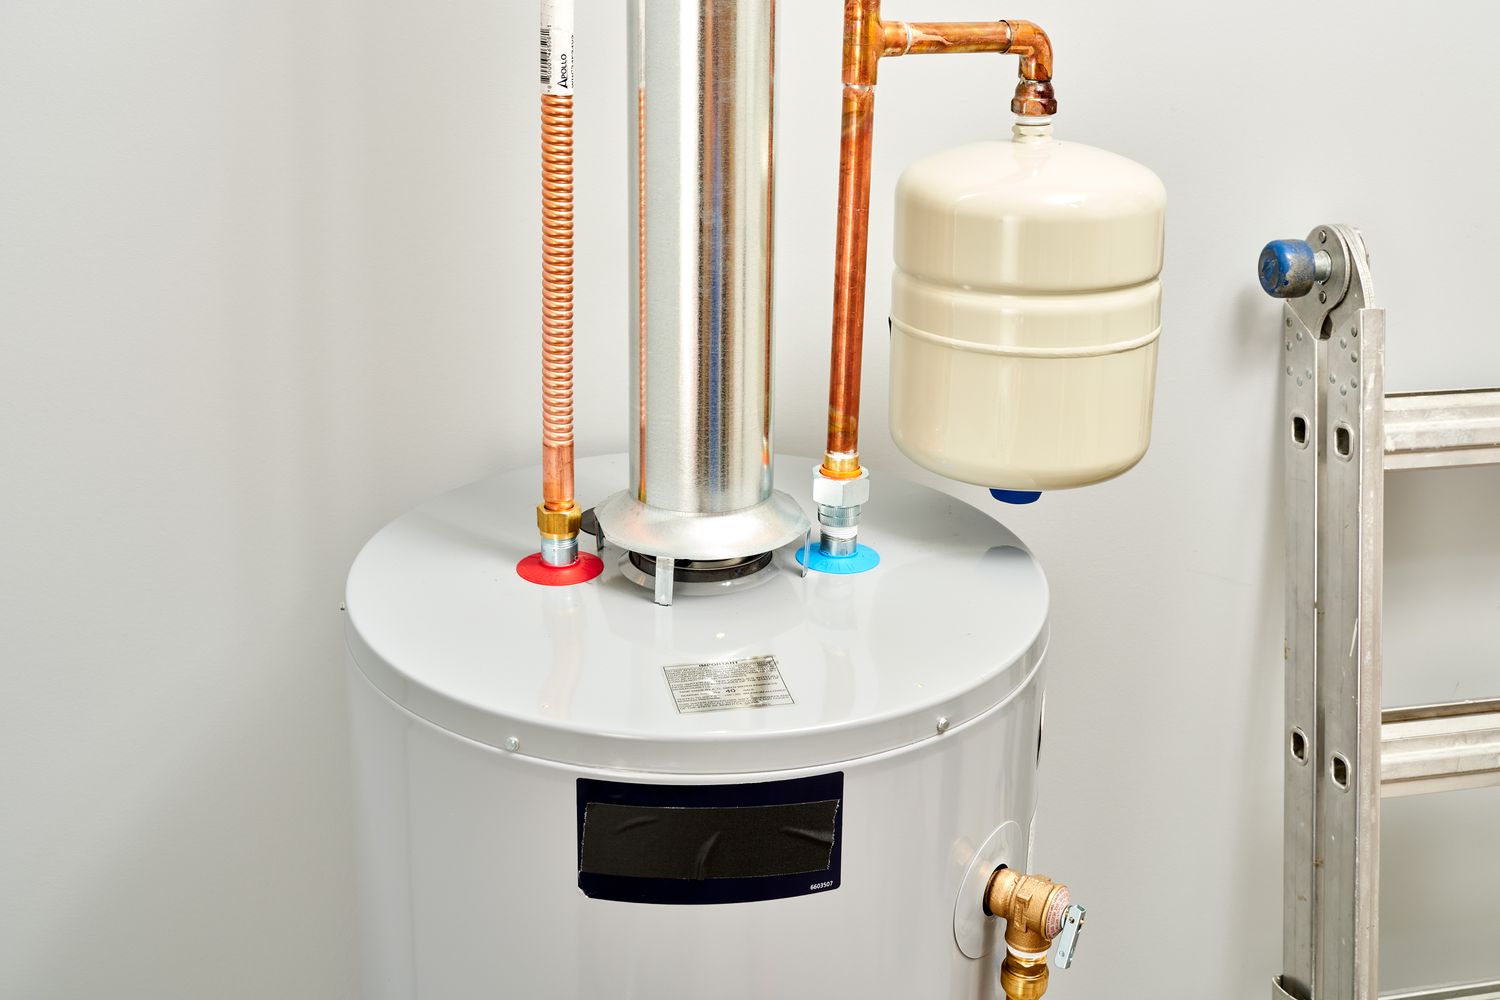
Step 8: Reconnect the Supply Lines
With the new straps securely in place, it’s time to reconnect the supply lines to your water heater. Reconnecting the supply lines ensures proper functionality and allows for the resumption of hot water supply. Here’s how to reconnect the supply lines:
1. Inspect the supply lines: Before reconnecting, inspect the supply lines for any damage or wear. Replace any damaged or faulty lines to ensure a secure connection and prevent leaks.
2. Position the supply lines: Position the cold and hot water supply lines appropriately, aligning them with the corresponding connections on the water heater. Ensure the threads on both the supply lines and the water heater are clean and free of debris.
3. Attach the supply lines: With the supply lines positioned correctly, use an adjustable wrench or pliers to tighten the nuts onto the threaded connections. Ensure a snug fit, but be careful not to overtighten and cause damage.
4. Turn on the water supply: Locate the shut-off valve on the cold water supply line and turn it counterclockwise to open the valve. This will allow water to flow into the water heater.
5. Check for leaks: After turning on the water supply, carefully inspect the connections for any signs of leaks. If you notice any leaks, close the shut-off valve and tighten the connections further. Repeat the inspection until no leaks are detected.
By reconnecting the supply lines, you restore the water flow to your water heater and ensure proper functionality. Take your time to ensure a secure and leak-free connection. With the supply lines reconnected, you can move on to the next step: filling the water heater.
Read more: How To Turn On A Water Heater
Step 9: Fill the Water Heater
Once the supply lines are securely reconnected, it’s time to fill the water heater with water. Filling the water heater is an essential step to ensure proper operation and functionality. Here’s how to fill the water heater:
1. Close the drain valve: Ensure the drain valve on the water heater is tightly closed. You don’t want water to escape while filling the tank.
2. Turn on the water supply: Locate the shut-off valve on the cold water supply line and turn it counterclockwise to fully open the valve. This will allow water to flow into the water heater.
3. Monitor the temperature and pressure relief valve: As the water fills the tank, keep an eye on the temperature and pressure relief valve. This valve is typically located on the side of the water heater. If you notice water leaking from the valve, it may indicate excessive pressure. In such cases, consult a professional to address the issue.
4. Wait for the water heater to fill: Allow the water heater to fill completely until water flows steadily from the hot water faucet in your home. This ensures that all air has been purged from the system.
5. Check for leaks: Once the water heater is filled, inspect all connections, including the supply lines, for any signs of leaks. If you notice any leaks, close the shut-off valve and tighten the affected connection further.
Filling the water heater ensures that the tank is properly filled with water and ready for use. It’s essential to monitor the temperature and pressure relief valve during this process to ensure optimal performance and safety. Once the water heater is filled, you can proceed to the final step: turning on the power.
Step 10: Turn On the Power
With the water heater filled and all connections checked for leaks, it’s time to turn on the power and bring your water heater back to full operation. Here’s how to turn on the power to your water heater:
1. Electric Water Heater: Locate the breaker box in your home and identify the circuit breaker labeled for your water heater. Switch the breaker to the “On” position to restore power.
2. Gas Water Heater: If you have a gas water heater, ensure that the gas control valve is in the “On” position. Use caution when handling gas and refer to the manufacturer’s instructions if you are unsure how to operate the gas control valve.
3. Monitor the water heater: Once the power is restored, monitor the water heater for any signs of proper operation. Check for the pilot light (for gas water heaters) or listen for the heating elements activating (for electric water heaters).
4. Give it time to heat up: It may take some time for the water heater to heat up the water to the desired temperature. Be patient and allow sufficient time for the water to reach the desired temperature before using hot water.
By turning on the power, you restore the energy source to your water heater, allowing it to operate efficiently. Monitor the water heater closely after turning on the power to ensure that it is functioning properly. If you encounter any issues or notice abnormal operation, consult a professional for further assistance.
Congratulations! You have successfully strapped and secured your water heater. By following these steps, you have taken an important step in ensuring the safety and stability of your water heater. Regularly inspect your water heater and straps for any signs of wear or damage and address any issues promptly to maintain its optimal performance.
Conclusion
Properly strapping your water heater is a crucial step in ensuring the safety and stability of your home. By following the step-by-step guide outlined in this article, you can confidently secure your water heater and minimize the risk of damage or injury caused by tipping or displacement.
Starting with gathering the necessary materials, turning off the power, and draining the water heater, each step is designed to help you navigate the process smoothly. Disconnecting the supply lines, removing the old straps, and positioning and securing the new straps are essential in providing proper support for your water heater.
Remember to reconnect the supply lines, fill the water heater, and turn on the power to resume its regular operation. Throughout the process, it’s important to inspect for leaks and monitor the temperature and pressure relief valve to ensure optimal performance and avoid any potential issues.
Regularly check the straps and the water heater for any signs of wear or damage and address any concerns promptly. Compliance with local building codes and regulations is also crucial to ensure the installation meets safety standards.
By taking the time to properly strap your water heater, you provide an added layer of protection for your home and peace of mind for you and your family. Remember that safety should always be a top priority when working with plumbing systems and electrical components. If you are unsure of any steps or encounter difficulties, it’s recommended to seek the assistance of a professional.
Stay proactive, maintain your water heater and its straps regularly, and be prepared to make any necessary adjustments or repairs when needed. By doing so, you can extend the lifespan of your water heater and enjoy a steady supply of hot water for years to come.
So, take the necessary steps today to properly strap your water heater and enhance the safety and stability of your home!
Frequently Asked Questions about How To Strap A Water Heater
Was this page helpful?
At Storables.com, we guarantee accurate and reliable information. Our content, validated by Expert Board Contributors, is crafted following stringent Editorial Policies. We're committed to providing you with well-researched, expert-backed insights for all your informational needs.

0 thoughts on “How To Strap A Water Heater”