Articles
How To Check A Water Heater
Modified: February 22, 2024
Learn how to check a water heater with our informative articles. Get expert tips and advice on maintaining and troubleshooting your water heating system.
(Many of the links in this article redirect to a specific reviewed product. Your purchase of these products through affiliate links helps to generate commission for Storables.com, at no extra cost. Learn more)
Introduction
Having a functional and efficient water heater is essential for any home. It provides hot water for daily activities such as bathing, washing dishes, and doing laundry. However, over time, a water heater may develop issues that can affect its performance and even lead to costly repairs if not addressed promptly. That’s why it’s important to regularly check your water heater to ensure it’s in good working condition.
In this article, we will walk you through the step-by-step process of checking your water heater. By following these guidelines, you can identify any potential issues, address them early on, and prolong the lifespan of your water heater.
Before getting started, it’s essential to note that working with a water heater involves some level of risk, including the potential for burns and electrical hazards. If you are unsure about any steps or feel uncomfortable performing them, it’s always best to consult a professional plumber.
Now that we have covered the necessary precautions, let’s dive into the steps for checking your water heater.
Key Takeaways:
- Regularly checking your water heater is crucial for ensuring optimal performance, identifying potential issues, and maintaining a reliable supply of hot water in your home. Safety precautions, visual inspections, and proper maintenance are key to extending the lifespan of your water heater.
- By implementing routine checks and maintenance, you can enjoy the comfort and convenience of reliable hot water for your daily activities while also maximizing the efficiency and longevity of your water heater. Don’t overlook the importance of checking your water heater to avoid costly repairs and replacements in the long run.
Read more: How To Check Electric Water Heater
Step 1: Safety Precautions
Before you begin any maintenance or inspection on your water heater, it’s crucial to prioritize safety. Take the following safety precautions to ensure your well-being throughout the process:
- Turn off the power: Start by turning off the power supply to the water heater. This can usually be done by flipping the corresponding circuit breaker in your electrical panel. Turning off the power prevents any accidental shocks or electrical mishaps.
- Allow the water to cool: Hot water can cause burns, so it’s important to let the water heater cool down before starting any inspection. Wait for a few hours or overnight to ensure that the water has reached a safe temperature.
- Put on protective gear: To protect yourself from potential hazards, wear safety goggles, gloves, and appropriate footwear. This will minimize the risk of injury and ensure your safety throughout the process.
- Keep a fire extinguisher nearby: It’s always a good idea to have a fire extinguisher readily available in case of an emergency. Ensure that the extinguisher is not expired and that you know how to use it.
- Read the manufacturer’s instructions: Familiarize yourself with the manufacturer’s instructions and guidelines for your specific water heater model. This will provide you with essential information on safety recommendations, maintenance procedures, and troubleshooting.
By taking these safety precautions, you can proceed with confidence knowing that you have minimized potential risks and created a safe environment for inspecting your water heater.
Step 2: Turn off the Power
Once you have ensured your safety by following the necessary precautions, the next step is to turn off the power supply to the water heater. This step is essential to prevent any electrical accidents or injuries during the inspection.
To turn off the power to your water heater:
- Locate the circuit breaker panel: The circuit breaker panel is usually located in a utility area or basement of your home. It contains a series of switches or circuit breakers that control the electrical power to different areas of your house.
- Identify the correct circuit breaker: Look for the circuit breaker that is labeled for your water heater. It may be labeled as “water heater,” “hot water tank,” or something similar. If you are unsure, refer to the manufacturer’s instructions or consult a professional.
- Switch off the circuit breaker: Once you have identified the correct circuit breaker, switch it to the “off” position. This will cut off the electrical power supply to your water heater.
After turning off the power, it’s always a good idea to double-check that it has been successfully disconnected by testing the water heater. Make sure that there is no hot water coming from the faucets and that the water heater remains off.
By turning off the power supply, you have eliminated any potential electrical hazards and created a safe environment to proceed with inspecting your water heater.
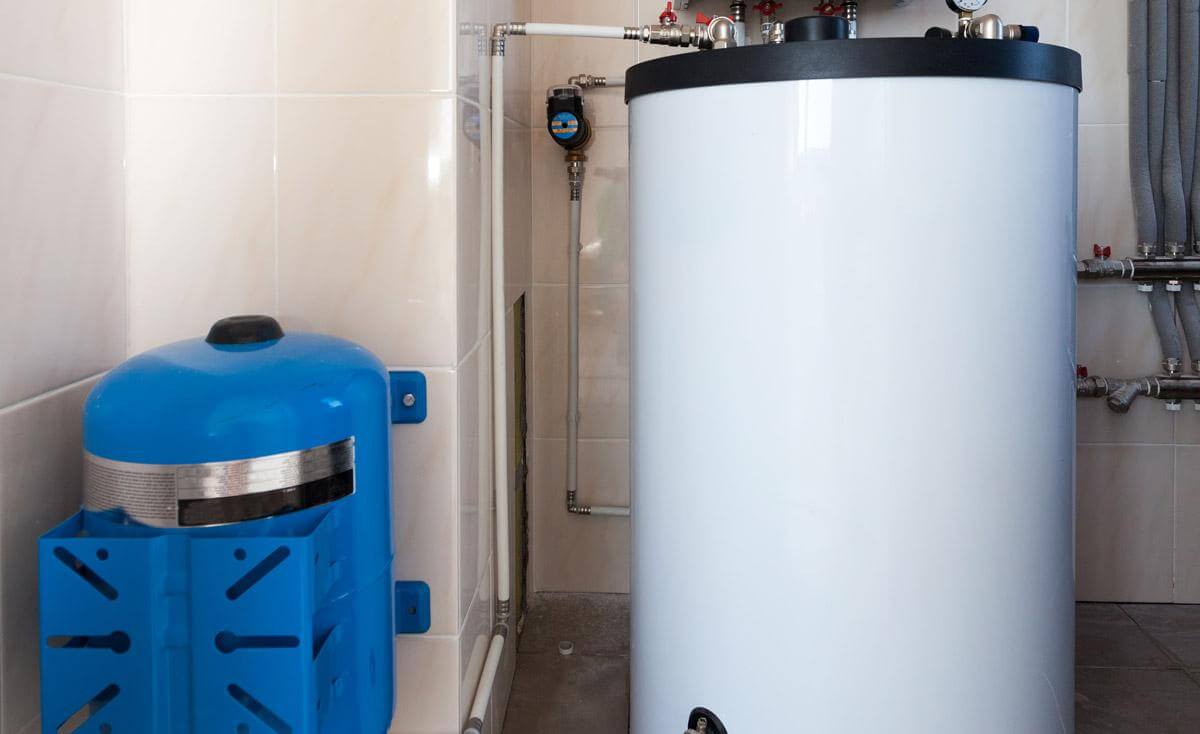
Step 3: Locate the Water Heater
The next step in checking your water heater is to locate its position within your home. The exact location of your water heater may vary depending on the layout and configuration of your house.
If you are unsure about the whereabouts of your water heater, here are some common areas where it may be found:
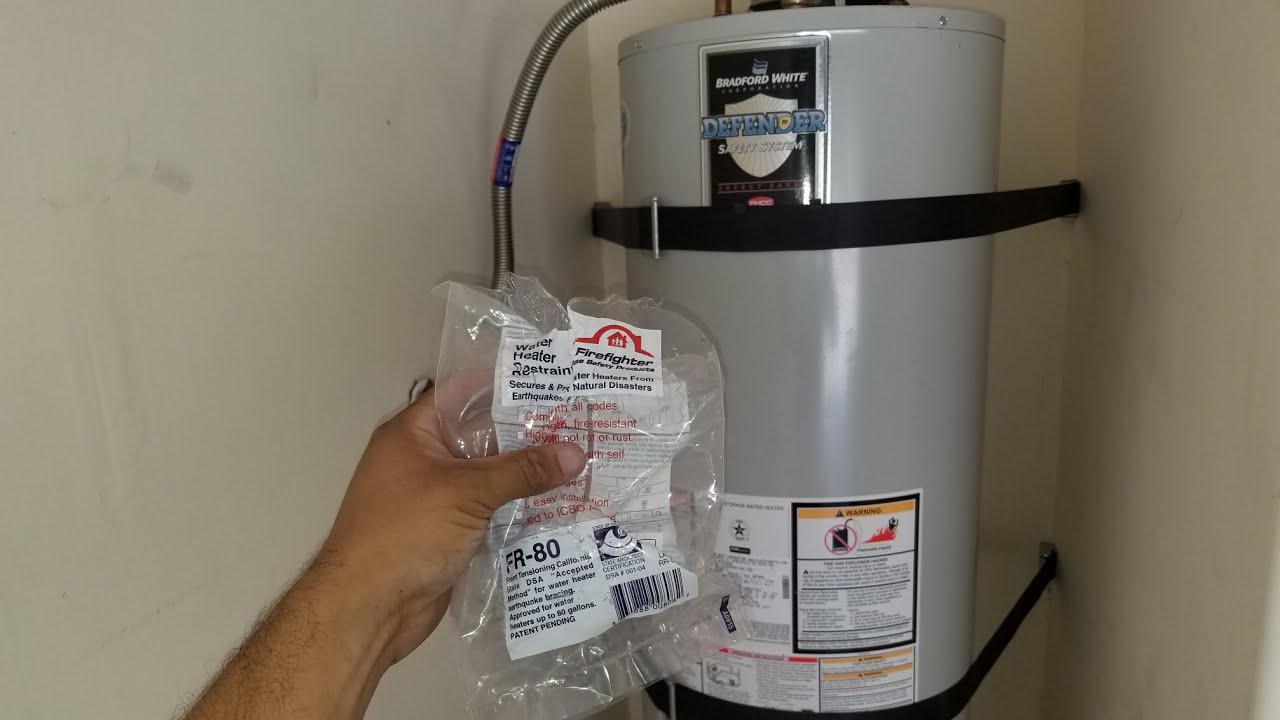
- Basement: Many homes have their water heaters installed in the basement. Look for a dedicated room or area where the water heater is typically situated.
- Garage: Some houses have their water heaters installed in the garage. Check for a water heater in the corner or against a wall.
- Closet: In apartments or smaller homes, water heaters are often located in a dedicated closet. Look for a closet with a louvered door or ventilation openings.
- Utility room: Properties with a designated utility room may house the water heater in that space. It could be next to other HVAC equipment or near the washing machine and dryer.
- Crawl space or attic: In some cases, water heaters may be installed in crawl spaces or attics, especially in older homes. Check these areas if you haven’t found the water heater in any of the previous locations.
Once you have identified the general location of your water heater, take note of any potential obstacles or restricted access points. This will help you navigate around the area more efficiently during the inspection process.
Remember, if you are having difficulty locating the water heater or you are unsure about its position, consult the property’s blueprints or contact a professional plumber who can assist you in finding the water heater.
Now that you have located your water heater, it’s time to move on to the next step of checking for any leaks.
Step 4: Check for Leaks
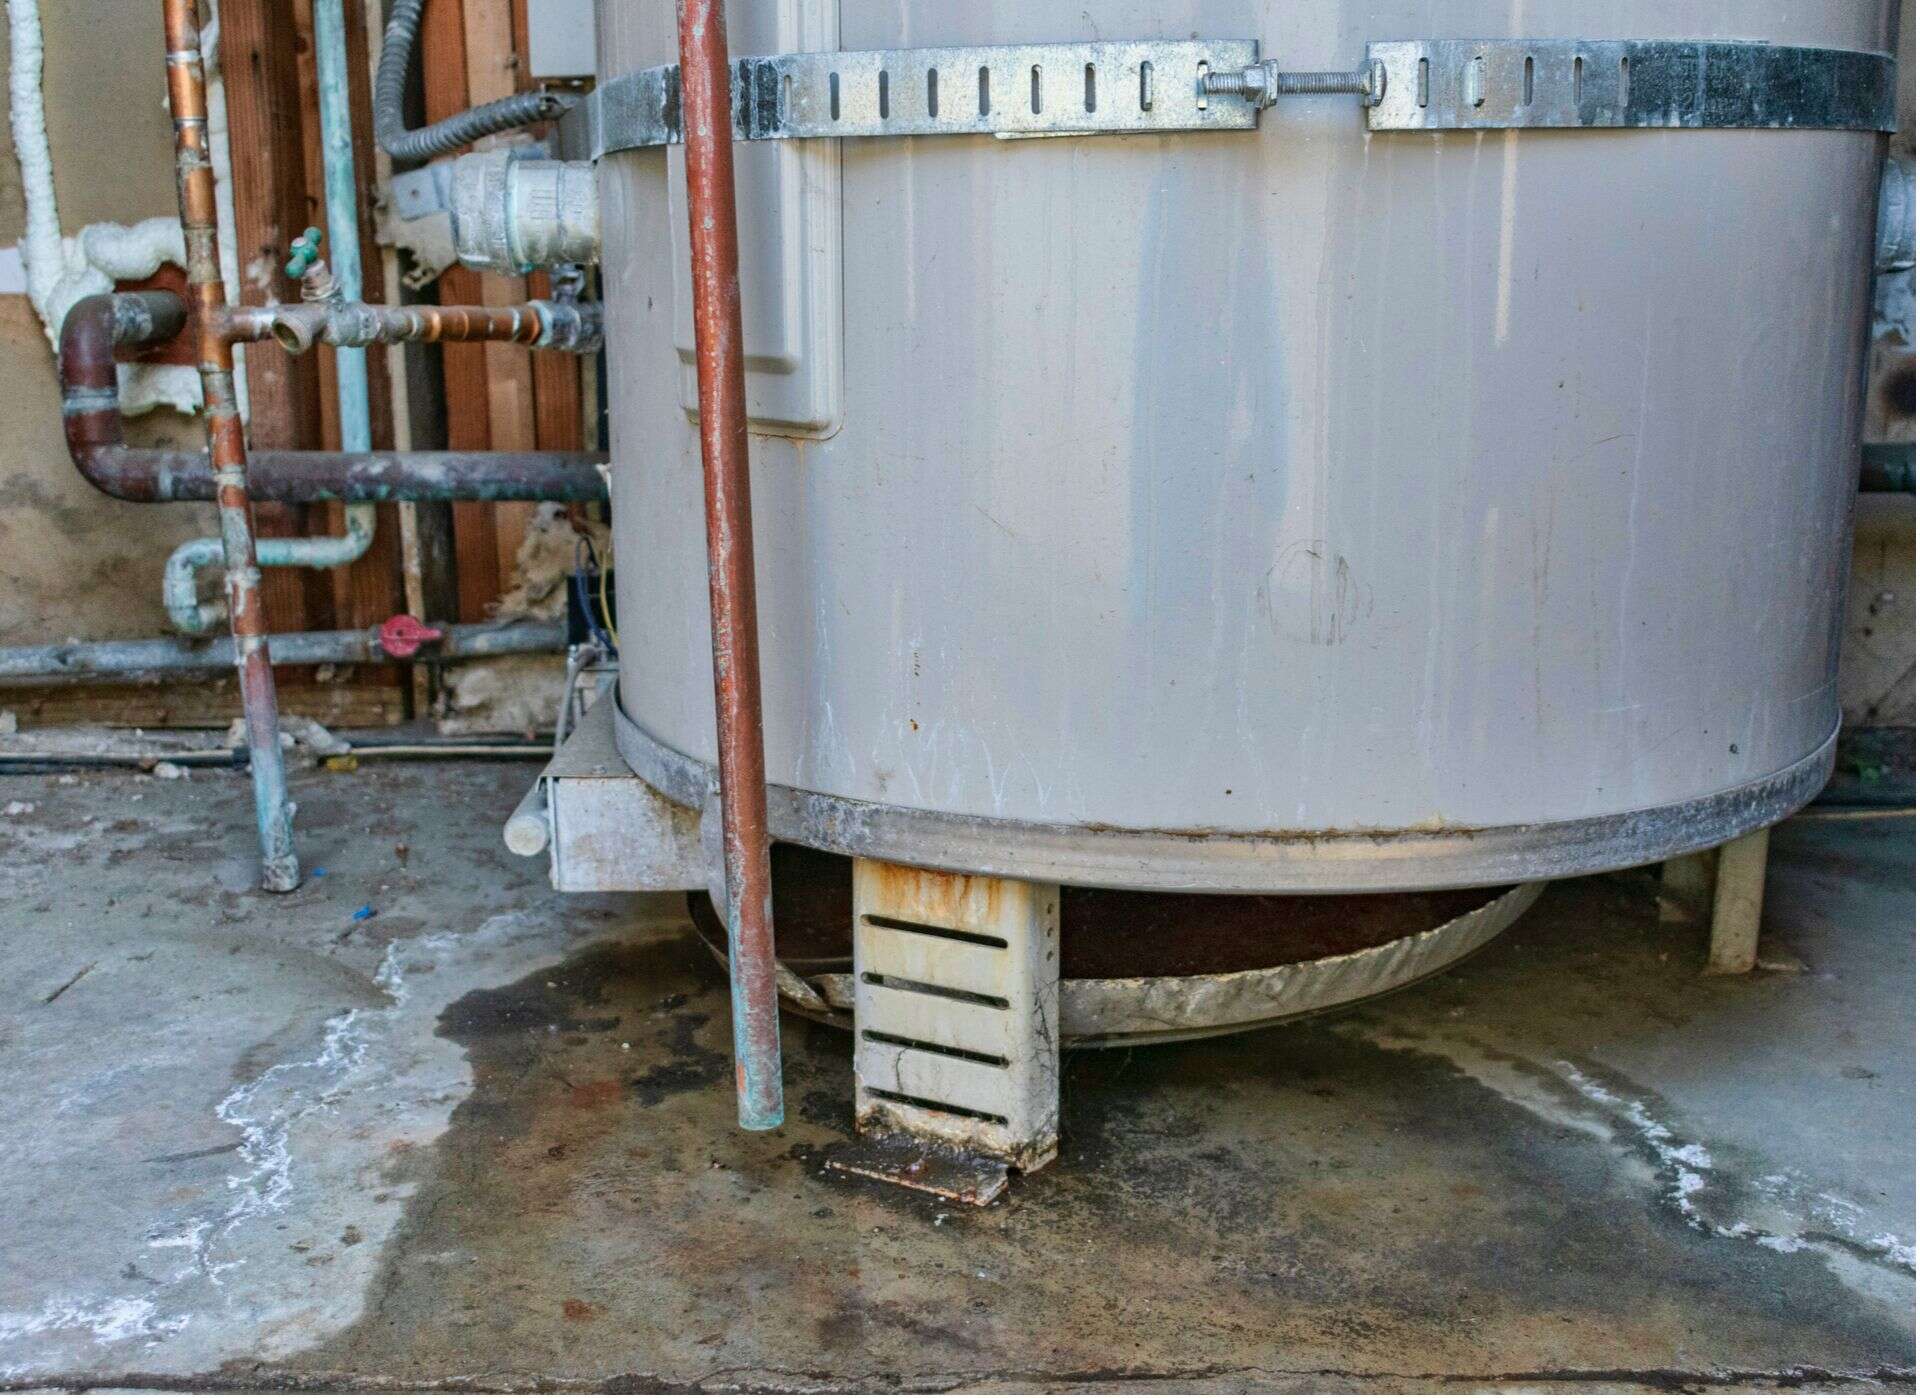
Checking for leaks is an important step in inspecting your water heater as it can indicate potential issues or damage. Identifying leaks early on can help prevent further damage and the need for costly repairs. Follow these steps to check for leaks:
- Visually inspect the water heater: Take a close look at the water heater and surrounding area for any signs of water accumulation, puddles, or moisture. Check the bottom of the water heater, connections, pipes, and valves. If you notice any water, it’s an indication of a leak.
- Check the drain valve: Locate the drain valve at the bottom of the water heater. Place a bucket underneath the valve to catch any water. Slowly open the valve to release a small amount of water. If water continuously drips from the valve even when it’s closed, there may be a leak.
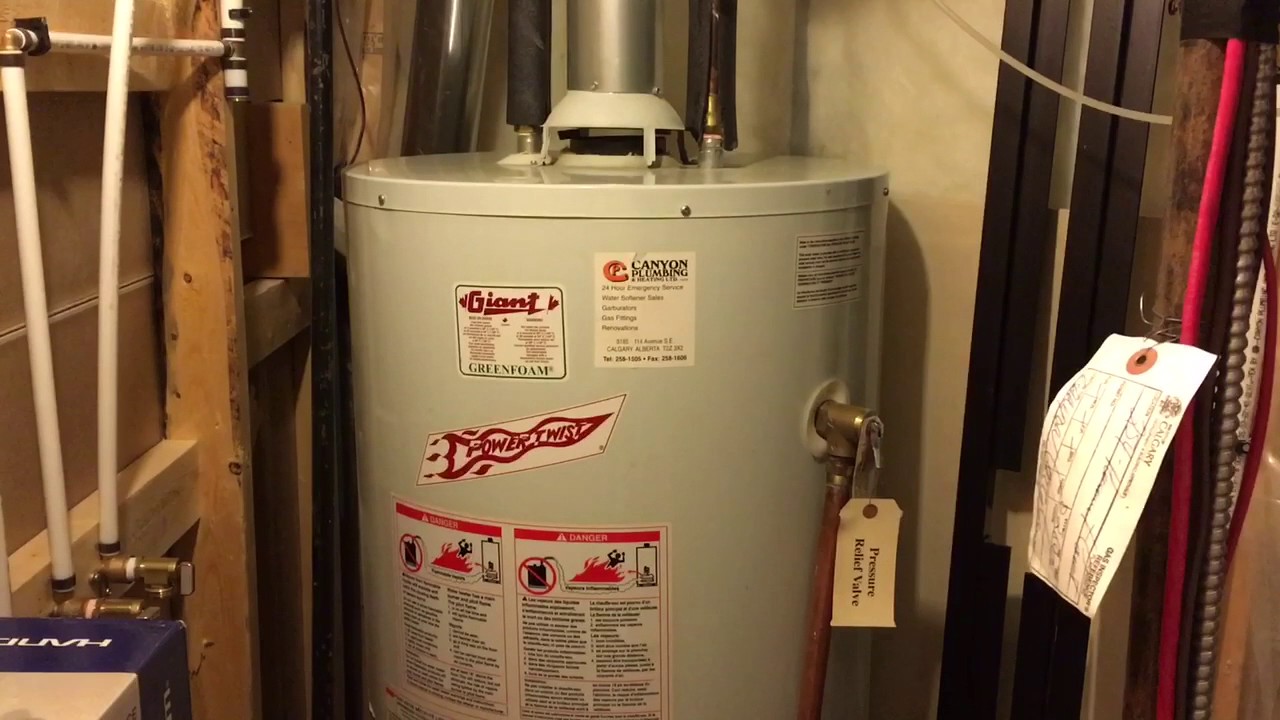
- Inspect the pressure relief valve: The pressure relief valve is a safety device that prevents excessive pressure build-up inside the water heater. Check for any water dripping from the valve or signs of corrosion. A leaking pressure relief valve may indicate issues with the water heater’s pressure or temperature settings.
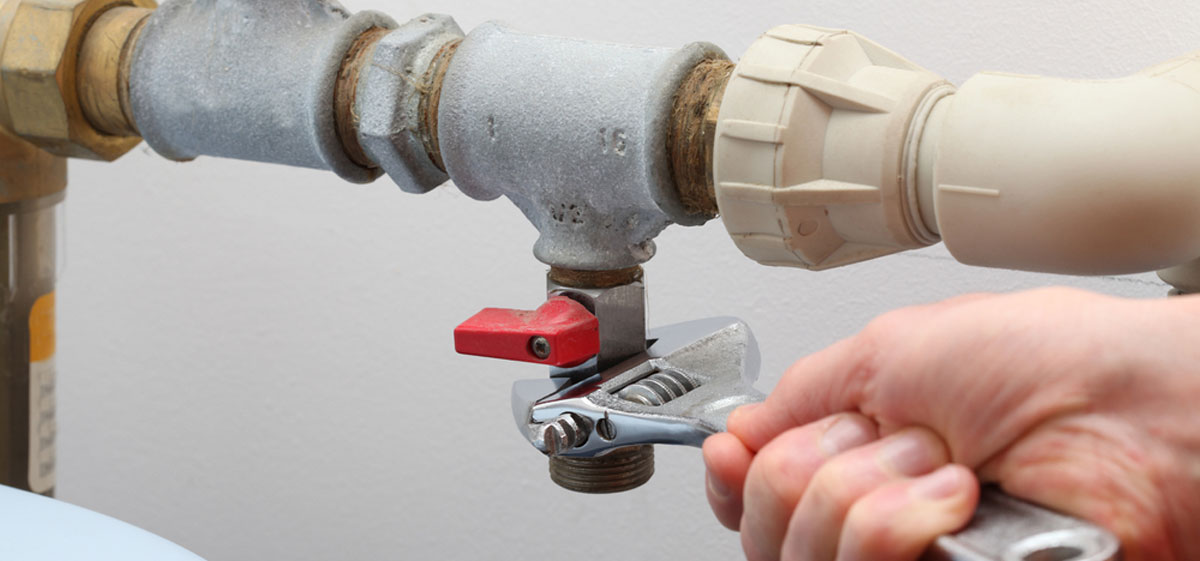
- Examine pipe connections: Inspect the connections between the water heater and the pipes leading to it. Look for signs of moisture, rust, or water stains. Tighten any loose connections and replace any damaged or corroded pipes.
- Inspect the temperature and pressure relief valve discharge pipe: This pipe is connected to the pressure relief valve and allows excess water to be discharged safely. Check for any leakage or disconnection of the pipe. Ensure that it is properly connected and aligned towards a suitable drainage area.
If you discover any leaks during this inspection, it’s crucial to address them as soon as possible. Minor leaks may be resolved by tightening connections or replacing faulty components. However, significant leaks or persistent issues should be addressed by a professional plumber to prevent further damage and ensure proper repairs.
Once you have completed the leak inspection, proceed to the next step to examine the pressure relief valve.
Read more: How To Check Thermostat On Water Heater
Step 5: Inspect the Pressure Relief Valve
The pressure relief valve is a crucial safety component of your water heater. It prevents excessive pressure buildup inside the tank, which can lead to potential hazards. Regularly inspecting and testing the pressure relief valve ensures its proper functionality. Follow these steps to inspect the pressure relief valve:
- Locate the pressure relief valve: The pressure relief valve is usually located on the top or side of the water heater. It is typically a lever or a small handle attached to a valve.
- Check for visible signs of damage: Inspect the pressure relief valve for any signs of corrosion, rust, or leakage. These issues can indicate a malfunctioning valve that needs to be replaced.
- Operate the pressure relief valve: Gently lift or pull the lever on the pressure relief valve. This will manually open the valve and release a small amount of water and steam. Be cautious as the water may be hot.
- Observe the valve in action: While the valve is open, observe the flow of water. It should steadily discharge water and then stop once you release the lever. If the water continues to flow or the valve doesn’t close properly, it may be a sign of a defective valve and requires replacement.
- Listen for a hissing sound: During the operation of the pressure relief valve, listen for any unusual hissing or whistling sounds. These noises can indicate a faulty valve that needs attention.
- Replace the pressure relief valve if necessary: If you notice any signs of damage, continuous leakage, or malfunctions during the operation of the valve, it’s essential to replace it. Consult the manufacturer’s instructions or seek professional assistance to ensure the correct replacement valve is installed.
By inspecting and testing the pressure relief valve, you can ensure that it is in proper working order. This safeguards your water heater and reduces the risk of pressure-related accidents.
Now that you have completed the pressure relief valve inspection, let’s move on to examining the heating elements in the next step.
Regularly check the pressure relief valve on your water heater to ensure it is functioning properly. Lift the lever to release some water and ensure it stops when the lever is released.
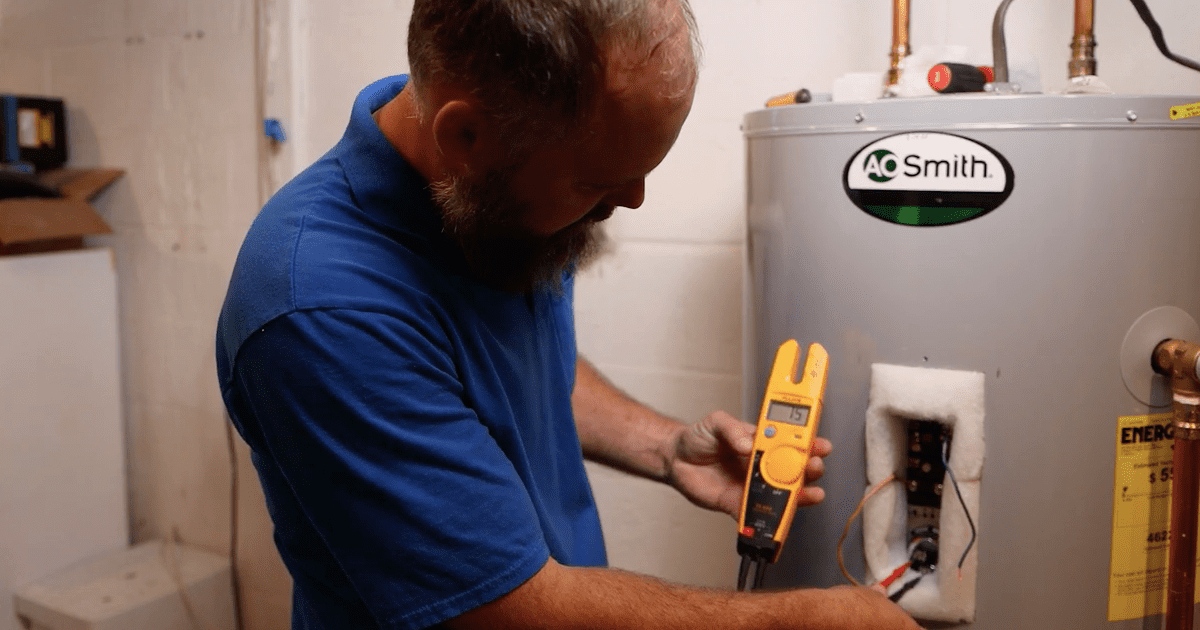
Step 6: Examine the Heating Elements
The heating elements are responsible for heating the water inside your water heater. Over time, these elements can deteriorate or malfunction, resulting in a decrease in the water heater’s performance. Follow these steps to examine the heating elements:
- Turn off the power: Before inspecting the heating elements, make sure the power supply to the water heater is turned off. This will help prevent any electrical accidents.
- Access the heating element: Most water heaters have access panels that allow you to reach the heating elements. Remove the appropriate panel, usually located on the side of the water heater, to access the elements.
- Inspect for signs of damage or corrosion: Carefully examine the heating elements for any visible signs of damage, such as cracks, breaks, or corrosion. If you notice any issues, it may be an indication that the heating element needs to be replaced.
- Clean the heating elements: Over time, sediment and mineral deposits can build up on the heating elements, reducing their efficiency. Use a soft brush or cloth to gently clean the elements and remove any debris. Be careful not to damage the elements during the cleaning process.
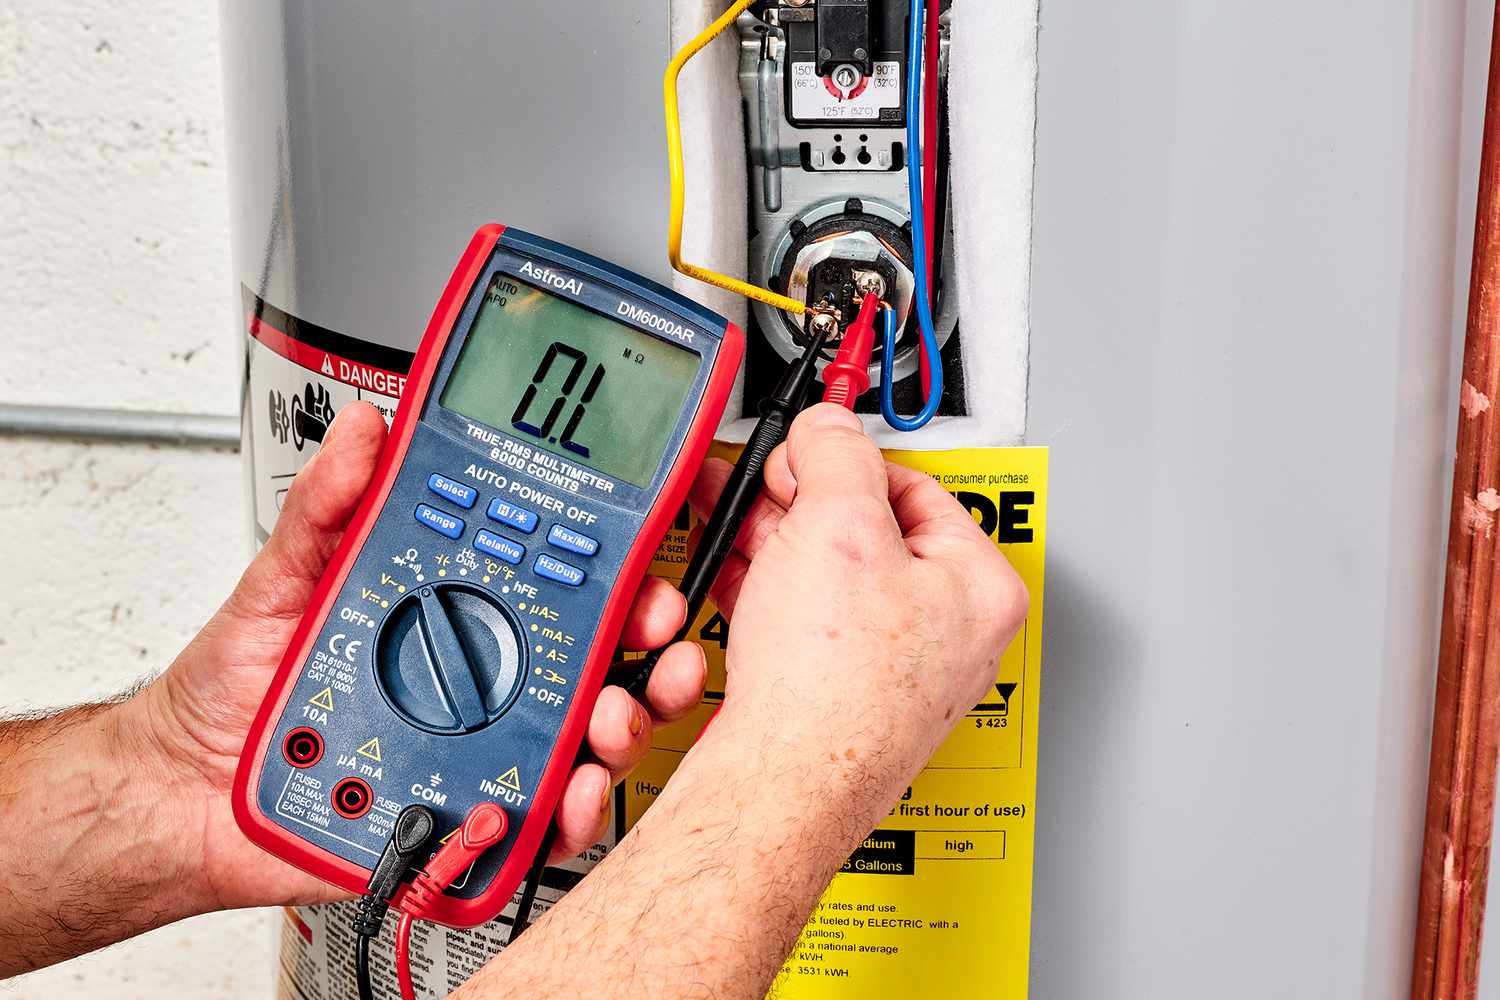
- Test the heating elements: Use a multimeter to test the heating elements for continuity. Set the multimeter to the resistance or ohms setting and touch the probes to the terminals of each heating element. If the reading on the multimeter shows infinite resistance, it may indicate a faulty element that needs to be replaced.
- Replace faulty heating elements: If you find any damaged or malfunctioning heating elements during the inspection or testing process, it’s essential to replace them. Consult the manufacturer’s instructions or seek professional help in selecting and installing the correct replacement elements.
By examining the heating elements, you can ensure they are in good condition and functioning properly. This will help maintain the efficiency and performance of your water heater, ensuring a steady supply of hot water.
Now that you have completed the examination of the heating elements, let’s move on to measuring the temperature in the next step.
Step 7: Measure the Temperature
Measuring the temperature of your water heater allows you to ensure that it is set to the desired level and functioning correctly. It also helps identify potential issues such as inaccurate temperature readings or temperature fluctuations. Follow these steps to measure the temperature:
- Turn on the power: Before measuring the temperature, make sure the power supply to the water heater is turned on. This will allow the heater to heat the water to its set temperature.
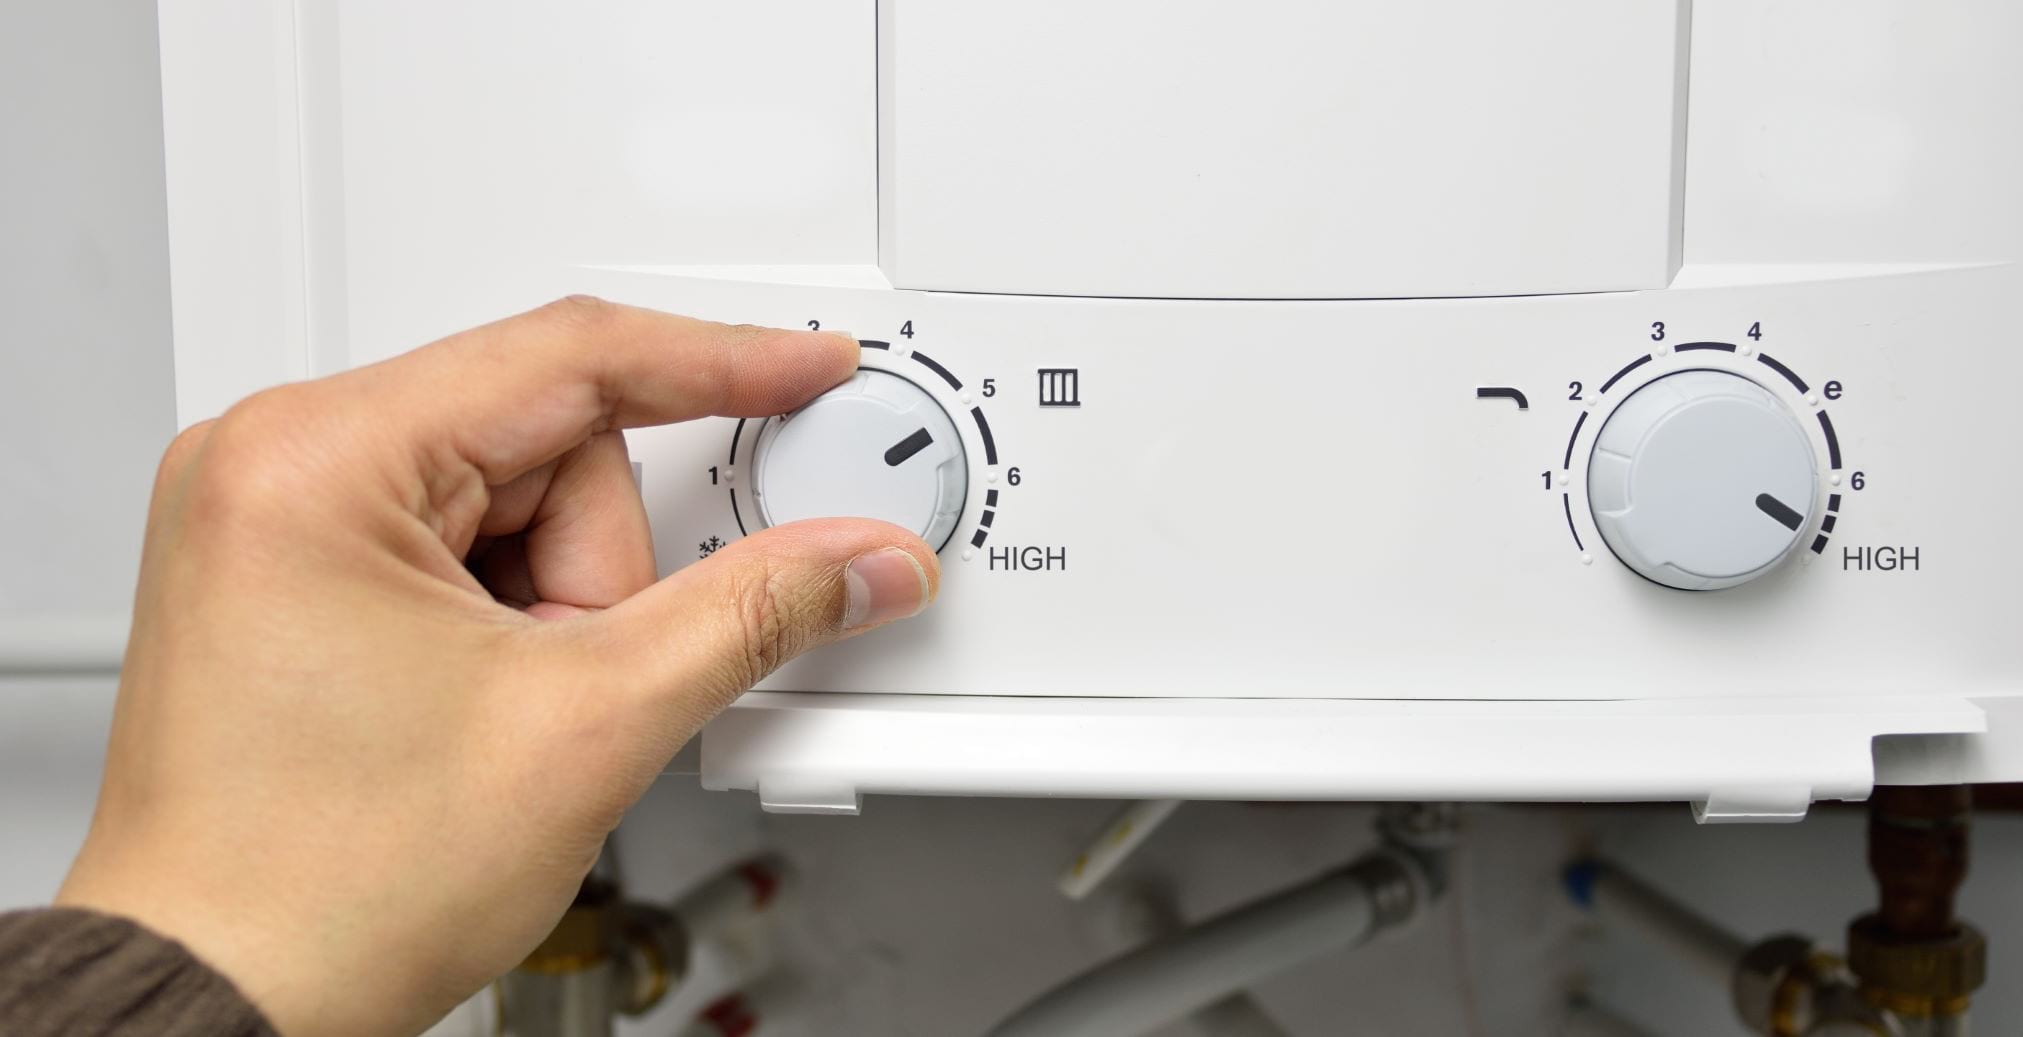
- Locate the temperature dial or control: The temperature dial or control is typically located on the front or side of the water heater. It may be labeled as “temperature,” “thermostat,” or something similar.
- Use a thermometer: Take a thermometer and hold it under a faucet that dispenses hot water from the water heater. Let the water run for a few minutes to ensure it reaches its maximum temperature.
- Immerse the thermometer: Carefully immerse the thermometer into the hot water stream, ensuring that the thermometer is fully submerged. Allow the thermometer to stabilize and read the temperature.
- Compare the temperature: Compare the measured temperature with the temperature setting on the water heater’s temperature dial. It should closely match or be within a few degrees of the set temperature. If there is a significant difference, you may need to adjust the thermostat or seek professional assistance.
- Record the temperature: Make a note of the measured temperature for future reference. This will allow you to track any changes or fluctuations in the water heater’s temperature over time.
Measuring the temperature of your water heater ensures that it is operating at the appropriate level and provides hot water at the desired temperature. If you find any inconsistencies or issues with the temperature, it may indicate a problem with the thermostat or other components of the water heater, which might require further investigation or professional assistance.
Now that you have measured the temperature, let’s move on to testing the thermostat in the next step.
Step 8: Test the Thermostat
The thermostat controls the temperature of the water inside your water heater. If the thermostat is not functioning correctly, it can lead to issues such as inconsistent hot water temperatures. Testing the thermostat will help you ensure its accuracy and proper functioning. Follow these steps to test the thermostat:
- Turn off the power: Before testing the thermostat, make sure the power supply to the water heater is turned off. This will help prevent any electrical accidents.
- Access the thermostat: Locate the thermostat on the water heater. It is often located on the front or side of the tank and can be accessed by removing an access panel or cover.
- Set the thermostat to a higher temperature: Adjust the thermostat to a higher temperature setting than the current water temperature. This will simulate the need for the water heater to heat the water.
- Wait for the water heater to heat up: Turn on the power to the water heater and allow it to run for some time. This will give the heater time to heat the water to the set temperature.
- Test the hot water: Open a hot water faucet and let the water run for a few minutes to ensure that it reaches its hottest point. Use a thermometer to measure the temperature of the hot water.
- Compare the temperatures: Compare the measured temperature of the hot water with the temperature set on the thermostat. They should be closely aligned or within a few degrees. If there is a significant difference, it may indicate a problem with the thermostat that requires adjustment or replacement.
- Repeat the test at different temperature settings: Perform the temperature test at different thermostat settings to ensure consistent results. This will help you identify any temperature inconsistencies or irregularities at various temperature settings.
Testing the thermostat allows you to verify its accuracy and ensure that it is functioning properly. If you notice any significant discrepancies in the temperatures or inconsistent performance, it may be necessary to adjust or replace the thermostat to restore optimal functionality to your water heater.
Now that you have tested the thermostat, let’s move on to conducting a flushing test in the next step.
Read more: How To Check Water Heater Element
Step 9: Conduct a Flushing Test
Over time, sediment and mineral deposits can accumulate at the bottom of your water heater. This buildup can affect the efficiency and performance of the unit. Conducting a flushing test helps remove these deposits and keeps your water heater functioning optimally. Follow these steps to conduct a flushing test:
- Turn off the power: Before flushing the water heater, make sure the power supply to the unit is turned off. This will prevent any electrical accidents during the process.
- Locate the drain valve: The drain valve is typically located at the bottom of the water heater. It may be a faucet-like valve or a screw-type valve. Attach a garden hose to the drain valve to allow for proper drainage.
- Place a bucket or drain pan beneath the drain valve: Position a bucket or drain pan beneath the drain valve to collect the water and sediment that will be flushed out.
- Open the drain valve: Slowly open the drain valve by turning it counterclockwise. This will allow the water to flow out of the tank through the hose and into the bucket or drain pan.
- Flush out the sediment: Let the water flow through the hose until it runs clear. Initially, you may notice cloudy or discolored water as the sediment is flushed out. Continue flushing until the water becomes clear and free of sediment.
- Close the drain valve: Once the water runs clear, close the drain valve by turning it clockwise. Ensure it is securely closed to prevent any leaks.
- Turn on the water supply: Turn on the water supply to the water heater, allowing it to refill the tank. Check for any leaks around the connections or valves.
- Turn on the power: Once the tank is refilled and there are no signs of leaks, turn on the power supply to the water heater. This will enable the heating elements to heat the water.
Performing a flushing test at least once a year helps remove sediment and mineral deposits, improving the efficiency and prolonging the lifespan of your water heater. Regular flushing also helps prevent the buildup of sediment that can lead to issues such as reduced heating efficiency or even tank damage.
Now that you have conducted the flushing test, let’s move on to the final step of turning on the power to the water heater.
Step 10: Turn on the Power
After completing all the necessary inspections and tests on your water heater, it’s time to turn on the power and restore the functionality of the unit. Follow these steps to safely turn on the power to your water heater:
- Double-check all connections: Before turning on the power, ensure that all connections, valves, and drain plugs are properly tightened and secure. This will help prevent any leaks or water damage.
- Locate the circuit breaker panel: Find the circuit breaker panel in your home where the power to the water heater is controlled.
- Identify the water heater circuit breaker: Locate the circuit breaker labeled for your water heater. It is usually marked as “water heater,” “hot water tank,” or something similar.
- Flip the circuit breaker to the “on” position: Once you have identified the correct circuit breaker, switch it to the “on” position. This will restore the electrical power supply to your water heater.
- Confirmation: Confirm that the power to the water heater has been restored by checking the functioning of the unit. Listen for any sounds indicating that the heating elements are working, such as the heating element entering the heating cycle.
- Monitor the water heater: As the water heater powers on, keep an eye out for any leaks, unusual noises, or malfunctions. If you notice any issues, it is advisable to consult a professional plumber for further assistance.
By following these steps and turning on the power to your water heater, you ensure that it is ready to provide hot water as needed. Regularly monitor the performance of your water heater to ensure it continues to function properly.
With that, you have completed all the steps to check your water heater and ensure its efficient and safe operation. Regular maintenance and inspections are key to extending the lifespan of your water heater and avoiding costly repairs in the future.
Remember, if you are unsure about any steps or encounter any difficulties, it is always best to consult a professional plumber who can provide expert guidance and assistance.
By taking the time to inspect and maintain your water heater, you can enjoy reliable hot water for your daily needs for years to come.
Conclusion
Regularly checking your water heater is essential for ensuring its optimal performance and longevity. By following the step-by-step process outlined in this article, you can identify any potential issues, address them promptly, and maintain a reliable supply of hot water in your home.
We started by emphasizing the importance of safety precautions, including turning off the power and wearing protective gear. This ensures your well-being throughout the inspection process.
We then walked you through each step, including turning off the power, locating the water heater, checking for leaks, inspecting the pressure relief valve, examining the heating elements, measuring the temperature, testing the thermostat, conducting a flushing test, and finally, turning on the power.
Throughout this process, we highlighted the significance of visual inspections, proper maintenance, and regular cleaning to identify and address potential issues, such as leaks, corrosion, or sediment buildup, which can impact the efficiency and performance of your water heater.
By implementing these practices, you can not only extend the lifespan of your water heater but also potentially save money on costly repairs or replacements in the long run.
Remember, if you ever feel unsure about any of the steps or encounter any difficulties, it’s always best to consult a professional plumber. They have the expertise to handle more complex issues and ensure the optimal functioning of your water heater.
With routine checks and maintenance, you can enjoy the comfort and convenience of reliable hot water for your daily activities while also maximizing the efficiency and longevity of your water heater.
So, don’t overlook the importance of checking your water heater! Take the time to follow these steps and keep your water heater running efficiently for years to come.
Frequently Asked Questions about How To Check A Water Heater
Was this page helpful?
At Storables.com, we guarantee accurate and reliable information. Our content, validated by Expert Board Contributors, is crafted following stringent Editorial Policies. We're committed to providing you with well-researched, expert-backed insights for all your informational needs.


0 thoughts on “How To Check A Water Heater”