Articles
How To Tile A Fireplace Hearth
Modified: October 20, 2024
Learn how to tile a fireplace hearth with our comprehensive articles. Discover step-by-step instructions and expert tips for a beautiful fireplace renovation.
(Many of the links in this article redirect to a specific reviewed product. Your purchase of these products through affiliate links helps to generate commission for Storables.com, at no extra cost. Learn more)
Introduction
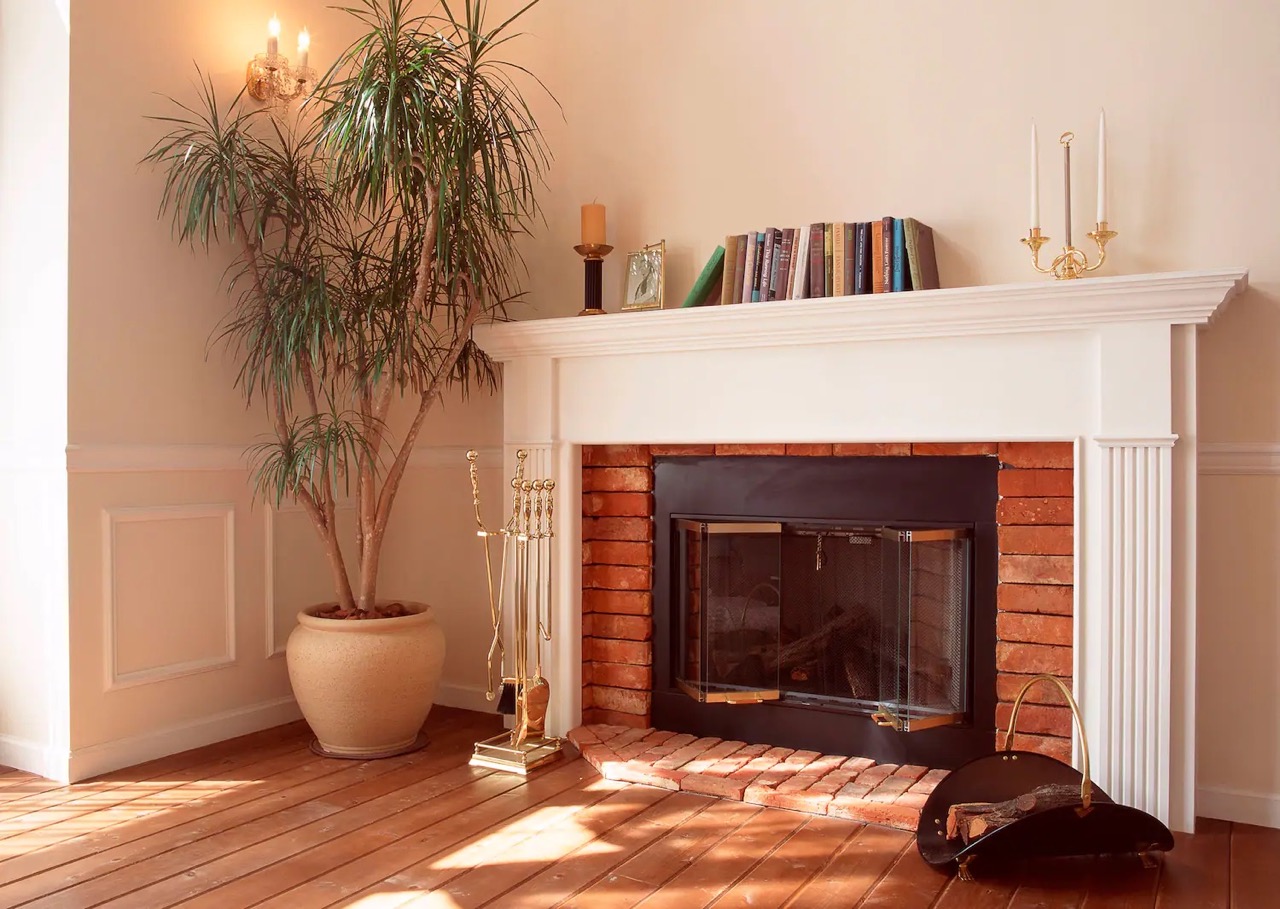
When it comes to enhancing the visual appeal of your fireplace, tiling the hearth is a fantastic option that can completely transform the look of the room. A well-tiled hearth can create a focal point, add a touch of elegance, or even showcase your personal style. However, tackling a tiling project can seem daunting, especially if you’re a novice DIY enthusiast. But fear not! In this article, we will guide you through the process of tiling a fireplace hearth, providing you with all the information you need to turn this project into a successful and rewarding endeavor.
Before we dive into the step-by-step process, it’s important to understand that choosing the right tiles is paramount to achieving the desired outcome. The type, color, texture, and size of the tiles you choose will greatly impact the overall look and feel of the hearth. Whether you prefer a contemporary and sleek design or a more rustic and earthy style, there is a wide range of tiles available to suit your taste.
Once you have selected the perfect tiles, the next step is to measure and plan the layout of the hearth. Accurate measurements are crucial to ensure that the tiles fit perfectly and create a seamless finished look. Take into consideration the size of the hearth, the surrounding area, and any special design elements you may want to incorporate, such as a decorative border or mosaic pattern.
Before you start tiling, it is essential to prepare the surface properly. Remove any existing tiles or debris and ensure that the hearth is clean and level. This will provide a solid foundation for the tiles and ensure their longevity.
When it comes to applying the tiles, the use of thinset mortar is recommended. This adhesive material provides a strong bond between the tiles and the hearth. The process of setting the tiles involves carefully applying the mortar and arranging the tiles in the desired pattern. Take your time and pay attention to spacing and alignment for a professional finish.
Inevitably, there will be instances where you’ll need to cut and fit tiles to accommodate corners, edges, or irregular shapes. This can be tricky but with the right tools and techniques, you can achieve a seamless look. Use a wet saw or tile cutter to make accurate cuts, and always remember to wear protective eyewear and gloves when handling cutting tools.
Once all the tiles are set in place, it’s time to grout. Grouting not only fills in the gaps between the tiles but also adds stability and prevents moisture from seeping underneath. Choose a grout color that complements your tiles and carefully apply it using a grout float. Ensure that all the spaces are thoroughly filled, wiping away any excess grout with a damp sponge.
Finally, after the grout has dried, clean the tiles thoroughly to remove any haze or residue. A solution of water and vinegar can be used to achieve a streak-free shine. Don’t forget to add any finishing touches, such as sealing the grout or adding a decorative trim, to complete the look of your newly tiled fireplace hearth.
Now that you have a comprehensive overview of the tiling process, you are ready to embark on this exciting DIY project. Remember to take your time, follow the steps carefully, and seek professional assistance if needed. By tiling your fireplace hearth, you can create a stunning focal point in your living space that will surely impress your family and friends.
Key Takeaways:
- Transform your fireplace with the perfect tiles, careful planning, and expert techniques to create a stunning focal point that reflects your personal style and enhances the ambiance of your living space.
- Achieve a professional and polished fireplace hearth by mastering the art of tiling, grouting, and adding finishing touches, ensuring a beautiful and long-lasting centerpiece for your home.
Read more: What Is The Hearth On A Fireplace
Choosing the Right Tiles
When it comes to tiling a fireplace hearth, selecting the right tiles is crucial to achieve the desired aesthetic and functionality. The type, color, texture, and size of the tiles will greatly impact the overall look and feel of the hearth, so it’s important to choose wisely. Below are some key factors to consider when selecting the perfect tiles for your fireplace hearth:
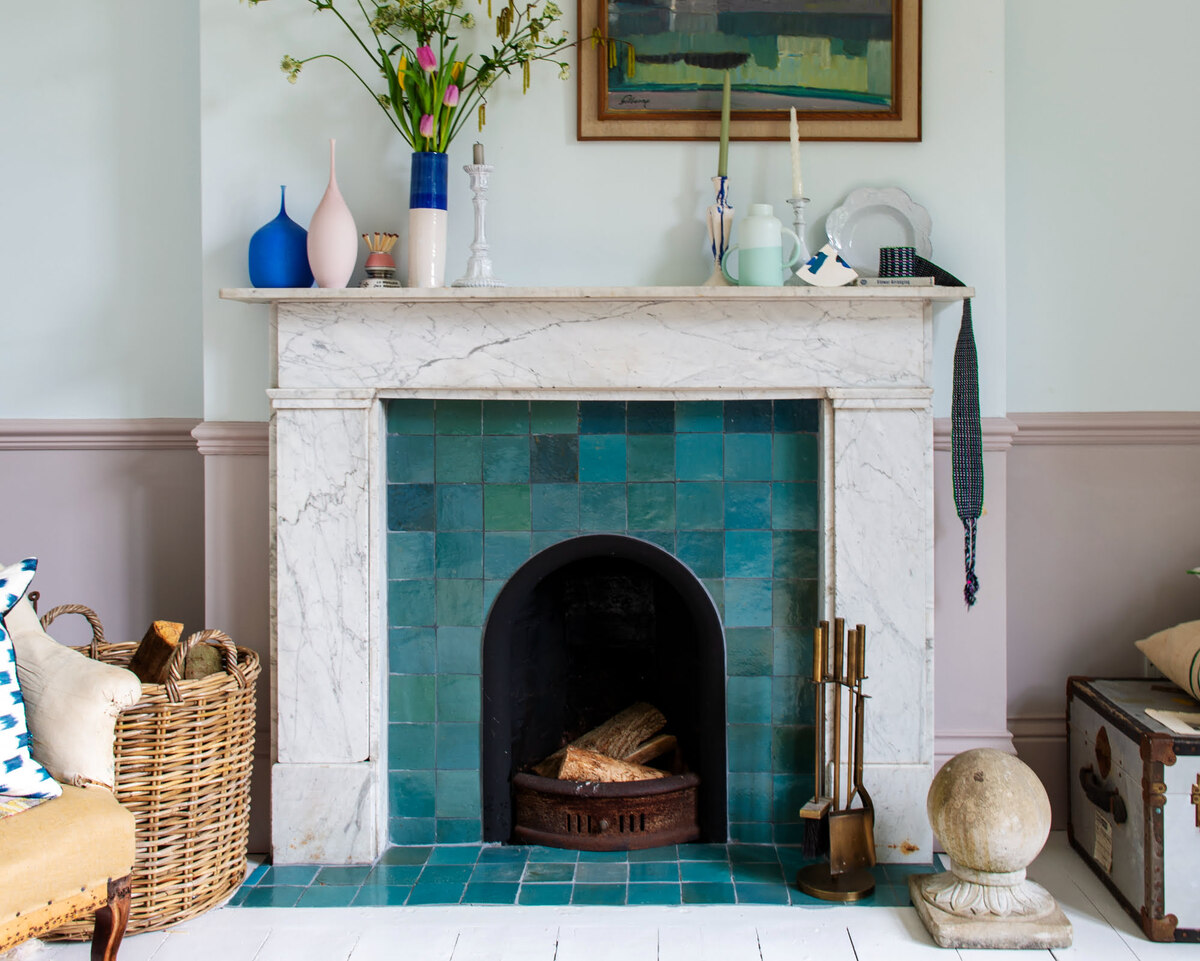
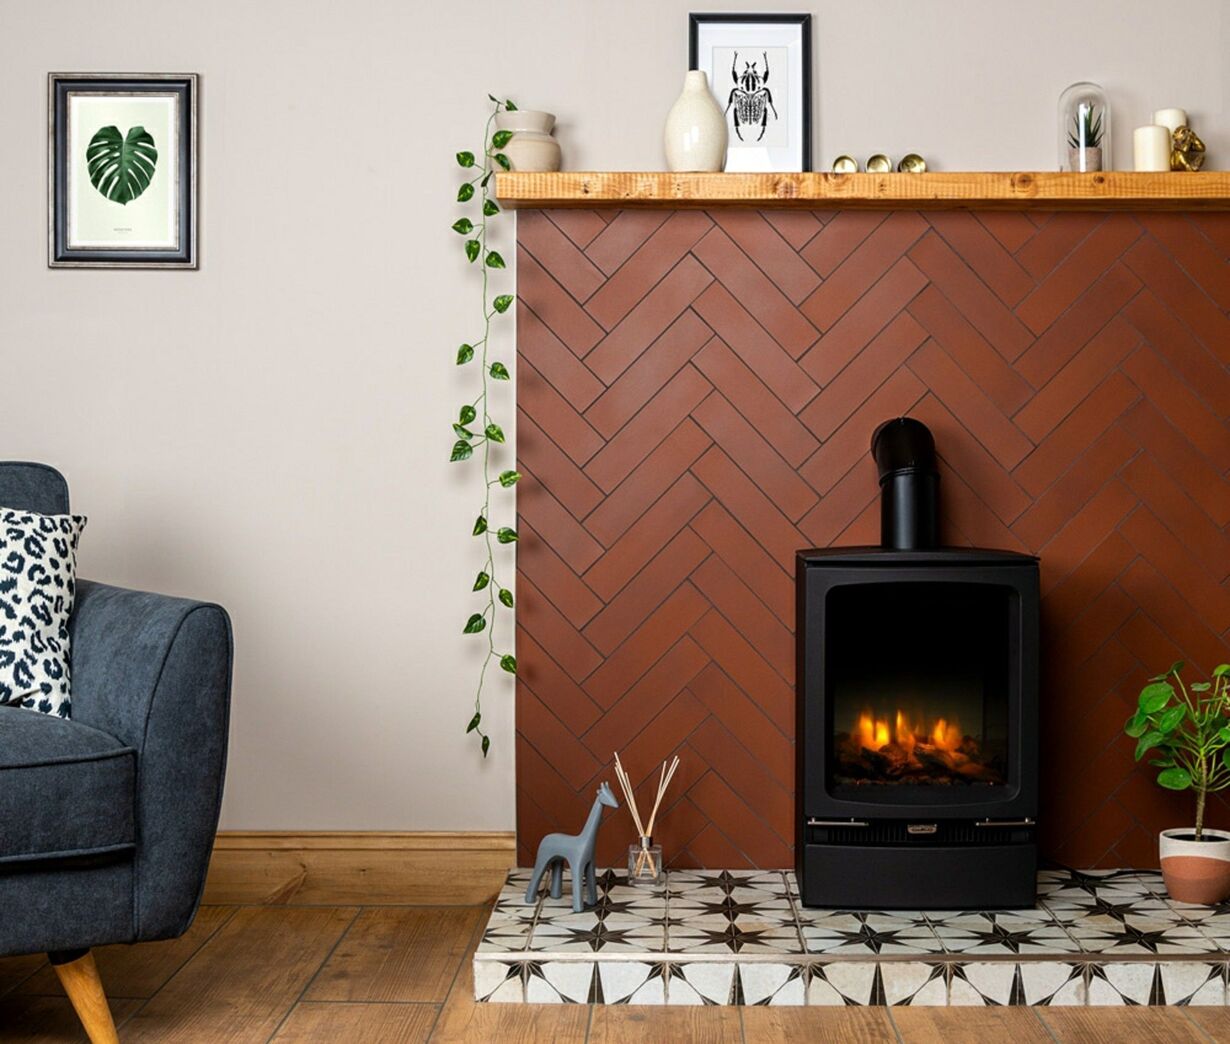
1. Type of Tiles: There are various types of tiles available in the market, each with its own unique characteristics. Common options for fireplace hearths include ceramic, porcelain, glass, stone, and mosaic tiles. Ceramic and porcelain tiles are versatile and durable, making them popular choices for hearth tiling. Glass tiles can add an elegant and modern touch, while natural stone tiles can bring a rustic and earthy feel. Mosaic tiles allow for creative designs and patterns, adding visual interest to the hearth.
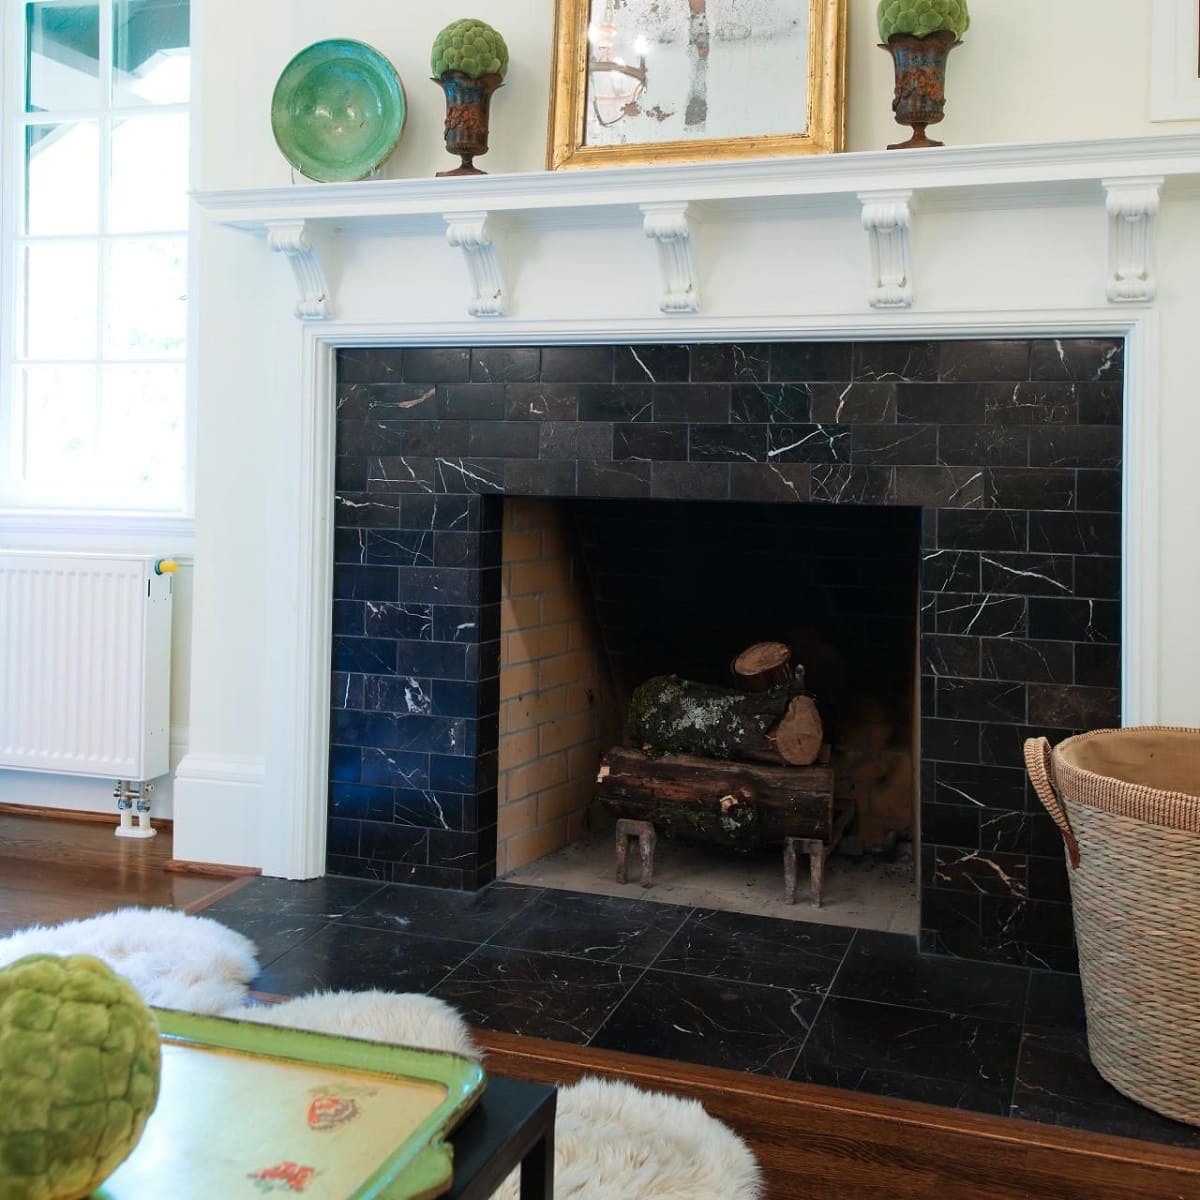
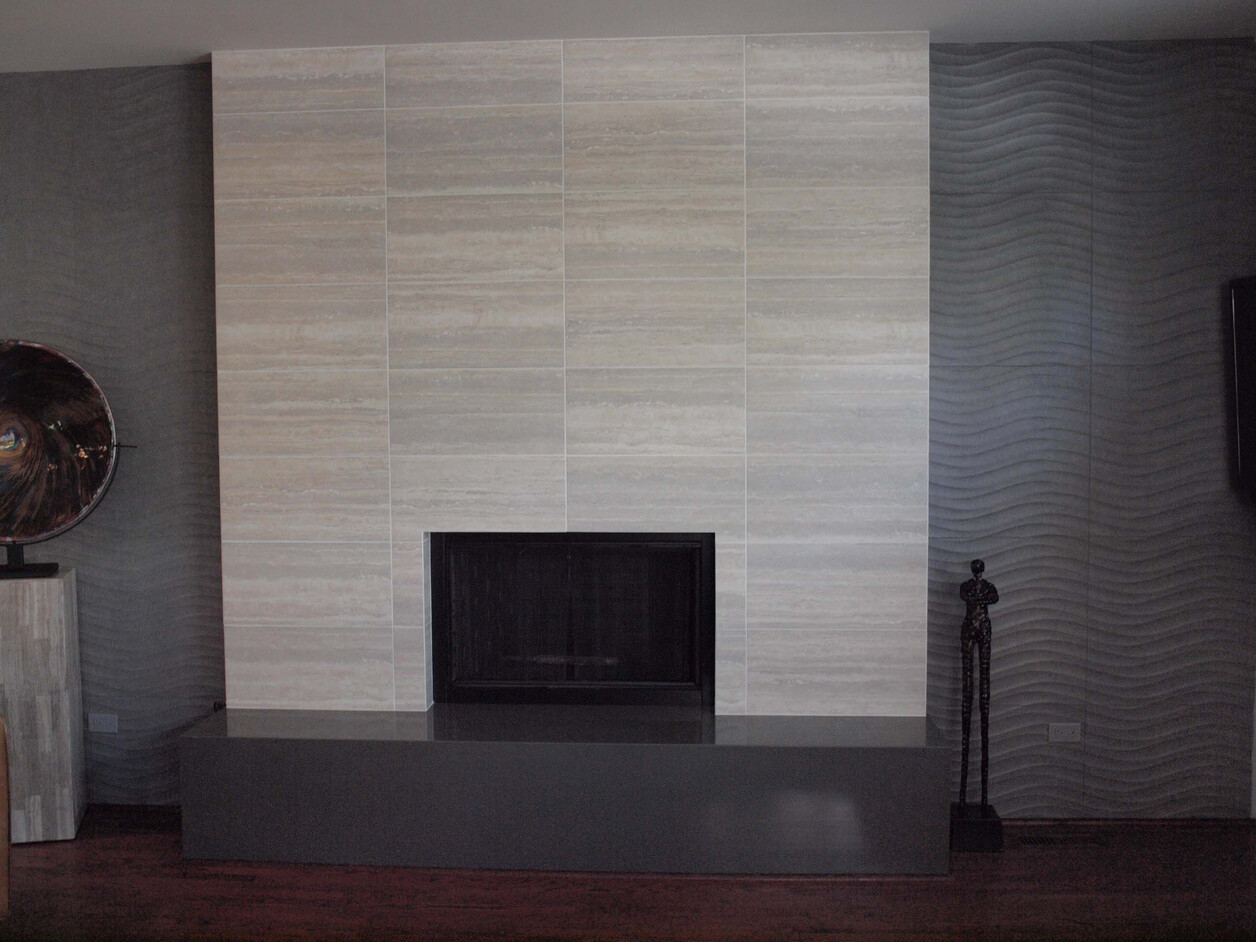
2. Color: The color of the tiles will set the overall tone and mood of your fireplace hearth. Consider the existing color scheme of the room and choose tiles that complement or contrast with the surrounding decor. Lighter colors can create a bright and airy feel, while darker colors offer a more dramatic and cozy ambiance. Earth tones are versatile and blend well with various interior styles, while bold colors can make a statement and add a pop of visual interest.
3. Texture: The texture of the tiles not only affects the visual appeal but also the tactile experience. Smooth and polished tiles can lend a more contemporary and sophisticated look, while textured or matte tiles add a touch of depth and visual interest. Consider the overall style and theme of your space when selecting the texture of the tiles, ensuring they harmonize with the surrounding elements.
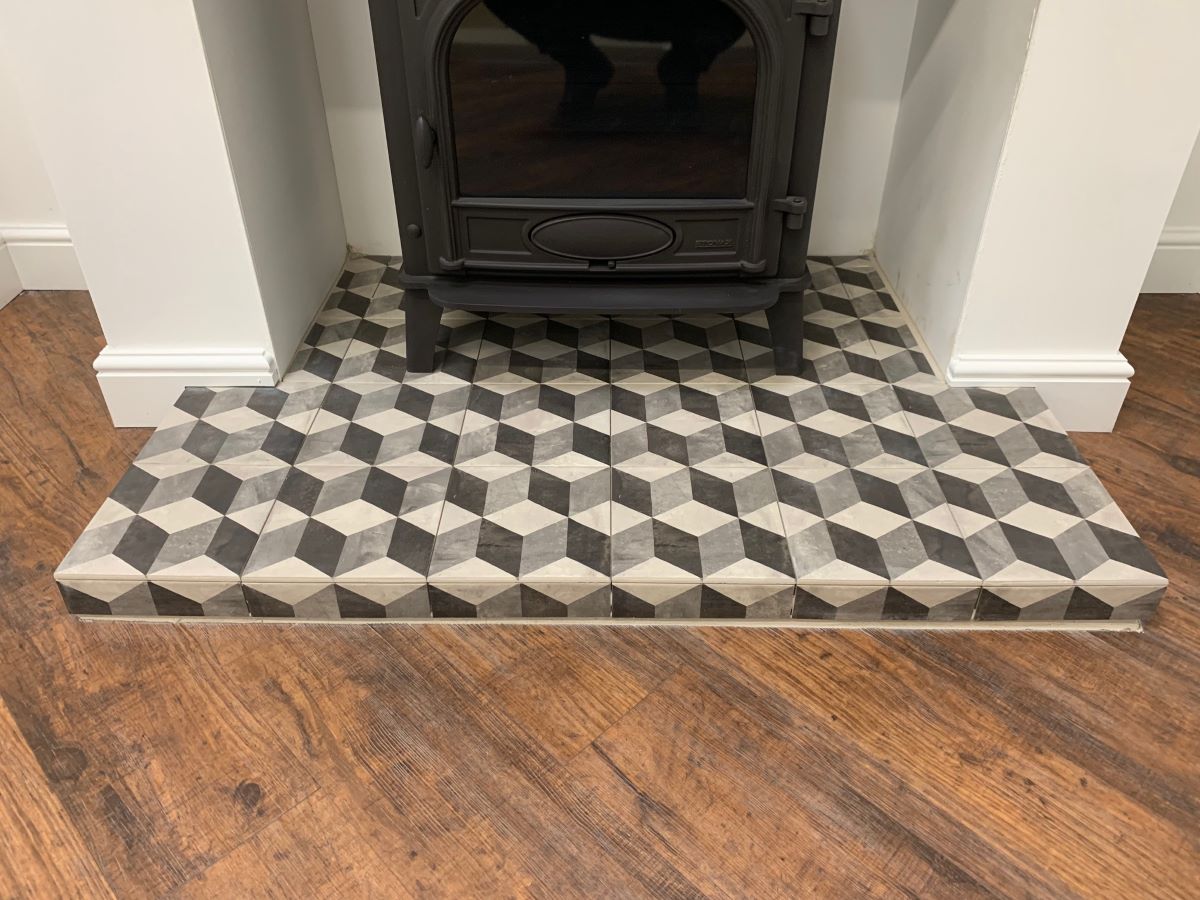
4. Size and Shape: The size and shape of the tiles can greatly impact the overall visual effect. Larger tiles can create a sense of space and elegance, while smaller tiles provide intricate details and allow for creative patterns. Consider the proportions of the hearth and the size of the room when selecting the size and shape of the tiles. Rectangular or square tiles are classic choices, while hexagonal or mosaic tiles can add a unique and artistic touch.
5. Durability: The hearth area can be subjected to high temperatures and occasional exposure to sparks or embers. Therefore, it’s important to choose tiles that are heat-resistant and durable. Ceramic, porcelain, and natural stone tiles are generally good options as they can withstand high temperatures and are resistant to scratches and stains. Ensure that the tiles you choose are suitable for fireplace hearths and can withstand the demands of regular use.
6. Maintenance: Consider the maintenance requirements of the tiles. Some tiles may require regular sealing to protect them from moisture or staining, while others may be more low-maintenance. Choose tiles that align with your lifestyle and maintenance preferences, ensuring that they are easy to clean and maintain in the long run.
By carefully considering these factors, you can choose the perfect tiles that will not only enhance the aesthetic appeal of your fireplace hearth but also withstand the demands of its function. Don’t be afraid to explore various options and seek inspiration from design magazines, online galleries, or home improvement stores. With the right tiles, your fireplace hearth will become the centerpiece of your living space, adding beauty and warmth for years to come.
Measuring and Planning
Accurate measurement and careful planning are essential steps when tiling a fireplace hearth. By taking the time to measure properly and plan the layout of the tiles, you can ensure a professional-looking and cohesive end result. Here are the key steps to follow when measuring and planning for your hearth tiling project:
1. Measure the Hearth: Start by measuring the dimensions of your fireplace hearth. Use a measuring tape to measure the length, width, and height of the hearth, as well as any protruding areas or irregular shapes. Take note of these measurements and write them down for reference throughout the tiling process.
2. Plan the Tile Layout: Consider the design and pattern you want to achieve with your tiles. Sketch out a rough layout of the hearth on paper, indicating the arrangement of the tiles and any special design elements such as borders or decorative patterns. This will help you visualize the final result and guide you during the installation process.
3. Calculate the Tile Quantity: Once you have a clear idea of the tile layout, you can calculate the quantity of tiles required for the project. Measure the length and width of individual tiles and divide the total area of the hearth by the area covered by a single tile. This will give you an estimate of the number of tiles needed. It’s always a good idea to purchase extra tiles to account for any breakage or future repairs.
4. Consider Tile Placement: Think about how you want to position the tiles on the hearth. In most cases, it’s recommended to start tiling from the center and work your way outwards. This ensures a balanced and symmetrical look. However, depending on the design and pattern you’ve chosen, you may need to start from a different point. Plan out the tile placement accordingly.
5. Account for Grout Lines: Remember to consider the width of the grout lines when planning the tile layout. Grout lines create space between the tiles and play a significant role in the overall appearance. You can use tile spacers to ensure consistent spacing between the tiles and achieve a professional finish. Take into account the size of the spacers when measuring and planning the tile layout.
6. Consult a Professional (if needed): If you’re unsure about the measuring and planning process, or if you have a complex hearth design in mind, it’s always a good idea to consult a professional. An experienced tile installer or designer can provide valuable guidance, ensuring that the measurements are accurate and the tile layout is visually appealing and functional.
By taking the time to measure accurately and plan the layout of the tiles, you can set the foundation for a successful tiling project. Remember to double-check your measurements, consider the placement of the tiles, and calculate the quantity needed. With careful planning, you can proceed with confidence and achieve a beautifully tiled fireplace hearth that will be the envy of all who see it.
Preparing the Surface
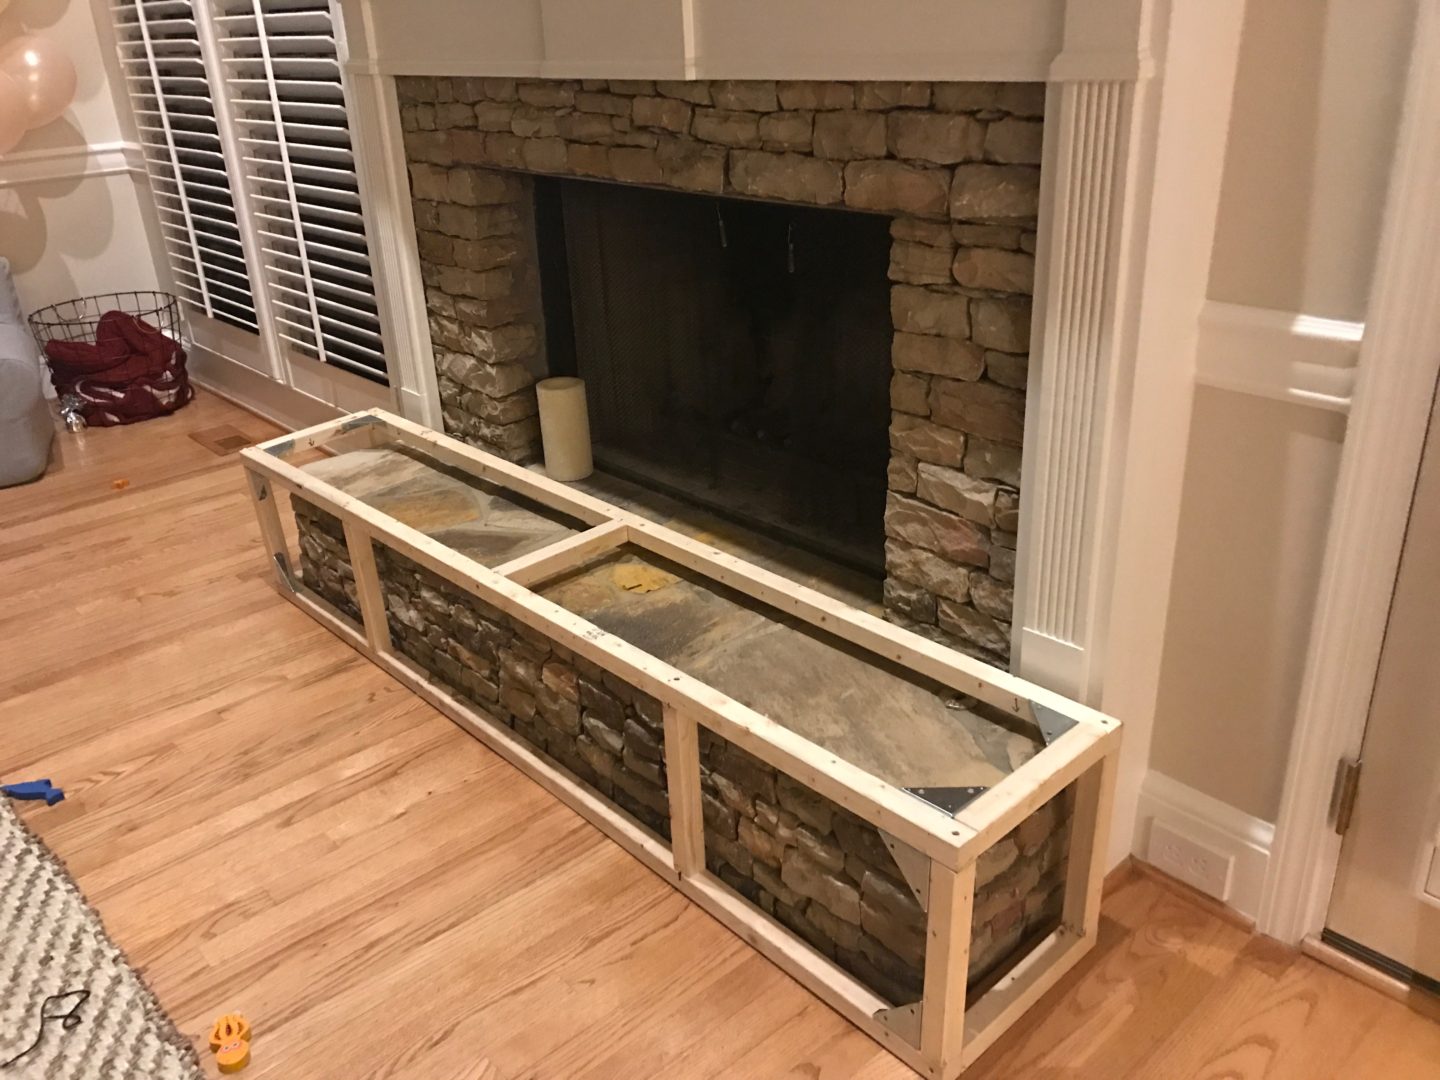
Before you can start tiling your fireplace hearth, it is crucial to properly prepare the surface to ensure a durable and long-lasting installation. Preparing the surface involves cleaning, removing any existing tiles or debris, and creating a smooth and level base for the tiles. Here are the key steps to follow when preparing the surface of your fireplace hearth:
1. Clear the Area: Start by removing any objects, decorations, or furniture around the fireplace hearth. This will provide you with a clear and unobstructed workspace to work with.
2. Protect Surrounding Surfaces: To avoid any accidental damage, protect the surrounding areas, such as the walls and flooring, by covering them with a drop cloth or plastic sheeting. This will protect these surfaces from any debris or as well as any accidental spills or damage from adhesive or grout.
3. Remove Existing Tiles: If there are existing tiles on the hearth, you will need to remove them before proceeding. Use a chisel and hammer to gently chip away at the tiles, starting from the edges and working your way towards the center. Be sure to wear protective goggles and gloves during this process to prevent any injuries. Once the tiles are removed, use a scraper or putty knife to remove any adhesive or mortar residue left behind. Ensure that the surface is clean and smooth before proceeding.
4. Clean the Surface: Thoroughly clean the hearth surface to remove any dust, dirt, or debris. Sweep the area with a broom, and use a vacuum cleaner to ensure a clean surface. You can also use a damp cloth or sponge to wipe away any stubborn stains or residues. It’s essential to start with a clean and debris-free surface to allow for proper adhesion of the tiles.
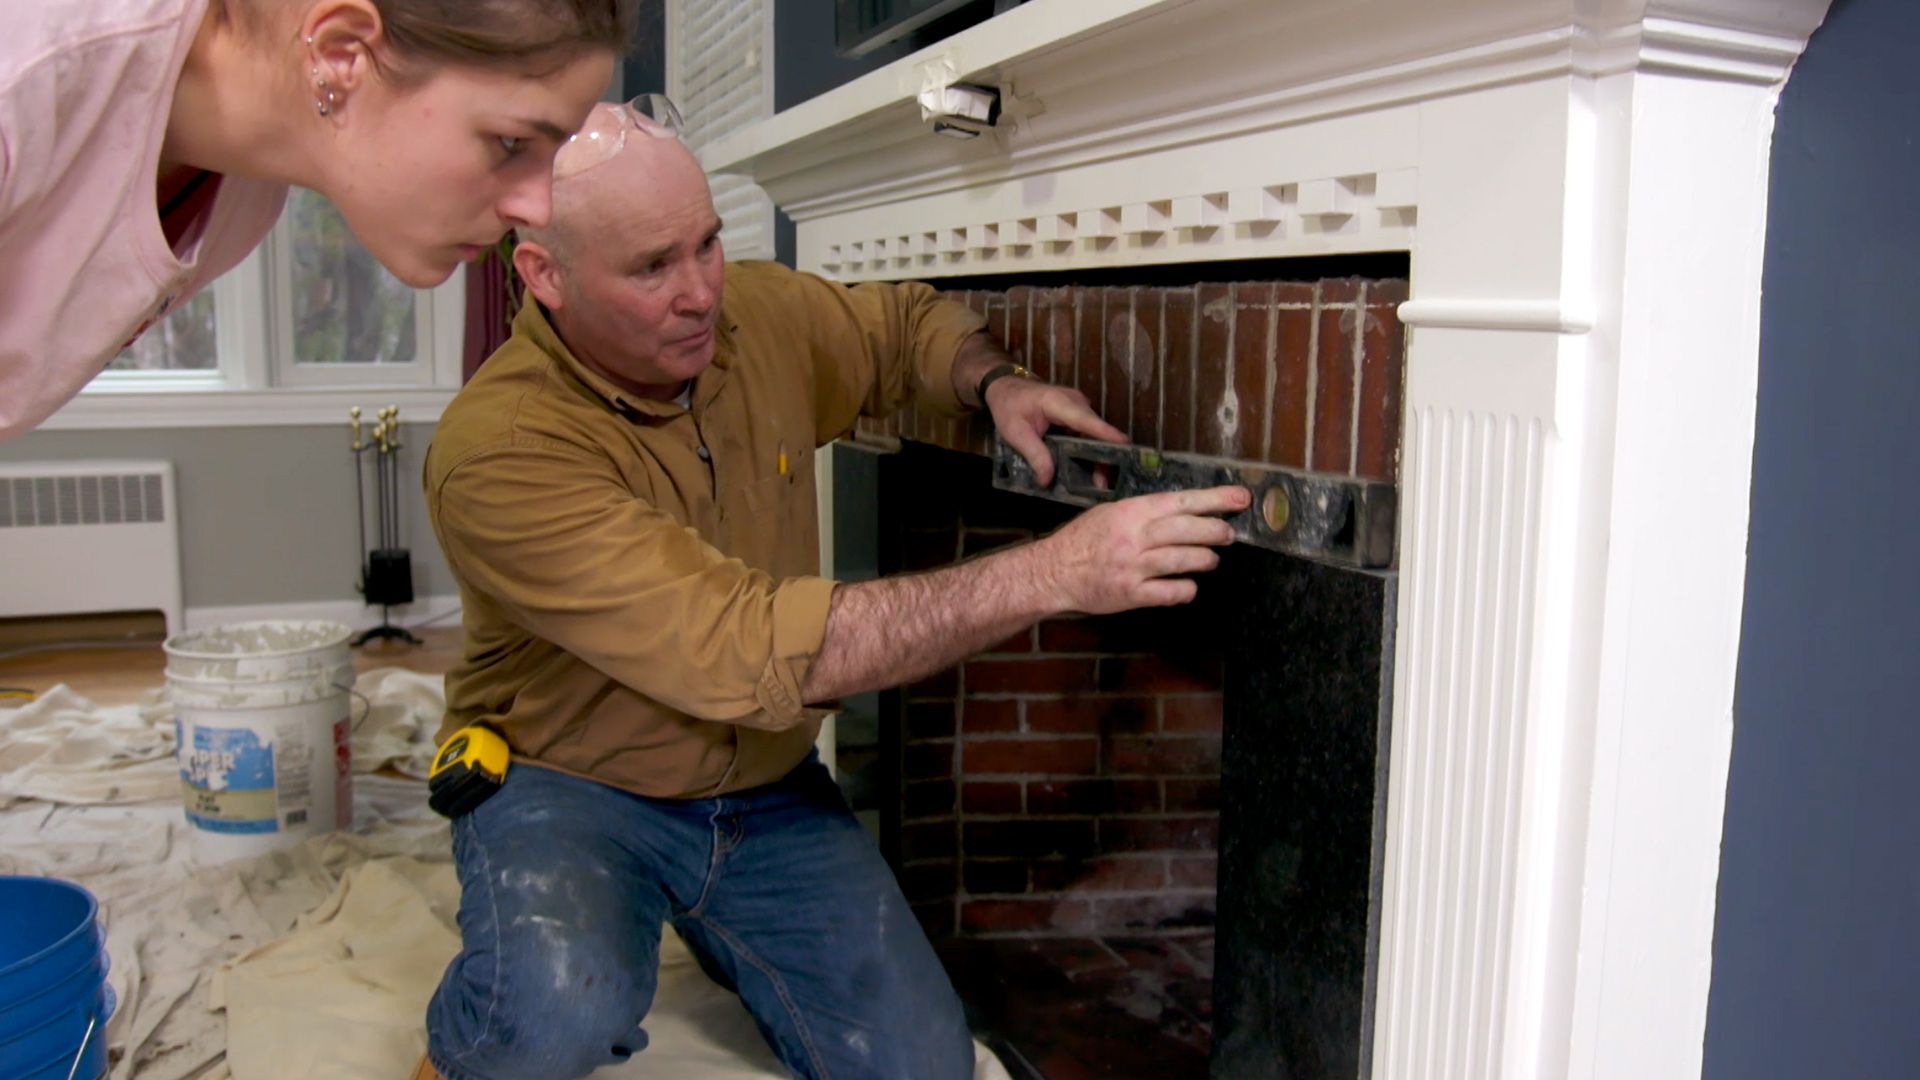
5. Check for Levelness: Use a level to check the levelness of the hearth surface. Place the level on different areas of the hearth, including the edges, corners, and center. If you notice any unevenness or variations, you may need to make adjustments to ensure a level surface. Depending on the severity of the unevenness, you can use a self-leveling compound to fill in any low spots or sand down any high spots. A level surface is crucial for a professional and visually appealing tile installation.
6. Allow for Drying Time: If you have used any compounds or cleaners during the surface preparation process, allow sufficient time for them to dry completely. This ensures that the surface is ready for the next step – applying the thinset mortar and setting the tiles.
By properly preparing the surface of your fireplace hearth, you create a solid foundation for a successful tiling project. Cleaning, removing any existing tiles or debris, and ensuring a level surface are essential steps that should not be skipped. With a clean and well-prepared surface, you can proceed to the next steps of tiling, confident in the longevity and visual appeal of your finished fireplace hearth.
Applying Thinset Mortar
One of the crucial steps in tiling a fireplace hearth is applying thinset mortar. Thinset mortar is a specially formulated adhesive that helps create a strong bond between the tiles and the hearth surface. This ensures a durable and long-lasting tile installation. Here are the key steps to follow when applying thinset mortar:
1. Gather Your Tools and Materials: Before you begin, make sure you have all the necessary tools and materials. This includes thinset mortar, a notched trowel, a bucket for mixing the mortar, a margin trowel for scooping and spreading the mortar, and a sponge for cleaning.
2. Prepare the Thinset Mortar: Follow the manufacturer’s instructions to mix the thinset mortar. Typically, you will add water to the mortar powder gradually while stirring with a margin trowel until you achieve a smooth, spreadable consistency. Avoid mixing too much mortar at once to prevent it from drying out before you can use it.
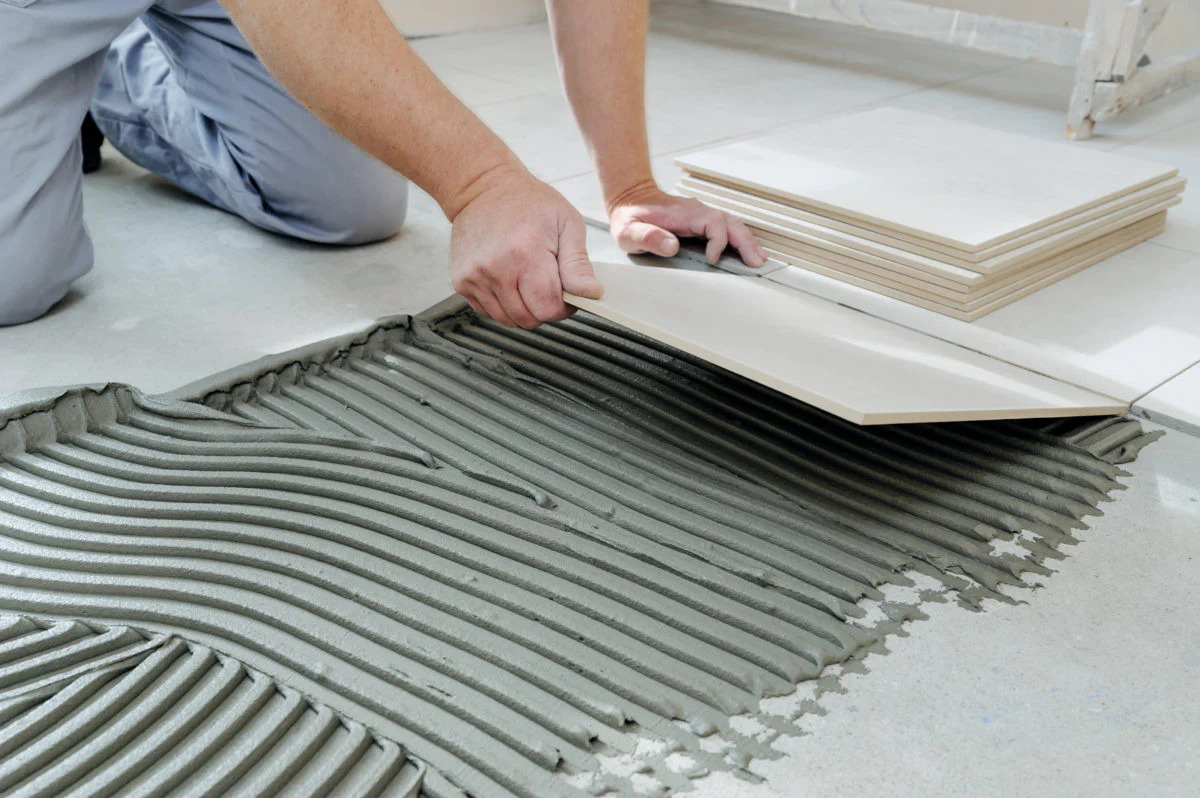
3. Apply the Mortar: Starting from the center of the hearth, use the flat side of the notched trowel to spread a layer of thinset mortar onto the hearth surface. Hold the trowel at a 45-degree angle and apply the mortar in even, sweeping motions. Work in small sections to ensure that the mortar remains workable and doesn’t dry out.
4. Comb the Mortar: Once you have spread the initial layer of mortar, flip the notched trowel and use its notched edge to comb through the mortar. Hold the trowel at a 45-degree angle and create parallel ridges in the mortar by dragging the notched edge of the trowel across it. This ensures proper coverage and adhesion of the mortar to the hearth surface.
5. Work in Sections: Work on one section at a time. Avoid spreading mortar over a large area as it can dry out before you have a chance to set the tiles. The mortar should be freshly combed and still tacky when you lay the tiles. If the mortar starts to dry, remove and replace it with fresh mortar for optimal tile adhesion.
6. Set the Tiles: Place the tiles into the thinset mortar, starting from the center and working outward. Press the tiles firmly into the mortar, wiggling them slightly to ensure good contact. Use tile spacers to maintain consistent spacing between the tiles. Continue setting the tiles in your desired pattern until the entire hearth is covered.
7. Check for Levelness and Alignment: Use a level to ensure that the tiles are level and aligned correctly. Adjust the tiles as needed before the mortar sets. Do not walk on freshly set tiles to avoid disturbing their position.
8. Clean Excess Mortar: As you work, periodically clean off any excess mortar that may squeeze up between the tiles. Use a damp sponge to carefully wipe away the excess mortar before it dries. This will make the grouting process easier and ensure a clean and professional finish.
9. Allow the Mortar to Cure: Follow the manufacturer’s instructions for the curing time of the thinset mortar. It typically takes 24 to 48 hours for the mortar to fully cure. Avoid any excessive moisture or foot traffic on the freshly tiled hearth during this time.
By following these steps and applying thinset mortar properly, you can achieve a secure and long-lasting bond between the tiles and the hearth surface. Take your time, work in small sections, and ensure that the tiles are level and aligned correctly. With the thinset mortar set, you’re one step closer to completing your beautifully tiled fireplace hearth.
When tiling a fireplace hearth, make sure to use heat-resistant mortar and grout to withstand the high temperatures. It’s also important to measure and plan the layout carefully to ensure a professional finish.
Read more: How To Decorate Fireplace Hearth
Setting the Tiles
With the thinset mortar applied, it’s now time to set the tiles on your fireplace hearth. This step involves carefully placing each tile in its designated spot, ensuring proper spacing and alignment. Here are the key steps to follow when setting the tiles:
1. Start from the Center: Begin setting the tiles from the center of the hearth and work your way outward. This will ensure a balanced and symmetrical look. Use a tile spacer to maintain consistent spacing between the tiles.
2. Press Tiles Firmly: Place each tile into the thinset mortar, pressing it firmly into place. Use a slight twisting motion to ensure good contact and help the tile settle into the mortar. Avoid sliding the tiles as this can disrupt the mortar bed.
3. Align Tiles: Pay close attention to the alignment of the tiles as you set them. Ensure that they are level with each other and the designated guidelines. Adjust the tiles as needed to maintain straight lines and even spacing.
4. Check for Levelness: Use a level to ensure that the tiles are level horizontally and vertically. This will ensure a professional and visually pleasing installation. Make any necessary adjustments by pressing the tiles deeper into the mortar or adding more mortar if needed.
5. Cut Tiles if Necessary: There may be instances where you need to cut tiles to fit them around obstacles or along the edges of the hearth. Use a wet saw or tile cutter to make accurate and clean cuts. Take the necessary safety precautions and wear protective eyewear and gloves when handling cutting tools.
6. Work in Small Sections: Set the tiles in small sections at a time, typically a few rows or a manageable area. This allows you to work more efficiently and ensures that the mortar remains workable. Avoid spreading mortar over a large area as it can dry out before you can set all the tiles.
7. Maintain Consistent Spacing: As you set the tiles, regularly check and adjust the spacing between them using tile spacers. Consistent spacing will ensure a uniform and professional finish. Remove any excess mortar that may squeeze up between the tiles using a damp sponge.
8. Clean Off Excess Mortar: Periodically clean off any excess mortar on the face of the tiles as you work. Use a damp sponge to carefully wipe away the mortar before it dries. This will make the grouting process easier and ensure a clean and polished appearance.
9. Allow Tiles to Set: After all the tiles are set, allow them to set and cure as per the manufacturer’s instructions. This usually takes 24 to 48 hours. Avoid any excessive moisture or foot traffic on the freshly set tiles during this time.
By following these steps, you can ensure a successful and professional-looking tile installation on your fireplace hearth. Take your time to set the tiles accurately, maintaining proper alignment and spacing. With the tiles in place, you’re now ready to move on to the next step — grouting the tiles and completing the transformation of your fireplace hearth.
Cutting and Fitting Tiles
When tiling a fireplace hearth, it’s common to encounter areas that require cutting and fitting tiles to accommodate corners, edges, or irregular shapes. This step is crucial to ensure a seamless and professional-looking installation. Here are the key steps to follow when cutting and fitting tiles:
1. Measure and Mark: Begin by measuring the area where the tile needs to be cut. Use a measuring tape to determine the dimensions accurately. Mark the cutting line on the tile using a pencil or a marker, ensuring that the line is visible and precise.
2. Use the Right Tools: To cut the tiles, you’ll need the appropriate tools. A wet saw or tile cutter is commonly used for straight cuts, while nippers or tile snips are used for smaller or irregular cuts. For more intricate cuts, a tile file or a grinding wheel can be used to refine the shape. Make sure to wear protective eyewear and gloves when working with cutting tools.
3. Score and Snap: If you’re using a wet saw or tile cutter, align the cutting line with the saw blade or cutter wheel. Gently score the surface of the tile along the marked line, applying even pressure. Once scored, use the snap feature of the tool to break the tile along the scored line. This will result in a clean cut.
4. Nip or Trim: For smaller or irregular cuts, nippers or tile snips can be used. Place the tile between the jaws of the nipper or snip, positioning them slightly away from the marked line. Squeeze the handles to gradually nibble away at the excess tile until the desired shape is achieved. Make small, controlled cuts to avoid breakage or uneven edges.
5. Refine the Shape: If needed, use a tile file or a grinding wheel to refine the shape of the cut tile. This is particularly useful for curved or intricate cuts. Gently file or grind away any rough edges or imperfections until the tile fits perfectly into the designated space.
6. Test the Fit: Once the tile is cut and shaped, test the fit by placing it in the intended position on the hearth. Ensure that it aligns correctly and fills the space without any gaps or overlaps. Trim or adjust further if necessary until the tile fits snugly.
7. Apply Adhesive: Apply a small amount of thinset mortar to the back of the cut tile using a margin trowel or a notched trowel. Ensure that the mortar is evenly spread to ensure proper adhesion.
8. Set the Tile: Press the cut tile firmly into place, aligning it with the surrounding tiles. Wiggle the tile slightly to ensure good contact with the mortar. Use tile spacers, if needed, to maintain consistent spacing with the adjacent tiles.
9. Clean Off Excess Mortar: Immediately clean off any excess mortar on the face of the tile using a damp sponge. This will prevent the mortar from drying and leaving behind unsightly residue. Wipe gently to avoid disturbing the newly set tile.
By following these steps, you can successfully cut and fit tiles to accommodate corners, edges, or irregular shapes on your fireplace hearth. Take your time and work carefully to ensure precise cuts and a seamless fit. With the tiles cut and fitted, your fireplace hearth will have a polished and professional finish.
Grouting the Tiles
Grouting is a crucial step in tiling a fireplace hearth as it not only fills in the gaps between the tiles but also provides stability and prevents moisture from seeping underneath. Proper grouting ensures a polished and finished look for your hearth. Here are the key steps to follow when grouting the tiles:
1. Gather Your Tools and Materials: Before you begin, ensure that you have all the necessary tools and materials. This includes grout mix, a grout float, a bucket for mixing the grout, a margin trowel for mixing, and a sponge for cleaning.
2. Choose the Right Grout: Select a grout color that complements your tile and desired aesthetic. Consider factors such as the color and texture of the tiles, as well as the overall design of the room. You can opt for a color that matches the tiles for a seamless look, or choose a contrasting color to create visual interest.
3. Mix the Grout: Follow the manufacturer’s instructions to mix the grout in a bucket. Typically, you’ll add water to the grout powder and stir it with a margin trowel until you achieve a smooth and paste-like consistency. Ensure that the grout is well-mixed to avoid any lumps or dry spots.
4. Apply the Grout: Using a grout float, scoop a portion of the grout and spread it over the tiles at a 45-degree angle, making sure to push the grout into the joints. Work in small sections to prevent the grout from drying out before you’re able to clean it.
5. Fill the Joints: Use the edge of the grout float to press the grout firmly into the joints, ensuring they are completely filled. Scrape off any excess grout from the tile surface using the float held at a 90-degree angle. Repeat this process for each section of the hearth.
6. Clean Off Excess Grout: After applying the grout, wait for a few minutes until the grout begins to set. Then, using a damp sponge, gently wipe the surface of the tiles in a diagonal motion to remove any excess grout. Rinse and wring out the sponge regularly to avoid smearing the grout onto the tiles.
7. Allow the Grout to Cure: Follow the manufacturer’s instructions for the recommended curing time of the grout. Typically, it takes 24 to 48 hours for the grout to fully cure. During this time, avoid any excessive moisture or foot traffic on the newly grouted hearth.
8. Polish the Grout: Once the grout has cured, use a dry cloth to buff the surface of the tiles and remove any remaining haze or residue. This will bring out the natural beauty of the tiles and give a clean and polished look to your hearth.
9. Seal the Grout (Optional): Depending on the type of grout used and your personal preference, you may choose to seal the grout. Sealing provides an additional layer of protection against stains and moisture. Follow the manufacturer’s instructions for the appropriate sealer and application process.
By following these steps, you can achieve a professional and finished look for your tiled fireplace hearth. Take your time during the grouting process, ensuring that the grout is evenly applied and the excess is cleaned off promptly. With the grout in place, your fireplace hearth will be ready to impress and enhance the overall aesthetic of your living space.
Cleaning and Finishing Touches
Once you’ve completed the tiling and grouting process for your fireplace hearth, it’s time to focus on the final steps of cleaning and adding the finishing touches. These steps will ensure that your hearth looks polished and well-maintained. Here are the key steps to follow when cleaning and adding finishing touches to your fireplace hearth:
1. Clean off Grout Haze: After the grout has fully cured, you may notice a haze or residue on the surface of the tiles. To clean this off, use a solution of water and vinegar. Dampen a clean sponge or cloth with the solution, and gently wipe the tiles in a circular motion. Rinse the sponge regularly and wring it out well to avoid spreading the residue. Repeat this process until the haze is completely removed.
2. Remove Excess Sealant: If you have chosen to seal the grout, check for any excess sealant that may have gotten onto the tiles. Use a clean cloth or sponge dampened with the appropriate sealant remover to gently wipe away any excess sealant. Be mindful not to scrub too hard as it may damage the tiles.
3. Clean and Polish the Tiles: Give your tiles a thorough cleaning using a mild tile cleaner or warm soapy water. Use a soft cloth or sponge to wipe down the tiles, focusing on any spots or stains. Rinse the tiles with clean water and dry them with a clean towel. For a polished finish, consider using a tile-specific cleaner or polish to enhance the shine of the tiles.
4. Inspect for Loose Tiles: Take a close look at the tiles to ensure that none have become loose or dislodged during the tiling and grouting process. If you notice any tiles that need to be re-secured, carefully remove them and scrape away any old adhesive or grout. Apply fresh adhesive or thinset mortar to the back of the tile, and press it firmly into place. Allow it to set according to the manufacturer’s instructions.
5. Finishing Touches: Consider adding any finishing touches that will enhance the overall appearance of your fireplace hearth. You may choose to install a decorative trim or border tile, either in a contrasting color or complementary design. This can add an element of visual interest and create a polished look. Additionally, if your hearth has edges or corners, you can use corner trim pieces to provide a smooth and finished appearance.
6. Regular Maintenance: Keep your fireplace hearth looking its best by performing regular maintenance. Avoid harsh chemical cleaners that can damage the tiles or grout. Instead, use a mild cleaner specifically designed for tile surfaces. Regularly sweep or vacuum away any loose dirt or debris, and wipe down the tiles with a damp cloth or mop as needed. This will help your hearth maintain its beauty and longevity over time.
7. Safety Precautions: It’s important to keep in mind any safety measures when using your fireplace. Make sure to follow proper fire safety guidelines, such as using a screen or glass enclosure to prevent embers or sparks from reaching the tiles. Additionally, always be cautious when cleaning the hearth, ensuring that the area is cool and free from any fire hazards.
By following these steps and maintaining regular cleaning and care of your fireplace hearth, you can enjoy a beautiful and welcoming focal point in your living space. The cleaning and finishing touches will ensure that your fireplace hearth remains a stunning and well-maintained feature for years to come.
Frequently Asked Questions about How To Tile A Fireplace Hearth
Was this page helpful?
At Storables.com, we guarantee accurate and reliable information. Our content, validated by Expert Board Contributors, is crafted following stringent Editorial Policies. We're committed to providing you with well-researched, expert-backed insights for all your informational needs.


0 thoughts on “How To Tile A Fireplace Hearth”