Articles
How To Tile A Fireplace
Modified: October 20, 2024
Learn how to tile a fireplace with our informative articles. Transform your fireplace into a stunning focal point with our step-by-step guides and expert tips.
(Many of the links in this article redirect to a specific reviewed product. Your purchase of these products through affiliate links helps to generate commission for Storables.com, at no extra cost. Learn more)
Introduction
When it comes to home improvement projects, few things can transform the look and feel of a room like tiling a fireplace. A tiled fireplace not only adds a touch of elegance to your living space but also provides a focal point that draws attention and creates a cozy atmosphere. Whether you’re looking to update an outdated fireplace or want to add a stunning design element to a new construction, tiling your fireplace is a fantastic option.
However, many homeowners may feel intimidated by the idea of tackling a tiling project, especially when it involves a fireplace. But fear not! With the right tools, materials, and a bit of guidance, tiling a fireplace can be a manageable and rewarding endeavor. In this article, we’ll walk you through the step-by-step process of how to tile a fireplace, ensuring a successful and visually appealing result.
Before diving into the process, it’s crucial to take some time for planning and preparation. This includes measuring the fireplace, choosing the right tiles, gathering the necessary tools and materials, and preparing the surface. By taking these initial steps, you’ll set yourself up for a smooth and efficient tiling experience.
So, if you’re ready to elevate the look of your fireplace and create a stunning focal point in your home, let’s get started on tiling your fireplace!
Key Takeaways:
- Elevate your living space by tiling your fireplace, creating a captivating focal point with the right tools, materials, and step-by-step guidance for a stunning and visually appealing result.
- Transform your home with a rewarding tiling project, from preparing the surface to grouting and finishing, each step plays a crucial role in ensuring a seamless and professional installation.
Step 1: Prepare the Fireplace
Before you can start tiling your fireplace, it’s important to properly prepare the surface. This includes removing any existing tiles, paint, or debris from the fireplace surround. Here’s how to prepare your fireplace:
- Start by protecting the surrounding area with drop cloths or plastic sheets to catch any debris or dust.
- If there are any existing tiles on the fireplace surround, carefully remove them using a chisel and hammer. Be cautious not to damage the underlying wall surface.
- If the fireplace has a painted surface, you’ll need to strip off the paint using a paint stripper or sandpaper. Make sure to wear protective gloves and follow the manufacturer’s instructions for the paint stripper.
- Once the tiles and paint are removed, thoroughly clean the fireplace surface with a mild detergent and warm water. Use a scrub brush or sponge to remove any dirt, grease, or residue.
- After cleaning, inspect the surface for any cracks or uneven areas. If you find any, use a filler or spackling compound to repair and smooth out the surface. Allow the compound to dry and then sand it down until it’s flush with the surrounding area.
- Lastly, wipe down the fireplace surface with a damp cloth to remove any remaining dust or debris. Allow the surface to dry completely before proceeding to the next step.
By properly preparing your fireplace, you create a clean and smooth surface for the tile installation. This step ensures better adhesion and a professional-looking finish. Now that your fireplace is prepped and ready, let’s move on to measuring and calculating the quantity of tiles you’ll need.
Step 2: Measure and Calculate Tile Quantity
Measuring your fireplace accurately and calculating the quantity of tiles needed is crucial to ensure a smooth tiling process. Here’s how to measure and calculate the tile quantity:
- Start by measuring the height and width of the fireplace surround. Use a tape measure to get the precise measurements.
- Next, multiply the height and width measurements to get the total square footage of the surface. For example, if the height is 3 feet and the width is 5 feet, the total square footage would be 15 square feet.
- It’s important to account for wastage and cuts when calculating the tile quantity. As a rule of thumb, add an extra 10% to the total square footage to accommodate for any mistakes, breakage, or irregular shapes.
- If you’re using different tile sizes or patterns, calculate the square footage for each, and then sum up the totals.
- Consult with your tile supplier or refer to the product packaging to determine the coverage area per box of tiles. Divide the total square footage by the coverage area of a single box to get the number of boxes needed.
- Keep in mind that it’s always a good idea to purchase extra tiles in case of future repairs or replacements.
By accurately measuring and calculating the tile quantity, you can ensure that you have enough tiles to complete the fireplace project without any delays or last-minute surprises. Once you have determined the required quantity, it’s time to move on to choosing the right tiles for your fireplace.
Step 3: Choose the Right Tiles
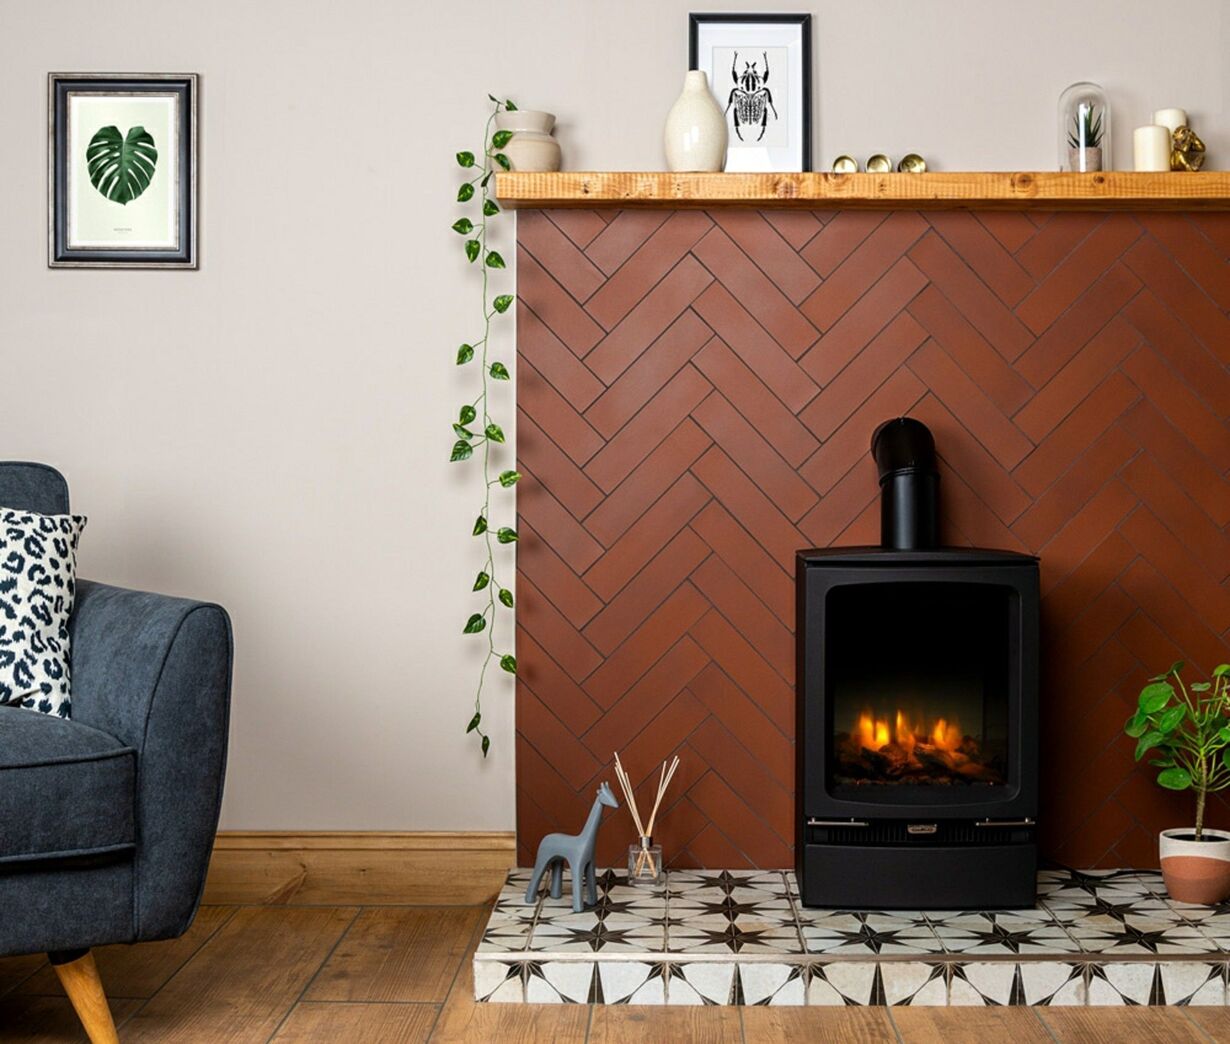
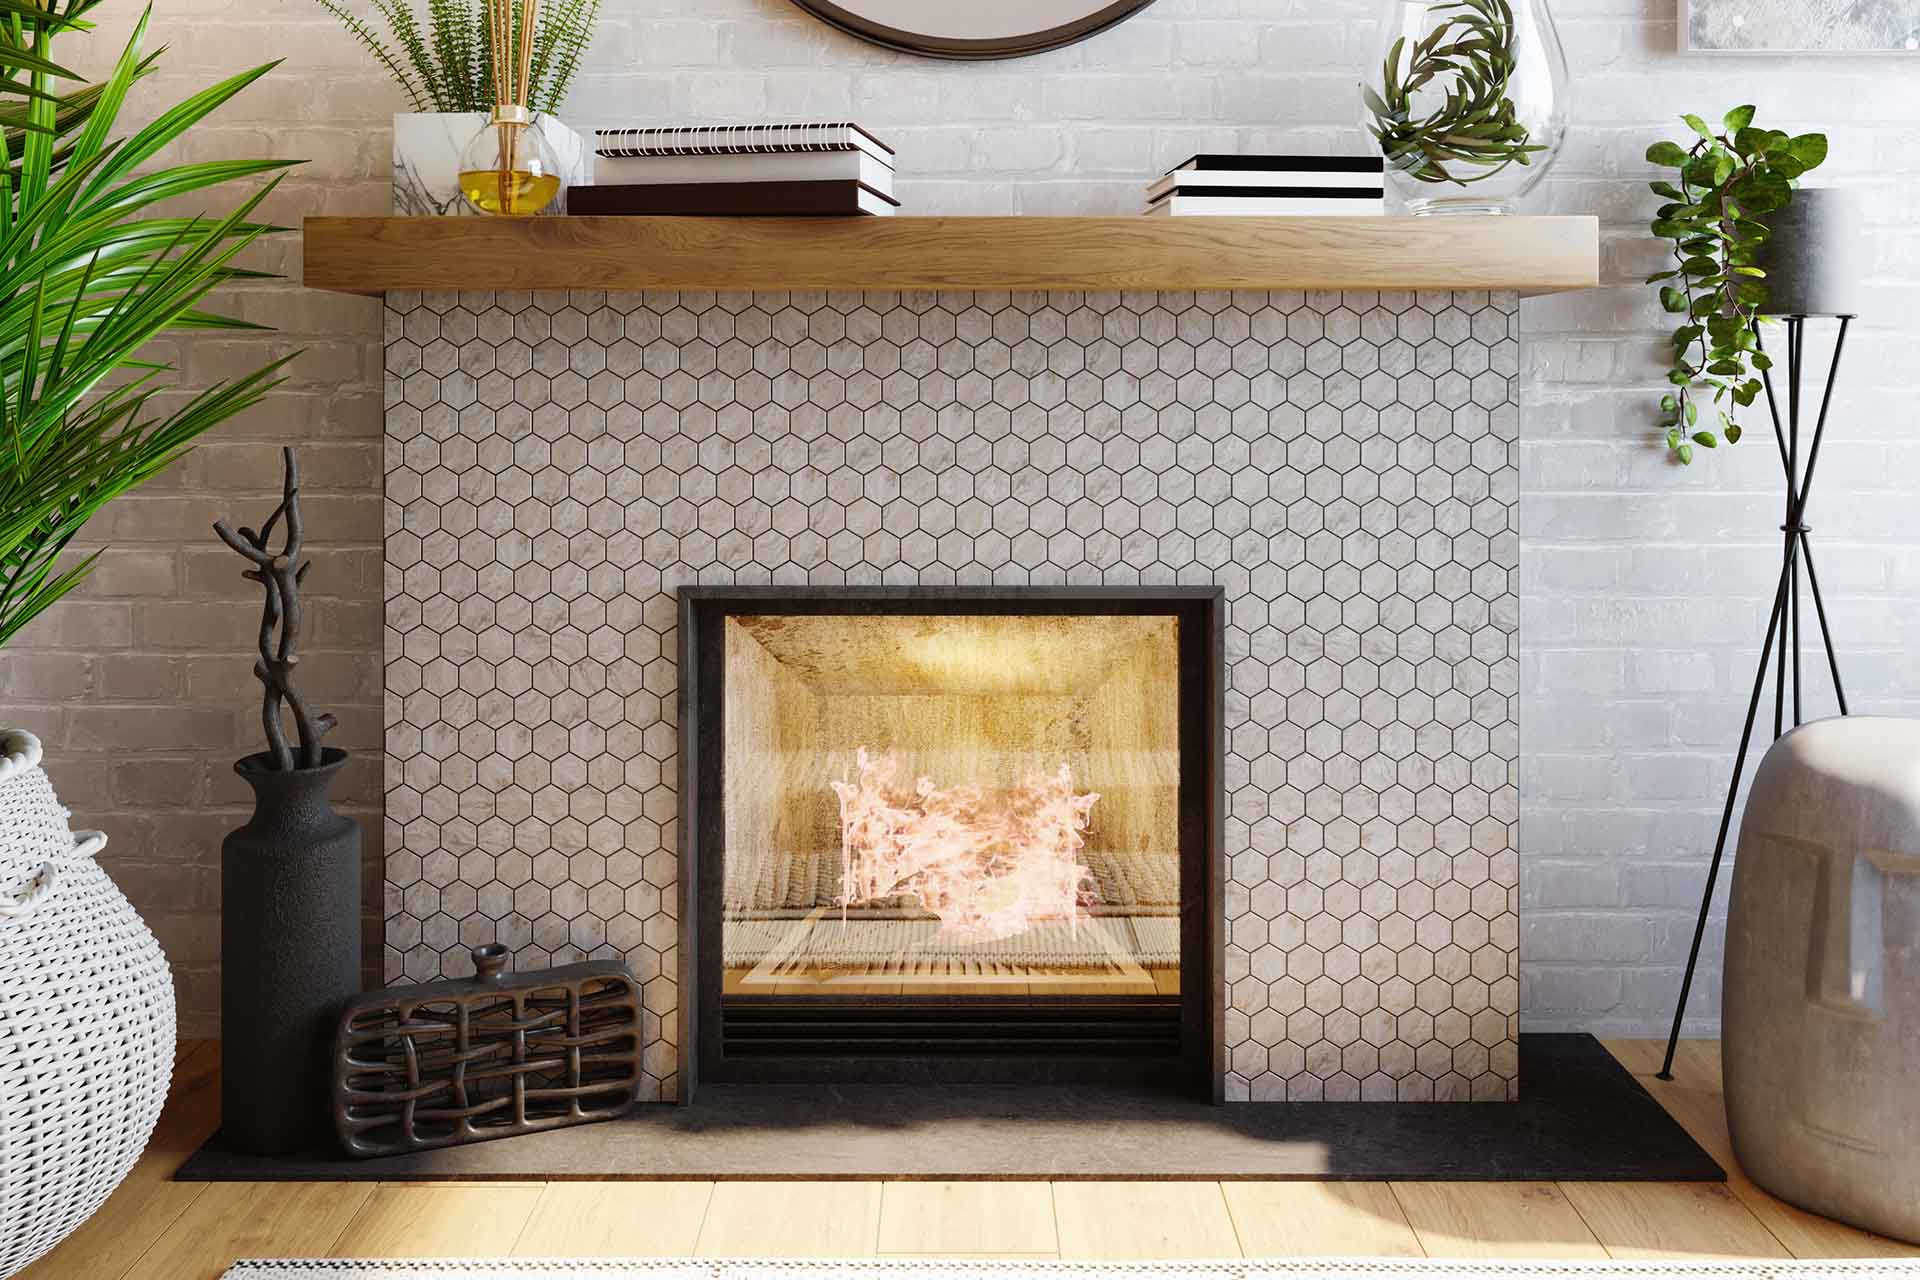
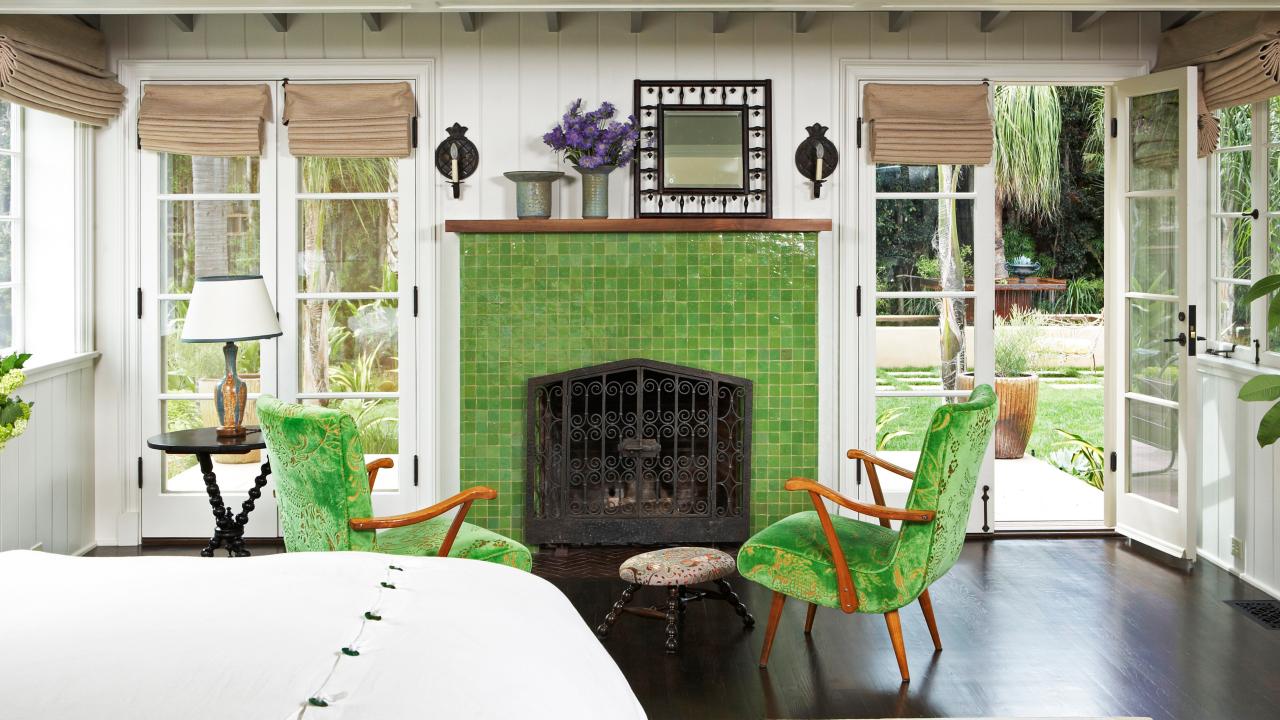
Choosing the right tiles is a crucial step in creating a stunning fireplace that complements your overall design aesthetic. With so many options available, it’s important to consider factors such as the style, color, material, and size of the tiles. Here’s how to choose the right tiles for your fireplace:
- Consider the style and theme of your space. Are you going for a modern, minimalist look or a rustic, traditional vibe? Choose tiles that align with the overall design style of the room.
- Decide on the color palette that you want to incorporate. Consider the existing color scheme in the room and choose tiles that harmonize or contrast with it.
- Think about the material of the tiles. Options range from porcelain and ceramic to natural stone like marble or slate. Each material has its own unique characteristics, so choose one that suits your preferences and fits within your budget.
- Consider the size and shape of the tiles. Larger tiles can create a more seamless and contemporary look, while smaller tiles can add intricate detail and texture.
- Take into account the maintenance and durability of the tiles. If the fireplace will be subjected to high heat or frequent use, choose tiles that can withstand these conditions.
- It’s always a good idea to bring home tile samples and see how they look in your space. Consider the lighting in the room and how it affects the appearance of the tiles.
- Lastly, consult with a tile specialist or designer who can provide guidance and recommendations based on your specific needs and preferences.
By carefully selecting the right tiles, you can ensure that your fireplace becomes a visually striking feature that enhances the overall look and feel of your room. Once you’ve chosen your desired tiles, it’s time to gather the necessary tools and materials for the tiling process.
Step 4: Gather the Necessary Tools and Materials
Before diving into the tiling process, it is important to gather all the necessary tools and materials. Having everything on hand will make the project run smoothly and efficiently. Here’s a list of the essential tools and materials you’ll need:
Read more: How To Tile A Fireplace Wall
Tools:
- Tile cutter – for cutting tiles to fit around edges and corners
- Tile saw – if you’re using natural stone or thicker tiles
- Notched trowel – for spreading tile adhesive
- Grout float – for applying grout
- Rubber mallet – for gently tapping tiles into place
- Sponge – for wiping away excess grout
- Level – to ensure the tiles are installed straight and level
- Measuring tape – for measuring and marking tile placement
- Tile spacers – to create even spacing between tiles
- Grout brush – for cleaning grout lines
Materials:
- Tiles – the quantity and style you’ve chosen for your fireplace
- Tile adhesive – choose a quality adhesive suitable for the type of tiles and fireplace surface
- Grout – select a grout color that complements your chosen tiles
- Grout sealer – to protect the grout from staining
- Tile spacers – to create even spacing between tiles
- Primer – if recommended for the specific tiles and fireplace surface
- Clean water – for mixing adhesive and cleaning tools
- Protective gloves and goggles – for safety during the tiling process
Having all the necessary tools and materials at hand will ensure a smooth and efficient tiling process. It’s a good idea to double-check your supplies before starting to avoid any delays or interruptions. With everything ready, it’s time to move on to the next step: cleaning and priming the fireplace surface.
Step 5: Clean and Prime the Surface
Before applying the tiles, it is crucial to clean and prime the surface of the fireplace. This step ensures better adhesion of the tile adhesive and promotes a long-lasting installation. Here’s how to clean and prime the surface:
- Start by thoroughly cleaning the surface of the fireplace with a mild detergent and warm water. Use a scrub brush or sponge to remove any dust, dirt, or grease. Pay special attention to any stubborn stains or debris.
- Rinse the fireplace surface with clean water to remove any soap residue. Allow it to dry completely before proceeding.
- Once the surface is dry, check for any cracks, holes, or uneven areas. If you notice any, fill them with a suitable filler or spackling compound. Smooth it out with a putty knife and let it dry according to the manufacturer’s instructions.
- If recommended for your specific tiles and fireplace surface, apply a primer. Using a paintbrush or roller, apply a thin and even coat of primer over the entire surface. This will improve the adhesion of the tile adhesive and ensure a solid bond.
- Allow the primer to dry completely before proceeding to the next step. Refer to the primer packaging for the recommended drying time.
Cleaning and priming the surface ensures that the tiles adhere properly and that the final result is durable and long-lasting. Skipping this step may result in tiles loosening or falling off over time. With the surface cleaned and primed, you’re now ready to move on to the next step: laying out the tile pattern.
Step 6: Layout the Tile Pattern
Laying out the tile pattern is an important step in achieving a visually appealing and well-balanced fireplace design. By planning and marking the tile placement beforehand, you can ensure that the final result is symmetrical, aligned, and suits your desired aesthetic. Here’s how to layout the tile pattern:
- Start by dry-fitting the tiles on the fireplace surface without adhesive. This will give you a visual idea of how the tiles will look and allow you to make any necessary adjustments.
- Begin from the center of the fireplace and work your way outwards. This will help create a balanced and symmetrical design.
- Consider using tile spacers to create even spacing between the tiles. These spacers will help maintain consistent gaps and ensure a professional-looking installation.
- If you are using different tile sizes or patterns, experiment with different arrangements to find the most pleasing layout. Play around with different orientations and positions until you are satisfied with the pattern.
- Use a pencil or chalk to mark the tile placement on the fireplace surface. This will serve as a guide during the actual installation process.
- Take measurements to ensure that the tiles fit properly around corners and edges. Use a tile cutter or saw to make precise cuts as needed.
- Avoid having narrow cuts of tiles at the edges or corners, as this can disrupt the symmetry and visual appeal of the fireplace. Adjust the layout if necessary to minimize small cuts.
Taking the time to layout the tile pattern will help you visualize the final result and make any necessary adjustments before committing to the adhesive. Once you are satisfied with the layout, you’re ready to move on to the next step: cutting tiles to fit.
Read more: How To Tile A Fireplace Hearth
Step 7: Cut Tiles to Fit
When tiling a fireplace, it’s common to have areas where the tiles need to be cut to fit around edges, corners, or obstacles. Cutting tiles to fit properly is essential for achieving a seamless and professional-looking installation. Here’s how to cut tiles to fit:
- Start by measuring the area that needs a cut. Use a tape measure to determine the dimensions accurately.
- Transfer the measurements onto the tile using a pencil, making sure to account for any necessary gaps or spacing.
- For straight cuts, use a tile cutter. Place the tile on the cutter, aligning the marked line with the cutting guide. Apply firm pressure and score the tile along the marked line. Then, depress the handle to break the tile along the score line.
- For curved cuts or irregular shapes, use a tile saw. Wet the tile saw blade with water and carefully guide the tile along the marked line to make the desired cut.
- After cutting the tile, smooth any rough edges using a tile file or sandpaper.
- Test the cut tile in its designated spot to ensure it fits properly. Make any necessary adjustments if the fit is not perfect.
- Repeat this process for each tile that requires cutting.
Take your time when cutting the tiles and make precise cuts to achieve the best result. It’s always a good idea to double-check the measurements and test the fit before applying adhesive. With the tiles precisely cut, you’re now ready to move on to the next step: applying the tile adhesive.
Before tiling a fireplace, make sure to clean and prep the surface to ensure the tiles adhere properly. Use a high-temperature adhesive suitable for fireplaces to prevent tiles from cracking due to heat.
Step 8: Apply Tile Adhesive
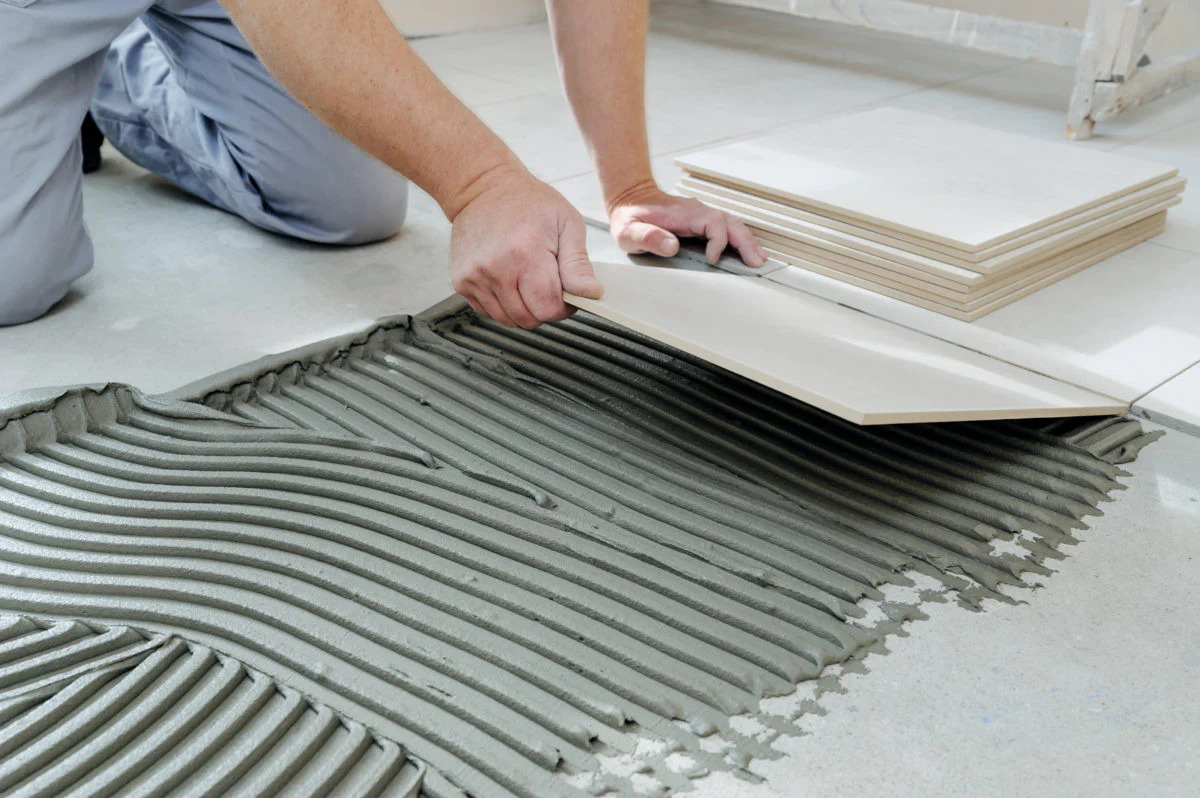
Applying tile adhesive is a crucial step in securing the tiles to the fireplace surface. The adhesive creates a strong bond between the tiles and the substrate, ensuring a durable and long-lasting installation. Here’s how to apply tile adhesive:
- Start by preparing the tile adhesive according to the manufacturer’s instructions. Follow the recommended mixing ratio and ensure that the adhesive is well-mixed and free of lumps.
- Using a notched trowel, scoop a generous amount of adhesive onto the flat side of the trowel.
- Hold the notched side of the trowel at a 45-degree angle and spread the adhesive evenly over a small section of the fireplace surface. Work in manageable sections to prevent the adhesive from drying out before the tiles are applied.
- With the flat side of the trowel, comb through the adhesive to create ridges. This helps improve the bond and ensures an even thickness of adhesive.
- Place the tiles onto the adhesive, pressing them firmly into place. Wiggle the tiles slightly to ensure a good bond with the adhesive.
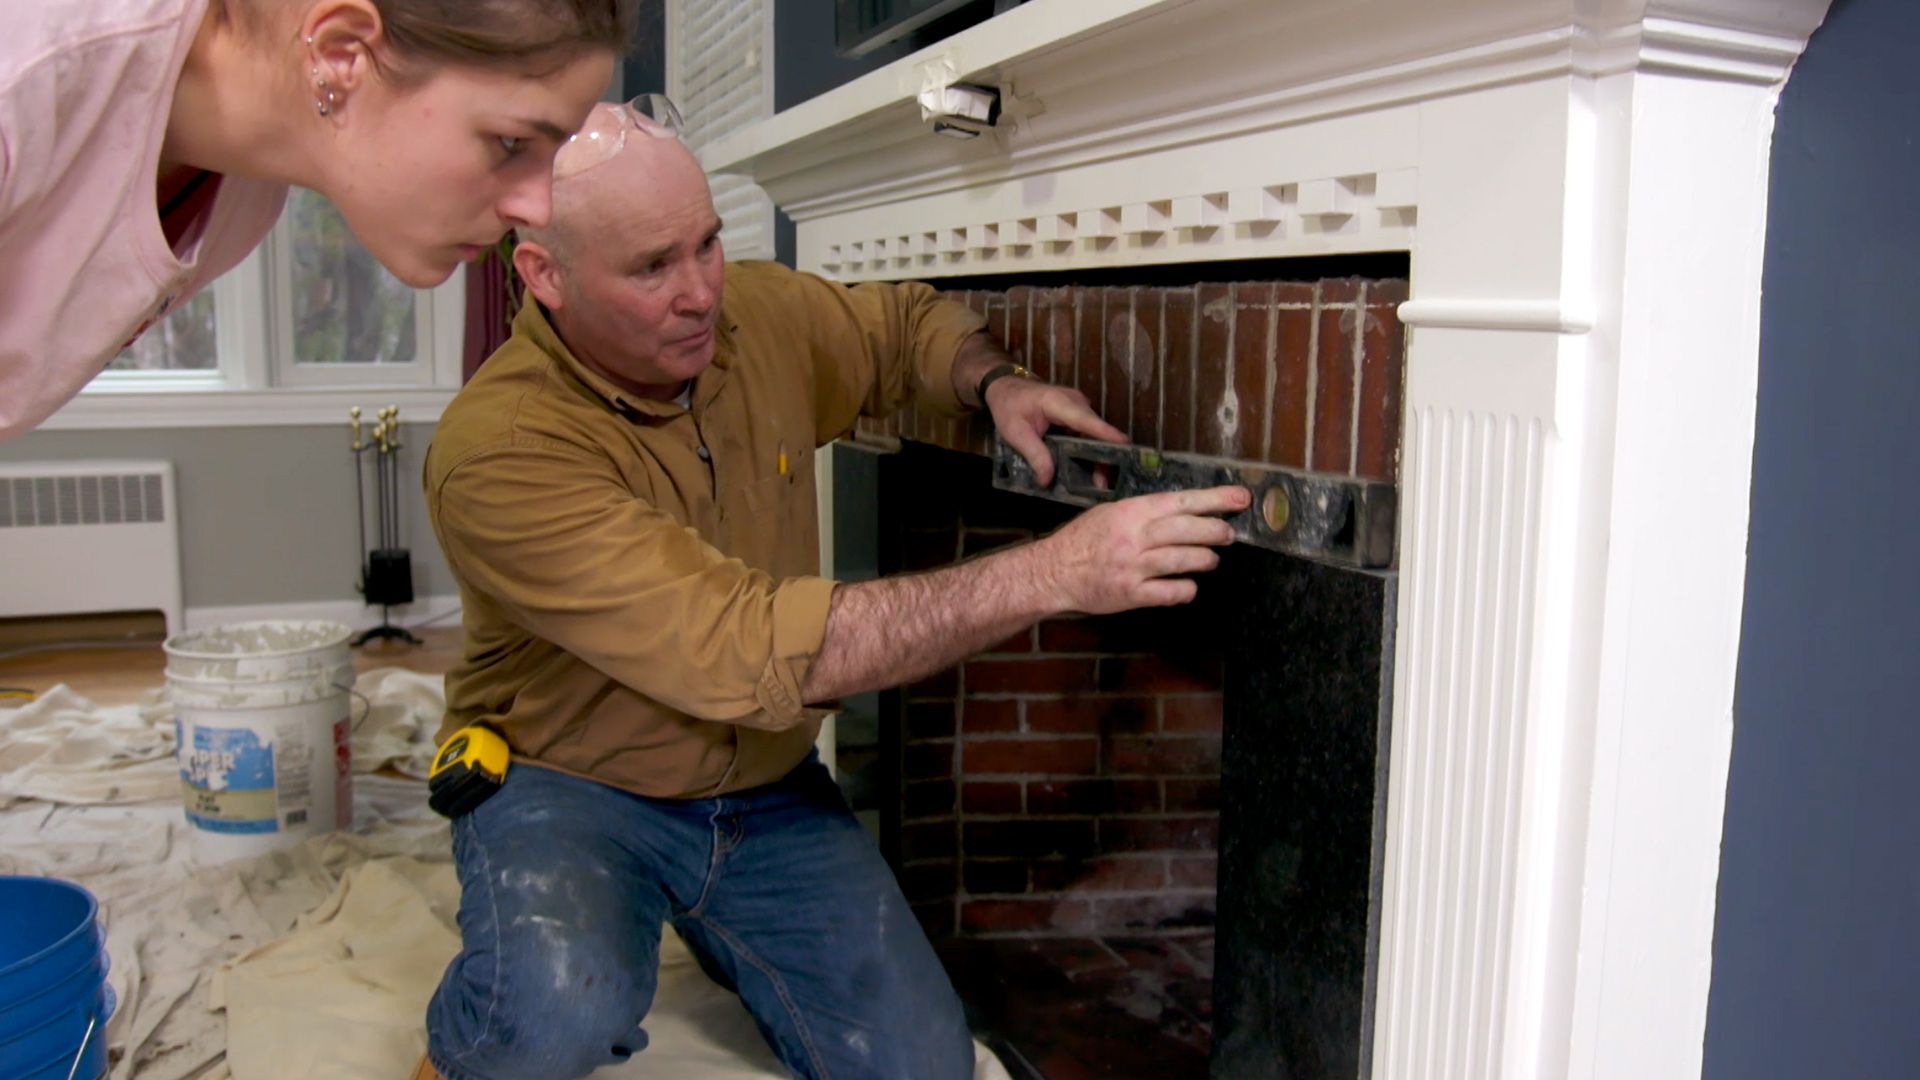
- Use a level to check that the tiles are straight and level. Make any necessary adjustments by gently tapping the tiles with a rubber mallet.
- Continue applying adhesive and installing tiles, working in small sections until the entire fireplace surface is covered.
- Place tile spacers between the tiles to create consistent spacing.
- Wipe away any excess adhesive that oozes out from the tile joints using a damp cloth or sponge.
- Allow the adhesive to dry and cure according to the manufacturer’s instructions. This typically takes 24 to 48 hours.
Be sure to work efficiently when applying the adhesive as it can dry quickly. It’s important to follow the specific instructions provided with the adhesive, as drying times may vary depending on the type and brand. Once the adhesive has fully dried, you’re ready to move on to the next step: installing the tiles.
Step 9: Install the Tiles
Now that the tile adhesive has dried and cured, it’s time to install the tiles onto the fireplace surface. Installing the tiles requires careful precision to ensure a seamless and visually appealing result. Here’s how to install the tiles:
- Start by removing the tile spacers that were placed between the tiles during the adhesive application. Gently pull them out and set them aside.
- Begin at one corner of the fireplace and work your way across. Apply tile adhesive to the back of each tile using a small trowel or a notched trowel, depending on the size and shape of the tiles.
- Press each tile firmly onto the adhesive, aligning it with the marked layout lines and existing tiles. Use a slight twisting motion to secure the tile in place.
- Continue installing the tiles, making sure to maintain consistent spacing between them. Use a level to ensure that each tile is straight and level.
- If necessary, cut tiles to fit around edges, corners, or obstacles using a tile cutter or saw. Remember to wear safety goggles and gloves when cutting tiles.
- Wipe away any excess adhesive that may ooze out from the tile joints using a damp cloth or sponge. It’s important to keep the surface clean for a neat finish.
- Periodically step back and assess the overall look of the tiles to ensure they are aligning well and creating a cohesive pattern.
- Allow the installed tiles to set for the recommended drying time specified by the tile adhesive manufacturer. This can range from 24 to 48 hours.
Installing the tiles requires patience and attention to detail. Take your time to ensure that each tile is properly aligned and securely installed. Once the tiles have dried and set, you’re ready to move on to the next step: grouting the tiles.
Step 10: Grout the Tiles
Grouting is an essential step that adds the finishing touch to your tiled fireplace. The grout not only fills in the gaps between the tiles but also provides stability and protection. Here’s how to grout the tiles:
- Start by preparing the grout according to the manufacturer’s instructions. Mix the grout until it reaches a smooth and consistent consistency.
- Using a grout float, scoop a generous amount of grout onto the float’s flat side.
- Hold the float at a 45-degree angle and apply the grout diagonally across the tiles, pressing it into the joints. Work in small sections to prevent the grout from drying out.
- Hold the float at a 90-degree angle and scrape off any excess grout from the surface of the tiles, making sure to fill in all the joints evenly.
- After applying the grout, wait about 15 to 20 minutes for it to set. This will allow the grout to firm up slightly.
- Using a damp, clean sponge, gently wipe away the excess grout from the surface of the tiles. Rinse the sponge regularly to prevent smearing the grout.
- Continue wiping the tiles until they are clean and the grout lines are neat. Be careful not to remove too much grout from the joints.
- Allow the grout to dry for the recommended time specified by the grout manufacturer, typically 24 to 48 hours.
- After the grout has dried, use a clean, dry cloth to buff away any residue or haze on the tiles.
- Lastly, apply a grout sealer to protect the grout from stains and moisture. Follow the instructions on the sealer packaging for proper application.
Grouting requires attention to detail and precision. Take your time to ensure that the grout is applied evenly and the tiles are cleaned properly. By following these steps, you will achieve a beautifully finished tiled fireplace. Now, it’s time to move on to the final step: cleaning and finishing the fireplace.
Read more: How To Update Fireplace Tile
Step 11: Clean and Finish the Fireplace
The final step in tiling a fireplace is cleaning and finishing the surface to reveal the full beauty of the newly installed tiles. This step involves removing any residual grout or haze, as well as applying any necessary finishing touches. Here’s how to clean and finish your tiled fireplace:
- Start by inspecting the fireplace surface for any remaining grout residue or haze. Use a damp sponge or cloth to wipe away any stubborn grout or haze that may have been missed during the previous cleaning.
- For stubborn grout residue, use a grout cleaner or a mixture of vinegar and water. Apply the cleaner to the affected areas and scrub gently with a non-abrasive brush. Rinse with clean water afterward.
- Once the surface is clean, step back and assess the overall appearance of the tiled fireplace. Look for any gaps or areas where touch-ups may be required.
- If necessary, fill in any small gaps or imperfections in the grout lines using a grout pen or touch-up paint that matches the color of the grout.
- Inspect the tiles for any adhesive residue or smudges. Clean the tiles with a tile cleaner or a mixture of mild detergent and warm water to restore their shine.
- After cleaning, wipe down the fireplace surface with a dry cloth to remove any moisture or residue.
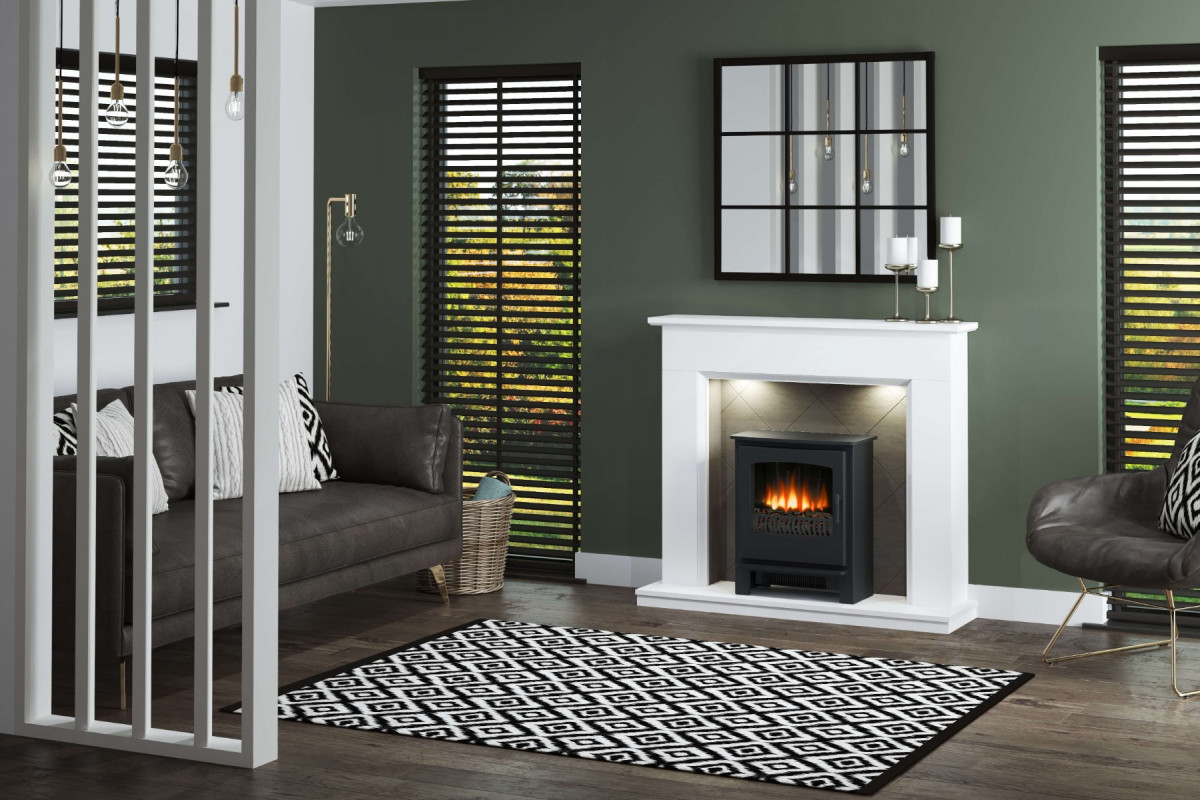
- Take the opportunity to enhance the visual appeal of your tiled fireplace by adding finishing touches. This can include installing a decorative mantel, arranging artwork or accessories, or even adding a fireplace screen or surround.
- Step back and admire your beautifully tiled fireplace! Enjoy the transformative effect it has on your living space and the cozy atmosphere it creates.
Cleaning and finishing the fireplace is the final step in the tiling process. By taking the time to clean thoroughly and make necessary touch-ups, you can ensure that your fireplace looks its best. Now, sit back, relax, and enjoy the beauty and warmth of your newly tiled fireplace!
Conclusion
Tiling a fireplace is a rewarding home improvement project that can completely transform the look and feel of your living space. With the right tools, materials, and step-by-step guidance, you can achieve a stunning and visually appealing result. By following the process outlined in this article, you can successfully tile your fireplace and create a captivating focal point in your home.
From preparing the surface to selecting the right tiles, from applying the adhesive to grouting and finishing, each step plays a crucial role in ensuring a seamless and professional installation. Taking the time to measure and calculate tile quantity, choosing the right tiles, and gathering the necessary tools and materials will set you up for success. Preparing the fireplace surface, laying out the tile pattern, cutting tiles to fit, and applying tile adhesive require attention to detail and precision. Finally, grouting the tiles and cleaning and finishing the fireplace will bring your tiling project to a beautiful conclusion.
Remember, while it’s important to follow the steps closely, don’t be afraid to let your creativity shine through. Experiment with different tile patterns, colors, and textures to create a fireplace that truly reflects your personal style and enhances the overall ambiance of your space.
So, if you’re ready to embark on a tiling adventure, follow the steps outlined in this article, and let your fireplace become a stunning centerpiece that adds warmth and elegance to your home for years to come.
Frequently Asked Questions about How To Tile A Fireplace
Was this page helpful?
At Storables.com, we guarantee accurate and reliable information. Our content, validated by Expert Board Contributors, is crafted following stringent Editorial Policies. We're committed to providing you with well-researched, expert-backed insights for all your informational needs.


0 thoughts on “How To Tile A Fireplace”