
Articles
How To Update Fireplace Tile
Modified: October 20, 2024
Learn how to update fireplace tile with our informative articles. Transform your fireplace with these step-by-step guides and expert tips.
(Many of the links in this article redirect to a specific reviewed product. Your purchase of these products through affiliate links helps to generate commission for Storables.com, at no extra cost. Learn more)
Introduction
The fireplace is often the focal point of a room, adding warmth and ambiance to the space. However, outdated or worn-out fireplace tile can detract from the overall aesthetic and style of the room. If you’re looking to update your fireplace tile, you’re in the right place. In this article, we’ll provide you with a step-by-step guide on how to update your fireplace tile to breathe new life into your space.
Before you begin this project, it’s essential to assess the current condition of your fireplace tile and determine the type of tile you have. This information will influence the approach you take to update the tile and the materials you’ll need.
Read more: How To Update A Shower Tile
Assessing the Current Fireplace Tile
Start by evaluating the condition of your fireplace tile. Look for signs of cracks, damage, or discoloration. Determine if the tile is securely attached to the surface or if it is loose. This assessment will help you understand the extent of the update needed.
Next, identify the type of tile you have. Is it ceramic, porcelain, natural stone, or a different material? This information will guide you in selecting suitable replacement tile and help you determine the appropriate techniques to remove the existing tile.
Preparing for the Update
Once you have assessed the current fireplace tile, it’s time to gather the necessary tools and materials for the update. The tools may include a hammer, chisel, pry bar, grout removal tool, gloves, safety glasses, and a trowel. Additionally, you’ll need replacement tile, adhesive or mortar, grout, and grout sealer.
Before starting the tile removal process, remove any surrounding objects and furniture from the fireplace area. This will provide you with a clear workspace and prevent any potential damage or obstructions during the update.
Protecting the surrounding area is crucial to minimize mess and safeguard the rest of the room. Use drop cloths or plastic sheets to cover the floor and nearby furniture. This will catch any debris or dust generated during the tile removal and installation process.
With everything prepared, you’re ready to begin updating your fireplace tile. Follow the step-by-step guidelines in the subsequent sections to achieve a successfully transformed fireplace. Let’s get started!
Key Takeaways:
- Transform your fireplace with a stunning update by assessing the current tile, selecting the right materials, and following a step-by-step installation process.
- Prepare, plan, and execute your fireplace tile update with attention to detail, creativity, and safety to achieve a visually appealing and long-lasting transformation.
Assessing the Current Fireplace Tile
Before embarking on the process of updating your fireplace tile, it’s important to assess the current condition of the tile and determine its type. This evaluation will help you understand the extent of the update required and guide you in selecting suitable replacement materials.
Evaluating the Condition
Start by closely examining the current fireplace tile. Look for any visible signs of damage, such as cracks, chips, or discoloration. Pay attention to whether the tile is securely attached to the surface or if it is loose. It’s important to note that if the tile is in overall good condition and firmly in place, you may only need to clean and refresh the tile rather than replacing it entirely.
If there are minor chips or cracks, you may be able to repair them with a ceramic or tile repair kit. However, if the damage is severe or widespread, it may be necessary to remove and replace the tile entirely. This decision will ultimately depend on the severity of the damage and your desired outcome for the fireplace update.
Read more: How To Update Gas Fireplace
Determining the Type of Tile
Once you have evaluated the condition of the fireplace tile, it’s time to determine the type of tile you’re working with. Understanding the material of the existing tile will help you select suitable replacement options and guide you in the removal process.
Common types of fireplace tile materials include ceramic, porcelain, natural stone (such as marble, slate, or granite), glass, and metal. Each material has its own unique characteristics and requires different techniques for removal and installation.
To determine the type of tile, visually examine the tile’s surface texture, color, and patterns. You can also gently tap the tile to assess its sound and hardness. Additionally, consult any documentation or records you have regarding the fireplace installation, as they may provide information about the type of tile used.
If you’re unsure about the type of tile or need further clarification, it’s recommended to consult with a professional tile installer or visit a local tile supplier. They can help you identify the tile material and provide guidance for the subsequent steps in updating the fireplace.
By assessing the condition of your current fireplace tile and determining its type, you can make informed decisions about the update process. Whether you need to repair minor damage, completely replace the tile, or simply refresh the existing tile, understanding these factors will set you on the right path for a successful fireplace transformation.
Preparing for the Update
Before you begin updating your fireplace tile, proper preparation is crucial to ensure a smooth and efficient process. This involves gathering the necessary tools and materials, removing surrounding objects and furniture, and taking measures to protect the surrounding area.
Gathering Necessary Tools and Materials
First and foremost, gather all the tools and materials you will need for the update. These may include:
- Hammer
- Chisel
- Pry bar
- Grout removal tool
- Gloves
- Safety glasses
- Trowel
- Replacement tile
- Tile adhesive or mortar
- Grout
- Grout sealer
Ensure that you have all the necessary tools and materials readily available before starting the update. This will prevent unnecessary delays and interruptions during the process.
Removing Surrounding Objects and Furniture
Prior to beginning the update, remove any objects or furniture in close proximity to the fireplace. This will allow you to have a clear and unobstructed workspace. It also helps to prevent any potential damage to your belongings during the update process.
Carefully relocate any decorative items, frames, or furniture that could be damaged by debris or accidentally bumped during the tile removal and installation.
Read more: How To Update A Fireplace Mantel
Protecting the Surrounding Area
As you remove the old tile and install the new tile, it’s important to take measures to protect the surrounding area. This will help to contain dust, debris, and potential damage to the room.
Lay down drop cloths or plastic sheets on the floor and any nearby furniture or surfaces. This will catch any falling debris, tile fragments, or dust that may be produced during the tile removal process.
Consider covering any vents or openings with plastic sheets or tape to prevent dust and debris from spreading to other areas of the room. You may also want to use painter’s tape to protect adjacent walls or surfaces that are not being updated.
Taking these precautionary steps will safeguard your space and make the cleanup process much more manageable once the fireplace tile update is complete.
By gathering the necessary tools and materials, removing surrounding objects and furniture, and protecting the surrounding area, you will be well-prepared to begin the process of updating your fireplace tile. These preparatory measures will ensure a smooth and successful update, allowing you to achieve the desired transformation for your fireplace.
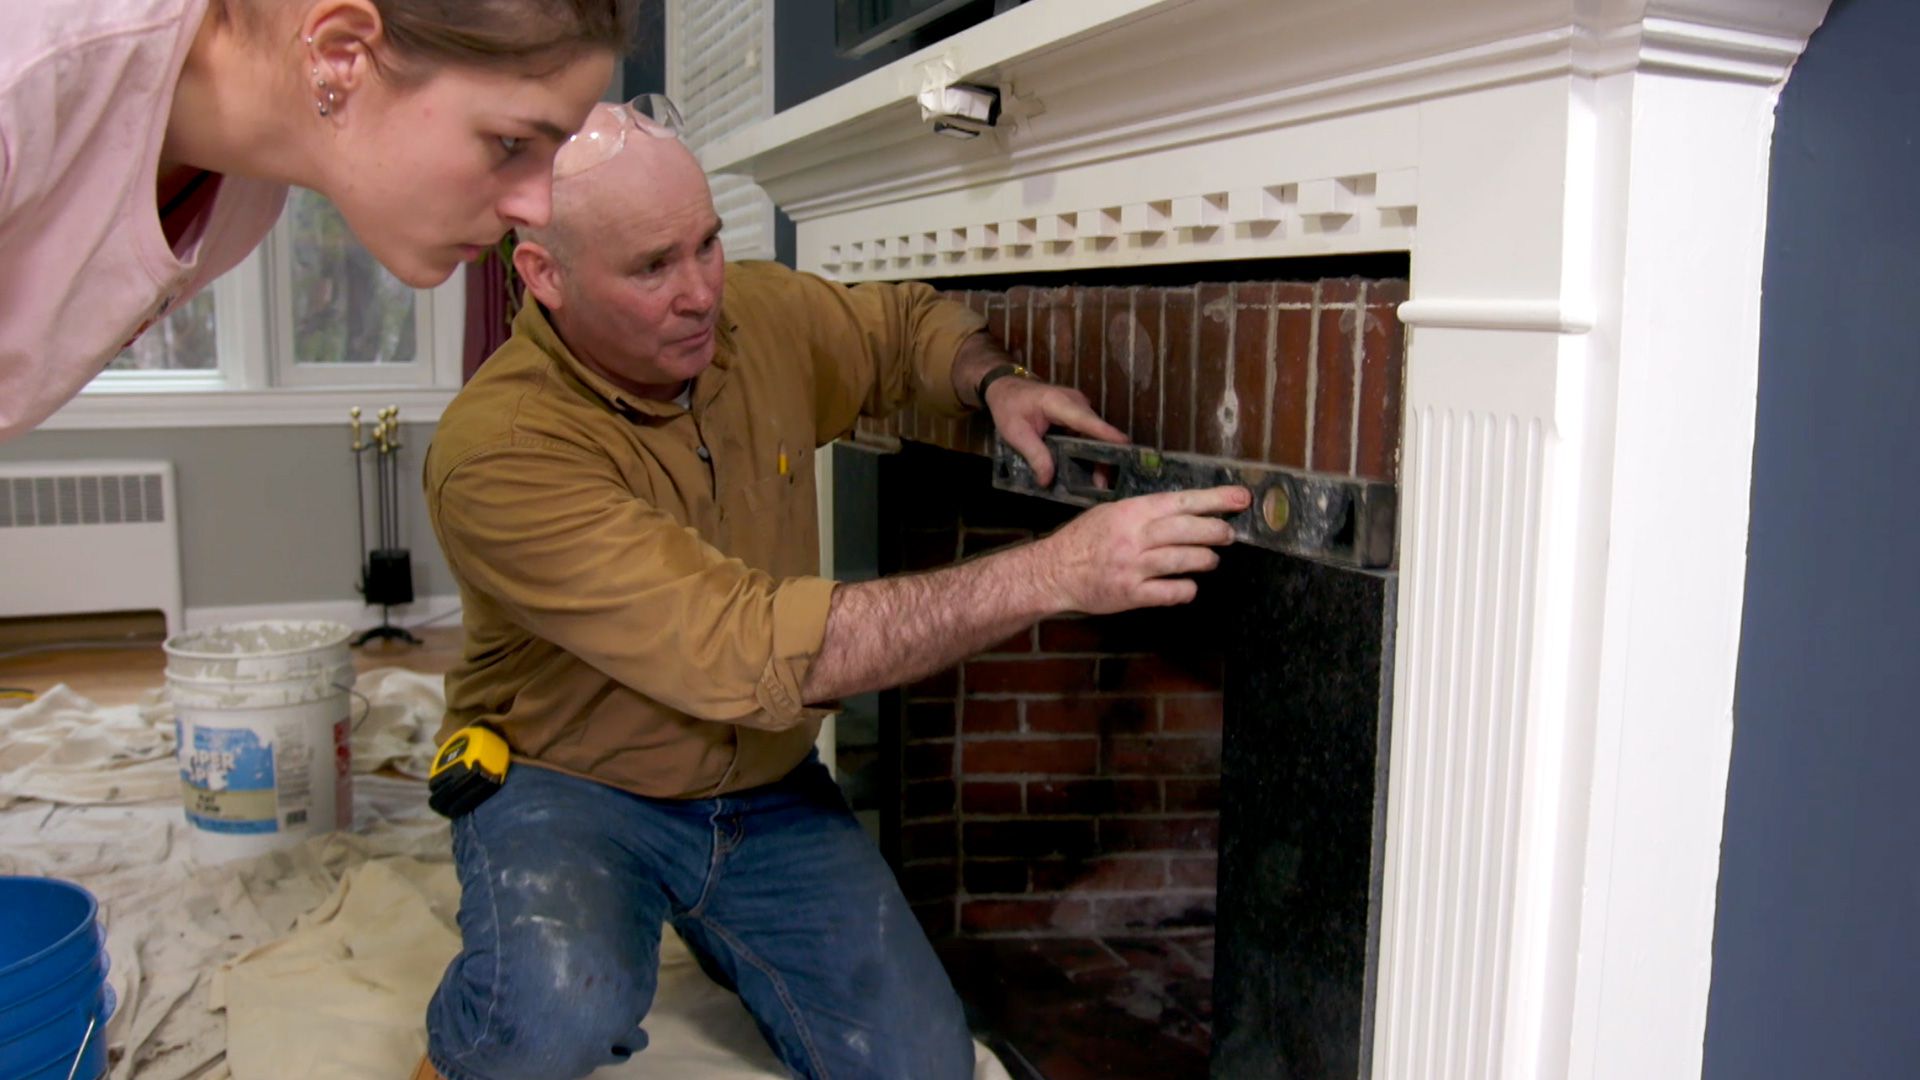
Removing the Old Tile
Once you have prepared the workspace and gathered all the necessary tools and materials, it’s time to remove the old tile from your fireplace. This process involves preparing the workspace, safely breaking the tiles, and removing any adhesive or mortar residue.
Preparing the Workspace
Before you begin removing the old tile, it’s essential to prepare the workspace to minimize mess and facilitate the removal process. Follow these steps:
- Put on protective equipment, including gloves and safety glasses.
- Cover the surrounding area with drop cloths or plastic sheets to catch debris.
- Securely attach a tarp or large garbage bag to the bottom of the fireplace opening to catch debris that may fall inside.
Once you have taken these precautions, you are ready to proceed with the tile removal.
Breaking Tiles Safely
Using a hammer, gently tap the center of a tile to create a starting point for removal. Be careful not to strike the tile with excessive force, as this can result in unnecessary damage to surrounding tiles or the fireplace structure itself.
Once you have created a starting point, use a chisel or pry bar to carefully loosen and remove the tiles. Insert the tool along the edges of the tile and apply gentle pressure to lift it away from the surface. Work gradually and methodically, moving from one tile to the next until all tiles have been removed.
Remember to exercise caution while handling the tools and broken tile pieces to avoid injury. Place the broken tiles in a heavy-duty garbage bag for disposal.
Removing Adhesive or Mortar
After removing the old tiles, you may find adhesive or mortar residue on the fireplace surface. Depending on the type of tile and installation method, this residue can vary in difficulty to remove.
If the adhesive or mortar is still pliable and easy to remove, you can use a putty knife or scraper to gently scrape it off the surface. Be careful not to scratch or damage the surface underneath.
For stubborn adhesive or mortar, you may need to use a chemical adhesive remover or a commercial-grade tile stripper. Follow the manufacturer’s instructions carefully to ensure safe and effective removal of the residue.
After removing the adhesive or mortar, thoroughly clean the surface with a mild cleanser and water to remove any remaining residue and ensure a clean and smooth base for the new tile installation.
By following these steps to prepare the workspace, safely break the tiles, and remove any adhesive or mortar residue, you will be well on your way to a successful fireplace tile update. Stay focused and take your time to complete each step with care and precision.
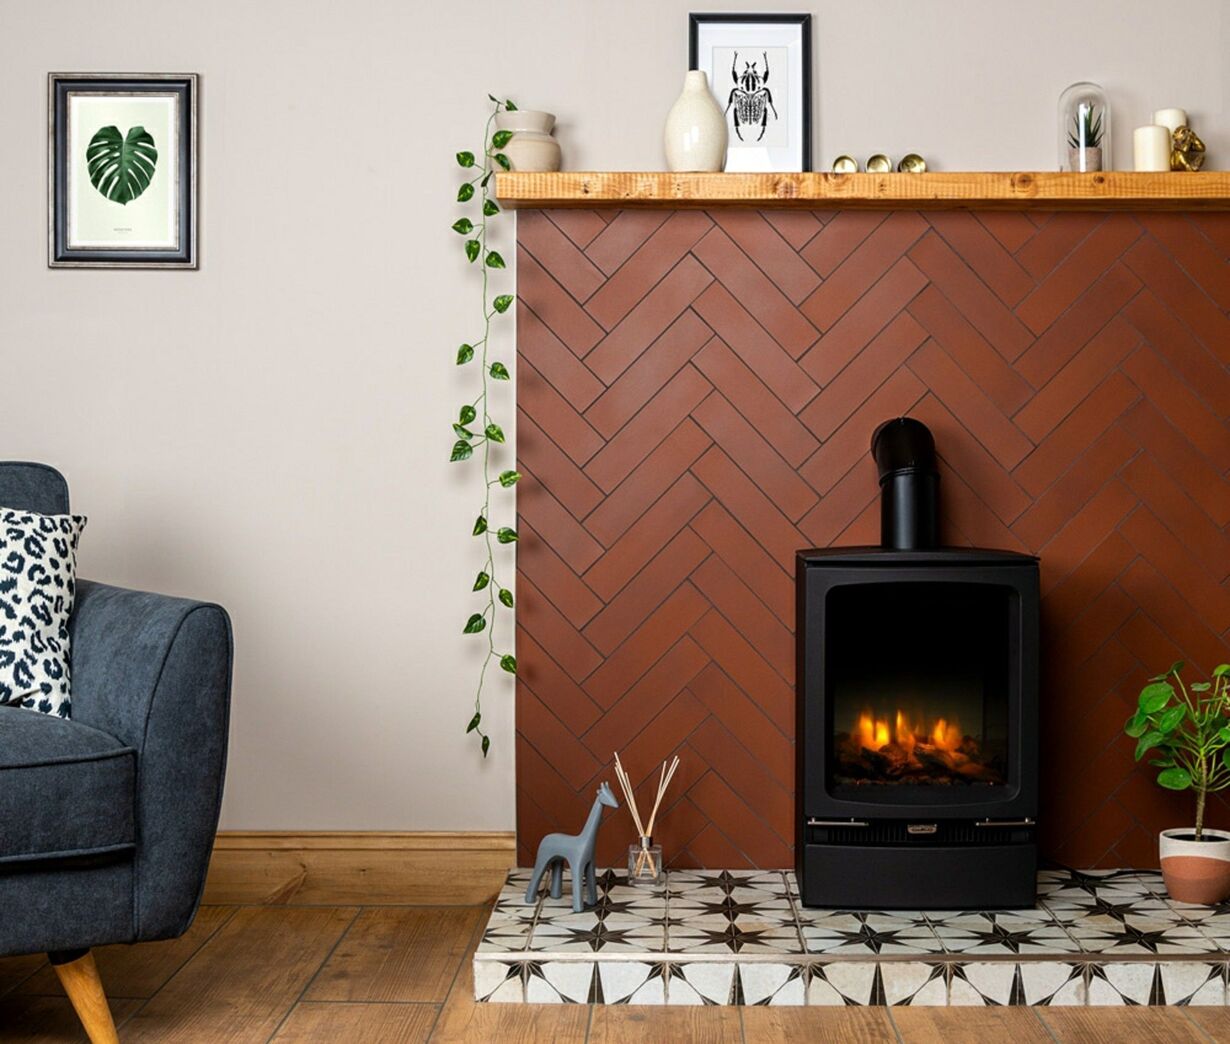
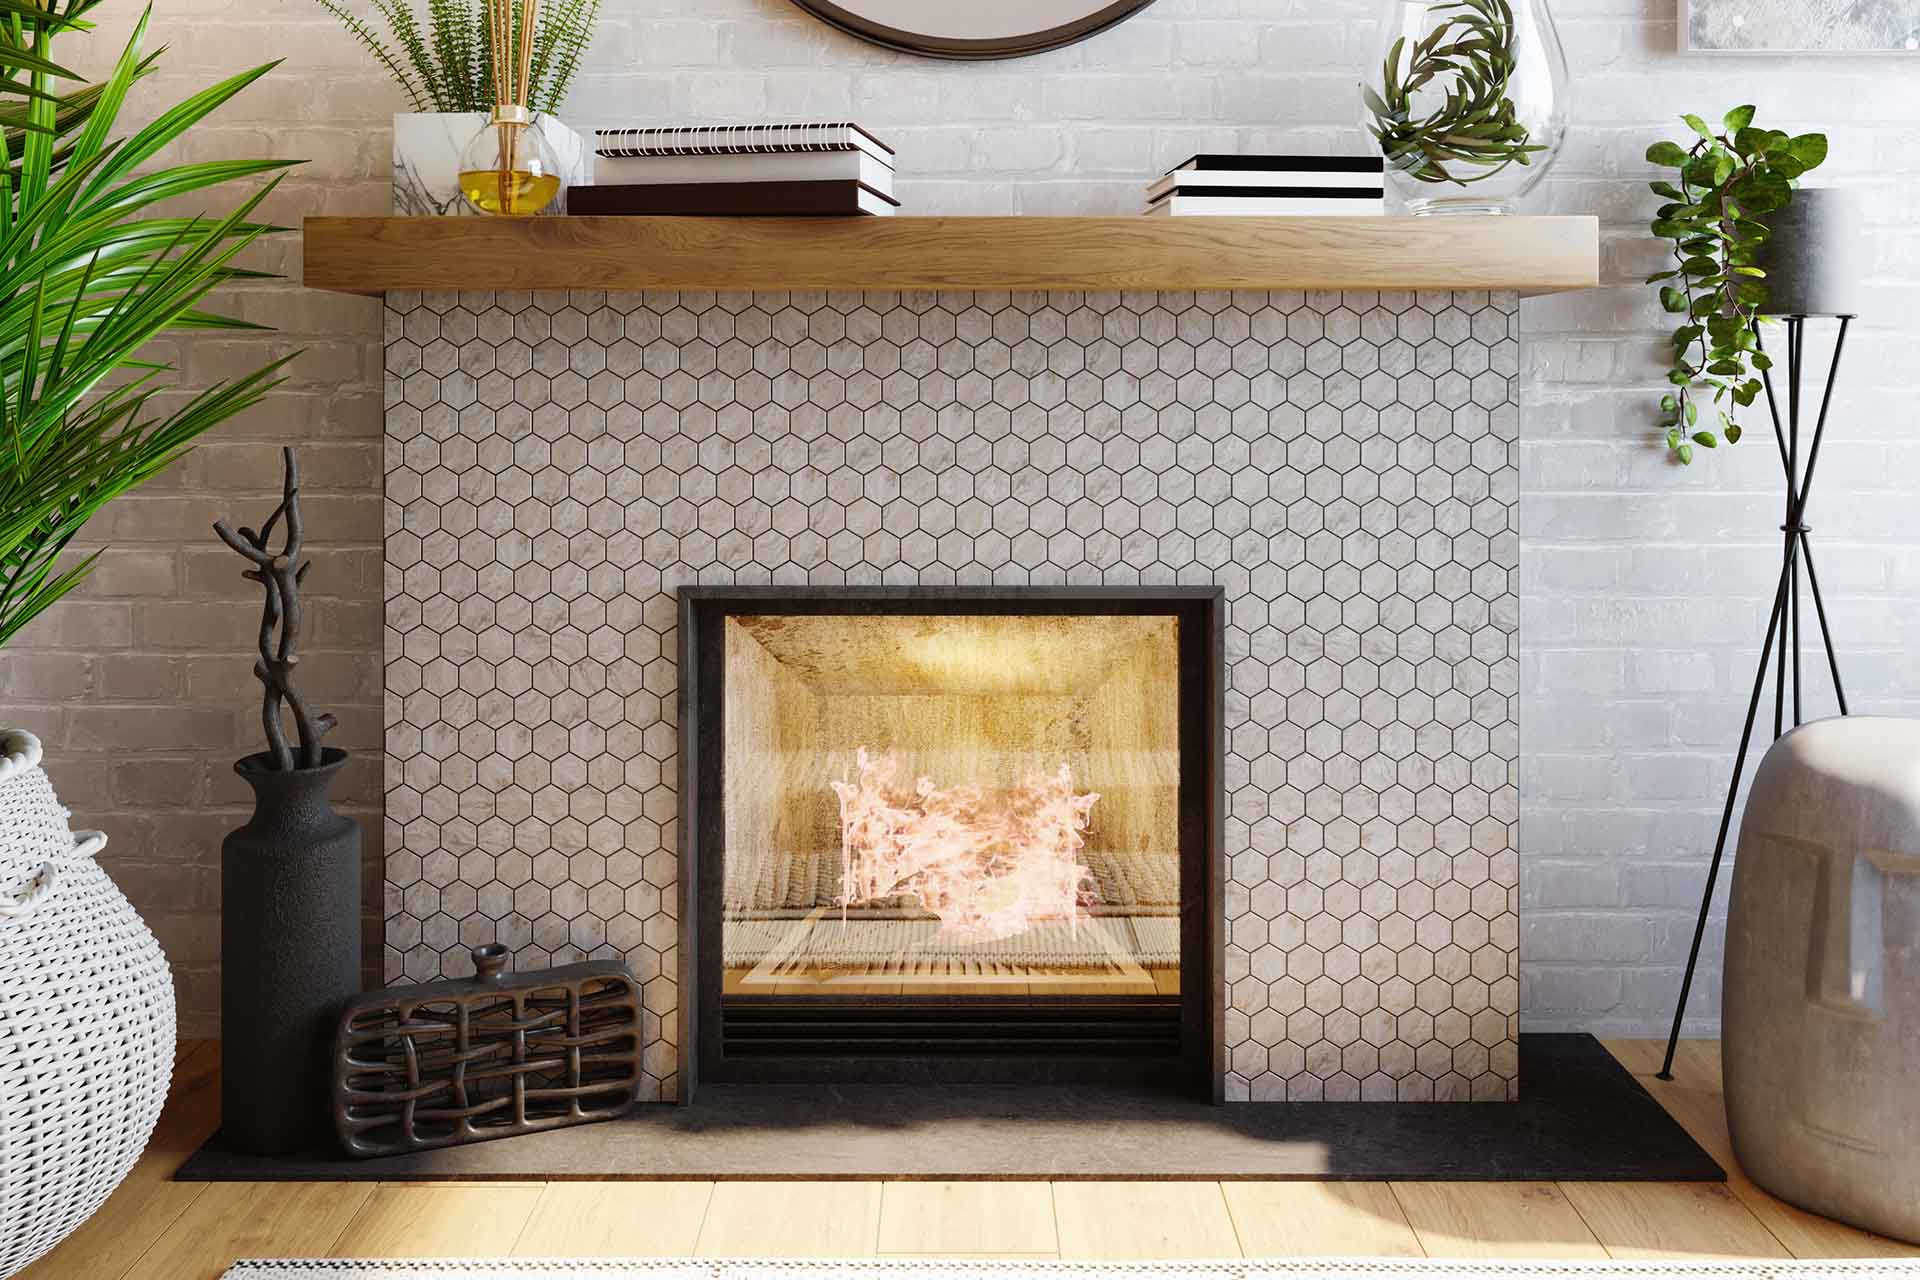
Choosing the New Tile
When updating your fireplace tile, selecting the right type of tile is crucial to achieving the desired design and style. This involves considering the design and style elements, choosing a suitable material, and calculating the required amount of tile for the project.
Considering Design and Style
Start by considering the overall design and style you want to achieve with your updated fireplace. Look for inspiration in interior design magazines, online platforms, or even in other rooms or homes. Take note of colors, patterns, textures, and shapes that catch your eye and align with your desired aesthetic.
If you are looking for a contemporary or modern look, you may opt for sleek and minimalist tiles in neutral colors or bold geometric patterns. For a more traditional or rustic look, you might consider natural stone tiles or handcrafted ceramics with textured finishes.
Take into account the existing decor and color palette of the room to ensure that the new tile complements the overall interior design. Consider the size and scale of the tile as well, as it should be proportionate to the size of the fireplace and the room.
Selecting Suitable Material
Once you have an idea of the design and style you’re aiming for, it’s time to select a suitable material for your fireplace tile. There are various materials available, each with its own characteristics and considerations:
- Ceramic and Porcelain: These are versatile options that come in a wide range of colors, patterns, and finishes. They are relatively easy to clean and maintain.
- Natural Stone: Options like marble, granite, slate, or travertine offer a timeless and elegant appearance. However, they require more maintenance and may be more prone to staining or damage.
- Glass: Glass tiles can create stunning visual effects with their translucent nature and reflective properties. They are often used as accent tiles or in mosaic patterns.
- Metal: Metal tiles, such as stainless steel or copper, can add a touch of sophistication and contemporary flair to the fireplace. They are durable and resistant to heat.
Consider the pros and cons of each material, such as durability, maintenance requirements, and heat resistance, to make an informed decision that suits your preferences and lifestyle.
Read more: How To Tile A Fireplace
Calculating the Required Amount
Before purchasing the new tile, it’s important to calculate the required amount based on the dimensions of your fireplace. Measure the height and width of the fireplace, and multiply these measurements to determine the square footage of tile needed.
Depending on the tile shape and pattern, you may need to add a little extra for wastage and cuts. It’s recommended to purchase around 10-15% more tile than the calculated amount to account for any unexpected breakage or mistakes during the installation process.
If you’re unsure about the calculations, consult with a professional tile supplier or installer who can assist you in determining the correct amount of tile needed for your fireplace update.
By considering the design and style elements, selecting a suitable material, and calculating the required amount of tile, you can confidently choose the new tile that will transform your fireplace into a stunning focal point of your space.
Preparing the Surface for New Tile
Before installing the new tile on your fireplace, it’s crucial to properly prepare the surface. This involves cleaning the fireplace and ensuring that the surface is smooth and level, providing a solid foundation for the new tile.
Cleaning the Fireplace
The first step in preparing the surface is to thoroughly clean the fireplace. Use a vacuum cleaner or a brush to remove any loose debris, dust, or ashes from the fireplace area. Pay close attention to the corners and crevices where dirt may accumulate.
Next, mix a solution of warm water and mild detergent. Use a sponge or cloth to wipe down the entire fireplace surface, removing any dirt, grime, or soot. Rinse the surface with clean water and allow it to dry completely. It’s important to ensure that there is no residual dirt or cleaning solution left on the surface.
If you encounter any stubborn stains or residue, you may need to use a specialized fireplace cleaner or a mixture of vinegar and water. Always refer to the manufacturer’s instructions when using cleaning products on your specific fireplace surface.
Smoothing and Leveling the Surface
After cleaning the fireplace, inspect the surface for any imperfections or unevenness. If you notice any cracks, chips, or rough patches, you’ll need to address them to create a smooth and level base for the new tile.
If there are small cracks or chips, you can use a high-quality heat-resistant repair filler or putty specifically designed for fireplaces. Fill in the damaged areas using a putty knife, and ensure that the surface is level and smooth. Allow the filler to dry and cure according to the manufacturer’s instructions.
If the fireplace surface is uneven or has significant imperfections, you may need to apply a heat-resistant mortar or leveling compound. These products can help create a flat and consistent surface for the tile installation. Follow the instructions provided by the manufacturer for proper application and drying times.
Once the repairs and leveling are complete, use a sanding block or sandpaper to lightly sand the surface. This will help smooth out any roughness and promote better adhesion of the tile adhesive.
By cleaning the fireplace and ensuring that the surface is smooth and level, you’ll create a solid base for the new tile. This preparation step is vital to ensure the longevity and quality of the fireplace tile installation.
Read more: How To Update Old Brick Fireplace
Installing the New Tile
With the surface of your fireplace prepared and ready, it’s time to move on to the exciting step of installing the new tile. This process involves applying tile adhesive or mortar, placing the tiles, and grouting the joints to create a sturdy and visually appealing fireplace update.
Applying Tile Adhesive or Mortar
Start by preparing the tile adhesive or mortar according to the manufacturer’s instructions. Use a trowel to spread a layer of adhesive or mortar onto the fireplace surface, ensuring an even and consistent coverage. It’s important to work in small sections to prevent the adhesive from drying before you can place the tiles.
When applying the adhesive or mortar, use the notched edge of the trowel to create grooves or ridges. These grooves help improve the bond between the tile and the surface. Remember to wear gloves and protective eyewear while working with the adhesive or mortar.
Placing the Tiles
Once the adhesive or mortar is applied, carefully place the tiles onto the surface, starting from the bottom and working your way up. Press each tile firmly and wiggle it slightly to ensure proper adhesion. Take care to align the tiles evenly and maintain consistent spacing between them.
If necessary, use tile spacers to achieve uniform grout lines between the tiles. These spacers will be removed once the adhesive or mortar has dried.
Continue placing the tiles, making sure to periodically check for levelness and adjust as needed. Pay attention to intricate patterns or designs if you are using multiple tile types or sizes.
Grouting the Joints
Once the tiles are in place, it’s time to fill the gaps between them with grout. Mix the grout following the manufacturer’s instructions and apply it to the joints using a grout float. Hold the float at a 45-degree angle and press the grout into the gaps, ensuring complete coverage.
After applying the grout, use the edge of the float to remove any excess grout from the tile surfaces. Clean the tile surfaces with a damp sponge, being careful not to disturb the grout lines. Rinse the sponge frequently to avoid smearing the grout on the tiles.
Allow the grout to cure for the recommended time, often about 24 hours, before applying a grout sealer to protect the grout from stains and discoloration. Follow the manufacturer’s instructions for the sealer application if required.
By applying tile adhesive or mortar, placing the tiles carefully, and grouting the joints, you will create a strong and visually appealing fireplace update. Take your time during this process to ensure accurate placement and a professional finish.
Read more: How To Tile A Fireplace Wall
Finishing Touches
As you near the completion of your fireplace tile update, it’s time to focus on the finishing touches. These final steps involve cleaning the tiles, sealing the tile surface, and restoring the surrounding area to showcase your newly updated fireplace.
Cleaning the Tiles
Start by cleaning the tiles to remove any grout haze or residue that may have been left behind during the grouting process. Use a clean, damp sponge and gentle circular motions to wipe the tile surfaces. Rinse the sponge frequently and continue until the tiles are clean and free from any grout marks.
If necessary, you can also use a specialized tile cleaner or a mixture of mild detergent and water to remove stubborn stains or residue. Be sure to follow the manufacturer’s instructions and test the cleaner on a small, inconspicuous area of the tile before applying it to the entire surface.
Once the tiles are clean, use a dry cloth or towel to remove any excess moisture and leave the tiles looking polished and pristine.
Sealing the Tile
Sealing the tile surface is an important step to protect it from stains, moisture, and daily wear and tear. The type of sealer you use will depend on the material of your tiles. Consult with a professional or the tile manufacturer to determine the appropriate type of sealer for your specific tiles.
Apply the sealer according to the manufacturer’s instructions, using a clean cloth or brush. Ensure that the sealer is evenly distributed over the entire tile surface and allow it to dry completely before using the fireplace or placing any objects on the tiles.
Remember to reapply the sealer periodically, as recommended, to maintain the protection and longevity of the tiles.
Restoring Surrounding Area
Finally, once the tiles are clean and sealed, it’s time to restore the surrounding area and put the finishing touches on your updated fireplace. Remove any protective coverings or drop cloths that were placed to safeguard the room during the tile installation process.
Double-check the integrity of the surrounding walls or surfaces and make any necessary touch-ups or repairs. Paint or touch up any areas that may have been scuffed or damaged during the update process. This will ensure that the entire space looks refreshed and cohesive.
Consider adding decorative elements, such as a mantel, artwork, or accessories, to enhance the overall aesthetic and create a cozy and inviting atmosphere around the fireplace.
By cleaning the tiles, sealing the tile surface, and restoring the surrounding area, you will add those final touches that complete your fireplace tile update and create a stunning focal point in your space.
Read more: How To Tile A Fireplace Hearth
Conclusion
Updating the tile on your fireplace can transform the entire look and feel of your space. With proper planning, preparation, and execution, you can achieve a stunning and visually appealing fireplace that enhances the overall aesthetic of your room. Let’s recap the key steps to successfully update your fireplace tile:
– Assess the current condition of your fireplace tile and determine the type of tile you’re working with. This will help guide your decisions throughout the update process.
– Gather the necessary tools and materials, remove surrounding objects and furniture, and take precautions to protect the surrounding area.
– Safely remove the old tiles, taking care to prepare the workspace and properly dispose of any debris.
– Consider the design and style you want to achieve and select the suitable material for your new tile.
– Clean the fireplace surface thoroughly and smooth out any imperfections, ensuring a solid base for the new tile.
– Apply tile adhesive or mortar, carefully place the new tiles in position, and grout the joints to create a strong and visually appealing installation.
– Finish the project with attention to detail by cleaning the tiles, sealing the tile surface to protect it from stains and damage, and restoring the surrounding area.
By following these steps and using your creativity, you can give your fireplace a fresh and updated look that reflects your personal style and enhances the overall aesthetic of your room.
Remember, throughout the entire process, it’s important to take your time, pay attention to detail, and ensure your safety by wearing protective gear.
Now, it’s time to sit back, relax, and enjoy the warmth and beauty of your newly updated fireplace. Gather around with family and friends, and create lasting memories in a space that exudes style and charm.
So go ahead, let your creativity soar, and embark on your fireplace tile update journey with confidence. Your updated fireplace will serve as a captivating centerpiece, bringing joy and comfort to your home for years to come.
Frequently Asked Questions about How To Update Fireplace Tile
Was this page helpful?
At Storables.com, we guarantee accurate and reliable information. Our content, validated by Expert Board Contributors, is crafted following stringent Editorial Policies. We're committed to providing you with well-researched, expert-backed insights for all your informational needs.


0 thoughts on “How To Update Fireplace Tile”