Articles
How To Tile A Fireplace Wall
Modified: August 26, 2024
Learn how to tile your fireplace wall with these informative articles. Transform your space with a stylish and modern look.
(Many of the links in this article redirect to a specific reviewed product. Your purchase of these products through affiliate links helps to generate commission for Storables.com, at no extra cost. Learn more)
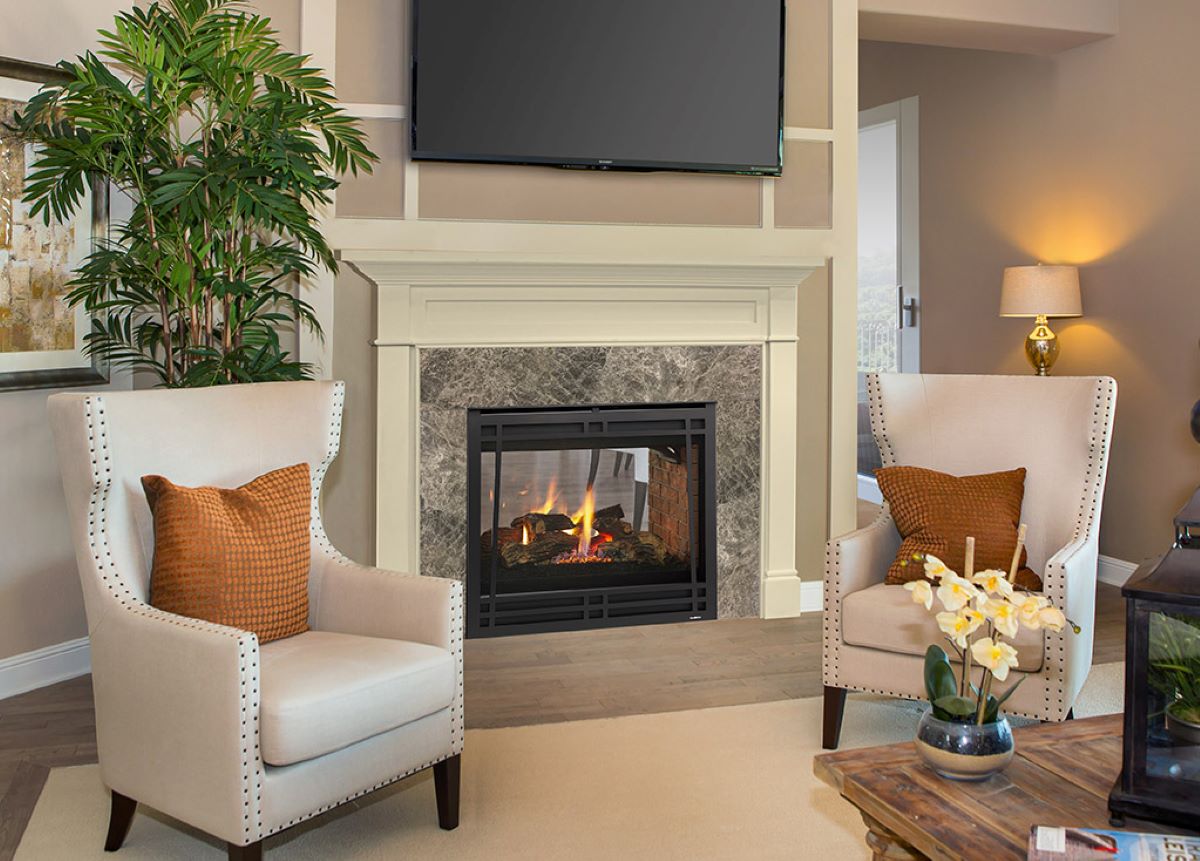
Introduction
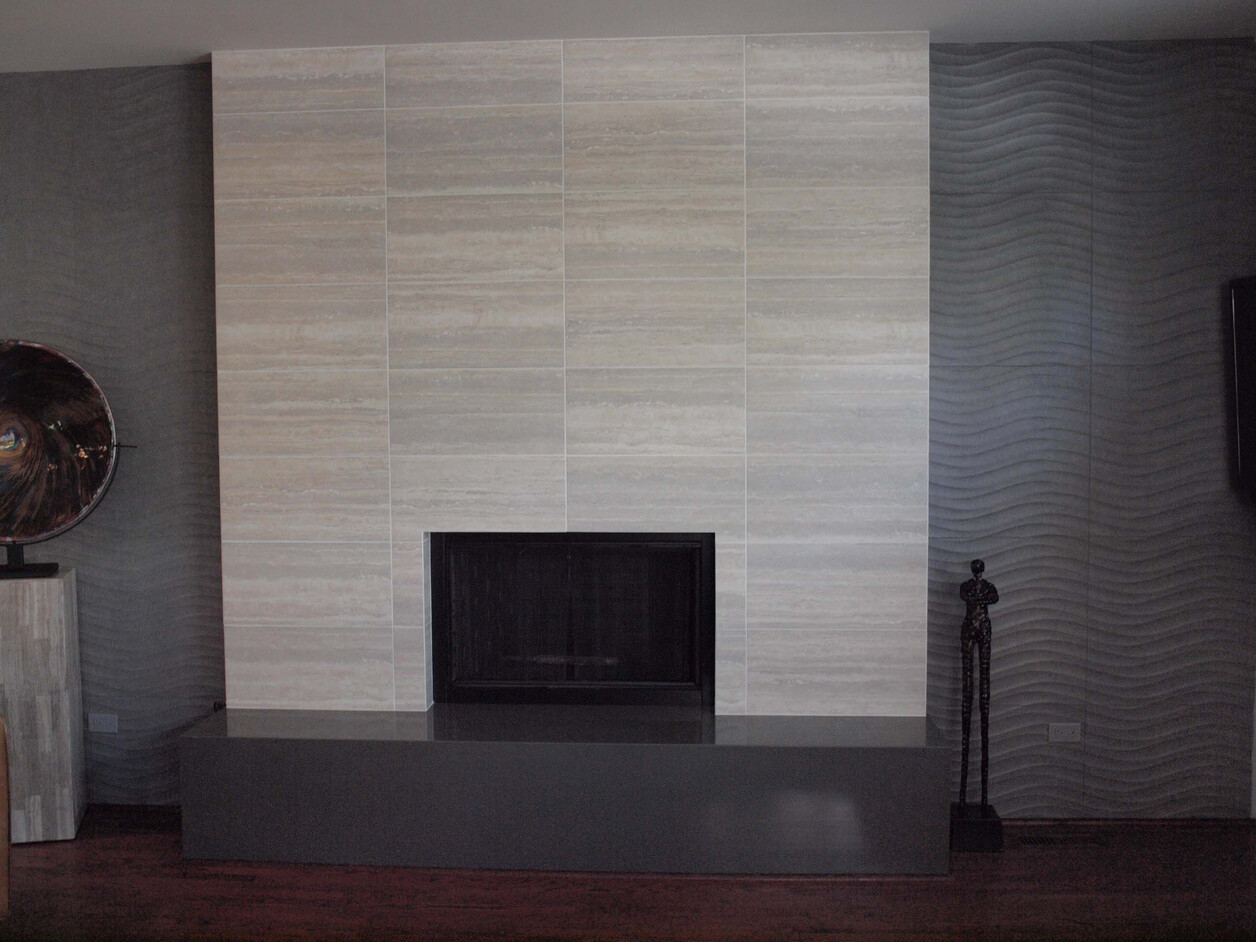
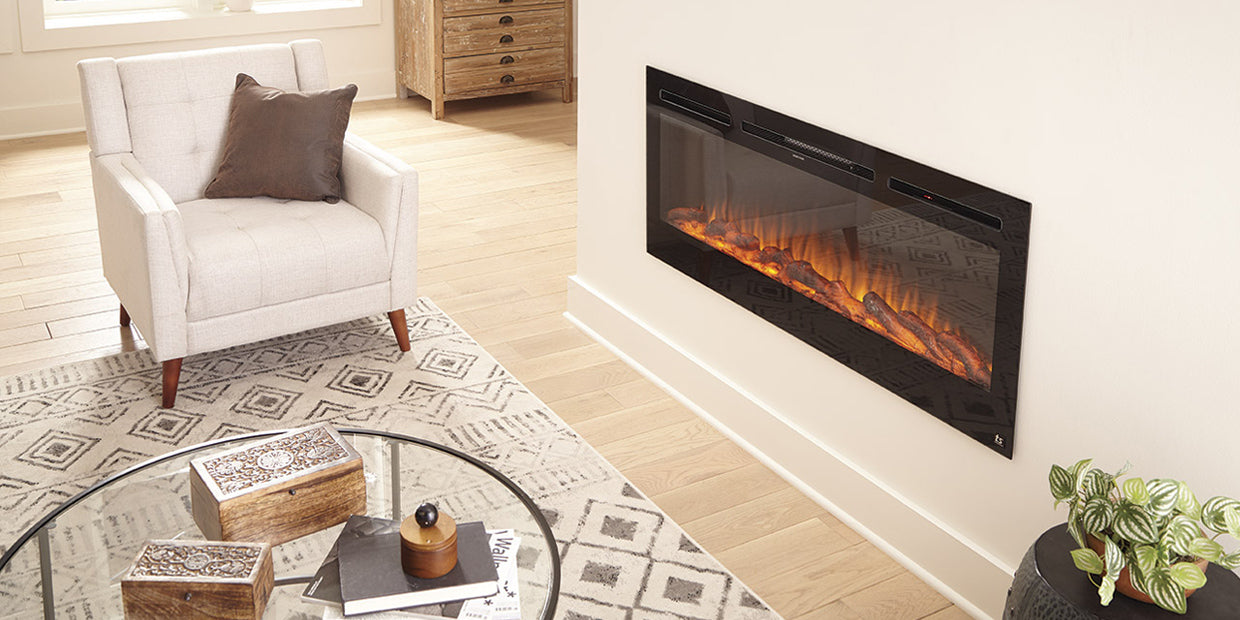
Tiling a fireplace wall can be a transformative and visually appealing way to enhance the overall look and feel of your living space. Whether you have a traditional wood-burning fireplace or a modern gas fireplace, adding tiles to the surrounding wall can create a stunning focal point that complements your interior design.
There are several reasons why tiling a fireplace wall is a popular choice among homeowners. One of the main benefits is the durability and longevity of tiles. Unlike paint or wallpaper, tiles are resistant to heat, moisture, and wear, making them suitable for the high-temperature environment of a fireplace wall. They are also easy to clean and maintain, ensuring that your fireplace wall retains its beauty for years to come.
Another advantage of tiling a fireplace wall is the variety of design options available. Tiles come in a wide range of colors, patterns, and textures, allowing you to create a unique look that complements your personal style and the overall aesthetic of your home. Whether you prefer a classic, timeless design or a bold, modern statement, there is a tile choice that will suit your taste.
In addition, tiling a fireplace wall provides an opportunity to enhance the visual appeal and architectural interest of the space. By choosing the right tiles and arranging them in a creative pattern, you can add depth and dimension to the wall, making it a focal point that draws attention and creates a sense of ambiance. With the right combination of tiles, you can transform a plain and ordinary fireplace into a stunning feature that enhances the overall design of your room.
Furthermore, tiling a fireplace wall offers flexibility in terms of customization. You can choose to tile the entire wall, create a pattern or mosaic, or incorporate tiles as an accent around the fireplace. This versatility allows you to add your personal touch and create a fireplace wall that reflects your unique style and personality.
Overall, tiling a fireplace wall is not only a practical choice but also a creative opportunity to enhance your living space. From durability and easy maintenance to a wide range of design options and customization possibilities, there are plenty of reasons why tiling is favored over other wall coverings. So if you’re looking to add beauty, elegance, and character to your fireplace, consider tiling the surrounding wall and make a stunning statement in your home.
Key Takeaways:
- Transform Your Living Space
Tiling a fireplace wall offers durability, design flexibility, and customization options. It’s a practical and creative way to enhance your living space with a stunning focal point that complements your style and personality. - Attention to Detail and Safety
Accurate measurements, precise tile placement, and proper safety precautions are crucial for a successful tiling project. Take your time, prioritize safety, and enjoy the process of creating a beautiful and long-lasting tiled fireplace wall.
Materials and Tools Needed
Before you start tiling your fireplace wall, it’s important to gather all the necessary materials and tools. Here is a list of items you’ll need for a successful tiling project:
Materials:
- Tiles: Choose tiles that are suitable for fireplace use, such as ceramic, porcelain, or natural stone. Ensure you have enough tiles to cover the entire area of your fireplace wall, considering some extra for cuts and replacements.
- Thinset Mortar: This adhesive material is used to adhere the tiles to the wall. Make sure to select a thinset mortar that is suitable for your specific tile type.
- Grout: Choose a grout color that complements your tiles and fits your desired aesthetic. Opt for a grout that is suitable for fireplace use and is resistant to heat and flames.
- Grout Sealer: A grout sealer will help protect the grout from stains and discoloration, ensuring long-lasting durability.
- Tile Spacers: These small plastic pieces are used to achieve consistent spacing between the tiles, ensuring a professional finish.
- Tile Adhesive: Depending on the specific requirements of your fireplace wall, you may need additional adhesive, such as mastic or cement board tape.
- Tile Trim: If you’re planning to edge the tiles, you’ll need tile trim pieces that match your tiles and provide a clean, finished look.
- Primer: In some cases, you may need a primer to prepare the fireplace wall surface for tiling.
- Sponge and Bucket: These will be used for cleaning excess grout from the tiles during the installation process.
- Rags or Towels: Keep rags or towels handy for wiping off any excess water or grout from the tiles.
- Protective Equipment: Make sure to wear safety goggles, gloves, and a dust mask to protect yourself during the tiling process.
Tools:
- Tape Measure: Accurate measurements are crucial for a successful tiling project. Use a tape measure to measure the dimensions of your fireplace wall and calculate the quantity of tiles needed.
- Level: A level will help ensure that your tiles are installed straight and even.
- Notched Trowel: This tool is used to spread the thinset mortar evenly on the wall before placing the tiles.
- Tile Cutter or Wet Saw: Depending on the type of tiles you’re using and the required cuts, you’ll need either a tile cutter or a wet saw to make accurate cuts.
- Grout Float: A grout float is used to apply the grout to the gaps between the tiles and ensure a smooth and even finish.
- Grout Brush: This brush is used to clean the grout joints and remove any excess grout.
- Tile Nippers: Tile nippers are handy for making small, precise cuts or shaping tiles to fit around obstacles or corners.
- Tile File: A tile file is useful for smoothing the edges of cut tiles or making small adjustments to the shape.
- Grout Sealer Applicator: To apply the grout sealer, you’ll need a brush or foam applicator that allows for precise application.
Make sure to gather all the necessary materials and tools before you start tiling your fireplace wall. Having everything ready will ensure a smoother and more efficient tiling process, resulting in a beautiful and professionally finished fireplace wall.
Preparing the Surface
Properly preparing the surface of your fireplace wall is crucial for successful tiling. Here are the essential steps to follow:
Read more: How To Tile A Fireplace
1. Removing any existing coverings or debris:
Before you can begin tiling, you need to ensure that the fireplace wall is clean and free of any existing coverings or debris. Remove any paint, wallpaper, or other wall coverings using appropriate tools such as a scraper or sandpaper. If there are any loose or damaged sections, repair them to create a smooth and stable surface for tiling.
2. Cleaning and smoothing the surface:
After removing the existing coverings, thoroughly clean the surface of the fireplace wall. Use a damp cloth or sponge to wipe away any dirt, dust, or residue. If there are stubborn stains or grime, you can use a mild detergent mixed with warm water. Be sure to rinse the wall thoroughly with clean water and allow it to dry completely.
Once the surface is clean, check for any imperfections or unevenness. Fill in any cracks or holes with a suitable patching compound and allow it to dry. Use a sanding block or sandpaper to smooth out any rough areas or ridges on the wall. The goal is to create a level and smooth surface that will ensure proper adhesion of the tiles.
If your fireplace wall is made of a combustible material, such as drywall, it is important to apply a layer of cement board or a heat-resistant backer board to protect it from the heat of the fireplace. Follow the manufacturer’s instructions for installing the appropriate backing material before proceeding to the next steps.
Preparing the surface of your fireplace wall is a critical step that sets the foundation for a successful tiling project. By removing any existing coverings, cleaning the wall thoroughly, and ensuring a smooth surface, you can create an ideal environment for the tile adhesive to bond effectively and ensure the longevity of your tiled fireplace wall.
Measuring and Planning
Accurate measurements and careful planning are essential for a successful tiling project on your fireplace wall. Here’s what you need to know:
Importance of accurate measurements:
Before you start tiling, it’s crucial to take precise measurements of your fireplace wall. This ensures that you have enough tiles to cover the entire surface and helps you avoid any unexpected surprises. Measure the height and width of the wall to determine the total area and calculate the number of tiles needed. It’s always a good idea to purchase a few extra tiles to account for any cuts or replacements that may be necessary.
Read more: How To Tile A Fireplace Hearth
Tips for determining tile layout and pattern:
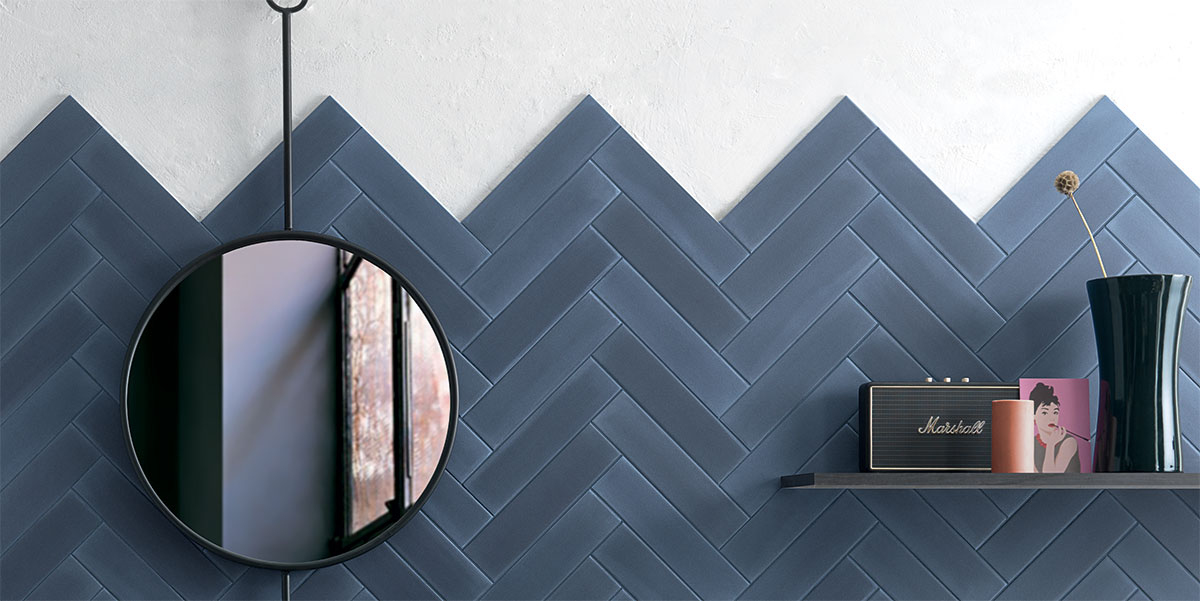
Consider the overall design and style you want to achieve when determining the tile layout and pattern for your fireplace wall. You can opt for a traditional, uniform layout with square or rectangular tiles, or get creative with different shapes and sizes, such as mosaic patterns or herringbone layouts.
One popular technique is to create a focal point around the fireplace by using a contrasting tile pattern or a different color. This draws attention to the fireplace and adds visual interest to the wall. Experiment with different tile arrangements by laying them out on the floor or using design software to visualize the final look before starting the installation process.
Marking reference lines for alignment:
To ensure that your tiles are installed in a straight and even manner, it’s important to mark reference lines on the wall. Start by finding the center point of the fireplace and mark a vertical line using a level and a pencil. This line will serve as a guide for the center of your tile layout.
Next, determine the height at which you want the first row of tiles to start. Use a level to draw a horizontal line across the entire width of the wall at that height. This line will act as your starting point for installing the tiles from bottom to top.
Continue to mark reference lines at regular intervals based on the size of your tiles and the desired grout spacing. Use a level and a pencil to create vertical and horizontal lines that intersect with the starting lines, creating a grid-like pattern on the wall. These reference lines will guide you during the tile installation, ensuring that the tiles are aligned correctly.
Measuring accurately, planning the tile layout, and marking reference lines are crucial steps in the tiling process for your fireplace wall. By taking the time to measure properly, envisioning the design, and marking reference lines for alignment, you will set yourself up for a smooth and visually pleasing tile installation.
Applying Thinset Mortar
Applying thinset mortar is a crucial step in tiling your fireplace wall. The thinset mortar provides a strong bond between the tiles and the wall surface. Here is a step-by-step guide to help you mix and apply thinset mortar effectively:
Step 1: Gather the necessary materials:
Before you begin mixing the thinset mortar, make sure you have all the necessary materials ready. This includes the thinset mortar powder, a mixing bucket, a drill with a mixing attachment, water, and a trowel.
Read more: How To Update Fireplace Tile
Step 2: Mix the thinset mortar:
Start by pouring the required amount of thinset mortar powder into the mixing bucket. Follow the manufacturer’s instructions for the correct water-to-mix ratio. Attach the mixing attachment to the drill and slowly add water to the powder while mixing at a low speed. Continue mixing until you achieve a smooth and creamy consistency. Avoid making the mixture too thin or too thick.
Step 3: Let the thinset mortar rest:
Once the thinset mortar is mixed, let it rest for about 10 minutes. This resting period allows the mixture to activate and thicken slightly, making it easier to spread and adhere to the wall.
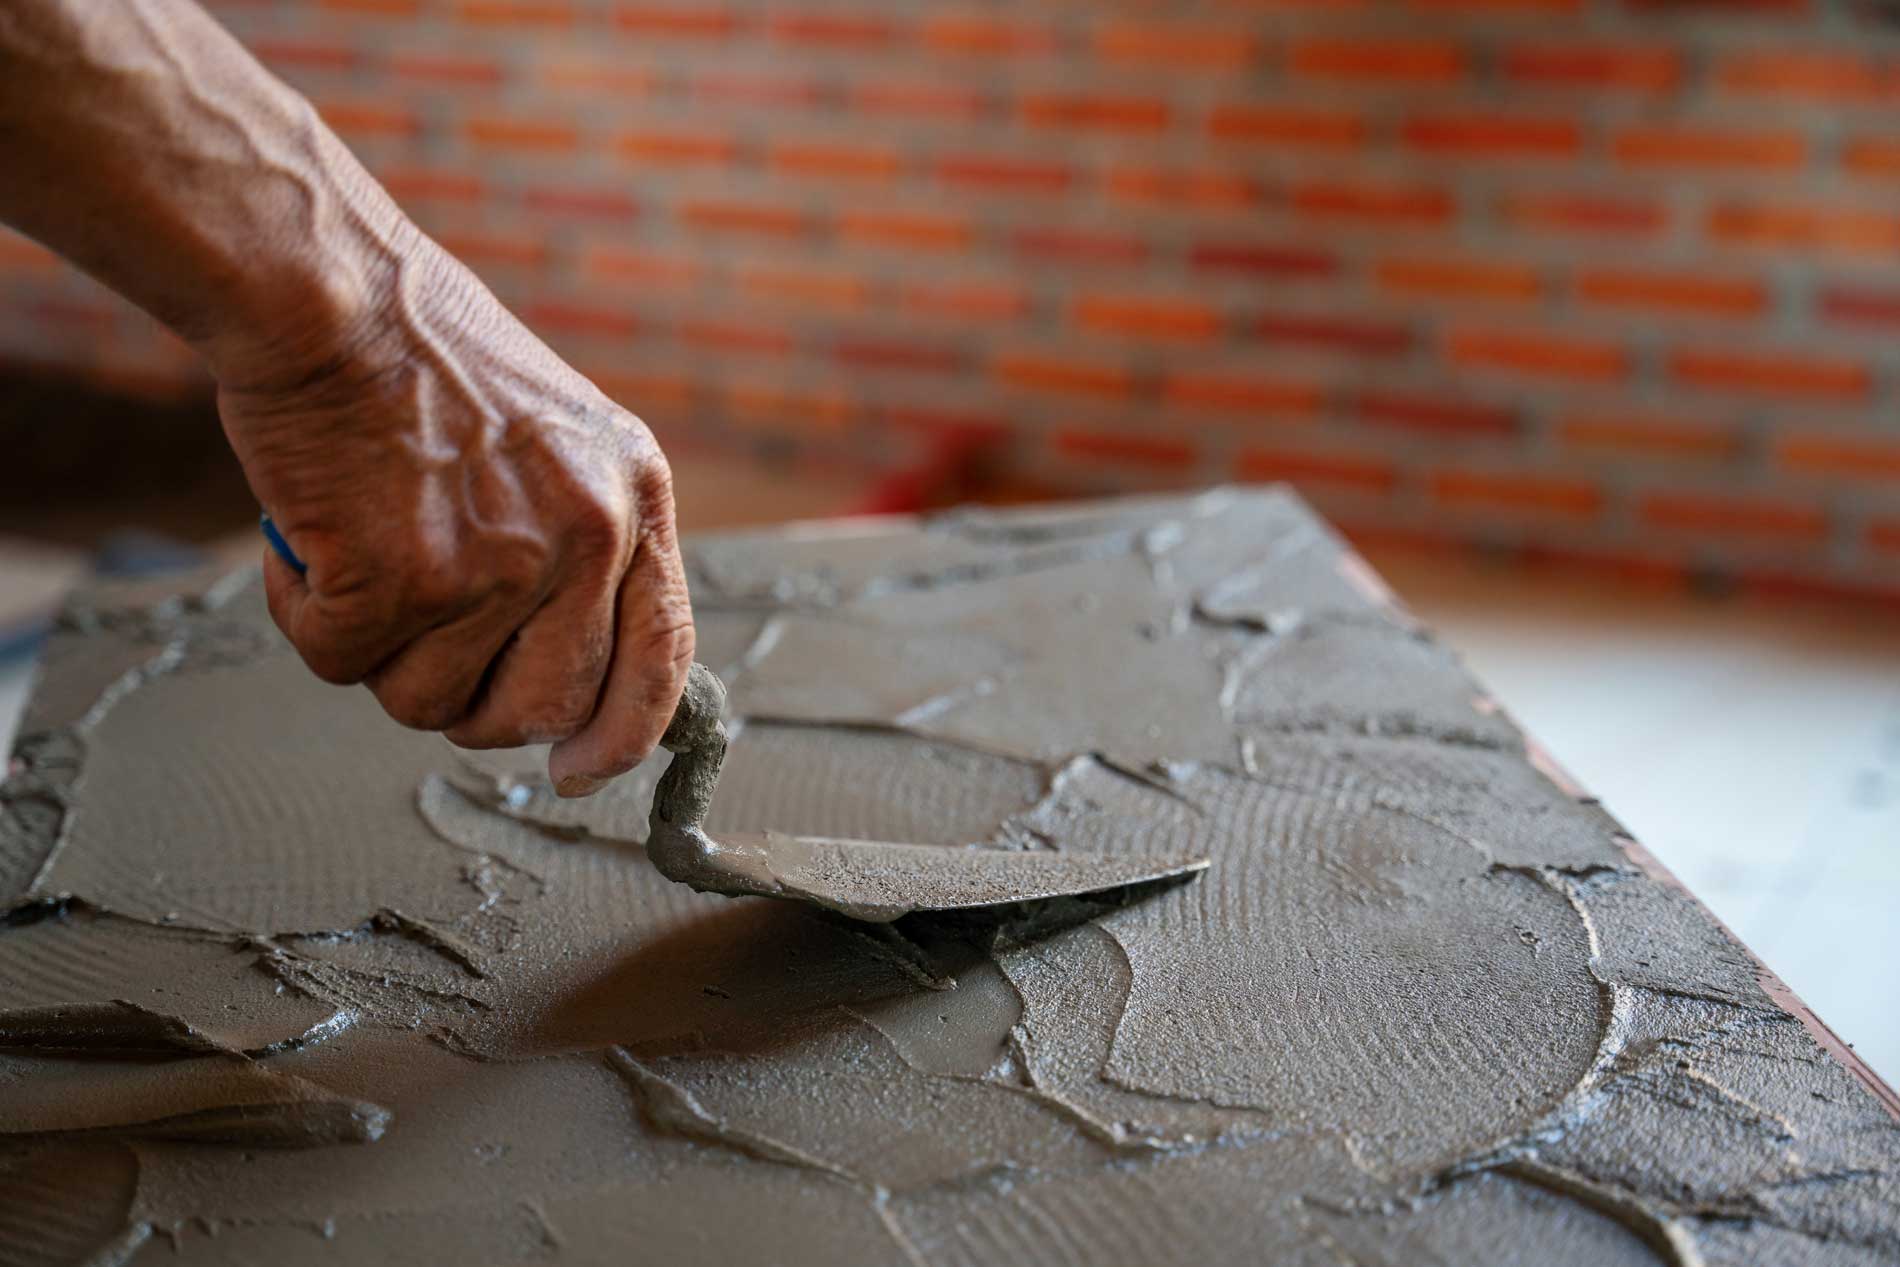
Step 4: Apply the thinset mortar:
Using a trowel, scoop a generous amount of thinset mortar onto the flat side of the trowel. Hold the trowel at a 45-degree angle and apply the mortar to the wall, starting at the bottom and working your way up. Use the notched side of the trowel to create grooves or ridges in the mortar. This helps to ensure a solid bond between the tiles and the wall.
Step 5: Achieve a level and even application:
After applying the mortar, use the flat side of the trowel to even out the surface, ensuring a consistent thickness of the mortar. Check the levelness of the mortar using a level, adjusting as necessary to maintain a flat and even surface.
It’s important to work in smaller sections to prevent the mortar from drying out before you can lay the tiles. Depending on the thinset mortar used, you may have a limited amount of time to work with before it sets.
Remember to remove any excess mortar from the surface of the wall and wipe off any drips or smudges on the tiles with a damp sponge or cloth. This helps to create a clean and professional finish.
Applying thinset mortar is a critical step in ensuring a strong bond between the tiles and the fireplace wall. By following these step-by-step instructions and techniques, you can achieve a level and even application, setting the stage for a successful tiling project.
Read more: How To Tile A Brick Fireplace
Installing the Tiles
Installing the tiles on your fireplace wall is an exciting step that brings your tiling project to life. Here are some methods, tips, and techniques for a successful tile installation:
Methods for arranging and placing tiles on the fireplace wall:
There are different methods you can use to arrange and place tiles on your fireplace wall, depending on the design and pattern you want to achieve:
- Straight Lay: This is the most common method where tiles are placed in a straight, horizontal or vertical pattern. It creates a clean and modern look.
- Herringbone: A herringbone pattern creates a more dynamic and visually interesting design. It involves placing tiles diagonally to form a V-shaped pattern.
- Mosaic: Mosaic patterns involve arranging smaller tiles to create intricate designs or images. You can create your own mosaic pattern or use pre-designed mosaic sheets for easier installation.
- Staggered/Offset: In this method, the tiles are offset by half their length or width, creating a staggered effect. It adds visual interest and helps to hide any slight imperfections in the wall.
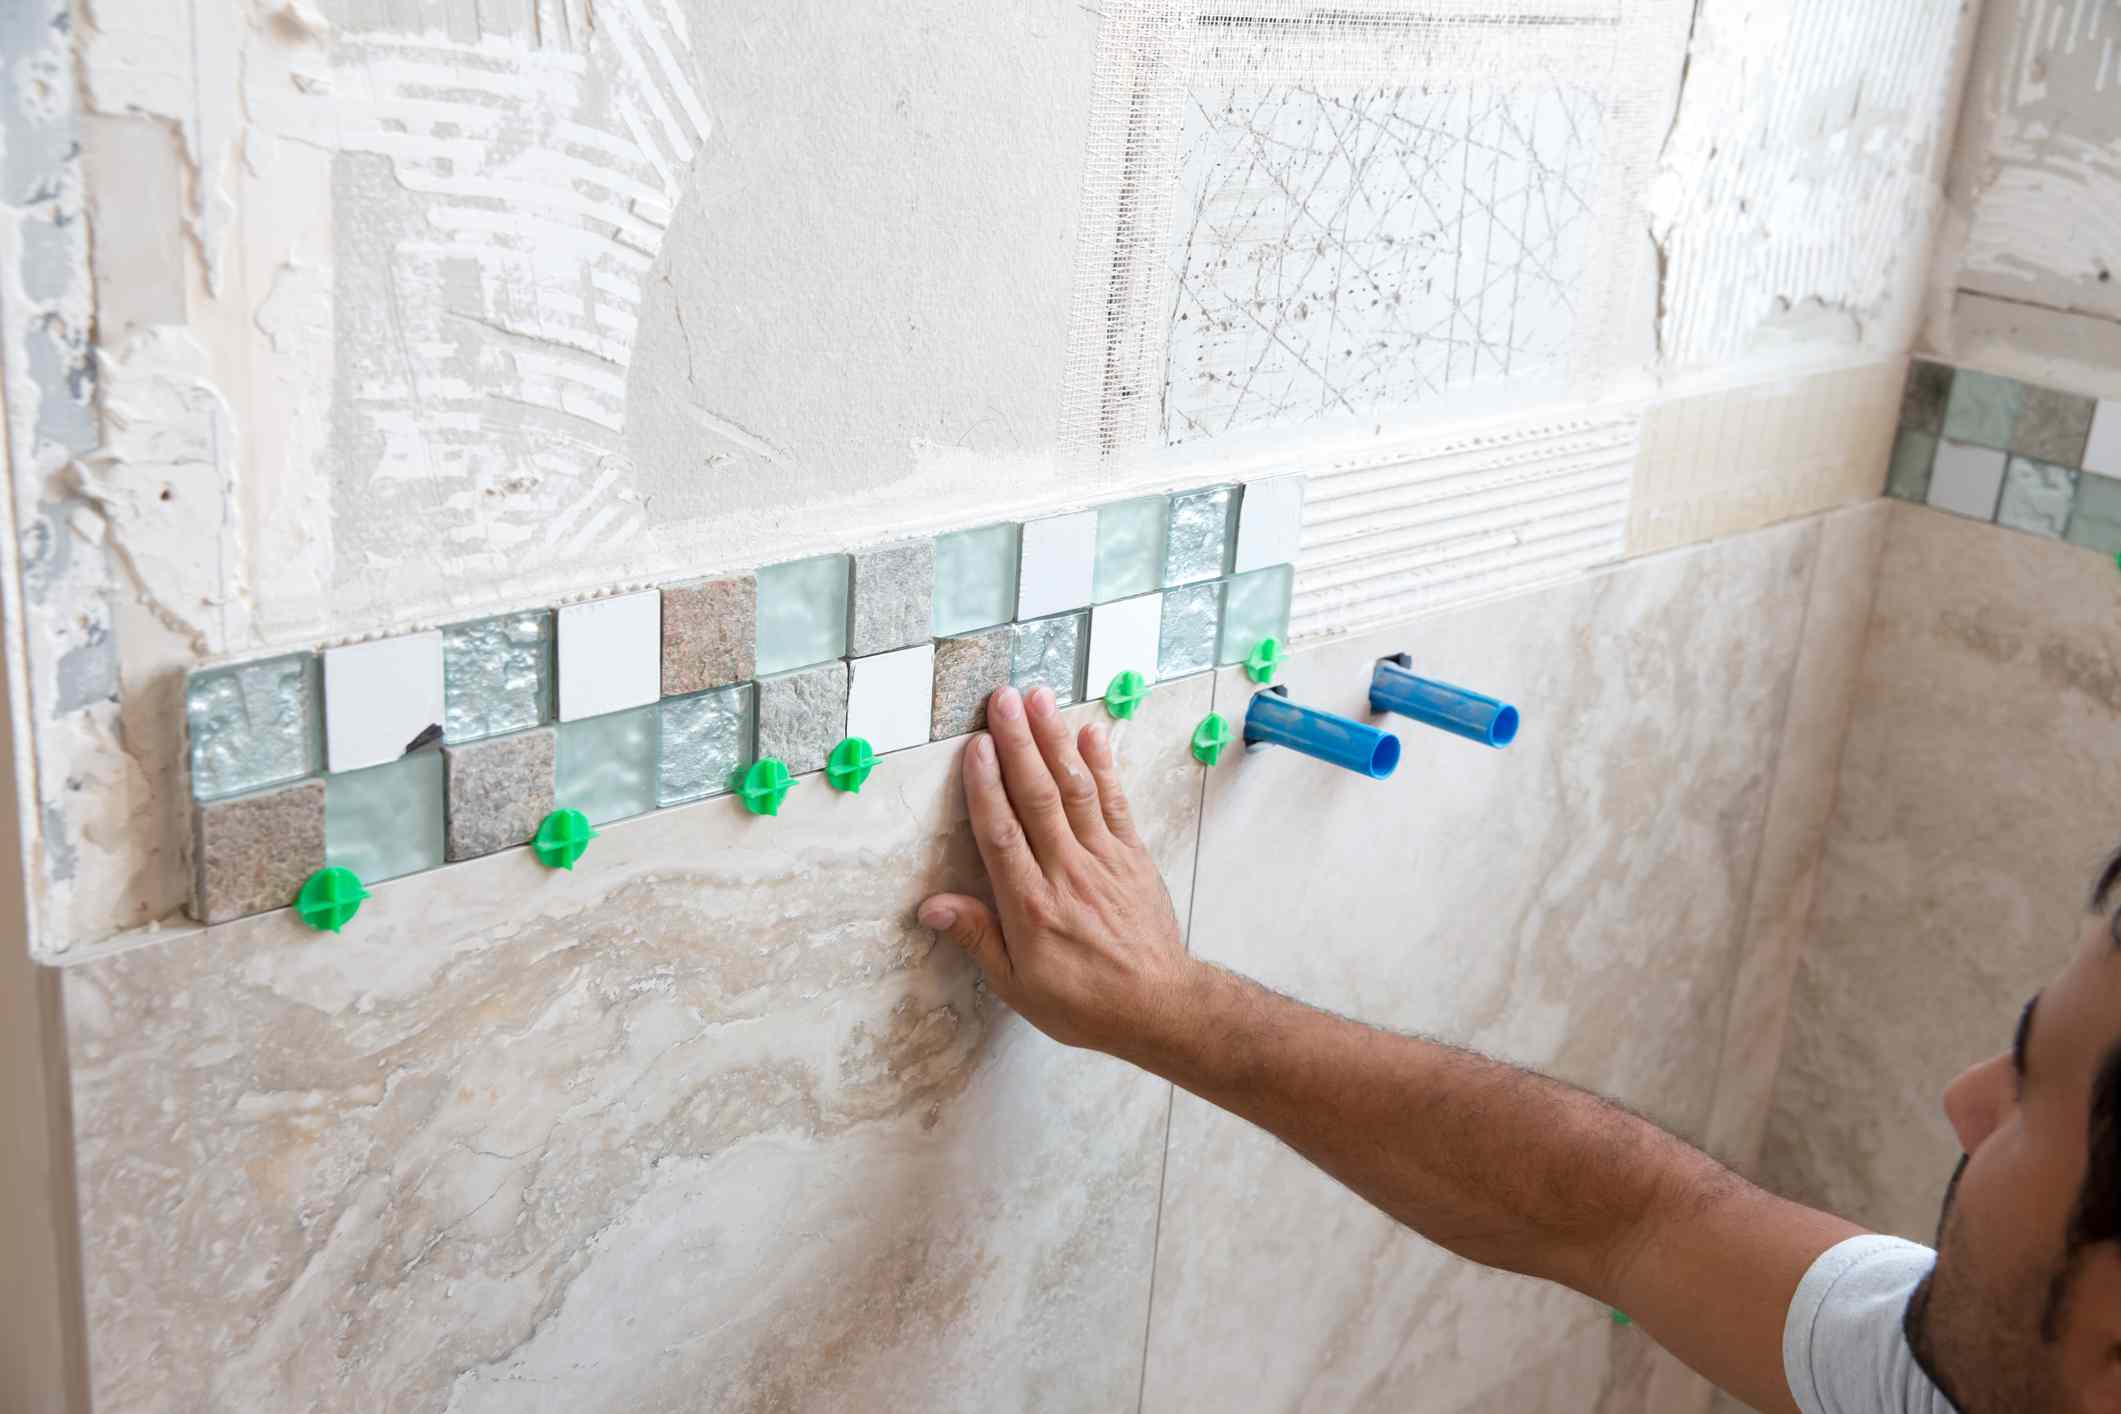
Tips for spacing and maintaining consistent grout lines:
When installing tiles, it’s important to maintain consistent grout lines for a professional finish. Here are some tips to help you achieve this:
- Use tile spacers: Tile spacers are small plastic pieces that help you maintain consistent spacing between the tiles. They ensure uniformity and provide a guide for the proper width of the grout lines.
- Measure and adjust: Take measurements periodically to ensure that the grout lines are consistent across the wall. Adjust the tile placement if needed to maintain uniformity.
- Use a level: Place a level across the tiles periodically to ensure they are installed evenly. Adjust as necessary to achieve a level surface.
- Check alignment: Use reference lines or neighboring tiles to check the alignment of the tiles. Make adjustments if needed to ensure straight lines and a visually pleasing layout.
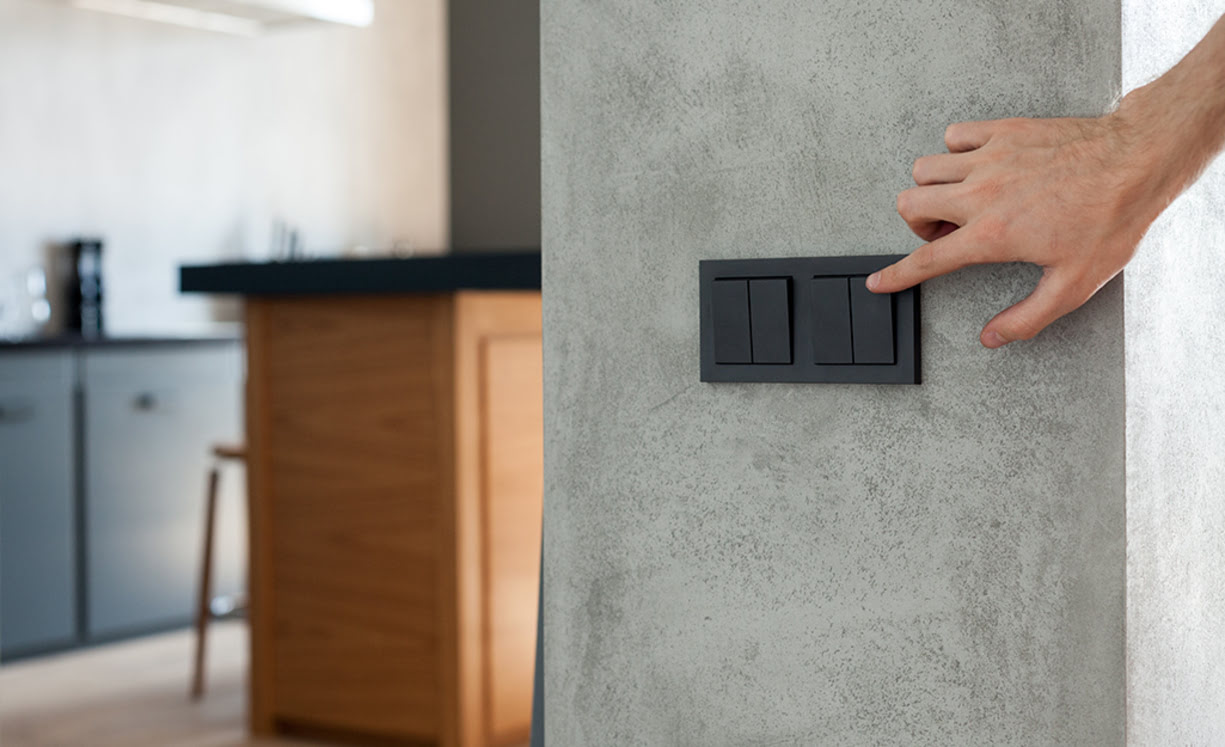
Cutting and shaping tiles to fit around obstacles:
It’s common to encounter obstacles such as outlets, switches, or corners when tiling a fireplace wall. Here are some techniques for cutting and shaping tiles to fit around these obstacles:
- Measure and mark: Measure the dimensions of the obstacle on the tile, allowing for a small gap for expansion. Use a pencil or marker to mark the cutting lines on the tile.
- Tile cutter or wet saw: Depending on the type of tile, use a tile cutter or wet saw to make the necessary cuts. Follow the manufacturer’s instructions for proper cutting techniques.
- Tile nippers or files: For intricate cuts or shaping, use tile nippers or files to achieve the desired shape. Make small, controlled cuts to avoid damaging the tile.
- Test fit: Before applying adhesive, test fit the cut tile around the obstacle to ensure it fits properly. Make any necessary adjustments before proceeding.
Working patiently and using these methods, tips, and techniques will result in a well-organized, visually pleasing tile installation on your fireplace wall. Take your time to ensure precision and accuracy, and your efforts will be rewarded with a stunning tiled fireplace.
Read more: How To Replace Tile Around Fireplace
Grouting the Tiles
Grouting is the final step in tiling your fireplace wall, and it plays a vital role in the overall appearance and durability of the tiled surface. Here’s what you need to know about grouting:
Selecting the right grout color and type:
Choosing the right grout color is important, as it can either complement the tiles and enhance their beauty or create a contrasting effect for a bolder look. Consider the overall design and style you want to achieve. You can opt for a grout color that matches the tiles for a seamless look or a contrasting color to create visual interest.
In addition to color, consider the type of grout best suited for your fireplace wall. There are different types of grout available, such as sanded and unsanded grout. Sanded grout is typically used for wider grout lines, whereas unsanded grout is suitable for narrower grout lines. Be sure to choose a grout that is heat-resistant and suitable for the application.
Step-by-step instructions for applying grout:
Follow these steps to apply grout to your tiled fireplace wall:
- Mix the grout: Follow the manufacturer’s instructions for mixing the grout properly. Use a clean bucket and a mixing paddle to achieve a smooth, lump-free consistency.
- Apply the grout: With a rubber grout float, hold it at a slight angle and spread the grout across the tiles, pushing it into the joints. Work in a diagonal or circular motion to ensure thorough coverage.
- Remove excess grout: Once the grout is applied, hold the float at a 45-degree angle and remove excess grout from the surface. Scrape across the tiles diagonally to prevent the grout from being removed from the joints.
- Clean the tiles: After removing excess grout, use a slightly damp sponge or cloth to wipe off any grout haze from the face of the tiles. Rinse the sponge frequently and wring it out well to avoid excess moisture on the tiles.
Cleaning and finishing the grouting process:
After the initial cleaning, allow the grout to dry for the recommended time provided by the manufacturer. Once dry, the grout might have a slight haze on the surface. You can use a grout haze remover or a mild acidic solution to clean the tiles and remove any remaining haze. Follow the instructions carefully and ensure the product is safe for your specific tile material.
Finally, take a soft cloth or towel and buff the tiles to remove any residue and give them a polished finish. Avoid walking on the tiled surface for at least 24 hours to allow the grout to fully cure.
Grouting is a critical step that enhances both the appearance and longevity of the tiled fireplace wall. Taking the time to select the right grout color and type, following the proper grouting technique, and finishing with a thorough cleaning will result in a beautiful and professionally finished project.
Read more: How To Build Fireplace Wall
Sealing the Tiled Surface
Sealing the tiled surface of your fireplace wall is an important step to protect the tiles and prolong their lifespan. Here’s what you need to know about sealing:
Importance of sealing to protect the tiles:
Sealing the tiles on your fireplace wall provides a protective barrier that helps prevent stains, moisture absorption, and damage from dirt or other contaminants. Sealing is particularly important for porous tile materials such as natural stone or unglazed ceramic, as they are more susceptible to staining and moisture penetration.
By sealing the tiles, you can enhance their durability, maintain their appearance, and make them easier to clean and maintain. Sealing also helps to preserve the original beauty of the tiles, shielding them from the effects of daily wear and tear, heat exposure, and potential damage from soot or fireplace emissions.
Recommended sealant options and application methods:
When selecting a sealant for your tiled fireplace wall, consider the specific tile material and the level of protection required. Here are a few sealant options and application methods:
- Penetrating Sealers: Penetrating sealers are absorbed into the pores of the tiles, providing long-lasting protection without altering the appearance of the surface. These sealers are suitable for natural stone tiles or porous ceramic tiles. Apply the sealer with a soft brush or a sponge, following the manufacturer’s instructions for the recommended number of coats and drying time.
- Topical Sealers: Topical sealers create a protective layer on top of the tiles, forming a barrier against stains and spills. They can enhance the color and sheen of the tiles, providing a glossy or matte finish. Topical sealers are typically applied with a roller or brush, ensuring even coverage. Be sure to follow the manufacturer’s instructions for application and drying time.
- Impregnating Sealers: Impregnating sealers are a hybrid between penetrating and topical sealers. They partially penetrate the tiles’ surface while also forming a protective layer on top, providing both protection and enhancing the appearance. These sealers are suitable for a wide range of tiles and can be applied with a brush or roller.
Before applying the sealant, ensure that the tiles are clean and free of any dust, dirt, or debris. Follow the manufacturer’s instructions for the specific sealant you are using, including the recommended application method, number of coats, and drying time. It’s advisable to test the sealant on a small, inconspicuous area of the tiles before applying it to the entire surface to ensure compatibility and the desired outcome.
Regularly check the condition of the sealed surface and reapply the sealer as recommended by the manufacturer or when you notice signs of wear or decreased effectiveness. With proper sealing and maintenance, your tiled fireplace wall will remain protected and retain its beauty for years to come.
Final Touches and Considerations
As you near the end of your tiling project for your fireplace wall, there are some final touches and considerations to keep in mind. Here’s what you need to know:
Removing excess grout and cleaning the tile surface:
Once the grout has dried, it’s important to remove any excess grout and clean the tile surface to achieve a polished and finished look. Follow these steps:
- Use a grout sponge or a damp cloth to gently wipe away any haze or residue on the tiles.
- Be careful not to disturb the grout lines or pull out any fresh grout.
- Rinse the sponge or cloth frequently and wring out the excess moisture to avoid leaving a film on the tiles.
- Inspect the tiles for any remaining grout residue or smudges, and use a clean, dry cloth to gently buff the surface until it’s clean and smooth.
Tips for maintaining and caring for a tiled fireplace wall:
To keep your tiled fireplace wall looking its best and maintain its longevity, consider these tips for maintenance and care:
- Regular cleaning: Regularly dust and wipe down the tiles with a soft cloth or a non-abrasive sponge to remove any soot, dirt, or debris. Avoid using abrasive cleaners or harsh chemicals that can damage the tiles or grout.
- Sealing touch-ups: Monitor the condition of the sealant on the tiles and reapply as needed to maintain its protective qualities. This may be necessary every few years, depending on the type of sealer used.
- Spot cleaning: If any spills, stains, or marks occur on the tiles, address them promptly. Use a mild detergent or a specified tile cleaner with a soft cloth to spot clean the affected area.
- Avoid excessive heat exposure: While tiles are heat-resistant, avoid subjecting them to extreme temperatures or direct contact with flames. Use a fireplace screen or barrier to protect the tiles from direct heat exposure.
- Handle with care: When moving or rearranging objects near the tiled fireplace wall, exercise caution to prevent accidentally chipping or damaging the tiles.
Safety precautions during the tiling process:
During the tiling process, it’s crucial to prioritize safety to ensure a smooth and injury-free experience. Consider these safety precautions:
- Wear protective gear: Use safety goggles to protect your eyes from debris, gloves to protect your hands, and a dust mask to avoid inhaling dust or fumes during tile cutting.
- Work in a well-ventilated area: If you’re using adhesives, grout, or sealants that emit fumes, make sure you work in a well-ventilated space or use proper ventilation equipment.
- Follow manufacturer’s instructions: Always read and follow the instructions provided by the manufacturer for tile installation, the use of adhesives, the mixing of mortar, and the application of sealants.
- Use caution with tools: Handle tile cutting tools, such as tile cutters or wet saws, with care to avoid accidents or injuries. Follow proper usage instructions and keep fingers away from moving parts.
- Secure the workspace: Keep your work area clear of potential tripping hazards and make sure your supplies and tools are organized and stored safely when not in use.
By following these final touches, maintenance tips, and safety precautions, you can ensure a beautiful, well-maintained tiled fireplace wall while prioritizing your safety throughout the entire process.
Conclusion
Tiling a fireplace wall can be a rewarding and transformative DIY project that enhances the beauty and character of your living space. By following the key steps involved in the tiling process, you can create a stunning focal point that will be the centerpiece of your room. Let’s recap these steps:
1. Importance of preparation: Properly prepare the surface by removing existing coverings, cleaning and smoothing the wall to ensure a solid foundation for the tiles.
2. Accurate measurements and planning: Take precise measurements and carefully plan the tile layout and pattern, considering the design and style you want to achieve.
3. Applying thinset mortar: Mix and apply thinset mortar evenly and at a 45-degree angle, creating ridges for a level and strong bond between the tiles and the wall.
4. Installing the tiles: Arrange and place tiles on the fireplace wall using various methods, such as straight lay, herringbone, or mosaic. Maintain consistent grout lines and make precise cuts to fit around obstacles.
5. Grouting the tiles: Select the right grout color and type, apply grout using a float, and clean the excess grout from the tile surface to achieve a polished finish.
6. Sealing the tiled surface: Protect the tiles by applying a suitable sealant that preserves their appearance and guards against stains and moisture.
7. Final touches and considerations: Remove excess grout, clean the tile surface, and implement proper maintenance and care to extend the life of your tiled fireplace wall. Follow safety precautions throughout the entire process.
Tackling the project of tiling a fireplace wall may seem daunting, but with patience, attention to detail, and the right tools and materials, you can achieve professional-looking results. Remember, taking your time and following each step carefully is essential to ensure a successful outcome.
So, go ahead and embrace the opportunity to transform your fireplace wall into a stunning focal point. Whether you choose a modern, sleek design or a classic, intricate pattern, your tiled fireplace wall will add warmth, character, and visual appeal to your home.
Get started on this exciting DIY project and enjoy the satisfaction of creating a beautiful fireplace wall that you can admire for years to come.
Frequently Asked Questions about How To Tile A Fireplace Wall
Was this page helpful?
At Storables.com, we guarantee accurate and reliable information. Our content, validated by Expert Board Contributors, is crafted following stringent Editorial Policies. We're committed to providing you with well-researched, expert-backed insights for all your informational needs.

0 thoughts on “How To Tile A Fireplace Wall”