Articles
How To Update Old Brick Fireplace
Modified: October 19, 2024
Learn how to update your old brick fireplace with these helpful articles. Transform your fireplace into a stunning focal point in your home.
(Many of the links in this article redirect to a specific reviewed product. Your purchase of these products through affiliate links helps to generate commission for Storables.com, at no extra cost. Learn more)
Introduction
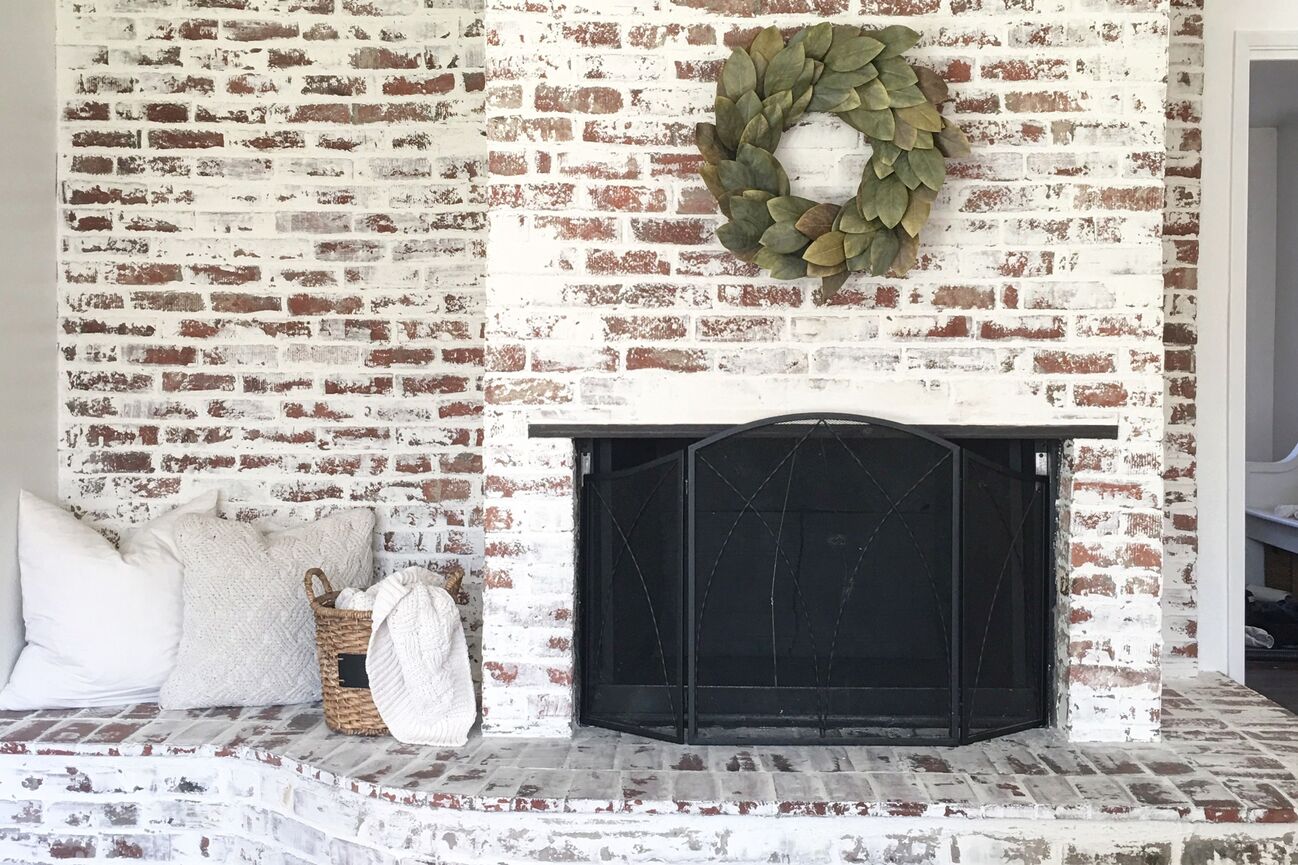
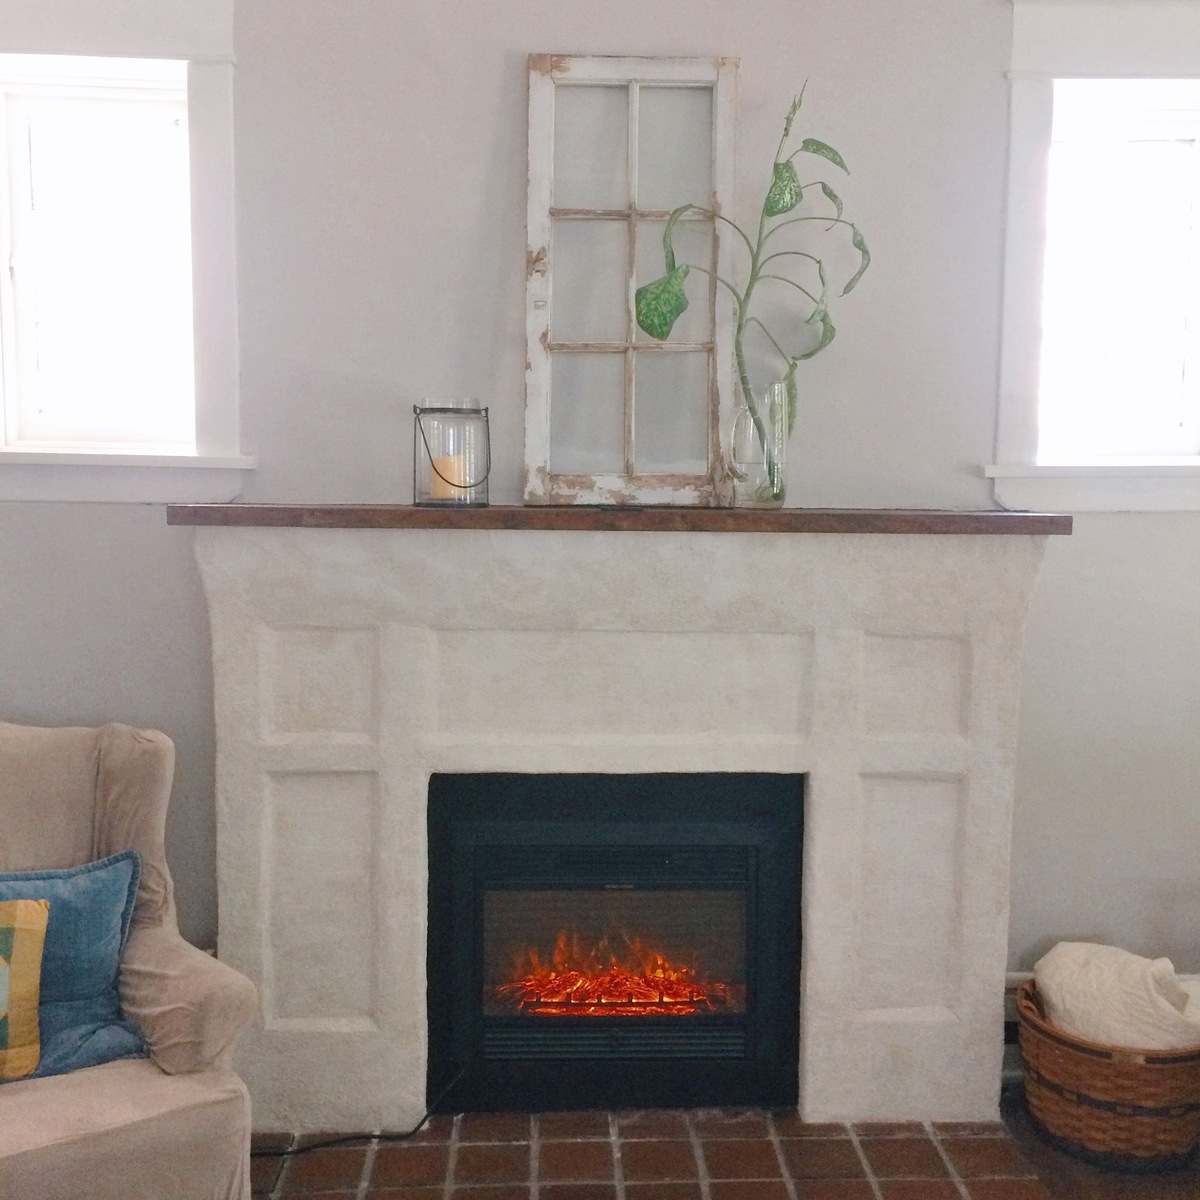
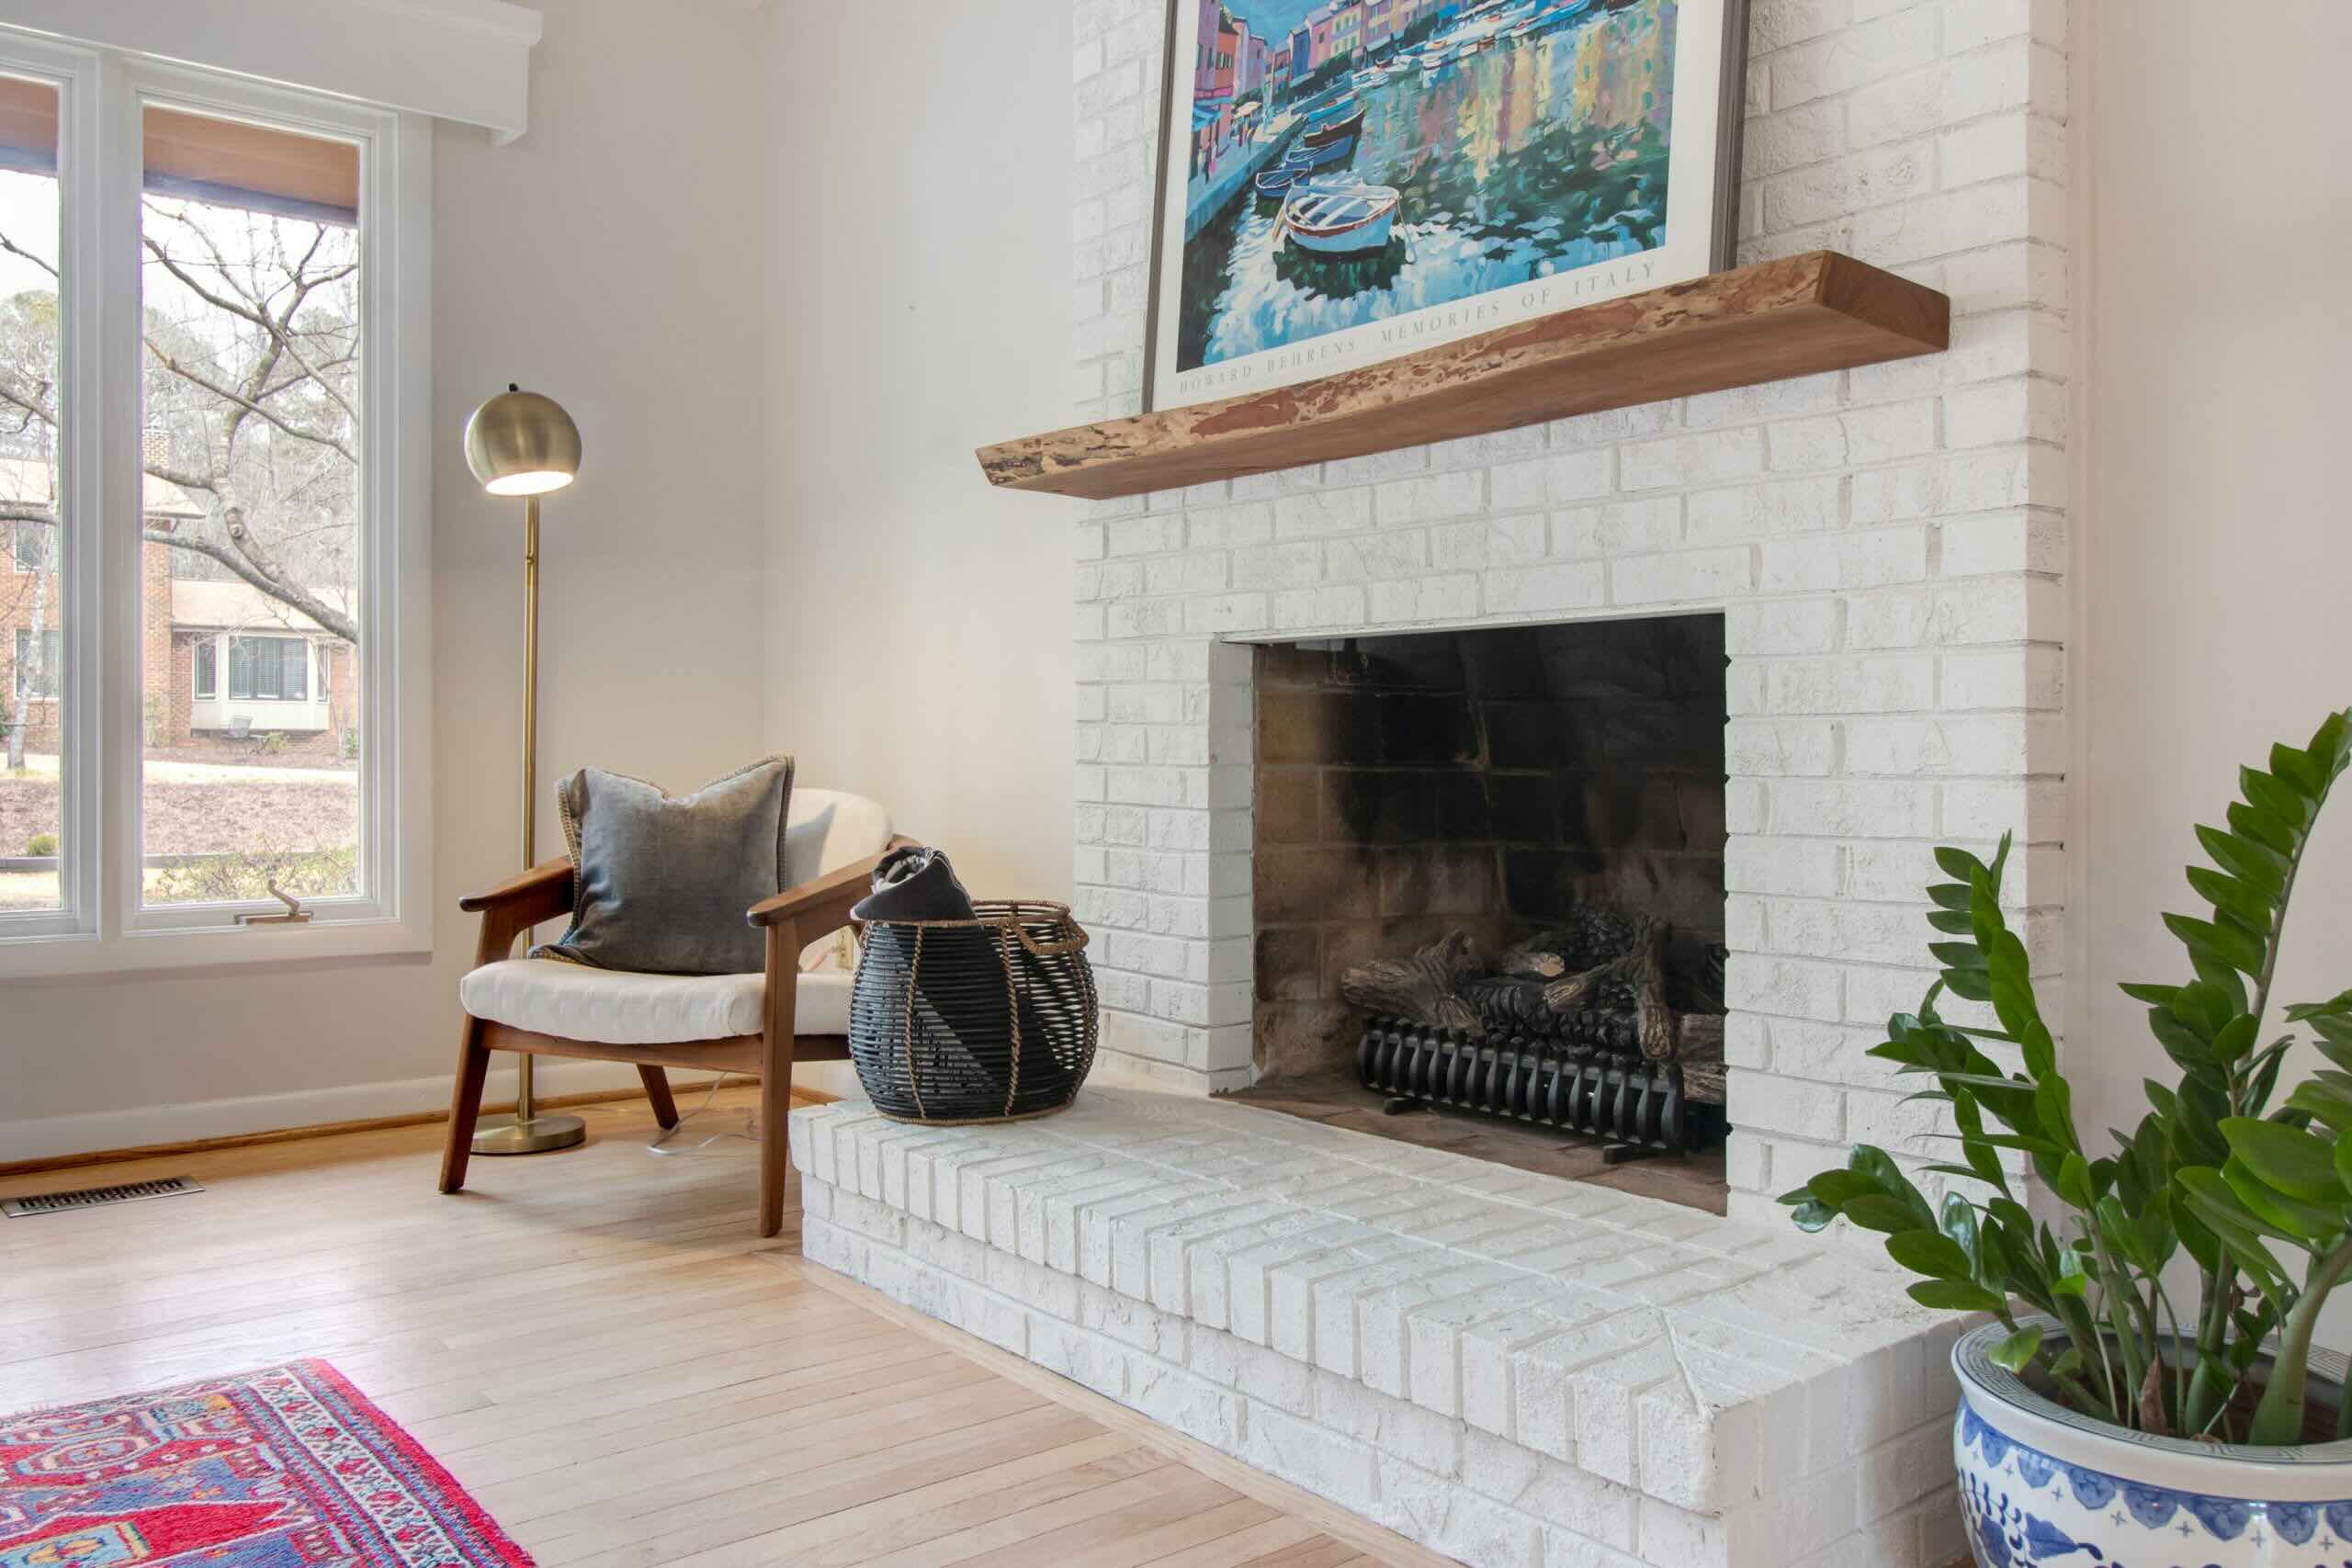
A brick fireplace can add charm and character to any home, but over time, it may start to look outdated or worn. If you have an old brick fireplace that’s in need of a refresh, you’re in luck! There are several options available to update your fireplace and breathe new life into your living space. In this article, we’ll explore various ways to transform your old brick fireplace and create a stunning focal point in your home.
Before diving into the update process, it’s essential to assess the condition of your brick fireplace. Look for signs of damage, such as cracks, crumbling mortar, or loose bricks. Addressing any structural issues should be your top priority before proceeding with any aesthetic updates. If you’re unsure about the condition of your fireplace, it’s always a good idea to consult a professional mason to ensure your fireplace is safe to work on.
Once you’ve determined that your brick fireplace is structurally sound, it’s time to choose the right update option. There are several approaches you can take, depending on your desired outcome and personal style. Let’s explore some popular options:
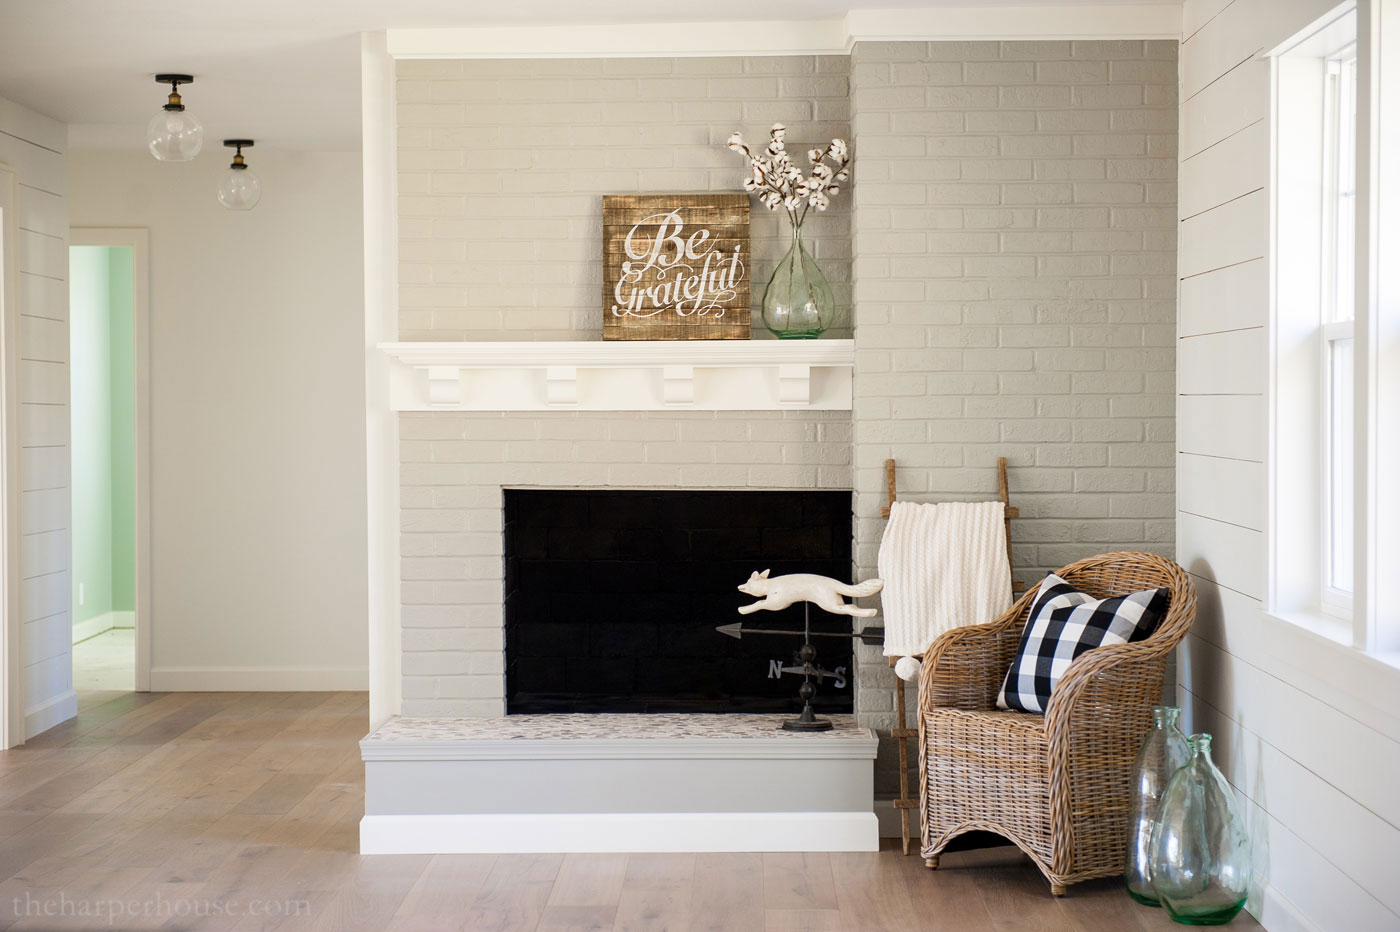
- Painting the Bricks: This is a relatively simple option that can dramatically transform the appearance of your fireplace. By painting the bricks, you can update the color, hide any imperfections, and give your fireplace a fresh, modern look.
- Installing a Fireplace Insert: If you’re looking to improve the functionality and efficiency of your fireplace, consider installing a fireplace insert. These inserts can increase heat output, reduce energy consumption, and provide a safer and cleaner burning experience.
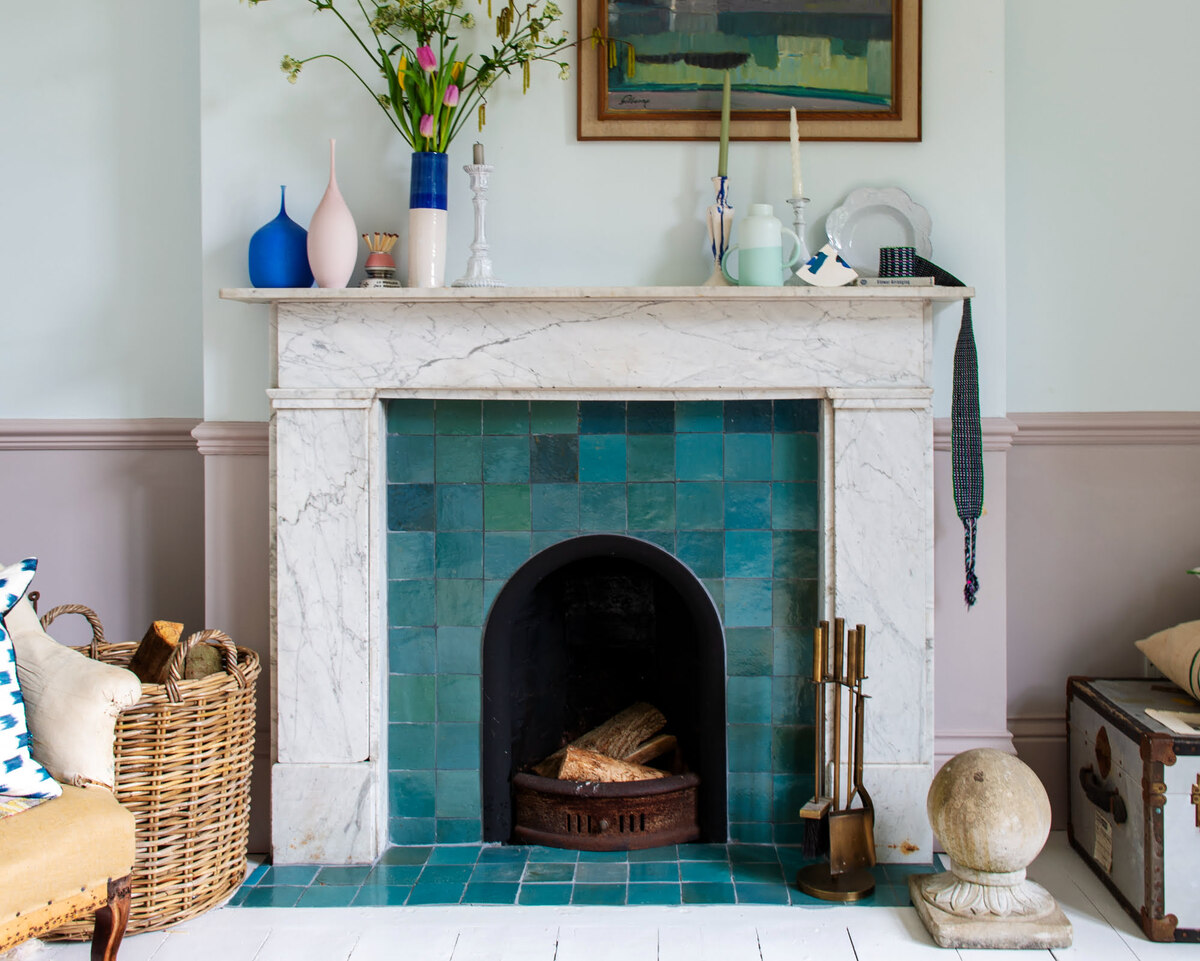
- Adding Decorative Tiles or Stone Veneer: For a more decorative update, consider adding decorative tiles or stone veneer to your fireplace. This will instantly add texture, depth, and visual interest to your space. There are a variety of options available, including ceramic, glass, and natural stone tiles.
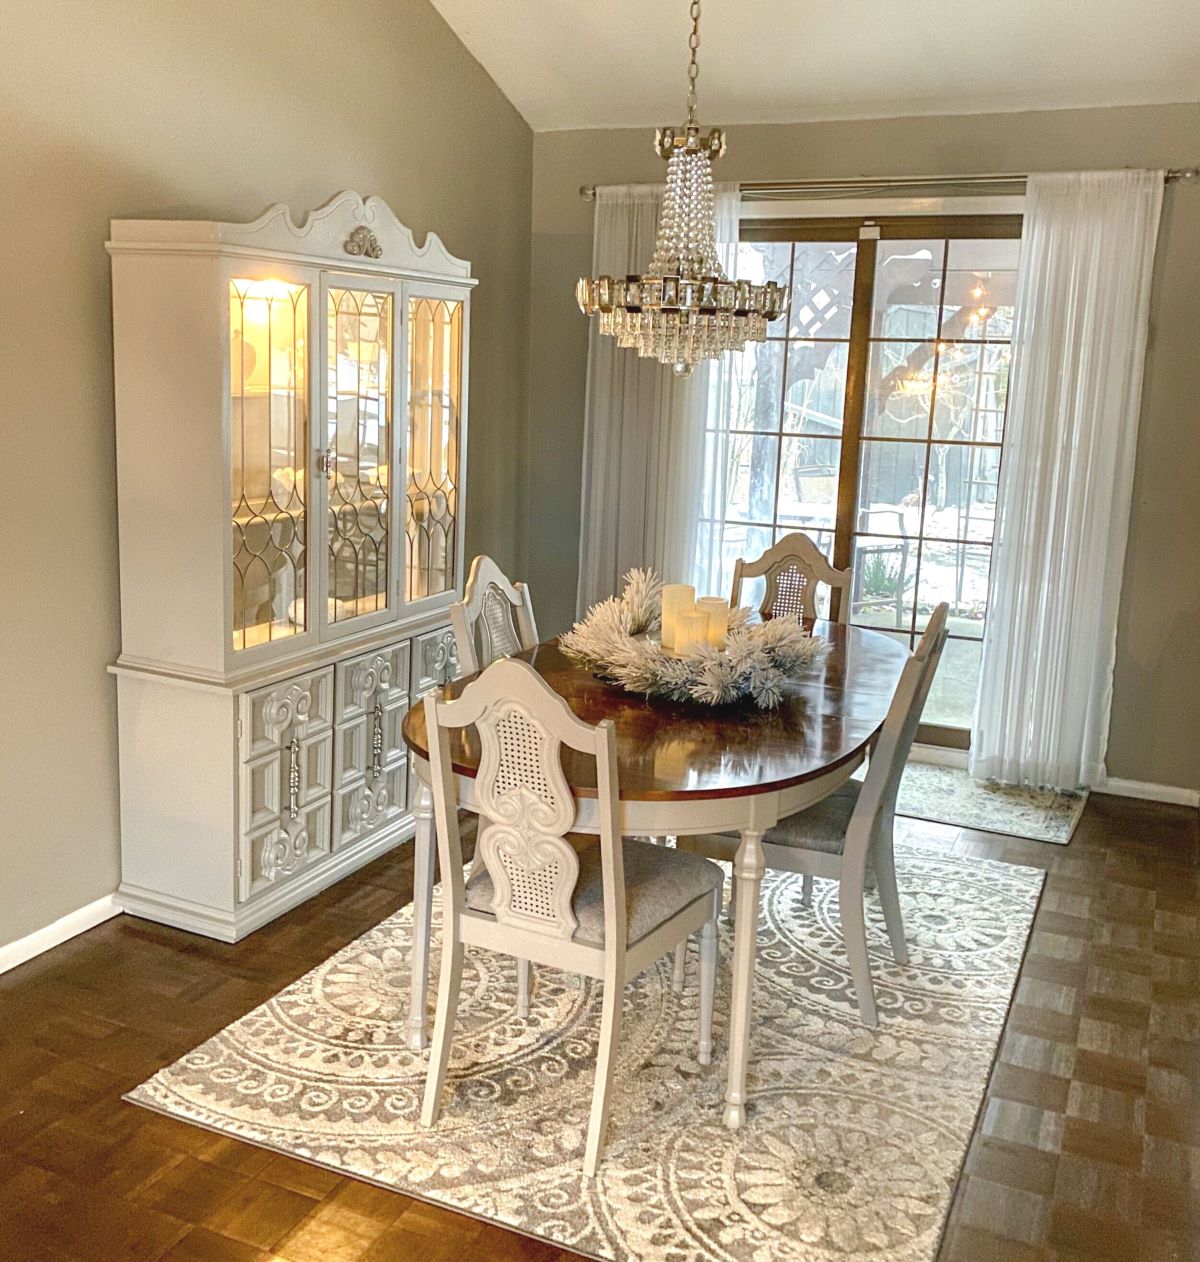
- Enhancing the Fireplace Surround: Finally, don’t forget about the fireplace surround. This is the area surrounding the firebox and can have a significant impact on the overall look of your fireplace. Updating the surround with new materials, such as wood, tile, or metal, can completely transform your fireplace.
Before starting any update, it’s important to prepare your fireplace for the changes. Clear the area around the fireplace and cover nearby furniture and flooring to protect them from dust and debris. Additionally, make sure to gather all the necessary tools and materials for the specific update you’ve chosen.
In the following sections, we’ll dive deeper into each update option, providing step-by-step instructions and tips to help you achieve the desired results. Whether you’re looking to completely transform your fireplace or make subtle changes, these updates will help breathe new life into your space and create a cozy, inviting atmosphere.
Key Takeaways:
- Transform your old brick fireplace with options like painting, adding decorative tiles, or installing a fireplace insert to create a stunning focal point in your home.
- Ensure safety by assessing the condition, preparing the fireplace, and repairing damaged bricks before updating to achieve a beautiful and long-lasting transformation.
Read more: How To Update An Old Bathtub
Assessing the Condition of the Brick Fireplace
Before embarking on any update or renovation project for your brick fireplace, it’s crucial to assess its condition. This step ensures that you address any structural issues and lays the foundation for a successful update. Here’s a step-by-step guide to help you assess the condition of your brick fireplace:
- Inspect the bricks: Begin by examining the bricks themselves. Look for any cracks, chips, or signs of damage. Pay attention to any loose bricks or areas where the mortar between the bricks is deteriorating.
- Check for water damage: Water damage is a common issue with brick fireplaces. Look for any signs of water stains, discoloration, or dampness on the bricks or surrounding walls. These signs may indicate a leaking chimney or roof.
- Examine the chimney: Inspect the chimney to ensure it’s in good condition. Look for any cracks in the mortar joints or missing bricks. Check for any signs of deterioration or crumbling of the exterior chimney bricks.
- Test the fireplace draft: Poor fireplace draft can lead to smoke entering the room or difficulty in starting and maintaining a fire. Light a small amount of newspaper or a smoke stick near the fireplace opening and observe the direction of the smoke. A strong draft should draw the smoke up and out of the chimney.
- Assess the firebox: Examine the firebox for any signs of damage or deterioration. Look for cracks, gaps, or signs of rust on metal fireboxes. Address any issues with the firebox before proceeding with any updates.
If you notice any significant damage or concerns during your assessment, it’s essential to consult with a professional mason or fireplace contractor. They will be able to provide expert guidance and recommendations for repairing or restoring your fireplace.
Even if your brick fireplace is in relatively good condition, it’s still a good idea to make minor repairs and perform routine maintenance. This includes repairing any loose or cracked bricks, replacing deteriorating mortar, and installing a chimney cap to prevent water infiltration.
By thoroughly assessing the condition of your brick fireplace, you can identify and address any structural issues before proceeding with updates. This ensures not only the safety of your fireplace but also ensures the longevity and success of your chosen update option. With a solid foundation, you can confidently move forward with transforming your old brick fireplace into a stunning centerpiece in your home.
Choosing the Right Update Option
When it comes to updating your old brick fireplace, there are several options to choose from. The right update option for you will depend on your personal style, budget, and the overall look you want to achieve. Here are some popular update options to consider:
- Painting the Bricks: A fresh coat of paint can completely transform the look of your brick fireplace. Choose a paint color that complements your décor and gives your fireplace a modern, updated appearance. Keep in mind that once the bricks are painted, it can be challenging to return to the original brick look, so make sure you’re confident in your decision.
- Installing a Fireplace Insert: If your main goal is to improve the functionality and efficiency of your fireplace, consider installing a fireplace insert. These inserts come in various styles and fuel options, including gas, wood-burning, or electric. They offer increased heat output, better control over the fire, and improved energy efficiency.
- Adding Decorative Tiles or Stone Veneer: To add texture and visual interest to your fireplace, consider adding decorative tiles or stone veneer. Tiles can be ceramic, glass, or even metallic, and can be arranged in different patterns for a unique look. Stone veneer, such as natural stone or faux stone panels, can give a rustic, earthy feel to your fireplace.
- Enhancing the Fireplace Surround: Don’t forget about the fireplace surround – the area around the firebox. Updating the surround with materials like wood, tile, or metal can completely transform the look of your fireplace. Consider adding a wooden mantel or a mosaic tile surround to create a striking focal point in your room.
When choosing the right update option, consider the overall style of your home and the desired outcome. If you prefer a modern and sleek look, painting the bricks might be the best choice. On the other hand, if you want to create a cozy and rustic atmosphere, adding stone veneer or a wooden surround can achieve that. Consider your budget as well, as some options may be more cost-effective than others.
It’s also essential to take into account the amount of time and effort you’re willing to invest in the update. Painting the bricks is a relatively quick and straightforward process, while adding decorative tiles or stone veneer may require more time and skill. Find an update option that aligns with your skill level and the amount of time you have available.
Lastly, don’t be afraid to get creative and think outside the box. Incorporating unique design elements, such as a custom metal fireplace surround or a reclaimed wood mantel, can add a personalized touch to your fireplace update.
By carefully considering your style preferences, budget, and desired outcome, you can choose the right update option that will breathe new life into your old brick fireplace and create a stunning focal point in your home.
Preparing the Fireplace for the Update
Before you embark on updating your old brick fireplace, it’s crucial to properly prepare the space to ensure a successful and smooth process. Preparing the fireplace involves a few essential steps to protect the surrounding area and ensure the best results for your chosen update option. Here’s a guide to help you prepare your fireplace for the update:
Clear the Area: Start by clearing the area around the fireplace. Remove any furniture, decor, or other items that could get in the way or be damaged during the update process. This will provide you with a clear and safe workspace.
Protect the Surrounding Area: Cover the nearby flooring, furniture, and any surfaces that could be affected by dust, debris, or paint. Use drop cloths or plastic sheets to create a barrier and protect these areas. It’s important to take these precautions to prevent any damage or mess during the update process.
Gather the Necessary Tools and Materials: Depending on the specific update option you have chosen, gather all the necessary tools and materials before starting the update. This may include paint, brushes, rollers, painter’s tape, grout, adhesive, tiles, stone veneer, or any other supplies required for your chosen update. Having everything on hand will make the process more efficient and minimize interruptions.
Inspect and Clean the Fireplace: Give your fireplace a thorough inspection and cleaning before proceeding with the update. Remove any existing flammable materials, such as old paper and wood. Take the time to inspect the firebox, chimney, and any other components to ensure they’re in good working condition and free of debris.
Check for Structural Issues: It’s essential to address any structural issues before updating your fireplace. Look for cracks, loose bricks, or deteriorating mortar joints. If you notice any concerns, consult with a professional mason to address these issues and ensure the structural integrity of your fireplace.
Follow Safety Guidelines: Always prioritize safety when working on your fireplace. Ensure proper ventilation during the update process, especially when using paint or adhesives. Use protective gear, such as goggles and gloves, as necessary. If you’re unsure about any aspect of the update, consult a professional or seek expert guidance.
By taking the time to prepare your fireplace for the update, you create a clean and safe workspace while protecting the surrounding area. This ensures that your chosen update option can be implemented effectively and with minimal disruption. Once the preparations are complete, you’re ready to move on to the next steps and transform your old brick fireplace into a stunning focal point in your home.
Cleaning the Brick Surface
Before updating your old brick fireplace, it’s essential to clean the brick surface to ensure a smooth and pristine finish for your chosen update option. Cleaning the brick surface will remove dirt, soot, grime, and any other contaminants that may hinder the effectiveness of the update. Here’s a step-by-step guide to help you clean the brick surface:
1. Gather the necessary supplies: Before you begin, gather the supplies you’ll need for the cleaning process. This may include a wire brush, a bucket of warm water, mild detergent or brick cleaner, a sponge or scrub brush, and clean towels or rags.
2. Test the cleaning solution: If you’re using a brick cleaner or detergent, it’s essential to test it in a small, inconspicuous area of the brick to ensure it doesn’t cause any damage or discoloration. Follow the instructions on the cleaner and observe any reactions before proceeding with cleaning the entire brick surface.
3. Remove loose dirt and debris: Start by using a wire brush to gently remove any loose dirt, debris, or soot from the brick surface. This will help prepare the bricks for a deeper clean and remove any surface-level contaminants.
4. Prepare the cleaning solution: If you’re using a mild detergent or brick cleaner, mix it with warm water according to the manufacturer’s instructions. Avoid using harsh chemicals or abrasive cleaners that may damage the brick surface.
5. Apply the cleaning solution: Dip a sponge or scrub brush into the cleaning solution and apply it to the brick surface. Work in small sections, focusing on one area at a time. Scrub gently in circular motions to effectively remove stains and dirt. Pay extra attention to areas that may be particularly dirty or discolored.
6. Rinse the brick surface: Once you’ve scrubbed the brick surface, rinse it thoroughly with clean water. Use a clean sponge or cloth to remove any remaining cleaning solution and residue. Ensure that all traces of detergent or cleaner are removed, as they can leave behind a film or residue if not properly rinsed.
7. Allow the bricks to dry: After rinsing, allow the bricks to air dry completely before proceeding with the update. This may take a few hours or longer, depending on the level of moisture and airflow in the room. Avoid applying any update, such as paint or adhesive, to damp bricks, as it can compromise the effectiveness and adhesion of the update.
8. Address stubborn stains or discoloration: If you encounter stubborn stains or discoloration during the cleaning process, you may need to use a more specialized cleaner or technique. Consult with a professional or a brick-cleaning expert to determine the best approach for your specific situation.
By taking the time to thoroughly clean the brick surface, you create a clean and smooth canvas for your chosen update option. This will ensure optimal results and a fresh, updated look for your old brick fireplace. Once the brick surface is clean and dry, you’re ready to proceed with the next steps of the update process.
Read more: How To Update Gas Fireplace
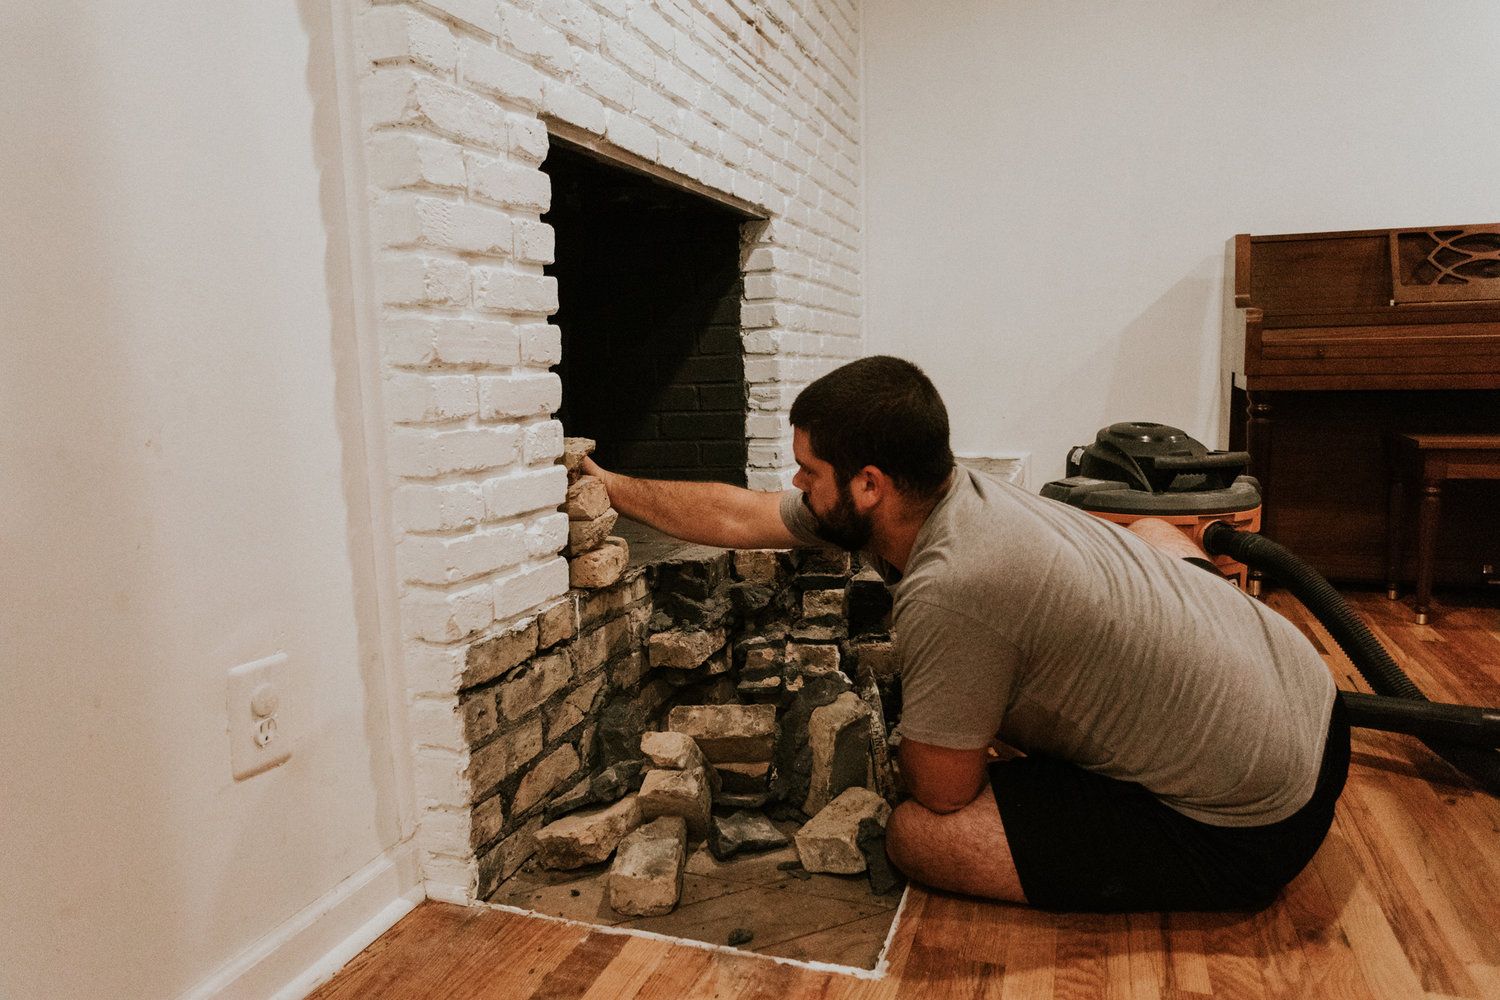
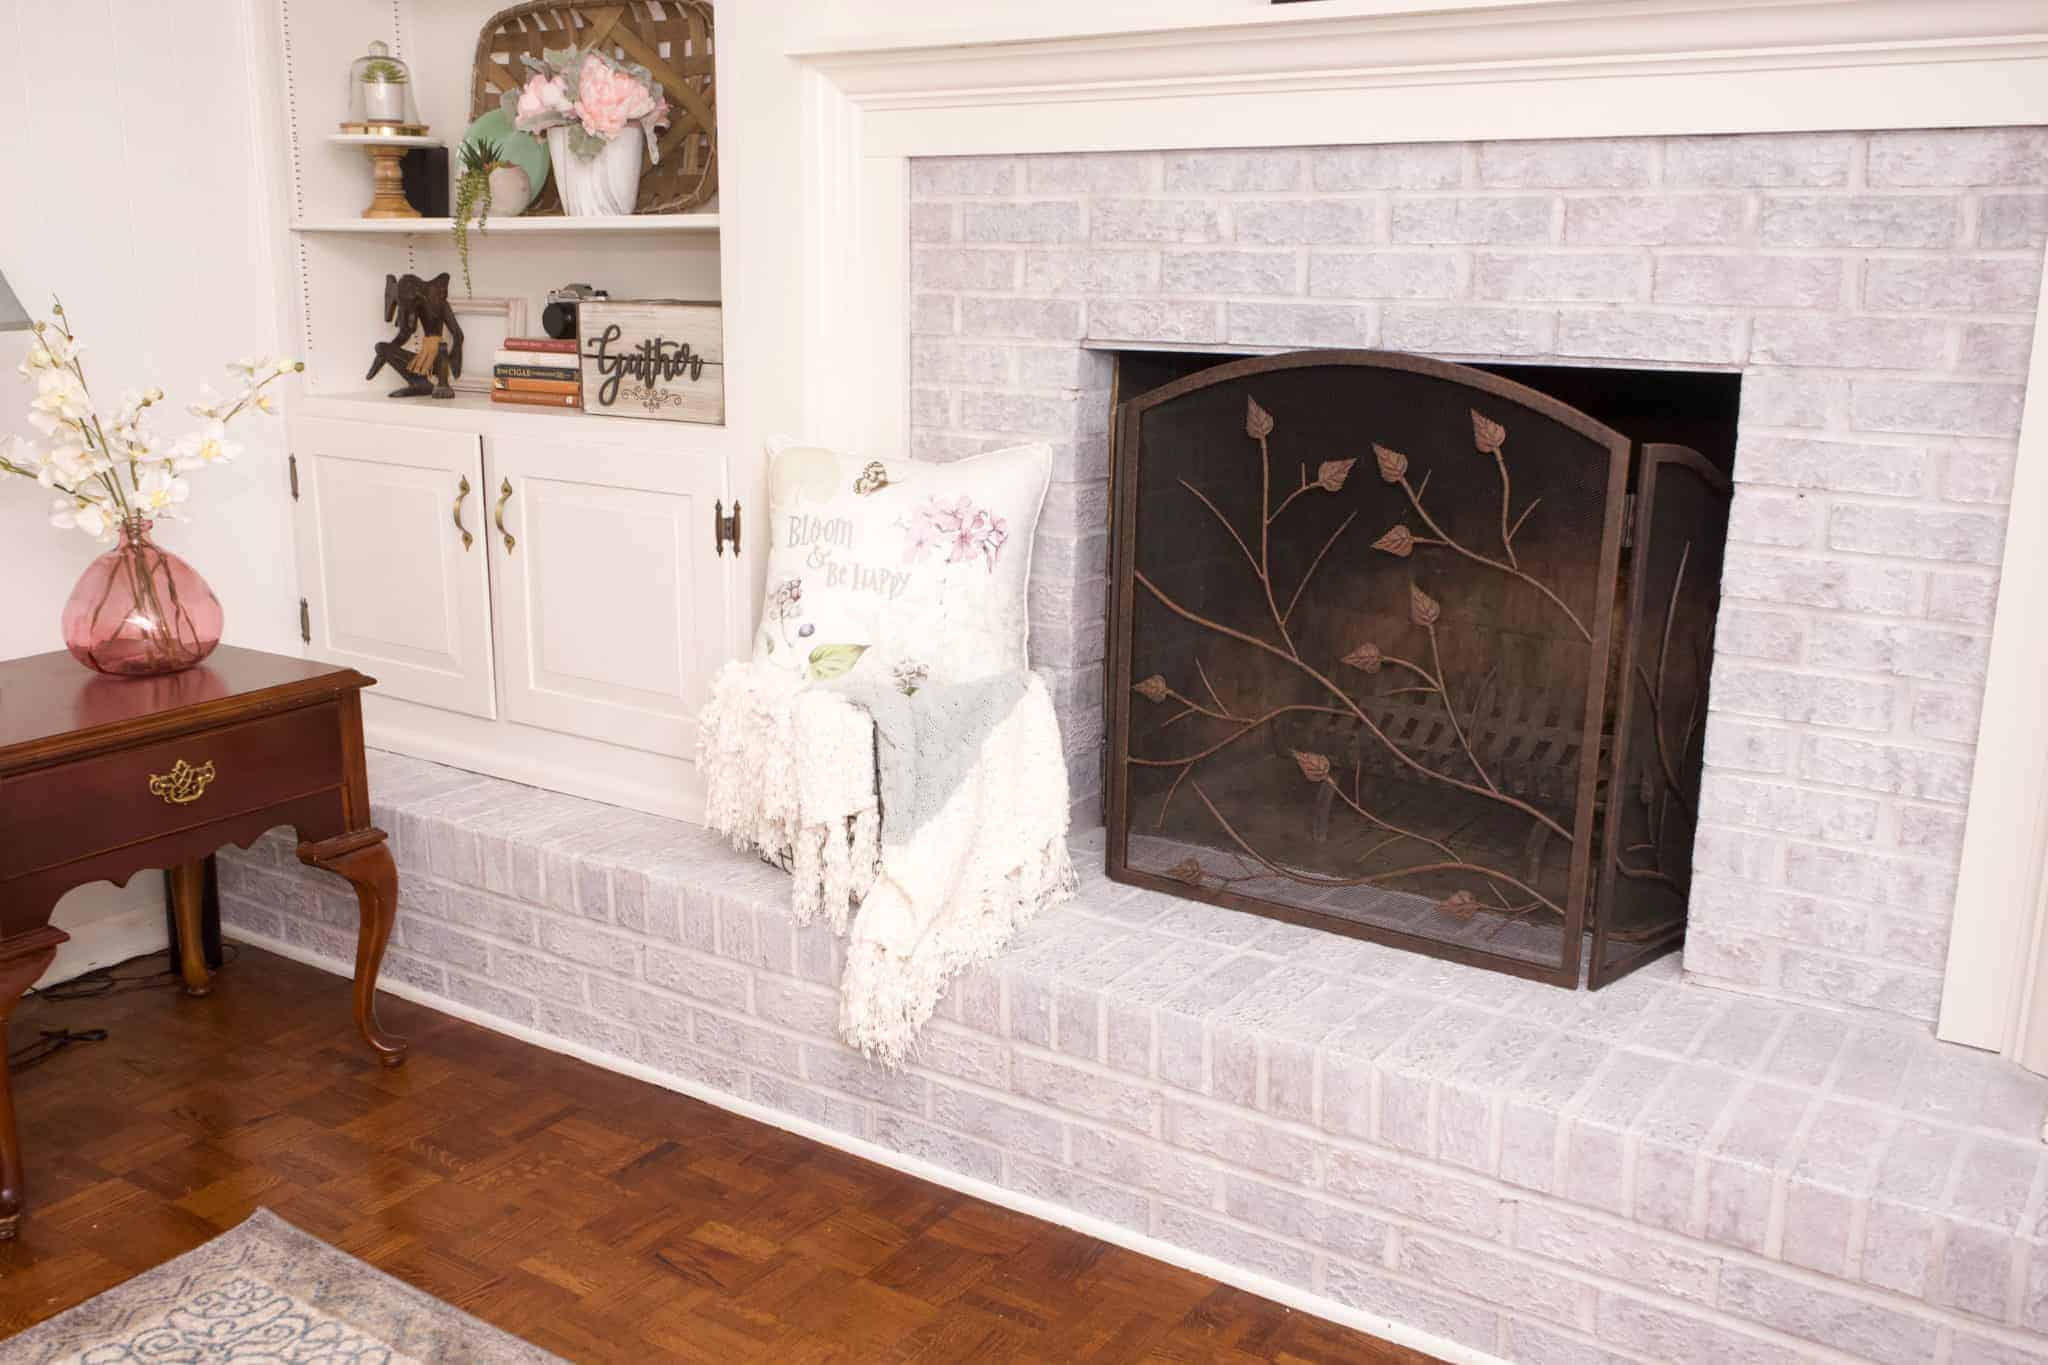
Repairing Damaged Bricks
When updating an old brick fireplace, it’s essential to address any damaged bricks. Cracked, chipped, or loose bricks can not only affect the appearance of your fireplace but also compromise its structural integrity. Repairing damaged bricks will help ensure a solid foundation for your chosen update option and prolong the lifespan of your fireplace. Here’s a step-by-step guide to help you repair damaged bricks:
1. Assess the extent of the damage: Start by examining the damaged bricks and assessing the severity of the damage. Determine if the brick can be repaired or if it needs to be replaced entirely. In the case of loose bricks, determine if the mortar needs to be repaired or replaced.
2. Remove loose mortar: If there are loose bricks, carefully remove the surrounding mortar using a chisel and hammer. Gently tap the chisel along the mortar line to break it up and remove it from the joint. Be cautious not to damage the surrounding bricks during this process. This step is essential to ensure a strong bond when repairing or replacing the damaged bricks.
3. Replace damaged bricks: If the damaged brick needs to be replaced, carefully remove it from the fireplace using a chisel, hammer, or brick removal tool. Clean out any debris or remaining mortar from the hole, ensuring a clean and solid base for the new brick. Insert the new brick into the hole and press it firmly into place. Use mortar to secure it, ensuring that it aligns with the surrounding bricks. Allow the mortar to dry and set according to the manufacturer’s instructions.
4. Repair cracks in bricks: For cracked bricks, first clean the crack and remove any loose debris. Apply a high-quality brick repair mortar or a brick patch product to the crack, using a trowel or putty knife. Smooth the mortar or patch, ensuring it blends seamlessly with the surrounding brick surface. Allow the repair to dry and cure fully before proceeding with the next steps of the update.
5. Replace damaged mortar joints: If the mortar joints between the bricks are damaged, remove the loose or deteriorated mortar using a chisel and hammer. Clean out the joint, removing any debris or remaining mortar. Mix a batch of mortar according to the manufacturer’s instructions and apply it to the joint using a pointing trowel. Be sure to pack the mortar firmly into the joint, ensuring a solid bond. Use a pointing tool or the edge of the trowel to smooth the mortar and achieve a neat finish.
6. Allow repairs to cure: After making the necessary repairs to the damaged bricks and mortar joints, allow the repairs to dry and cure fully before proceeding with the update. Follow the manufacturer’s instructions for curing time, taking into account factors such as humidity and temperature.
7. Inspect the repairs: Once the repairs have cured, inspect them for any imperfections or areas that require further attention. Address any issues promptly to ensure a seamless and durable repair.
By repairing damaged bricks, you not only improve the aesthetics of your fireplace but also ensure its stability and longevity. Take the time to assess and address any damage before proceeding with your chosen update option. With a solid foundation and properly repaired bricks, you can confidently move forward with the next steps of transforming your old brick fireplace into a stunning centerpiece in your home.
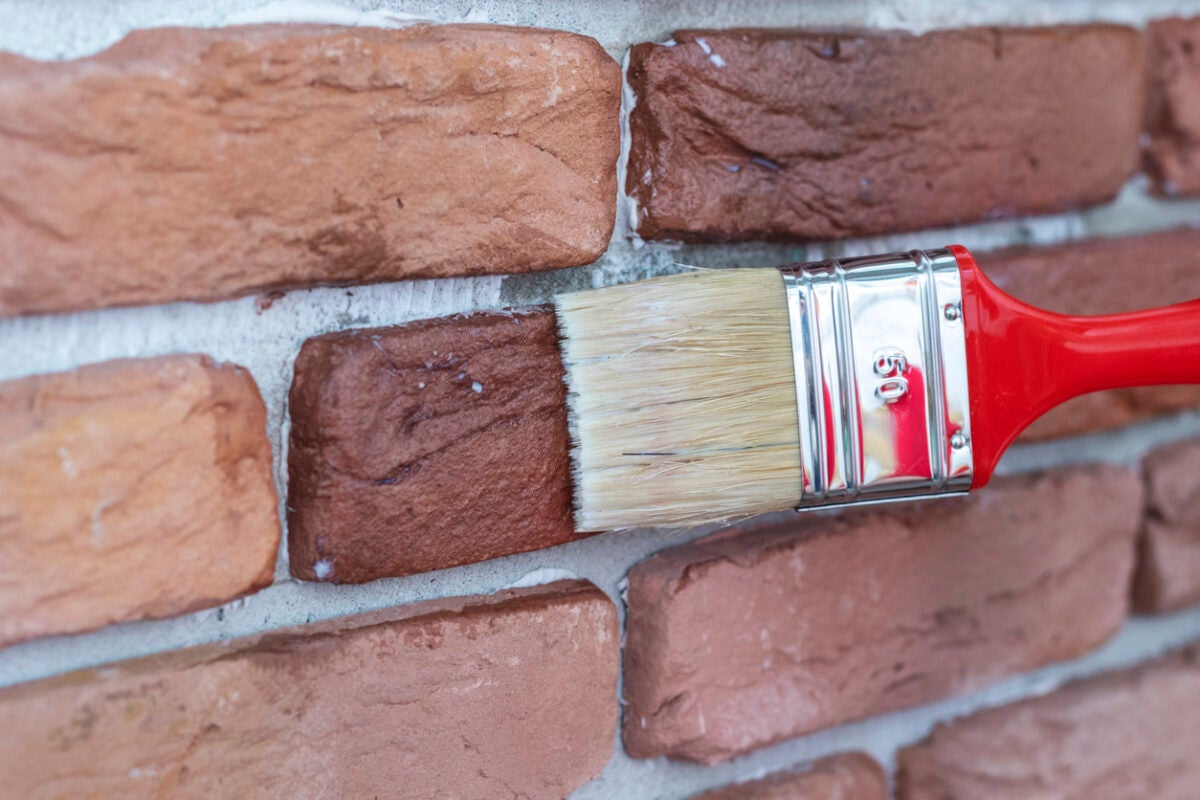
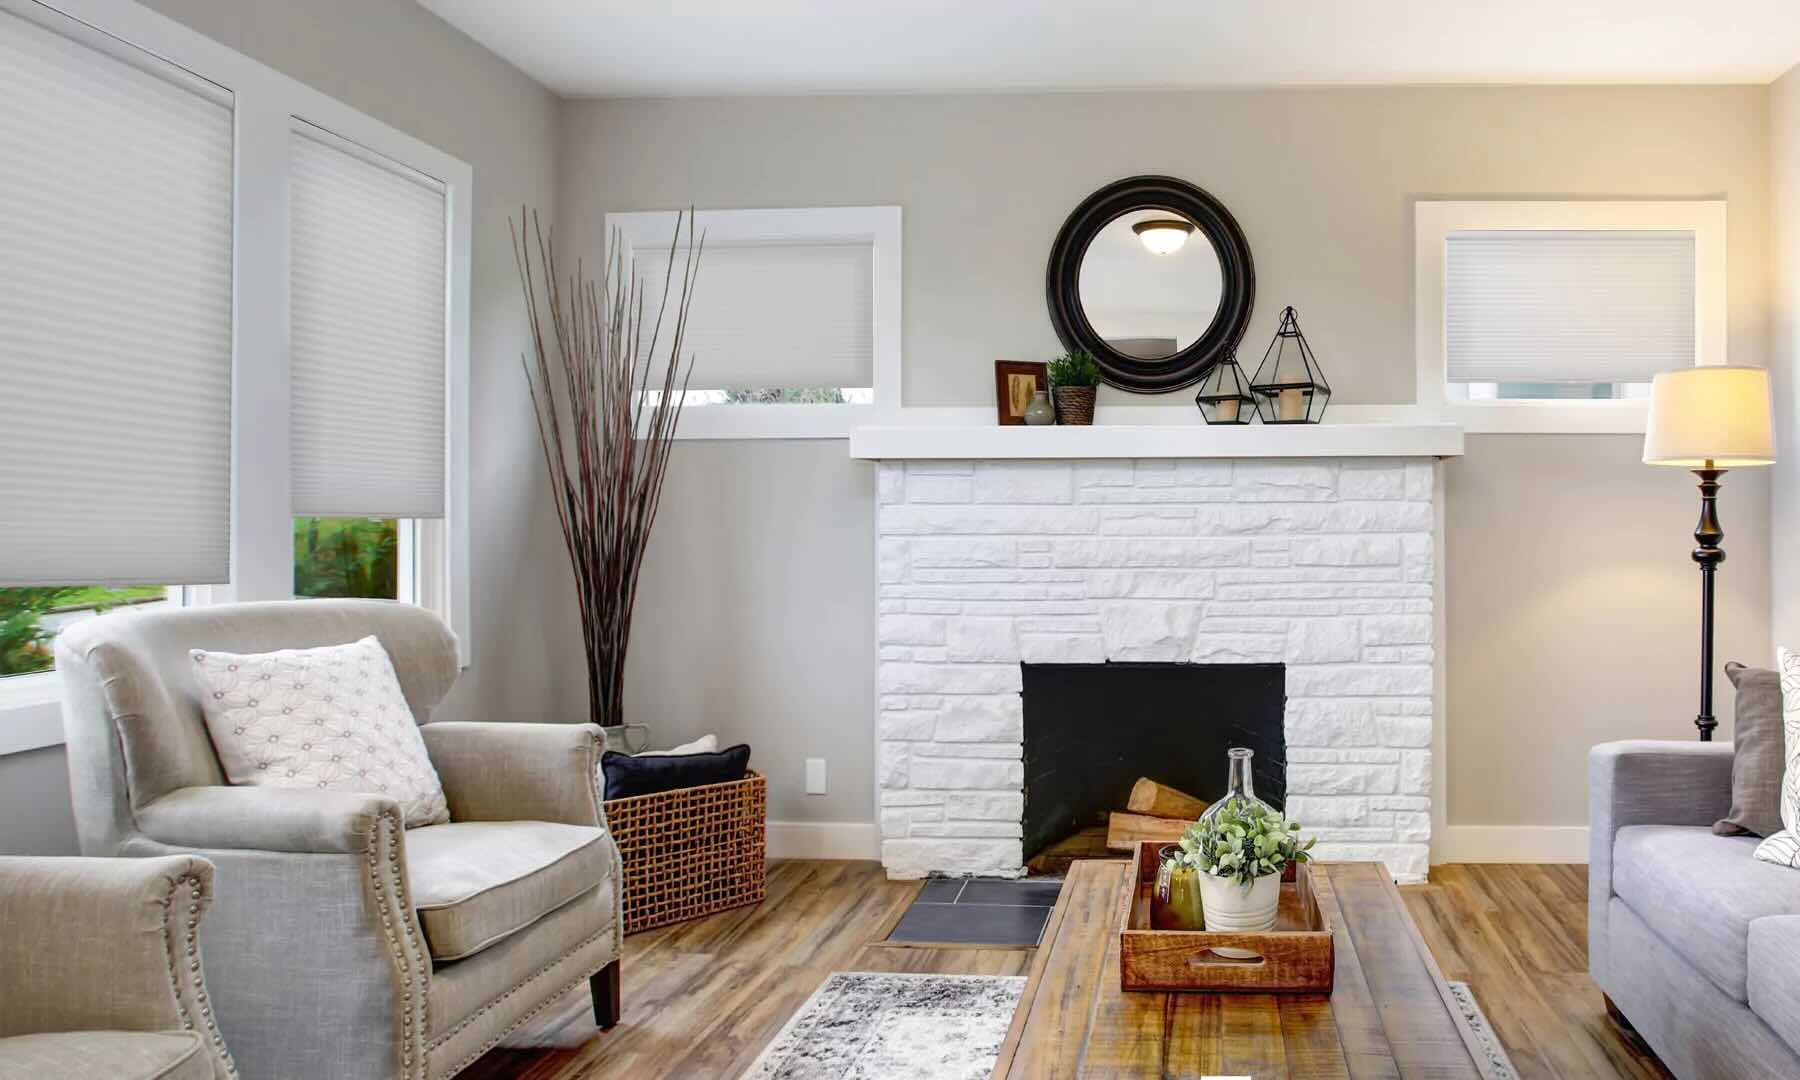
Consider painting the old brick fireplace with a fresh coat of heat-resistant paint to give it a modern and updated look. Make sure to clean the bricks thoroughly before painting for best results.
Applying a Fresh Coat of Paint
One of the most effective ways to update an old brick fireplace is by applying a fresh coat of paint. Painting the bricks can completely transform the look of the fireplace and give it a modern, updated appearance. Here’s a step-by-step guide to help you apply a fresh coat of paint to your brick fireplace:
1. Gather the necessary supplies: Before you begin, gather all the necessary supplies. This includes paint (specifically formulated for masonry surfaces), a paint roller or brush, painter’s tape, drop cloths, a paint tray, a stir stick, and a paintbrush for cutting in corners and edges.
2. Prepare the fireplace: Protect the surrounding area by placing drop cloths over the floor, furniture, and any surfaces that could be affected by paint splatter. Use painter’s tape to secure the drop cloths and protect areas that you don’t want to be painted, such as adjacent walls or mantels.
3. Clean the brick surface: Ensure that the brick surface is clean and free of dirt, dust, and debris. Use a wire brush or a stiff-bristle brush to remove any loose dirt or paint chips. Wipe down the surface with a damp cloth to remove any remaining residue. Allow the bricks to dry completely before proceeding to the next step.
4. Prime the bricks (if necessary): Depending on the condition of the bricks and the type of paint you’re using, it may be necessary to apply a primer before painting. Check the manufacturer’s instructions to determine if a primer is recommended. Apply the primer evenly across the brick surface, using a brush or roller. Allow the primer to dry completely before proceeding to the next step.
5. Paint the bricks: Start by cutting in the corners and edges of the brick surface using a paintbrush. This will ensure a neat and precise finish. Then, use a roller or brush to apply the paint to the rest of the brick surface. Work in small sections, and use a smooth, even motion to achieve an even coverage. For textured bricks, you may need to use a brush to work the paint into the deep crevices. Allow the first coat of paint to dry completely before applying a second coat, if necessary.
6. Remove the painter’s tape: Once the paint has dried, carefully remove the painter’s tape while the paint is still slightly tacky. This will prevent the paint from peeling or chipping as you remove the tape. Be gentle and pull the tape away at a 45-degree angle.
7. Touch up and finalize the finish: Inspect the painted surface for any areas that require touch-ups or additional coats. Use a small paintbrush to touch up any missed spots or imperfections. Ensure that the paint is evenly applied and the finish is smooth and uniform.
8. Allow the paint to cure: Give the paint ample time to cure and fully dry before exposing the fireplace to regular use or cleaning. Follow the manufacturer’s instructions for the recommended drying time.
By applying a fresh coat of paint to your brick fireplace, you can easily update its appearance and create a more modern and cohesive look in your space. It’s an effective and cost-efficient way to transform your old brick fireplace into a stunning focal point in your home.
Installing a Fireplace Insert
To improve the functionality and efficiency of your old brick fireplace, consider installing a fireplace insert. A fireplace insert can provide better heat output, increased energy efficiency, and a safer and cleaner burning experience. Here’s a step-by-step guide to help you install a fireplace insert:
1. Choose the right insert: Before beginning the installation process, choose a fireplace insert that suits your needs and preferences. Consider factors such as fuel type (wood-burning, gas, or electric), size, heating capacity, and design. Measure the dimensions of your existing fireplace opening to ensure a proper fit.
2. Prepare the existing fireplace: Thoroughly clean the existing fireplace, removing any soot, debris, or loose bricks. Inspect the chimney and flue to ensure they’re in good condition. If necessary, have a professional chimney sweep clean and inspect the chimney to ensure it’s safe for use with the new insert.
3. Clear the area: Remove any furniture, decor, or combustible materials from the area surrounding the fireplace to create a safe and accessible workspace.
4. Install a chimney liner (if required): If you’re installing a wood-burning or gas fireplace insert, you may need to install a chimney liner. The liner ensures proper venting and combustion, improving the overall efficiency and safety of the insert. Consult a professional or the manufacturer’s instructions to determine if a chimney liner is necessary and follow the recommended installation procedure.
5. Position the fireplace insert: Carefully position the fireplace insert into the existing fireplace opening. Follow the manufacturer’s instructions for proper placement and ensure a snug fit. Some inserts may require additional support or brackets to secure them in place.
6. Connect the venting system: Connect the venting system according to the manufacturer’s instructions. The venting may include pipes, connectors, and termination caps. Ensure that the venting is properly installed and secured to prevent any leaks or blockages.
7. Install the outlet and controls: If your insert requires an electrical connection, ensure that there’s an appropriate outlet nearby. Install any electrical components, such as controls or thermostats, according to the manufacturer’s instructions.
8. Test the insert: Before using the fireplace insert regularly, test it to ensure proper operation. Follow the manufacturer’s instructions for the initial lighting and operation of the insert. Monitor the flames, heat output, and any ventilation for any signs of issues or irregularities. Make any necessary adjustments or repairs as needed.
9. Follow maintenance guidelines: To ensure the longevity and efficient operation of your fireplace insert, follow the manufacturer’s maintenance guidelines. This may include regular cleaning and inspection, as well as scheduling professional servicing as recommended.
Installing a fireplace insert can transform your old brick fireplace into a more functional and efficient heating source. It’s important to follow the manufacturer’s instructions and, when in doubt, consult a professional to ensure proper installation and safe operation. With a fireplace insert, you can enjoy the warmth and comfort of a fire while improving energy efficiency and reducing environmental impact.
Adding Decorative Tiles or Stone Veneer
To add texture, depth, and visual interest to your old brick fireplace, consider adding decorative tiles or stone veneer. This can instantly transform the look of your fireplace and create a stunning focal point in your home. Here’s a step-by-step guide to help you add decorative tiles or stone veneer to your brick fireplace:
1. Choose the tile or stone veneer: Select the type, style, and color of the tiles or stone veneer that best matches your desired aesthetic and complements the overall design of your space. Consider both the look and the texture of the materials to achieve the desired effect.
2. Prepare the brick surface: Thoroughly clean the brick surface, removing any dirt, dust, or debris. Use a wire brush or stiff-bristle brush to remove loose mortar or paint chips. Wipe down the surface with a damp cloth to ensure it’s clean and free of residue. Allow the bricks to dry completely before proceeding.
3. Measure and mark the area: Measure the dimensions of the area where you plan to install the tiles or stone veneer. Use a level and a tape measure to mark guidelines on the brick surface, ensuring that the tiles or veneer will be evenly aligned and installed straight.
4. Apply the adhesive: Depending on the type of tiles or stone veneer you’re using, follow the manufacturer’s instructions to apply the appropriate adhesive to the back of each piece. Evenly spread the adhesive on the brick surface within the marked guidelines, using a notched trowel or a putty knife.
5. Install the tiles or stone veneer: Carefully press each tile or piece of stone veneer into the adhesive, following the marked guidelines. Apply even pressure to ensure proper adhesion. Use spacers or wedges to maintain consistent spacing between the tiles. Continue this process until the entire area is covered.
6. Allow the adhesive to dry: Follow the manufacturer’s instructions for the recommended drying time of the adhesive. Avoid disturbing or putting pressure on the installed tiles or veneer during this drying period.
7. Grout the tiles (if applicable): If you’re working with tiles, follow the manufacturer’s instructions to mix the grout. Apply the grout into the spaces between the tiles using a grout float or a putty knife. Remove any excess grout from the tile surface using a damp sponge or cloth. Allow the grout to dry according to the manufacturer’s instructions before proceeding.
8. Seal the tiles or stone veneer (if applicable): Depending on the type of tiles or stone veneer you’ve installed, it may be necessary to apply a sealer to protect and enhance the surface. Follow the manufacturer’s instructions to apply the appropriate sealer, ensuring even coverage. Allow the sealer to dry completely before exposing the fireplace to regular use or cleaning.
By adding decorative tiles or stone veneer to your old brick fireplace, you can create a visually stunning and unique centerpiece in your home. Take your time during the installation process to ensure precise alignment and a seamless finish. Whether you choose tiles that reflect your personal style or stone veneer that adds a rustic touch, this update will breathe new life into your old brick fireplace and transform your living space.
Read more: How To Update A Fireplace Mantel
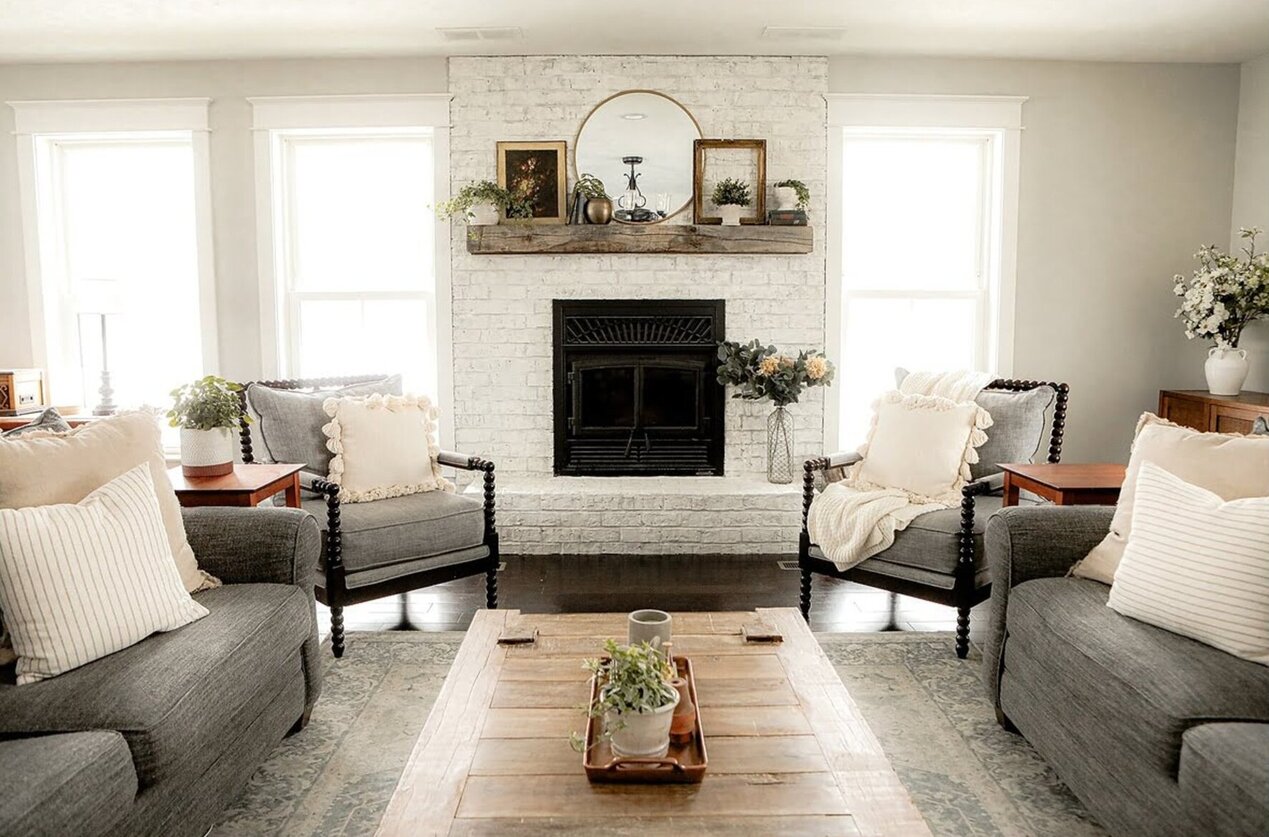
Enhancing the Fireplace Surround
The fireplace surround plays a crucial role in the overall look and ambiance of your old brick fireplace. By enhancing the surround, you can further elevate the visual appeal and create a personalized touch. Here’s a step-by-step guide to help you enhance the fireplace surround:
1. Choose the desired materials: Select the materials that best suit your style and complement the existing décor. Options for enhancing the fireplace surround include wood, tile, metal, or a combination of materials. Consider the color, texture, and design elements that will work harmoniously with the rest of your living space.
2. Prepare the fireplace surround: Make sure the existing fireplace surround is clean and free of any debris. Remove any screws, nails, or other fasteners that could interfere with the installation of the new materials. If necessary, repair any damaged areas or fill in gaps with wood filler or appropriate patching material. Ensure that the surround is smooth and even for a seamless installation.
3. Measure and mark the dimensions: Use a tape measure and level to measure and mark the dimensions and layout of the new materials. Take accurate measurements to ensure precise and tight-fitting installation.
4. Cut or shape the materials (if applicable): Depending on the materials chosen, you may need to cut or shape them to fit the dimensions of the fireplace surround. Use appropriate cutting tools, such as a saw or tile cutter, to achieve the desired shape and size. Take safety precautions and follow the manufacturer’s guidelines for cutting or shaping each specific material.
5. Install the materials: Begin the installation process by applying adhesive or fasteners to the back of the chosen materials. Carefully place each piece onto the fireplace surround, following the marked guidelines. Use a level to ensure that the materials are straight and aligned. For tiles or smaller pieces, use spacers to maintain consistent spacing. Apply pressure to secure the materials in place, ensuring proper adhesion or installation.
6. Finish the edges: Pay attention to the edges of the fireplace surround, as they contribute to a polished appearance. Use trim pieces or edge caps to create clean, finished edges. Secure them in place using appropriate adhesive or fasteners. Take extra care to ensure that the edges are aligned and flush with the installed materials.
7. Paint or seal (if applicable): Depending on the chosen materials, you may need to paint or seal them to enhance their durability and appearance. Follow the manufacturer’s instructions for painting or sealing each specific material. Choose paint or sealer that is appropriate for the material and complements the overall design of the fireplace surround.
8. Clean and maintain: Regularly clean and maintain the enhanced fireplace surround to preserve its beauty and longevity. Follow the manufacturer’s guidelines for cleaning and maintenance, as different materials may require specific care. This will ensure that the surround continues to enhance the overall aesthetic of your old brick fireplace.
By enhancing the fireplace surround, you can significantly transform the look and feel of your old brick fireplace. Whether you opt for a rustic wood surround, a sleek metal design, or a mosaic tile pattern, this update will create a focal point that reflects your personal style and enhances the ambiance of your living space.
Conclusion
Updating an old brick fireplace can breathe new life into your living space, creating a stunning focal point that enhances the overall ambiance and style of your home. Whether you choose to paint the bricks, install a fireplace insert, add decorative tiles or stone veneer, or enhance the fireplace surround, each option offers its own unique benefits and visual impact.
Before starting any update, it’s crucial to assess the condition of your fireplace, ensuring it is structurally sound and safe to work on. Address any necessary repairs or maintenance to create a solid foundation for the update process.
Choosing the right update option is key to achieving your desired outcome. Consider your personal style, budget, and the look you want to achieve. Each option – painting the bricks, installing a fireplace insert, adding decorative tiles or stone veneer, or enhancing the fireplace surround – offers its own set of advantages and can significantly transform the overall appearance of your fireplace.
Throughout the update process, it’s essential to follow proper preparation techniques, such as clearing the area, protecting surrounding surfaces, and gathering the necessary tools and supplies. Take care to clean the brick surface thoroughly before proceeding with any update, ensuring a smooth canvas for the transformation.
Repairing damaged bricks, when necessary, is crucial to both the aesthetic and structural integrity of your fireplace. Carefully assess and address any cracked, chipped, or loose bricks to create a solid and safe foundation for the update.
Whether you choose to apply a fresh coat of paint, install a fireplace insert, add decorative tiles or stone veneer, or enhance the fireplace surround, each step requires careful attention to detail and adherence to manufacturer’s instructions. By following the proper techniques, you can achieve a beautiful and long-lasting update.
In conclusion, updating your old brick fireplace can have a transformative effect on your living space. From modernizing the look with a fresh coat of paint to improving functionality and efficiency with a fireplace insert, the possibilities are endless. By taking the time to assess the condition, choose the right update option, and prepare the fireplace properly, you can create a stunning centerpiece that adds warmth and character to your home.
So, go ahead and explore the different update options, unleash your creativity, and enjoy the process of transforming your old brick fireplace into something truly remarkable.
Frequently Asked Questions about How To Update Old Brick Fireplace
Was this page helpful?
At Storables.com, we guarantee accurate and reliable information. Our content, validated by Expert Board Contributors, is crafted following stringent Editorial Policies. We're committed to providing you with well-researched, expert-backed insights for all your informational needs.

0 thoughts on “How To Update Old Brick Fireplace”