Home>Furniture & Design>Bathroom Accessories>How To Update An Old Bathtub
Bathroom Accessories
How To Update An Old Bathtub
Modified: August 20, 2024
Learn how to update an old bathtub with the latest bathroom accessories. Transform your bathroom with our step-by-step guide.
(Many of the links in this article redirect to a specific reviewed product. Your purchase of these products through affiliate links helps to generate commission for Storables.com, at no extra cost. Learn more)
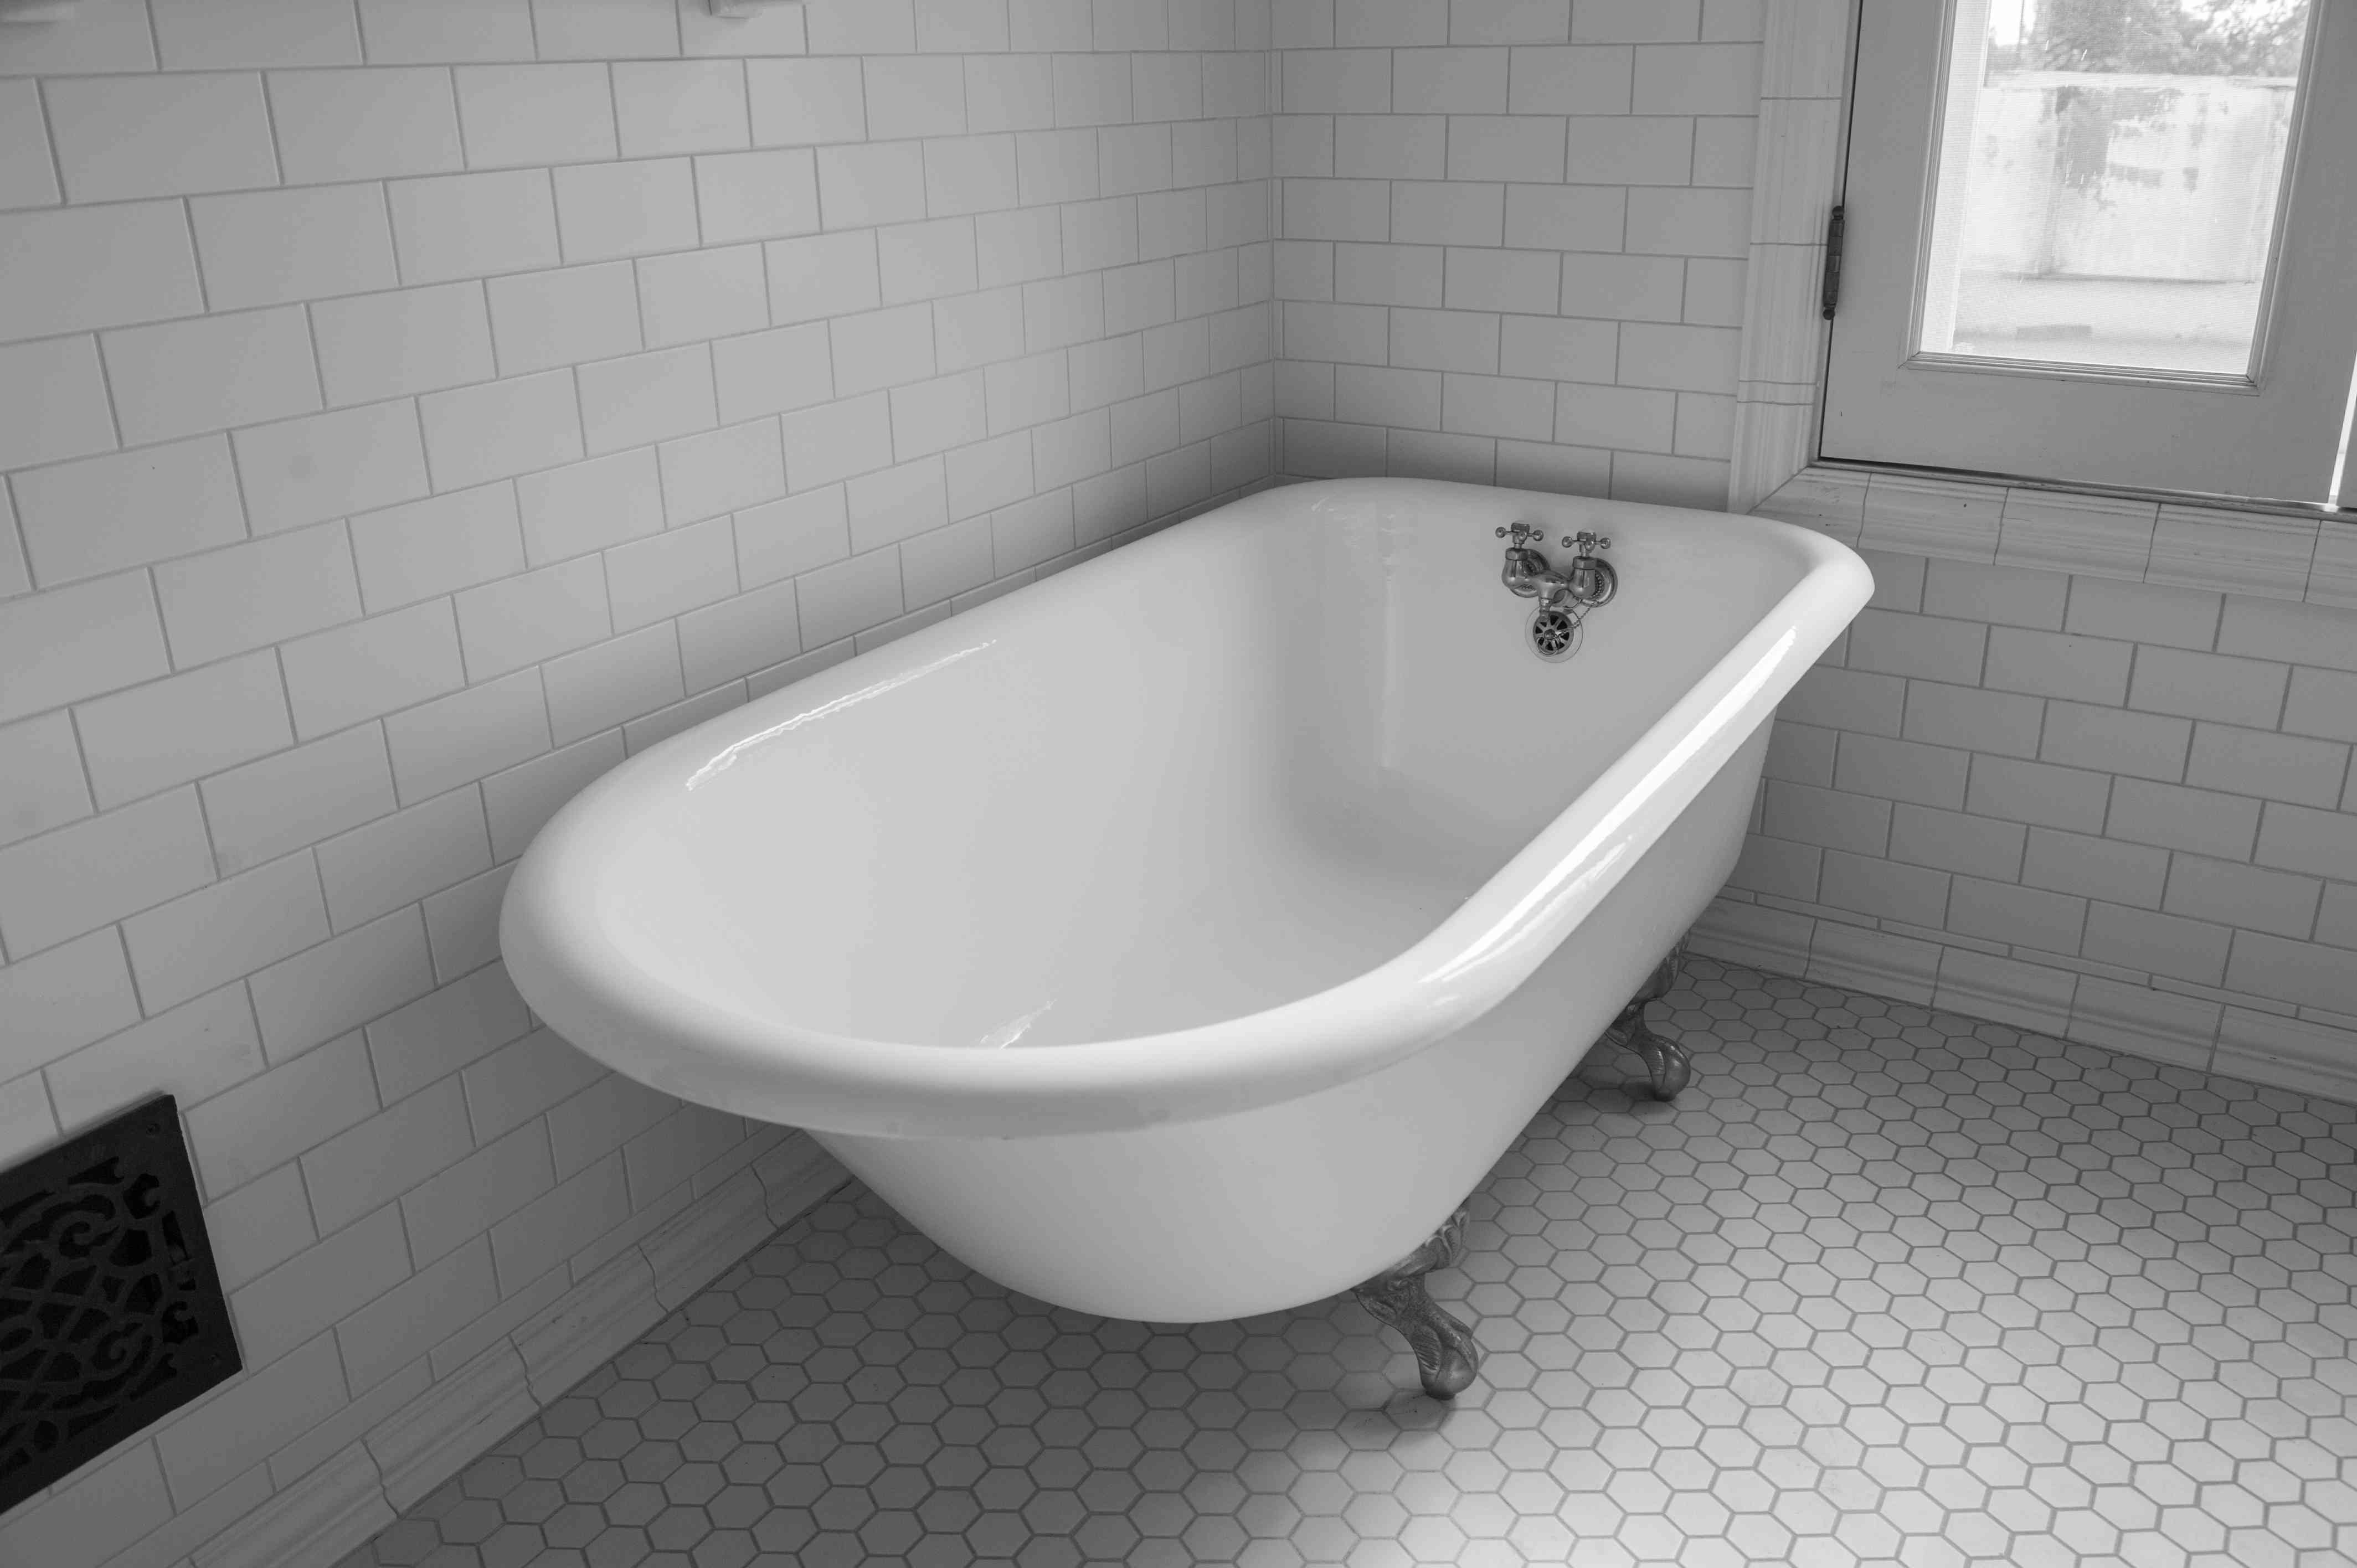
Assessing the Condition of the Bathtub
Before embarking on the journey of updating an old bathtub, it's crucial to thoroughly assess its current condition. This initial step sets the stage for the subsequent restoration process, ensuring that the end result is both aesthetically pleasing and functional. Here's how to effectively evaluate the state of your bathtub:
-
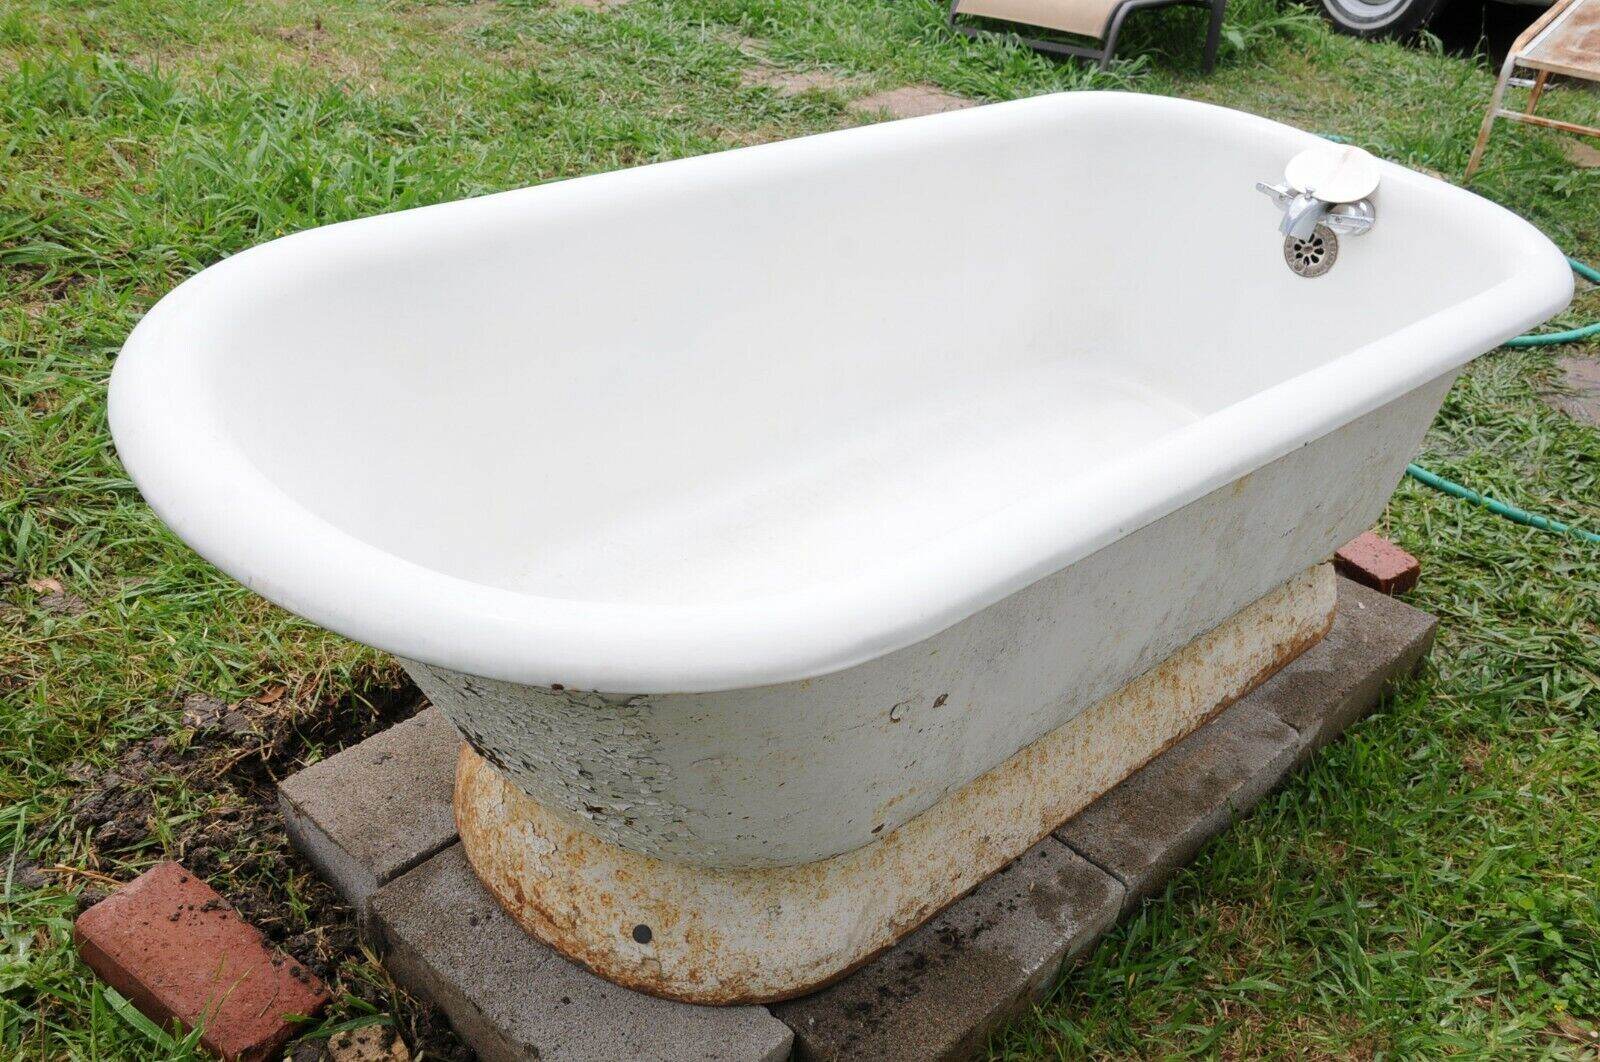
Surface Inspection: Begin by closely examining the bathtub's surface for signs of wear and tear. Look for areas where the finish has worn off, exposing the underlying material. Additionally, check for any discoloration, rust, or mineral deposits that may have accumulated over time.
-
Structural Integrity: Assess the structural integrity of the bathtub by checking for any visible cracks, chips, or dents. These imperfections not only detract from the bathtub's appearance but can also lead to water leakage and further damage if left unaddressed.
-
Water Retention: Determine whether the bathtub retains water or if there are any areas where water pools and fails to drain properly. This could indicate underlying issues with the drainage system or the bathtub's shape and alignment.
-
Grime and Stains: Take note of any stubborn grime, stains, or mold that have accumulated on the surface. These blemishes not only mar the bathtub's appearance but can also harbor bacteria and compromise hygiene.
-
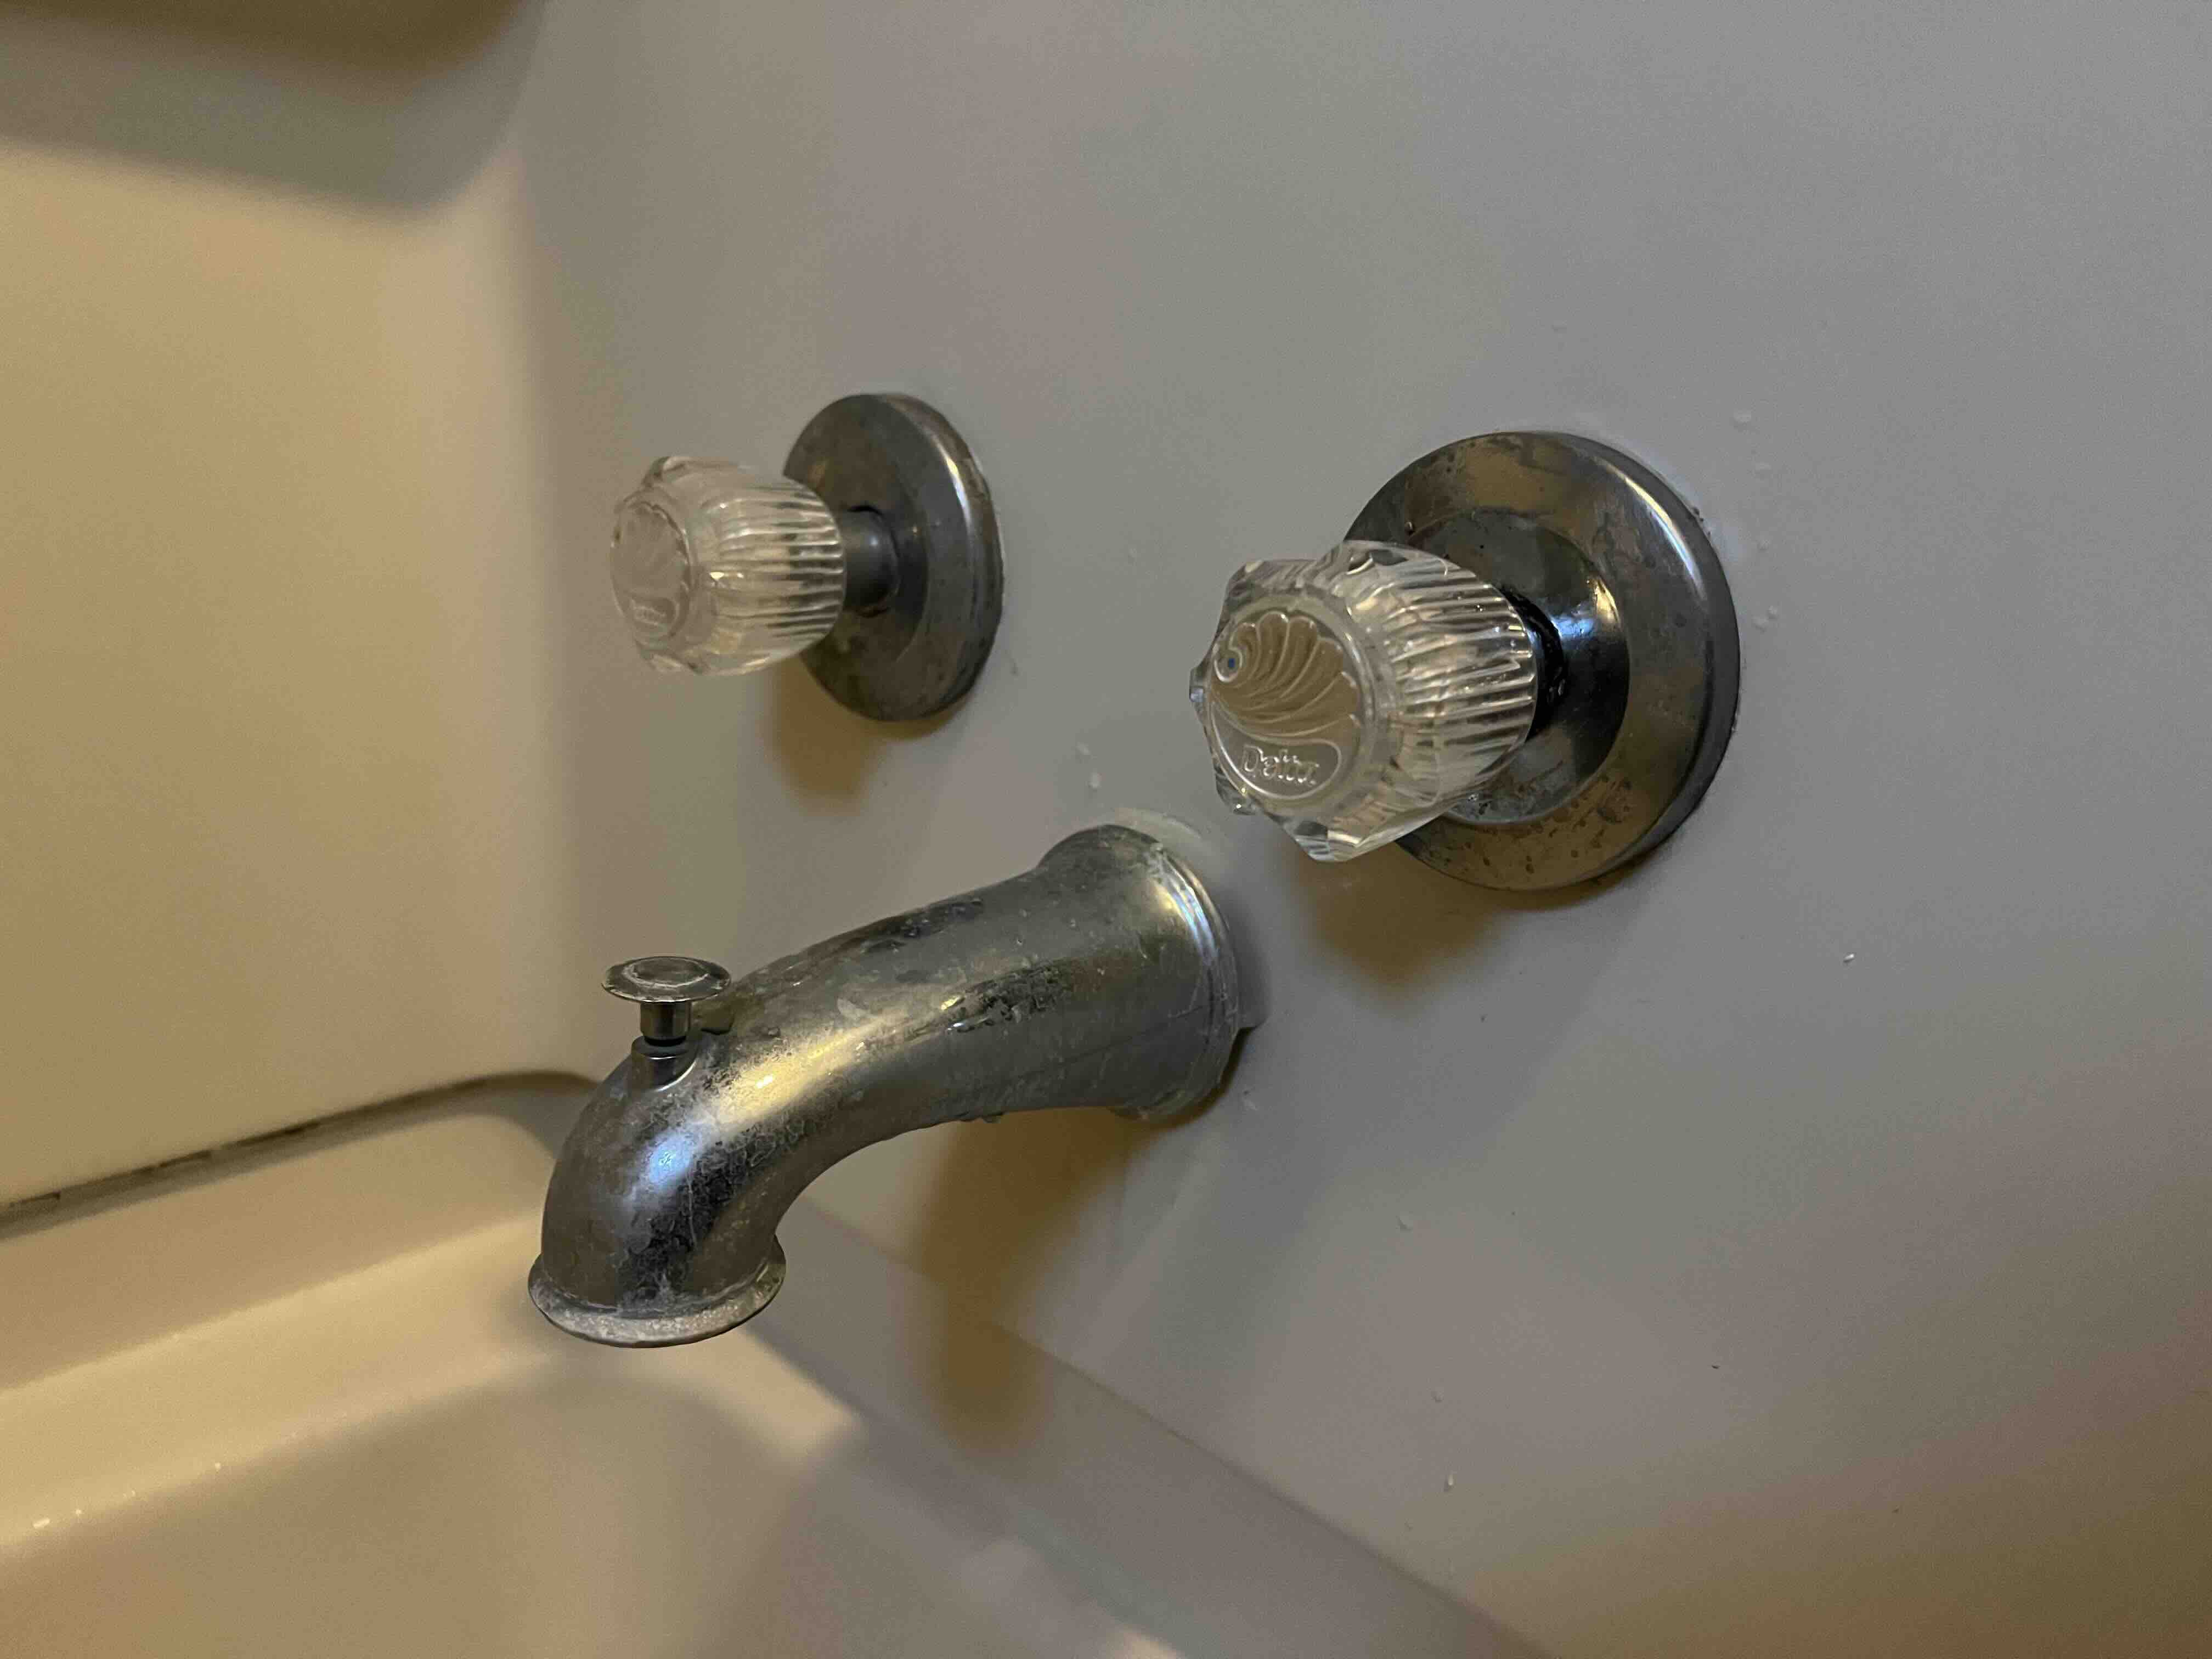
Fixture Assessment: Evaluate the condition of the bathtub fixtures, including the faucet, handles, and drain. Look for signs of corrosion, leaks, or malfunctioning components that may need to be addressed during the updating process.
By meticulously assessing these key aspects, you'll gain a comprehensive understanding of the challenges that lie ahead and can tailor your approach to suit the specific needs of your bathtub. This initial evaluation serves as the foundation for the subsequent cleaning, repair, and refinishing steps, ensuring that your efforts yield a revitalized and rejuvenated bathtub that enhances the overall ambiance of your bathroom.
Key Takeaways:
- Assess the condition of your old bathtub by checking for surface damage, structural integrity, water retention, grime, and fixture condition. This helps you understand the challenges ahead and tailor your approach for a successful update.
- To update an old bathtub, clean and prepare the surface, repair chips and cracks, apply a new finish, and seal the surface. This process revitalizes the bathtub’s appearance, enhances durability, and adds a polished touch to your bathroom.
Read more: How To Update Old Brick Fireplace
Cleaning and Preparing the Surface
The cleaning and preparation of the bathtub's surface are pivotal stages in the process of updating an old bathtub. These initial steps lay the groundwork for achieving a flawless and long-lasting finish. Here's a detailed guide on how to effectively clean and prepare the surface of your bathtub:
-
Clearing the Area: Begin by removing any items in the vicinity of the bathtub to create ample space for the cleaning and preparation process. This includes shower curtains, bath mats, and any personal care products that may hinder access to the bathtub's surface.
-
Dust and Debris Removal: Thoroughly clean the bathtub's surface to eliminate any dust, debris, or loose particles that may have accumulated. Use a soft-bristled brush or a vacuum cleaner to ensure that the surface is free from any foreign matter that could affect the adhesion of the new finish.
-
Degreasing and Cleaning Agents: Utilize a mild degreasing agent or a specially formulated bathtub cleaner to remove any residual soap scum, oils, or grime that may have built up over time. Apply the cleaner generously and allow it to sit for the recommended duration to effectively loosen and dissolve stubborn residues.
-
Scrubbing and Rinsing: Armed with a non-abrasive sponge or cloth, gently scrub the entire surface of the bathtub to dislodge any embedded dirt and stains. Pay particular attention to areas around the drain, faucet, and any crevices where grime tends to accumulate. Once scrubbed, thoroughly rinse the bathtub with clean water to remove all traces of the cleaning agent.
-
Drying the Surface: After rinsing, use a clean, dry cloth to meticulously dry the bathtub's surface. Ensure that all moisture is completely removed, as any residual water could interfere with the subsequent steps of the updating process.
-
Surface Sanding (Optional): In cases where the bathtub's surface exhibits signs of wear or unevenness, consider lightly sanding the surface to create a smooth and uniform base for the new finish. Use fine-grit sandpaper and work in gentle, circular motions to achieve the desired level of smoothness.
By meticulously adhering to these cleaning and preparation steps, you'll effectively rid the bathtub's surface of impurities and create an optimal foundation for the subsequent repair and refinishing processes. This meticulous approach ensures that the updated bathtub not only exudes a pristine appearance but also boasts enhanced durability and longevity.
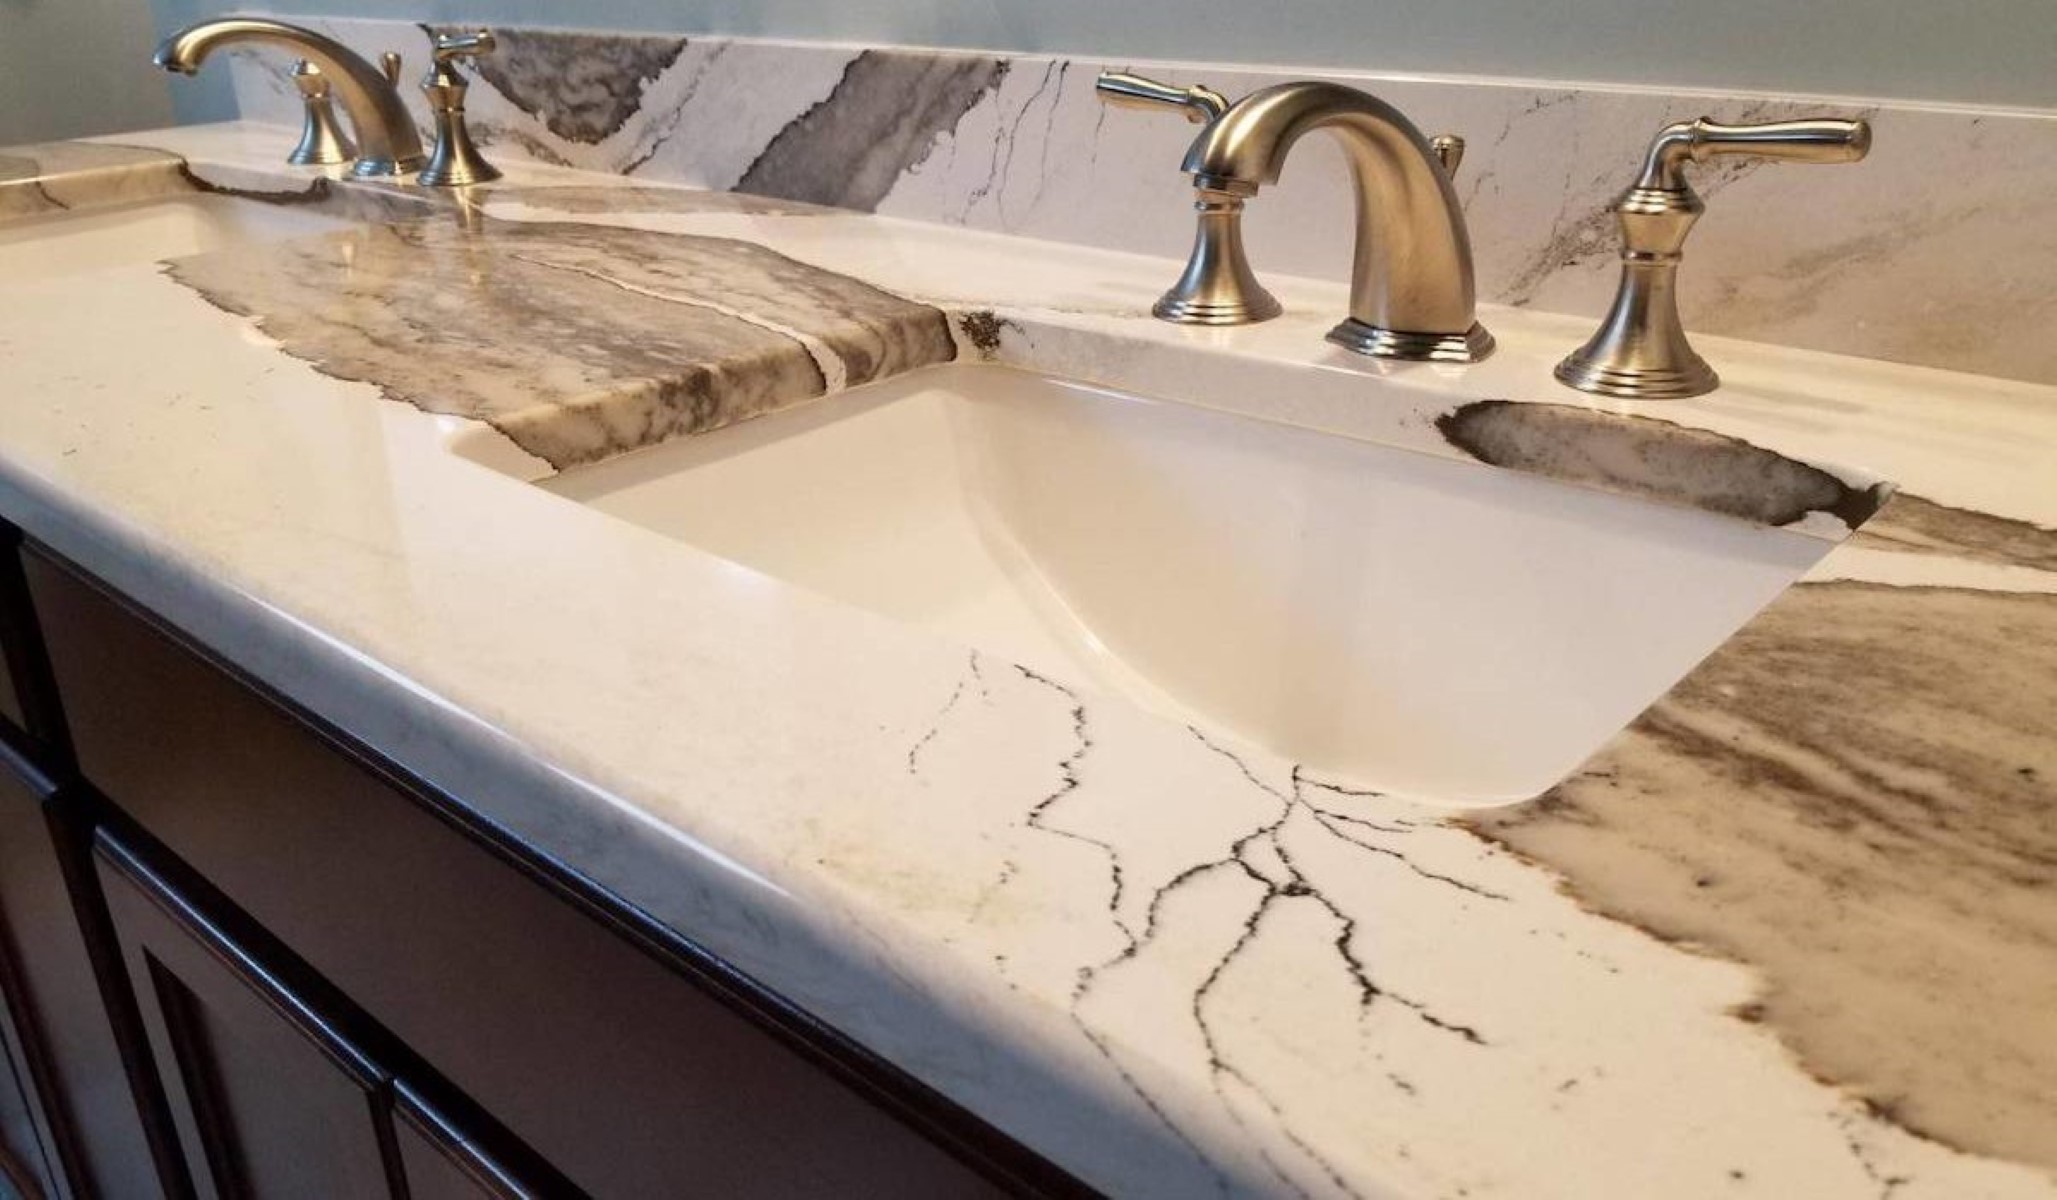
Repairing Chips and Cracks
Repairing chips and cracks in an old bathtub is a critical step in the restoration process, as these imperfections not only compromise the visual appeal of the bathtub but can also lead to further damage if left unattended. Here's a comprehensive guide on effectively addressing chips and cracks to ensure a seamless and durable finish:
-
Surface Preparation: Before commencing the repair, ensure that the affected area is clean and free from any debris or moisture. Thoroughly dry the surface to create an optimal environment for the repair materials to adhere effectively.
-
Choosing the Right Repair Kit: Select a high-quality bathtub repair kit that is specifically designed to address chips and cracks. These kits typically contain epoxy or filler compounds that are formulated to withstand the rigors of daily use and provide a long-lasting solution.
-
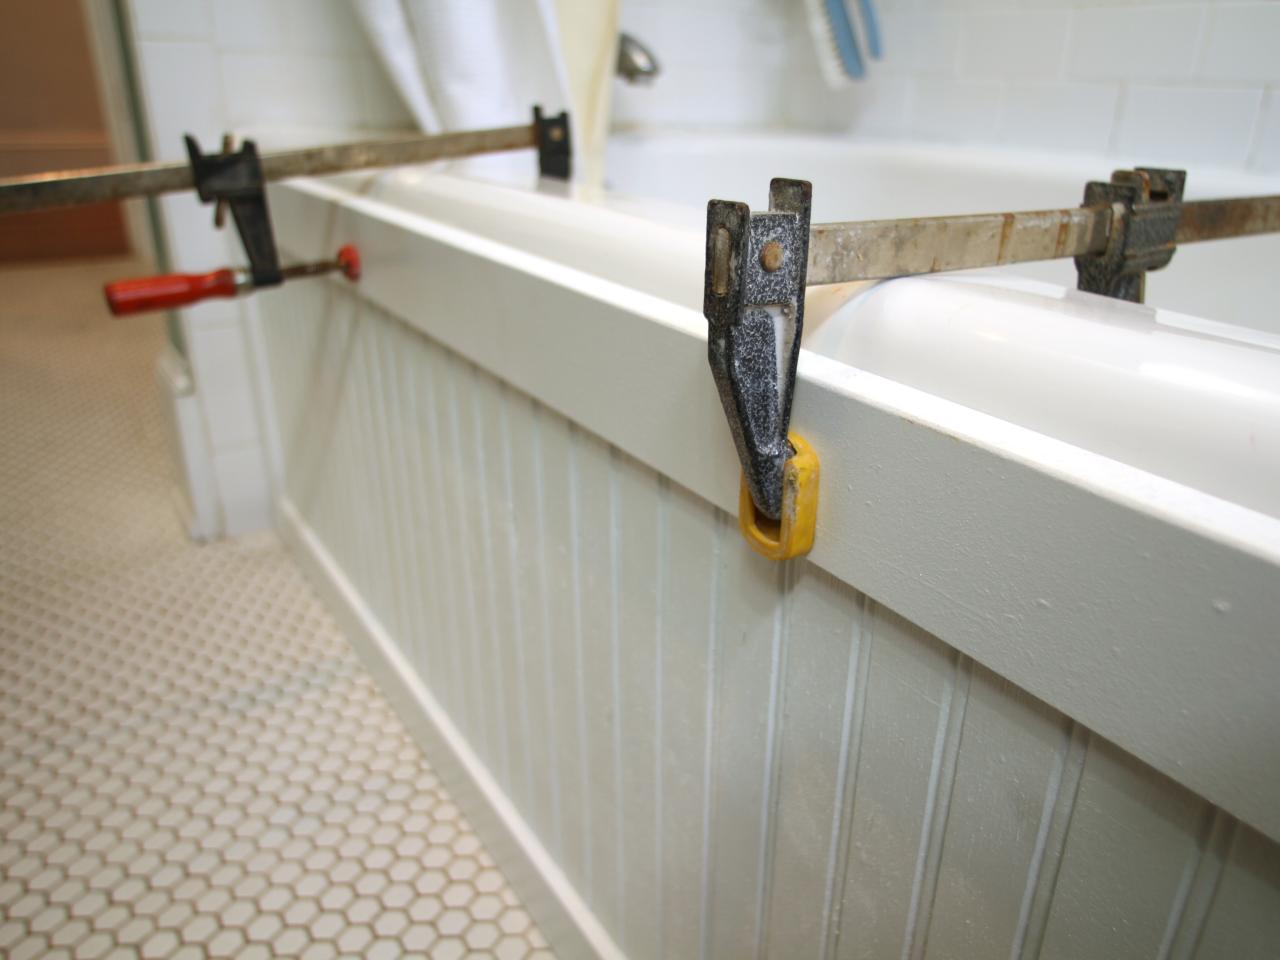
Application of Filler: Carefully apply the filler or epoxy compound to the chipped or cracked areas, ensuring that it is spread evenly and smoothly across the surface. Use a putty knife or a similar tool to achieve a level finish that seamlessly blends with the surrounding bathtub surface.
-
Smoothing and Shaping: Once the filler is applied, meticulously smooth and shape the repaired area to match the contours of the bathtub. This step is crucial in achieving a seamless integration of the repair, ensuring that the imperfections are effectively concealed.
-
Curing and Drying: Allow the repaired areas to cure and dry as per the manufacturer's instructions. This typically involves a waiting period to ensure that the filler or epoxy sets and adheres firmly to the bathtub surface.
-
Fine Sanding and Blending: After the repair has fully cured, lightly sand the repaired areas to achieve a uniform and smooth finish. This step is essential in blending the repaired sections with the rest of the bathtub surface, creating a cohesive and flawless appearance.
-
Quality Inspection: Thoroughly inspect the repaired areas to ensure that the chips and cracks have been effectively addressed. Run your fingers over the repaired sections to check for any roughness or inconsistencies that may require further attention.
By meticulously following these steps, you can effectively repair chips and cracks in an old bathtub, restoring its integrity and visual appeal. This meticulous approach ensures that the updated bathtub not only exudes a pristine appearance but also boasts enhanced durability and longevity, setting the stage for the subsequent refinishing process.
Applying a New Finish
Applying a new finish to an old bathtub is a transformative process that revitalizes its appearance and extends its lifespan. This crucial step involves the application of a durable and visually appealing coating that not only enhances the bathtub's aesthetic appeal but also provides a protective barrier against daily wear and tear. Here's a comprehensive guide on how to effectively apply a new finish to your old bathtub:
-
Surface Preparation: Before applying the new finish, it's imperative to ensure that the bathtub's surface is impeccably clean and free from any residual debris or contaminants. Thoroughly clean the bathtub using a mild degreasing agent and rinse it meticulously to remove all traces of the cleaning agent. Once cleaned, dry the surface completely to create an optimal foundation for the new finish.
-
Masking and Protection: To safeguard surrounding areas from overspray or accidental application, carefully mask off the perimeter of the bathtub using painter's tape and plastic sheeting. This precautionary measure ensures that the new finish is applied exclusively to the intended surface, preventing any inadvertent damage to adjacent fixtures or surfaces.
-
Selection of Finish: Choose a high-quality bathtub refinishing kit that aligns with your aesthetic preferences and durability requirements. These kits often include epoxy-based coatings or refinishing paints that are specifically formulated for use in wet environments, ensuring long-lasting performance and visual appeal.
-
Application Technique: Whether utilizing a brush, roller, or sprayer, apply the new finish evenly and methodically across the bathtub's surface. Ensure that each stroke or spray pass overlaps slightly with the previous application to achieve a uniform and consistent coating. Pay particular attention to corners, edges, and intricate areas to ensure comprehensive coverage.
-
Drying and Curing: Allow the newly applied finish to dry and cure in accordance with the manufacturer's instructions. This typically involves a specified waiting period to ensure that the finish sets and adheres firmly to the bathtub surface, creating a resilient and enduring coating.
-
Additional Coats (If Required): Depending on the specific refinishing product used, it may be necessary to apply multiple coats to achieve the desired level of coverage and durability. Follow the manufacturer's recommendations regarding the application of additional coats, ensuring that each layer is applied and cured meticulously.
-
Final Inspection: Once the new finish has fully cured, carefully inspect the bathtub surface to ensure that the coating is uniform and free from any imperfections. Run your hand over the surface to detect any irregularities, and address any minor flaws or inconsistencies as needed.
By meticulously following these steps, you can effectively apply a new finish to your old bathtub, rejuvenating its appearance and fortifying its resilience. This meticulous approach ensures that the updated bathtub not only exudes a pristine and refreshed look but also boasts enhanced durability, setting the stage for the subsequent sealing and finishing touches.
Sealing and Finishing Touches
The sealing and finishing touches represent the culminating phase in the comprehensive process of updating an old bathtub. This pivotal stage not only ensures the longevity and resilience of the newly refurbished bathtub but also adds the final aesthetic flourishes that elevate its visual appeal. Here's a detailed guide on how to effectively seal and add the finishing touches to your updated bathtub:
Read more: How To Update An Old Dining Room Set?
Sealing the Surface
After the new finish has fully cured, it's essential to apply a high-quality sealant to safeguard the bathtub's surface against moisture, stains, and daily wear. Opt for a waterproof sealant that is specifically formulated for use in wet environments, ensuring optimal protection and longevity. Carefully apply the sealant in even strokes, covering the entire bathtub surface to create a robust barrier that repels water and enhances the durability of the new finish.
Reinstalling Fixtures
Once the sealing process is complete, reattach the bathtub fixtures, including the faucet, handles, and drain components. Ensure that these fixtures are securely fastened and properly aligned, preventing any potential leaks or functional issues. This step not only restores the functionality of the bathtub but also adds the final touches that complete its rejuvenation.
Buffing and Polishing
To impart a lustrous sheen to the updated bathtub, consider buffing and polishing the surface using a non-abrasive polishing compound. This meticulous step enhances the visual allure of the bathtub, creating a smooth and reflective finish that exudes elegance and sophistication. Employ gentle circular motions to buff the surface, gradually unveiling its renewed luster.
Grout and Caulk Renewal
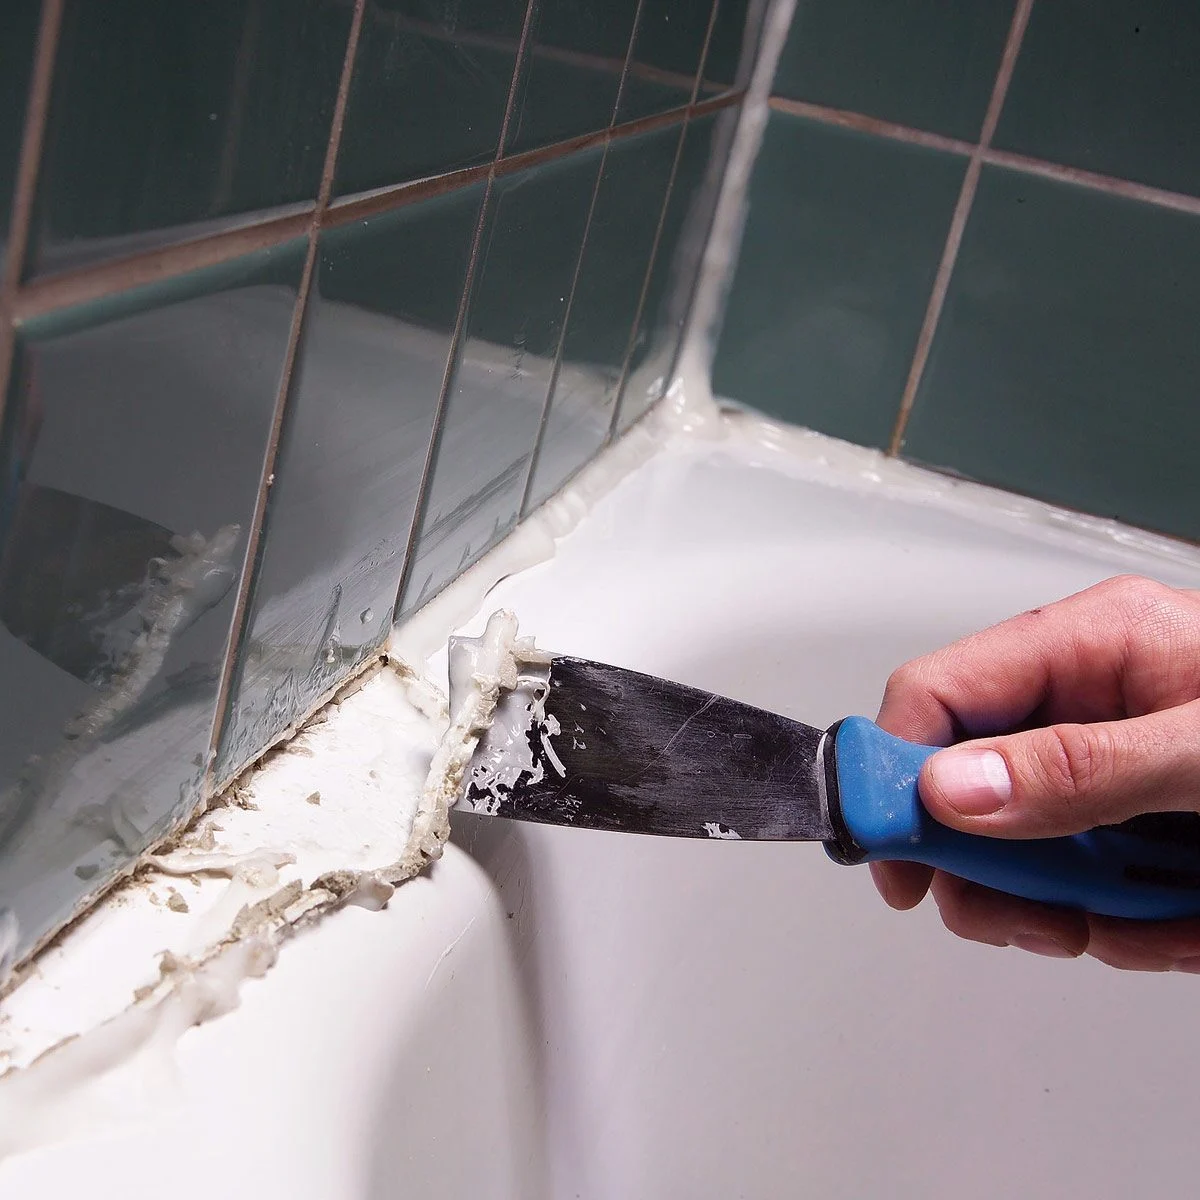
Inspect the grout lines and caulking around the bathtub to identify any areas that require renewal. Address any deteriorated or discolored grout by meticulously removing the old grout and applying a fresh layer to restore the crisp and clean appearance of the bathtub's surroundings. Similarly, recaulk the perimeter of the bathtub to ensure a watertight seal and a polished aesthetic.
Read more: How To Restore Old Clawfoot Bathtub
Final Inspection and Touch-Ups
Conduct a thorough inspection of the updated bathtub, scrutinizing the surface for any imperfections or areas that may require touch-ups. Address any minor flaws or blemishes with precision, ensuring that the bathtub's appearance is flawless and refined. This meticulous attention to detail culminates in a revitalized bathtub that exudes a pristine and inviting allure.
By meticulously adhering to these sealing and finishing touches, you can elevate the updated bathtub to new heights of elegance and functionality. This comprehensive approach ensures that the refurbished bathtub not only boasts enhanced durability and resilience but also exudes a captivating aesthetic charm that enriches the ambiance of your bathroom.
Frequently Asked Questions about How To Update An Old Bathtub
Was this page helpful?
At Storables.com, we guarantee accurate and reliable information. Our content, validated by Expert Board Contributors, is crafted following stringent Editorial Policies. We're committed to providing you with well-researched, expert-backed insights for all your informational needs.


0 thoughts on “How To Update An Old Bathtub”