Home>Articles>How To Use A Laser Level For Large Drain Piping
Articles
How To Use A Laser Level For Large Drain Piping
Modified: October 27, 2024
Learn how to use a laser level for large drain piping with our detailed articles. Gain valuable insights and techniques for accurate installation and alignment.
(Many of the links in this article redirect to a specific reviewed product. Your purchase of these products through affiliate links helps to generate commission for Storables.com, at no extra cost. Learn more)
Introduction
Welcome to the world of large drain piping installation! If you are embarking on a project that involves laying down extensive drain piping, you’ll quickly realize the importance of precise measurements and accurate leveling. And that’s where a laser level becomes an indispensable tool.
A laser level is a sophisticated device that emits a laser beam to create a perfectly straight and level reference line. It’s commonly used in construction and engineering projects to ensure precision and efficiency. When it comes to large drain piping, the use of a laser level can significantly simplify the installation process and save you both time and effort.
In this article, we’ll dive into the world of laser levels and explore their importance in large drain piping projects. We’ll discuss how to prepare for drain piping installation, set up the laser level, and utilize it for accurate leveling and slope calculation. We’ll also provide troubleshooting tips for common laser level issues. By the end, you’ll have a clear understanding of the benefits of using a laser level in your drain piping project and how to make the most out of this incredible tool.
So, without further ado, let’s get started!
Key Takeaways:
- Laser levels are essential for large drain piping projects, providing precision, time-saving, consistency, cost-effectiveness, and safety. They simplify the leveling process, ensuring accurate and efficient installations while preventing future issues.
- Proper preparation, setup, and troubleshooting are crucial for maximizing the effectiveness of laser levels in drain piping projects. By following guidelines and addressing common issues, contractors can achieve optimal results and streamline the installation process.
Read more: How To Use A Laser Level
Understanding Laser Levels
Before we delve into how to use a laser level for large drain piping projects, let’s first understand what a laser level is and how it works.
A laser level is a device designed to emit a laser beam that creates a straight and level reference line. It typically consists of a laser diode, a leveling mechanism, and a housing unit. The laser diode generates the laser beam, while the leveling mechanism ensures that the beam is perfectly horizontal or vertical.
There are different types of laser levels available, including rotary laser levels, line laser levels, and dot laser levels. Rotary laser levels emit a 360-degree laser beam, making them ideal for large-scale projects. Line laser levels, on the other hand, produce a straight line in one or more directions. Dot laser levels project multiple dots onto a surface, allowing for precise point reference.
Laser levels are powered by either batteries or electrical outlets. They come with various features such as self-leveling technology, adjustable rotation speed, and remote control capabilities. Some advanced models even offer additional functionalities like slope calculation and scanning modes.
Now that we have an understanding of laser levels, let’s explore why they are crucial in large drain piping projects.
Importance of Laser Levels in Large Drain Piping Projects to be continued…
Importance of Laser Levels in Large Drain Piping Projects
Large drain piping projects require precise measurements and accurate leveling to ensure proper flow and drainage. Here’s why laser levels play a vital role in these projects:
- Precision and accuracy: Laser levels provide a level of precision and accuracy that is almost impossible to achieve using traditional leveling methods. They create a highly visible laser beam that serves as a reference line, allowing contractors to align the drain pipes accurately. This ensures that the pipes are properly installed and sloped, preventing any issues with water flow or blockages.
- Time-saving: In large drain piping projects, time is of the essence. Laser levels expedite the leveling process by eliminating the need for manual measurements and estimations. With a laser level, contractors can quickly set up and establish perfectly level lines, reducing the time spent on trial and error. This ultimately leads to faster and more efficient installations.
- Consistency: Achieving consistent results is crucial in drain piping projects. Laser levels provide consistent and reliable measurements, ensuring uniformity and precision across the entire system. This consistency helps prevent any deviations in the slope, which can lead to drainage issues or pipe damage in the long run.
- Cost-effective: While laser levels may seem like an initial investment, they can save you money in the long term. By using a laser level, you can avoid costly rework due to improper installation. The accuracy provided by laser levels helps prevent future issues, such as leaks or pipe failures, which could lead to expensive repairs and replacements.
- Safety: Large drain piping projects often involve working in tight or confined spaces. Laser levels provide a safe and efficient way to level pipes from a distance, minimizing the need for physical contact with the pipes. This reduces the risk of injury to workers and minimizes the potential for damage to the pipes during installation.
Overall, laser levels are an invaluable tool in large drain piping projects. They simplify the leveling process, save time and money, ensure accuracy, and promote safety. With a laser level in hand, you can confidently tackle even the most challenging drain piping installations.
Preparing for Drain Piping Installation
Before you begin the drain piping installation process, proper preparation is essential to ensure a smooth and successful project. Here are some key steps to consider:
- Plan and design: Start by creating a detailed plan and design for your drain piping system. Consider factors such as the location, slope requirements, and capacity of the pipes. Consult plumbing codes and regulations to ensure compliance and obtain necessary permits. A well-thought-out plan will serve as a guide throughout the installation process.
- Gather the materials: Once you have a plan in place, gather all the necessary materials and tools for the project. This includes drain pipes, connectors, fittings, adhesive, and any other components required for your specific installation. Having everything readily available will ensure a seamless workflow and minimize interruptions.
- Prepare the work area: Clear the work area of any obstacles or debris that could hinder the installation process. This includes removing rocks, branches, or other items that could impede the placement of the drain pipes. Ensure that the ground is level and compacted to provide a stable foundation for the pipes.
- Check for underground utilities: Before digging or trenching, it’s crucial to perform a thorough check for any underground utilities. Contact your local utility companies to mark the location of gas lines, electrical cables, and other utilities. This will help prevent accidental damage during excavation.
- Review the project specifications: Take a close look at your project specifications, including the required slope and alignment for the drain pipes. This information will guide you in setting up the laser level and ensure that the pipes are installed correctly. Double-check the measurements and slope calculations to avoid any errors.
- Prepare the laser level: Set up your laser level according to the manufacturer’s instructions. This typically involves mounting the laser level on a tripod or secure surface and leveling it using the built-in leveling mechanism. Ensure that the laser level is properly calibrated and ready for use.
- Establish reference points: Use the laser level to establish reference points along the installation path. This will serve as a guide for aligning and placing the drain pipes. Take measurements and mark the designated positions for the pipes to ensure accurate and consistent placement.
By following these preparation steps, you’ll be well-equipped to start the drain piping installation process with confidence and accuracy. Proper planning and readiness will help streamline the project and ensure optimal results.
Setting up the Laser Level
Now that you have completed the necessary preparations, it’s time to set up the laser level for your drain piping installation. Here are the steps to follow:
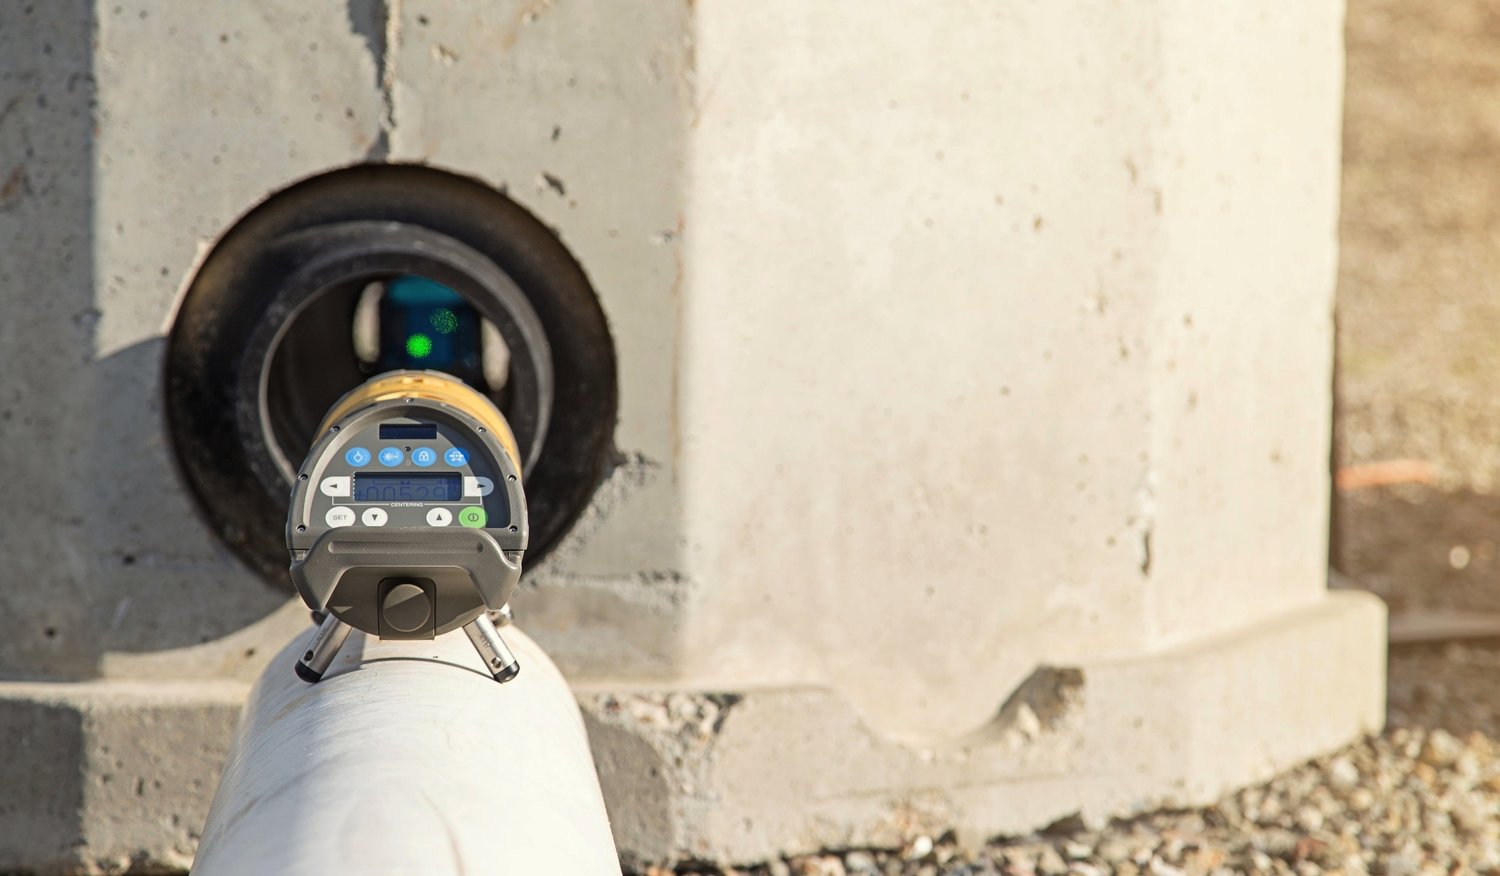
- Choose the appropriate laser level: Select the type of laser level that best suits your project. For large drain piping installations, a rotary laser level is often the most suitable choice. This type of laser level emits a 360-degree laser beam, providing a full coverage reference line.
- Find a stable surface: Locate a stable surface or mount for your laser level. This could be a tripod, a wall bracket, or any other secure support that allows for easy adjustment and movement. Ensure that the surface is level, as any tilt or instability can affect the accuracy of the laser level.
- Mount the laser level: Attach the laser level securely to the chosen mounting surface. Follow the manufacturer’s instructions for proper installation. Make sure the laser level is firmly attached, as any vibrations or movement can disrupt the accuracy of the laser beam.
- Level the laser: Use the built-in leveling mechanism of the laser level to ensure that it is perfectly horizontal or vertical. Most modern laser levels have a self-leveling feature, which simplifies the leveling process. If your laser level requires manual leveling, adjust the position of the level until the bubble indicator is centered within the leveling vials.
- Calibrate the laser level: Some laser levels require calibration to ensure accurate measurements. Follow the manufacturer’s instructions to calibrate your specific laser level model. This ensures that the laser beam emitted by the device is precisely aligned and provides accurate reference lines.
- Test the laser level: Before using the laser level for your drain piping installation, perform a quick test to ensure that it is working correctly. Turn on the laser level and observe if the laser beam is clearly visible and aligned with the reference points. Adjust the position if needed until the laser beam is accurate and visible across the entire installation area.
By following these steps, you will have successfully set up your laser level for the drain piping installation. Keep in mind that proper placement, leveling, and calibration are crucial for accurate measurements and precise alignment. Once your laser level is set up, you’re ready to use it for leveling the drain pipes.
When using a laser level for large drain piping, make sure to set up the level on a stable surface and adjust the height to match the slope needed for proper drainage. Double-check the accuracy of the level before beginning any installation work.
Read more: How To Use A Self Leveling Laser Level
Using the Laser Level for Leveling
Now that you have your laser level set up, it’s time to utilize it for leveling the drain pipes. Follow these steps to ensure accurate leveling:
- Select a starting point: Choose a starting point along the installation path where you will begin the leveling process. This point should be aligned with your reference points and serve as a base for the rest of the pipes.
- Position the laser level: Position the laser level in a way that allows the laser beam to project directly onto the reference points and the starting point. Ensure that the laser beam is visible and aligned with the desired slope and alignment of the drain pipes.
- Measure the height: Place a measuring device, such as a leveling rod or measuring tape, vertically against the starting point. Measure the height from the ground up to the desired level or slope for the drain pipes. This measurement will serve as a reference for the rest of the pipes.
- Align the drain pipes: Position the first drain pipe at the starting point and align it with the laser beam. Use a level or measuring device to ensure that the pipe is perfectly level or matches the desired slope. Adjust the position of the pipe if necessary to achieve the correct alignment.
- Continue the leveling process: Move along the installation path, placing the subsequent drain pipes in position and aligning them with the laser beam. Use the measuring device and level to check the levelness or slope of each pipe. Make adjustments as needed to achieve uniformity and accuracy.
- Secure the drain pipes: Once all the drain pipes are properly aligned and leveled, secure them in place using appropriate fittings and connectors. Ensure that the pipes are tightly connected to prevent any movement or misalignment.
Throughout the leveling process, periodically check the alignment and levelness of the pipes using the laser level and measuring devices. This will help maintain accuracy and consistency across the entire drain piping system.
Remember, the laser level serves as a reliable guide for precise leveling. Adjust the position of the pipes to match the projected laser beam, taking into account the desired slope and alignment requirements. By using the laser level effectively, you can ensure that the drain pipes are level and properly installed, promoting efficient water flow and drainage.
Using the Laser Level for Slope Calculation
In addition to leveling, a laser level can also be used to calculate and establish the desired slope for your drain pipes. Here’s how you can use the laser level for slope calculation:
- Determine the slope requirements: Before getting started, determine the required slope for your drain pipes. This will depend on local plumbing codes and the specific needs of your project. The slope is typically expressed as a percentage or a ratio, indicating the vertical drop over a given horizontal distance.
- Position the laser level: Position the laser level at an appropriate starting point, ensuring that the laser beam is aligned with the reference points. It’s important to have a clear line of sight along the installation path for accurate slope calculation.
- Measure the desired slope: Place a measuring device, such as a measuring rod or ruler, on the ground starting from the reference point and extending towards the direction of the slope. Measure the desired vertical drop over a specific horizontal distance, according to the slope requirements. The measuring device should be in contact with the ground and intersect the laser beam.
- Adjust the drain pipes: Position the drain pipes along the installation path, aligning them with the laser beam. Use the measuring device to determine the correct drop for each section of the drain pipes. Make adjustments by raising or lowering the pipes as needed to match the desired slope. Ensure that the pipes are securely connected to maintain the correct alignment and slope.
- Check the slope along the installation: As you progress along the installation path, regularly check the slope of the drain pipes using the laser level and measuring device. Ensure that the vertical drop is consistent and matches the slope requirements. Make any necessary adjustments to maintain slope accuracy.
- Secure the drain pipes: Once the drain pipes are in the desired position and the slope is accurately set, secure them in place using appropriate fittings and connectors. Double-check the levelness and alignment of the pipes using the laser level and measuring devices before finalizing the connections.
By using the laser level for slope calculation, you can ensure that your drain pipes are correctly positioned to facilitate proper drainage. Maintaining the recommended slope minimizes the risk of water buildup or blockages, ensuring efficient flow and preventing potential issues in the future.
Remember that regular checks and adjustments are necessary to maintain slope accuracy throughout the drain piping installation process. The laser level serves as an invaluable tool for precise slope calculation and alignment, helping you achieve optimal results.
Troubleshooting Common Laser Level Issues
While laser levels are incredibly reliable tools, they may encounter some issues from time to time. Here are some common problems that you may encounter with a laser level and troubleshooting tips to resolve them:
- Low visibility: If you find that the laser beam is not clearly visible, it may be due to low battery power or dirt on the lens. Check the battery level and replace or recharge it if necessary. Clean the lens of the laser level using a soft, lint-free cloth to ensure maximum visibility.
- Inaccurate leveling: If your laser level is not accurately leveling, it may be a result of an unlevel mounting surface or improper calibration. Ensure that the surface on which the laser level is mounted is level. If your laser level requires calibration, follow the manufacturer’s instructions to recalibrate it for accurate leveling.
- Uneven laser beam: If the laser beam appears uneven or distorted, it could indicate a misalignment of the laser level. Check the mounting position and ensure that the laser level is securely attached to a stable surface. Adjust the level using the built-in leveling mechanism to ensure a straight and level laser beam.
- Interference from sunlight: In bright sunlight, the laser beam may become obscured or less visible. To overcome this issue, consider using a laser detector or target card that can help you locate the laser beam even in bright lighting conditions. These accessories enhance the visibility of the laser beam and assist in accurate measurements.
- Interference from other light sources: Other light sources, such as other construction equipment or reflective surfaces, may interrupt the laser beam. Avoid placing the laser level in direct line with other sources of light or reflective surfaces. If necessary, use a laser enhancement kit to filter out potential interfering light sources.
- Temperature and environmental factors: Extreme temperatures, humidity, and dust can affect the performance of a laser level. Ensure that the laser level is stored and used within the recommended temperature and humidity range specified by the manufacturer. Keep the laser level clean and free from debris to maintain optimal functionality.
If you encounter any persistent issues with your laser level that cannot be resolved through troubleshooting, it may be necessary to contact the manufacturer or seek professional assistance for repairs or replacement.
By being aware of these common laser level issues and following the troubleshooting tips, you can ensure that your laser level operates effectively and reliably throughout your drain piping installation project.
Conclusion
Using a laser level for large drain piping projects is a game-changer. It brings precision, accuracy, and efficiency to the installation process, ensuring optimal water flow and drainage. By understanding how to effectively utilize a laser level, you can enhance your project’s success and save time and money in the long run.
In this article, we discussed the importance of laser levels in large drain piping projects. We explored how to prepare for the installation, set up the laser level, and utilize it for both leveling and slope calculation. We also provided troubleshooting tips to address common laser level issues that may arise during the project.
A laser level offers unparalleled precision and accuracy, overcoming the limitations of manual measurements and estimations. It simplifies the leveling process, allowing you to align drain pipes with ease and efficiency. Additionally, it enables you to establish the desired slope, ensuring optimal water flow and preventing issues such as blockages and water buildup.
However, it’s essential to remember that proper preparation, including planning, gathering materials, and clearing the work area, is essential. Additionally, following manufacturer instructions for setting up and calibrating the laser level is crucial for accurate measurements.
By maintaining the laser level’s visibility, alleviating interference, and addressing potential issues promptly, you can maximize its effectiveness throughout the drain piping installation process. Regular checks and adjustments ensure consistent accuracy and help avoid future problems that may arise due to improper leveling or slope.
In conclusion, a laser level is an indispensable tool for large drain piping projects. It provides the precision, efficiency, and accuracy needed to ensure optimal water flow and drainage. By utilizing a laser level effectively and following the guidelines outlined in this article, you can successfully complete your drain piping installation with confidence, knowing that you’ve achieved the highest level of accuracy and professionalism.
Frequently Asked Questions about How To Use A Laser Level For Large Drain Piping
Was this page helpful?
At Storables.com, we guarantee accurate and reliable information. Our content, validated by Expert Board Contributors, is crafted following stringent Editorial Policies. We're committed to providing you with well-researched, expert-backed insights for all your informational needs.


0 thoughts on “How To Use A Laser Level For Large Drain Piping”