Home>Articles>How To Use A Laser Level Indoors On Crown Molding
Articles
How To Use A Laser Level Indoors On Crown Molding
Modified: August 21, 2024
Learn how to effectively use a laser level on crown molding indoors with our informative articles. Achieve precise and professional results with our expert tips and techniques.
(Many of the links in this article redirect to a specific reviewed product. Your purchase of these products through affiliate links helps to generate commission for Storables.com, at no extra cost. Learn more)
Introduction
Welcome to this comprehensive guide on how to use a laser level indoors for crown molding. If you’re embarking on a home improvement project and want to achieve precise and professional-looking results, a laser level can be your best friend. Crown molding, with its intricate design and delicate angles, requires careful measuring and alignment. By using a laser level, you can ensure that your crown molding installation is accurate, level, and visually pleasing.
In this article, we will walk you through the step-by-step process of using a laser level indoors for crown molding. We will discuss everything from understanding crown molding to selecting the right laser level and using it effectively. Whether you’re a seasoned DIY enthusiast or a beginner, this guide will provide you with the knowledge and skills needed to tackle your crown molding project with confidence.
Before we dive into the details, let’s briefly explain what crown molding is and why it is such a popular choice for enhancing the aesthetics of a room.
Crown molding is a decorative trim that is typically installed along the top edge where the walls and ceiling meet. It adds elegance, sophistication, and architectural appeal to any room. Crown molding can be made from various materials, including wood, plaster, or polyurethane. It comes in a wide range of styles and sizes, allowing homeowners to choose the perfect design that complements their interior décor.
Now that you have an understanding of what crown molding is, let’s move on to the next section, where we will discuss the importance of choosing the right laser level for your crown molding project.
Key Takeaways:
- Using a laser level for crown molding ensures precise installation, but it’s crucial to choose the right laser level, align it accurately, and prioritize safety to achieve professional-looking results.
- Practice, patience, and attention to detail are essential when using a laser level for crown molding installation. Following the step-by-step process and safety precautions will lead to a visually appealing and elegant transformation of your living space.
Read more: How To Use A Laser Level
Understanding Crown Molding
Before you start using a laser level for crown molding, it’s crucial to have a good understanding of the molding itself and its installation requirements. Crown molding is not your typical straight trim; it consists of intricate profiles that require precise measurements and angle adjustments for a seamless installation.
There are a few key terms and concepts related to crown molding that you should familiarize yourself with:
- Profile: The profile refers to the cross-sectional shape of the crown molding. It can vary from simple curves to elaborate designs, each adding a unique touch to your space.
- Projection: The projection is the distance the crown molding extends from the wall to the ceiling. It determines the depth and visual impact of the molding.
- Spring Angle: The spring angle is the angle at which the crown molding meets the wall and ceiling. It can be categorized into three main types: 38 degrees, 45 degrees, and 52 degrees. It’s essential to determine the spring angle of your crown molding before starting the installation process.
When selecting crown molding for your project, it’s crucial to consider the style and scale of your room. Larger rooms with higher ceilings can accommodate wider and more intricate crown moldings, while smaller rooms benefit from narrower and simpler profiles to avoid overwhelming the space.
Furthermore, crown molding can be installed flush against the ceiling or used to create a gap known as a “reveal.” Deciding on the desired look and effect will determine how you position the crown molding during installation.
Now that you have a better understanding of crown molding and its various components, the next step is to choose the right laser level to ensure accuracy and efficiency in your installation process. This will be discussed in detail in the next section.
Choosing the Right Laser Level
When it comes to using a laser level for crown molding, selecting the right tool is essential for achieving accurate and precise results. There are several factors to consider when choosing a laser level for your project:
- Type of Laser Level: There are two main types of laser levels: rotary and line laser levels. Rotary laser levels emit a 360-degree beam and are ideal for larger projects or outdoor use. Line laser levels, on the other hand, emit a straight line and are more suitable for indoor applications like crown molding installation.
- Visibility: Laser levels come in different visibility ranges, typically measured in feet or meters. Make sure to choose a laser level with sufficient visibility for the size of your room and the distance between the walls.
- Accuracy: Accuracy is crucial when it comes to crown molding installation. Look for a laser level that offers a high level of precision, typically expressed as a margin of error in inches or millimeters.
- Self-Leveling Capability: A self-leveling laser level automatically adjusts its position to ensure a level line. This feature reduces the chances of human error and simplifies the installation process.
- Additional Features: Some laser levels come with additional features like pulse mode (for use with a detector), multiple line projections, or the ability to switch between horizontal and vertical lines. Consider these features based on your specific needs and project requirements.
It’s important to invest in a high-quality laser level from a reputable manufacturer to ensure reliability and durability. Read customer reviews, compare specifications, and consult with professionals or sales representatives to make an informed decision.
Once you have chosen the right laser level, the next step is to set it up properly. In the following section, we will discuss the necessary steps to ensure a stable and accurate laser level setup for crown molding installation.
Setting Up the Laser Level
Properly setting up your laser level is crucial for achieving accurate and reliable measurements during crown molding installation. Follow these steps to ensure a stable and precise laser level setup:
- Choose a Stable Surface: Find a flat and stable surface to place your laser level. A sturdy tripod or a mounting bracket can provide the necessary stability for your laser level.
- Check for Level: Before turning on the laser level, make sure the surface it is sitting on is level. Use a bubble level or a built-in leveling indicator on the tripod or mounting bracket to ensure accuracy.
- Position the Laser Level: Once the surface is leveled, position the laser level so that the laser beam will project onto the walls and ceiling where the crown molding will be installed. Adjust the height and angle of the laser level as needed to align with your project requirements.
- Secure the Laser Level: Once you have positioned the laser level correctly, secure it in place using the locking mechanism on the tripod or mounting bracket. This will prevent any movement or displacement during the installation process.
- Turn on the Laser Level: Power on the laser level according to the manufacturer’s instructions. Ensure that the laser beam is visible and projecting a straight line onto the wall and ceiling.
It is important to note that laser levels may have different settings for brightness and line visibility. Adjust these settings based on the lighting conditions of your workspace to ensure optimal visibility during installation.
Now that your laser level is properly set up, the next step is to align it with the crown molding. This will be discussed in detail in the following section.
Aligning the Laser Level with Crown Molding
Once your laser level is set up and projecting a straight line onto the walls and ceiling, the next step is to align it with the crown molding. This will ensure that the molding is installed level and accurately.
Follow these steps to align the laser level with the crown molding:
- Identify the Reference Line: Determine the desired placement of the crown molding on the wall. This will serve as your reference line, indicating where the bottom edge of the molding should align with the laser line.
- Measure and Mark: Measure and mark the position of the reference line at several points along the wall. Use a tape measure and a pencil to make clear and accurate marks.
- Align the Laser Line: Adjust the position and angle of the laser level until the projected line aligns with the reference marks on the wall. This ensures that the bottom edge of the crown molding will be level.
- Double-Check for Accuracy: Use a bubble level or a straightedge to verify that the laser line is indeed level. Make any necessary adjustments to the laser level or the positioning until it is accurate.
It’s important to note that when aligning the laser level with the crown molding, you’ll need to consider the spring angle of the molding. The laser line should align with the bottom edge of the molding, taking into account the angle at which it meets the wall and ceiling.
Once the laser level is aligned with the crown molding, you can proceed with the installation process confidently. However, before you start installing the crown molding, it’s important to ensure the accuracy of your laser level adjustment. This will be discussed in the next section.
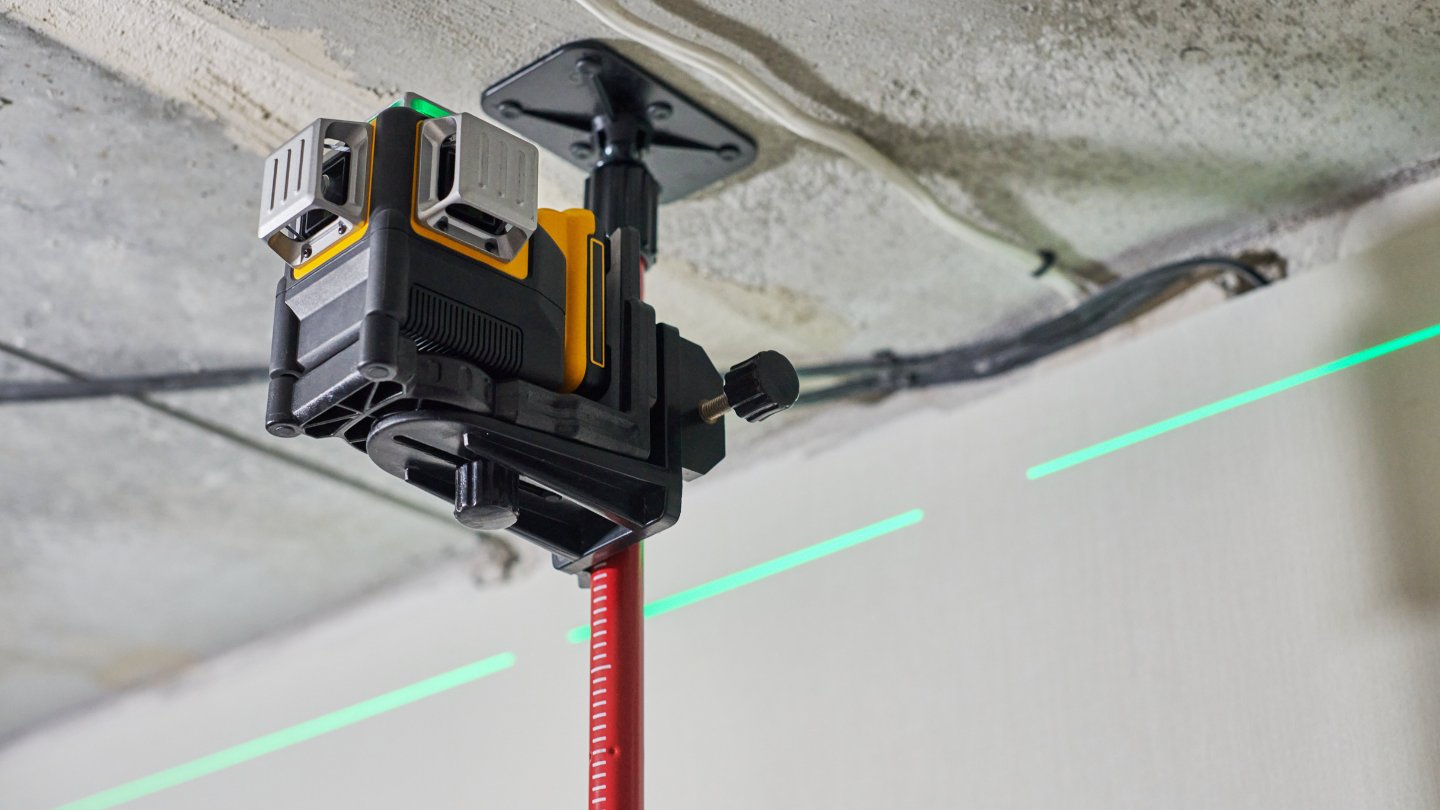
When using a laser level indoors on crown molding, make sure to secure the level firmly in place to avoid any movement. This will ensure accurate and precise alignment of the molding.
Read more: How To Use A Self Leveling Laser Level
Adjusting the Laser Level for Accuracy
Ensuring the accuracy of your laser level is crucial for achieving precise and professional results when installing crown molding. While modern laser levels are designed to be highly accurate, adjustments may still be necessary to compensate for any minor deviations or discrepancies.
Follow these steps to adjust your laser level for accuracy:
- Measurements and Test Cuts: Before adjusting the laser level, take accurate measurements of the room and make test cuts on scrap material to verify the fit of the crown molding. This will help identify any inconsistencies or discrepancies that need to be addressed.
- Check the Line Projection: Use a straightedge or a spirit level to verify the accuracy of the laser line projected by your laser level. Ensure that it is level both horizontally and vertically.
- Adjust the Height and Angle: If you notice any discrepancies in the alignment of the laser line, adjust the height and angle of the laser level accordingly. Most laser levels have built-in controls or knobs for these adjustments. Refer to the manufacturer’s instructions for the specific steps.
- Confirm Accuracy: After making adjustments, check the laser line again with a straightedge or spirit level to confirm the accuracy. Make any further adjustments if necessary.
- Test with Scrap Material: To verify the accuracy of the adjusted laser level, make test cuts on scrap material and check the fit of the crown molding. Ensure that the angles are correct, the joints fit tightly, and the molding aligns with the laser line as intended.
Keep in mind that adjustments to the laser level should be made carefully and in small increments. It’s important not to overcompensate or make drastic changes that could lead to inaccuracies in the installation. Make gradual adjustments and double-check the accuracy at each stage to achieve the desired results.
Now that your laser level is accurately adjusted, you are ready to use it for crown molding installation. The next section will guide you through the process of using the laser level effectively.
Using the Laser Level to Install Crown Molding
Now that you have your laser level set up, aligned, and calibrated for accuracy, it’s time to use it for installing crown molding. Follow these steps to effectively utilize the laser level during the installation process:
- Measure and Mark: Start by measuring the length of the wall where you will be installing the crown molding. Transfer these measurements to the molding itself, marking the appropriate lengths and angles.
- Cut the Crown Molding: Using a miter saw or a coping saw, carefully cut the crown molding according to your marked measurements. Take your time to ensure clean and precise cuts.
- Position the Molding: Position the cut pieces of crown molding along the wall, making sure they align with the reference line projected by the laser level. Use the laser line as a guide to ensure the correct positioning and alignment of the molding.
- Secure the Molding: Once the molding is positioned correctly, secure it to the wall using nails, screws, or adhesive, depending on the material and the specific requirements of your project. Make sure to follow proper installation techniques for crown molding.
- Align with the Laser Level: As you continue installing the crown molding along the wall, constantly refer to the laser level to ensure that each piece is aligned properly with the reference line. The laser line acts as a guide to maintain a level installation.
- Double-Check with a Level: Occasionally, verify the levelness of the installed crown molding using a bubble level or a straightedge. This additional step ensures that the molding is not only aligned with the laser level but also level with the surrounding walls.
- Repeat the Process: Continue measuring, cutting, positioning, securing, and aligning the crown molding along the entire length of the wall. Use the laser level as your constant reference guide to maintain accuracy and consistency throughout the installation.
By utilizing the laser level as your guide, you can ensure that the crown molding is installed level, straight, and aligned perfectly along the wall and ceiling.
Remember to work methodically and carefully, making adjustments as needed along the way. Take your time to achieve the best results, and refer back to the laser level frequently to maintain accuracy.
Now that you know how to use the laser level effectively for crown molding installation, let’s explore some additional tips to enhance your experience and ensure a successful project.
Tips for Using a Laser Level Indoors on Crown Molding
Using a laser level indoors for crown molding installation can greatly simplify the process and ensure precise results. To make the most of your laser level and enhance your experience, consider the following tips:
- Double-check your measurements: Accurate measurements are crucial for a successful crown molding installation. Take your time to measure twice and ensure that your cuts and positioning are precise.
- Use proper safety precautions: Always prioritize safety when working with tools. Wear safety goggles, gloves, and ear protection if necessary. Keep your work area clean and free of obstacles to prevent accidents.
- Check for levelness before each use: Before starting your project or after any adjustments, always check the levelness of your laser level. This will ensure accurate alignment and positioning of the crown molding.
- Consider using additional support: For longer walls or larger rooms, it may be helpful to use additional support such as temporary braces or clamps to hold the crown molding in place while you secure it.
- Make use of auxiliary lines: In addition to the laser line projected by your laser level, you can create auxiliary lines on the walls or ceilings using a pencil or painter’s tape. These lines can serve as additional visual guides during the installation process.
- Take breaks and step back: It’s easy to get caught up in the details of crown molding installation. Take regular breaks to step back and assess your progress. This will help ensure that the molding is visually appealing and symmetrical.
- Practice on scrap or test pieces: If you’re new to crown molding installation or using a laser level, it’s beneficial to practice on scrap or test pieces before tackling the actual installation. This will help you familiarize yourself with the tools and techniques.
- Clean and maintain your laser level: Regularly clean your laser level to remove any dust or debris that may affect its accuracy. Also, check the batteries and ensure they are fully charged or replaced as needed.
- Seek professional guidance if needed: If you’re unsure about any aspect of using a laser level for crown molding installation, don’t hesitate to seek guidance from professionals or experienced DIYers. They can provide valuable tips and advice based on their expertise.
By following these tips, you can effectively use a laser level for crown molding installation and achieve professional-looking results in your home.
However, it’s important to remember that practice makes perfect. The more you work with your laser level and gain experience with crown molding installation, the more confident and skilled you will become. So, don’t be discouraged if it takes a few tries to master the process.
Now, let’s move on to discussing some safety precautions that you should always keep in mind when using a laser level for crown molding installation.
Safety Precautions
When using a laser level indoors for crown molding installation, it is important to prioritize safety to prevent accidents or injuries. Here are some essential safety precautions to keep in mind:
- Wear Personal Protective Equipment (PPE): Always wear appropriate personal protective equipment, such as safety goggles, gloves, and ear protection, to protect yourself from potential hazards. This is especially important when using power tools or working with sharp objects.
- Ensure a Safe and Clean Work Area: Before starting your project, clear the work area of any obstacles or hazards. Keep the space clean and organized to minimize the risk of accidents. Secure loose cables or cords and ensure proper lighting for optimal visibility.
- Follow Manufacturer’s Instructions: Be familiar with the operation and safety guidelines provided by the manufacturer of your laser level and any other tools you are using. Adhere to these instructions to prevent misuse and potential hazards.
- Secure the Laser Level and Molding: Ensure that your laser level is securely mounted or placed on a stable surface to prevent it from falling or moving during the installation process. Similarly, properly secure the crown molding to avoid any accidents or injuries caused by loose or falling pieces.
- Be Cautious with Power Tools: If you are using power tools, such as a miter saw or coping saw, exercise caution and follow proper safety procedures. Keep your hands away from the cutting area and always use the appropriate safety guards and guides provided with the tools.
- Avoid Exposing Eyes to Direct Laser Beams: Direct exposure to laser beams can be harmful to your eyes. Avoid looking directly at the laser beam emitted from the laser level and encourage others in the vicinity to do the same. If necessary, use protective eyewear specifically designed for laser work.
- Turn Off the Laser Level When Not in Use: When taking breaks or not actively using the laser level, always turn it off to avoid any accidental discharge of the laser beam that could harm yourself or others.
- Work at a Comfortable Height: Avoid working at awkward heights or in unstable positions. Use appropriate platforms or stools to reach higher areas safely, ensuring that you maintain your balance and stability throughout the process.
- Take Regular Breaks: Working on crown molding installation can be physically demanding. Take regular breaks to rest, stretch, and hydrate. This will help prevent fatigue and reduce the risk of making mistakes due to exhaustion.
Always prioritize your safety and the safety of others around you while working on your crown molding project. By following these safety precautions, you can complete your installation with peace of mind.
Now, let’s conclude this guide on using a laser level indoors for crown molding and summarize the key points discussed.
Read more: How To Use A Laser Level For Framing
Conclusion
Congratulations! You have reached the end of this comprehensive guide on how to use a laser level indoors for crown molding. By following the steps outlined in this article, you are well-equipped to tackle your crown molding project with confidence and precision.
We started by understanding the intricacies of crown molding and the importance of selecting the right laser level for your project. We then discussed the steps involved in setting up the laser level, aligning it with the crown molding, and adjusting it for accuracy. Using the laser level, we explored how to install crown molding with the utmost precision and attention to detail.
Throughout the guide, we provided valuable tips and safety precautions to enhance your experience, ensure optimal results, and keep you safe while working on your project.
Remember, practice makes perfect. The more you work with your laser level and gain experience in crown molding installation, the more confident and proficient you will become. Don’t be discouraged if it takes a few tries to achieve the desired results. Take your time, follow the steps diligently, and the end result will be beautiful crown molding that enhances the aesthetics of your space.
Lastly, always prioritize safety. Take the necessary precautions, wear appropriate protective equipment, and maintain a clean and organized work area. Safety should always be at the forefront of your mind to prevent accidents or injuries.
We hope this guide has provided you with the knowledge and skills necessary to use a laser level effectively for crown molding installation. Remember, precision and accuracy are key in achieving professional-looking results. So go ahead, confidently embark on your crown molding project, and enjoy the satisfaction of transforming your living space with this timeless decorative element.
Good luck, and happy crown molding installation!
Frequently Asked Questions about How To Use A Laser Level Indoors On Crown Molding
Was this page helpful?
At Storables.com, we guarantee accurate and reliable information. Our content, validated by Expert Board Contributors, is crafted following stringent Editorial Policies. We're committed to providing you with well-researched, expert-backed insights for all your informational needs.


0 thoughts on “How To Use A Laser Level Indoors On Crown Molding”