Articles
How To Use Hilti Laser Level
Modified: February 22, 2024
Learn how to use a Hilti laser level in this comprehensive guide. Find step-by-step articles and tutorials to help you master this powerful tool.
(Many of the links in this article redirect to a specific reviewed product. Your purchase of these products through affiliate links helps to generate commission for Storables.com, at no extra cost. Learn more)
Introduction
Welcome to the world of Hilti laser levels! Whether you’re a DIY enthusiast or a professional contractor, having a reliable and accurate laser level can make all the difference in your projects. Hilti, a trusted name in construction tools and equipment, offers a range of laser levels that are designed to make your leveling and alignment tasks easier and more precise.
In this article, we will explore the various features and functionalities of a Hilti laser level and provide you with comprehensive step-by-step instructions on how to use it effectively. From unboxing and inspection to calibration and troubleshooting, we will cover everything you need to know to get the most out of your Hilti laser level.
Before we dive into the details, it’s important to note that laser levels are precision instruments and should be handled with care. Safety should always be a top priority when working with any construction tool, including laser levels. Always read the user manual and follow the safety precautions provided by the manufacturer.
Now, let’s get started and discover how to harness the power of a Hilti laser level to achieve accurate and professional-level results in your projects.
Key Takeaways:
- Prioritize safety, read the user manual, and follow manufacturer’s guidelines when using a Hilti laser level to ensure secure and accident-free construction projects.
- Regular maintenance, proper cleaning, and calibration checks are essential to extend the lifespan and maintain accurate performance of your Hilti laser level.
Read also: 13 Best Hilti Laser Level for 2025
Safety Precautions
Prioritize safety when using a Hilti laser level to prevent accidents and ensure a secure working environment. Here are some important safety precautions to keep in mind:
- Read the user manual: Familiarize yourself with the manufacturer’s instructions and recommended safety guidelines.
- Protective gear: Wear appropriate personal protective equipment, such as safety goggles and gloves, to safeguard against potential hazards.
- Secure footing: Use stable and secure footing when operating the laser level to prevent slips or falls.
- Avoid direct eye contact: Never stare directly into the laser beam as it can cause eye damage. Use caution when working near others to prevent accidental exposure.
- Keep away from children: Store the laser level in a secure place out of reach of children to prevent accidental use.
- Avoid extreme temperatures and moisture: Laser levels can be sensitive to extreme temperatures and moisture, so store and use them in appropriate conditions.
- Inspect the equipment: Before each use, inspect the laser level for any signs of damage or wear. Do not use if there are visible issues.
- Proper handling: Always hold the laser level firmly and securely to avoid drops or mishandling.
- Secure the work area: Clear the work area of any obstructions or tripping hazards to ensure a safe working environment.
- Disconnect power source: When not in use, disconnect the power source and properly store the laser level to prevent accidental activation.
These safety precautions are general guidelines. Refer to the user manual provided by Hilti for specific safety instructions related to your particular laser level model. By following these precautions, you can minimize the risk of accidents and work confidently with your Hilti laser level.
Unboxing and Inspection
Upon receiving your Hilti laser level, it’s important to carefully unbox and inspect the contents to ensure everything is in proper working order. Here’s a step-by-step guide on how to unbox and inspect your Hilti laser level:
- Find a clean and spacious area to perform the unboxing.
- Remove the packaging material, such as the cardboard box or foam, from the outside of the package.
- Open the package and carefully remove the laser level unit.
- Inspect the laser level for any visible signs of damage, such as scratches, dents, or cracks. If you notice any damage, contact Hilti’s customer support for assistance.
- Check the accessories that come with the laser level, such as the tripod, target plate, and carrying case, if applicable. Ensure they are all present and in good condition.
- Read the user manual thoroughly to familiarize yourself with the features, functionalities, and operating instructions of the laser level.
- Inspect the battery compartment to ensure there is no damage or corrosion.
- Check the laser level for any loose parts or connections. If any parts appear loose, refer to the user manual for instructions on how to properly secure them.
It’s important to perform a thorough inspection to identify any potential issues before using the laser level. If you encounter any problems during the inspection, reach out to Hilti’s customer support for assistance. By ensuring your Hilti laser level is in optimal condition, you can proceed confidently with your leveling and alignment tasks.
Battery Installation
Before you can power on and use your Hilti laser level, you’ll need to install the batteries. The battery installation process may vary depending on the specific model of your laser level. Here’s a general guide on how to install the batteries in your Hilti laser level:
- Refer to the user manual to identify the specific type and number of batteries required for your laser level. Using the correct batteries is crucial for optimal performance.
- Locate the battery compartment on your laser level. It is usually located on the back or side of the device.
- Open the battery compartment by sliding it open or removing the cover, depending on the design of your specific model.
- Insert the batteries into the compartment according to the indicated polarity. Pay attention to the positive (+) and negative (-) symbols to ensure proper alignment.
- Close the battery compartment securely. Ensure that it is properly locked or latched to prevent accidental battery removal during operation.
- Inspect the battery compartment to make sure there are no obstructions or debris that could interfere with the battery contacts.
Once the batteries are properly installed, you can proceed to power on your Hilti laser level and begin using it for your leveling and alignment tasks. It is important to replace the batteries when they are depleted or no longer provide sufficient power. Refer to the user manual for specific instructions on battery replacement for your particular laser level model.
Remember to dispose of used batteries according to local regulations to minimize environmental impact. Many electronics and hardware stores provide battery recycling services for proper disposal.
By following the correct battery installation process and ensuring proper battery maintenance, you can keep your Hilti laser level powered up and ready for precision leveling and alignment tasks in your projects.
Powering On the Laser Level
Once you have installed the batteries in your Hilti laser level, it’s time to power it on and get ready for your leveling and alignment tasks. Here’s how to power on your Hilti laser level:
- Ensure that the battery compartment is securely closed.
- Locate the power button or switch on your laser level. It is usually labeled with a power symbol (circle with a vertical line).
- Press and hold the power button for a few seconds until the laser level powers on.
- Observe the laser diode on the laser level. It may flash or emit a solid beam, depending on the model and operating mode.
- Once the laser level is powered on, it may go through a self-leveling process to ensure accurate leveling. Wait for the self-leveling indicator to stop flashing or remain steady, indicating that the laser level is ready for use.
It’s important to allow the laser level to complete the self-leveling process before proceeding with your alignment tasks. This ensures that the laser level achieves accurate and reliable leveling results.
If the laser level does not power on or if you encounter any difficulties during the power-on process, check the battery installation and ensure that the batteries are properly inserted and have sufficient charge. If the issue persists, consult the user manual or contact Hilti’s customer support for further assistance.
By following the correct power-on procedure, you can activate your Hilti laser level and prepare it for precise and accurate leveling and alignment tasks in your construction projects.
Read more: How To Use A Laser Level
Adjusting the Laser Level
Once your Hilti laser level is powered on and ready for use, it’s important to ensure that the laser beam is properly aligned and adjusted to meet your specific leveling needs. Here are the steps you can follow to adjust the laser level:
- Identify the adjustment knobs or controls on your laser level. These vary depending on the model but typically include horizontal and vertical adjustment knobs or buttons.
- For horizontal alignment, use the horizontal adjustment knob to move the laser beam left or right until it aligns with your desired reference point or marking on the wall or surface.
- For vertical alignment, use the vertical adjustment knob to tilt the laser beam up or down until it aligns with your desired reference point or marking on the wall or surface.
- Some Hilti laser levels have additional controls for slope or angled alignments. Refer to the user manual for specific instructions on adjusting the laser level for slope.
- After making adjustments, observe the laser beam to ensure it is aligned accurately and precisely with your desired reference point or marking. Make further adjustments if necessary.
- Lock the adjustment knobs or controls to secure the laser level in its adjusted position, ensuring that the beam remains steady during your leveling and alignment tasks.
It’s important to take your time and make precise adjustments to achieve the desired leveling and alignment results. If you find that the laser beam is not aligning correctly or if you encounter difficulties in adjusting the laser level, refer to the user manual or contact Hilti’s customer support for further assistance. They can provide specific guidance based on the model of your laser level.
By correctly adjusting the laser level, you can ensure accurate and reliable results in your leveling and alignment tasks, saving time and enhancing the quality of your construction projects.
Selecting the Operating Mode
Hilti laser levels offer different operating modes to accommodate various leveling and alignment tasks. Understanding and selecting the appropriate operating mode is crucial for achieving accurate results. Here’s how to select the operating mode on your Hilti laser level:
- Refer to the user manual to identify the available operating modes for your laser level. Common modes include horizontal, vertical, and slope.
- Locate the mode selection button or switch on your laser level. It may be labeled with the respective operating modes.
- Press or toggle the mode selection button to cycle through the available modes until you reach the desired mode for your task.
- Observe the display or indicator on the laser level to confirm that the selected mode is activated.
Each operating mode serves a specific purpose:
- Horizontal mode: This mode emits a laser beam that is aligned horizontally, allowing you to establish level lines for various applications such as installing cabinets, aligning shelves, or setting up a drop ceiling.
- Vertical mode: This mode emits a laser beam that is aligned vertically, enabling you to create plumb lines for tasks like aligning partitions, installing door frames, or setting up stair railings.
- Slope mode: Some Hilti laser levels offer a slope mode that allows you to set a specific angle for inclined surfaces or slopes. This mode is useful for tasks like grading, landscaping, or installing ramps.
It’s important to select the correct operating mode according to your specific task requirements. The user manual will provide detailed instructions on how to effectively utilize each mode and make the most out of your Hilti laser level.
By selecting the appropriate operating mode, you can tailor the laser level’s functionality to your specific leveling and alignment needs, ensuring precise and accurate results in your construction projects.
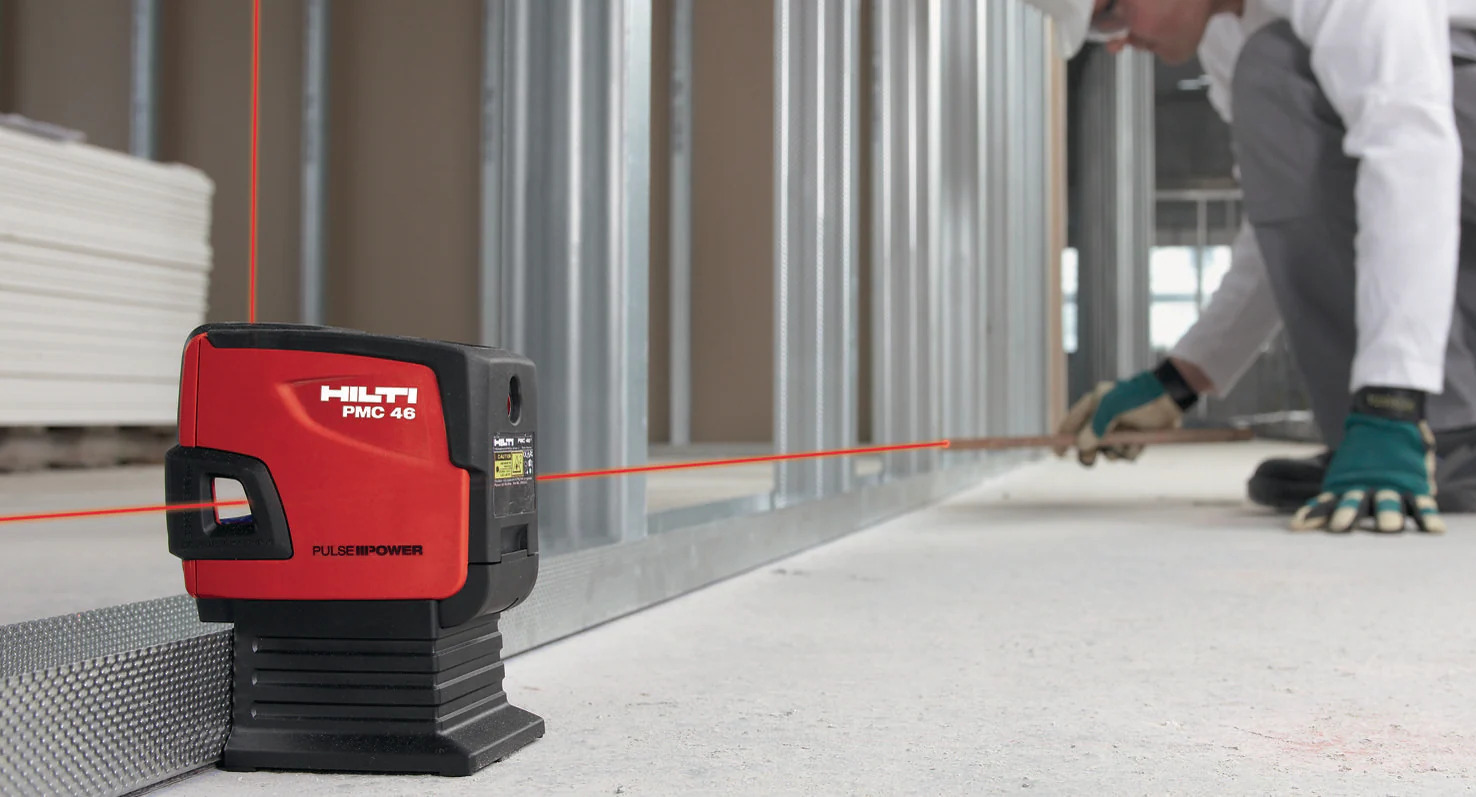
When using a Hilti laser level, ensure that the device is placed on a stable surface and that the laser beam is visible and aligned with the desired reference point. Always refer to the user manual for specific instructions.
Using the Laser Level for Horizontal Alignment
Horizontal alignment is a common task in many construction projects, such as installing shelves, hanging artwork, or setting up a drop ceiling. Using a Hilti laser level for horizontal alignment ensures precise and accurate results. Here’s how to use your laser level for horizontal alignment:
- Ensure that your laser level is powered on and in the horizontal operating mode.
- Set up the laser level on a stable surface or mount it securely onto a tripod. Ensure that it is positioned at an appropriate height for your specific task.
- Aim the laser beam towards the desired reference point or marking on the wall or surface where you want to establish a level line.
- Tweak the horizontal adjustment knob or control to move the laser beam left or right until it aligns precisely with the reference point or marking. Take your time to make small adjustments for accurate alignment.
- Once the laser beam is aligned, mark the position of the laser line on the wall or surface using a pencil or a masking tape.
- You can now use the marked line as a guide for your horizontal alignment task, such as installing shelves or hanging objects.
Remember to avoid directly looking into the laser beam to prevent eye damage. Take necessary precautions and wear safety goggles if required.
If you need to establish multiple parallel lines for your horizontal alignment, you can use a laser detector. The laser detector can detect the laser beam at a distance and help you create additional reference points or markings for alignment.
Always refer to the user manual specific to your Hilti laser level model for additional instructions and tips on achieving precise horizontal alignment.
By utilizing your Hilti laser level for horizontal alignment tasks, you can ensure accurate and professional results, making your construction projects more efficient and visually appealing.
Using the Laser Level for Vertical Alignment
Vertical alignment is a common task in construction projects, such as installing door frames, aligning partitions, or setting up stair railings. A Hilti laser level can greatly assist in achieving precise vertical alignment. Here’s how to use your laser level for vertical alignment:
- Ensure that your laser level is powered on and in the vertical operating mode.
- Set up the laser level on a stable surface or mount it securely onto a tripod. Adjust the height of the laser level as needed for your specific alignment task.
- Aim the laser beam towards the desired reference point or marking on the wall or surface where you want to establish a plumb line.
- Use the vertical adjustment knob or control to tilt the laser beam up or down until it aligns precisely with the reference point or marking. Take your time to make small adjustments for accurate alignment.
- Once the laser beam is aligned, mark the position of the plumb line on the wall or surface using a pencil or a masking tape.
- You can now use the marked line as a guide for your vertical alignment task, such as installing door frames or aligning partitions.
Remember to avoid direct eye contact with the laser beam to protect your eyes. Consider wearing safety goggles if necessary.
If you need to establish multiple parallel plumb lines for your vertical alignment, you may use a laser detector to detect the laser beam at a distance and create additional reference points or markings.
Always refer to the user manual specific to your Hilti laser level model for additional instructions and guidance on achieving precise vertical alignment.
By using your Hilti laser level for vertical alignment tasks, you can achieve accurate and professional results, enhancing the quality and efficiency of your construction projects.
Read more: How To Use A Self Leveling Laser Level
Setting Slope with the Laser Level
Setting slope is a crucial task in construction projects that require inclined surfaces or angled alignments, such as grading, landscaping, or installing ramps. Some Hilti laser levels offer a slope mode that allows you to set a specific angle. Here’s how to set slope using your Hilti laser level:
- Ensure that your laser level supports slope functionality and is set to the slope operating mode.
- Set up the laser level on a stable surface or mount it securely onto a tripod. Adjust the height and position of the laser level to align with your desired slope.
- Refer to the user manual for the specific steps to activate and adjust the slope on your particular Hilti laser level model.
- Depending on the model, you may have a dedicated control or button to adjust the slope angle. Use this control to set the desired slope by increasing or decreasing the angle.
- Observe the laser beam to ensure it aligns with the desired slope angle. Make necessary adjustments until the slope is accurately set.
- Once the slope is set, mark the position or trajectory of the laser beam to create the desired slope for your construction task, such as grading or installing ramps.
It’s important to note that setting slope with a laser level requires precise adjustments and careful measurements. Take your time to ensure accurate results, and consult the user manual for specific instructions and recommendations for setting slope angles.
Using slope mode with your Hilti laser level allows you to achieve accurate and efficient alignments in projects that require slopes. It simplifies tasks like grading or creating level surfaces on inclined terrains.
Always refer to the user manual specific to your Hilti laser level model for detailed instructions and tips on utilizing the slope feature effectively.
Calibrating the Laser Level
Calibrating your Hilti laser level ensures that it is accurately aligned and provides precise leveling and alignment results. While some laser levels are factory-calibrated, regular calibration may be necessary to maintain optimal performance. Here’s how to calibrate your Hilti laser level:
- Refer to the user manual for specific calibration instructions for your particular Hilti laser level model. Different models may have varying calibration procedures.
- Find a stable and level surface where you can perform the calibration process.
- Power on the laser level and allow it to complete the self-leveling process if applicable.
- Place the laser level on the stable surface and ensure it is positioned in a way that it can project the laser beam in a level and straight line.
- Aim the laser beam towards a target or reference point at a reasonable distance.
- Observe the emitted laser beam and compare it to the target or reference point, making note of any misalignment or deviation.
- Use the calibration controls or knobs provided with your laser level to adjust the beam until it aligns accurately with the target or reference point.
- Repeat the calibration process several times from different positions and angles to ensure consistent alignment.
- Once you are satisfied with the calibration, lock the calibration controls or knobs to secure the adjusted position.
- Perform regular checks and recalibration as needed to ensure ongoing accuracy and optimal performance of your laser level.
Calibration requirements may vary based on factors such as transportation or environmental conditions. It is important to follow the manufacturer’s recommended calibration intervals and guidelines for your specific laser level model.
By calibrating your Hilti laser level regularly, you can maintain accurate leveling and alignment results, ensuring the overall success of your construction projects.
Always refer to the user manual specific to your Hilti laser level model for detailed calibration instructions and tips to achieve precise results.
Troubleshooting Common Issues
While Hilti laser levels are designed for reliable performance, you may encounter some common issues during their use. Here are some troubleshooting tips to help you address and resolve these issues:
- No laser beam: Check if the laser level is powered on and the batteries are properly installed and charged. Ensure that the self-leveling process has completed, if applicable. If the issue persists, inspect the laser aperture for any obstructions and clean it as necessary. Contact Hilti’s customer support for further assistance.
- Inaccurate leveling: If the laser level is not achieving accurate leveling, check the surface on which it’s placed for stability and ensure it is level. Make sure the laser level is on a stable surface or securely mounted on a tripod. Check for any visible damage or malfunctioning components and refer to the user manual for proper adjustment procedures.
- Poor visibility of laser beam: Ensure that you are using the laser level in appropriate lighting conditions. In bright environments, use a laser detector to detect the laser beam. Clean the laser aperture and target plate, if applicable, to remove any dirt or debris that may be obstructing the visibility of the laser beam.
- Battery issues: If you experience battery-related issues, such as short battery life or difficulty powering on the laser level, check the battery contacts for corrosion or poor connections. Replace the batteries, if necessary, with fresh ones of the recommended type and ensure they are properly inserted and secured.
- Misalignment during adjustment: If you encounter difficulty in making precise adjustments, ensure that you are using proper techniques and following the instructions provided in the user manual. Take your time to make small and measured adjustments, and always double-check the alignment after each adjustment.
If you encounter any other issues or difficulties with your Hilti laser level that cannot be resolved through troubleshooting, it is recommended to contact Hilti’s customer support for further assistance. They have the expertise to provide specific guidance and help you troubleshoot and resolve any issues you may be facing.
Regular maintenance, following the recommended usage guidelines, and proper storage of your Hilti laser level can help prevent many common issues and ensure its optimal performance.
Remember to consult the user manual specific to your Hilti laser level model for detailed troubleshooting instructions and recommendations.
Maintenance and Cleaning
Proper maintenance and regular cleaning of your Hilti laser level are important to ensure its longevity and optimal performance. By following these maintenance and cleaning guidelines, you can extend the lifespan of your laser level and maintain accurate leveling and alignment results:
- Store properly: When not in use, store your laser level in a clean and dry place, preferably in its designated carrying case or protective bag. This will protect it from dust, moisture, and potential damage.
- Avoid extreme conditions: Avoid exposing your laser level to extreme temperatures, moisture, or direct sunlight for prolonged periods. Extreme conditions can affect the performance and accuracy of the laser level.
- Regular checks: Perform regular visual inspections of your laser level for any signs of damage, wear, or loose parts. Check the battery compartment for corrosion, and replace any damaged or worn-out parts as needed.
- Clean the laser aperture: Dust, dirt, and debris can accumulate on the laser aperture over time, diminishing the visibility and accuracy of the laser beam. Use a clean, lint-free cloth to gently wipe the laser aperture and remove any particles. Avoid using harsh chemicals that may damage the lens.
- Clean the target plate (if applicable): If your laser level has a target plate, clean it regularly using a damp cloth. Ensure that the target plate is free from any dirt, smudges, or scratches that may affect its functionality.
- Battery maintenance: Inspect the battery contacts regularly for any signs of corrosion or dirt buildup. Clean the contacts using a soft cloth or a cotton swab dipped in rubbing alcohol. Ensure that the batteries are inserted and secured properly to maintain a reliable power source.
- Calibration checks: Periodically check the accuracy of your laser level by comparing its results with a known reference point or leveling tool. If you notice any significant deviation, refer to the user manual for calibration procedures or contact Hilti’s customer support for assistance.
Regular maintenance and proper cleaning will help preserve the functionality and accuracy of your Hilti laser level. By incorporating these practices into your routine, you can ensure consistent and reliable performance in your leveling and alignment tasks.
Always refer to the user manual specific to your Hilti laser level model for detailed maintenance instructions and recommendations.
Read more: How To Use A Laser Level For Framing
Conclusion
Congratulations! You now have a comprehensive understanding of how to use and maintain your Hilti laser level effectively. Whether you are a DIY enthusiast or a professional contractor, having a reliable and accurate laser level is essential for achieving precise leveling and alignment results in your construction projects.
We started by emphasizing the importance of safety precautions when working with any construction tool, including laser levels. Always prioritize safety and follow the guidelines provided by Hilti to protect yourself and those around you.
Throughout this article, we covered various topics such as unboxing and inspection, battery installation, powering on the laser level, adjusting the laser level for horizontal and vertical alignment, setting slope, calibrating the laser level, troubleshooting common issues, and maintenance and cleaning tips.
Remember to consult the user manual specific to your Hilti laser level model for detailed instructions and guidelines tailored to your device.
By following the step-by-step instructions provided and incorporating proper maintenance and cleaning practices into your routine, you can ensure the longevity and optimal performance of your Hilti laser level.
Whether you’re leveling shelves, aligning partitions, grading landscapes, or tackling any other construction task that requires precise leveling and alignment, your Hilti laser level will be an invaluable tool to help you achieve professional-level results.
Now, go ahead and put your newfound knowledge to use. Level, align, and conquer your construction projects with confidence and precision using your Hilti laser level!
Frequently Asked Questions about How To Use Hilti Laser Level
Was this page helpful?
At Storables.com, we guarantee accurate and reliable information. Our content, validated by Expert Board Contributors, is crafted following stringent Editorial Policies. We're committed to providing you with well-researched, expert-backed insights for all your informational needs.


0 thoughts on “How To Use Hilti Laser Level”