Home>Articles>How To Make Your Kegerator Convert To Home Brew
Articles
How To Make Your Kegerator Convert To Home Brew
Modified: October 19, 2024
Learn how to convert your kegerator into a home brew setup with our informative articles. Start brewing your own beer at home and save money!
(Many of the links in this article redirect to a specific reviewed product. Your purchase of these products through affiliate links helps to generate commission for Storables.com, at no extra cost. Learn more)
Introduction
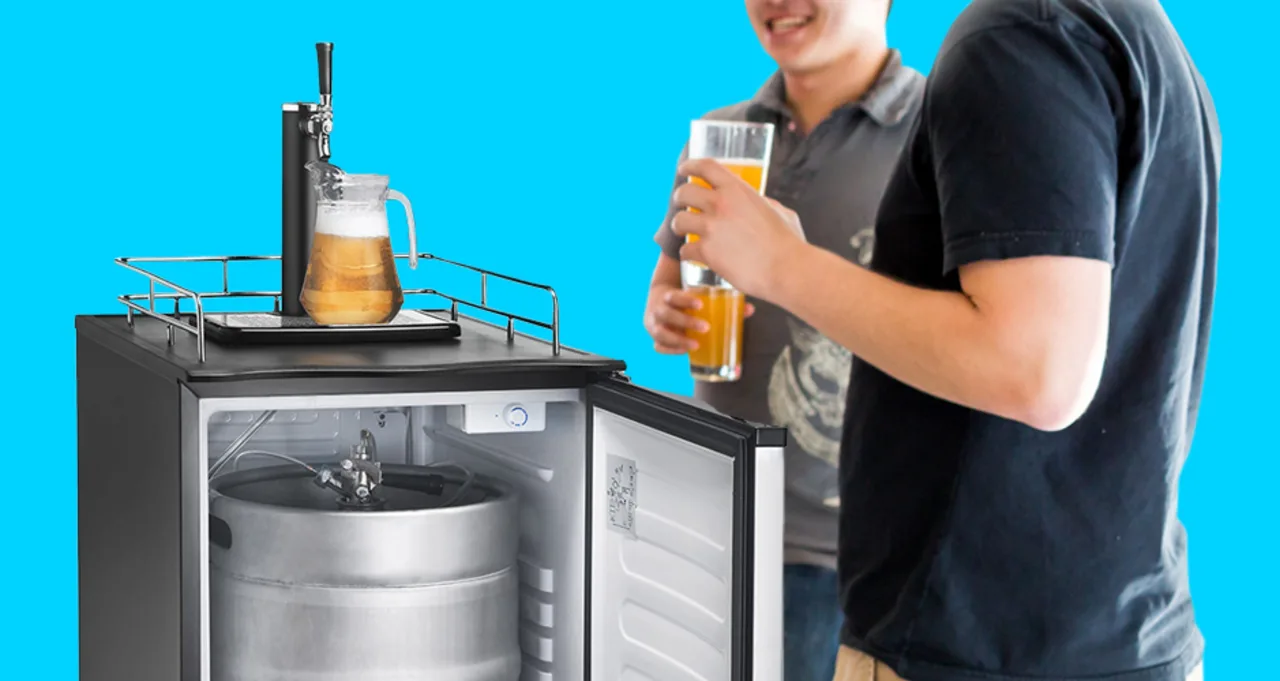
Welcome to the exciting world of home brewing! If you’re passionate about beer and want to take your hobby to the next level, converting your kegerator to accommodate home brew is a fantastic way to do so. Not only will it allow you to enjoy the fruits of your brewing labor in the comfort of your own home, but it will also give you complete creative control over your beer recipes and flavors.
In this article, we will guide you through the step-by-step process of converting your kegerator into a home brew-friendly system. From gathering the necessary tools to carbonating and dispensing your home brew, we’ll cover everything you need to know to make this transition successfully.
Before we dive into the conversion process, it’s important to note that the specific steps and requirements may vary depending on the type and model of your kegerator. Be sure to consult the manufacturer’s instructions or seek professional guidance if needed. With that said, let’s get started on transforming your kegerator into the perfect home brew setup!
Before you begin, make sure you have all the necessary tools and equipment ready. This will ensure a smooth conversion process and prevent any unnecessary delays. Here’s a list of what you’ll need:
- Wrench or screwdriver (depending on your kegerator model)
- Home brew tap system kit
- Kegs and CO2 tanks
- Sanitizing solution
- Cleaning brushes
Once you have these tools and equipment on hand, you’re ready to proceed with the conversion process. Remember, patience and attention to detail are key to achieving a successful home brew setup. So, let’s move on to the first step: cleaning and sanitizing your kegerator.
Key Takeaways:
- Embrace the Exciting World of Home Brewing
Transform your kegerator into a home brew-friendly system and enjoy the freedom to craft unique beer recipes with complete creative control. Share your handcrafted creations with friends and fellow beer enthusiasts, and savor the satisfaction of seeing others appreciate your unique flavors. - Elevate Your Beer Experience with DIY Kegerator Conversion
By following the step-by-step process, you can convert your kegerator to accommodate home brew, from cleaning and sanitizing to installing a tap system and carbonating your beer. Enjoy the fruits of your brewing labor and take pride in creating something truly unique and delicious.
Step 1: Gather the Necessary Tools and Equipment
Before you can begin converting your kegerator to accommodate home brew, you’ll need to gather all the necessary tools and equipment. Having everything you need readily available will make the conversion process much smoother. Here’s a detailed list of what you’ll need:
- Wrench or screwdriver: The specific tool you need will depend on your kegerator model. Check the user manual or consult the manufacturer to determine which one you’ll need.
- Home brew tap system kit: This kit will include the necessary components for dispensing and serving home brew, such as taps, faucets, shanks, and hoses. Make sure to choose a kit that is compatible with your kegerator.
- Kegs and CO2 tanks: To store and carbonate your home brew, you’ll need kegs and CO2 tanks. The size and number of kegs will depend on your brewing volume and frequency.
- Sanitizing solution: It’s crucial to keep your kegerator and all brewing equipment clean and free from any bacteria or contaminants. Invest in a good sanitizing solution specifically designed for brewing purposes.
- Cleaning brushes: These will come in handy when cleaning the kegerator and keg components. Look for brushes with different sizes to ensure you can reach all the nooks and crannies.
Once you have gathered all these tools and equipment, you’re ready to move on to the next steps of the conversion process. Remember, it’s crucial to have everything prepared to avoid any delays or complications along the way. With your tools at the ready, proceed to Step 2: cleaning and sanitizing your kegerator.
Step 2: Clean and Sanitize Your Kegerator
Before you start the conversion process, it’s essential to thoroughly clean and sanitize your kegerator. This is crucial for maintaining the quality and taste of your home brew.
First, unplug your kegerator and remove all the kegs, beer lines, faucets, and any other components that will be replaced or cleaned. Use a wrench or screwdriver to disconnect any fittings and remove them from the kegerator.
Next, prepare a sanitizing solution according to the manufacturer’s instructions. Most sanitizers need to be mixed with water to create the proper concentration. Fill a bucket or container with this solution and place all the removable kegerator components into it.
Allow the kegerator components to soak in the sanitizing solution for the recommended amount of time. This will usually be around 10-15 minutes, but make sure to check the instructions provided with your specific sanitizer.
While the components are soaking, use a soft cloth or sponge to clean the interior of the kegerator. Remove any spilled beer, residue, or dirt that may have accumulated. Pay special attention to the seals, gaskets, and corners of the kegerator to ensure a thorough cleaning.
Once the soaking time is complete, remove the kegerator components from the sanitizing solution and rinse them thoroughly with clean water. Make sure to remove any residue from the surfaces and give them a final rinse to remove any remaining sanitizer.
Dry all the components completely using a clean towel or allow them to air dry. Be sure to check that everything is completely dry before proceeding to the next steps.
Now that your kegerator and its components are clean and sanitized, you’re ready to move on to Step 3: removing the commercial tap system. Stay tuned for the next part of the conversion process!
Step 3: Remove the Commercial Tap System
With your kegerator fully cleaned and sanitized, it’s time to remove the existing commercial tap system to make way for your home brew setup. Removing the commercial tap system may involve disconnecting beer lines, removing faucets, and dismantling any other components that are part of the system.
Start by disconnecting the beer line from the coupler attached to the keg. Use a wrench or screwdriver to loosen any fittings and carefully remove the beer line. Be cautious not to spill any remaining beer, as it can be sticky and leave residue.
Next, remove the faucet from the tap tower or shank. Depending on the type of tap system you have, this may involve unscrewing or loosening a nut that secures the faucet in place. Once loosened, gently pull the faucet out of the tap tower.
If your kegerator has a drip tray, remove it by unscrewing any screws or brackets holding it in place. Clean and sanitize the drip tray separately, as it may have collected spills or residue.
Inspect the tap tower or shank to ensure that all components of the commercial tap system have been removed. Clean any remaining residue or debris from the area to prepare it for the installation of your home brew tap system.
Once you have removed the commercial tap system and cleaned the area, you’re ready to move on to Step 4: installing a home brew tap system. This step will guide you through the process of setting up your own tap system specifically designed for dispensing your home brew. Get ready to dive into the exciting world of homemade beer!
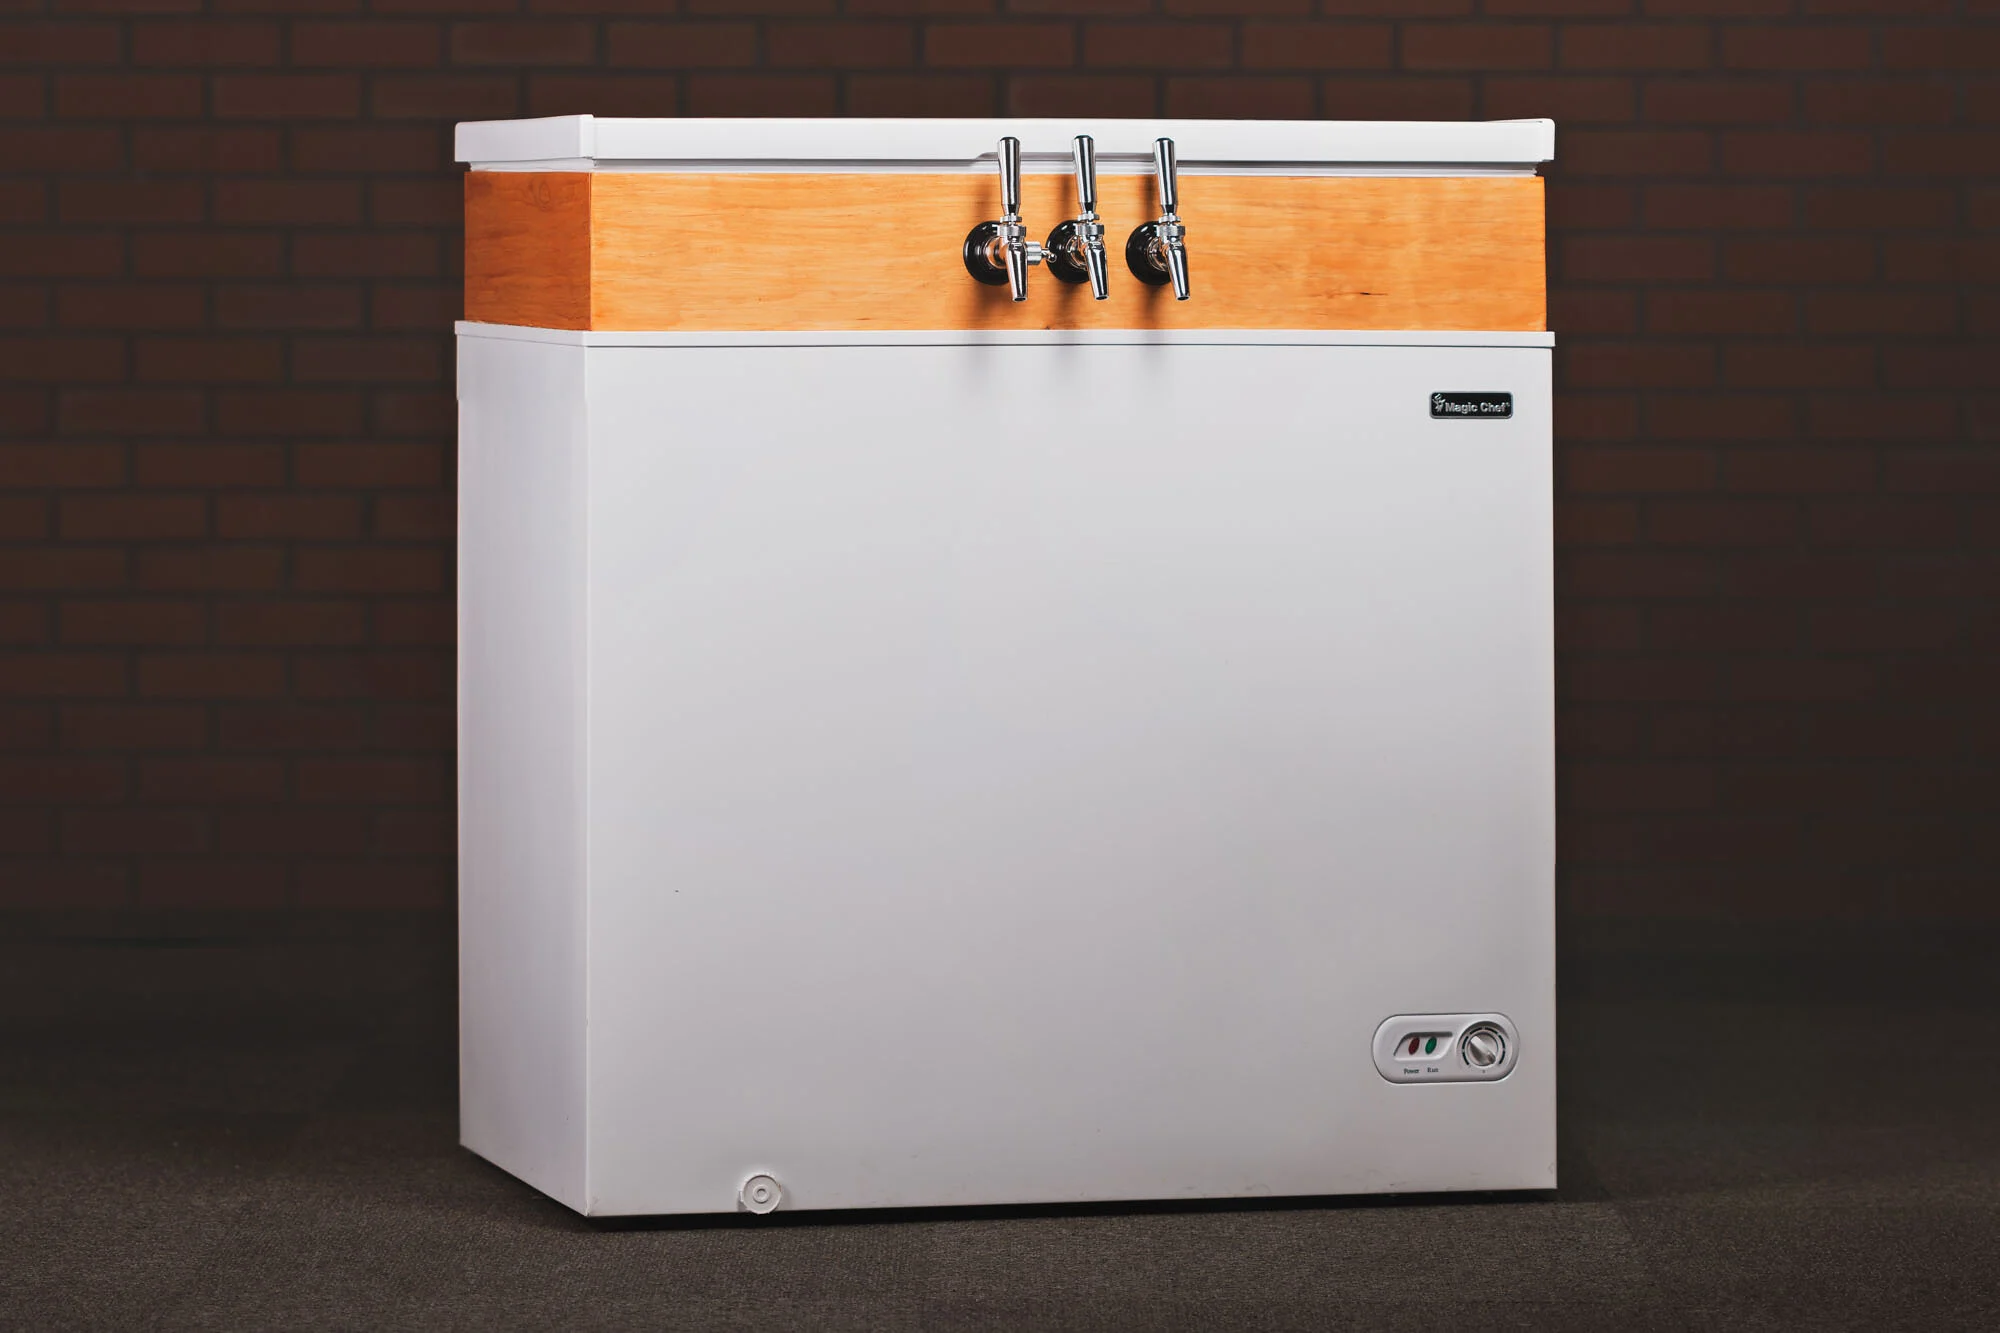
Step 4: Install a Home Brew Tap System
Now that you’ve removed the commercial tap system, it’s time to install a home brew tap system that is specifically designed for dispensing your own beer creations. This step will guide you through the process of setting up your tap system in your kegerator.
First, unpack your home brew tap system kit and familiarize yourself with all the components. The kit will typically include taps, faucets, shanks, hoses, and any necessary connectors or fittings.
Begin by attaching the shank to the tap tower, following the manufacturer’s instructions. The shank serves as a connector between the faucet and the beer line, allowing beer to flow from the keg to the tap.
Once the shank is securely attached, screw the faucet into the end of the shank. Ensure that it is tightened properly but be careful not to over-tighten, as this could damage the components.
Next, connect the beer line to the shank using the appropriate connector or fitting. Make sure it is securely attached, as any loose connections may cause leaks or a disruption in beer flow.
If your tap system kit includes a manifold, which allows you to dispense beer from multiple kegs simultaneously, install it according to the manufacturer’s instructions. This will require connecting the individual beer lines from each keg to the manifold.
After you have completed the installation of the tap system, it’s important to check for any leaks. Turn on the CO2 gas and pressurize the system. Using a spray bottle filled with a soap and water solution, spray it on all the connections and fittings. If you see any bubbles forming, tighten the connections until the leaks stop.
Once you are confident that there are no leaks, you are ready to move on to the next step: transferring your home brew into kegs. This step will guide you through the process of moving your brewed beer from fermenters to kegs in preparation for carbonation and eventual dispensing. Get ready to bring your homemade beer to its final home!
Read more: How To Make A Kegerator For Cold Brew
Step 5: Transfer Your Home Brew into Kegs
With your home brew tap system installed and ready to go, it’s time to transfer your homemade beer from fermenters to kegs. This step is crucial for carbonating and conditioning your beer before it’s dispensed through the tap system.
Before you begin the transfer process, make sure your kegs are clean and sanitized. Use a sanitizing solution and rinse the kegs thoroughly to ensure that they are free from any potential contaminants.
Start by attaching a sanitized tubing to the spigot or racking cane of your fermentation vessel. If using an auto-siphon or racking cane, you may need to start the siphoning process by priming the tubing with a few pumps or by keeping one end in a lower position than the vessel.
As the beer begins to flow, carefully transfer it into the keg, leaving behind any excess sediment or trub at the bottom of the fermenter. Avoid too much agitation during the transfer to minimize the introduction of oxygen, which can degrade the beer’s quality.
It’s important to be mindful of the fill level in the kegs. Leave enough headspace to accommodate the carbonation process without overflowing. Typically, it’s recommended to leave about 1 inch of headspace in the kegs.
Once the kegs are filled, seal them tightly using the appropriate keg seals or O-rings. Double-check that all connections and fittings are secure to prevent any leaks during the carbonation process.
At this point, you have successfully transferred your home brew into kegs. It’s time to move on to the next step, Step 6: carbonating your home brew. Stay tuned as we guide you through the process of carbonating your beer to achieve the perfect level of carbonation for a refreshing pour from your newly installed tap system!
When converting a kegerator to home brew, make sure to clean and sanitize all parts thoroughly to avoid any contamination from previous use. This will ensure the quality and taste of your home brewed beer.
Step 6: Carbonate Your Home Brew
Now that your home brew is safely transferred into kegs, it’s time to carbonate it to achieve that perfect level of carbonation and make it ready for consumption. Carbonation enhances the flavor and mouthfeel of your beer, giving it that refreshing fizz we all love.
There are two common methods to carbonate your home brew: natural carbonation and forced carbonation. Let’s explore both options:
Natural Carbonation:
In this method, you allow the beer to naturally carbonate over time by adding a small amount of priming sugar to each keg before sealing it. The residual yeast in the beer will consume the sugar, producing carbon dioxide as a byproduct.
To carbonate your home brew naturally, calculate the appropriate amount of priming sugar based on your beer style and desired carbonation level. Dissolve the sugar in a small amount of boiling water and then distribute it evenly among the kegs.
Seal the kegs tightly and let them sit at room temperature for a week or two to allow the yeast to ferment the priming sugar and carbonate the beer. Remember to periodically check for leaks and relieve any excess pressure that may build up.
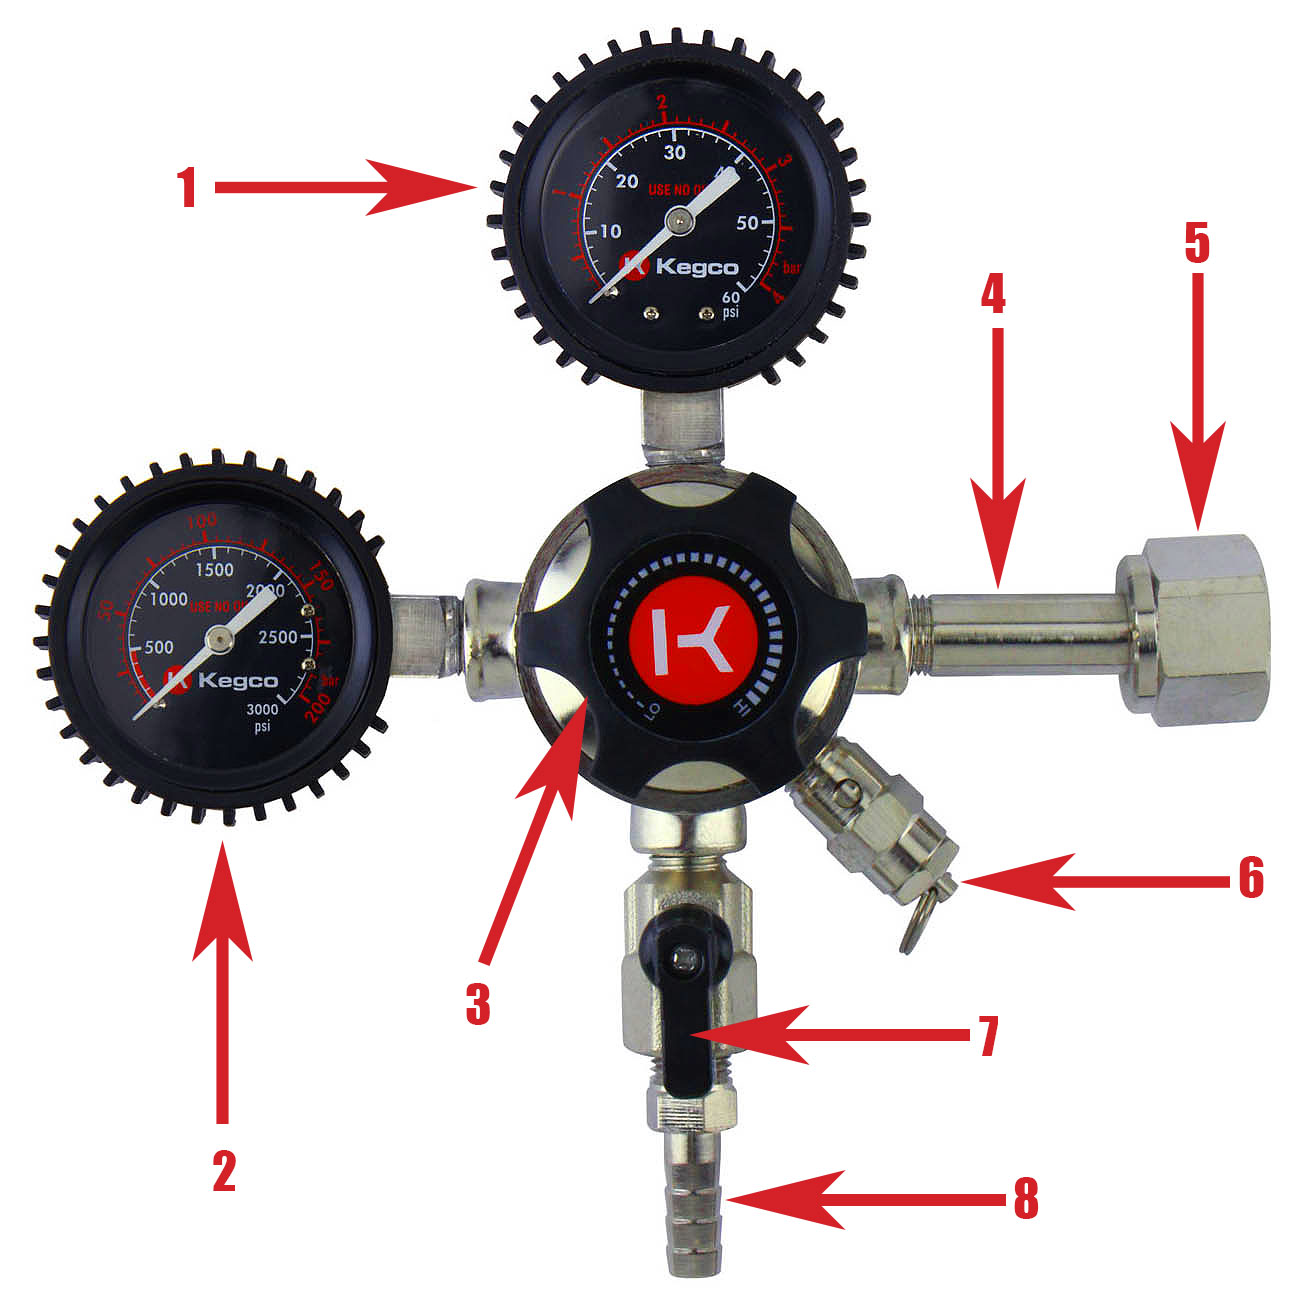
Forced Carbonation:
If you’re looking for a faster carbonation method, forced carbonation is the way to go. With this method, you’ll be using CO2 to carbonate the beer by applying pressure directly into the kegs.
Connect the CO2 tank to the kegs using the appropriate fittings and hoses. Set the pressure on your CO2 regulator to the desired level based on your beer style and carbonation preferences.
Keep the kegs refrigerated and apply the CO2 pressure to the kegs. This process typically takes a few days, but you can periodically check the carbonation level by dispensing a small sample from the tap and tasting it. Adjust the CO2 pressure if needed to attain the desired carbonation.
Now that your home brew is carbonated, it’s time to move on to the final step: dispensing and enjoying your beer! This is where your home brew tap system comes into play, allowing you to pour your delicious creations straight from the keg.
Read more: How To Make A Kegerator Handle
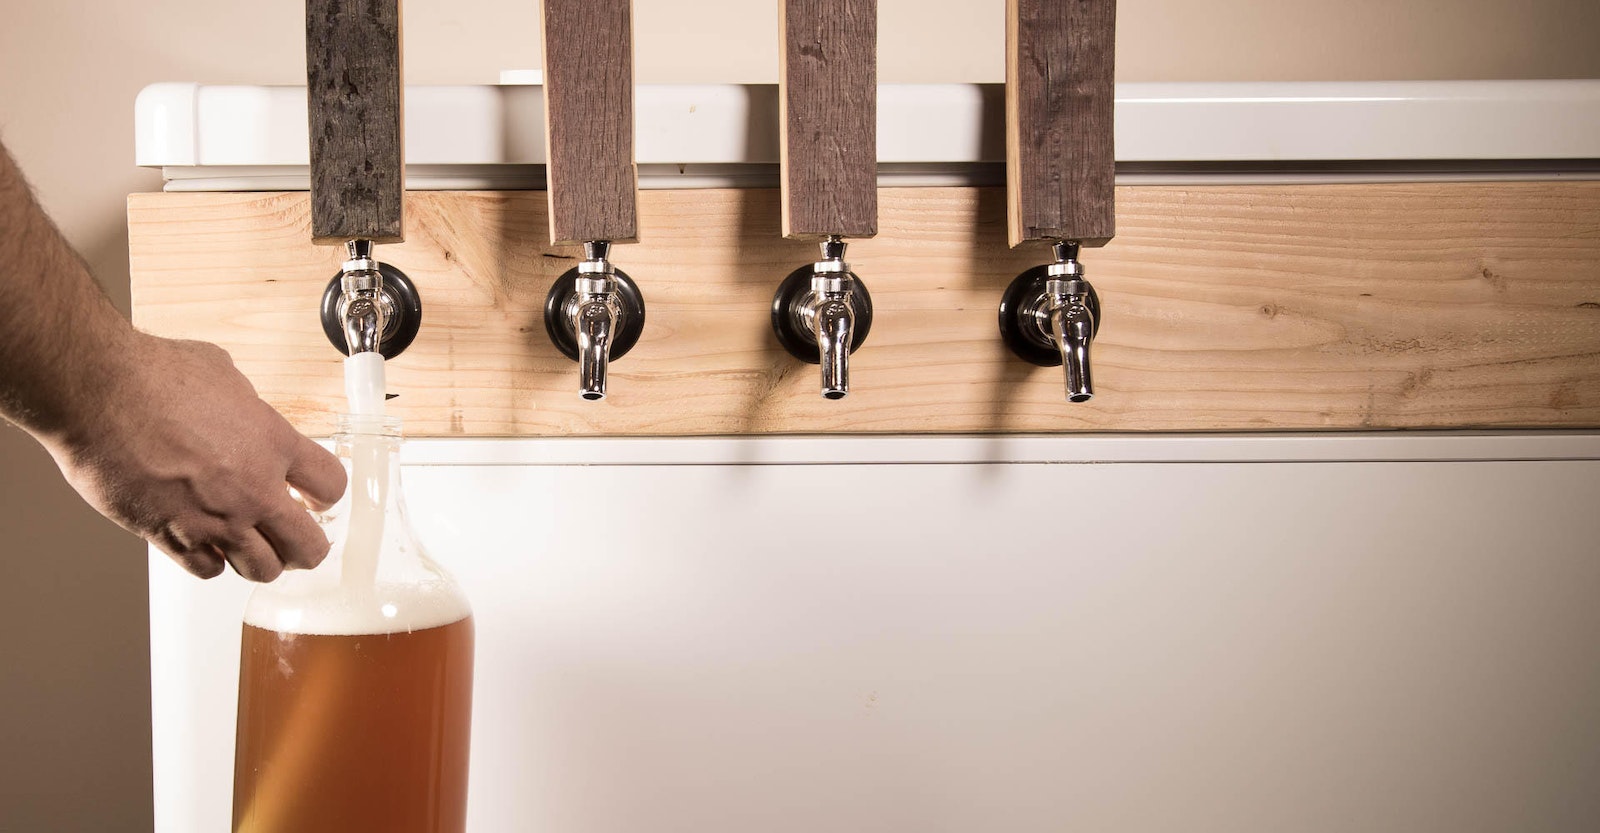
Step 7: Dispense and Enjoy Your Home Brew
Congratulations! You’ve made it to the final step of the kegerator conversion process: dispensing and enjoying your home brew. Now it’s time to sit back, relax, and savor the fruits of your brewing labor.
To begin, connect the beer line from your tap system to the keg. Make sure that all connections are secure and that there are no leaks. Double-check that your CO2 tank is properly pressurized and ready to dispense the beer.
Before pouring your first glass, it’s a good idea to purge the beer line of any residual air or foam. To do this, open the tap briefly and let a small amount of beer flow through until you see a clear stream without excessive foam.
Once the line is purged, it’s time to pour your home brew! Open the tap slowly and at a slight angle to minimize foam formation. Fill your glass by gradually tipping it upright as the beer level rises. Be mindful of the headspace in the glass to avoid excessive foam.
Take a moment to appreciate the aroma, color, and carbonation of your beer as you pour. Allow it to settle for a moment before taking that first sip.
Now, sit back, relax, and enjoy the flavors of your homemade beer. Share it with friends and fellow beer enthusiasts, and take pride in the fact that you’ve created something unique and delicious.
Remember to clean your tap system and kegerator regularly to maintain the quality of your home brew. This includes cleaning the tap lines, faucets, and keg connectors to prevent any buildup of bacteria or off-flavors.
As you continue to refine your brewing skills, don’t be afraid to experiment with new recipes, flavors, and techniques. The kegerator conversion opens up a world of possibilities for you to explore and craft your own signature beers.
So, raise a glass to your successful kegerator conversion and the delicious home brew that now flows from it. Cheers to your brewing journey and the enjoyment of your handcrafted beer!
Conclusion
Converting your kegerator to accommodate home brew is a rewarding endeavor that allows you to fully immerse yourself in the world of brewing. By following the step-by-step process outlined in this article, you have learned how to transform your kegerator into a home brew-friendly system, from gathering the necessary tools to dispensing and enjoying your delicious creations.
Throughout this journey, you have acquired the skills and knowledge needed to maintain a clean and sanitized kegerator, install a home brew tap system, transfer your brewed beer into kegs, carbonate your beer, and finally, enjoy the fruits of your labor.
With your newly converted kegerator, you have the freedom to experiment with different beer styles, ingredients, and flavors. Whether you’re a seasoned brewer or just starting out, this conversion opens up a world of possibilities to express your creativity and passion for beer.
Remember to continue honing your brewing skills, learning from each batch and experimenting with new techniques. The joy of home brewing lies in the process of crafting unique and flavorful beers tailored to your taste preferences.
Lastly, don’t forget to share your home brew with friends, family, and fellow beer enthusiasts. Use the tap system to pour perfectly carbonated pints and enjoy the satisfaction of seeing others appreciate your creations.
So go ahead, embark on your kegerator conversion journey and get ready to take your home brewing to new heights. Cheers to your success as you create and enjoy the perfect pint of your very own home brew!
Frequently Asked Questions about How To Make Your Kegerator Convert To Home Brew
Was this page helpful?
At Storables.com, we guarantee accurate and reliable information. Our content, validated by Expert Board Contributors, is crafted following stringent Editorial Policies. We're committed to providing you with well-researched, expert-backed insights for all your informational needs.


0 thoughts on “How To Make Your Kegerator Convert To Home Brew”