Articles
How To Repair Cracks In Basement Wall
Modified: October 20, 2024
Learn the most effective techniques and tools for repairing cracks in your basement walls with our informative articles. Gain the knowledge you need to tackle this common home repair issue.
(Many of the links in this article redirect to a specific reviewed product. Your purchase of these products through affiliate links helps to generate commission for Storables.com, at no extra cost. Learn more)
Introduction
Welcome to our comprehensive guide on how to repair cracks in basement walls. If you are a homeowner, you might be familiar with the stress and worry that comes with discovering cracks in your basement walls. Cracks in basement walls can be a sign of structural damage or water intrusion, and it is important to address them promptly to prevent further damage.
In this article, we will delve into the causes of cracks in basement walls, provide a list of tools and materials you will need for the repair, guide you through the step-by-step process, and offer tips on preventing future cracks. By following our advice and taking the necessary steps, you can ensure the structural integrity of your basement and maintain a dry and secure space.
Before we dive into the repair process, it is essential to understand the common causes of cracks in basement walls. Cracks can occur due to various factors, including:
- Settlement: Over time, the soil underneath your foundation can shift and settle, causing stress on the walls and leading to cracks.
- Hydrostatic pressure: Excessive groundwater or poor drainage around your foundation can create hydrostatic pressure, which can result in cracks.
- Temperature changes: Extreme temperature fluctuations can cause the materials in your basement walls to expand and contract, leading to cracks.
- Structural issues: Construction defects or insufficient reinforcement can weaken the walls and make them prone to cracking.
To effectively repair cracks in basement walls, you will need a toolkit that includes the following:
- Protective gear: Safety goggles, gloves, and a dust mask to protect yourself during the repair process.
- Masonry chisel and hammer: Necessary for widening cracks and creating a V-shaped groove for proper patching.
- Wire brush: Used to clean the crack and remove any loose debris or particles.
- Epoxy or polyurethane injection system: These systems are common methods for filling and sealing cracks in basement walls.
- Concrete patching compound: A high-quality patching material to restore the structural integrity of the wall.
- Paintbrush: Used for applying sealant or paint to the repaired area.
Now that you have an idea of the causes and the tools required, let’s move on to the preparation process before repairing cracks in your basement walls. This step is crucial to ensure a successful repair and prevent any complications in the future.
Key Takeaways:
- Addressing cracks in basement walls promptly with the right tools and materials, proper preparation, and a thorough repair process can ensure the structural integrity of your home and prevent further damage.
- Implementing preventive measures, such as proper drainage, foundation waterproofing, and regular maintenance, can significantly reduce the risk of future cracks in basement walls, preserving the stability and durability of your home.
Read more: When To Worry About Cracks In Basement Walls
Understanding the Causes of Cracks in Basement Walls
Before attempting to repair cracks in basement walls, it is essential to understand the underlying causes. By identifying the root cause, you can implement an effective repair strategy and prevent the recurrence of cracks in the future.
One of the primary causes of cracks in basement walls is settlement. Over time, the soil underneath your foundation can shift and settle unevenly. This can exert significant pressure on the walls, leading to cracks. Settlement can occur due to various factors, including poor soil compaction during construction, changes in soil moisture content, or the natural aging of the building’s foundation.
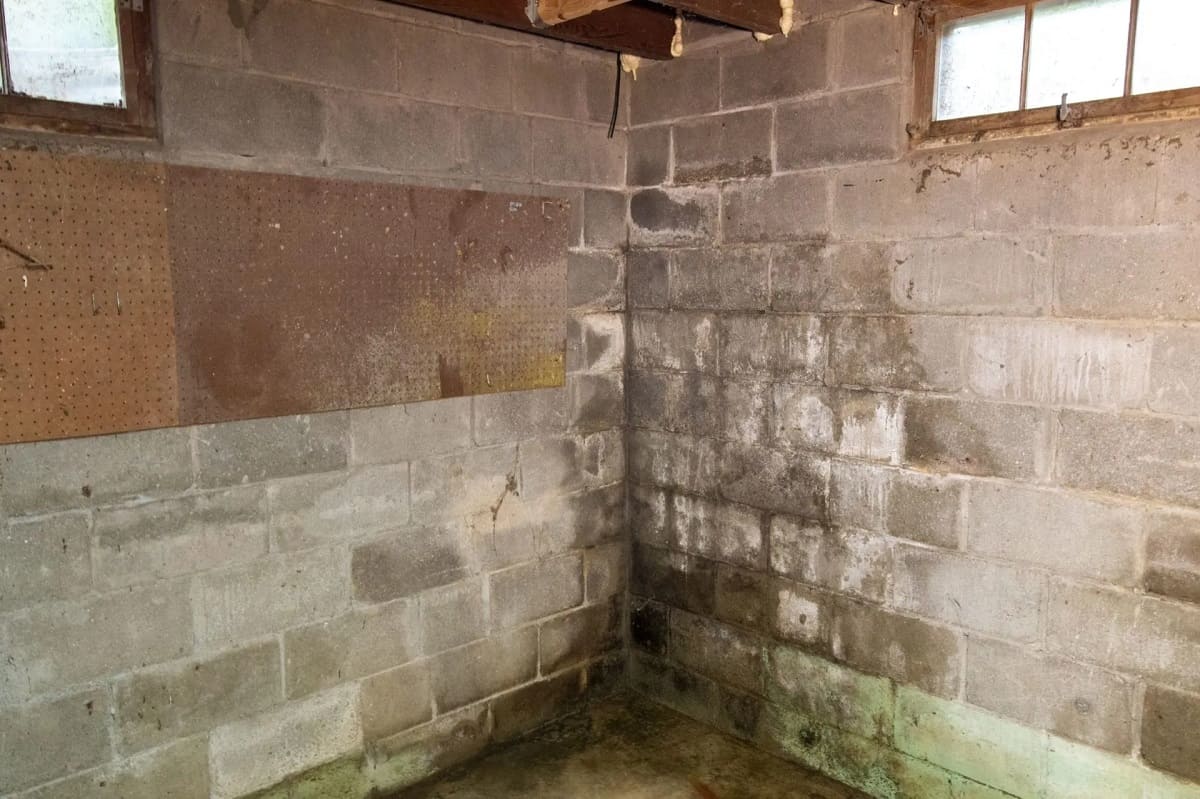
Another common cause of cracks is hydrostatic pressure. If your basement is not properly waterproofed or lacks a sufficient drainage system, water can accumulate around the foundation, increasing the hydrostatic pressure on the walls. This pressure can cause the walls to crack and allow water to seep in, leading to further issues such as mold growth or structural damage.
Temperature changes can also contribute to cracks in basement walls. When exposed to extreme temperature fluctuations, the materials in the walls expand and contract. Over time, this expansion and contraction can cause stress on the walls, resulting in cracks. This is particularly common in regions with cold winters and hot summers, where the temperature differential is significant.
In some cases, cracks in basement walls may be the result of structural issues. Construction defects, such as inadequate reinforcement or the use of low-quality materials, can weaken the walls, making them more susceptible to cracking. It’s important to have a professional inspection to determine if structural issues are contributing to the cracks and to address them accordingly.
Identifying the cause of the cracks is crucial in determining the appropriate repair method. Depending on the severity and nature of the cracks, you may need to employ different techniques and materials. For example, if the cracks are primarily caused by settlement, it may be necessary to address the underlying soil issues before repairing the walls.
In the next section, we will discuss the tools and materials required for repairing cracks in basement walls. Equipped with this knowledge, you’ll be ready to tackle the repair process with confidence and ensure the long-term stability of your basement walls.
Tools and Materials Needed
When it comes to repairing cracks in basement walls, having the right tools and materials is crucial for a successful and long-lasting repair. Here is a list of the essential items you will need:
- Protective Gear: Before starting any repair work, ensure you have the necessary safety equipment. This includes safety goggles to protect your eyes from debris, gloves to safeguard your hands, and a dust mask to prevent inhaling dust particles.
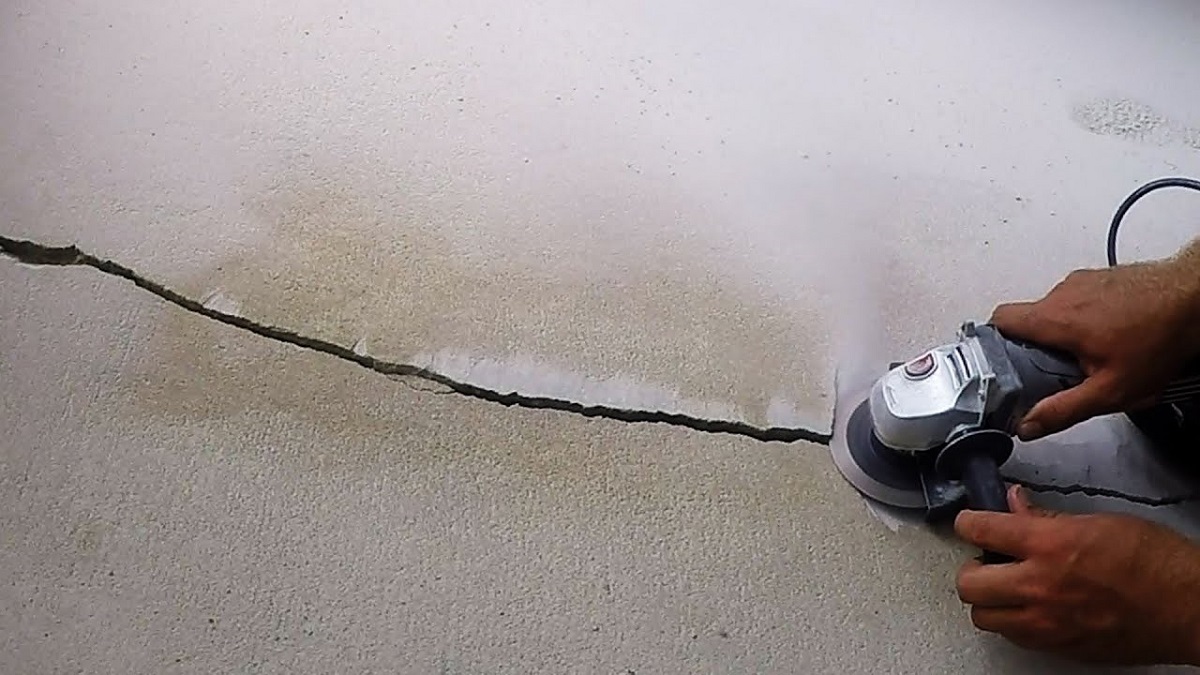
- Masonry Chisel and Hammer: These tools are essential for widening cracks and creating a V-shaped groove. By widening the crack, you provide more space for the patching material to adhere to the walls effectively.
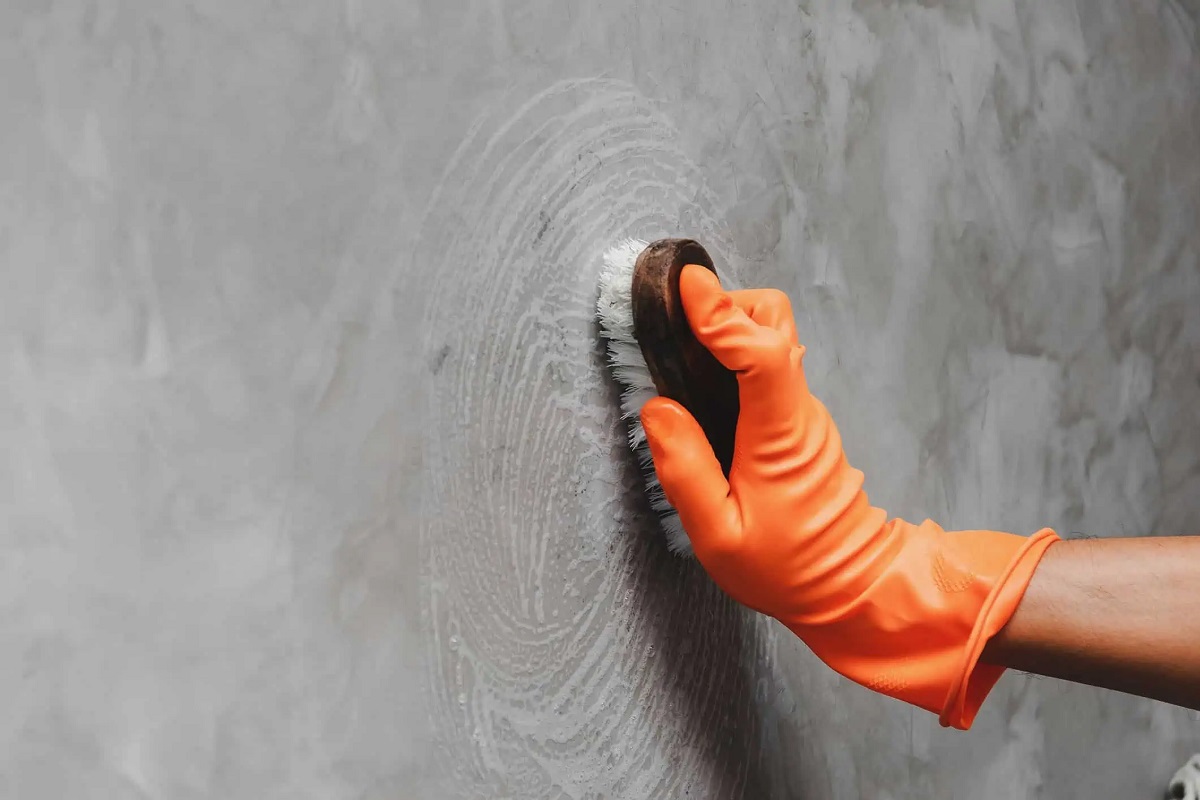
- Wire Brush: Use a wire brush to clean the crack and remove loose debris, dirt, and old caulking. Properly cleaning the crack will ensure a strong bond between the patching material and the wall surface.
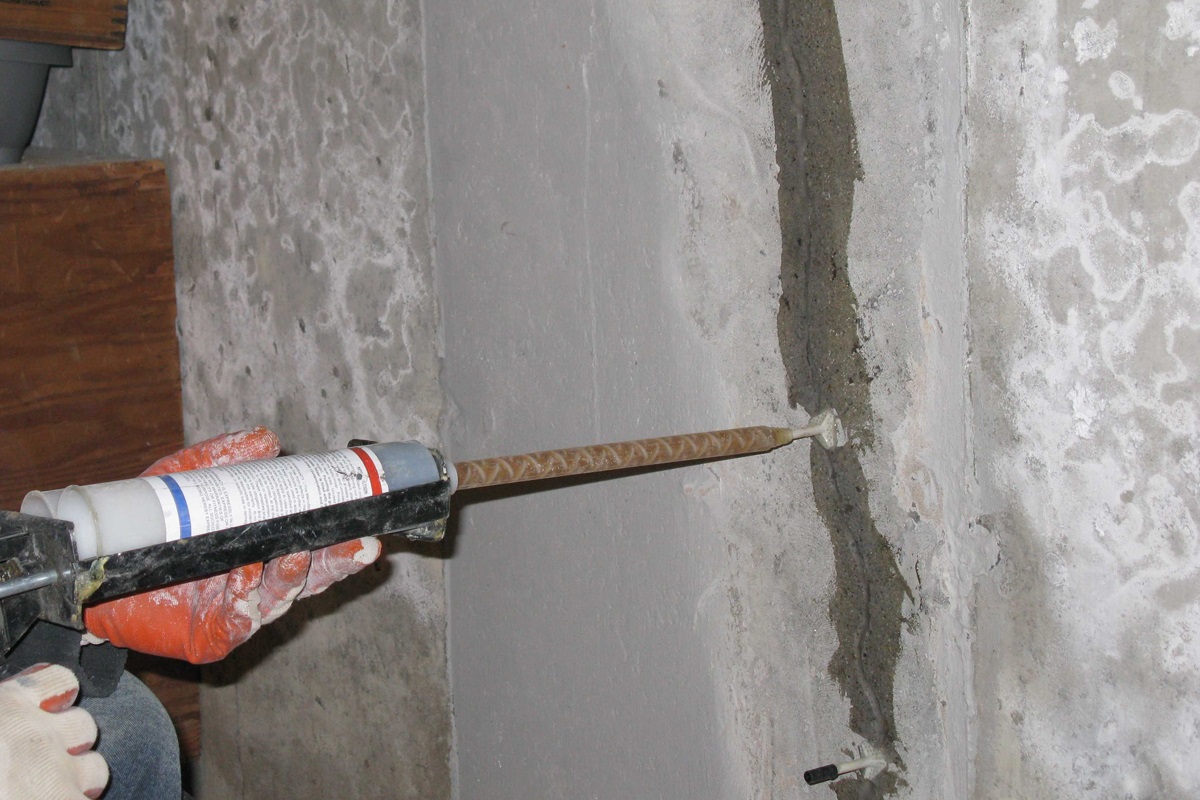
- Epoxy or Polyurethane Injection System: Depending on the type of crack and its severity, you will need an epoxy or polyurethane injection system. These systems are designed to fill and seal cracks effectively. Epoxy injections are suitable for structural cracks, while polyurethane injections are ideal for hairline cracks or cracks that are actively leaking.
- Concrete Patching Compound: After the crack has been prepared, you will need a high-quality concrete patching compound to fill and repair the crack. Look for a compound specifically designed for basement wall repairs. It should have strong bonding properties and be able to withstand moisture and temperature changes.
- Paintbrush: A paintbrush will come in handy for applying sealant or paint to the repaired area. It ensures an even coat and a professional-looking finish. Choose a high-quality brush with stiff bristles for better control and coverage.
- Caulking Gun: If the crack is small and accessible, you may choose to use a caulking gun instead of an injection system. A caulking gun enables you to apply a bead of caulk directly into the crack for a quick and straightforward repair.
- Plastic Sheeting and Tape: If you’re working with an active leak, you’ll need plastic sheeting and tape to temporarily cover the crack and prevent water from seeping through during the repair process.
It’s important to ensure that you have all the necessary tools and materials before starting the repair. This will save you time and frustration during the process. Additionally, following the manufacturer’s instructions for each product is crucial to ensure proper application and long-lasting results.
Now that you’re equipped with the essential tools and materials, it’s time to prepare for the repair process. In the next section, we will discuss the necessary steps to take before repairing cracks in basement walls.
Preparation before Repairing Cracks
Before jumping into the repair process for cracks in your basement walls, it’s important to undertake some necessary preparation. This preparation will ensure that the repair is effective and long-lasting. Here are the key steps to take:
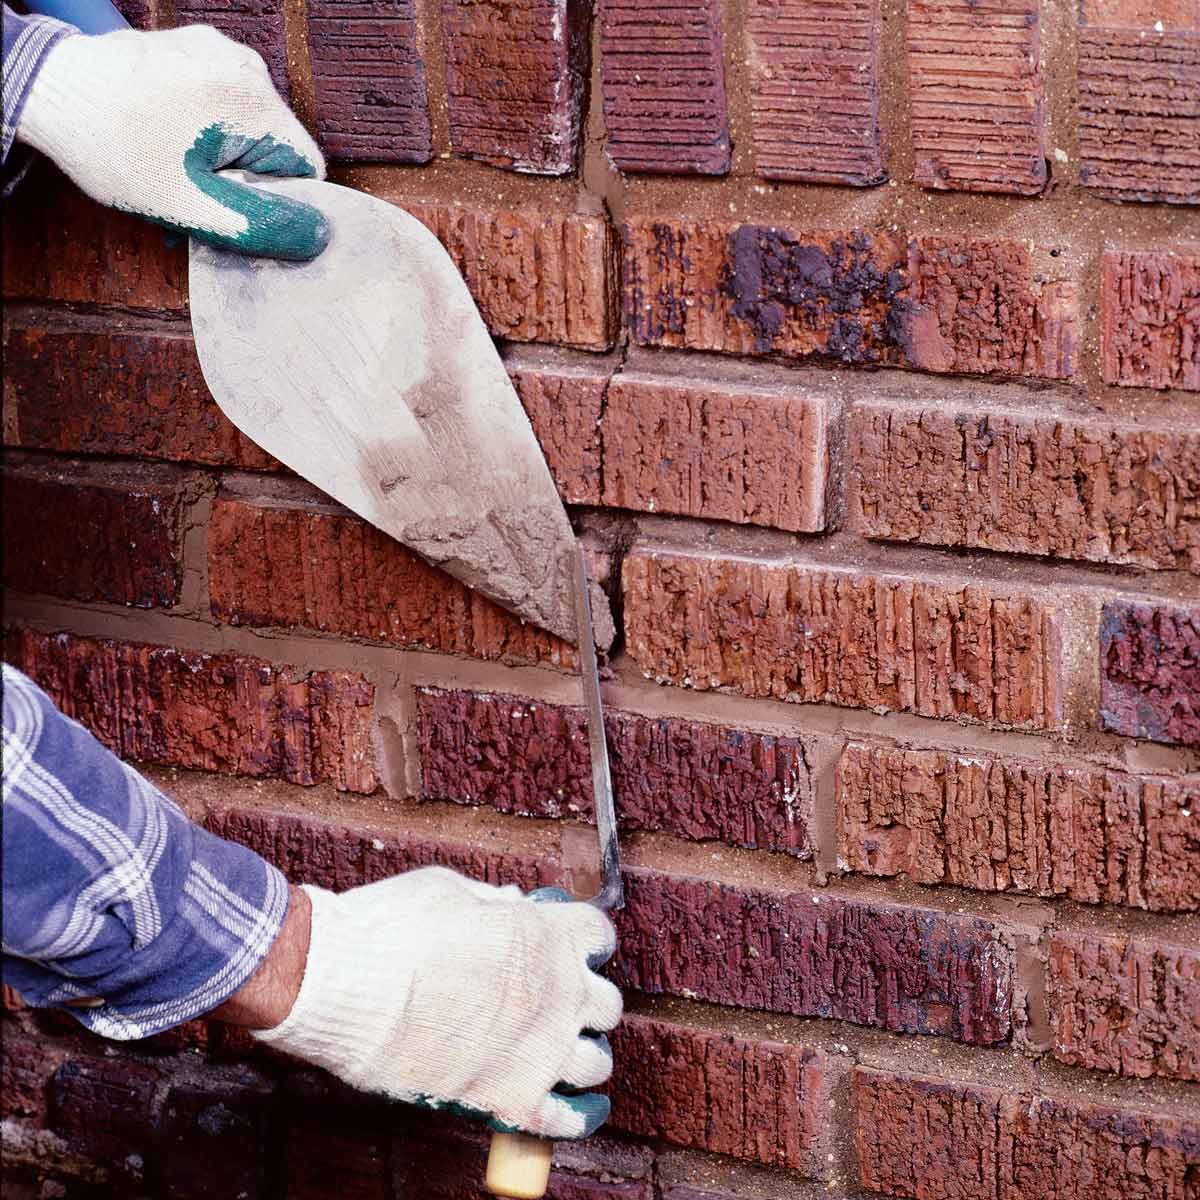
- Clean the Area: Start by cleaning the area around the crack. Use a wire brush to remove any loose debris, dirt, or old caulking. You want to create a clean and smooth surface for the patching compound to adhere to.
- Widen the Crack: If the crack is narrow, use a masonry chisel and hammer to widen it. Create a V-shaped groove by gently chiseling away at the edges of the crack. This will provide more surface area for the patching material to bond with, ensuring a stronger repair.
- Address Water Leakage: If you have a crack that is actively leaking water, it’s important to address the leakage before proceeding with the repair. Temporarily cover the crack with plastic sheeting and secure it with tape to prevent water from seeping in during the repair process.
- Apply Concrete Bonding Agent: To enhance the adhesion of the patching compound, consider applying a concrete bonding agent to the prepared crack. This bonding agent allows the patching material to bond more securely with the existing concrete, creating a stronger and longer-lasting repair.
- Prepare the Patching Compound: Mix the concrete patching compound according to the manufacturer’s instructions. Follow the recommended water-to-powder ratio to achieve the proper consistency. Ensure thorough mixing to create a uniform and workable compound.
- Protect Nearby Surfaces: Before applying the patching compound, protect nearby surfaces from accidental spills or splatters. Cover the surrounding areas with plastic sheeting or painter’s tape to ensure a neat and clean repair.
By taking these preparation steps, you are setting a solid foundation for the repair process. This preparation ensures that the crack is clean, properly widened, and ready for the application of the patching compound. Additionally, addressing water leakage and applying a concrete bonding agent will help in creating a strong and watertight seal.
Now that you’ve completed the necessary preparation, it’s time to move on to the step-by-step guide for repairing cracks in basement walls. In the following section, we will walk you through the process, ensuring a successful repair that restores the structural integrity of your basement walls.
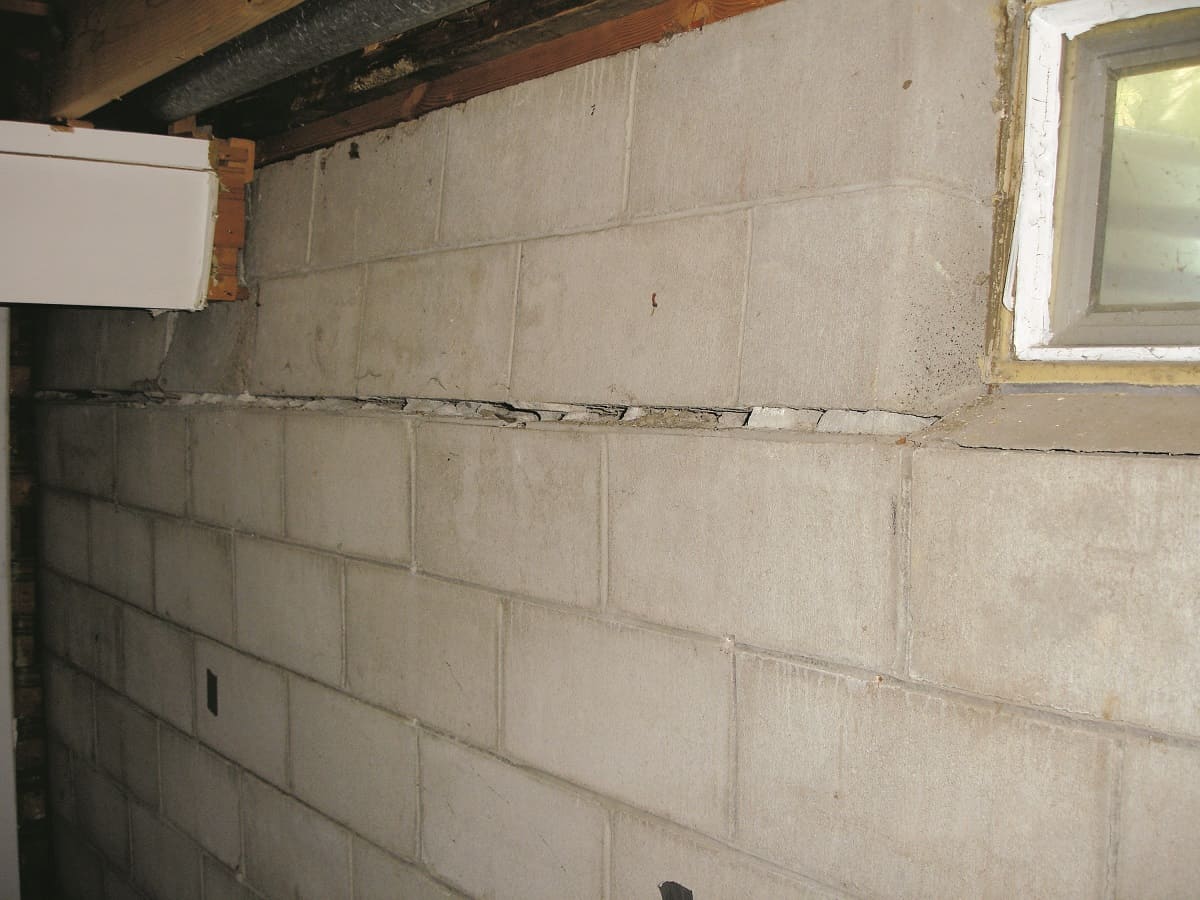
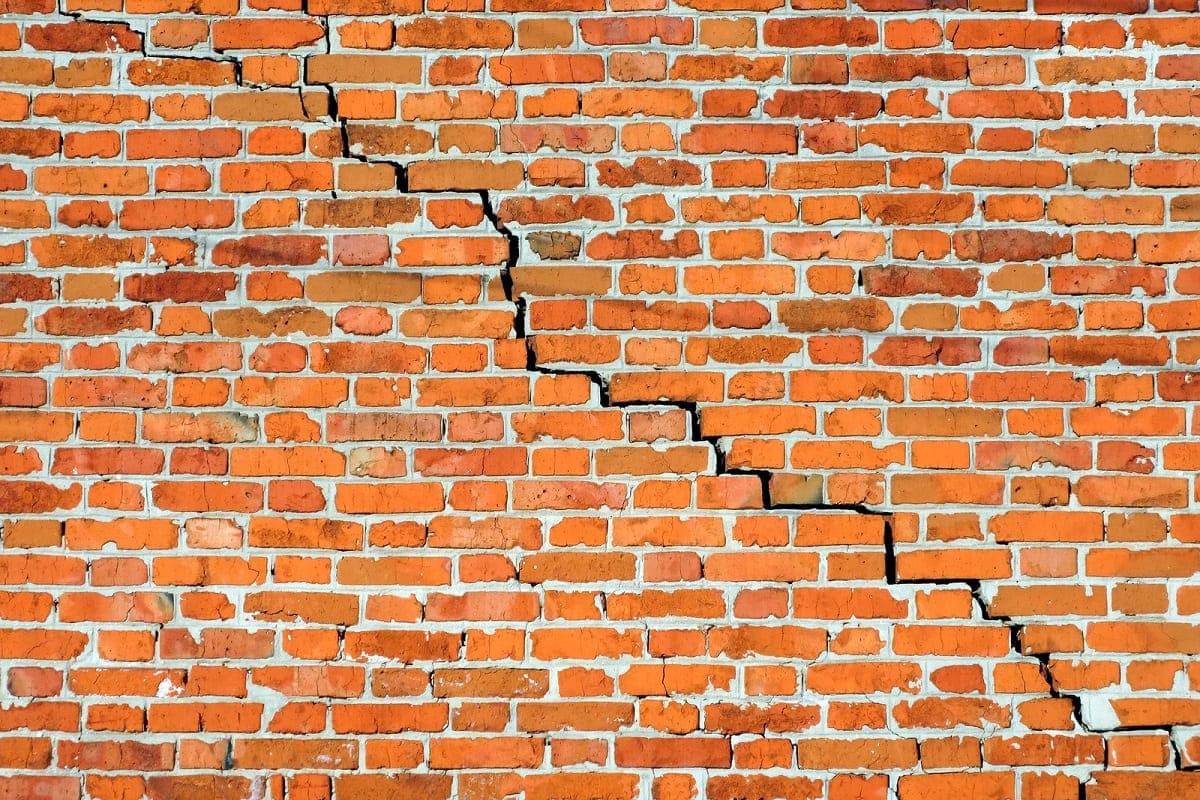
Types of Cracks in Basement Walls
Before embarking on the repair process for cracks in your basement walls, it is important to understand the different types of cracks you may encounter. Identifying the type of crack will help determine the appropriate repair method and ensure effective results. Here are some common types of cracks:
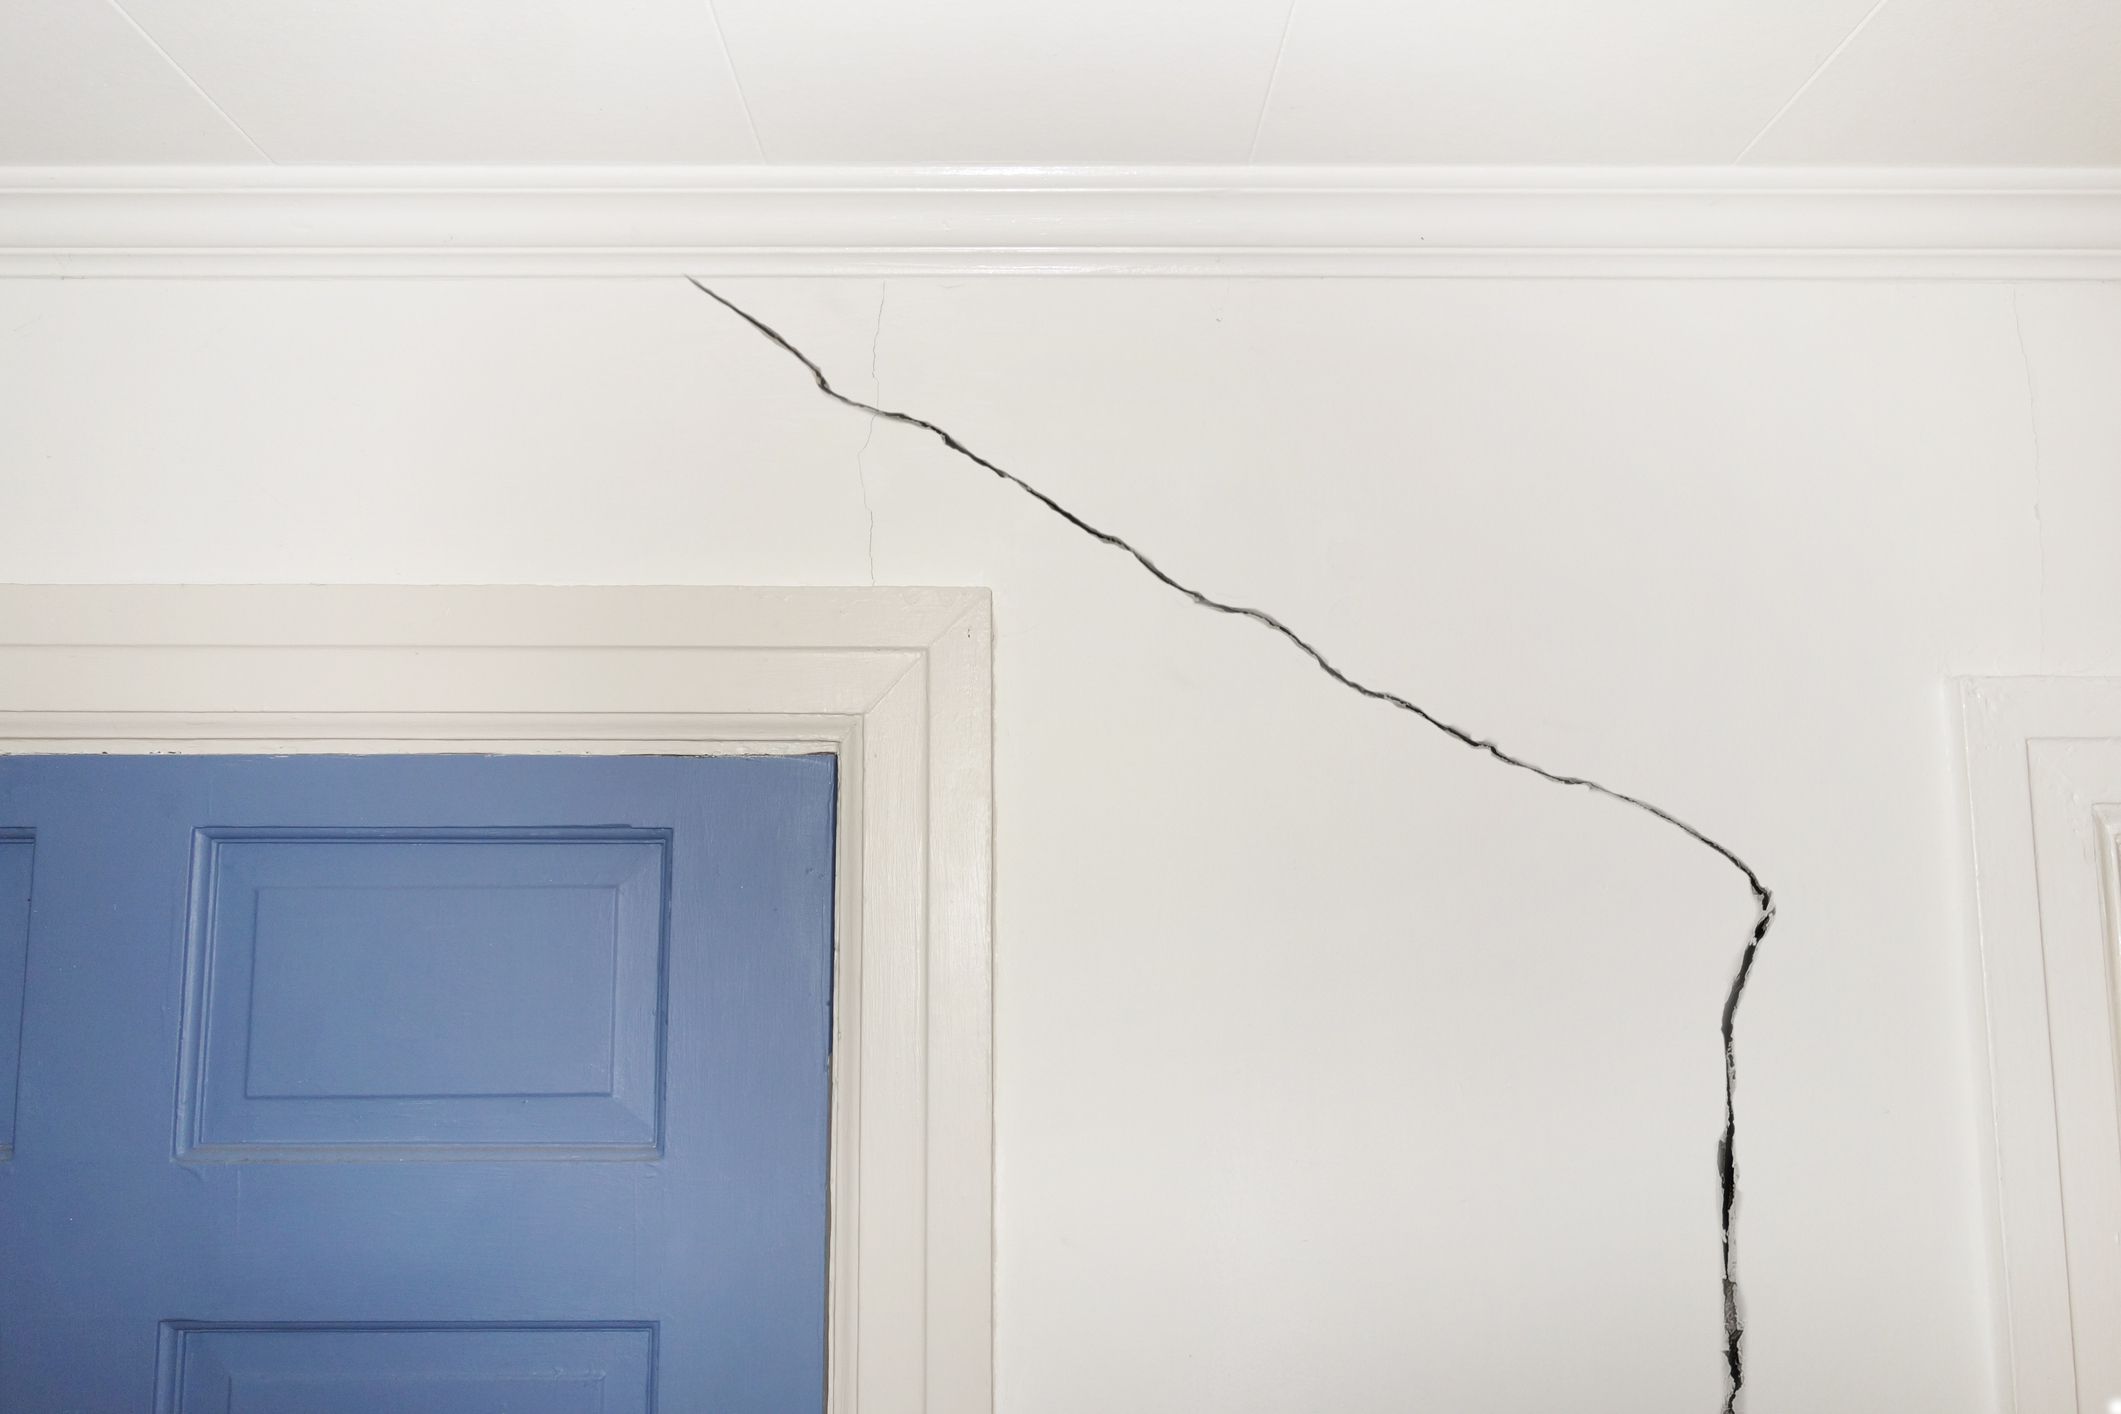
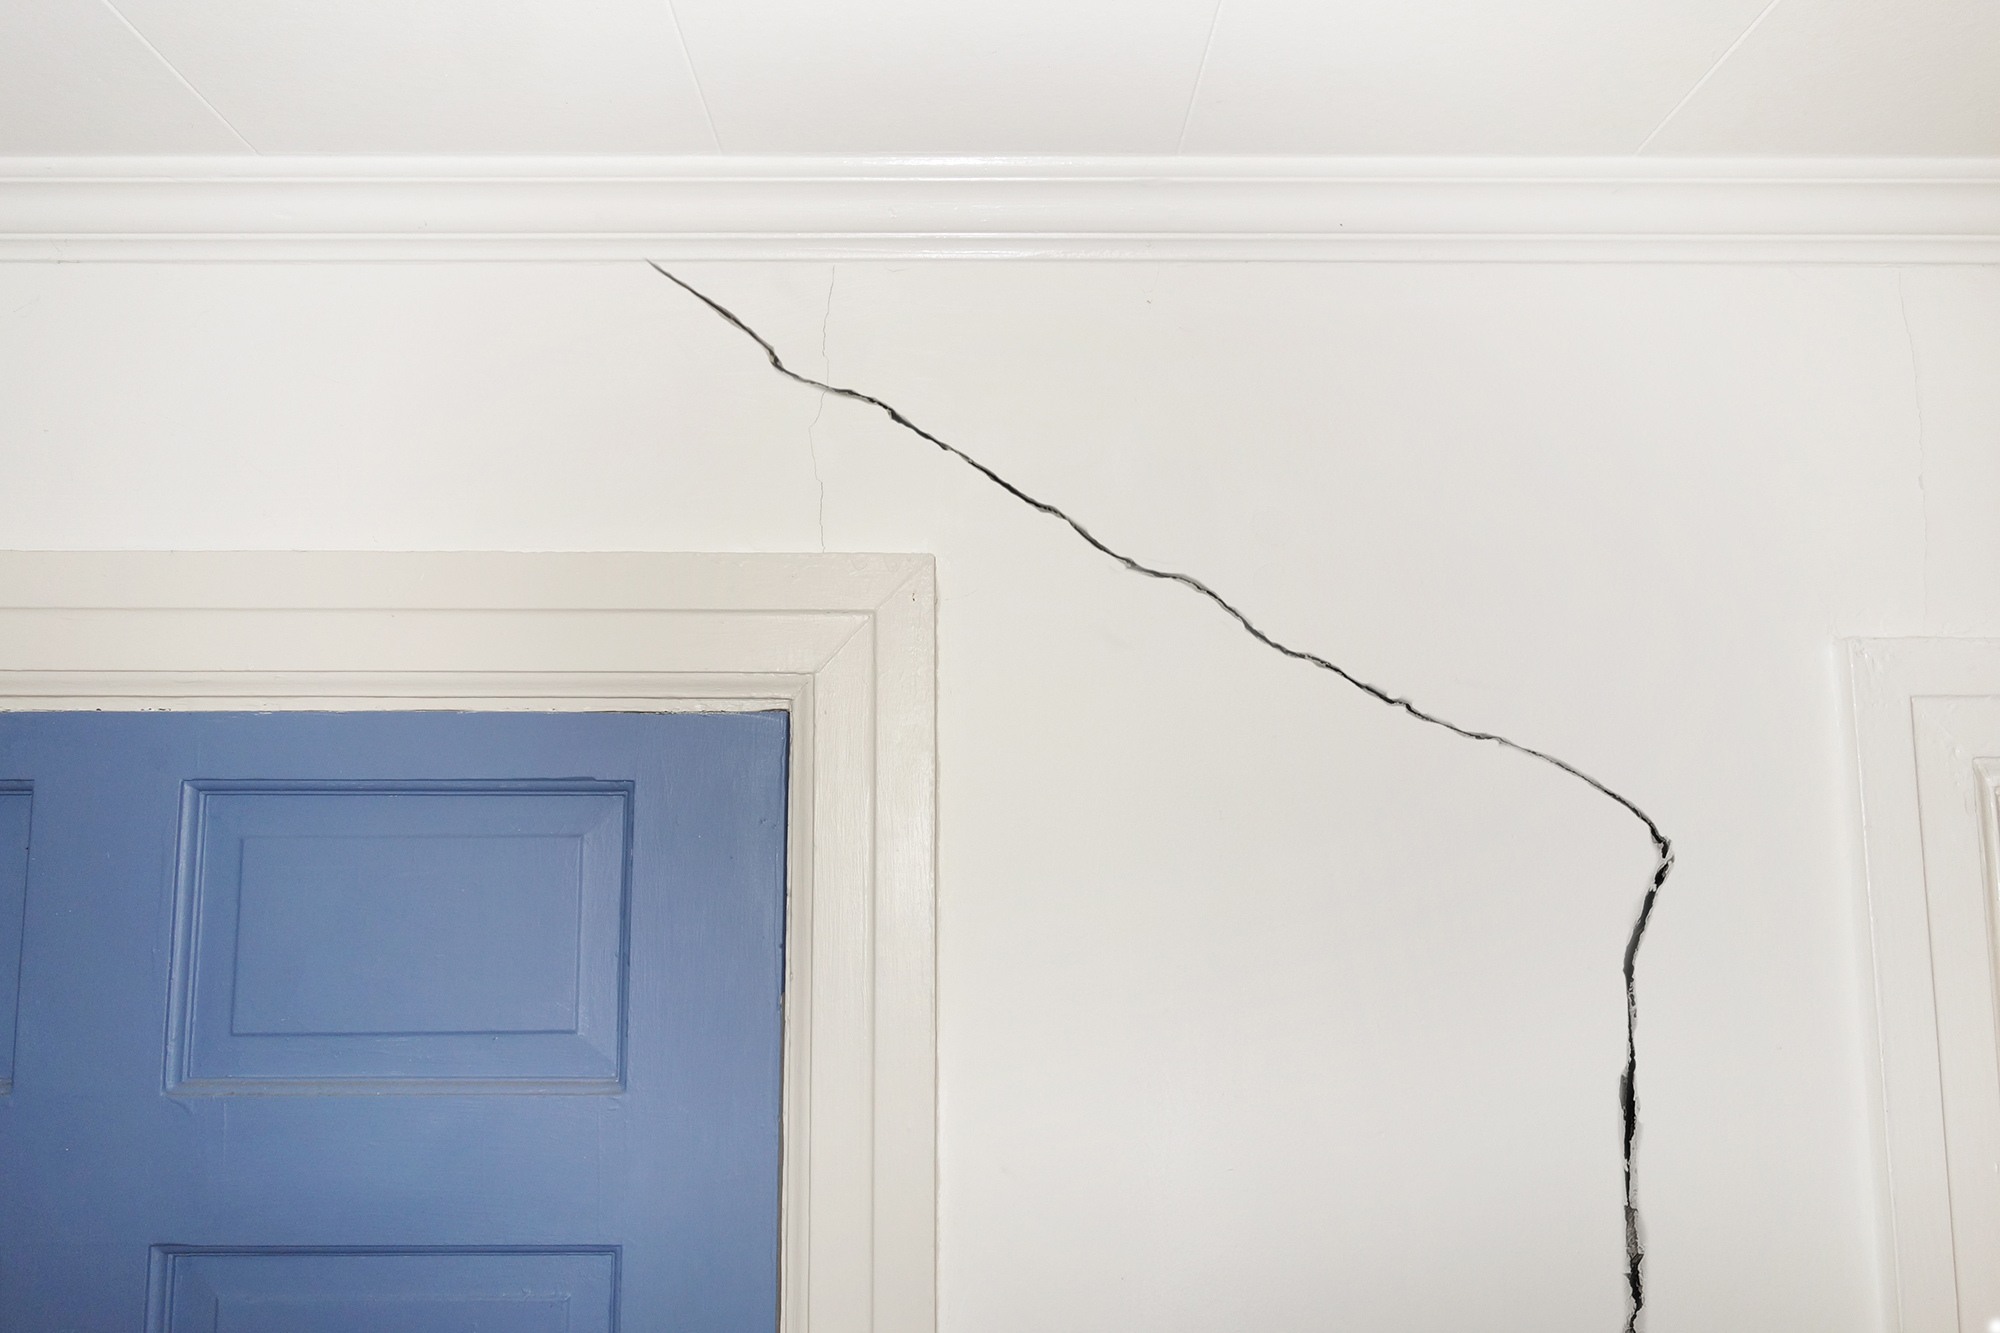
- Vertical Cracks: Vertical cracks are among the most common types of cracks in basement walls. These cracks typically run straight up and down and may be caused by settling, hydrostatic pressure, or temperature changes. Vertical cracks are generally less severe and easier to repair.
- Horizontal Cracks: In contrast to vertical cracks, horizontal cracks run parallel to the ground and are typically more concerning. Horizontal cracks can indicate more significant structural issues, such as excessive soil pressure or foundation movement. It is crucial to address horizontal cracks promptly to prevent further damage.
- Diagonal Cracks: Diagonal cracks typically occur at a 45-degree angle and can be a sign of differential settling. This means that one area of the wall is settling at a different rate than another. Diagonal cracks may indicate soil movement or foundation problems and require professional inspection.
- Stair-Step Cracks: Stair-step cracks are characterized by a series of diagonal cracks that resemble the steps of a staircase. These cracks are generally found in masonry walls and can be caused by settlement or foundation movement. Stair-step cracks should be addressed promptly to prevent further deterioration of the wall.
- Spiderweb Cracks: Spiderweb cracks, also known as hairline cracks, are very thin and superficial cracks that resemble spiderwebs. They are usually caused by drying shrinkage or minor settling and are commonly found in newly constructed walls. Spiderweb cracks are generally not a cause for concern and can be repaired easily.
Identifying the type of crack is the first step in determining the appropriate repair method. Each type of crack may require a specific approach and materials. For example, vertical cracks can be repaired using epoxy or polyurethane injections, while horizontal or stair-step cracks may require more extensive repairs, such as carbon fiber reinforcement or underpinning.
It is important to note that while some cracks may seem minor, they can indicate underlying structural issues. It is always advisable to consult with a professional if you are unsure or if the cracks are severe or increasing in size.
Now that you have a better understanding of the different types of cracks in basement walls, you can proceed with greater confidence in addressing them. In the next section, we will provide a step-by-step guide to repairing cracks in basement walls, ensuring a successful and long-lasting repair.
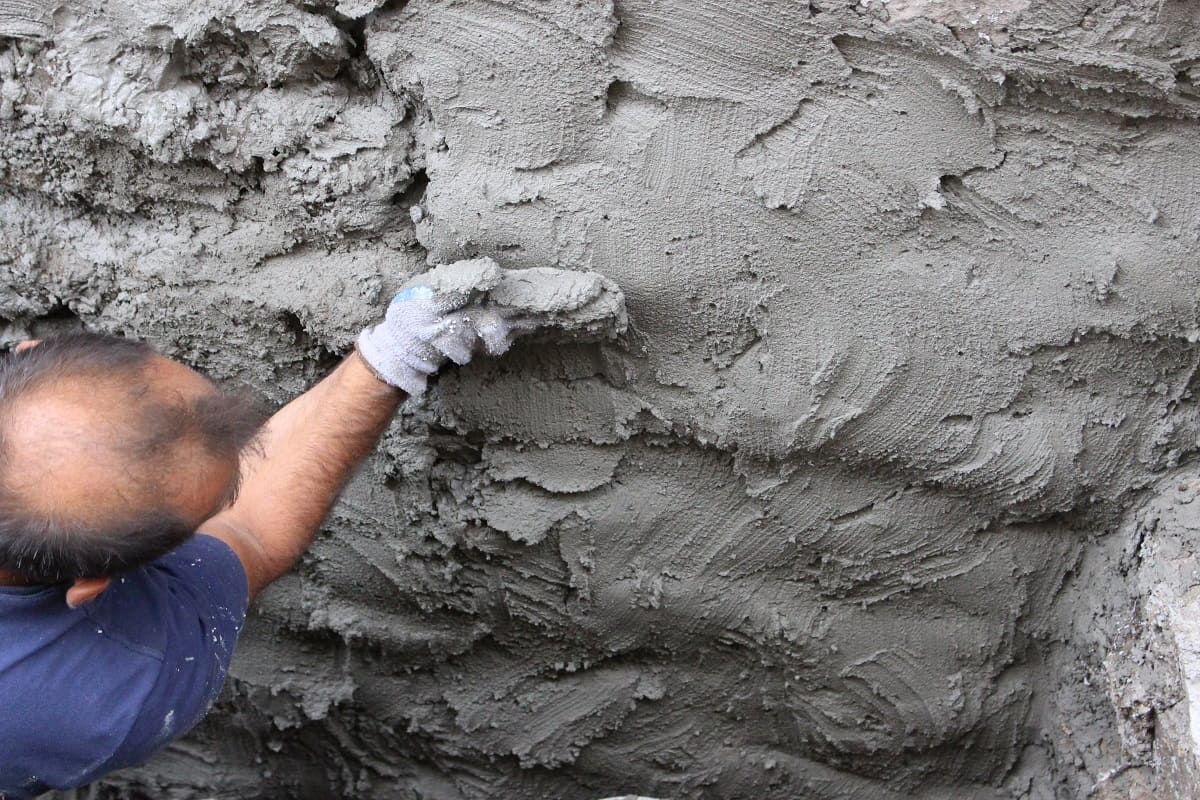
Use hydraulic cement to fill in the cracks in the basement wall. Make sure to clean the area thoroughly before applying the cement and follow the manufacturer’s instructions for best results.
Step-by-Step Guide to Repairing Cracks in Basement Walls
Repairing cracks in basement walls is a task that can be accomplished with the right tools, materials, and techniques. Follow this step-by-step guide to ensure a successful and long-lasting repair:
- Step 1: Prepare the Crack: Start by cleaning the crack using a wire brush to remove any loose debris or dirt. If necessary, widen the crack using a masonry chisel and hammer, creating a V-shaped groove. This will provide more surface area for the patching material to adhere to.
- Step 2: Address Active Leakage: If the crack is actively leaking water, temporarily cover it with plastic sheeting and tape to prevent water from seeping in during the repair process.
- Step 3: Apply Concrete Bonding Agent: Use a brush to apply a concrete bonding agent to the crack. This will enhance the adhesion of the patching material to the wall surface.
- Step 4: Fill the Crack: Depending on the size and nature of the crack, choose the appropriate repair method. For narrow cracks, use an injection system such as epoxy or polyurethane. Follow the manufacturer’s instructions for mixing and injecting the material into the crack. For wider cracks, apply a patching compound using a trowel, ensuring it is pressed firmly into the crack.
- Step 5: Smooth and Feather the Surface: After filling the crack, use a putty knife or trowel to smooth and feather the surface of the patch. This will create a seamless transition between the repair and the surrounding wall.
- Step 6: Allow the Repair to Cure: Follow the recommended curing time provided by the manufacturer of the patching material. This will ensure that the repair has fully hardened and is ready for further treatment.
- Step 7: Fine-Tune the Surface: Once the repair has cured, use sandpaper or a sanding block to fine-tune the surface, making it smooth and ready for finishing.
- Step 8: Apply Sealant or Paint: Depending on the desired aesthetic and level of protection, apply a sealant or paint to the repaired area. This will help to further seal and protect the crack, as well as blend it with the surrounding wall.
- Step 9: Monitor and Inspect: Regularly monitor the repaired crack for any signs of further movement or water leakage. Inspect the area periodically to ensure the repair remains intact and addresses the underlying issue.
Following these steps will help you effectively repair cracks in basement walls and maintain the structural integrity of your home. Remember, if you are uncertain about the severity of the cracks or encounter any complications during the repair process, it is always best to consult with a professional for guidance.
Now that you’ve successfully repaired the cracks in your basement walls, let’s move on to the next section, which focuses on the finishing touches to complete the repair.
Finishing the Repair
Completing the repair of cracks in basement walls involves some essential finishing touches to ensure the repair looks seamless and blends in with the surrounding wall. Follow these steps to achieve a professional and polished finish:
- Step 1: Assess the Surface: Inspect the repaired crack and the surrounding area for any rough edges or unevenness. Use sandpaper or a sanding block to smooth out any imperfections, ensuring a flush and seamless surface.
- Step 2: Clean the Area: Remove any dust or debris resulting from the repair process. Use a brush or vacuum cleaner to clean the surface around the repaired crack, ensuring a clean and tidy workspace.
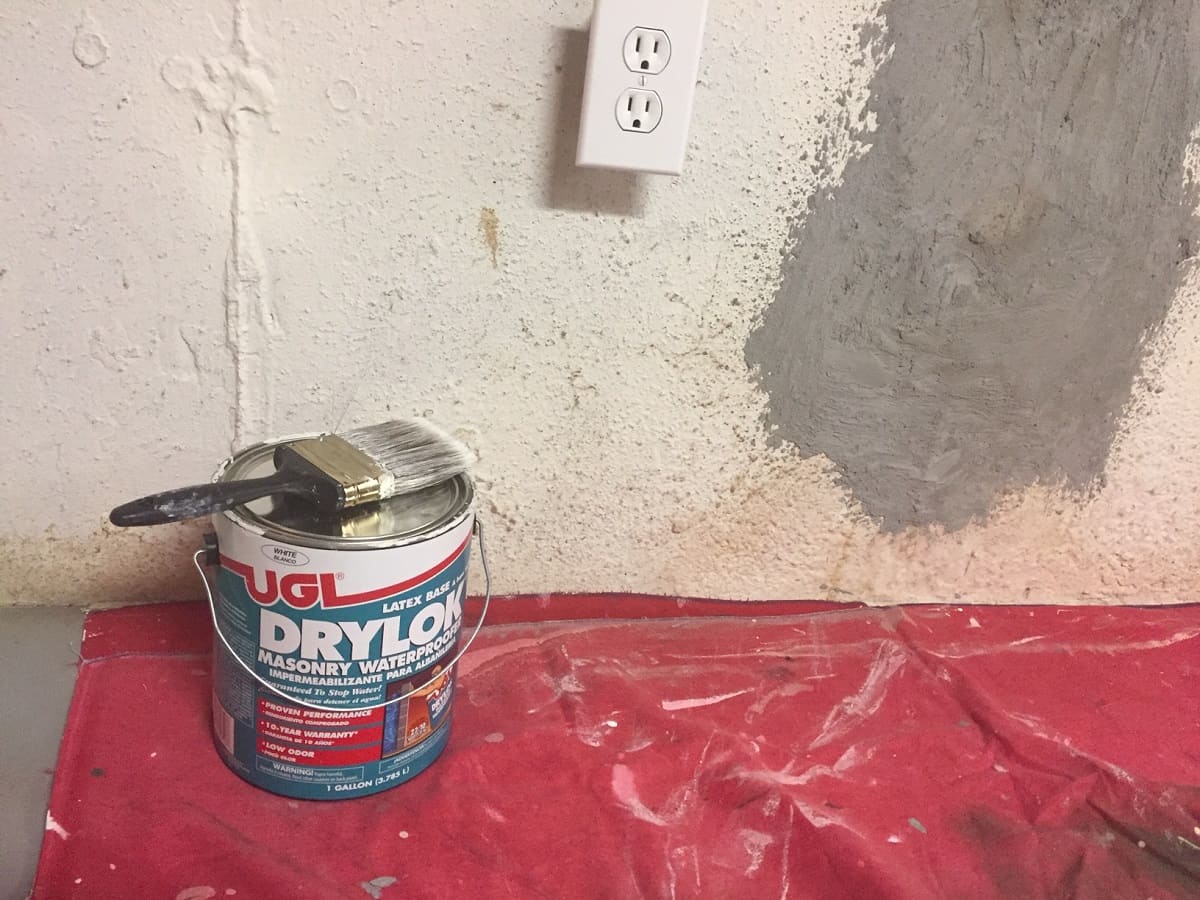
- Step 3: Apply Primer: If you plan to paint the repaired area, consider applying a primer to promote better adhesion and coverage of the paint. Choose a primer suitable for masonry surfaces and follow the manufacturer’s instructions for proper application.
- Step 4: Paint or Finish the Area: If desired, apply paint or a suitable finish to the repaired area to match the surrounding wall. Select a high-quality paint or finish that can withstand moisture and temperature changes. Apply multiple coats as necessary, allowing proper drying time between each coat.
- Step 5: Blend with the Surrounding Wall: Blend the repaired area with the surrounding wall by ensuring a consistent texture and color. Use a brush, sponge, or texture roller to mimic the texture of the existing wall surface and create a seamless appearance.
- Step 6: Clean Up: Clean your tools and dispose of any leftover materials according to local regulations. Ensure the area is neat and tidy, and remove any leftover plastic sheets or protective coverings used during the repair.
- Step 7: Regular Maintenance: Keep an eye on the repaired area and monitor for any signs of further cracking or water leakage. Conduct regular inspections and address any issues promptly to maintain the integrity of the repair.
By following these finishing steps, you can ensure that the repaired crack in your basement wall not only restores the structural integrity but also blends seamlessly with the surrounding wall. Remember to take your time and be meticulous during the finishing process to achieve the best results.
Now that you have completed the repair and finishing of the cracks in your basement walls, let’s move on to the final section of this guide, where we will discuss preventive measures to avoid future cracks and maintain the stability of your basement walls.
Preventing Future Cracks in Basement Walls
Repairing cracks in basement walls is essential, but it’s even more important to take preventive measures to avoid future cracks. By implementing these preventive measures, you can maintain the stability of your basement walls and minimize the need for future repairs. Here are some effective strategies to prevent cracks in basement walls:
- Proper Drainage: Ensure that your property has proper drainage systems in place to divert water away from the foundation. This includes maintaining gutters and downspouts, grading the soil away from the foundation, and installing proper drainage systems, such as French drains.
- Foundation Waterproofing: Apply a waterproofing membrane or coating to the exterior of your basement walls. This acts as a barrier against moisture intrusion and helps prevent hydrostatic pressure buildup, which can cause cracks.
- Maintain Consistent Moisture Levels: Monitor and control the moisture levels in your basement by using a dehumidifier. Excessive moisture in the air can lead to the expansion and contraction of materials, contributing to cracks in the walls.
- Address Plumbing Leaks: Regularly inspect and fix any plumbing leaks or issues in your basement. Leaking pipes can lead to water seepage and increase the risk of cracks in the walls.
- Inspect and Maintain the Foundation: Conduct regular inspections of your foundation, both inside and outside. Look for signs of settling, shifting, or cracks. Address any issues promptly to prevent further damage.
- Control Temperature and Humidity: Avoid extreme temperature fluctuations and humidity levels in your basement. Use insulation to regulate temperature and consider installing a vapor barrier to control moisture levels.
- Avoid Overloading: Be mindful of the weight you place on your basement walls. Avoid storing heavy items against the walls, as this can exert additional pressure and potentially lead to cracking.
- Professional Inspection: Schedule regular inspections by a professional to assess the condition of your basement walls and foundation. They can identify potential issues early on and recommend appropriate maintenance or repairs.
By following these preventive measures, you can significantly reduce the risk of future cracks in your basement walls. Regular maintenance, attention to drainage and moisture control, and early detection of any issues will go a long way in preserving the integrity of your basement walls and preventing costly repairs.
With these preventive measures in mind, you can enjoy a dry, stable, and structurally sound basement that provides you with peace of mind for years to come.
We hope that this comprehensive guide on repairing cracks in basement walls has been helpful to you. By understanding the causes, having the right tools and materials, following the proper repair process, and implementing preventive measures, you can effectively address cracks and maintain the quality of your basement walls.
Remember, if you are unsure about tackling the repair yourself or if the cracks are severe, it’s always best to consult with a professional to ensure the safety and integrity of your home.
Thank you for reading, and we wish you success in your basement wall repair endeavors!
Conclusion
Repairing cracks in basement walls is a crucial task for homeowners to ensure the structural integrity and stability of their homes. By understanding the causes of cracks, having the right tools and materials, and following a step-by-step guide, you can successfully repair and prevent future cracks in your basement walls. Additionally, implementing preventive measures will help maintain the quality of the walls and minimize the need for future repairs.
Throughout this comprehensive guide, we have discussed the causes of cracks in basement walls, the tools and materials needed for the repair, the importance of preparation, the different types of cracks, and a step-by-step guide to repairing the cracks. We have also provided tips for finishing the repair and preventing future cracks.
Remember, it is crucial to address cracks promptly, as they can lead to more significant issues such as water intrusion, mold growth, or even structural damage. If you are unsure of the severity of the cracks or encounter any complications during the repair process, it is always wise to consult with a professional for guidance and assistance.
By following the proper repair techniques and preventive measures, you can maintain the stability and durability of your basement walls, ensuring a dry, secure, and functional space. Regular maintenance and inspections will also help detect any issues early on, allowing for timely repairs and avoiding costly damages in the long run.
We hope that this guide has provided you with valuable information and guidance in repairing cracks in basement walls. By taking the necessary steps and being proactive in maintaining your basement walls, you can enjoy peace of mind knowing that your home is safe and well-maintained.
Thank you for reading, and best of luck with your basement wall repairs!
Frequently Asked Questions about How To Repair Cracks In Basement Wall
Was this page helpful?
At Storables.com, we guarantee accurate and reliable information. Our content, validated by Expert Board Contributors, is crafted following stringent Editorial Policies. We're committed to providing you with well-researched, expert-backed insights for all your informational needs.

0 thoughts on “How To Repair Cracks In Basement Wall”