Articles
Top Tips For Building A Shed
Modified: January 19, 2024
Looking for expert advice on building a shed? Check out our top tips and articles on how to construct the perfect shed for your backyard.
(Many of the links in this article redirect to a specific reviewed product. Your purchase of these products through affiliate links helps to generate commission for Storables.com, at no extra cost. Learn more)
Introduction
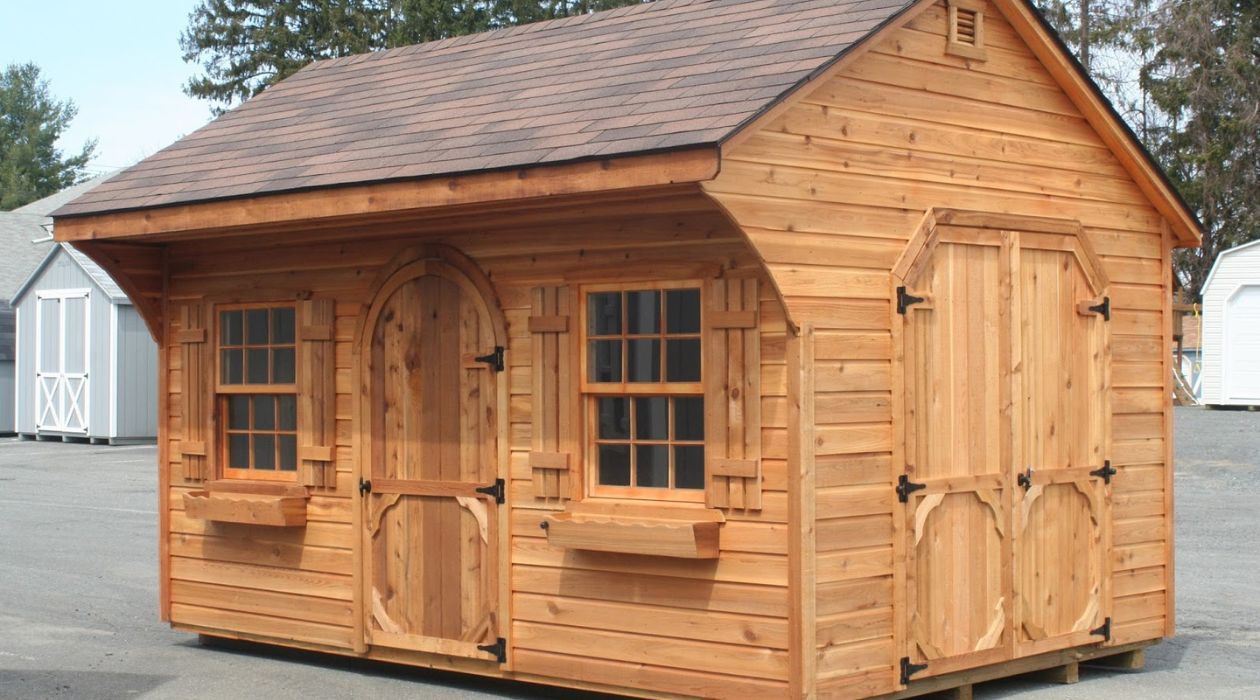
Building a shed is a great addition to any property. Not only does it provide extra storage space, but it also adds value and functionality to your home. Whether you need a place to store tools, garden equipment, or outdoor furniture, building a shed can be a practical and rewarding project.
However, constructing a shed requires careful planning and attention to detail. From choosing the right location to selecting the appropriate building materials, each step of the process plays a crucial role in creating a sturdy and functional shed. In this article, we will explore the top tips for building a shed that will help you in the planning and construction process.
By following these tips, you can ensure that your shed is built to last and meets your specific needs. So, let’s get started with the first step: choosing the right location for your shed.
Key Takeaways:
- Choose the right location for your shed to ensure accessibility, sun exposure, and compliance with neighborhood regulations. A well-placed shed enhances functionality and visual appeal.
- Building a sturdy shed frame is crucial for stability and longevity. Follow design plans and reinforce the frame for a robust structure that withstands the elements.
Read more: How Build A Shed
Choose the Right Location
When it comes to building a shed, choosing the right location is key. The location of your shed will impact its accessibility, functionality, and overall appearance. Here are a few things to consider when selecting the perfect spot for your shed:
- Accessibility: You’ll want to choose a location that is easily accessible from your house or driveway. This will make it convenient to transport items to and from the shed.
- Ground level and drainage: Ensure that the area you choose is relatively flat and well-drained. A sloped or uneven terrain can make it difficult to construct a stable foundation and may cause water accumulation around the shed.
- Sun exposure: Consider the amount of sunlight the shed will receive throughout the day. If you plan on using your shed for activities like gardening or woodworking, you may want to choose a location that gets ample sunlight.
- Proximity to utilities: If you plan on using electricity or plumbing in your shed, it’s important to choose a location near existing utility connections. This will minimize the cost and effort required to run electrical or plumbing lines.
- Neighborhood restrictions: Check with your local neighborhood association or municipality for any specific regulations regarding shed placement. Some areas may have restrictions on the size, height, or setback requirements for sheds.
Once you’ve considered these factors, take a walk around your property to find the ideal location. You may want to take note of any obstructions such as trees, fences, or buildings that could impact the placement of your shed.
Remember, a well-placed shed not only enhances the visual appeal of your property but also ensures that it serves its intended purpose effectively. Take the time to choose the right location, and you’ll set the foundation for a successful shed-building project.
Determine the Shed Size
After choosing the right location for your shed, the next step is to determine the size that best suits your needs. The size of your shed will depend on several factors, including the intended purpose, available space, and budget constraints. Here are some tips to help you determine the ideal shed size:
1. Assess your storage needs: Consider what items you plan to store in the shed. Will it be used mainly for garden tools and equipment, or do you need space for larger items like bicycles or lawnmowers? Take inventory of your belongings to get an idea of the storage capacity you’ll require.
2. Measure available space: Measure the area where you plan to build the shed to determine the maximum dimensions. Consider any setbacks or restrictions imposed by local building codes or neighborhood guidelines.
3. Allow for future growth: If you anticipate acquiring more items or expanding your hobbies, it’s wise to build a slightly larger shed than your current needs. This will save you from the hassle of having to build a new shed or overcrowding an existing one in the future.
4. Consider additional functionalities: If you plan on using the shed for purposes other than storage, such as a workshop or hobby space, factor in the additional space needed for equipment and maneuverability.
It’s important to strike a balance between having enough space to accommodate your needs without building an excessively large shed that is disproportionate to your property. A well-sized shed not only provides adequate storage but also blends harmoniously with its surroundings.
Once you have a general idea of the size, consider drawing a scaled floor plan or using online shed design tools to visualize the layout. This will help you make any necessary adjustments and ensure that the shed meets your requirements.
Remember, the size of your shed should be carefully planned to optimize functionality and aesthetics. Take the time to determine the right dimensions, and you’ll have a shed that seamlessly integrates into your property while meeting all your storage needs.
Obtain Necessary Permits
Before you start building your shed, it’s crucial to ensure that you have obtained all the necessary permits and approvals from your local municipality. Building permits are typically required for any construction project, including sheds, to ensure compliance with safety and zoning regulations. Here are the steps you should follow to obtain the necessary permits:
1. Research local regulations: Start by researching the local building codes and regulations specific to your area. Check with your municipality or building department to find out the requirements, such as shed size limitations, setback distances, and any design specifications.
2. Prepare the necessary documents: Once you have familiarized yourself with the regulations, gather all the necessary documents needed for the permit application. This may include detailed plans, drawings, a site plan, and a list of materials to be used.
3. Submit the permit application: Fill out the permit application form provided by your municipality and attach all the required documents. Pay any applicable fees and submit the application to the appropriate department. Be sure to follow any specific submission procedures or guidelines provided by your local authority.
4. Wait for approval: After submitting your application, it may take a few weeks for the building department to review and approve it. They may conduct inspections or request modifications to ensure compliance with regulations. It’s important to be patient and responsive during this process.
5. Obtain the permit: Once your application is approved, you will receive the building permit. It is important to prominently display the permit at the construction site and comply with any conditions or instructions stated on the permit.
Failure to obtain the necessary permits can lead to penalties, delays, or even the requirement to demolish the shed. Additionally, building without a permit may affect the future sale or insurance coverage of your property. It’s always better to follow the proper procedures and obtain the required permits before proceeding with shed construction.
Every locality has its unique regulations, so make sure to consult with your local building department or municipality for specific permit requirements. By doing so, you can ensure that your shed is built legally and in compliance with all applicable building codes and regulations.
Prepare the Foundation
One of the most crucial steps in building a shed is preparing the foundation. A solid and level foundation not only ensures the stability and longevity of the structure but also provides a smooth and even base for the construction process. Here’s a step-by-step guide to help you prepare the foundation:
1. Clear the area: Start by clearing the area where you plan to build the shed. Remove any vegetation, rocks, or debris to create a clean and level surface. Ensure that the area is free from any potential obstructions that may affect the stability of the shed.
2. Mark the layout: Use stakes and string to mark the layout of the shed. This will give you a visual guide for the foundation and help you ensure that the shed is properly aligned with the chosen location.
3. Excavate the site: Excavate the marked area to a depth of at least 4-6 inches. This will allow space for the foundation materials and provide a solid base for the shed. Use a shovel or rent equipment like a mini-excavator for large areas.
4. Level the ground: Once the site is excavated, use a long board or a level to ensure that the ground is level. This step is crucial for the stability of the shed and will prevent any future issues with doors or windows not fitting properly.
5. Install a base layer: Lay a base layer of crushed stone or gravel in the excavated area. This will help with drainage and prevent moisture-related issues. Spread the material evenly and compact it using a tamper or plate compactor.
6. Build a frame: Construct a frame using pressure-treated lumber or concrete blocks. This will serve as the perimeter for the shed foundation. Make sure the frame is square and level, using a measuring tape and a level to check for accuracy.
7. Add compacted gravel: Fill the frame with compacted gravel to create a stable foundation. Layer the gravel, compacting it after each layer to ensure a solid and even surface. Continue adding gravel until the desired height is reached.
8. Check the level: Use a level to check the levelness of the foundation. Adjust as necessary by adding or removing gravel until the foundation is perfectly level in all directions.
By following these steps, you can prepare a sturdy and level foundation for your shed. A well-built foundation will provide the necessary support for the structure and contribute to its overall durability and longevity.
Next, it’s time to select the appropriate building materials for your shed construction.
Read more: How To Build A Shed
Select the Building Materials
Choosing the right building materials is essential for constructing a durable and long-lasting shed. The materials you select will affect the shed’s strength, appearance, and resistance to the elements. Here are some considerations when selecting building materials:
1. Framing material: The most common options for shed framing are wood, metal, and plastic. Wood is a popular choice due to its versatility, affordability, and ease of construction. It provides a natural and traditional look. Metal and plastic materials offer durability and resistance to pests and rot, but may be costlier.
2. Siding material: Siding protects the shed from weather elements and enhances its aesthetics. Common siding options include wood, vinyl, metal, and composite materials. Wood siding offers a classic and natural appearance, while vinyl is low-maintenance and resistant to fading and rot. Metal siding is durable and requires minimal upkeep. Composite materials offer the look of wood with added durability and resistance to moisture and bugs.
3. Roofing material: The choice of roofing material will depend on your shed’s design and climate. Common options include asphalt shingles, metal roofing, and corrugated panels. Asphalt shingles are popular for their affordability and ease of installation. Metal roofing provides durability and longevity, while corrugated panels are lightweight and cost-effective.
4. Doors and windows: Consider the type and material of doors and windows you want for your shed. Common options for doors include solid wood, metal, or fiberglass. Windows can be made of glass or acrylic, and you can choose between fixed or operable styles. Opt for materials that complement the overall design and meet your functional needs.
5. Flooring material: Depending on your shed’s purpose, you can select different flooring materials such as plywood, concrete, or vinyl. Plywood is versatile and easy to install. Concrete provides durability and is resistant to moisture. Vinyl flooring offers low maintenance and is available in various styles.
Consider your budget, desired aesthetics, and maintenance requirements when selecting building materials. It’s essential to strike a balance between durability, functionality, and cost-effectiveness. Additionally, check local building codes and regulations for any specific requirements or restrictions regarding shed construction materials.
Once you have chosen the building materials, you can move on to the next step: building the shed frame.
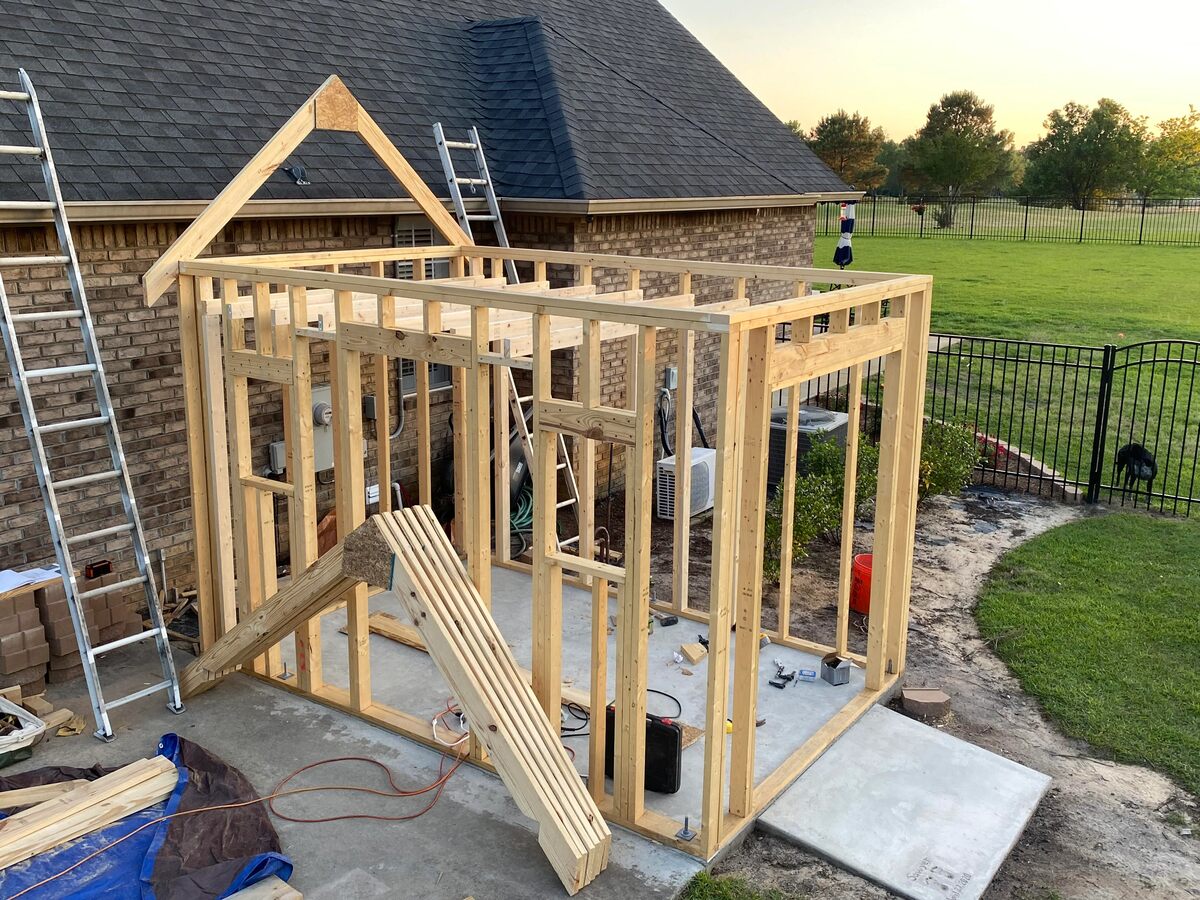
Build the Shed Frame
The shed frame is the backbone of the structure, providing stability and support for the rest of the construction process. Building a sturdy and well-constructed frame is crucial for the longevity and structural integrity of your shed. Here’s a step-by-step guide to help you build the shed frame:
1. Cut the lumber: Start by measuring and cutting the lumber according to your shed plans. Use a circular saw or miter saw to ensure accurate and clean cuts. Label each piece to avoid confusion during assembly.
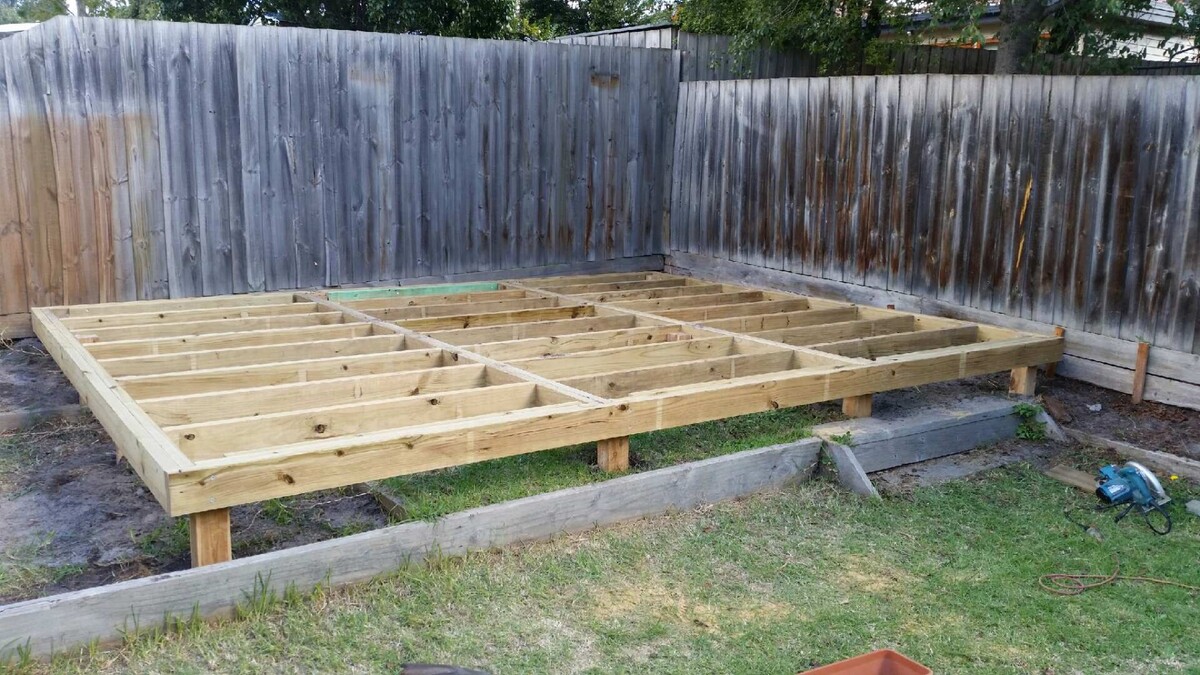
2. Assemble the floor frame: Begin by building the floor frame. Lay out the treated lumber joists according to your shed’s dimensions, spacing them evenly. Secure the joists together using joist hangers or galvanized nails. Use a spirit level to ensure the frame is level and adjust as needed.
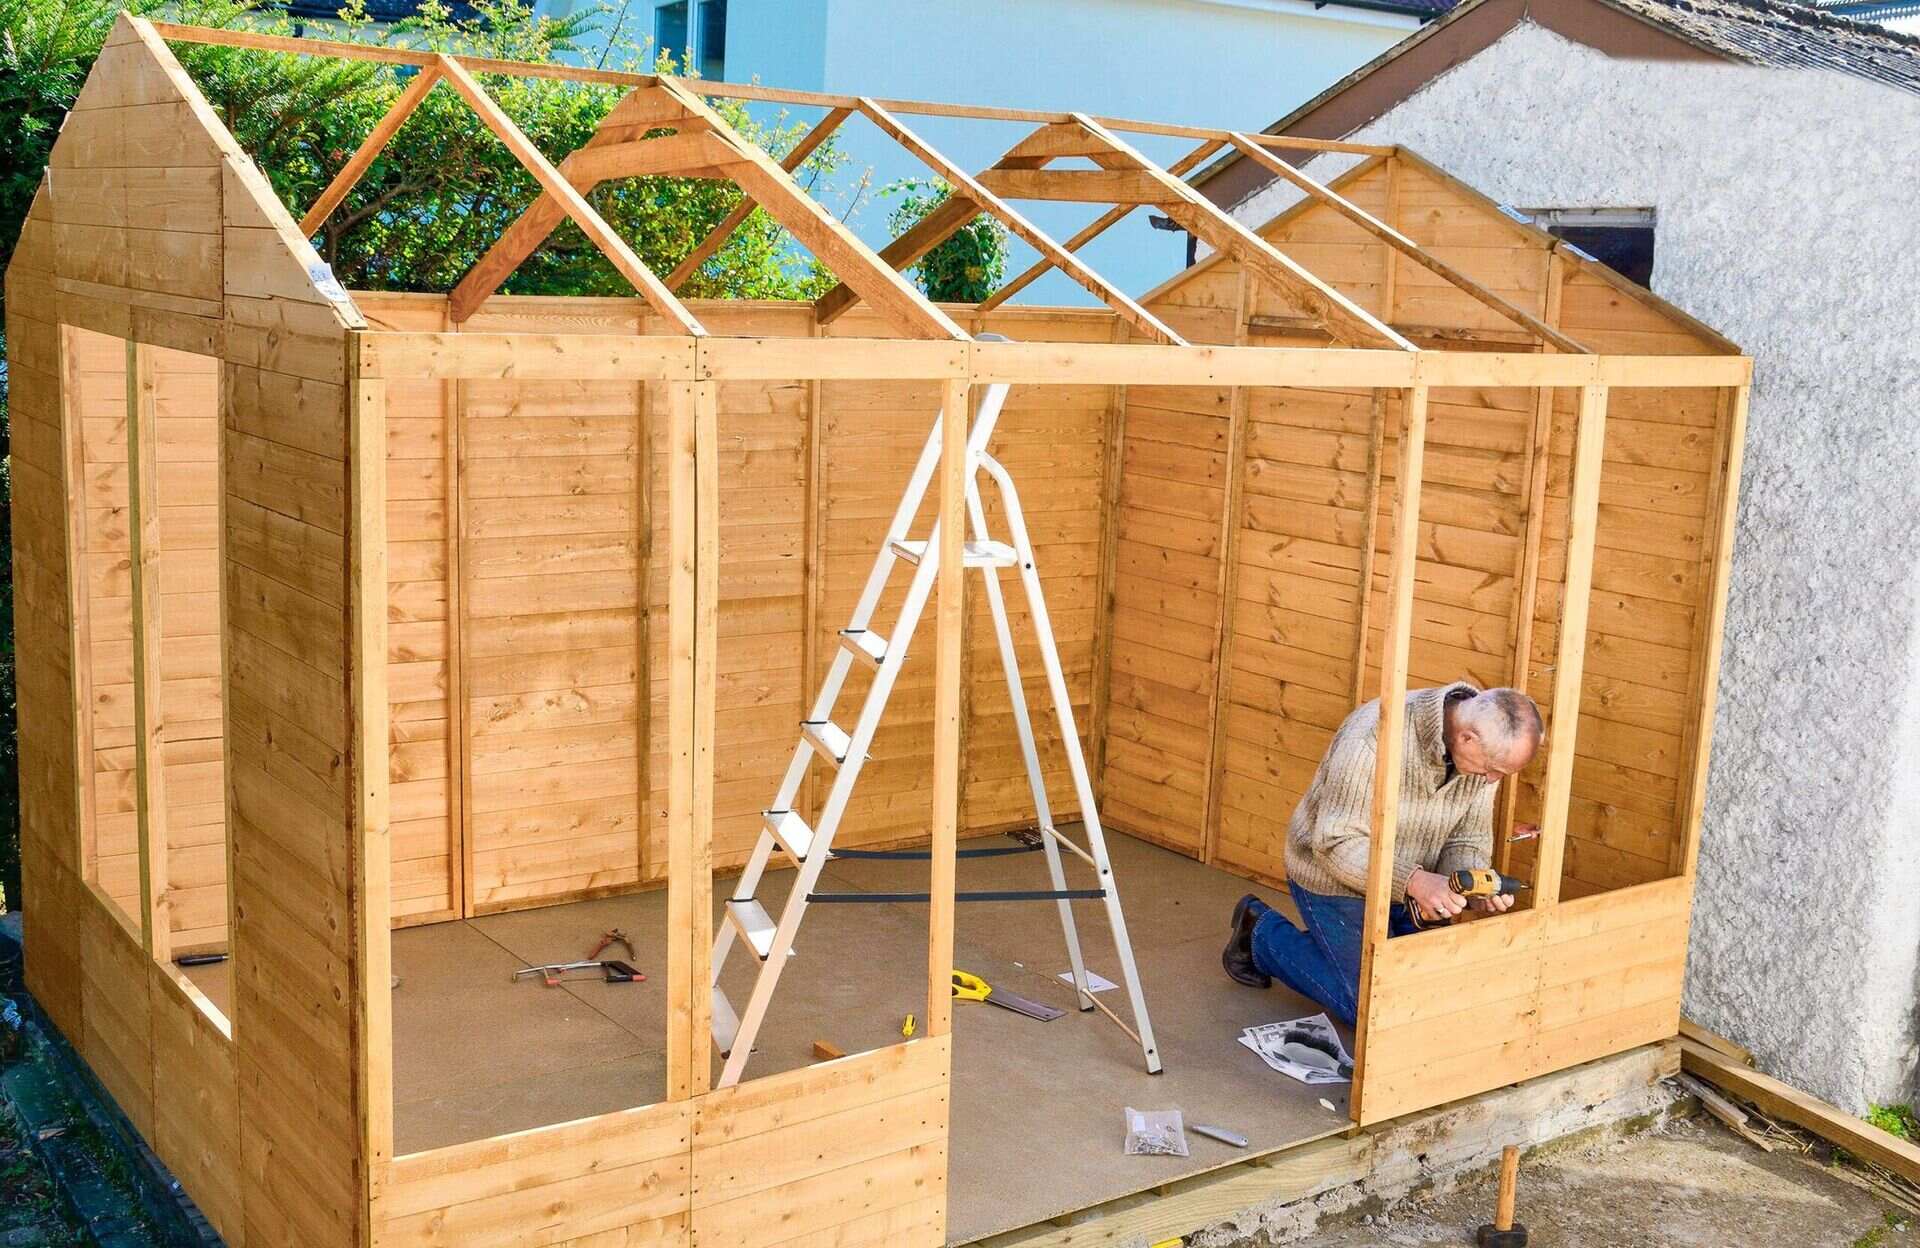
3. Attach the wall studs: With the floor frame in place, attach the wall studs to the frame, ensuring they are plumb and evenly spaced. Use galvanized nails or screws to secure the studs to the floor frame. To provide additional support, install double studs at each corner of the shed.
4. Install the top plates: Attach the top plates to the wall studs, creating a sturdy connection between the walls. Ensure that the top plates are aligned and level throughout the shed perimeter.
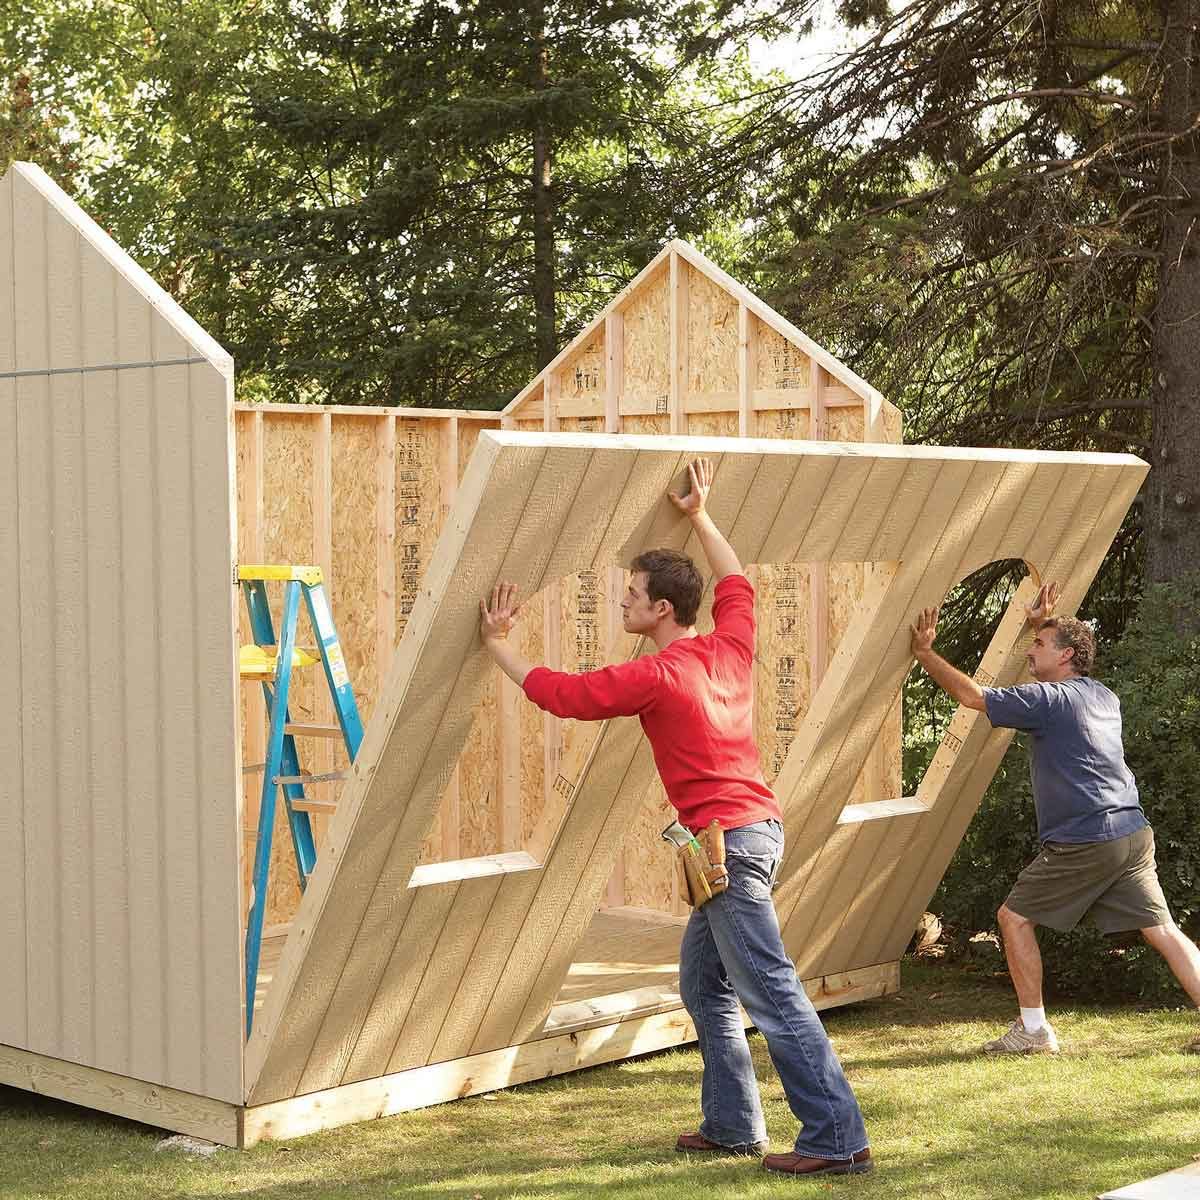
5. Raise the walls: With the floor frame, wall studs, and top plates in place, it’s time to raise the walls. Enlist the help of a friend or family member to hold the walls in position as you secure them to the floor frame and top plates. Use galvanized nails or screws to secure the walls in place.
6. Frame the roof: Once the walls are in place, it’s time to frame the roof structure. Depending on your shed design, this may involve installing rafters, trusses, or joists. Follow your shed plans and ensure that the roof framing is properly secured to the walls and aligned.
7. Reinforce the frame: To ensure enhanced stability and strength, consider adding additional supports to the shed frame. This can include diagonal bracing or hurricane ties at key connection points. These reinforcements will help withstand high winds and prevent structural issues.
Throughout the framing process, use a tape measure, level, and square to ensure accurate measurements and precise alignment. It’s crucial to follow your shed plans closely and double-check each step to ensure a sturdy and well-built frame.
With the shed frame complete, the next step involves installing the roof, followed by the installation of siding and doors/windows. Stay tuned for the next sections to learn more about these crucial steps in building your shed.
When building a shed, make sure to use pressure-treated lumber for the foundation and floor to prevent rot and decay. This will ensure the longevity of your shed.
Install the Roof
Installing the roof is a critical step in completing your shed construction. A well-built and properly installed roof will protect your shed from the elements and ensure its longevity. Here’s a step-by-step guide to help you install the roof:
1. Choose the roofing material: Select the roofing material that best suits your shed design, budget, and climate. Popular options include asphalt shingles, metal roofing, or corrugated panels. Ensure that the roofing material meets the necessary durability and weather resistance requirements.
2. Install the roof sheathing: Begin by installing the roof sheathing, commonly made of plywood or oriented strand board (OSB). Cut the sheathing to fit the dimensions of the roof, ensuring proper alignment and overhang. Secure the sheathing to the roof framing using galvanized nails or screws, following the recommended spacing for fasteners.
3. Apply underlayment: Install a layer of roofing underlayment over the sheathing. Underlayment acts as an additional barrier against water and helps to prevent leaks. This step is particularly important if you live in an area with heavy rainfall or snowfall. Secure the underlayment according to the manufacturer’s instructions.
4. Install the drip edge: Attach a drip edge along the eaves of the roof. A drip edge helps to prevent water from seeping under the roofing material and directs it away from the shed. Secure the drip edge with roofing nails or screws, ensuring a tight fit.
5. Install the roofing material: Place the roofing material on top of the underlayment and drip edge, following the manufacturer’s instructions. For asphalt shingles, start at the bottom of the roof and work your way up, overlapping each row for proper water drainage. If using metal roofing or corrugated panels, fasten them securely to the sheathing or roof framing using appropriate roofing screws or nails.
6. Install ridge vents or roof vents: Proper ventilation is essential to prevent excess heat and moisture buildup in your shed. Install ridge vents or roof vents along the peak of the roof, allowing for adequate airflow. Follow the manufacturer’s instructions for the installation process.
7. Check for any gaps or leaks: After installing the roof, inspect for any gaps, loose fasteners, or potential leaks. Ensure that all roofing components are securely fastened and that there are no points of entry for water or debris.
During the installation process, exercise caution when working at heights and ensure proper safety measures are in place. If you’re not confident in your ability to install the roof, it’s recommended to seek professional assistance.
With the roof installed, you’re one step closer to completing your shed construction. The next step involves installing the siding to complete the exterior enclosure of your shed. Stay tuned for the next section to learn more.
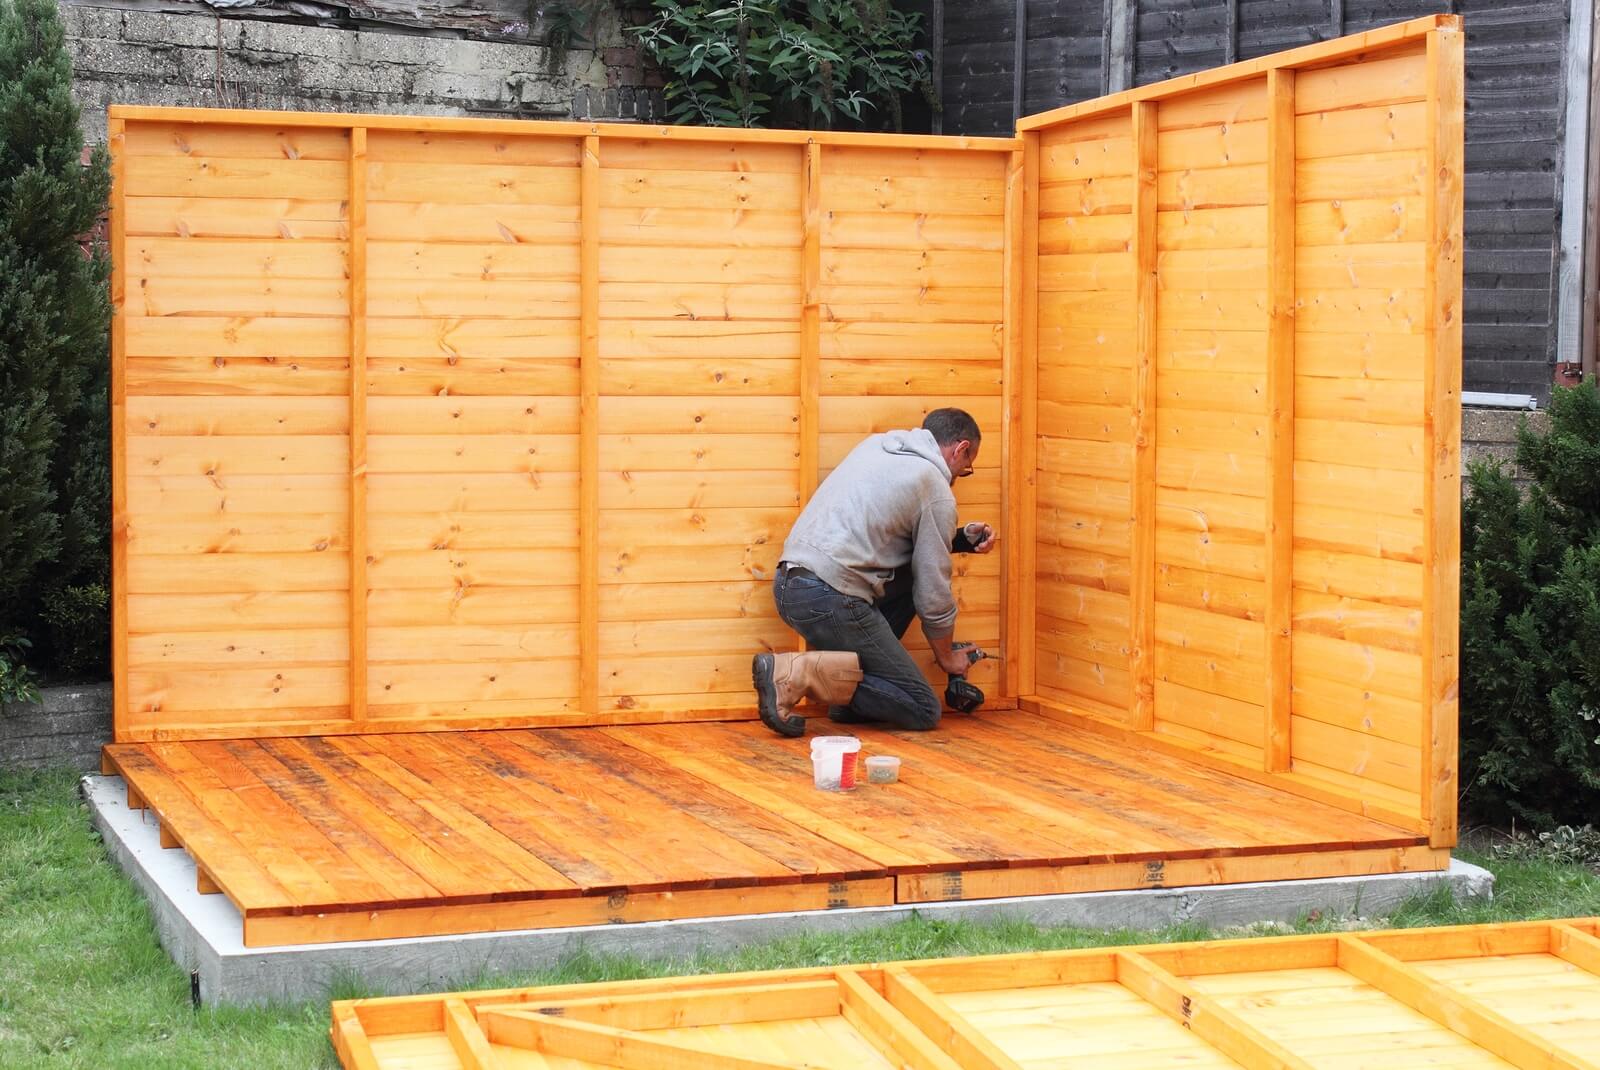
Install the Siding
Installing the siding is a crucial step in completing the exterior of your shed. The siding not only adds to the aesthetic appeal of the structure but also protects it from the elements. Here’s a step-by-step guide to help you install the siding:
1. Choose the siding material: Select the siding material that suits the style of your shed and meets your preferences and budget. Common siding options include wood, vinyl, metal, and composite materials. Consider factors like durability, maintenance requirements, and weather resistance when making your choice.
2. Prepare the walls: Ensure that the walls are clean, dry, and free from any debris. If using wooden siding or panels, apply a coat of primer or wood preservative to protect against moisture and rot. Follow any manufacturer’s recommendations for treating or priming the walls if necessary.
3. Measure and cut the siding: Take accurate measurements of each section of the wall and cut the siding panels accordingly. Use a circular saw, table saw, or sliding miter saw to achieve clean and precise cuts. If using vinyl or composite siding, follow the manufacturer’s instructions for cutting and handling the material.
4. Install the siding panels: Begin at the bottom of the wall and work your way up. Start with the first panel, ensuring that it is level and plumb. Secure it to the wall using nails, screws, or the recommended fasteners for the specific siding material. Continue installing the siding panels, ensuring proper spacing and alignment. Trim the panels as needed to fit corners, windows, and doors.
5. Apply finishing touches: Depending on the type of siding material, you may need to apply finishing touches. For wooden siding, consider applying paint or stain to enhance its appearance and provide additional protection. For vinyl or composite siding, no further finishing is typically required, as they come pre-finished.
6. Install corner trim, J-channels, and window/door trim: To give your shed a polished and professional appearance, install corner trims, J-channels around windows and doors, and any additional trim components according to the manufacturer’s instructions. These finishing touches help to create a seamless and neat look.
7. Inspect and make necessary adjustments: Once the siding installation is complete, inspect the exterior of the shed for any gaps, loose panels, or areas that require additional attention. Make any necessary adjustments or repairs to ensure that the siding is secure and properly aligned.
Proper installation of the siding not only enhances the appearance of your shed but also protects it from moisture, pests, and other elements. Take your time during the installation process, following best practices and manufacturer’s recommendations.
With the siding installed, the next step involves adding doors and windows to make your shed accessible and functional. Stay tuned for the next section to learn more about this important step in your shed construction.
Read more: How To Build Garden Shed
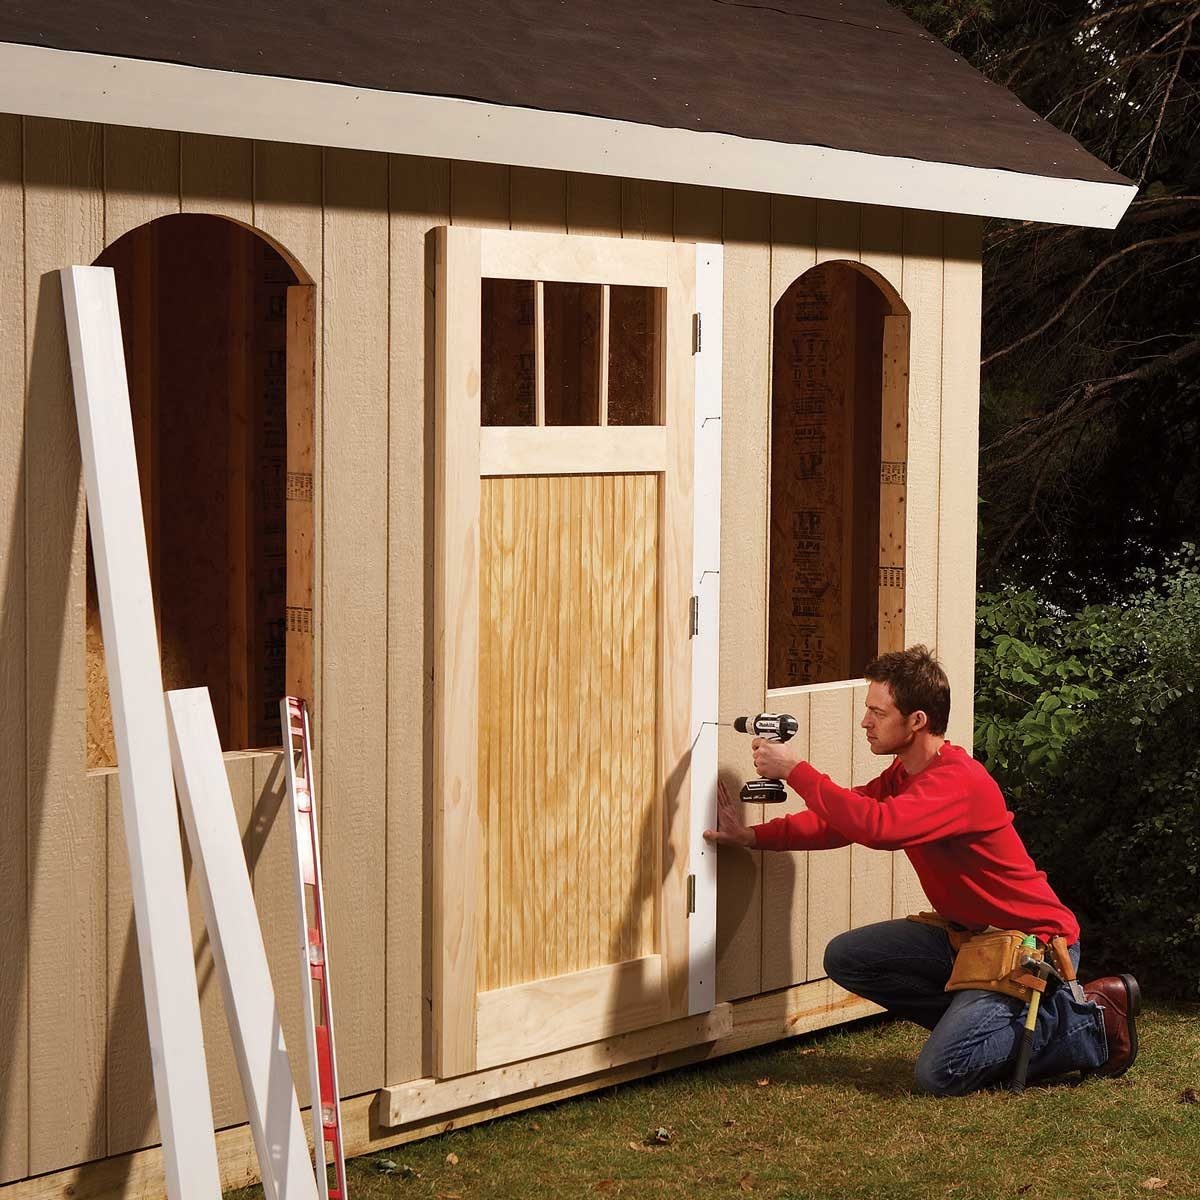
Add Doors and Windows
Adding doors and windows to your shed is a crucial step in making it functional, accessible, and visually appealing. Doors provide entry and exit points, while windows offer natural light and ventilation. Here’s a step-by-step guide to help you add doors and windows to your shed:
1. Select the doors and windows: Choose doors and windows that fit the style, size, and function of your shed. Consider factors like material, design, security features, and energy efficiency. Common options for shed doors include single or double doors made of wood, metal, or fiberglass. Windows can be single or double-hung, sliding, or fixed, made of glass or acrylic.
2. Measure and prepare the openings: Measure the openings for the doors and windows accurately. Mark the locations on the shed walls, ensuring proper spacing and alignment. For doors, you may need to frame the opening with additional studs or headers for structural support. Make sure the openings are clean and free from any debris or obstructions.
3. Install the doors: Start by installing the door frame or pre-hung door unit. Ensure that the frame is plumb, level, and square. Attach the door hinges to the frame and hang the door in place. Adjust as needed to ensure smooth operation and proper fit. Secure the door using screws or nails. Install any additional hardware, such as handles, locks, and weatherstripping, for security and weatherproofing.
4. Install the windows: Place the window frame or window unit in the prepared opening. Ensure that the window is level and square. Secure the frame to the wall using screws or nails. Install any necessary window trim or caulking to seal gaps and provide a finished look. Test the window to ensure proper functioning, including opening and closing smoothly.
5. Weatherproofing: Properly seal the gaps around the doors and windows to prevent water infiltration and ensure energy efficiency. Use weatherstripping, caulk, or insulation foam to seal any gaps between the frame and the shed walls. Pay attention to the bottom of the doors, where weatherstripping or threshold seals can help keep out drafts and moisture.
6. Test and adjust: Test the doors and windows for smooth operation and proper fit. Make any necessary adjustments to ensure they open, close, and lock securely. Check for any gaps or air leaks that may require additional sealing or adjustment.
The addition of doors and windows brings functionality, light, and ventilation to your shed. Take care to properly install and seal them for maximum security, energy efficiency, and weatherproofing.
Now that the doors and windows are installed, the next step is to finish the interior of your shed to make it a functional and organized space. Stay tuned for the next section to learn more about finishing the interior of your shed.
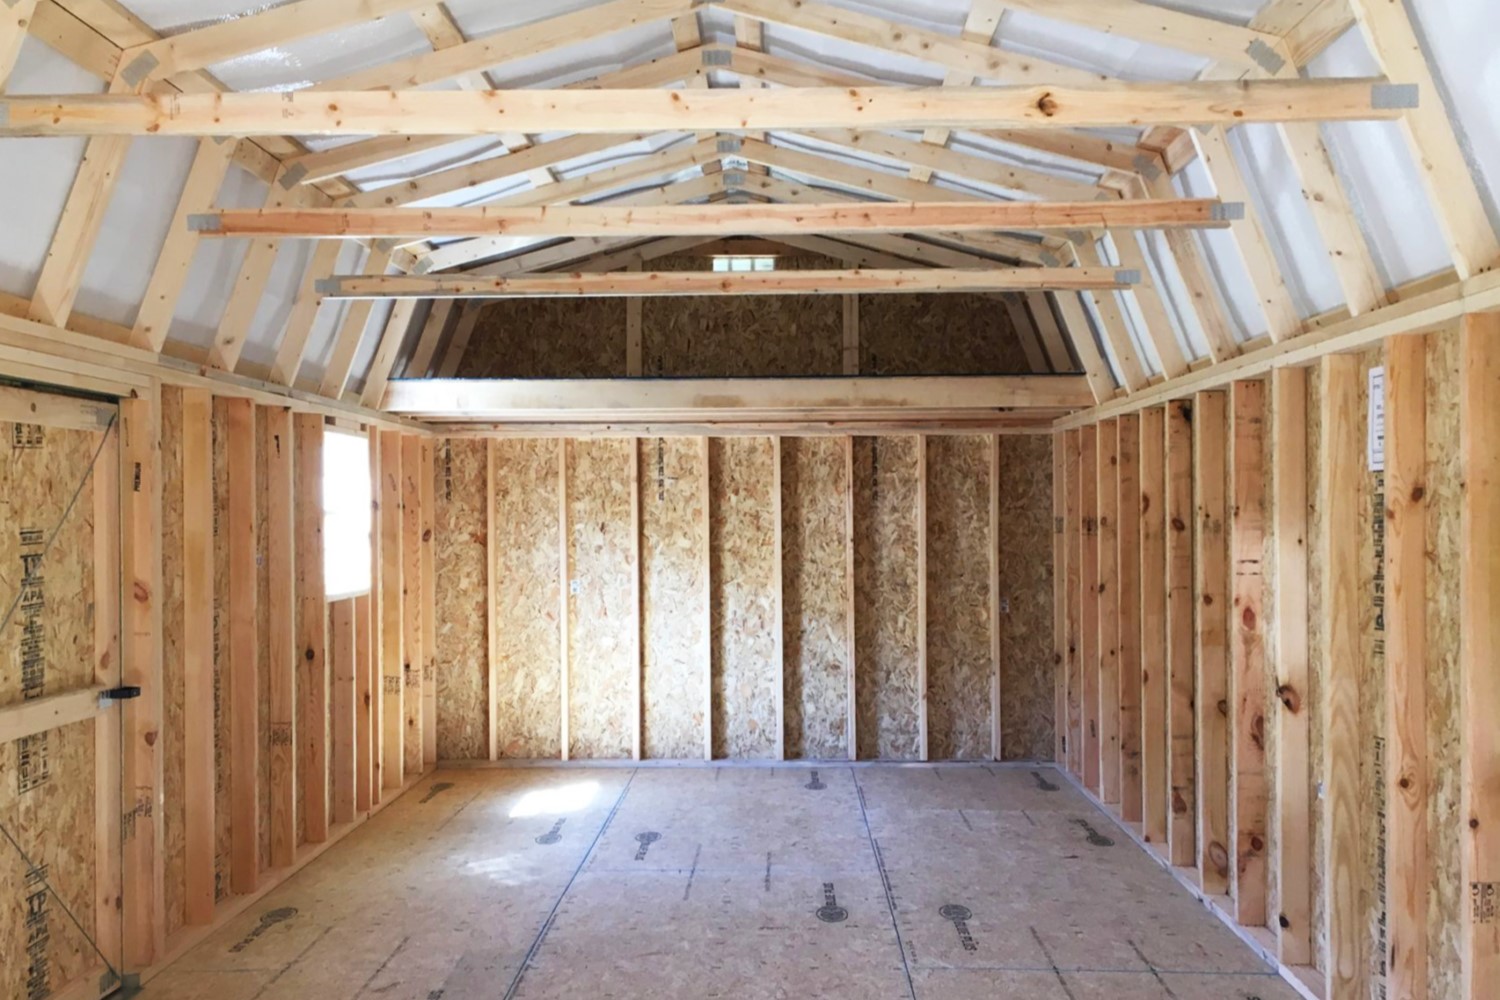
Finish the Interior
Finishing the interior of your shed is an important step that transforms it into a functional and organized space. Whether you plan to use it as a workspace, storage area, or hobby room, the interior should be tailored to your specific needs. Here are some tips to help you finish the interior of your shed:
1. Insulation: If you plan to use your shed year-round or in extreme weather conditions, consider insulating the walls, ceiling, and floor. Insulation helps to regulate temperature, reduce energy costs, and increase comfort. Choose insulation materials suitable for your shed’s construction, such as fiberglass batts or foam board insulation.
2. Wall finishes: Depending on your preference and shed’s purpose, you can choose a wall finish that suits your needs. Options include drywall, plywood, or paneling. Drywall provides a clean and professional look but requires more effort to install. Plywood is sturdy, versatile, and can be painted or stained. Paneling offers a quick and affordable option with various styles to choose from.
3. Flooring: Select a flooring material that is durable, easy to clean, and suitable for your shed’s purpose. Options include hardwood, vinyl, laminate, or concrete. Consider factors such as aesthetics, durability, moisture resistance, and ease of installation when choosing the flooring material.
4. Electricity and Lighting: Install electrical outlets, lighting fixtures, and switches as needed. Consult with a licensed electrician to ensure safe and proper installation. Plan the placement of outlets and lighting fixtures to accommodate your specific requirements and create a well-lit and functional space.
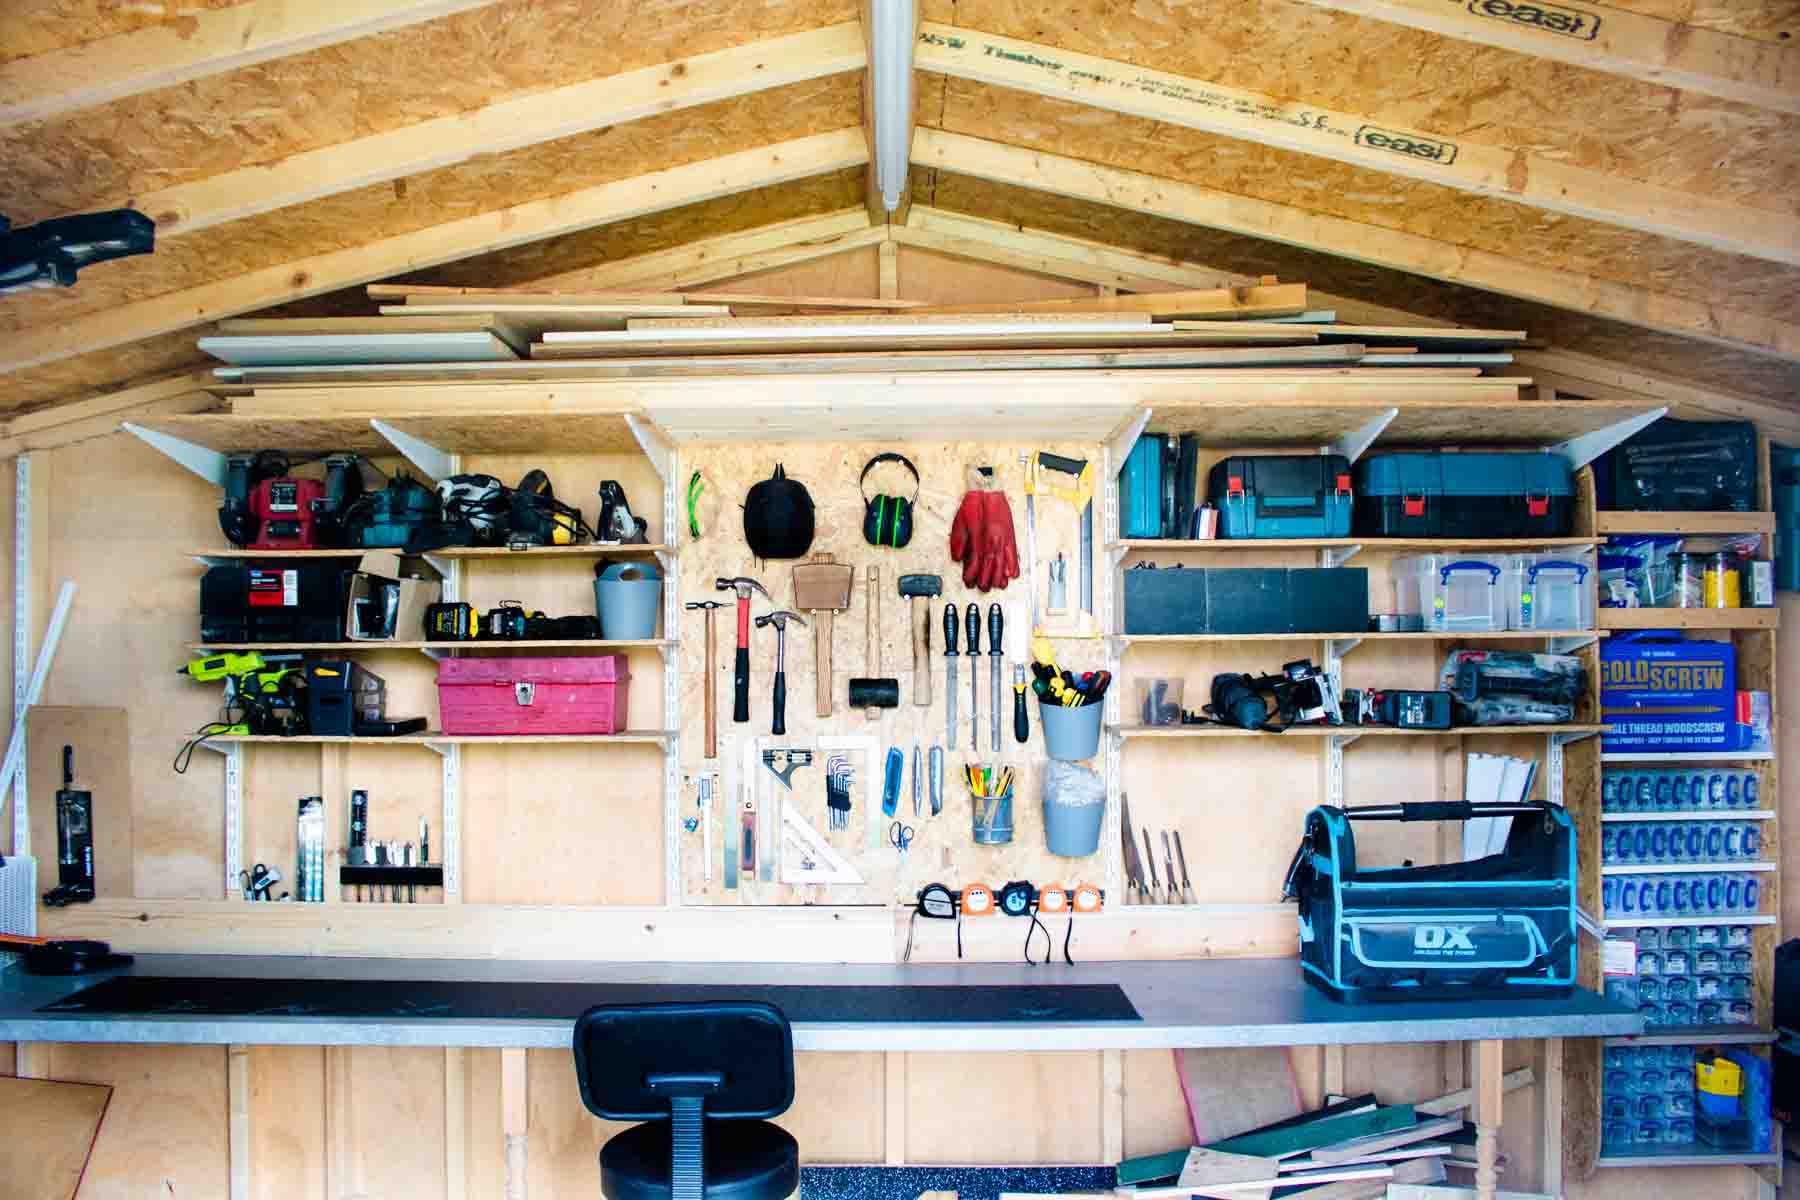
5. Shelving and Storage: Install shelves, cabinets, and storage systems to maximize the storage space in your shed. Consider your storage needs and utilize wall space efficiently. Modular shelving units, pegboards, and hooks can help keep your tools, equipment, and supplies organized and easily accessible.
6. Workbench or Workstation: If you plan to use your shed as a workspace, consider adding a workbench or workstation. Build a sturdy and functional work surface that suits your needs, using materials like solid wood or plywood. Incorporate storage drawers or cabinets underneath to keep your tools and supplies organized.
7. Personalize the Space: Add personal touches to make your shed feel like a comfortable and inviting space. Paint the walls with colors that reflect your style and taste. Hang artwork, mirrors, or a corkboard for inspiration and organization. Consider adding a rug or curtains to add warmth and character to the space.
When finishing the interior of your shed, it is important to keep functionality in mind. Plan the layout and design according to your specific needs and preferences. Take the time to organize and arrange your belongings in a way that maximizes space and creates an efficient workflow.
With the interior finished, the final step is to apply protective finishes to the exterior of your shed. Stay tuned for the next section to learn more about this important step in preserving the longevity and appearance of your shed.
Apply Protective Finishes
Applying protective finishes to the exterior of your shed is essential for preserving its longevity, appearance, and resistance to the elements. These finishes act as a barrier, protecting the shed from moisture, UV rays, insects, and other potential damage. Here are some protective finishes to consider for your shed:
1. Paint: Paint is one of the most popular and versatile finishes for sheds. It not only enhances the appearance but also provides a protective layer against moisture. Choose a high-quality exterior paint that is specifically formulated for outdoor use. Consider factors such as color, texture, and durability when selecting the paint for your shed.
2. Stain: Staining is an excellent choice if you want to highlight the natural beauty of the wood and maintain a rustic look. Stains penetrate the wood, providing protection against UV rays and moisture. Depending on the desired finish, you can choose from clear, semi-transparent, or solid stains. Ensure the stain is suitable for outdoor applications and provides adequate protection against the elements.
3. Sealant: Applying a sealant to the exterior of your shed helps to protect the wood from moisture and prevents rotting or warping. Clear sealants provide an invisible protective layer, maintaining the natural look of the wood. Make sure to use a sealant that is compatible with your shed’s construction material, whether it is wood, metal, or composite.
4. Varnish or Polyurethane: If you want to enhance the natural beauty of the wood while providing protection, varnish or polyurethane finishes are good options. These finishes create a clear, glossy, or satin surface that seals and protects the wood from UV rays, moisture, and wear. Choose a high-quality, outdoor-grade varnish or polyurethane for the best results.
5. Water Repellents: Water repellents are specifically designed to repel water and protect against moisture damage. They form a protective barrier on the surface of the shed without altering its appearance. Water repellents typically contain silicone or other water-resistant compounds and provide long-lasting protection against rain, snow, and humidity.
When applying any protective finish, it’s important to follow the manufacturer’s instructions for preparation and application. Prepare the surface by cleaning and sanding if necessary, and apply the finish evenly using brushes, rollers, or sprayers. Allow adequate drying time between coats, and apply multiple coats if recommended.
Regular maintenance is also crucial to ensure the longevity of your shed’s protective finish. Periodically inspect the exterior of your shed for any signs of damage, such as peeling, cracking, or fading. Touch up or reapply the protective finish as needed to maintain its effectiveness.
By applying protective finishes to the exterior of your shed, you can enhance its durability, appearance, and resistance to the elements. With these finishes in place, your shed will continue to serve its purpose and remain an asset to your property for years to come.
With the protective finishes applied, your shed construction is complete. Take a moment to admire your hard work and enjoy the functional space you’ve created.
Conclusion
Building a shed is an exciting and rewarding project that can add value, functionality, and appeal to your property. By following the top tips for building a shed, you can ensure that the process is well-planned, efficient, and successful. From choosing the right location to applying the finishing touches, each step plays a crucial role in creating a functional and durable shed.
Choosing the right location for your shed sets the foundation for a well-positioned and accessible structure. Consider factors like accessibility, sunlight exposure, and neighborhood regulations when selecting the perfect spot.
Determining the shed size is essential to accommodate your storage needs and future growth. Take inventory of your belongings and plan for any additional items or hobbies that may require extra space.
Obtaining the necessary permits is a crucial step in complying with local regulations and ensuring a smooth construction process. Research the specific requirements and guidelines for your area and obtain the appropriate permits before proceeding with the project.
Preparing a solid foundation is vital to the stability and longevity of your shed. Clear the area, level the ground, and construct a sturdy and level base that will support the shed structure.
Selecting the right building materials is key to constructing a durable and visually appealing shed. Choose framing material, siding, roofing, and other components that suit your style, budget, and climate.
Building a sturdy frame is the backbone of your shed. Follow the design plans and ensure proper alignment, stability, and reinforcement for a robust structure.
Installing the roof protects your shed from the elements and completes the enclosure. Choose the appropriate roofing material and follow proper installation techniques for a watertight and secure roof.
Installing the siding adds aesthetics and weather resistance to your shed. Choose a material that suits your style and climate, and install it correctly to provide a finished look and protect the shed from moisture and pests.
Adding doors and windows brings functionality, light, and ventilation to your shed. Choose doors and windows that match the style and purpose of your shed, ensuring proper installation and weatherproofing.
Finishing the interior of your shed transforms it into a functional and organized space. Insulate, choose suitable wall finishes and flooring, and plan electrical and storage solutions to make the most of the interior space.
Applying protective finishes to the exterior of your shed enhances its durability and resistance to the elements. Choose paint, stain, sealant, or other finishes that provide protection against moisture, UV rays, and wear.
Building a shed requires careful planning, attention to detail, and the right materials. By following these top tips, you can create a shed that is not only functional and durable but also visually pleasing and a valuable addition to your property.
Remember to consult local building codes and regulations, seek professional assistance when needed, and prioritize safety throughout the construction process.
Now it’s time to enjoy your newly built shed and make the most of the additional storage or workspace it provides. Whether it’s for gardening, woodworking, or storing your outdoor equipment, your shed will serve as a valuable asset for years to come.
Frequently Asked Questions about Top Tips For Building A Shed
Was this page helpful?
At Storables.com, we guarantee accurate and reliable information. Our content, validated by Expert Board Contributors, is crafted following stringent Editorial Policies. We're committed to providing you with well-researched, expert-backed insights for all your informational needs.


0 thoughts on “Top Tips For Building A Shed”