Articles
How To Remove A Textured Ceiling
Modified: September 2, 2024
Learn how to remove a textured ceiling with these helpful articles. Step-by-step instructions, tips, and tricks to successfully tackle this home improvement project.
(Many of the links in this article redirect to a specific reviewed product. Your purchase of these products through affiliate links helps to generate commission for Storables.com, at no extra cost. Learn more)
Introduction
Removing a textured ceiling can instantly transform the look and feel of a room. Whether you’re tired of the dated popcorn texture or renovating a space, getting rid of textured ceilings can give your home a fresh, modern appeal. However, removing a textured ceiling requires careful planning and preparation to ensure a successful outcome.
In this article, we will guide you through the step-by-step process of removing a textured ceiling. We will cover everything from gathering the necessary materials and tools to cleaning up the debris. By following these instructions, you can tackle this DIY project with confidence and achieve a smooth and polished ceiling.
So, let’s get started with the first essential step – gathering the materials and tools you’ll need for the job.
Key Takeaways:
- Safety First! Prioritize your well-being by wearing protective gear, testing for asbestos, and creating a safe work environment before tackling the textured ceiling removal process.
- Attention to Detail Matters. From preparing the room to finishing touches, meticulousness ensures a successful and rewarding transformation of your space.
Read more: How To Swirl Texture A Ceiling
Gather Materials and Tools
Before you begin removing the textured ceiling, it’s important to have the necessary materials and tools at hand. Here’s a checklist of items you will need:
1. Protective Gear: Start by prioritizing your safety. Wear safety goggles, a dust mask, and gloves to protect your eyes, lungs, and hands from any potential hazards.
2. Ladder or Scaffolding: Depending on the height of your ceiling, you may need a ladder or scaffolding to safely reach and work on the textured surface. Ensure stability and follow ladder safety guidelines.
3. Plastic Sheets or Tarps: Cover the floors, furniture, and any other items in the room with plastic sheets or tarps to protect them from debris and dust during the removal process.
4. Plastic Drop Cloths: Place plastic drop cloths over the plastic sheets or tarps. This additional layer provides an extra barrier to catch falling debris and makes cleanup easier.
5. Sprayer or Garden Pump: Use a sprayer or garden pump filled with warm water to soften the texture and make it easier to remove.
6. Putty Knife or Scraper: A wide putty knife or scraper will be your main tool for scraping off the texture from the ceiling. Opt for one with a comfortable grip and a sturdy blade.
7. Plastic Bags or Buckets: Use plastic bags or buckets to collect and dispose of the scraped off texture. This will help contain the mess and make cleanup more efficient.
8. Ceiling Patching Compound: After removing the texture, you may need to repair any damaged areas on the ceiling. Have a ceiling patching compound on hand to fill in any holes or imperfections.
9. Sandpaper and Sanding Block: Once the ceiling is patched, sandpaper and a sanding block will be necessary to smooth out the repaired areas for a seamless finish.
10. Primer and Paint: Finally, if you plan to paint the ceiling, make sure to have primer and paint ready. Choose a high-quality paint that is suitable for ceilings and matches your desired aesthetic.
By gathering these materials and tools before starting the project, you’ll be well-prepared and able to work efficiently, ensuring a successful textured ceiling removal.
Prepare the Room
Before you begin removing the textured ceiling, it’s important to properly prepare the room to minimize mess and protect surfaces from damage. Follow these steps to prepare the room:
1. Clear the Room: Remove all furniture, decorations, and any other items from the room. This will create a clear workspace and prevent any potential damage or obstruction during the removal process.
2. Cover the Floors: Place plastic sheets or tarps on the floor to protect it from falling debris and dust. Secure the edges with painter’s tape to keep them in place.
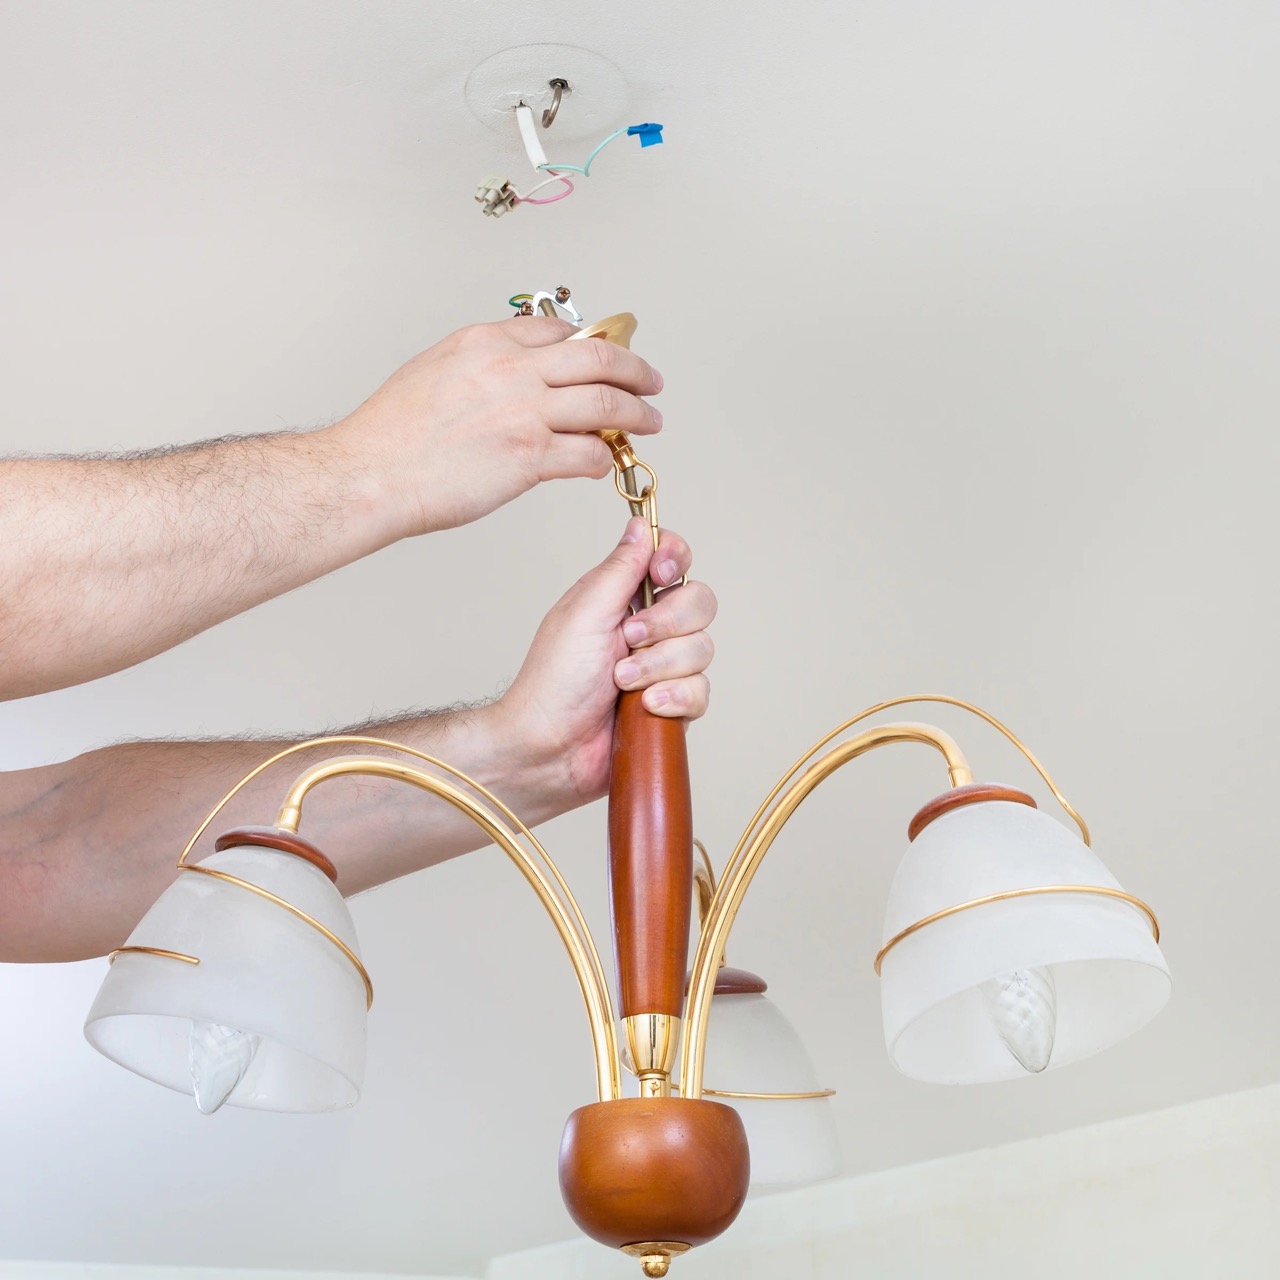
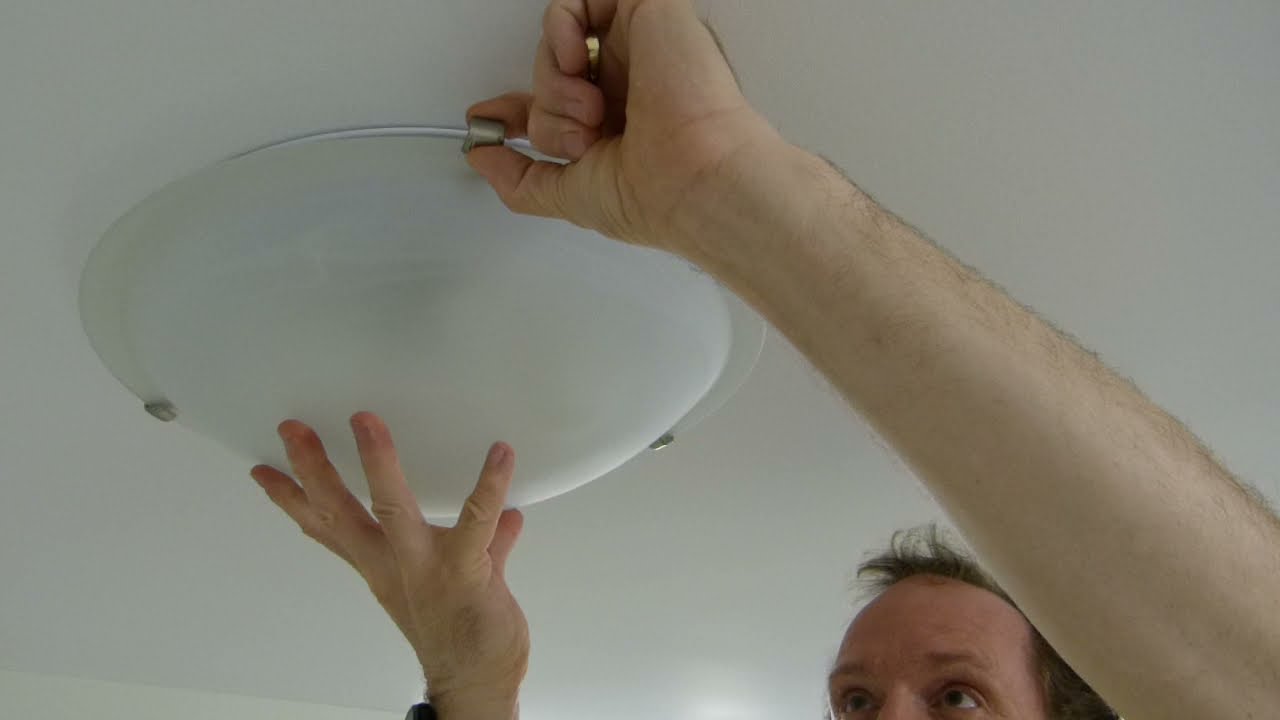
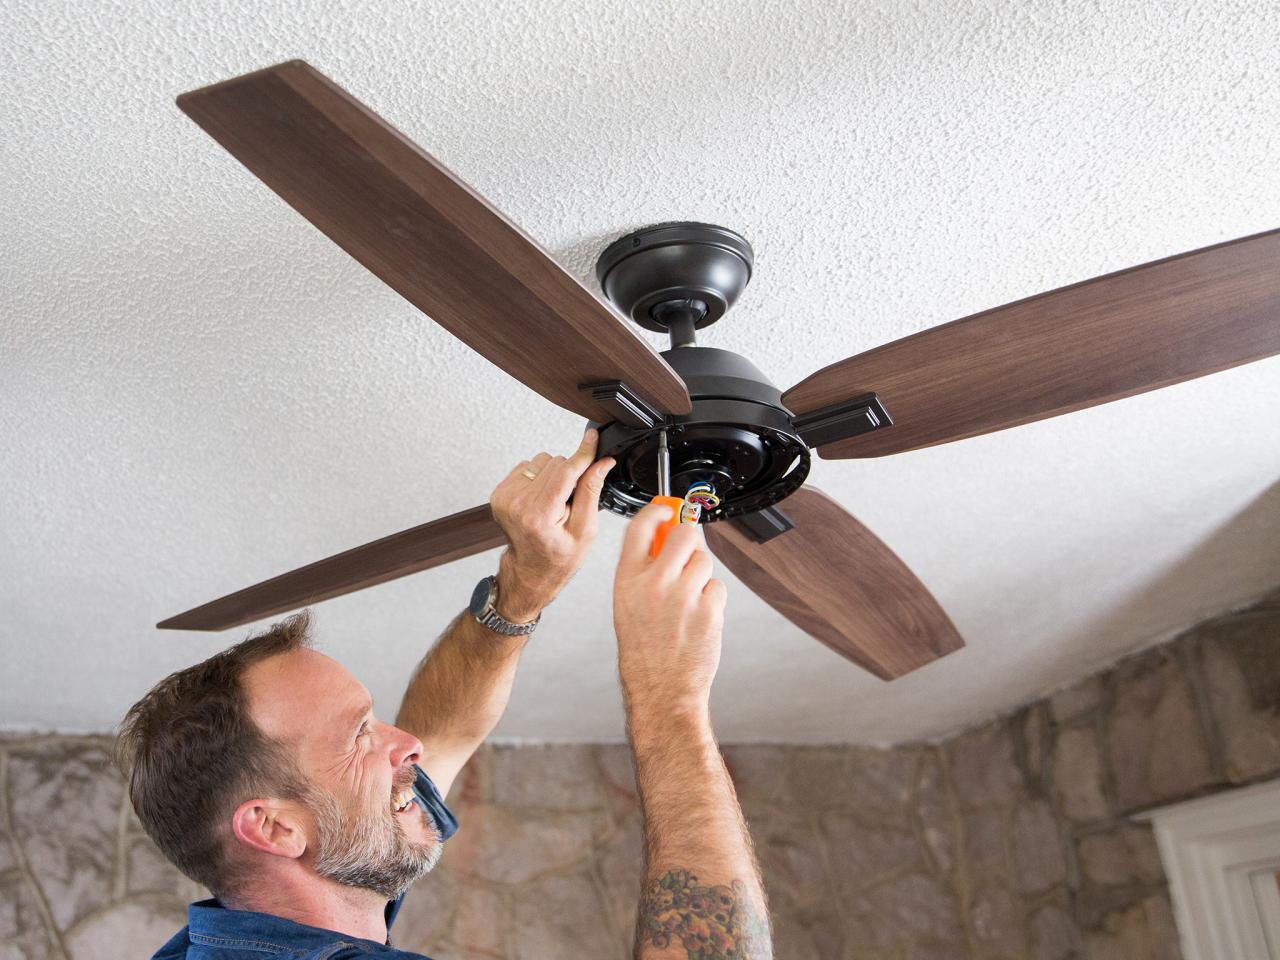
3. Remove Light Fixtures: If there are any light fixtures or ceiling fans, carefully take them down and set them aside. This will make the removal process easier and prevent any damage to the fixtures.
4. Turn off the Electricity: Prior to removing any light fixtures, ensure that the electricity to the room is turned off. This will prevent any accidental electrical shock.
5. Protect Walls and Trim: Cover the perimeter of the room, including walls and trim, with painter’s tape and plastic sheets. This will protect them from accidental damage or splatter during the removal process.
6. Ventilation: Ensure proper ventilation by opening windows or using fans. This will help with drying the ceiling and help dissipate any dust or odors during and after the removal process.
Preparing the room properly will save you time and effort in cleaning up later. It will also protect your belongings and surfaces from potential damage during the textured ceiling removal. With the room prepared, you can now move on to the next step of testing for asbestos, if necessary.
Test for Asbestos
Before proceeding with the removal of the textured ceiling, it is crucial to test for the presence of asbestos. Asbestos is a hazardous mineral that was commonly used in construction materials, including textured ceilings, before its health risks were discovered. Exposure to asbestos fibers can lead to serious respiratory diseases, including lung cancer and mesothelioma.
Testing for asbestos should be done by professionals, as they have the necessary training and equipment to handle the process safely. Here are the steps to follow:
1. Hire a Certified Asbestos Inspector: Look for a certified asbestos inspector who specializes in testing and removal. They will have the knowledge and experience to conduct a thorough assessment of your textured ceiling.
2. Schedule an Inspection: Contact the inspector and schedule an appointment for them to visit your home and collect samples. They will take samples from different areas of the textured ceiling to determine if asbestos is present.
3. Wait for the Results: The samples will be sent to a certified laboratory for analysis. It may take a few days to receive the results. While waiting, it is crucial to avoid disturbing the textured ceiling to prevent the release of any potential asbestos fibers.
4. Follow Professional Advice: Once you receive the results, follow the recommendations provided by the certified asbestos inspector. If asbestos is detected, it is highly recommended to hire professionals for the removal process, as they have the necessary equipment and expertise to handle it safely.
If asbestos is found in your textured ceiling, do not attempt to remove it yourself. Disturbing the asbestos-containing material can release harmful fibers into the air, posing a significant health risk to you and others in the vicinity. Hiring professionals for the removal process will ensure the safe and proper handling of the asbestos-containing material.
On the other hand, if the test results come back negative for asbestos, you can proceed with confidence to remove the textured ceiling using the appropriate techniques and tools, which we will discuss further in the following sections.
Protect Yourself
During the process of removing a textured ceiling, it’s essential to prioritize your safety and take precautions to protect yourself from potential hazards. Although the texture itself may not be harmful, other factors such as dust, debris, and potential exposure to asbestos (if present) can pose risks to your health. Follow these guidelines to ensure your safety:
1. Wear Protective Gear: Before starting the removal process, make sure to wear the appropriate protective gear. This includes safety goggles to protect your eyes from falling debris and dust, a dust mask or respirator to filter out particles, and gloves to protect your hands from any scrapes or irritants.
2. Cover Exposed Skin: It’s advisable to wear long sleeves, long pants, and closed-toe shoes to protect any exposed skin from contact with debris or potential irritants. This will minimize the risk of cuts, scratches, or other injuries.
3. Test the Air for Asbestos (If Applicable): If asbestos is suspected or confirmed in the textured ceiling, it is essential to have the air quality tested by professionals before you start the removal process. This will help gauge the level of contamination and ensure that proper safety measures are in place to protect yourself and others.
4. Create a Barrier: Set up a containment area around the work area to prevent the spread of dust and debris. Use plastic sheets or tarps to create a barrier and seal off the space with painter’s tape. This will help minimize the risk of contaminating other areas of your home and allow for easier cleanup.
5. Ventilate the Room: Open windows and use fans to keep the room well-ventilated during the removal process. This will help prevent the buildup of dust and improve air circulation, reducing the chance of respiratory irritation.
6. Take Frequent Breaks: Removing a textured ceiling can be physically demanding, so it’s important to take regular breaks to rest and hydrate. Overexertion can lead to fatigue and increased risk of accidents. Listen to your body and pace yourself accordingly.
7. Properly Dispose of Waste: Dispose of the scraped-off texture and any debris in sturdy plastic bags or containers that are properly sealed. Label them as hazardous waste if asbestos is present. Follow local regulations and guidelines for the proper disposal of materials.
Remember, safety should always be your top priority when performing any DIY project, especially one that involves potential hazards like textured ceiling removal. By following these safety measures, you can minimize risks to your health and carry out the project in a safe and controlled manner.
Read more: How To Knockdown Texture A Ceiling
Remove Furniture and Cover Floors
Before you begin removing the textured ceiling, it’s essential to protect your furniture and floors from potential damage. Dust and debris from the removal process can easily settle on surfaces and cause stains or scratches. Follow these steps to remove furniture and cover your floors:
1. Clear the Room: Start by removing all furniture, decorations, and items from the room. This includes chairs, tables, rugs, and any decor hanging on the walls. Clearing the room will provide you with a spacious and safe working area.
2. Protect Delicate Furniture: If you have delicate or valuable furniture pieces that cannot be easily moved out of the room, cover them with plastic sheets or furniture covers. Secure the covers with tape to keep them in place.
3. Cover Floors: Place large plastic sheets or tarps on the floor to protect it from dust, debris, and potential damage. Ensure the entire floor surface is covered, extending the sheet up against the walls to catch any falling materials.
4. Secure the Edges: Use painter’s tape to secure the edges of the plastic sheets or tarps to the baseboards or walls. This will prevent the sheets from sliding or shifting during the removal process, keeping the floor fully covered and protected.
5. Consider Additional Padding: If you’re concerned about protecting your floors, you may opt to add an extra layer of padding. Foam mats or drop cloths placed beneath the plastic sheets can provide an added cushion to prevent scratches or damage to the floor surface.
6. Create Pathways: If there are areas of the room that will still be accessible during the removal process, create designated pathways using additional plastic sheets or self-adhesive carpet protection film. This will help keep those areas clean and prevent tracking debris throughout the house.
By removing furniture from the room and carefully covering the floors, you’ll minimize the risk of damage during the textured ceiling removal process. These precautions will also make the cleanup process easier and more efficient once the project is complete. With the room prepared and protected, you can now move on to the next step of preparing the ceiling for removal.
Use a spray bottle to dampen small sections of the ceiling at a time before scraping. This will help loosen the texture and make it easier to remove.
Prepare the Ceiling
Before you start removing the textured ceiling, it’s crucial to prepare the surface to ensure a smooth and successful removal process. Taking the time to properly prepare the ceiling will make the job easier and help you achieve the desired results. Follow these steps to prepare the ceiling:
1. Turn Off Power: Ensure that the electricity to the room is turned off at the circuit breaker. This will prevent any electrical accidents while working on the ceiling. Use a voltage tester to double-check that the power is indeed off.
2. Test a Small Section: Before tackling the entire ceiling, start by testing a small section of the textured surface. Use a spray bottle filled with warm water to dampen a small area. Allow the water to penetrate the texture for a few minutes to soften it.
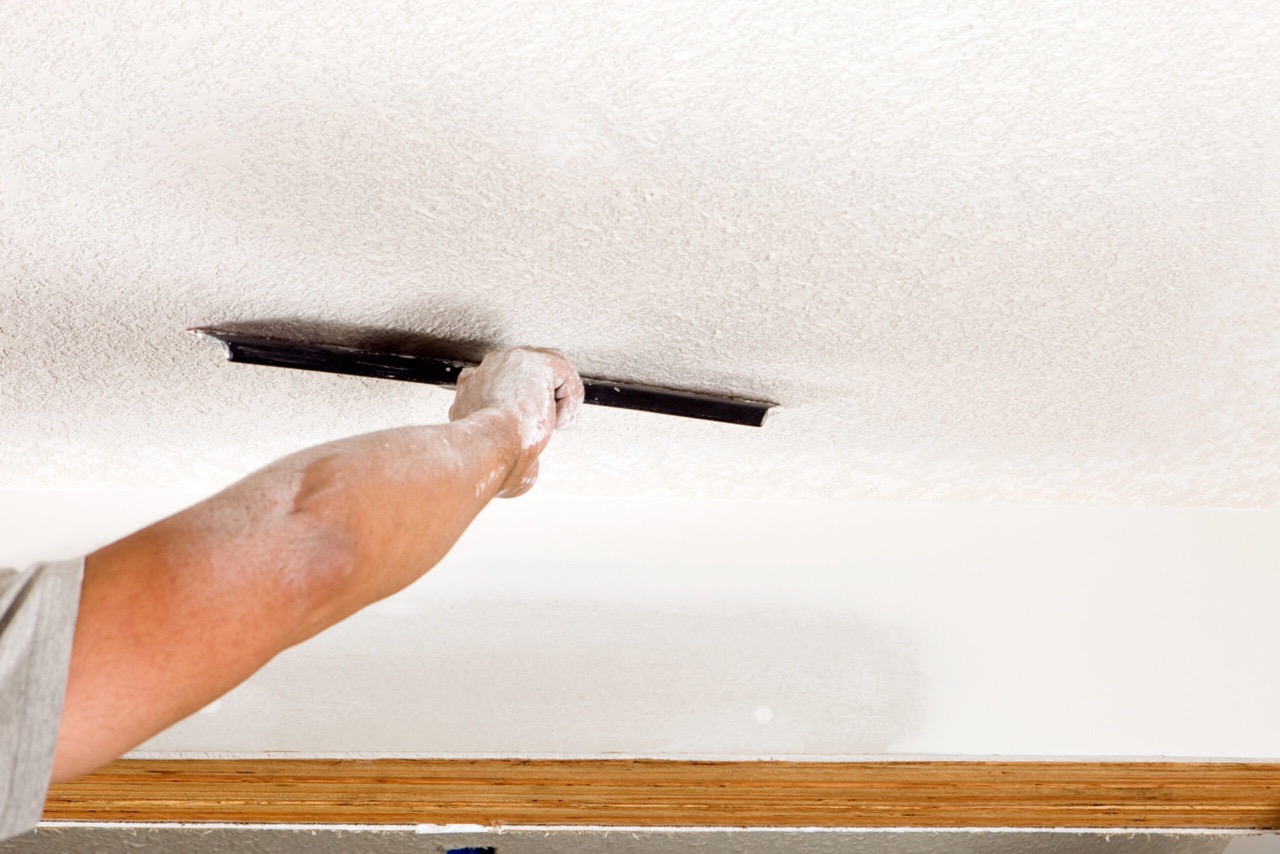
3. Scrape Test: Once the texture has softened, use a putty knife or scraper to gently scrape off the dampened area. This will help you gauge the difficulty and amount of effort required to remove the texture. If it comes off easily and without damaging the underlying ceiling, you can proceed with confidence.
4. Adjust Water-to-Texture Ratio: Based on the results of the scrape test, adjust the water-to-texture ratio as needed. For more stubborn textures, you may need to increase the water volume or use a spray bottle with a more powerful misting mechanism to thoroughly dampen the surface.
5. Work in Small Sections: For manageable and efficient removal, work on the ceiling in small sections at a time. This allows you to concentrate on one area while keeping the surrounding texture adequately softened for easier removal.
6. Take Breaks: Textured ceiling removal can be physically demanding, so be sure to take regular breaks to prevent fatigue and avoid strain on your body. Pace yourself and stay hydrated throughout the process.
By following these steps, you’ll ensure that the ceiling is properly prepared for the removal of the textured surface. This preparation will make the scraping process more manageable and help you achieve a smooth surface for any further repairs or refinishing. Now that the ceiling is ready, it’s time to move on to the next step: scraping the textured ceiling.
Scrape the Textured Ceiling
Now that the ceiling is properly prepared, it’s time to start removing the textured surface. Scaping the textured ceiling can be a messy and time-consuming task, but with the right techniques and tools, you can achieve a smooth and clean result. Follow these steps to scrape the textured ceiling:
1. Work in Small Sections: Divide the ceiling into manageable sections to make the scraping process more efficient. Start with a small area, approximately 3×3 feet, and gradually work your way around the room.
2. Spray the Texture: Use a sprayer or garden pump filled with warm water to mist the textured surface. Allow the water to soak in for a few minutes to soften the texture. This will make it easier to scrape off.
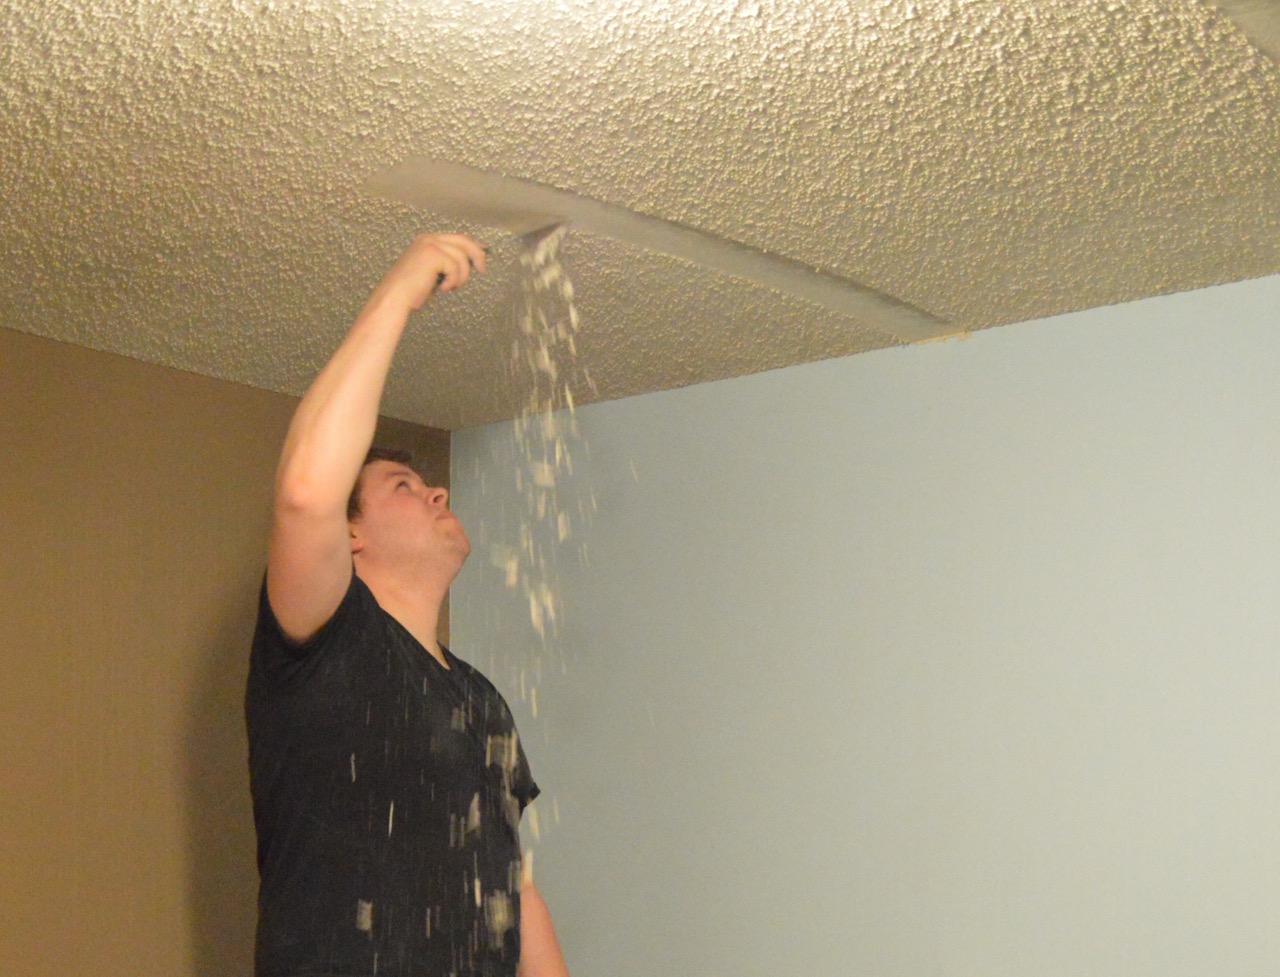
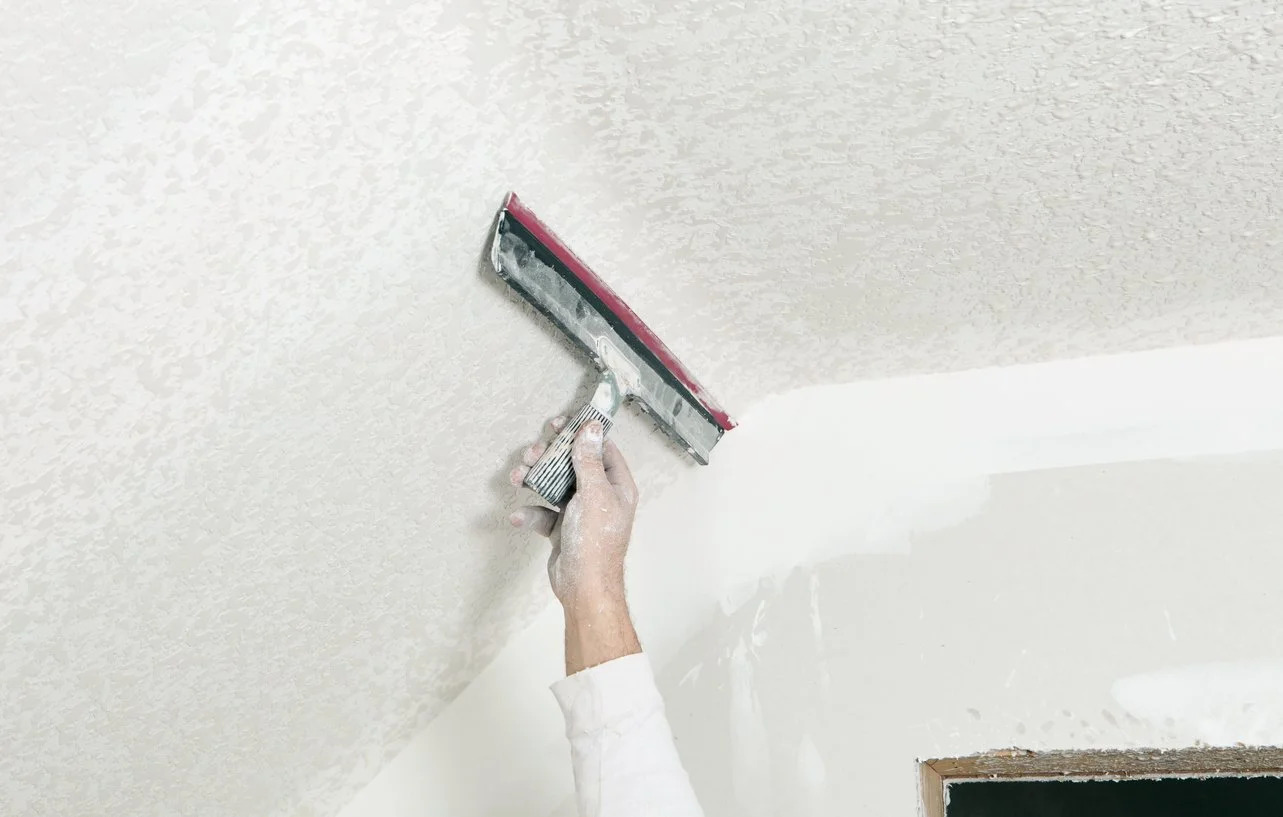
3. Scrape with a Putty Knife: Once the texture has softened, gently scrape it off using a wide putty knife or scraper. Hold the tool at a shallow angle and apply moderate pressure to remove the texture from the ceiling. Work in a methodical manner to ensure thorough coverage of the section.
4. Collect the Scraped Texture: As you scrape off the texture, collect it in a plastic bag or bucket. This will help contain the mess and make cleanup easier. Be sure to seal the bag tightly to prevent dust from escaping.
5. Repeat the Process: Move on to the next section and repeat the spraying and scraping process. Continue until all the textured areas have been removed from the ceiling.
6. Address Stubborn Areas: Some areas may have more stubborn texture that is difficult to remove. In such cases, dampen the area again and use a little more pressure while scraping. Be careful not to damage the underlying ceiling surface.
7. Smooth the Surface: After scraping off the texture, you may notice rough patches or small imperfections on the ceiling. Use sandpaper or a sanding block to smooth out these areas, ensuring a uniform surface.
Remember to work slowly and methodically while scraping the textured ceiling, as rushing the process can lead to accidental damage or uneven results. Take breaks as needed and stay hydrated. Once the scraping is complete, you can move on to the next step of repairing any damaged areas on the ceiling.
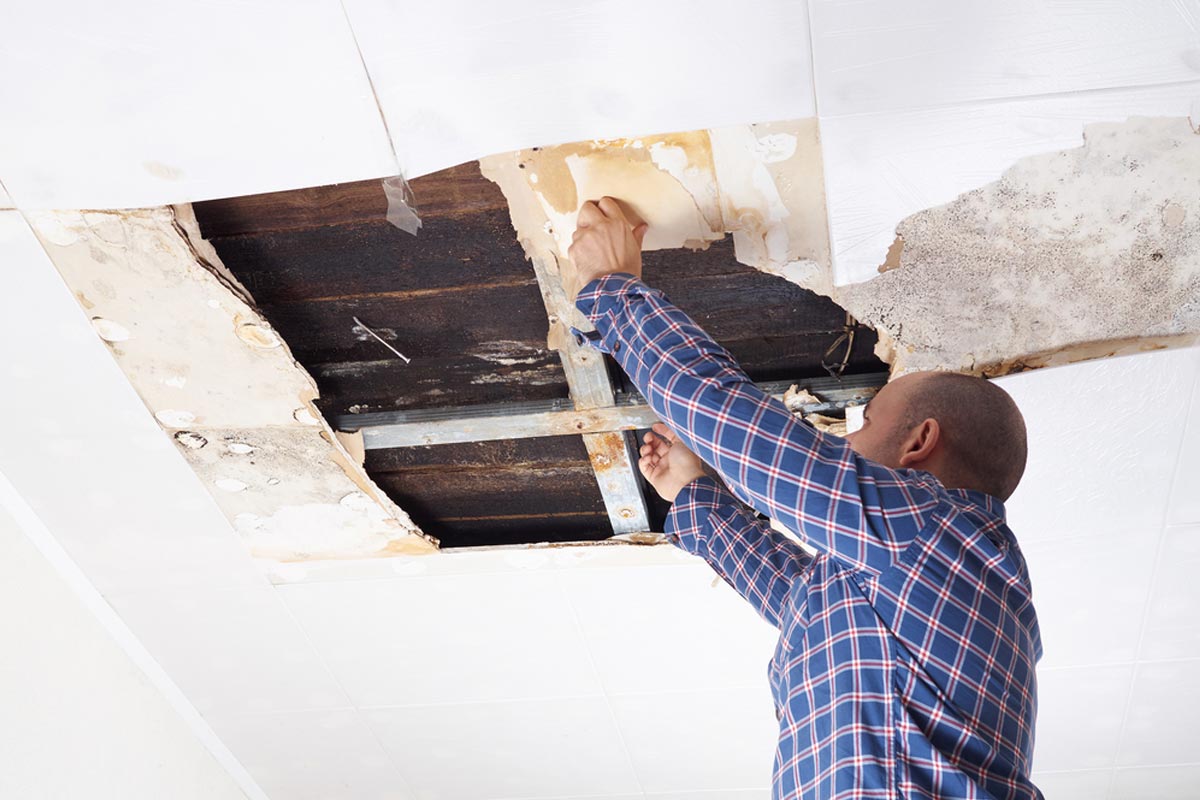
Repair any Damaged Areas
After removing the textured ceiling, it’s common to find some areas that require repair. These may include cracks, holes, or uneven spots. Repairing these damaged areas will ensure a smooth and seamless finish. Follow these steps to repair any damaged areas on the ceiling:
1. Clean the Surface: Before proceeding with repairs, clean the ceiling surface to remove any dust, debris, or loose material. Use a broom or vacuum cleaner with a soft brush attachment to gently clean the area.
2. Fill Holes and Cracks: For small holes or cracks, use a high-quality spackling compound or drywall joint compound. Apply a small amount of compound to a putty knife or scraper, then spread it over the damaged area. Smooth it out with the blade, feathering the edges for a seamless finish. Allow it to dry according to the manufacturer’s instructions.
3. Sand the Repaired Areas: Once the compound is fully dry, use fine-grit sandpaper or a sanding block to smooth out the repaired areas. Gently sand the surface until it is level and blends with the rest of the ceiling. Be careful not to over-sand or damage the surrounding texture.
4. Wipe Clean: After sanding, use a damp cloth or sponge to wipe away any dust or residue from the repaired areas. Allow the ceiling to dry completely before moving on to the next step.
5. Prime the Repaired Areas: Apply a coat of primer to the repaired areas to ensure proper adhesion of the paint and a consistent finish. Use a brush or roller to evenly apply the primer, following the manufacturer’s instructions. Allow the primer to dry completely before proceeding.
6. Paint the Ceiling: Once the primer is dry, apply a coat of paint to the entire ceiling, including the repaired areas. Use a high-quality paint designed for ceilings and follow the manufacturer’s instructions for application. For a smooth and even finish, consider using a paint roller with a long nap.
By properly repairing any damaged areas on the ceiling, you will create a seamless and professional look after removing the textured surface. Take your time with the repairs to ensure a high-quality finish. Once the repairs have been completed and the paint has dried, you can focus on cleaning up the debris from the removal process.
Read more: How Do I Texture A Ceiling
Clean Up the Debris
After removing the textured ceiling and repairing any damaged areas, it’s time to clean up the debris left behind. Cleaning up properly will help you restore the room to its original state and ensure a tidy and safe environment. Follow these steps to effectively clean up the debris:
1. Remove the Plastic Sheets and Tarps: Start by carefully removing the plastic sheets or tarps that were covering the floors and furniture. Gather them up and dispose of them responsibly.
2. Vacuum the Room: Use a vacuum cleaner with a HEPA filter to thoroughly clean the floors, walls, and any remaining debris. Pay close attention to corners, crevices, and baseboards where dust and particles may have accumulated.
3. Wipe Down Surfaces: Use a damp cloth or sponge to wipe down any surfaces that may have collected dust or residue during the removal process. This includes walls, windowsills, light fixtures, and furniture.
4. Clean Light Fixtures: If you removed any light fixtures or ceiling fans, take the opportunity to clean them before reinstalling. Wipe them down with a damp cloth to remove any dust or debris.
5. Dispose of Debris: Empty the contents of the bag or bucket that contains the scrapped texture into a heavy-duty trash bag. Seal the bag securely to prevent any particles from escaping. Dispose of the bag according to local regulations for asbestos-containing materials if applicable.
6. Clean Your Tools: Take the time to clean your tools used for scraping the textured ceiling. Scrapers and putty knives can be soaked in warm soapy water to remove any residual debris. Rinse and dry them thoroughly before storing.
7. Ventilate the Room: Open windows or use fans to increase ventilation in the room. This will help to remove any lingering dust or odors and improve air circulation.
By following these steps, you will effectively clean up the debris left behind after removing the textured ceiling. Remember to be thorough in your cleaning to ensure a clean and safe environment. With the debris cleaned up, you can now attend to the finishing touches to complete the project.
Finishing Touches
The textured ceiling removal process is almost complete, but there are a few finishing touches you can add to enhance the overall look and feel of the room. These detail-oriented steps will help you achieve a polished and professional outcome. Follow these final touches to complete your project:
1. Check for Imperfections: Inspect the ceiling for any remaining imperfections, such as small bumps, uneven areas, or missed spots. Use sandpaper or a sanding block to smooth out any rough patches and ensure a seamless finish.
2. Patch and Touch Up: If you come across any additional holes or cracks that you missed during the repair stage, patch them using the same spackling compound or drywall joint compound. Sand and touch up these areas with primer and paint for a consistent appearance.
3. Apply Ceiling Paint: Once you’re satisfied with the smoothness of the ceiling, apply a fresh coat of paint to achieve a uniform finish. Select a paint color that complements the room’s decor and follow proper painting techniques for a professional result.
4. Reinstall Light Fixtures: If you removed any light fixtures or ceiling fans, now is the time to reinstall them. Carefully follow the manufacturer’s instructions to securely mount and connect the fixtures. Ensure that the electricity is turned off before working with electrical connections.
5. Restore Furniture: Move the furniture items back into the room, taking caution not to scrape or damage the newly painted ceiling. Take the opportunity to rearrange your furniture or update the room’s layout for a refreshed and inviting space.
6. Clean Up Final Dust: Give the room one last thorough cleaning to ensure any remaining dust or debris is removed. Vacuum the floors, wipe down surfaces, and clean any remaining areas that may have collected dust during the project.
7. Admire Your Work: Finally, step back and take a moment to admire your handiwork. The removal of the textured ceiling has transformed the room, giving it a modern and clean look. Enjoy the renewed space and the sense of accomplishment that comes with completing a DIY project.
Remember, attention to detail is important in these finishing touches. It’s these final steps that will elevate the overall result and make the room feel complete. With the finishing touches complete, you can now sit back, relax, and enjoy your newly transformed space.
Conclusion
Removing a textured ceiling can be a challenging yet rewarding project that can completely transform the look and feel of a room. By following the step-by-step process outlined in this article, you’ll be equipped with the knowledge and confidence to tackle this DIY task successfully.
We started by gathering the necessary materials and tools, ensuring that you have everything you need to safely and effectively remove the textured surface. Properly preparing the room, testing for asbestos if necessary, and protecting yourself from potential hazards are essential steps to ensure a safe and healthy working environment.
Once the room was prepared, we delved into the process of removing the textured ceiling itself. By working in small sections, dampening the surface with water, and using a putty knife or scraper, you can scrape away the texture and reveal a smooth and clean ceiling underneath. Repairing any damaged areas and cleaning up the debris are crucial steps to achieving a polished and professional finish.
With the finishing touches complete, including final repairs, painting, and reinstalling fixtures, you can stand back and appreciate the remarkable transformation you have accomplished. The room now boasts a modern and updated appearance, ready for you to enjoy and showcase to others.
Throughout this entire process, your safety and well-being have remained a top priority. From wearing the proper protective gear to hiring professionals for asbestos testing, you have taken the necessary precautions to ensure a successful and health-conscious endeavor.
Removing a textured ceiling may require time, effort, and attention to detail, but the results are well worth it. Your newly transformed room will offer a clean and modern aesthetic that enhances the overall appeal of your home.
Remember, if at any point during the textured ceiling removal process you feel unsure or overwhelmed, it’s always wise to seek professional assistance. They can provide guidance, perform necessary tests, and ensure the project is completed to the highest standards.
We hope this article has provided you with valuable insights and guidance for removing a textured ceiling. With the knowledge and skills you have acquired, you are well on your way to achieving the ceiling of your dreams. Happy renovating!
Frequently Asked Questions about How To Remove A Textured Ceiling
Was this page helpful?
At Storables.com, we guarantee accurate and reliable information. Our content, validated by Expert Board Contributors, is crafted following stringent Editorial Policies. We're committed to providing you with well-researched, expert-backed insights for all your informational needs.


0 thoughts on “How To Remove A Textured Ceiling”