Articles
Your Guide To Repairing A Stone Wall
Modified: January 9, 2024
Looking for articles on repairing stone walls? Your guide to fixing a stone wall is here, with expert tips and step-by-step instructions to help you get the job done right.
(Many of the links in this article redirect to a specific reviewed product. Your purchase of these products through affiliate links helps to generate commission for Storables.com, at no extra cost. Learn more)
Introduction
Stone walls add a timeless charm and elegance to any outdoor space. Whether they are used to define property boundaries, add structure to a garden, or create a retaining wall, stone walls are not only functional but also visually appealing. However, over time, these walls can become damaged due to weathering, age, or accidents. Repairing a stone wall may seem like a daunting task, but with the right techniques and tools, it can be a manageable and rewarding DIY project.
In this guide, we will walk you through the step-by-step process of repairing a stone wall. From assessing the damage to finishing and sealing the wall, we will cover everything you need to know to restore your stone wall to its former beauty. So, grab your tools and let’s get started!
Before we begin, it’s important to note that the extent of the repair work will depend on the severity of the damage. Minor cracks and loose stones may only require simple repairs, while larger damage may necessitate more extensive restoration. It’s always a good idea to thoroughly assess the wall before diving into the repair process to ensure you have a clear understanding of the work ahead.
Now, let’s move on to the first step: assessing the damage.
Key Takeaways:
- Assessing the damage, gathering tools and materials, and preparing the work area are crucial initial steps in successfully repairing a stone wall. Thoroughness and attention to detail are key to a successful restoration.
- From removing loose stones to cleaning and prepping the stones, mixing and applying mortar, and finishing and sealing the wall, each step in the repair process contributes to the structural integrity and visual appeal of the stone wall. Attention to detail and patience are essential for a job well done.
Assessing the Damage
Before you start repairing a stone wall, it’s crucial to assess the extent of the damage. This will help you determine the necessary repairs and understand the overall condition of the wall.
Begin by inspecting the entire length of the wall, looking for any visible cracks, loose stones, or gaps. Take note of any areas where the mortar has deteriorated or where water might be seeping through. This thorough examination will give you an idea of the scope of the repair work.
Pay close attention to any structural issues, such as bulging or leaning sections, as these may require additional reinforcement. Look for signs of erosion or shifting ground, as these can contribute to further damage if left unaddressed.
Once you have identified the areas that need repair, assess the type of damage. Are there small cracks that can be patched up, or do you need to replace entire stones? Is the mortar crumbling, or are there missing sections that need to be filled? Understanding the specific nature of the damage will help you plan your repair strategy and gather the necessary materials.
Another key aspect to consider is the cause of the damage. Is it purely the result of natural aging and weathering, or are there underlying issues such as poor drainage or tree roots causing pressure on the wall? Identifying and addressing these underlying causes will not only ensure a more effective repair but also help prevent future damage.
It’s important to note that if you are dealing with significant damage or structural issues, it may be wise to consult a professional before attempting the repair yourself. They will have the expertise and experience to assess the situation accurately and provide guidance on the best course of action.
By thoroughly assessing the damage, you will have a clear understanding of what needs to be done and can proceed with confidence to the next step: gathering tools and materials.
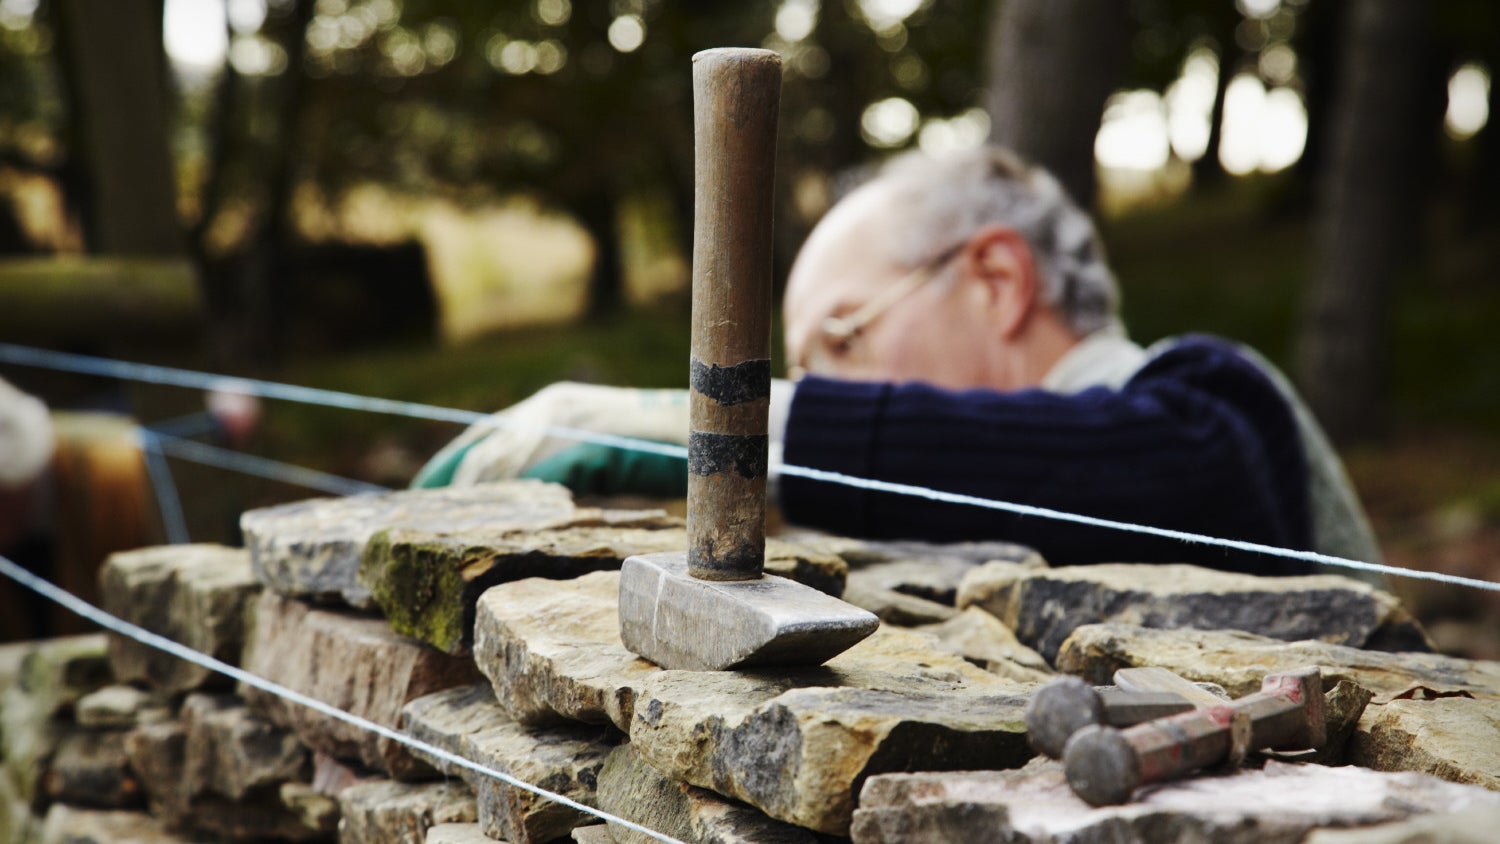
Gathering Tools and Materials
Once you have assessed the damage to your stone wall, it’s time to gather the necessary tools and materials for the repair. Having the right equipment on hand will ensure a smoother and more efficient repair process. Here are the essential tools and materials you will need:
Tools:
- Masonry hammer or chisel
- Mason’s trowel
- Pointing trowel
- Wire brush
- Safety glasses
- Dust mask
- Gloves
- Masonry saw or grinder
- Level
- Measuring tape
- Bucket for mixing mortar
Materials:
- Masonry cement
- Lime
- Sand
- Waterproofing sealer
- Replacement stones
- Mortar mix
- Masonry adhesive
The specific quantities of materials will depend on the size and scope of your repair project. Measure the dimensions of the damaged areas to estimate how much mortar and replacement stones you will need. It’s always a good idea to purchase slightly more materials than you think you will require to account for any unforeseen circumstances.
Make sure you choose the right type of mortar and adhesive for your stone wall. Consult with a hardware store or masonry professional if you are unsure of the best options for your specific wall and repair needs.
Remember to prioritize safety by wearing protective gear like safety glasses, a dust mask, and gloves. Stone and mortar can create fine dust particles that can be harmful when inhaled, so take necessary precautions to protect your lungs and eyes.
By gathering the appropriate tools and materials ahead of time, you will save yourself unnecessary trips to the store and be well-prepared to embark on the next steps of the repair process. So, let’s move on to the crucial step of preparing the work area.
Preparing the Work Area
Before you begin repairing your stone wall, it’s essential to prepare the work area to ensure a safe and efficient repair process. Preparing the work area involves several crucial steps:
1. Clear the area:
Remove any plants, debris, or furniture near the wall to create a clear workspace. This will prevent anything from getting in the way and allow for easy access to the damaged areas.
2. Protect surrounding surfaces:
Using plastic drop cloths or tarps, cover any surrounding surfaces such as walkways or adjacent walls to protect them from dust, debris, or accidental damage during the repair process.
3. Secure loose stones:
If there are any loose stones in the damaged area, gently remove them and set them aside. It’s important to secure loose stones to prevent further damage and to work on a stable surface during the repair process. If necessary, use a masonry adhesive to reattach them temporarily until you are ready to replace them permanently.
4. Wet the wall:
Before applying mortar, it’s beneficial to wet the wall with a garden hose or spray bottle. This will prevent the stone from absorbing too much moisture from the fresh mortar, ensuring a stronger bond between the stone and the mortar.
5. Set up your work area:
Arrange your tools and materials in a convenient and accessible manner near the work area. This will save you time and effort during the repair process, allowing for a more efficient workflow.
By taking the time to properly prepare the work area, you will create a conducive environment for repairing your stone wall. With a cleared and protected workspace, you can proceed confidently to the next step: removing loose or damaged stones.
Removing Loose or Damaged Stones
Now that you have prepared the work area, it’s time to tackle the task of removing any loose or damaged stones from your wall. This step is essential to ensure a solid foundation for your repair work. Here’s how to go about it:
1. Safety first:
Before you start, put on safety glasses and gloves to protect yourself from any potential injuries. Loose stones can be unpredictable, so taking precautionary measures is crucial.
2. Gently remove loose stones:
Using a masonry hammer or chisel, carefully tap on the stone’s edges to loosen it from the wall. If the stone is already loose, you may be able to remove it by hand. If it doesn’t budge, use the hammer or chisel to pry it out. Take your time to ensure that you don’t damage neighboring stones or the wall structure.
3. Evaluate the damage:
Inspect the area where the stone was removed for any underlying damage. If there are cracks or gaps in the mortar or underlying structure, take note of them for repair later. If necessary, gently remove any loose or crumbling mortar using the pointed trowel or wire brush.
4. Set aside the removed stones:
Keep the removed stones in a safe place, ensuring they won’t get damaged or lost. You will reattach or replace these stones later in the repair process.
5. Clean the area:
Use a wire brush to clean the surface where the stone was removed, removing any debris or loose mortar. This will provide a clean and stable base for the new mortar and stone.
By systematically removing loose or damaged stones, you are setting the stage for a successful repair. It’s important to handle each stone with care and take note of any further damage that needs attention. With the loose stones removed, you can now move on to the next step: cleaning and prepping the stones.
Read more: DIY Guide: Installing A Garbage Disposal
Cleaning and Prepping the Stones
Once you have removed the loose or damaged stones from your wall, it’s time to clean and prepare them for reinstallation. Cleaning and prepping the stones is an essential step that ensures a proper bond with the new mortar. Here’s what you need to do:
1. Remove dirt and debris:
Start by using a brush or a damp cloth to remove any dirt, dust, or debris from the surface of the stones. This will help create a clean and smooth surface for the mortar to adhere to.
2. Inspect for mold or mildew:
If you notice any signs of mold or mildew on the stones, mix a solution of water and mild dish soap. Scrub the affected areas gently with a soft brush to remove the growth. Rinse the stones thoroughly with clean water and allow them to dry before proceeding.
3. Repair damaged or crumbling stones:
If any of the removed stones are cracked or damaged, you may need to repair or replace them. Small cracks can be repaired using a stone or masonry epoxy, following the manufacturer’s instructions. For significantly damaged stones, it’s best to replace them with new ones to ensure the structural integrity of the wall.
Read more: How To Build A Stone Fireplace And Chimney
4. Soak the stones:
If your stones appear dry, consider soaking them in water for a few minutes before installation. This will prevent the stones from absorbing too much moisture from the fresh mortar, which could weaken the bond.
5. Sort and organize the stones:
As you prepare the stones, sort and organize them according to their size, shape, and color. This will make it easier to choose the right stone for each specific location during the repair process.
By taking the time to clean and prep the stones, you are ensuring a solid bond and a uniform appearance for your repaired stone wall. With the stones clean and ready, you can now move on to the next step: mixing and applying mortar.
Mixing and Applying Mortar
With the stones cleaned and prepped, it’s time to mix and apply the mortar for your stone wall repair. Mortar provides a strong and durable bond between the stones, ensuring the stability and longevity of the wall. Here’s how to mix and apply mortar effectively:
1. Gather your materials:
Start by collecting the necessary materials for mixing the mortar, including masonry cement, lime, sand, and water. Follow the instructions on the packaging for the recommended ratios of each component.
Read more: DIY Guide To Refinishing Hardwood Floors
2. Mix the mortar:
In a large bucket or wheelbarrow, combine the masonry cement, lime, and sand according to the specified ratios. Use a hoe or a mixing paddle attached to a drill to thoroughly mix the dry ingredients. Add water gradually and mix until you achieve a workable consistency. The mortar should be thick enough to hold its shape but wet enough to spread easily.
3. Prepare a small batch:
To start, it’s best to mix a small batch of mortar to ensure proper consistency and to prevent it from drying out before you can use it. As you progress with the repair, you can mix larger batches as needed.
4. Apply the mortar:
Using a mason’s trowel, apply a layer of mortar to the cleaned and wetted surface of the wall, covering an area slightly larger than the size of the stones you are working with. Create grooves in the mortar using the notched edge of the trowel to increase the bond between the mortar and the stones.
5. Set the stones:
Place the prepped stones into the mortar, pressing them firmly and wiggling them slightly to ensure good adhesion. Use a level to make sure the stones are aligned and plumb. Leave a small gap between the stones for mortar jointing. Repeat this process, working in small sections, until the damaged area is fully repaired.
Read more: DIY Guide To Installing A Pallet Wall
6. Clean excess mortar:
As you work, take care to clean any excess mortar from the faces of the stones and the joints. A pointing trowel can be helpful for shaping and smoothing the mortar joints as you go.
By mastering the art of mixing and applying mortar, you are well on your way to restoring the integrity and beauty of your stone wall. With the mortar in place and the stones set, you can now proceed to the next step: replacing stones.
Replacing Stones
Now that you have applied the mortar and set the stones in place, it’s time to focus on replacing any damaged or missing stones in your wall. Replacing stones is an important step in restoring the structural integrity and aesthetic appeal of your stone wall. Here’s what you need to do:
1. Assess stone placement:
Take a moment to assess the placement of the stones you removed earlier. Determine if they can be reattached or if they need to be replaced with new stones. If the removed stones are in good condition, you can carefully place them back into the wall using fresh mortar.
2. Match the size and shape:
If the original stones are not reusable or if you need additional stones for the repair, select replacement stones that closely match the size, shape, and color of the existing ones. This will ensure a seamless and cohesive look.
Read more: DIY Guide: Refinishing Hardwood Floors
3. Prepare the replacement stones:
Just like the previously cleaned stones, make sure the replacement stones are clean and free from any debris or loose particles. Soak new stones in water for a few minutes to prevent excessive absorption of moisture from the mortar.
4. Apply mortar to the wall and stone:
Using a trowel, apply a layer of mortar to both the prepared surface of the wall and the back of the replacement stone. The mortar should be similar to the consistency used for setting the stones earlier.
5. Position and secure the replacement stone:
Place the replacement stone into the prepared space, pressing it firmly into the mortar. Make sure it aligns correctly with the adjacent stones. Use a level to ensure it is plumb and adjust the position if necessary. Allow the mortar to set before continuing to the next stone.
6. Repeat the process:
Continue replacing any other damaged or missing stones using the same technique. Take your time to ensure proper alignment and a stable bond with the mortar. Allow the mortar to cure fully before moving on to the next step.
By replacing stones with care and precision, you are restoring the integrity and beauty of your stone wall. Each stone plays a vital role in maintaining the structural stability of the wall, so it’s crucial to take your time and ensure a proper fit. With the stones replaced, it’s time to focus on repairing cracks and gaps.
Read more: Your Guide To Styles And Types Of Doors
Repairing Cracks and Gaps
Cracks and gaps in a stone wall not only compromise its appearance but can also lead to further damage if left unattended. Repairing cracks and gaps is an essential step in the restoration process to ensure the wall’s structural integrity and aesthetic appeal. Here’s how to effectively repair cracks and gaps:
1. Clean the cracks and gaps:
Use a wire brush or a small chisel to clean out any debris, loose mortar, or dirt from the cracks and gaps. This will create a clean surface for the repair material to adhere to.
2. Dampen the area:
Before applying the repair material, dampen the cracked or gapped area with water. This will help the new mortar or patching material bond better with the existing wall.
3. Choose the appropriate repair material:
Depending on the size and location of the cracks or gaps, you may need different repair materials. For small cracks, you can use a mortar mix with a bonding agent. For larger cracks or gaps, you may need a stone epoxy or a specialized stone patching compound. Consult with a hardware store or masonry professional to determine the best product for your specific repair needs.
Read more: Your Guide To Troubleshooting Door Problems
4. Apply the repair material:
Using a trowel or a pointing tool, carefully apply the repair material into the cracks or gaps. Be sure to fill them completely, pushing the material firmly into place. Smooth out the surface of the repaired area with a trowel, making it level with the surrounding stones.
5. Let it cure:
Allow the repair material to cure according to the manufacturer’s instructions. This may take several hours or even days depending on the product used. Avoid any disturbances or contact with the repaired area during this time.
6. Check for additional cracks or gaps:
After the initial repair has cured, inspect the wall for any additional cracks or gaps that may have been missed. Repeat the cleaning and repair process as needed.
By diligently repairing cracks and gaps, you are safeguarding the structural stability and visual appeal of your stone wall. Taking the time to address these issues will minimize further damage and ensure a long-lasting repair. Once the cracks and gaps are repaired, it’s time to focus on finishing and sealing the wall.
Finishing and Sealing the Wall
After completing the repairs and restoring the integrity of your stone wall, it’s time to focus on the finishing touches and sealing the wall. Finishing and sealing the wall will not only enhance its appearance but also provide added protection against the elements. Here’s how to effectively finish and seal your stone wall:
1. Clean the surface:
Take a moment to clean the entire surface of the wall using a soft brush or a sponge. Remove any dust, dirt, or debris that may have accumulated during the repair process. This will ensure a clean and smooth finish for the wall.
2. Repair any joint lines:
If there are visible joint lines or inconsistencies in the mortar, use a pointing trowel or a small brush to touch up and smooth out the joints. This will create a uniform and seamless look for the wall.
3. Apply a water repellent sealer:
To protect your stone wall from water infiltration and potential damage, apply a water repellent sealer. Choose a sealer specifically designed for stone walls and follow the manufacturer’s instructions for application. Apply the sealer evenly to the entire surface of the wall, using a brush or a roller, making sure to cover all areas thoroughly.
4. Allow the sealer to cure:
After applying the sealer, allow it to cure according to the manufacturer’s instructions. This may take anywhere from a few hours to a few days. Avoid coming into contact with the sealed surface during this time to ensure a proper bond and complete curing.
Read more: What Is a Loveseat: Your Ultimate Guide
5. Inspect and make final touch-ups:
Once the sealer has cured, carefully inspect the wall for any areas that may need touch-ups or additional sealing. Reapply the sealer as necessary, paying attention to areas prone to water infiltration or that may have been missed during the initial application.
6. Enjoy your beautifully repaired and sealed stone wall:
With the final touches complete, stand back and admire your hard work. Your stone wall is now repaired, protected, and ready to be enjoyed for years to come. Take pride in the restoration you’ve accomplished and share the beauty of your stone wall with others.
By finishing and sealing the wall, you are not only enhancing its appearance but also prolonging its lifespan. The sealer will provide an extra layer of defense against moisture, weathering, and staining, ensuring that your stone wall remains in great condition for years to come.
Conclusion
Repairing a stone wall may seem like a challenging task, but with the right knowledge and techniques, it can be a rewarding DIY project. By following the steps outlined in this guide, you can restore the structural integrity and visual appeal of your stone wall with confidence.
Remember to start by thoroughly assessing the damage to your wall, gathering the necessary tools and materials, and preparing the work area. Taking the time to properly remove loose or damaged stones, clean and prep the stones, and mix and apply mortar will ensure a solid foundation for your repair work.
Replacing any damaged stones and repairing cracks and gaps is vital to maintaining the strength and longevity of the wall. By carefully matching and placing the stones, and using the appropriate repair materials, you can achieve a seamless and cohesive result.
Finishing and sealing the wall adds the final touch to your repair project. Cleaning the surface, applying a water repellent sealer, and making any necessary touch-ups will not only enhance the appearance of the wall but also provide added protection against the elements.
Throughout the repair process, prioritize safety by wearing protective gear and taking necessary precautions. If you encounter significant damage or structural issues that are beyond your expertise, it’s advisable to seek professional assistance to ensure a thorough and accurate repair.
Repairing a stone wall requires patience, attention to detail, and a passion for craftsmanship. But the end result is a beautifully restored wall that adds charm, character, and value to your outdoor space.
So, don’t shy away from the challenge. Embrace the opportunity to restore and revitalize your stone wall, and enjoy the satisfaction of a job well done.
Frequently Asked Questions about Your Guide To Repairing A Stone Wall
Was this page helpful?
At Storables.com, we guarantee accurate and reliable information. Our content, validated by Expert Board Contributors, is crafted following stringent Editorial Policies. We're committed to providing you with well-researched, expert-backed insights for all your informational needs.


0 thoughts on “Your Guide To Repairing A Stone Wall”