Home>Articles>Your Expert Guide To Installing Tile From Start To Finish

Articles
Your Expert Guide To Installing Tile From Start To Finish
Modified: January 6, 2024
Discover expert articles that guide you through the entire process of installing tile, from start to finish.
(Many of the links in this article redirect to a specific reviewed product. Your purchase of these products through affiliate links helps to generate commission for Storables.com, at no extra cost. Learn more)
Introduction
Welcome to your expert guide on installing tile from start to finish. Whether you’re transforming your bathroom, kitchen, or any other space, installing tile can add beauty, durability, and value to your home. However, the process can seem daunting for those who are new to DIY projects. Fear not, as this comprehensive guide will walk you through every step of the installation process, ensuring a successful and professional-looking result.
Before diving into the installation process, it’s crucial to have a solid plan and preparation. This includes selecting the right tile for your project, accurately measuring the area, and preparing the subfloor for the tile installation. By properly planning and preparing, you’ll set yourself up for success and avoid any issues that may arise later in the process.
Once you’ve planned and prepared, it’s time to move onto the exciting part: installing the tile. In this section, we will cover everything you need to know, from gathering the necessary tools and materials, to laying the foundation with thinset, setting the first row of tiles, spacing and aligning tiles, and cutting and fitting tiles to fit your unique space.
After the tiles are set in place, it’s time to move on to grouting and sealing. Grouting not only fills the gaps between the tiles but also adds stability and protection. We will guide you through the process of mixing and applying grout, cleaning the excess grout, and sealing the grout and tiles to ensure longevity and a beautiful finished look.
Finally, we will cover the finishing touches, including installing trim and transition pieces to create a seamless transition between different flooring surfaces. We will also provide tips on cleaning and maintaining your newly tiled surface to keep it looking pristine for years to come.
By following this expert guide, you’ll be equipped with the knowledge and confidence to tackle your tile installation project like a pro. So, let’s get started and transform your space with the beauty and functionality of tile!
Key Takeaways:
- Proper planning, precise measurements, and subfloor preparation are essential for a successful tile installation. Choose the right tile, calculate accurately, and ensure a stable foundation for professional results.
- From thinset application to grouting and sealing, attention to detail is key. Gather the right tools, follow proper techniques, and maintain your tiled surface for lasting beauty and value.
Planning and Preparation
Before diving into the exciting process of installing tile, it’s important to have a solid plan and proper preparation in place. This will ensure that your tile installation goes smoothly and yields a professional-looking result. In this section, we will cover three crucial steps: choosing the right tile, measuring and calculating, and preparing the subfloor.
Choosing the Right Tile
The first step in your planning process is selecting the right tile for your project. With countless options available, it’s important to consider factors such as style, durability, and maintenance requirements. You’ll need to decide between options like ceramic, porcelain, natural stone, or glass tile. Each material has its own unique characteristics and suitability for different areas of your home.
Consider the overall aesthetic you want to achieve and the specific requirements of the space. For example, a bathroom or kitchen may require a non-porous, water-resistant tile, while a living room or bedroom may allow for more decorative options. It’s also important to consider factors such as slip-resistance and durability for high-traffic areas.
Measuring and Calculating
Precision is key when it comes to measuring and calculating the amount of tile you’ll need for your project. Accurate measurements will ensure that you purchase the right quantity of tile, avoiding unnecessary wastage or shortages.
Start by measuring the length and width of the area where the tile will be installed. Multiply these measurements to calculate the square footage. Keep in mind that it’s always a good idea to add a 10% buffer for any cutting or fitting, as well as potential breakage during installation.
If you have irregularly shaped areas, such as alcoves or nooks, break them down into smaller rectangles or squares and calculate their square footage individually. Add these measurements to your total square footage calculation to get an accurate estimate.
Preparing the Subfloor
Before installing tile, it’s important to ensure that the subfloor is in good condition and properly prepared. This step is essential for the longevity and stability of your tile installation.
Start by inspecting the subfloor for any damage or unevenness. Ensure that the subfloor is clean, dry, and free from any debris or old adhesive. If you’re installing tile over concrete, make sure there are no cracks or holes. For wooden subfloors, check for any loose or squeaky areas and reinforce or repair as needed.
Depending on the condition of the subfloor, you may need to level it using self-leveling compound or install cement backer board to create a smooth and stable surface for the tile. Follow the manufacturer’s instructions for the specific product you’re using.
By taking the time to choose the right tile, accurately measure and calculate the needed quantity, and properly prepare the subfloor, you’re setting yourself up for a successful installation. With these essential planning and preparation steps complete, you’re now ready to move on to the exciting stage of installing the tile itself.
Installing the Tile
Now that you’ve completed the planning and preparation phase, it’s time to dive into the exciting process of installing the tile. This section will guide you through the essential steps, including gathering the necessary tools and materials, laying the foundation with thinset, setting the first row of tiles, spacing and aligning the tiles, and cutting and fitting tiles.
Gathering the Necessary Tools and Materials
Before you begin the installation process, it’s important to gather all the necessary tools and materials. This will make your installation smoother and more efficient. The basic tools you’ll need include:
- Tile cutter or wet saw
- Notched trowel
- Tile spacers
- Grout float
- Rubber mallet
- Level
- Measuring tape
- Sponge
- Bucket
In addition to these tools, you’ll need to have the appropriate materials on hand. This includes the tile adhesive (thinset), grout, and any necessary sealants or primers recommended for your specific tile material. Make sure to follow the manufacturer’s instructions and guidelines when selecting these materials.
Laying the Foundation with Thinset
Thinset is a type of mortar adhesive that acts as the foundation for your tile installation. Start by mixing the thinset according to the manufacturer’s instructions, using a bucket and a mixing paddle. The consistency should be similar to peanut butter.
Using a notched trowel, spread the thinset onto the prepared subfloor in small sections. Work in manageable areas, typically around 3×3 feet, to ensure the thinset doesn’t dry out before you have a chance to lay the tiles.
Setting the First Row of Tiles
Once the thinset is spread, carefully place the first tile in the corner of the room or at the center of the space, depending on your layout design. Press the tile firmly into the thinset, using a slight twisting motion to ensure full coverage and a solid bond.
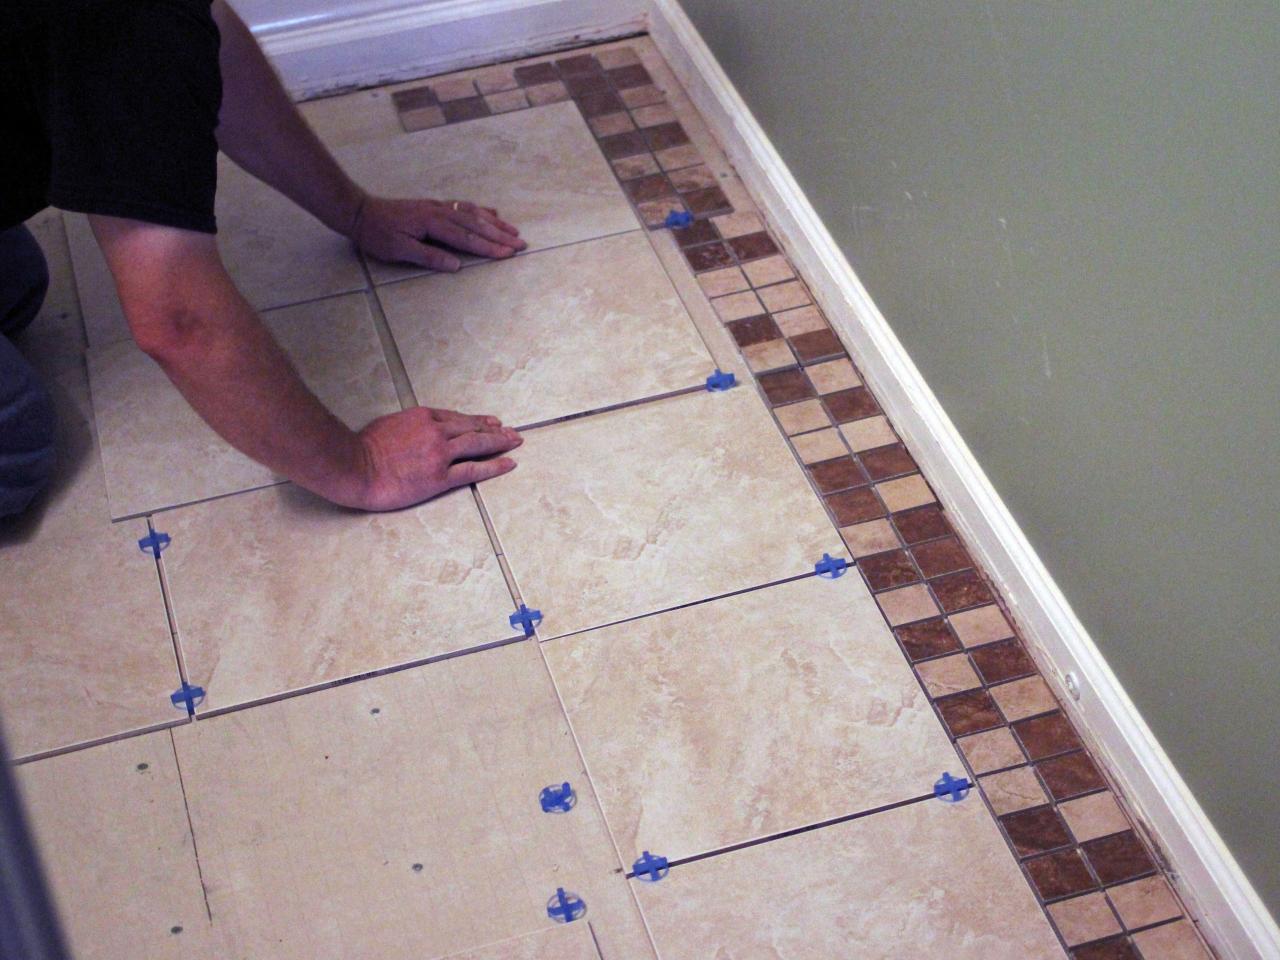
Continue setting the tiles along the first row, making sure to use tile spacers to maintain consistent spacing and alignment. Use a level to ensure that the tiles are straight and even. Adjust as necessary by tapping gently with a rubber mallet.
Spacing and Aligning the Tiles
As you continue the installation, use tile spacers to maintain consistent spacing between each tile. These spacers will ensure that your grout lines are even and straight. Adjust the tiles as necessary to achieve the desired spacing and alignment.
Cutting and Fitting Tiles
As you approach the edges of the installation area or encounter obstacles such as pipes or outlets, you’ll need to cut and fit tiles to ensure a seamless and professional-looking finish. Measure the space where the tile needs to be cut and use a tile cutter or wet saw to make precise cuts.
When fitting the tiles around obstacles, mark the tile accordingly and use tile nippers or a tile saw to carefully remove the necessary sections. Take your time and make precise cuts to achieve a seamless fit.
By following these steps, you’ll be well on your way to successfully installing your tile. The next section will cover the important steps of grouting and sealing, which will complete the installation process and give your tile a polished and finished look.
Grouting and Sealing
Once you have completed the tile installation, the next crucial step is grouting and sealing. Grout not only fills the gaps between the tiles but also provides stability and protection. Sealing the grout and tiles adds an extra layer of protection and helps to prolong their lifespan. In this section, we will guide you through the process of mixing and applying grout, cleaning the excess grout, and sealing the grout and tiles for a professional and finished look.
Mixing and Applying Grout
Start by selecting the appropriate grout color that complements your tiles and desired aesthetic. Follow the manufacturer’s instructions for mixing the grout, ensuring that you achieve the right consistency. It should be similar to a thick paste or peanut butter.
Using a grout float, apply the grout diagonally across the tiles, pressing it into the spaces. Hold the float at a 45-degree angle and move it across the tiles, filling the grout lines completely. Remove any excess grout from the tile surface by holding the float at a steeper angle and scraping diagonally across the tiles.
Cleaning the Excess Grout
Once you have applied the grout, it’s crucial to clean the excess grout from the tile surface before it dries. Fill a bucket with clean water and dampen a sponge. Gently wipe the surface of the tiles in a circular motion, rinsing the sponge frequently to remove the grout residue. Avoid excessive water on the grout lines, as this can weaken the integrity of the grout.
After you have removed most of the excess grout, allow the grout to dry and set for the recommended time specified by the manufacturer. This will usually take a few hours, but it’s crucial to follow the specific instructions provided.
Sealing the Grout and Tiles
After the grout has thoroughly dried, it’s time to seal the grout and tiles. Grout sealer helps to repel stains, moisture, and dirt, keeping your grout and tiles looking clean and fresh. Choose a high-quality grout sealer that is appropriate for your tile and grout type. Follow the manufacturer’s instructions for application.
Start by applying the sealer to the grout lines using a small brush or applicator. Be sure to cover all the grout lines thoroughly. Once the grout lines are sealed, use a clean cloth or sponge to wipe away any excess sealer from the tile surface. Allow the sealer to dry for the recommended time before exposing the tiles to water or foot traffic.
By properly grouting and sealing your tiles, you’re not only enhancing their appearance but also ensuring their longevity and durability. The grouting and sealing process adds that final touch to your tile installation, giving it a polished and professional finish.
Now that you have successfully completed the grouting and sealing process, the final section will cover the finishing touches, including installing trim and transition pieces, as well as cleaning and maintaining your newly tiled surface.
Finishing Touches
With the tile installation complete and the grouting and sealing finished, it’s time to add the final touches that will elevate the look of your tiled surface. This section will guide you through installing trim and transition pieces and provide tips on cleaning and maintaining your newly tiled surface.
Installing Trim and Transition Pieces
Trim and transition pieces are essential for creating a polished and seamless look around the edges of your tiled surface and where it meets other flooring surfaces. Depending on the design and layout of your space, you may need to install baseboard trim, quarter round, or other types of trim to cover the edges of the tile.
Measure and cut the trim pieces to fit the desired areas, ensuring that they align properly with the tile. Attach the trim using an appropriate adhesive or nails, following the manufacturer’s instructions for the specific trim material. Take care to make precise cuts and ensure a snug fit to achieve a professional and finished look.
Read more: How To Paint Over Wallpaper: An Expert Guide
Cleaning and Maintaining the Tiled Surface
To keep your newly tiled surface looking clean and beautiful, regular cleaning and maintenance are essential. Follow these tips to maintain the longevity and beauty of your tiles:
- Sweep or vacuum the surface regularly to remove dirt, dust, and debris that can accumulate over time.
- Use a mild, non-abrasive cleaner and warm water to clean the tiles. Avoid using harsh chemicals or abrasive cleaners, as they can damage the tile surface.
- Wipe up spills promptly to prevent staining. Use a soft cloth or sponge to absorb any liquid and clean the area with a mild cleaner.
- Avoid using excessive water on the grout lines, as it can weaken the grout over time. Wipe away any excess water during the cleaning process.
- Periodically reseal the grout lines, following the manufacturer’s instructions for the recommended frequency. This will help maintain the integrity and appearance of the grout.
By following these cleaning and maintenance tips, you can ensure that your newly tiled surface remains clean, durable, and visually appealing for years to come.
Congratulations! You’ve successfully completed the tile installation process from start to finish. By following this comprehensive guide, you have transformed your space with the beauty and functionality of tile. Whether it’s a bathroom, kitchen, or any other area, the stunning results are sure to impress both you and anyone who sees your newly tiled surface.
Remember, installing tile requires careful planning, proper preparation, and attention to detail. With the right tools, materials, and techniques, you can confidently tackle future tile installation projects and continue to enhance the beauty and value of your home.
Conclusion
Congratulations! You have reached the end of your expert guide to installing tile from start to finish. You have learned the importance of proper planning and preparation, the steps involved in installing tile, the process of grouting and sealing, and the finishing touches that complete the project. By following this comprehensive guide, you have gained the knowledge and confidence to tackle any tile installation project with ease.
Installing tile can be a rewarding and transformative experience. Not only does it add beauty and style to your space, but it also enhances the durability and value of your home. From bathrooms and kitchens to living areas and entryways, tile can be used in a variety of spaces to create stunning and functional surfaces.
Remember, selecting the right tile for your project is crucial. Consider factors such as style, durability, and maintenance requirements to ensure a successful installation. Accurate measuring and calculating will ensure that you purchase the right amount of tile and avoid unnecessary waste or shortages. Preparing the subfloor properly sets the foundation for a stable and long-lasting installation.
During the installation process, gather the necessary tools and materials, lay the foundation with thinset, set the first row of tiles, space and align the tiles, and cut and fit tiles as needed. Grouting and sealing are vital steps that provide stability, protection, and a finished look to your tiled surface. Finally, installing trim and transition pieces and maintaining the tiled surface through regular cleaning and maintenance will complete the project and keep it looking pristine.
With your newly acquired knowledge and skills, you have the ability to create beautiful tiled spaces and add value to your home. Take the time to properly plan and prepare, and remember to approach each step with patience and attention to detail. By doing so, you will achieve professional-looking results that will be enjoyed for years to come.
Thank you for following this expert guide. We hope it has been informative and empowering. Now it’s time to start your own tile installation project and enjoy the incredible transformation of your space. Happy tiling!
Frequently Asked Questions about Your Expert Guide To Installing Tile From Start To Finish
Was this page helpful?
At Storables.com, we guarantee accurate and reliable information. Our content, validated by Expert Board Contributors, is crafted following stringent Editorial Policies. We're committed to providing you with well-researched, expert-backed insights for all your informational needs.




0 thoughts on “Your Expert Guide To Installing Tile From Start To Finish”