Home>Dining>Table Decor>How To Make A Box Of Greens Table Centerpiece For Christmas
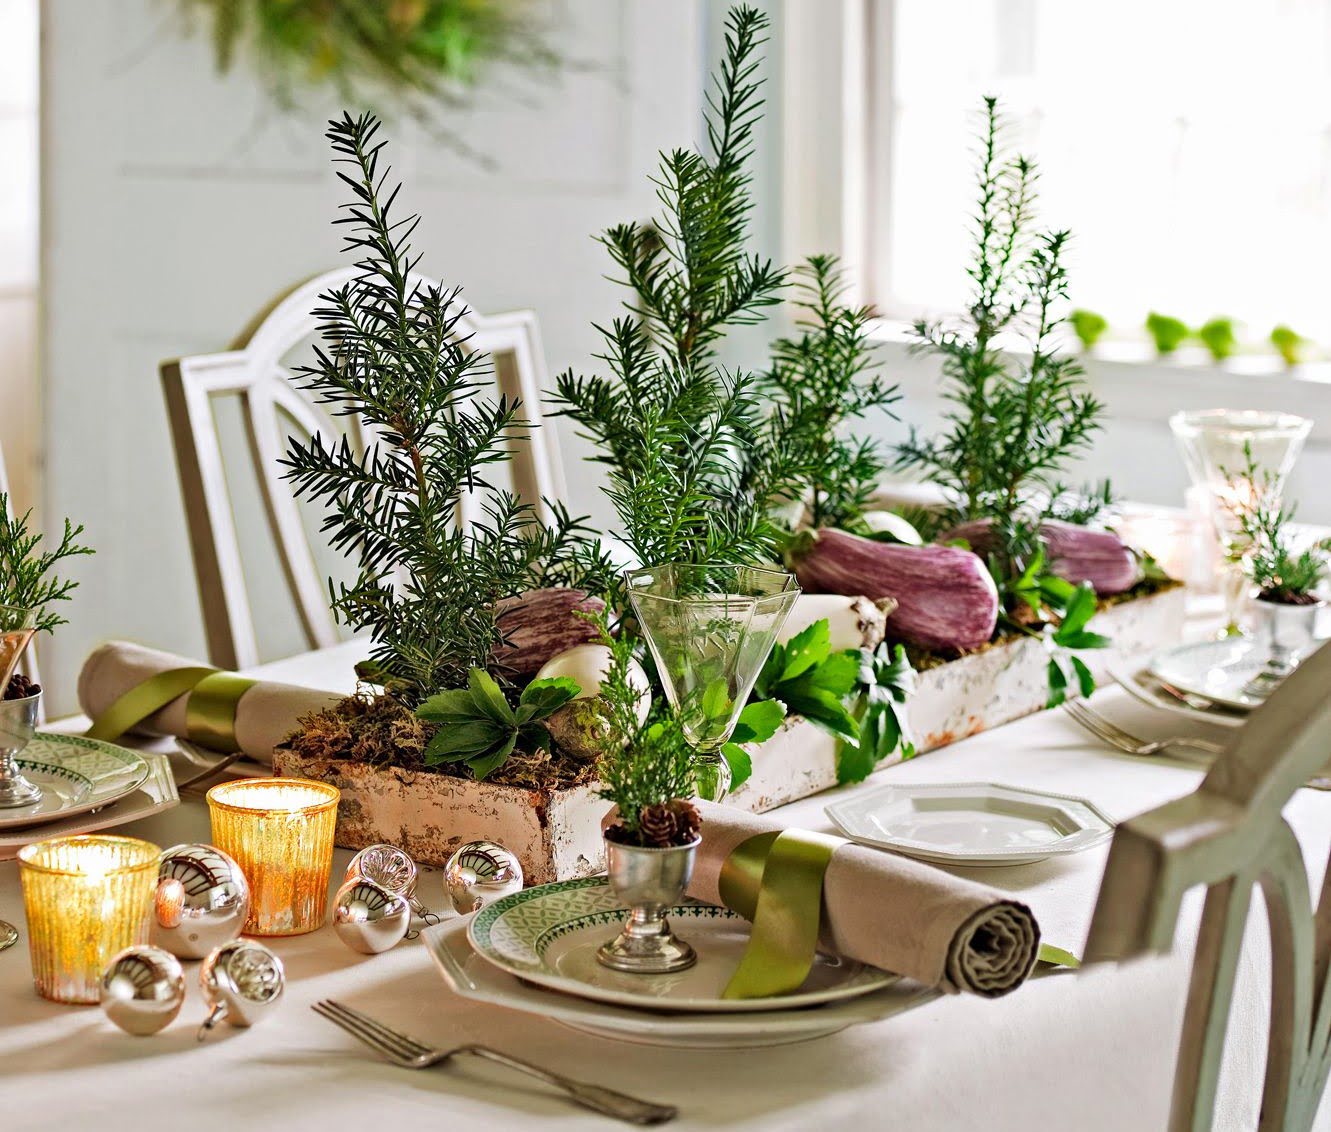
Table Decor
How To Make A Box Of Greens Table Centerpiece For Christmas
Modified: February 3, 2024
Learn how to create a festive Christmas table centerpiece with a stunning box of greens. Elevate your table decor with this easy step-by-step tutorial![table-decor]
(Many of the links in this article redirect to a specific reviewed product. Your purchase of these products through affiliate links helps to generate commission for Storables.com, at no extra cost. Learn more)
Introduction
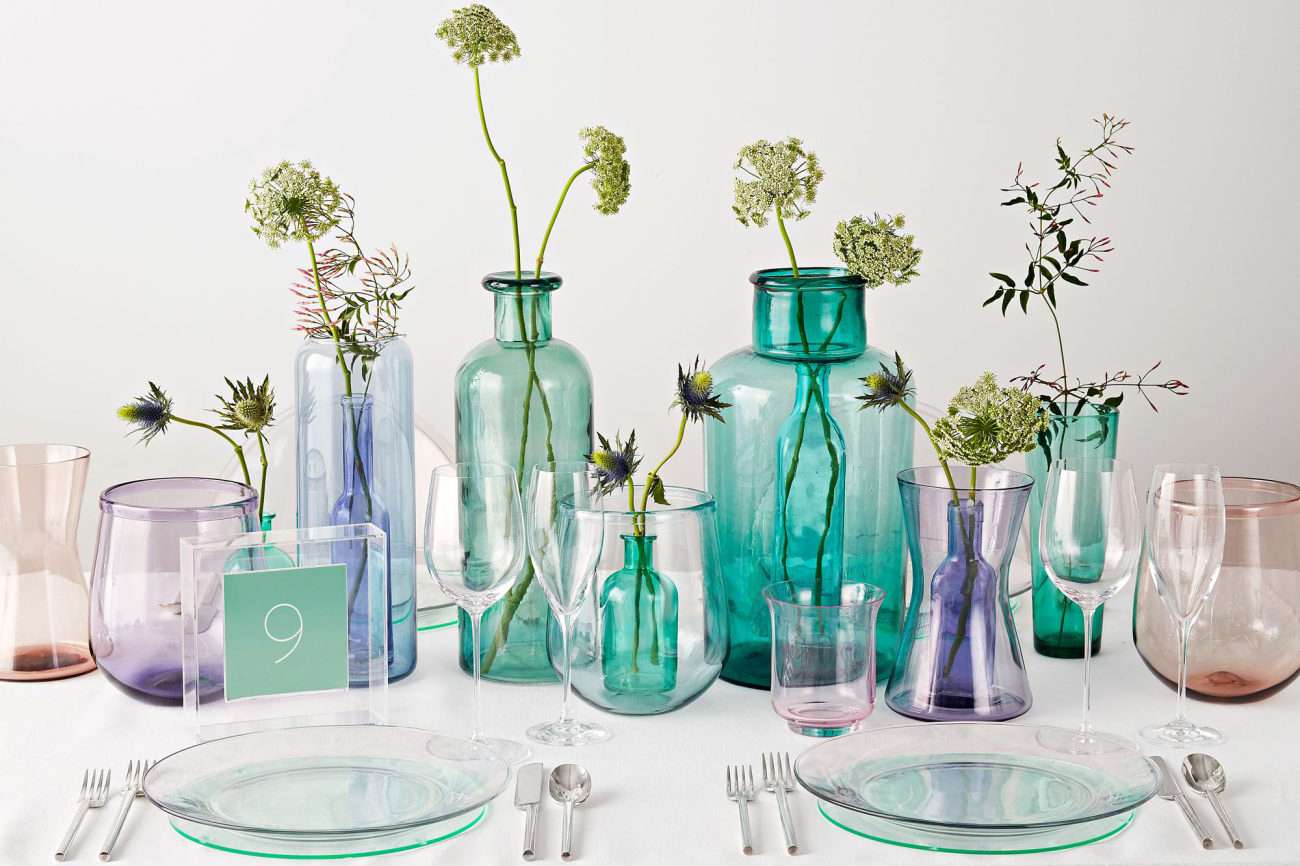
Welcome to the world of table decorations! When it comes to creating a stunning and captivating table centerpiece, nothing beats the natural beauty of a box of greens. Whether you’re preparing for a festive Christmas dinner or hosting a special event, a box of greens table centerpiece will add a touch of elegance and create a warm and inviting atmosphere.
In this article, we will guide you through the step-by-step process of creating your own box of greens table centerpiece for Christmas. We will discuss the materials you’ll need, the selection and preparation of the greens, and how to arrange them to create a visually appealing centerpiece that will impress your guests.
So, let’s dive in and discover the secrets of transforming a simple box and a few greens into a dazzling display that will make your table shine.
Key Takeaways:
- Create a visually stunning box of greens table centerpiece for Christmas by balancing the right box, varied greens, focal points, and accents. Infuse personal touches and enjoy the festive ambience it brings.
- Transform a simple box and greens into a captivating centerpiece that sets the stage for a warm and enchanting atmosphere. Embrace creativity, balance, and the joy it brings to your guests.
Read more: How To Make Centerpieces For Christmas
Materials Needed
Before we dive into the step-by-step process of creating a box of greens table centerpiece, let’s gather all the materials you’ll need for this project. Having everything prepared beforehand will make the process smoother and more enjoyable. Here’s a list of the materials you’ll need:
- A wooden or decorative box: Choose a box that fits the size of your table and complements your overall theme. It could be a simple wooden box, a vintage crate, or even a decorative container.
- Garden clippers or scissors: These will come in handy when trimming and shaping the greens.
- Floral foam or oasis: This foam will act as a base to hold the greens and keep them hydrated throughout the event.
- Assorted greens: You can use a variety of evergreen branches such as pine, cedar, fir, or eucalyptus. Consider using different shades of greens to add depth and visual interest.
- Focal point items: These can be candles, ornaments, pinecones, or any other decorative element that serves as the centerpiece’s focal point.
- Accent pieces: Look for small decorative items like berries, flowers, ribbons, or miniature ornaments that can be used to add dimension and texture to your centerpiece.
- Water source: To keep the greens hydrated, you’ll need a water source such as a water-filled spray bottle or a small cup.
Once you’ve gathered all these materials, you’re ready to start creating your box of greens table centerpiece. Let’s move on to the next step: choosing the box.
Step 1: Choosing the Box
The box you choose for your greens table centerpiece will set the foundation for the overall look and style. There are numerous options available, ranging from rustic to elegant, so you can select one that suits your personal taste and complements the theme of your event. Here are a few things to consider when choosing your box:
Size: Consider the size of your table and the space available for the centerpiece. The box should be proportionate to the table to create a balanced look. Aim for a size that allows room for the greens and other decorative elements without overwhelming the table.
Material: Think about the material that will best suit your desired aesthetic. A wooden box can add a rustic and natural touch, while a metallic or glass container can give a more contemporary and elegant feel. Choose a material that complements the overall theme and style of your event.
Shape: The shape of the box can add visual interest to your centerpiece. Consider options such as rectangular, square, or round boxes, and choose one that works well with the shape and size of your table.
Color: The color of the box can enhance or contrast with the greens and other elements in your centerpiece. Opt for a box color that complements the colors of your event’s theme. For example, a white box can create a fresh and clean look, while a dark wooden box can add warmth and depth.
Decorative details: Some boxes come with decorative details such as engravings, handles, or metal accents. These details can add charm and personality to your centerpiece. Choose a box that has decorative elements that align with your event’s theme and style.
Once you’ve considered these factors, it’s time to select the perfect box for your greens table centerpiece. Take your time and choose a box that resonates with your vision and brings your desired aesthetic to life. With the box chosen, we can move on to the next step: selecting the greens.
Step 2: Selecting the Greens
Now that you have your box ready, it’s time to choose the greens that will form the base of your table centerpiece. Selecting a variety of greens will add texture, depth, and visual interest to your arrangement. Here are some tips to help you choose the perfect greens:
Evergreen branches: Look for evergreen branches such as pine, cedar, fir, or eucalyptus. These branches are not only visually appealing but also have a delightful fragrance that will fill the air. Consider using different types of evergreen branches to create contrast and add dimension to your arrangement.
Varied shades of green: To create an interesting and dynamic centerpiece, mix different shades of green. Use darker greens for a more dramatic look and lighter greens for a softer and more delicate appearance. Combining various shades will add depth and create a visually pleasing arrangement.
Texture: Incorporate greens with different textures to add visual interest to your centerpiece. Look for foliage with needle-like leaves, feathery branches, or textured bark. A combination of textures will make your centerpiece more visually appealing and captivating.
Filler greens: Aside from the main evergreen branches, consider adding filler greens to add volume and filler to your centerpiece. Baby’s breath, ferns, or even small sprigs of holly can be used as filler greens. These will fill in any gaps and create a lush and full appearance.
Consider the season: Depending on the season and the theme of your event, you can incorporate seasonal greens or add a pop of color to your arrangement. For example, during the Christmas season, you can use red berries or holly to add a festive touch.
When choosing your greens, ensure that they are fresh and vibrant. Check for any signs of wilting or browning, and trim off any damaged or yellowing leaves or branches before using them in your centerpiece. By selecting a variety of greens and paying attention to their quality, you are on your way to creating a stunning table centerpiece.
With the greens selected, let’s move on to the next step: preparing the box to hold the arrangement.
Step 3: Preparing the Box
Now that you have your greens selected, it’s time to prepare the box that will hold your centerpiece. Proper preparation of the box will ensure stability and longevity for your arrangement. Follow these steps to get your box ready:
Clean the box: Start by cleaning the box thoroughly. Remove any dirt, dust, or residue that may be present. If your box is made of wood, you can use a damp cloth to wipe it down. For other materials, follow the appropriate cleaning instructions to ensure it’s free of any debris.
Line the box: To protect the box and the surface it will be placed on, consider lining the bottom of the box with a layer of plastic or waterproof liner. This will prevent any water or moisture from seeping through and damaging your table or other decorations.
Place floral foam: If you have chosen to use floral foam or oasis, now is the time to position it inside the box. Cut the foam to fit snugly into the box, ensuring it covers the entire bottom. Floral foam will provide a stable base for your greens and help keep them hydrated throughout your event.
Soak the floral foam: Once the foam is in place, thoroughly saturate it with water. Allow it to absorb the water and become fully hydrated before moving on to the next step. This will ensure that your greens receive adequate moisture and remain fresh for a longer period.
By following these steps and properly preparing the box, you are setting the stage for a successful and long-lasting centerpiece. With the box prepared, it’s time to move on to the next step: creating a base layer with the greens.
Read more: How To Make A Christmas Table Centerpiece
Step 4: Creating a Base Layer
With the box prepared, it’s time to start arranging the greens to create a beautiful base layer for your centerpiece. This base layer will provide the structure and foundation for the rest of your arrangement. Follow these steps to create a visually appealing base layer:
Trim the greens: Begin by trimming the evergreen branches to the desired length. Remove any excess foliage or branches that may hinder the arrangement process. Use garden clippers or sharp scissors to make clean cuts.
Start with the largest greens: Begin by placing the larger evergreen branches in the foam. These branches will form the base and provide a framework for the rest of the greens. Arrange them evenly around the perimeter of the box, ensuring they extend slightly beyond the edges.
Create height and dimension: To add height and dimension to your centerpiece, layer the greens at different heights. Place taller branches towards the center and shorter branches towards the outer edges. This will create a visually appealing cascading effect and prevent the arrangement from looking flat.
Overlap the greens: As you place the branches, overlap them slightly to fill in any gaps and create a lush appearance. This will give your centerpiece a full and abundant look. Be mindful of balancing the greens evenly throughout the arrangement.
Vary the direction and angle: Arrange the branches in different directions and angles to create movement and flow in your centerpiece. Some branches can point upwards, while others can cascade downwards or fan outwards. By varying the direction and angle, you will create a more dynamic and interesting base layer.
Step back and assess: After placing the initial layer of greens, step back and assess the arrangement. Make any necessary adjustments to ensure the greens are evenly distributed, and the base layer looks balanced and visually pleasing.
By following these steps, you will create a lush and well-structured base layer for your centerpiece. The base layer serves as a canvas for adding focal points, accents, and finishing touches. With the base layer complete, let’s move on to the next step: adding focal points to your arrangement.
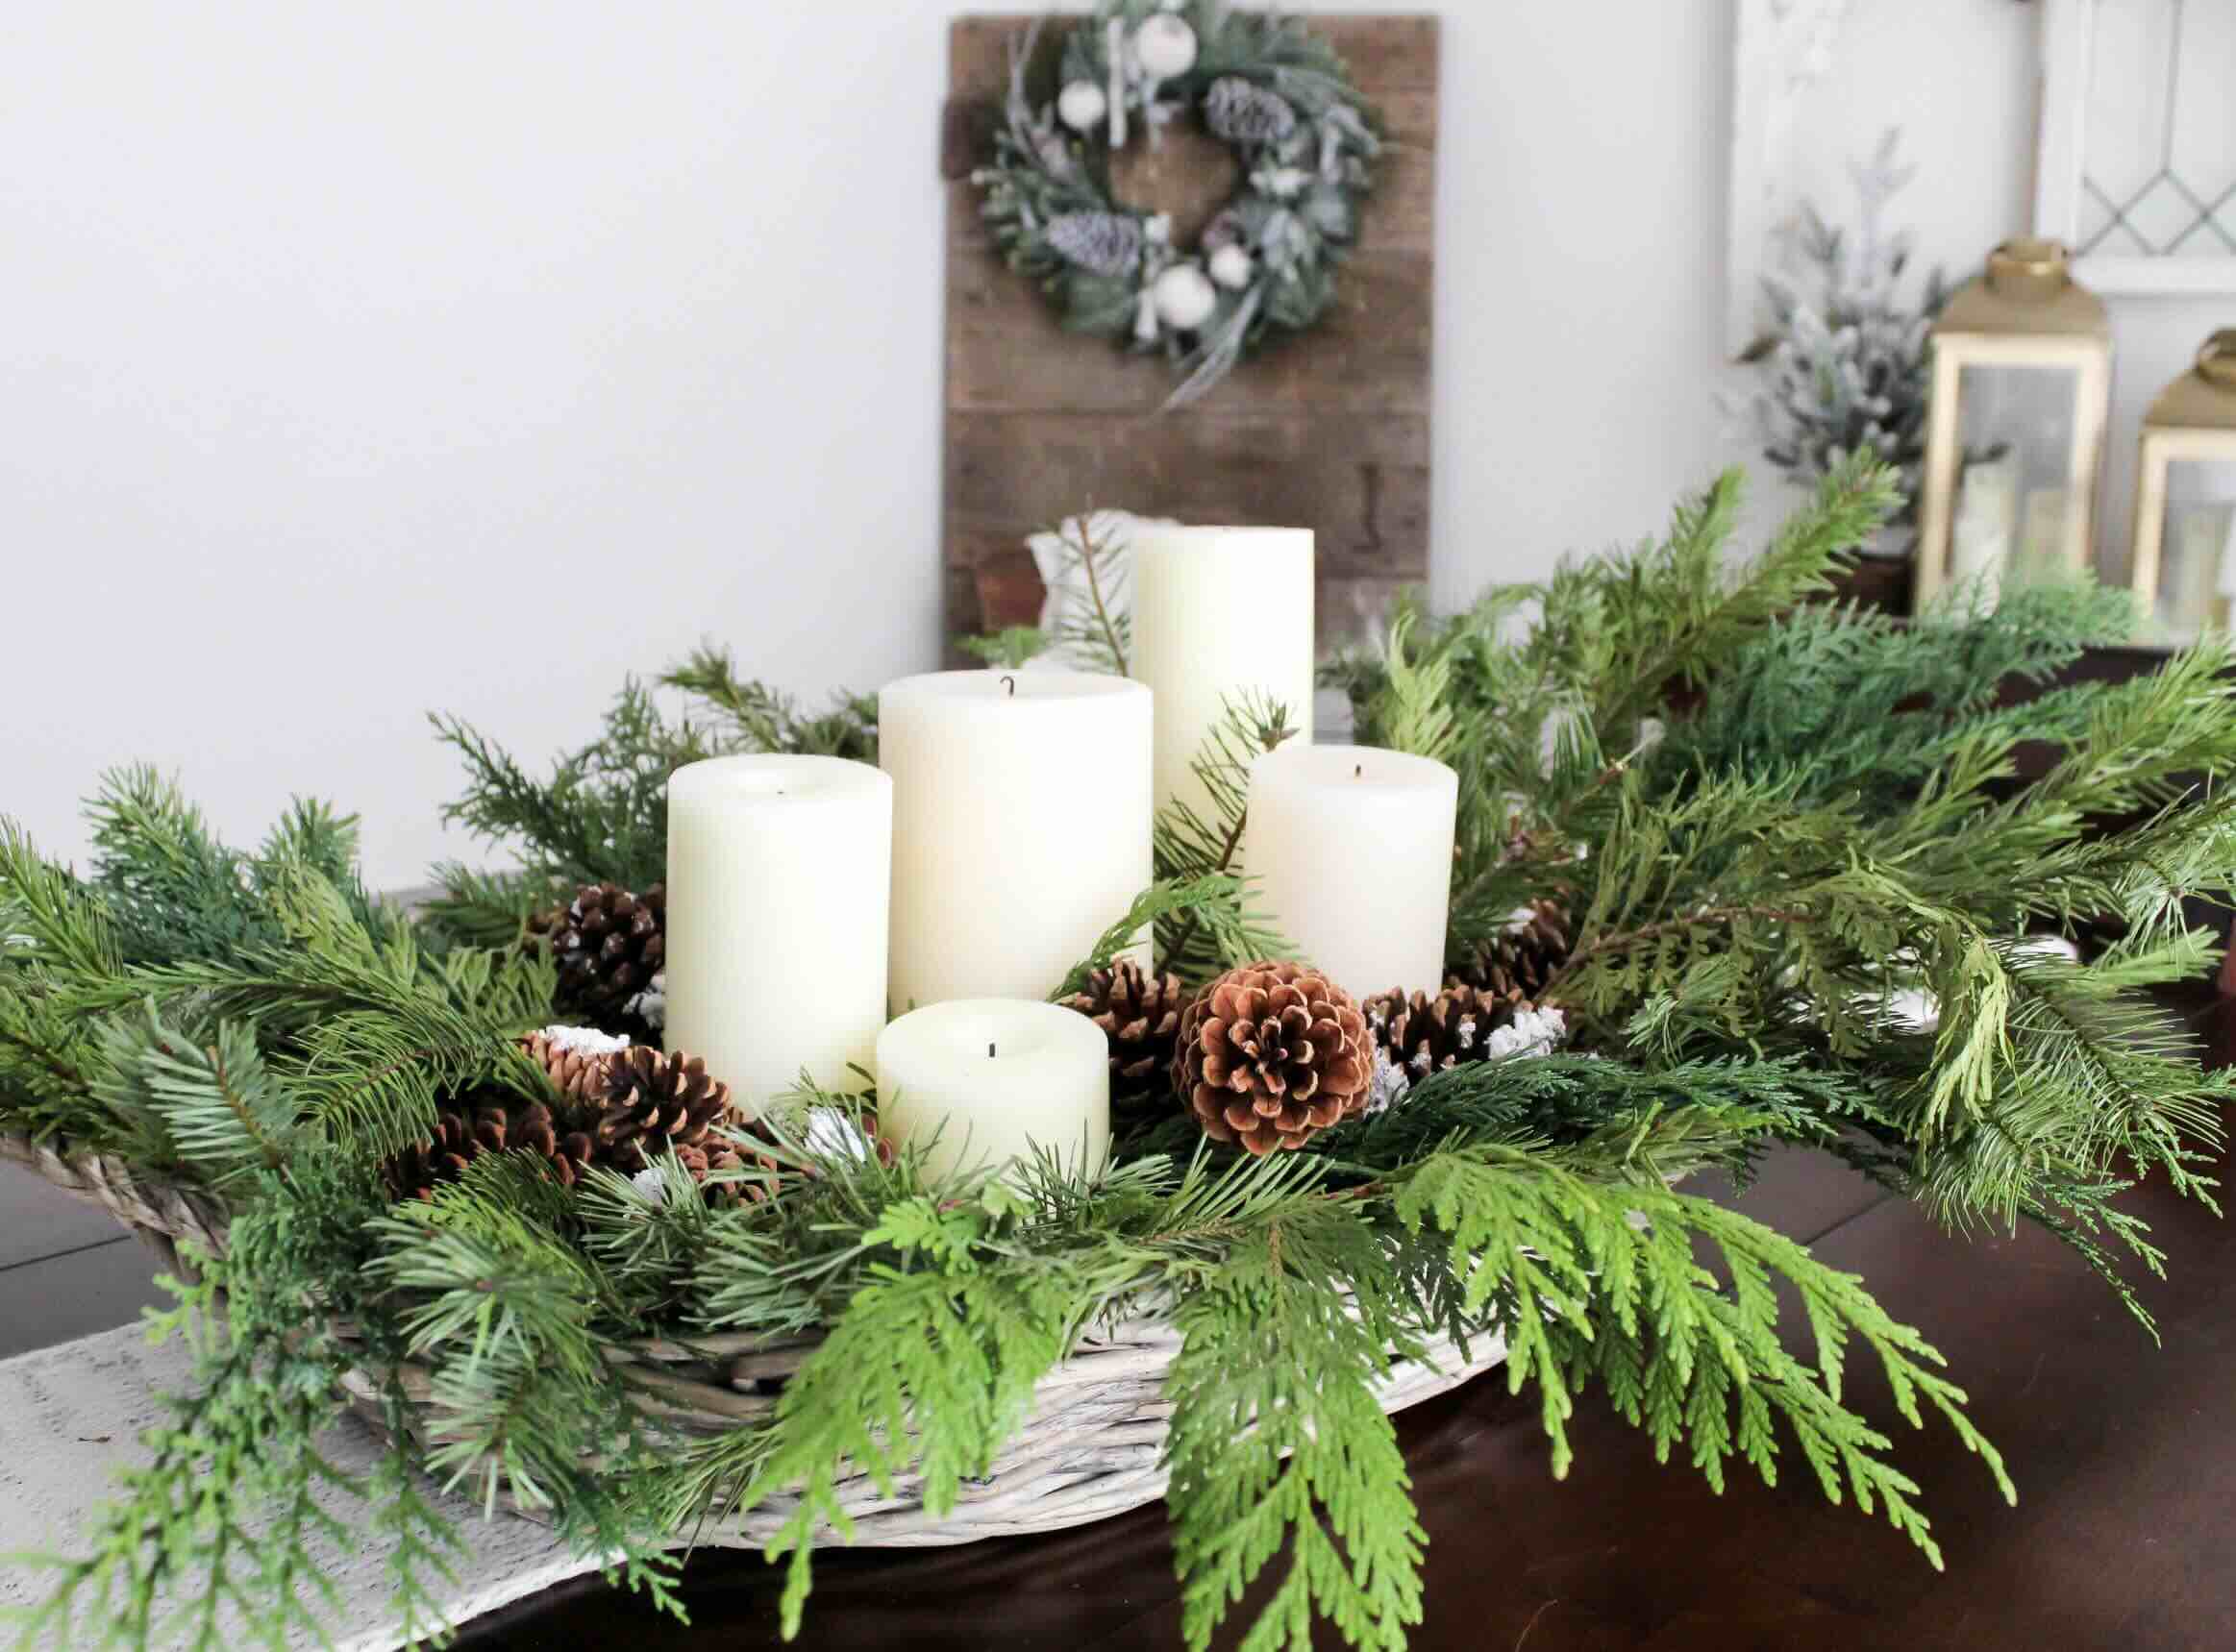
Consider using a mix of different greenery such as pine, cedar, and eucalyptus to create a visually interesting and festive table centerpiece for Christmas.
Step 5: Adding Focal Points
Now that you have created a beautiful base layer with the greens, it’s time to add focal points to your centerpiece. Focal points are the elements that draw attention and serve as the centerpiece’s main attraction. Here’s how you can add focal points to make your arrangement stand out:
Candles: Place candles of varying heights and sizes within the greens. Opt for unscented candles to avoid overpowering the natural fragrance of the greens. Candles create a warm and cozy ambiance, especially if you’re setting the centerpiece for a Christmas dinner or an evening event.
Ornaments: Use ornaments that complement your event’s theme or color scheme. Hang them from the branches or tuck them into the greens. Shiny baubles, glittery balls, or even personalized ornaments can add a festive touch to your centerpiece.
Pinecones: Collect pinecones from your yard or purchase decorative ones. Place them strategically within the greens to add a rustic and natural element. Consider painting them or dusting them with glitter to match your desired aesthetic.
Statues or figurines: If you have miniature statues or figurines that align with your event’s theme, incorporate them into your centerpiece. This could include Santa Claus, reindeer, angels, or any other decorative pieces that add charm and personality to your arrangement.
Fruit or berries: Adding elements of nature like fruit or berries can create a fresh and vibrant focal point. Consider using small apples, pomegranates, cranberries, or even small bunches of grapes to add color and texture to your centerpiece.
Additional greenery: Choose a standout piece of greenery, such as a large sprig of holly with berries, and place it prominently within the arrangement. This will create a focal point that draws attention and adds interest to your centerpiece.
When adding focal points, consider the size, shape, and placement to ensure they complement the overall arrangement and do not overwhelm it. Remember that less is often more, so choose focal points strategically and avoid overcrowding the centerpiece.
With the focal points added, your centerpiece is starting to take shape. However, there might be some gaps that need to be filled. In the next step, we’ll discuss how to fill those gaps and add accents to your arrangement.
Step 6: Filling in the Gaps
With the focal points in place, it’s time to fill in any gaps and add accents to your centerpiece. Filling these gaps will help create a cohesive and visually pleasing arrangement. Follow these steps to fill in the gaps and add some finishing touches:
Filler greens: Use filler greens, such as baby’s breath or small ferns, to fill in any empty spaces between the larger branches. These filler greens will add volume and create a fuller look. Trim them to size and tuck them into the gaps between the greens, focusing on areas that appear sparse.
Berries or flowers: Incorporate berries or small flowers into your centerpiece to add pops of color and texture. Look for berries that match your color scheme or flowers that complement the overall arrangement. Woven into the greens, these accents will bring vibrancy and beauty to your centerpiece.
Ribbons or bows: Add ribbons or bows in coordinating colors to bring a festive touch to your arrangement. Secure them around the greens or tie them onto branches to create a whimsical and decorative element. Consider using different widths and textures of ribbon to add dimension.
Miniature ornaments or trinkets: Place small ornaments or trinkets throughout the centerpiece for added interest. These can be miniature versions of the focal point ornaments or unique decorations that tie into your event’s theme. Arrange them strategically to fill in gaps and create points of visual intrigue.
Mist with water: Once you’ve filled in the gaps and added the final accents, give your centerpiece a light misting with water to keep the greens hydrated. This will ensure that your arrangement stays fresh and vibrant throughout your event.
By following these steps to fill in the gaps and add accents, you are bringing your centerpiece to life and adding those final touches that make it truly captivating. With the gaps filled, it’s time for the finishing touches in the next step.
Step 7: Adding Accents
Now that your centerpiece is nearly complete, it’s time to add those final accents that will add extra charm and personality to your arrangement. These accents will elevate your centerpiece and make it truly unique. Here are some ideas for adding accents:
Ribbons and bows: Use ribbons and bows to tie around the box itself or weave them through the greens. Choose ribbons in colors that match your event’s theme or opt for a more traditional holiday palette with red and green. Experiment with different ribbon textures and patterns to create a visually appealing display.
Sparkling elements: Add some sparkle to your centerpiece by incorporating glittered or metallic accents. This could include glittered pinecones, metallic ornaments, or even a dusting of glitter on the greens themselves. These sparkling elements will catch the light and create a festive and eye-catching display.
Mirror or reflective surfaces: Place a small mirror or reflective tray underneath your centerpiece to add depth and create an illusion of more greens. Mirrors can also enhance the glow of candles and amplify the warmth of the arrangement. Consider using mercury glass votives or metallic candle holders for an extra touch of elegance.
Scented additions: Consider adding scented elements to your centerpiece to engage multiple senses. This could include scented pinecones, cinnamon sticks, or even a few drops of essential oils on the greens. By incorporating scents, you can create a more immersive and memorable experience for your guests.
Personalized touches: Add a personal touch to your centerpiece by incorporating elements that have sentimental value or meaning to you. It could be a miniature frame holding a cherished photo, a small trinket that holds significance, or a handwritten note tucked within the greens. These personal accents will make your centerpiece even more special.
Remember to balance the accents with the overall arrangement, ensuring that they enhance rather than overpower the greens. By adding these carefully chosen accents, your centerpiece will become a true reflection of your style and creativity.
With the accents added, it’s time for the final step: applying the finishing touches to your beautiful box of greens table centerpiece.
Read more: How To Make Centerpieces With Candy
Step 8: Finishing Touches
Congratulations! You’ve reached the final step in creating your stunning box of greens table centerpiece. The finishing touches will allow you to fine-tune your arrangement and ensure that every detail is perfect. Here are some essential finishing touches to consider:
Check for symmetry: Step back and assess the overall balance and symmetry of your centerpiece. Adjust any branches or accents that may be leaning or appear uneven. Pay attention to the height and placement of the greens to create a harmonious arrangement.
Trim any stray branches: Take a moment to trim any stray or unruly branches that may be obstructing the visual flow of your centerpiece. This will give your arrangement a polished and cohesive look.
Eliminate clutter: Remove any unnecessary items or clutter that may have accumulated during the process. Make sure your centerpiece appears tidy and intentional by removing any loose leaves, clippings, or excess materials.
Adjust lighting: Evaluate the lighting in the room and make any necessary adjustments to highlight the beauty of your centerpiece. Dim the lights or accentuate specific areas with additional lighting to create an inviting and cozy ambiance.
Triple-check stability: Ensure that your centerpiece is stable and secure by giving it a gentle shake. Make any necessary rearrangements or add additional support if needed, particularly if you have incorporated tall or heavy elements.
Take a step back: Finally, step back and admire your masterpiece! Take a moment to appreciate the beauty and artistry of your box of greens table centerpiece. Marvel at how it transforms the table into a captivating focal point.
Remember, these finishing touches will add the final polish to your centerpiece. They allow you to refine and perfect the arrangement before unveiling it to your guests.
Now that you have completed all the steps, your beautiful box of greens table centerpiece for Christmas is ready to be displayed and admired. It’s time to enjoy the festive ambience and the warmth it brings to your special event. Happy holidays!
Conclusion
Creating a box of greens table centerpiece for Christmas is a wonderful way to bring natural beauty and elegance to your table. By following the step-by-step process outlined in this article, you have learned how to choose the right box, select and arrange greens, add focal points and accents, and apply the finishing touches to create a visually stunning centerpiece.
Remember, the key to a successful centerpiece is to strike a balance between the different elements. Choose a box that complements your theme and the size of your table. Select a variety of greens to add texture and color. Incorporate focal points and accents that enhance the overall aesthetic. Fill in gaps with filler greens and add personal touches to make your centerpiece unique.
Throughout the process, don’t be afraid to get creative and let your personal style shine through. Infuse your centerpiece with touches that reflect your personality and the spirit of the occasion. Embrace the beauty of imperfection and allow yourself to experiment and make adjustments as needed.
Lastly, remember that the true magic of your box of greens table centerpiece lies in the joy and warmth it brings to your guests. It sets the stage for a memorable and festive gathering, creating a welcoming and enchanting atmosphere for all to enjoy.
So, gather your materials, unleash your creativity, and have fun crafting your unique box of greens table centerpiece for Christmas. May it be a centerpiece that sparks conversations, evokes delight, and sets the stage for cherished moments with loved ones.
Happy decorating and happy holidays!
Frequently Asked Questions about How To Make A Box Of Greens Table Centerpiece For Christmas
Was this page helpful?
At Storables.com, we guarantee accurate and reliable information. Our content, validated by Expert Board Contributors, is crafted following stringent Editorial Policies. We're committed to providing you with well-researched, expert-backed insights for all your informational needs.


0 thoughts on “How To Make A Box Of Greens Table Centerpiece For Christmas”