Tableware
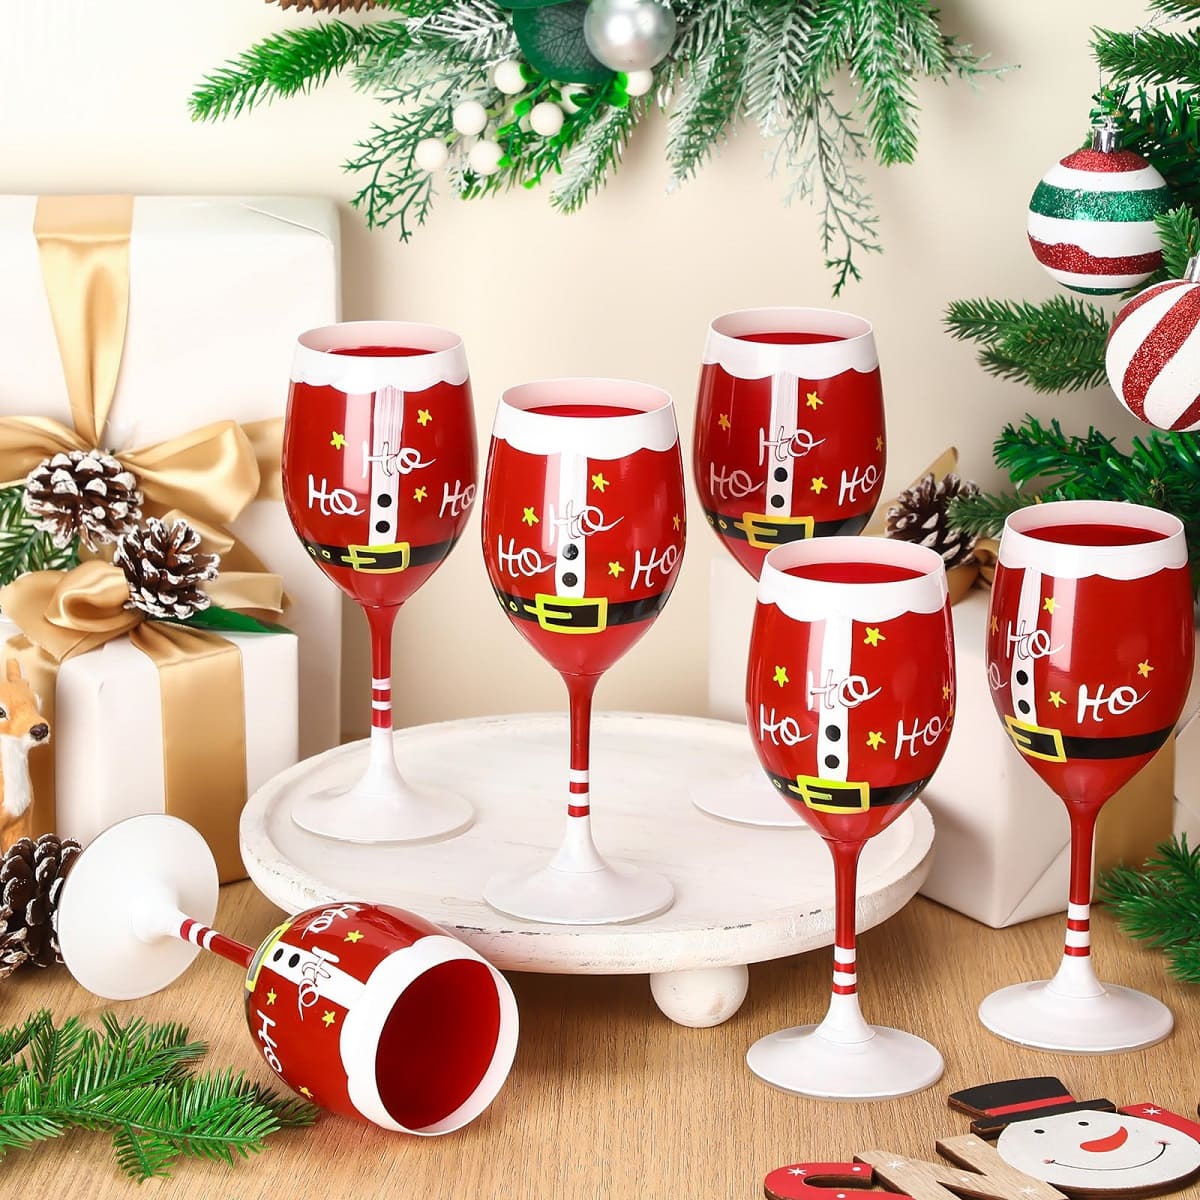
How To Make Christmas Wine Glasses
Modified: November 1, 2024
Learn how to make beautiful and festive Christmas wine glasses with our step-by-step guide. Elevate your tableware collection and impress your guests this holiday season!
(Many of the links in this article redirect to a specific reviewed product. Your purchase of these products through affiliate links helps to generate commission for Storables.com, at no extra cost. Learn more)
How To Make Christmas Wine Glasses
Key Takeaways:
- Creating personalized Christmas wine glasses involves choosing the right glassware, using the correct materials, and applying techniques such as painter’s tape and clear gloss spray paint to achieve professional and festive results.
- The step-by-step process of cleaning, painting, and sealing Christmas wine glasses requires patience and attention to detail. By following these steps, you can create stunning and durable tableware for your holiday celebrations.
Read more: How To Make Teacup Wine Glasses
Materials Needed
Creating personalized Christmas wine glasses is a fun and festive way to add a touch of holiday cheer to your next gathering. Here are the materials you will need:
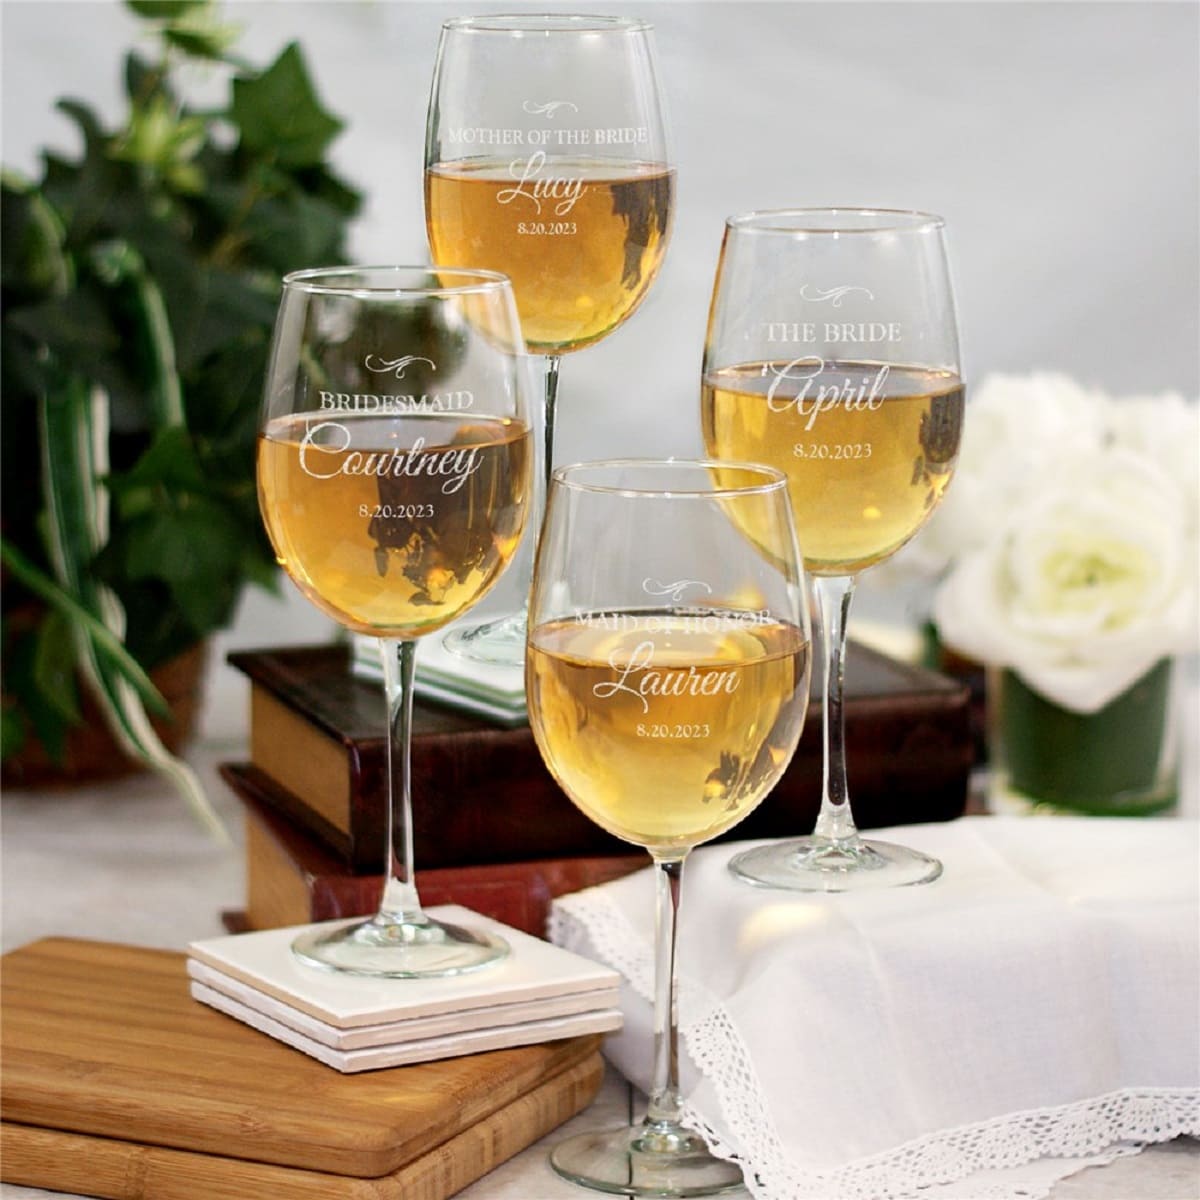
- Wine glasses: Choose clear wine glasses in a shape and size of your preference.
- Paintbrushes: You will need a variety of paintbrushes, including small and medium-sized brushes.
- Acrylic paint: Get acrylic paint in colors such as red, green, white, gold, and silver. These colors work well for Christmas-themed designs.
- Paint palette or disposable plate: Use a paint palette or a disposable plate as a surface to mix and hold your paints.
- Painter’s tape: This will be used to create clean lines and protect certain areas of the glass while painting.
- Clear gloss spray paint: To seal and protect the design on the wine glasses, the clear gloss spray paint is essential.
- Christmas-themed stencils or decals: These decorative elements will help you create intricate designs on the glasses.
- Rubbing alcohol: Use rubbing alcohol to clean the wine glasses before painting to ensure a smooth surface.
- Cotton balls or cloth: These will be used to apply rubbing alcohol to clean the glasses.
Having all of these materials ready before starting the project will help ensure a smooth and enjoyable experience.
Wine Glasses
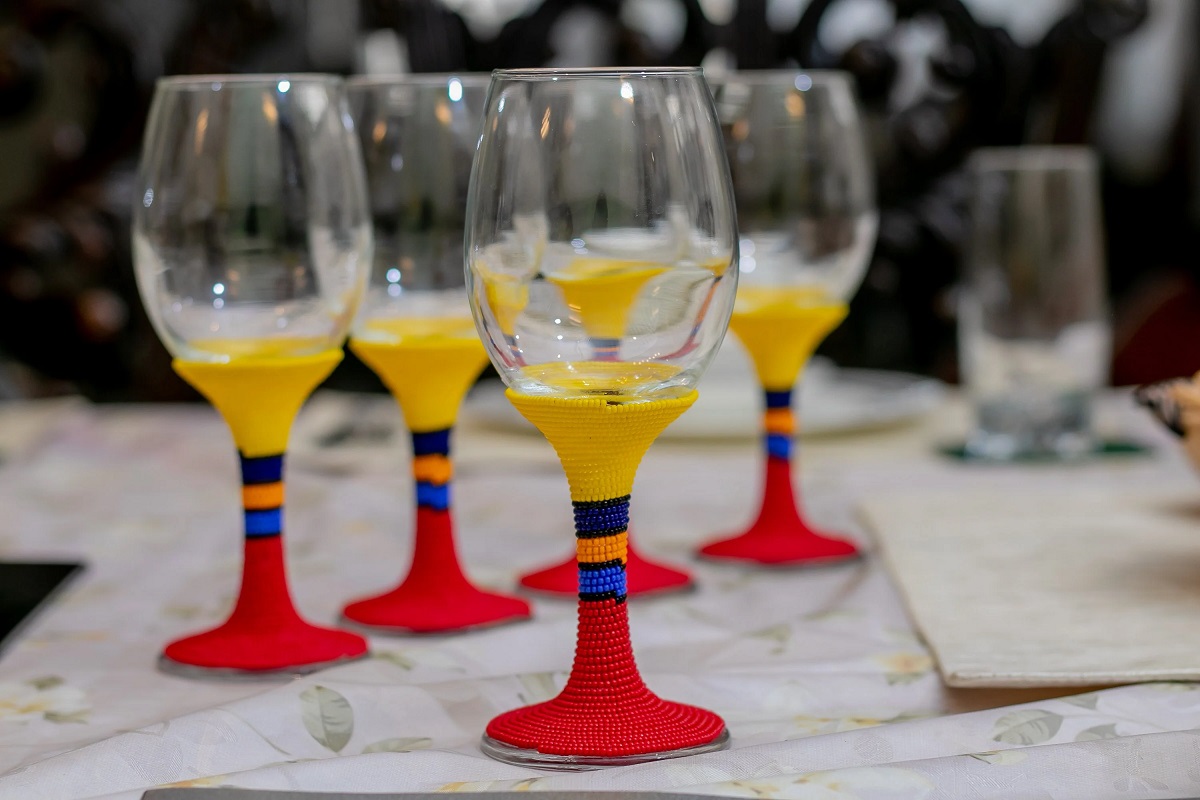
When it comes to making Christmas wine glasses, the choice of glassware is important. While you can use any type of wine glass, opting for clear glass allows the design and colors to truly shine. Here are a few things to consider when selecting your wine glasses:
1. Glass Type: Choose wine glasses with a stem and a bowl. The stem allows for easy handling without warming the wine with your hands, while the bowl shape allows the aroma and flavors of the wine to develop.
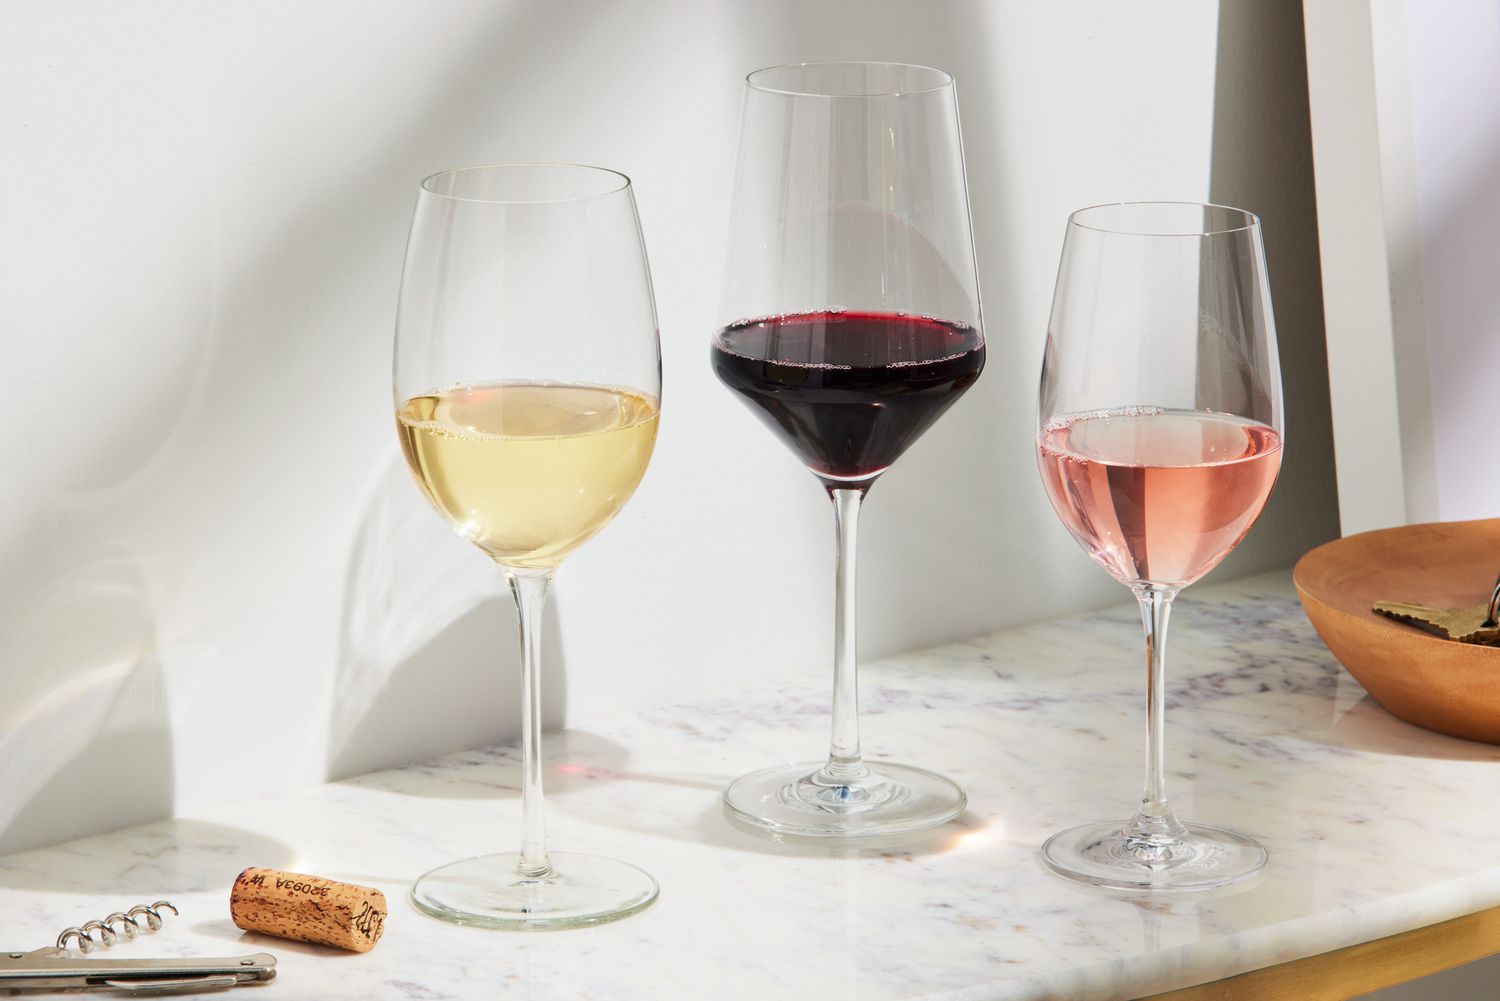
2. Size and Shape: Wine glasses come in various shapes and sizes, including standard wine glasses, stemmed goblets, and flutes. Consider the type of wine you will be serving and choose a glass that complements its characteristics.
3. Quality: Opting for high-quality wine glasses ensures durability and longevity. Look for glasses made from lead-free crystal or glass that is dishwasher-safe.
Once you have selected your wine glasses, make sure to clean them thoroughly before starting the painting process. This will help remove any dirt or residue that may interfere with the adhesion of the paint for wine glasses.
Remember, the wine glasses you choose will serve as the canvas for your Christmas designs, so select ones that will showcase your creativity and enhance the overall holiday atmosphere.
Paintbrushes
When it comes to creating beautiful Christmas wine glasses, having the right paintbrushes is essential. The brushes you choose will greatly influence the precision and control you have over your design. Here is a guide to selecting the right paintbrushes for your project:
1. Size: Paintbrushes come in various sizes, ranging from small to large. Different sizes are suitable for different tasks. For intricate details and fine lines, opt for small brushes. Larger brushes are better for filling in larger areas or creating broad strokes.
2. Bristle Type: Paintbrushes can have natural bristles or synthetic bristles. Natural bristle brushes are usually made from animal hair, such as sable or camel hair, and are ideal for working with watercolor or oil-based paints. Synthetic bristle brushes, made from nylon or polyester, are more suitable for working with acrylic paints.
3. Shape: Paintbrushes come in various shapes, including round, flat, and angled. Round brushes are versatile and can be used for both details and broader strokes. Flat brushes are great for spreading paint evenly, while angled brushes are useful for creating precise lines and edges.
4. Quality: Investing in high-quality paintbrushes will yield better results. Brushes with sturdy handles and bristles that maintain their shape will give you greater control and ensure longevity.
Make sure to clean your brushes properly after each use to maintain their quality. Rinse them with water until the water runs clear, gently reshape the bristles, and let them dry completely before storing.
Having a variety of paintbrushes at your disposal will allow you to explore different techniques and create stunning designs on your Christmas wine glasses. So, gather your brushes and let your creativity flow!
Acrylic Paint (Red, Green, White, Gold, Silver)
Acrylic paint is a versatile and popular medium for painting Christmas wine glasses. Its vibrant colors, quick drying time, and ability to adhere well to glass make it an ideal choice for this project. When gathering your supplies, be sure to include acrylic paint in red, green, white, gold, and silver to capture the festive spirit. Here’s why these colors are essential:
1. Red: Red is a classic color associated with Christmas, symbolizing warmth, love, and tradition. It is perfect for painting Santa hats, holly berries, or Rudolph’s nose on your wine glasses.
2. Green: Green represents evergreen trees, wreaths, and nature, making it an excellent choice for adding a touch of holiday foliage to your designs. Use it for painting Christmas tree branches, mistletoe leaves, or festive garlands.
3. White: White is a versatile color that can be used as a base or for highlighting details. It adds a snowy effect to your designs and complements other colors beautifully, allowing them to stand out against the glass.
4. Gold and Silver: Gold and silver are metallic colors that add a touch of elegance and glamour to your Christmas wine glasses. They are perfect for highlighting ornaments, stars, or any festive elements you want to emphasize.
Acrylic paint comes in different consistencies, including heavy body, fluid, and craft varieties. Heavy body paint is thick and provides excellent coverage, while fluid paint has a more fluid consistency, allowing for smoother brushstrokes. Craft paint is specifically designed for projects like glass painting and comes in a wide range of colors.
Remember to shake the acrylic paint bottles well before using them and apply the paint in thin layers to avoid clumping or streaking. If needed, you can mix and blend colors to achieve the desired shades and hues for your designs.
With these colors of acrylic paint at your disposal, you’ll be able to bring the Christmas spirit to life on your wine glasses, creating personalized and festive pieces that will be the talk of your holiday celebrations.
Read more: How To Make Custom Wine Glasses
Paint Palette or Disposable Plate
When working with acrylic paint for your Christmas wine glass project, it’s important to have a designated surface for holding and mixing your paint. A paint palette or a disposable plate can serve this purpose effectively. Here’s why you will need one:
1. Mixing Colors: A paint palette or a disposable plate provides a flat surface where you can easily mix different colors of acrylic paint. It allows you to create custom shades and hues by blending colors together, giving you more versatility and control over your designs.
2. Easy Cleanup: Acrylic paint dries quickly, so using a paint palette or a disposable plate makes cleanup a breeze. After you are done painting, you can simply discard the disposable plate or clean the palette with water and a gentle soap, removing any leftover paint residue.
3. Organization: Having a dedicated surface for your paint helps you stay organized and minimizes the risk of accidentally mixing colors or contaminating different shades. You can assign specific areas on the palette or plate for each color, ensuring that they remain separate and easily accessible.
4. Less Waste: Using a paint palette or a disposable plate allows you to control the amount of paint you dispense. This helps reduce waste, as you can start with small amounts and add more as needed. It also prevents the paint from drying out if left in a open container.
Both options – a paint palette or a disposable plate – are effective choices, so the decision depends on your personal preference and availability. A palette made from plastic or ceramic is reusable and durable, whereas a disposable plate provides convenience and easy cleanup.
By using a paint palette or a disposable plate, you’ll have a dedicated space to mix, blend, and organize your acrylic paint, making the process of painting your Christmas wine glasses more enjoyable and efficient.
Painter’s Tape
Painter’s tape is a vital tool when it comes to creating clean and precise designs on your Christmas wine glasses. This specialized tape offers several benefits that will help you achieve professional-looking results. Here’s why painter’s tape is an essential component of your wine glass painting project:
1. Clean Lines: Painter’s tape is designed to provide sharp edges and clean lines. By applying it strategically to your wine glass, you can create boundaries and protect specific areas from getting painted. This allows you to achieve precise and neat designs without any smudges or bleeding of the paint.
2. Protection: Painter’s tape acts as a barrier by shielding the sections of the wine glass that you want to keep paint-free. This is particularly useful when working on intricate designs or when using different paint colors. It ensures that each element of your design remains distinct and well-defined.
3. Easy Application and Removal: Painter’s tape is designed with a gentle adhesive that holds it firmly in place without leaving residue when removed. This makes it easy to apply and ensure a secure seal on the glass. When you’re finished painting, simply peel off the tape, leaving behind crisp lines and a clean surface.
4. Versatility: Painter’s tape can be easily cut to different lengths and shapes, making it versatile for various design ideas. Whether you want straight lines, curved edges, or intricate patterns, painter’s tape can be molded to suit your specific needs. It allows you to unleash your creativity and experiment with different designs.
When using painter’s tape, make sure the wine glasses are clean and dry before application. Press the tape firmly onto the glass, ensuring that there are no gaps or bubbles along the edge. When removing the tape, do it slowly and at a 45-degree angle to prevent any paint from peeling off with it.
Painter’s tape is a valuable tool that will elevate your wine glass painting game. With its help, you can achieve clean, precise, and professional-looking designs that will impress your guests during the holiday season.
Clear Gloss Spray Paint
Clear gloss spray paint is a crucial component when it comes to sealing and protecting the design on your Christmas wine glasses. It adds a final touch of professionalism and durability to your painted glasses. Here’s why clear gloss spray paint is an essential part of your wine glass painting project:
1. Sealing the Design: Once you’ve completed painting your designs on the wine glasses, it’s important to seal them to prevent the paint from easily scratching or chipping off. Clear gloss spray paint creates a protective layer over the painted surface, ensuring that your designs remain intact even with regular use.
2. Enhancing the Appearance: Clear gloss spray paint enhances the overall appearance of your wine glasses by adding a glossy and smooth finish. This finish not only makes your designs pop but also adds a professional touch that elevates the look of the glasses.
3. Easy Application: Clear gloss spray paint is incredibly easy to apply. Simply hold the spray can at a distance from the wine glass and coat the entire painted surface evenly. Make sure to apply thin, even layers to avoid drips or pooling of the spray paint.
4. Quick Drying Time: Clear gloss spray paint dries quickly, allowing you to complete your project in a timely manner. This is especially beneficial when you have multiple wine glasses to seal. It ensures that you can move on to the next steps or start using the glasses as soon as possible.
5. Long-lasting Protection: Clear gloss spray paint provides a durable protective layer that helps safeguard your artwork on the wine glasses. It acts as a barrier against moisture, dust, and daily wear and tear, ensuring that your designs remain vibrant and intact for a long time.
Before applying clear gloss spray paint, make sure your painted wine glasses are completely dry. Shake the spray can well, and apply the paint using smooth, sweeping motions. Allow the glasses to dry thoroughly according to the instructions on the spray paint can before handling or using them.
With the application of clear gloss spray paint, your Christmas wine glasses will have an added layer of protection and a beautiful shine, making them the perfect tableware for your holiday celebrations.
Christmas-Themed Stencils or Decals
Using Christmas-themed stencils or decals is an excellent way to add intricate and professional-looking designs to your wine glasses. These decorative elements provide endless possibilities for creating stunning and festive patterns. Here’s why incorporating Christmas-themed stencils or decals is a must for your wine glass painting project:
1. Versatility: Stencils and decals come in a variety of Christmas-themed designs, such as snowflakes, Christmas trees, reindeer, ornaments, and more. They offer a wide range of options to suit your personal style and the overall theme of your holiday celebration. You can mix and match different designs to create a unique and eye-catching pattern on each wine glass.
2. Ease of Use: Stencils and decals are user-friendly, even for beginners. Stencils are typically made of durable materials, such as plastic or mylar, that can be easily secured onto the wine glass. You can then apply paint over the stencil using a brush or sponge, ensuring clean and precise lines. Decals are pre-cut designs that can be adhered to the glass surface and sealed with a clear gloss spray paint or varnish.
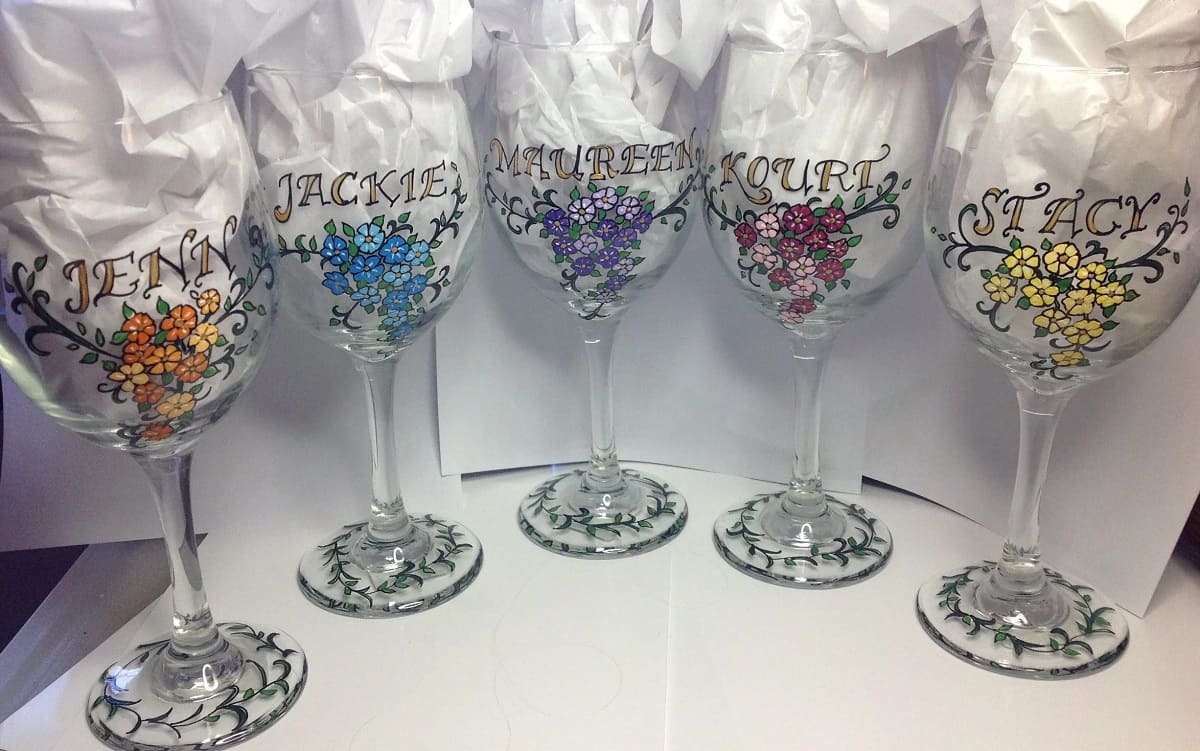
3. Consistency: Stencils and decals provide a consistent design across multiple wine glasses. This is particularly beneficial if you are creating a matching set or giving them as gifts. By using stencils or decals, you can ensure that each wine glass has the same level of detail and uniformity in the design.
4. Time-Saving: Stencils and decals can save you time when it comes to creating intricate designs. Rather than freehand painting every detail, you can quickly and easily achieve professional-looking results by using stencils or applying decals.
5. Customizability: Stencils and decals can be customized to suit your preferences. You can choose the colors of paint to apply over the stencil or opt for different colored decals. This allows you to personalize each wine glass, making them unique and tailored to your desired Christmas aesthetic.
Whether you decide to use stencils or decals, make sure to secure them onto the wine glass surface and follow the instructions provided. Take your time to ensure proper adhesion or alignment. Once the paint or decal is applied, allow it to dry thoroughly before moving on to the next step.
By incorporating Christmas-themed stencils or decals into your wine glass painting project, you’ll be able to achieve intricate designs with ease, adding a touch of elegance and charm to your festive table setting.
Read more: How To Make A Wine Glass Chandelier
Rubbing Alcohol
Rubbing alcohol is a critical component when it comes to preparing your wine glasses for painting. It plays a crucial role in ensuring a clean and smooth surface, allowing the paint to adhere properly. Here’s why rubbing alcohol is an essential part of your wine glass painting project:
1. Cleaning the Surface: Before you begin painting, it’s important to clean the surface of the wine glass to remove any dirt, oils, or residues. Rubbing alcohol acts as a powerful solvent that effectively cleans the glass, ensuring a pristine canvas for your designs. It helps eliminate any impurities that may interfere with the paint’s adhesion, resulting in a smoother and more professional-looking finish.
2. Removing Grease and Fingerprints: Fingerprints, oils, or other greasy substances on the surface of the glass can create a barrier that prevents the paint from adhering well. Rubbing alcohol helps dissolve and remove these substances, leaving the glass completely free of smudges and fingerprints. This step is particularly important for achieving a flawless and long-lasting paint application.
3. Degreasing and Deglassing: Rubbing alcohol not only cleans the glass but also degreases and deglasses it. This means it removes any greasy residue and etches the surface slightly, creating a microscopically rough texture. This texture helps the paint adhere better to the glass, ensuring a more durable and long-lasting design.
4. Application: To use rubbing alcohol, dampen a cotton ball or cloth with the alcohol and gently wipe the entire surface of the wine glass. Make sure to cover the inside and outside of the glass thoroughly. Allow the glass to air dry completely before proceeding with the painting process.
It’s important to note that rubbing alcohol should only be used on glass surfaces. Avoid using it on painted or decorative elements of the wine glass, as it may damage or remove the existing design.
By incorporating rubbing alcohol into your wine glass painting process, you ensure a clean and well-prepared surface, allowing the paint to adhere properly and creating a professional and long-lasting result. The little extra effort in cleaning with rubbing alcohol will significantly enhance the quality of your painted wine glasses.
Cotton Balls or Cloth
Cotton balls or cloth are essential items for your wine glass painting project. They are used in conjunction with rubbing alcohol to clean the glass surface thoroughly before painting. Here’s why cotton balls or cloth are necessary for achieving the best results:
1. Absorbency: Cotton balls and cloth have excellent absorbent properties, allowing them to effectively hold and distribute rubbing alcohol onto the glass surface. This ensures that the alcohol is evenly applied and can effectively remove any dirt, oils, or residues that may hinder the paint adhesion.
2. Gentleness: Cotton balls and cloth are soft and gentle on the glass, making them suitable for delicate surfaces. They won’t scratch or damage the glass while cleaning, ensuring that your wine glasses remain in excellent condition throughout the painting process.
3. Control: The use of cotton balls or cloth provides you with precise control over the pressure and movement when cleaning the wine glasses. You can apply the desired amount of pressure to remove stubborn stains or smudges effectively. This control ensures that the glass is thoroughly cleaned without causing any unnecessary damage.
4. Disposable: Cotton balls are usually disposable, making them convenient for single-use applications. If you prefer a reusable option, a soft cloth can be used instead. With cloth, you can wash and reuse it for multiple projects, reducing waste and saving money in the long run.
To use cotton balls or cloth with rubbing alcohol, dampen the cotton ball or fold the cloth into a small square. Apply a small amount of rubbing alcohol onto the cotton or cloth, and gently wipe the entire surface of the wine glass. Ensure that you cover both the inside and outside of the glass. Allow the glass to air dry completely before proceeding with the painting process.
Step-by-Step Instructions
- Clean the wine glasses: Use cotton balls or cloth dampened with rubbing alcohol to wipe the entire surface of the glasses, removing any dirt, oils, or residues. Ensure that the glass is completely dry before proceeding to the next step.
- Prepare the work area: Set up a well-ventilated and well-lit area to work on your wine glasses. Lay down a clean and protective surface, such as a tablecloth or newspaper, to catch any paint drips or spills.
- Apply painter’s tape: Use painter’s tape to create clean lines and protect specific areas of the glass that you don’t want to paint. Ensure that the tape is securely attached to the glass, with no gaps or bubbles.
- Choose the design and stencil: Select your desired Christmas-themed design and stencil. Position the stencil on the wine glass and secure it in place, ensuring it is centered and aligned correctly.
- Paint the base color: Using a paintbrush or sponge, apply the base color of acrylic paint onto the glass. Start from the stencil’s edges and work your way inward. Be careful not to apply too much paint, as this can cause bleeding or smudging.
- Apply additional designs and details: Remove the stencil and let the base color dry completely. If desired, use additional stencils or freehand painting techniques to add intricate details and designs to the glass. Take your time and be precise in your application.
- Remove painter’s tape and let it dry: Once you are satisfied with your design, carefully remove the painter’s tape to reveal clean lines and edges. Allow the paint to dry completely before proceeding.
- Apply a second coat of paint (if needed): If the paint appears translucent or uneven, you can apply a second coat of paint once the first coat is completely dry. This will enhance the vibrancy and coverage of the design.
- Seal the design with clear gloss spray paint: Once the paint is dry, apply a coat of clear gloss spray paint to seal and protect the design on the wine glass. Follow the instructions on the spray can and ensure even coverage.
- Let the glasses dry completely: Allow the clear gloss spray paint to dry completely before handling or using the wine glasses. Follow the drying time indicated on the spray can to ensure full curing.
- Clean up and enjoy your Christmas wine glasses: Once the glasses are fully dry, clean up your work area and prepare to showcase your beautifully painted wine glasses at your next holiday gathering. Enjoy the festive ambiance they bring to your table!
By following these step-by-step instructions and utilizing cotton balls or cloth for cleaning, you’ll be able to create stunning Christmas wine glasses that will make a memorable impact during your holiday festivities.
To make Christmas wine glasses, use glass paint to create festive designs like snowflakes or holly. Let the paint dry completely before using the glasses.
Step 1: Clean the Wine Glasses
Before you begin painting your Christmas wine glasses, it’s essential to clean them thoroughly. Cleaning the glasses ensures that the paint adheres properly and creates a smooth and flawless finish. Follow these steps to clean the wine glasses effectively:
- Prepare your materials: Gather the wine glasses, cotton balls or cloth, and rubbing alcohol.
- Pour rubbing alcohol onto a cotton ball or dampen a cloth: Apply rubbing alcohol onto a cotton ball or dampen a cloth with the alcohol. Be sure not to oversaturate the cotton ball or cloth.
- Wipe the entire surface of the glasses: Starting from the rim, gently wipe the entire surface of each wine glass using the alcohol-soaked cotton ball or cloth. Ensure that you cover both the inside and outside of the glass. This step removes any dirt, oils, or residues that may interfere with the paint’s adhesion.
- Pay attention to stubborn stains: If you encounter stubborn stains or sticky residue, apply a bit more pressure while wiping or use a gentle rubbing motion to remove them. Be careful not to apply excessive force that could damage or crack the glass.
- Dry the glasses: Allow the wine glasses to air dry completely before proceeding with the painting process. Ensure that there is no moisture or wetness remaining on the glass surface.
It’s important to note that cleaning the wine glasses should be done just before painting to minimize the accumulation of dust or any particles that may settle on the glass surface. Avoid touching the cleaned areas with your fingers as this could transfer oils that may affect the paint’s adhesion.
By starting with clean wine glasses, you create the ideal canvas for your Christmas designs, ensuring that the paint adheres smoothly and produces a professional-looking result. Properly cleaned glasses will enhance the longevity and vibrancy of your painted designs, making them a standout feature of your holiday table setting.
Read more: How To Make Glitter Wine Glasses
Step 2: Prepare the Work Area
Creating a suitable work area for your wine glass painting project is important to ensure a smooth and enjoyable experience. By setting up a well-organized space, you can focus on your creative process and minimize any potential mess or accidents. Follow these steps to prepare your work area:
- Choose a well-ventilated area: Select a space with good ventilation to allow for proper air circulation. This helps dissipate any fumes from the paints and varnishes, keeping the air fresh and reducing the risk of respiratory discomfort.
- Select a well-lit spot: Ensure that your work area is well-lit to provide adequate visibility as you paint. Natural light is ideal but, if necessary, supplement it with artificial lighting to ensure a clear view of your wine glasses and designs.
- Lay down a protective surface: Cover your work area with a clean tablecloth, newspaper, or a designated craft mat to protect the surface from paint drips or spills. This makes cleanup much easier and prevents any potential damage to your table or working surface.
- Gather your supplies: Organize all the necessary materials within easy reach. This includes the wine glasses, paintbrushes, acrylic paints, painter’s tape, stencils or decals, clear gloss spray paint, rubbing alcohol, cotton balls or cloth, and any other tools specific to your chosen design.
- Set up a drying area: Allocate a separate space for the painted wine glasses to dry. This area should be away from the immediate work area to prevent accidental bumps or smudges. Consider using a drying rack or dedicated surface where the glasses can rest undisturbed until they are completely dry.
- Ensure safety measures: It’s important to prioritize safety while working on your project. If using spray paint or varnish, make sure your work area is well-ventilated and consider wearing a mask or respirator to protect yourself from fumes. Keep any flammable materials away from open flames or heat sources.
Setting up a well-prepared work area allows you to focus on your creativity and painting process without any distractions. It also ensures that your workspace remains organized and prevents any potential mishaps or damage. By following these steps, you can create an environment conducive to creating beautiful Christmas wine glasses.
Step 3: Apply Painter’s Tape
Applying painter’s tape is a crucial step in creating clean and defined lines on your Christmas wine glasses. Painter’s tape acts as a protective barrier, ensuring that paint is applied only where desired and preventing any accidental smudges or spills. Follow these steps to apply painter’s tape effectively:
- Gather your materials: Prepare the wine glasses and painter’s tape.
- Cut the tape: Measure the length of tape needed for the desired design or section of the glass. Using scissors or a utility knife, cut the tape to the appropriate length. Make sure to cut the tape in a straight line to achieve clean edges.
- Place the tape: Carefully position the cut piece of painter’s tape onto the glass, aligning it with the desired line or edge. Press down firmly along the length of the tape to ensure proper adhesion to the surface. Smooth out any air bubbles or wrinkles using your fingertips.
- Create clean lines: Use additional strips of painter’s tape, if necessary, to create straight lines or specific shapes. Overlap the tape slightly at the corners to ensure continuous coverage and prevent any paint bleed-through.
- Protect designated areas: If there are areas of the wine glass that you want to keep paint-free, such as the stem or base, carefully apply painter’s tape around those sections. This will shield those areas from any accidental paint application.
- Double-check placement: Before proceeding with painting, take a moment to review the placement of the painter’s tape. Make sure it is taut and firmly adhered to the glass. Confirm that the tape is covering the desired areas and lines, ensuring clean and defined boundaries.
Keep in mind that the painter’s tape should be applied before you begin painting and removed after the paint has dried but before applying the clear gloss spray paint. This will allow you to achieve crisp and precise lines in your designs while maintaining a clean and professional appearance.
By using painter’s tape effectively, you can create distinct sections and achieve detailed designs on your Christmas wine glasses. It helps ensure that each element of your design is crisp and well-defined, resulting in stunning festive tableware that will impress your guests.
Step 4: Choose the Design and Stencil
Choosing the right design and stencil is a crucial step in creating personalized and festive Christmas wine glasses. The design sets the tone and theme for your glasses, allowing you to showcase your creativity and add a touch of holiday cheer to your table setting. Follow these steps to choose the perfect design and stencil:
- Consider Your Theme: Think about the overall theme or style you want to achieve with your wine glasses. Traditional, whimsical, elegant, or modern – determine the mood you want to evoke and the ambiance you want to create. This will guide your choice of design and stencil accordingly.
- Research and Gather Inspiration: Look for design inspiration online, in magazines, or at local craft stores. Explore different patterns, motifs, and Christmas-themed elements to spark your creativity. Consider incorporating elements like snowflakes, reindeer, ornaments, holly, stars, or Santa Claus into your design.
- Choose a Stencil or Create Your Own: Once you have an idea of the design you want, select a pre-made stencil that matches your vision. Craft stores often have a wide range of stencils available for purchase. If you can’t find the exact stencil you want, consider creating your own by tracing or printing a design onto a stencil material like acetate or thick cardstock.
- Size and Placement: Consider the size of your wine glasses when choosing a stencil. Ensure that the stencil will fit comfortably on the glass without distorting or being too small to make an impact. Plan the placement of the stencil on the glass, envisioning how it will look from different angles and on different parts of the glass surface.
- Multiple Designs: If you plan to paint multiple wine glasses, consider creating a set of coordinating or complementary designs. You can choose different stencils or variations of the same design, creating a cohesive yet unique collection of glasses.
Remember, the design and stencil you choose will set the stage for the painting process and determine the final look of your Christmas wine glasses. Take your time in selecting a design that resonates with you and aligns with the holiday ambiance you want to create.
By carefully choosing a design and finding or creating a suitable stencil, you’ll set the foundation for transforming plain wine glasses into festive and eye-catching pieces that will add a special touch to your holiday celebrations.
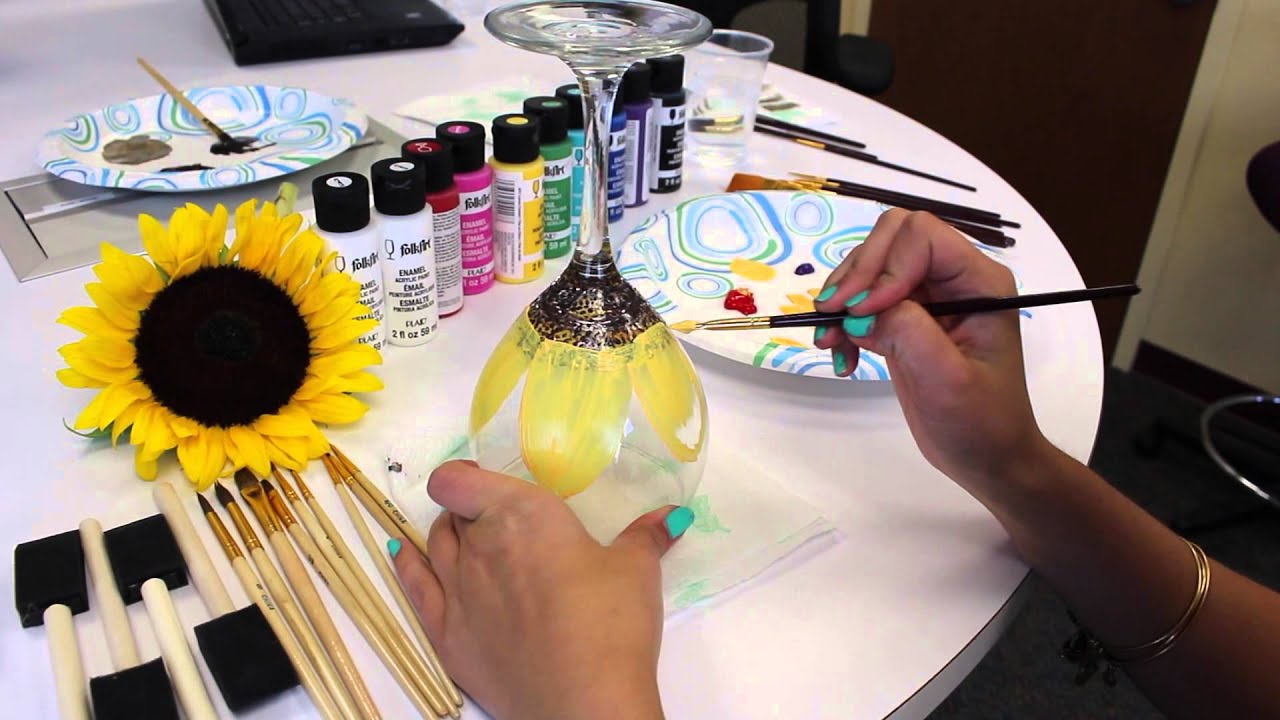
Step 5: Paint the Base Color
Painting the base color is a critical step in bringing your chosen design to life on your Christmas wine glasses. The base color acts as the foundation for your design and sets the tone for the overall look of the glass. Follow these steps to paint the base color accurately:
- Gather your materials: Prepare the wine glasses, acrylic paint in the desired color(s), paintbrushes, and a paint palette or disposable plate.
- Prepare the paint: Squeeze a small amount of the desired base color onto the paint palette or disposable plate. Spread the paint evenly, leaving enough space for mixing or selecting additional colors if needed.
- Dip your paintbrush: Dip your paintbrush into the base color paint, ensuring that the bristles are well coated but not overloaded with paint.
- Apply the base color: Starting from the area where you want to apply the base color, such as the bottom of the glass or a specific section, begin smoothly and evenly applying the paint. Use long, brushstrokes to cover the designated area, taking care to follow the shape of the glass.
- Blend the paint: If you are using multiple colors in your design, you may need to blend the base color with another color at certain transition points. To do this, clean your brush, dip it into the second color, and blend it with the base color where the two colors meet. Use gentle strokes to create a smooth transition between the colors.
- Cover the entire designated area: Continue painting with the base color until the entire designated area is evenly covered and the desired opacity is achieved. Ensure that there are no streaks or uneven patches in the paint. If needed, apply additional coats of paint, allowing each layer to dry before applying the next.
- Let the paint dry: Allow the base color to dry completely before applying any additional designs or details. Follow the manufacturer’s instructions on the paint’s drying time for best results. Avoid touching the painted areas during this drying period to prevent smudges or smears.
Painting the base color provides a solid background for the rest of your design, adding depth and dimension to the wine glass. It sets the stage for embellishments and additional details that will make your Christmas wine glasses truly distinct and festive.
By painting the base color carefully and evenly, you’ll create a solid foundation for your design, allowing you to build upon it and bring your vision to life. Take your time and enjoy the process as you watch your wine glasses transform into beautiful holiday tableware.
Read more: How To Make Wine Glass Charms
Step 6: Apply Additional Designs and Details
Once you have painted the base color of your Christmas wine glasses, it’s time to add additional designs and details that will bring your glasses to life. This step allows you to personalize and customize your glasses with festive elements and creative touches. Follow these steps to apply additional designs and details:
- Gather your materials: Prepare the wine glasses, acrylic paints in various colors, paintbrushes, stencils or decal designs, and any additional tools or materials you plan to use for detailing.
- Plan your designs: Take a moment to visualize and plan the additional designs you want to incorporate on your wine glasses. Decide on the placement and composition of the designs, considering the size and shape of the glass as well as the overall aesthetics you want to achieve.
- Choose your techniques: Determine the techniques you wish to use for adding the designs and details. You can use stencils to create precise and repeatable patterns or opt for freehand painting to allow for more spontaneity and creativity.
- Work in layers: Start with the background and larger design elements before moving on to smaller details. If using stencils, secure them in place on the glass and apply paint using a brush or sponge. If freehand painting, use small brushes to carefully add the desired designs directly onto the glass.
- Blend colors and add shading: To add depth and dimension to your designs, consider blending colors or adding shading. This can be done by mixing different shades of paint on your palette or by overlaying translucent layers of paint to create a layered effect.
- Add dotting or line work: Use small brushes or tools to add decorative dotting or intricate line work to enhance your designs further. Dots can be used to create patterns or simulate the appearance of snow, while fine lines can add intricacy and detail to objects or figures.
- Take your time and be patient: Applying additional designs and details can require precision and patience. Take your time and work slowly, allowing each layer of paint to dry before applying the next. This will prevent smudging or unintentional blending of colors.
- Review and make any adjustments: Once you have finished applying the additional designs and details, take a step back and review your work. Make any necessary adjustments or touch-ups to ensure that your designs are clear, well-defined, and visually appealing.
Remember, this step is where your creativity truly shines. Whether you choose to add intricate patterns, holiday motifs, or personalized elements, these additional designs and details will make your Christmas wine glasses unique and festive.
By applying additional designs and details thoughtfully and with precision, you’ll transform your wine glasses into beautiful and customized pieces of art. Let your imagination guide you as you paint, and enjoy the process of bringing your vision to life.
Step 7: Remove Painter’s Tape and Let It Dry
After applying the designs and details on your Christmas wine glasses, it’s time to remove the painter’s tape and let the glasses dry. This step is crucial for achieving clean lines and ensuring that your designs remain intact. Follow these steps to complete this step effectively:
- Check the paint’s dryness: Before removing the painter’s tape, ensure that the paint on the wine glasses is completely dry. Refer to the manufacturer’s instructions on the paint container for the recommended drying time.
- Start removing the tape: Gently peel off the painter’s tape from the wine glasses, starting from one end and carefully pulling it back in a slow and steady motion. Remove the tape at a 45-degree angle to prevent any accidental smudging or lifting of the paint.
- Inspect the lines and edges: As you remove the tape, take a close look at the lines and edges that were protected by the tape. Check for any paint bleeding or imperfections that may have occurred. If you notice any issues, use a small brush or cotton swab dipped in rubbing alcohol to carefully clean up and correct any mistakes or imperfections.
- Let it dry completely: Once the tape has been removed, allow the wine glasses to dry completely. This ensures that any adjustments or touch-ups you made are also dry and secure. It’s essential to exercise patience and allow sufficient drying time before moving on to the next step.
- Protect your designs: While the glasses are drying, make sure to handle them with care to avoid smudging or damaging the designs. Place them on a clean and flat surface where they won’t come into contact with any objects or surfaces that could potentially rub against the paint.
Removing the painter’s tape with precision and letting the wine glasses dry thoroughly is crucial for achieving clean and well-defined designs. By following this step diligently, you ensure that the hard work you put into your designs remains intact while the paint on the glasses cures and sets completely.
Once the tape is removed and the glasses are fully dry, you’re one step closer to completing your Christmas wine glass project. The next steps involve enhancing and protecting your designs, making them ready to be showcased and enjoyed during your holiday celebrations.
Step 8: Apply a Second Coat of Paint (if Needed)
Applying a second coat of paint is an optional but beneficial step in achieving a vibrant and flawless finish on your Christmas wine glasses. A second coat can help enhance the color intensity, improve coverage, and ensure a more professional-looking result. Follow these steps to apply a second coat of paint if needed:
- Evaluate the first coat: After the initial coat of paint has dried, assess the overall coverage and opacity of the design. Pay attention to any areas that appear translucent or unevenly covered. Determine whether or not a second coat is necessary to achieve the desired vibrancy and consistency.
- Prepare the paint: If you decide to proceed with the second coat, stir or shake the paint containers well to ensure uniformity in color and texture. Squeeze a small amount of paint onto your palette or disposable plate, ready for application.
- Apply the second coat: Dip your paintbrush into the paint, ensuring an adequate but not excessive amount of paint on the bristles. Begin applying the second coat of paint, starting from the area that requires additional coverage or touch-ups. Use smooth and even brushstrokes, following the original design lines.
- Blend with the first coat: As you apply the second coat, gently blend the paint with the first coat along the overlapping areas. This helps create a seamless transition between the layers and ensures better color saturation.
- Avoid excessive build-up: Be cautious not to apply too much paint or create a thick build-up on the glass. Apply the second coat in thin layers, allowing each layer to dry completely before adding more paint as needed. This prevents drips, clumps, or the paint layer from becoming unstable.
- Let the paint dry: Once the second coat is applied, allow the glasses to dry completely. Follow the manufacturer’s instructions on the paint container for the recommended drying time. Avoid touching or handling the glasses during this time to prevent any accidental smudging or damage to the fresh paint.
Applying a second coat of paint can significantly enhance the appearance and overall quality of your Christmas wine glasses. It ensures a more vibrant and consistent color, conceals any imperfections, and provides a professional finish.
However, it’s important to exercise caution and discretion when deciding to apply a second coat. Some designs or colors may already achieve the desired effect with just one coat of paint. Evaluating the coverage and color intensity of the first coat will help determine whether or not a second coat is necessary to achieve the desired results.
With the second coat of paint applied and allowed to dry, your Christmas wine glasses are one step closer to being ready for the final touches that will protect and showcase your designs, making them the perfect addition to your holiday table setting.
Step 9: Seal the Design with Clear Gloss Spray Paint
Sealing the design on your Christmas wine glasses with clear gloss spray paint is a vital step to protect your artwork and give it a professional and long-lasting finish. The clear gloss sealant adds a protective layer, enhances the vibrancy of the colors, and provides a smooth and glossy surface. Follow these steps to seal the design on your wine glasses:
- Gather your materials: Prepare the wine glasses, clear gloss spray paint, and a well-ventilated area for spraying.
- Read the instructions: Carefully read and follow the instructions on the clear gloss spray paint can. Each brand may have specific guidelines for application, drying time, and recommended distance for spraying.
- Prepare the work area: Set up a clean and well-ventilated space for spraying the clear gloss. Protect the surrounding area with a drop cloth or newspaper to catch any overspray.
- Shake the spray can: Shake the clear gloss spray paint can vigorously for the recommended time specified in the instructions. This ensures that the formula is well-mixed and ready for application.
- Spray the glasses: Hold the spray can at the recommended distance from the wine glasses. Start spraying off to the side, then sweep the can across the glasses in a smooth and even motion. Apply thin, even coats to avoid drips or excessive buildup of the clear gloss sealant.
- Allow drying time: After applying the first coat of clear gloss, allow the wine glasses to dry according to the instructions on the spray paint can. This may take a few hours or longer, depending on the specific product.
- Apply additional coats: If desired, apply additional coats of clear gloss spray paint to build up the protective layer and create a high-gloss finish. Be sure to follow the recommended drying time between coats.
- Let it cure: After the final coat of clear gloss is applied, allow the wine glasses to cure for the recommended time specified by the spray paint manufacturer. This ensures that the sealant fully hardens and provides optimal protection.
Sealing the design with clear gloss spray paint not only protects your artwork from scratches and abrasion but also adds a beautiful shine that enhances the overall appearance and longevity of your Christmas wine glasses.
Take your time during this step, ensuring a smooth and even application of the clear gloss spray paint. Following the instructions and recommended drying times will help you achieve the best results, providing a durable and professional finish to your painted wine glasses.
Once the clear gloss is fully cured, your Christmas wine glasses are ready to be enjoyed and showcased during your holiday festivities.
Read more: How To Make A Wine Glass Holder
Step 10: Let the Glasses Dry Completely
After sealing the design with clear gloss spray paint, it is crucial to allow adequate drying time for the wine glasses. This final step ensures that the paint and protective sealant fully cure and harden, providing a durable and long-lasting finish. Follow these steps to let the glasses dry completely:
- Set the glasses in a safe area: Find a clean and dust-free area where you can place the wine glasses, ensuring they won’t be disturbed or accidentally touched during the drying process.
- Avoid stacking or overcrowding: Do not stack the glasses or place them too close together. Give each glass ample space to allow for proper air circulation and to prevent any accidental smudging or damage to the designs.
- Follow the recommended drying time: Refer to the instructions on the clear gloss spray paint can for the suggested drying time. This period can vary depending on the specific brand and environmental factors such as temperature and humidity.
- Exercise patience: Be patient and resist the urge to handle or use the wine glasses before they have completely dried. Rushing this step could lead to smudges, fingerprints, or damage to the finish you have worked hard to achieve.
- Check for any touch-ups: While the glasses are drying, use this time to inspect the designs and overall appearance. If you notice any areas that may require touch-ups or additional detailing, take note for future reference or make any necessary adjustments once the glasses have fully dried.
- Confirm full drying: As a general guideline, it is recommended to allow at least 24 to 48 hours for the clear gloss spray paint and design on the wine glasses to dry fully. However, the actual drying time may vary, so ensure that you have followed the specific instructions provided by the spray paint manufacturer.
Letting the wine glasses dry completely is crucial for preserving the integrity and longevity of your designs. The drying time allows the paint and clear gloss sealant to cure and harden, providing a strong and durable finish.
During this step, exercise patience and resist the temptation to handle the glasses prematurely. By allowing the wine glasses to dry completely, you ensure that your hard work pays off, and you can confidently use and display your beautifully painted and sealed Christmas wine glasses.
Step 11: Clean Up and Enjoy Your Christmas Wine Glasses!
Congratulations on completing your Christmas wine glass painting project! The final step involves cleaning up your work area and getting ready to showcase and enjoy your beautifully crafted glasses. Follow these steps to wrap up your project:
- Dispose of used materials: Dispose of any used paint palettes, disposable plates, or cotton balls that were used during the project. Properly dispose of any empty paint containers or spray paint cans according to local regulations.
- Clean your brushes and tools: Thoroughly clean your paintbrushes, stencils, and any other tools used during the project with soap and water. Remove any paint residue or stains, ensuring that the brushes are completely clean and ready for future use.
- Organize and store your supplies: Take a moment to organize your remaining supplies, such as acrylic paints, painter’s tape, stencils, and other materials. Properly store them in a designated area for future projects to keep them in good condition and easily accessible.
- Showcase and use your Christmas wine glasses: Once your work area is clean and organized, it’s time to showcase and enjoy your festive wine glasses! Place them in a prominent location or table setting to add a touch of holiday spirit to your celebrations.
- Handle the glasses with care: Remember to handle the glasses with care, avoiding any rough handling or impacts that may damage the designs or finish. Treat them as delicate and valuable pieces of art to ensure their longevity and continued enjoyment.
- Clean the wine glasses with care: When it’s time to clean the wine glasses after use, gently hand wash them using mild dish soap and lukewarm water. Avoid using abrasive materials or harsh scrubbing, as this can potentially damage the painted designs or the clear gloss finish.
- Store the glasses safely: Once clean and dry, store your Christmas wine glasses in a secure place where they won’t be at risk of being bumped or accidentally knocked over. Consider using protective sleeves or individual compartments for added protection.
Now that your project is complete, you can proudly set your table with your beautifully painted and sealed Christmas wine glasses. They will add elegance, charm, and a personalized touch to your holiday gatherings, creating lasting memories for years to come.
So, sit back, relax, and raise a glass to your creativity and craftsmanship. Cheers and enjoy your festive wine glasses!
Frequently Asked Questions about How To Make Christmas Wine Glasses
Was this page helpful?
At Storables.com, we guarantee accurate and reliable information. Our content, validated by Expert Board Contributors, is crafted following stringent Editorial Policies. We're committed to providing you with well-researched, expert-backed insights for all your informational needs.


0 thoughts on “How To Make Christmas Wine Glasses”