Tableware
How To Make Tableware From Wood
Modified: December 7, 2023
Discover how to create stunning tableware from wood with our step-by-step guide. Enhance your dining experience with unique and eco-friendly tableware designs.
(Many of the links in this article redirect to a specific reviewed product. Your purchase of these products through affiliate links helps to generate commission for Storables.com, at no extra cost. Learn more)
Introduction
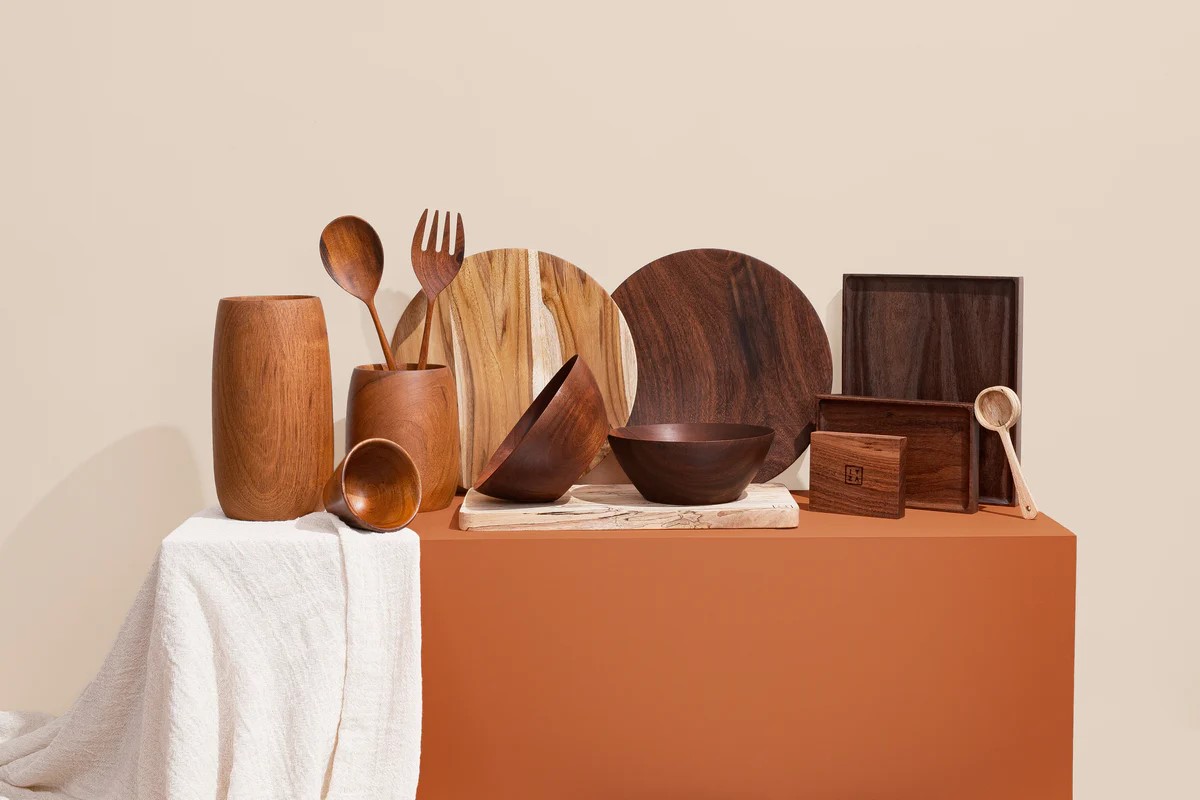
Welcome to the world of tableware! Tableware plays an essential role in our daily lives, adding both functionality and beauty to our dining experiences. While there are many materials used to create tableware, one material that stands out for its natural elegance and durability is wood.
In this article, we will explore the art of making tableware from wood. Whether you’re a woodworking enthusiast or simply looking to add a touch of rustic charm to your dining table, this guide will walk you through the process step by step.
Creating your own wooden tableware allows you to customize the design and size to perfectly suit your needs. Additionally, it’s an eco-friendly option as it involves working with sustainable and renewable resources.
Before we dive into the steps of making wooden tableware, let’s first discuss the importance of selecting the right type of wood.
Key Takeaways:
- Embrace the art of woodworking by creating personalized, eco-friendly wooden tableware that combines functionality, beauty, and sustainability for a unique dining experience.
- Selecting the right wood, meticulous preparation, and thoughtful design are essential for crafting durable, visually appealing wooden tableware that requires proper maintenance to ensure longevity and preserve its natural beauty.
Read more: How To Make Picture Frames From Barn Wood
Choosing the Right Wood
When it comes to making tableware from wood, choosing the right type of wood is crucial. Not all wood species are suitable for this purpose, as some may be too porous, prone to splintering, or have a strong odor that can affect the taste of food.
Here are some factors to consider when selecting the right wood for your tableware:
- Hardness: Opt for hardwoods such as maple, cherry, walnut, or oak. These woods are known for their durability and resistance to scratches, making them ideal for tableware that can withstand regular use.
- Grain Pattern: The grain pattern of the wood can add visual interest and enhance the overall aesthetic of the tableware. Explore different wood species and choose one with a grain pattern that appeals to you.
- Toxicity: Some woods may contain toxins or allergens that can be harmful when in contact with food. Avoid using woods like yew, camphor, or poisonous woods that can pose health risks. Research the toxicity of the wood species before using it for tableware.
- Sustainability: Consider using sustainably sourced wood to minimize the environmental impact. Look for wood that is certified by organizations like the Forest Stewardship Council (FSC) to ensure responsible forest management.
- Availability: Availability of the wood species can also play a role in your decision. Certain woods may be more readily available in your area, making them a convenient and cost-effective choice.
Once you have chosen the right wood for your tableware, it’s time to prepare the wood before diving into the design and manufacturing process.
Preparing the Wood
Before you can start transforming your chosen wood into beautiful tableware, it’s essential to prepare the wood properly. Proper preparation ensures that the wood is stable, smooth, and ready to be shaped into your desired designs.
Here are the steps to prepare the wood for tableware making:
- Drying the Wood: Freshly cut wood contains high moisture content, which can lead to warping or cracking once it’s shaped. It’s crucial to dry the wood to a suitable moisture level before working with it. This can be done through air drying or kiln drying, depending on the type of wood and your resources.
- Storing the Wood: Once the wood is dried to the appropriate moisture content, store it in a controlled environment to maintain its stability. This helps prevent any changes in moisture that could cause the wood to warp or deform.
- Planing and Thicknessing: Use a planer or thicknesser to achieve a consistent thickness throughout the wood. This step ensures an even surface for further shaping and helps remove any rough or uneven areas.
- Removing Bark and Splinters: Use a chisel, scraper, or sandpaper to remove the bark and any remaining splinters from the wood. This step creates a smooth and clean surface for the subsequent steps.
- Resawing and Dimensioning: If you need thinner pieces of wood for your tableware designs, you can use a bandsaw or table saw to resaw the wood into the desired thickness. Ensure accuracy and safety precautions while working with power tools.
By properly preparing the wood, you create a solid foundation for the next steps in the tableware making process. Now, let’s move on to the exciting part – designing your tableware!
Designing Tableware
The design of your tableware is where your creativity and personal preferences can truly shine. Whether you’re crafting a set of wooden plates, bowls, cutting boards, or utensils, the design should not only be aesthetically pleasing but also functional.
When designing your wooden tableware, consider the following factors:
- Functionality: Think about the purpose of the tableware and how it will be used. Consider factors such as the size, shape, and depth of bowls or plates to ensure they are practical for serving and eating. Utensils should have comfortable handles and appropriate blade shapes for efficient use.
- Aesthetics: Decide on the overall style and visual appeal you want to achieve. You can opt for sleek and modern designs or rustic and natural looks, depending on your personal preference and the atmosphere you want to create at your dining table.
- Ergonomics: It’s important to create tableware that feels comfortable in the hand. Consider the grip and weight distribution of utensils and the ergonomics of the handles on plates, bowls, or cutting boards.
- Durability: Keep in mind the durability of the tableware. Choose designs that can withstand regular use and cleaning without compromising their structural integrity. Reinforce weak points and consider the stability of designs to avoid tipping or breaking.
- Uniqueness: Don’t be afraid to experiment and add your own unique touch to the designs. Incorporate patterns, engravings, or inlays to make your tableware stand out and reflect your personal style.
Consider sketching or creating prototypes to visualize your designs before proceeding to the next steps. It may also be helpful to research and gather inspiration from existing wooden tableware designs to spark your creativity.
With your designs finalized, let’s move on to the practical aspects of transforming the wood into actual tableware.
Cutting and Shaping
Once you have your designs ready, it’s time to turn your vision into reality by cutting and shaping the prepared wood. This step requires precision and attention to detail to achieve the desired form and functionality of your wooden tableware.
Here’s how you can cut and shape the wood:
- Marking the Design: Transfer your design onto the prepared wood using a pencil or marking tool. Make sure the markings are clear and accurate to guide your cutting and shaping process.
- Cutting the Wood: Use a bandsaw, jigsaw, or coping saw to carefully cut along the marked lines. Take your time and follow the curves or angles of the design, ensuring smooth and precise cuts.
- Shaping the Edges: Refine the shape and smooth the edges of your tableware using various tools such as a router, files, or sandpaper. This step helps achieve a finished look and ensures comfort while handling the tableware.
- Creating Hollow Forms: If you’re making bowls or hollow utensils, you’ll need to remove the wood from the center to create a hollow form. This can be done using a lathe, carving tools, or specialized hollowing tools. Pay attention to maintaining the desired thickness and shape throughout the process.
- Detailing and Carving: Add intricate details or carving designs on the surface of the tableware, if desired. This step allows you to add a personal touch or enhance the aesthetic appeal of the wood.
- Testing and Refinement: As you shape and cut the wood, periodically test the functionality and comfort of the tableware. Make any necessary adjustments or refinements to ensure the final product meets your expectations.
Remember to prioritize safety while working with sharp tools and power equipment. Wear protective gear, follow proper safety guidelines, and work in a well-ventilated area.
Once your wooden tableware is cut and shaped to perfection, it’s time to move on to the next step – sanding and smoothing.
When making tableware from wood, choose a hardwood like maple or cherry for durability. Seal the wood with food-safe mineral oil to protect it from moisture and stains. Sand the edges and surfaces for a smooth finish.
Sanding and Smoothing
After cutting and shaping the wood, the next step in creating your wooden tableware is sanding and smoothing the surfaces. This crucial step not only provides a polished and refined look but also ensures a smooth texture that is pleasant to touch and easy to clean.
Here’s how you can sand and smooth your wooden tableware:
- Start with Coarse Grit Sandpaper: Begin by using a coarse grit sandpaper, such as 80 or 120 grit, to remove any rough edges, tool marks, or imperfections on the surface of the wood. Sand in the direction of the grain to avoid creating scratches.
- Progress to Finer Grits: Gradually move to finer grit sandpaper, such as 180, 220, and 320 grits, to smoothen the surface further. This process helps to eliminate any remaining scratches and create a uniform and silky-smooth finish.
- Hand Sanding and Contoured Surfaces: For intricate or contoured designs, you may need to resort to hand sanding with folded sandpaper or sanding sponges to reach all the nooks and crannies. Take your time and be meticulous to achieve a consistent texture throughout.
- Remove Dust and Debris: Regularly clean the sanded surface to remove dust and debris. This helps maintain a smooth finish and prevents particles from interfering with the next steps of the finishing process.
- Wet Sanding (Optional): If you desire an even smoother finish, you can try wet sanding. Wet the sandpaper and gently sand the surface in a circular motion. This technique helps to reduce friction and produces an exceptionally smooth result.
- Inspect and Touch-Up: After sanding, carefully inspect the tableware for any scratches or imperfections that may have been missed. Use finer grit sandpaper or sanding sponges to touch up those areas and achieve a flawless surface.
Remember to constantly check the progress of the sanding and adjust your technique accordingly. Always sand with the grain to maintain the natural beauty of the wood.
Once the sanding and smoothing process is complete, the next step is to apply a finish to protect and enhance the appearance of your wooden tableware.
Finishing Techniques
The finishing step in creating wooden tableware is essential for both protecting the wood and enhancing its natural beauty. A well-applied finish not only adds durability but also brings out the unique characteristics of the wood grain, creating a stunning final product.
Here are some popular finishing techniques for wooden tableware:
- Food-Safe Finishes: As tableware comes into contact with food, it’s crucial to choose finishes that are food-safe and non-toxic. Options like food-grade mineral oil, beeswax, or natural oils, such as walnut or linseed oil, are commonly used to provide a protective coating that is safe for both the wood and your health.
- Applying the Finish: Before applying the finish, ensure that the wood is clean and free from any sanding dust or debris. Use a clean cloth, brush, or sponge to evenly apply the finish, following the manufacturer’s instructions. Allow the finish to penetrate the wood for the recommended time and wipe off any excess.
- Multiple Coats: Depending on the type of finish you choose, applying multiple coats may be necessary to achieve the desired level of protection and sheen. Allow each coat to dry completely before applying the next, and lightly sand between coats to ensure a smooth surface.
- Buffing and Polishing: After the final coat of finish has dried, you can choose to buff and polish the surface to enhance its luster. Use a soft cloth or a buffing wheel to gently rub the surface, creating a smooth and glossy appearance.
- Engraving or Embellishments: If desired, you can add extra special touches to your wooden tableware by engraving or embellishing the surface. This can be done using specialized carving tools, wood burners, or even laser engraving techniques.
- Regular Maintenance: To keep your wooden tableware looking its best, it’s important to follow regular maintenance practices. This may include reapplying a protective finish or oil over time, avoiding harsh chemicals or abrasive cleaners, and drying the tableware thoroughly after each use.
Experiment with different finishes and techniques to find the one that suits your style and enhances the natural beauty of the wood. A well-finished wooden tableware piece will not only be functional but also serve as a stunning centerpiece for your dining table.
With your tableware complete and properly finished, it’s important to know how to care for and maintain it for longevity.
Maintenance and Care
Proper maintenance and care are essential for preserving the beauty and longevity of your wooden tableware. By following a few simple steps, you can ensure that your tableware remains in excellent condition for years to come.
Here are some tips for maintaining and caring for your wooden tableware:
- Hand Washing: To prolong the life of your wooden tableware, always hand wash it instead of using a dishwasher. The heat and moisture of a dishwasher can cause the wood to warp or crack. Use warm water, mild dish soap, and a soft sponge or cloth to gently clean the tableware, and promptly dry it with a towel afterward.
- Avoid Soaking: Do not soak wooden tableware in water or leave it submerged for an extended period. Excessive exposure to moisture can damage the wood and compromise its integrity. If necessary, wipe it clean and dry it immediately after use.
- Regular Oil Application: Over time, the wood may start to appear dry or lose its luster. To restore its vitality, apply a thin layer of food-safe mineral oil or a specialized wood oil periodically. This helps replenish the wood’s natural moisture, protect it from drying out, and maintain its beauty.
- Avoid Extreme Temperatures: Protect your wooden tableware from extreme temperatures, including direct sunlight, heat sources, or extremely cold environments. Exposure to such conditions can cause the wood to warp, crack, or fade.
- Avoid Cutting on the Surface: While wooden tableware is durable, avoid using knives or sharp utensils directly on the surface to prevent scratches or damage. Instead, use cutting boards or serving plates to protect the wood.
- Store Properly: When not in use, store your wooden tableware in a dry and well-ventilated area. Avoid stacking items to prevent pressure or deformation. If possible, store them standing up to maintain their original shape.
- Regular Inspections: Periodically inspect the tableware for any signs of wear, cracks, or damage. Address any concerns promptly to prevent further deterioration and maintain the quality of the wood.
By following these maintenance and care guidelines, you can enjoy the beauty and functionality of your wooden tableware for many years. Remember that wood is a natural material that can age gracefully with proper care.
As we conclude this guide, we hope you find joy in creating your own wooden tableware and appreciate the artistry and craftsmanship that goes into each piece. Happy woodworking!
Conclusion
Congratulations! You have reached the end of our comprehensive guide on making tableware from wood. We hope this article has provided you with valuable insights and inspiration to embark on your own woodworking journey.
Creating your own wooden tableware allows you to infuse your personal style and creativity into every piece. By carefully selecting the right wood, preparing it properly, designing unique shapes, and refining the surface through sanding and smoothing, you can create tableware that is not only functional but also visually appealing.
Remember to choose food-safe finishes and regularly maintain your wooden tableware to ensure its longevity and beauty. With proper care, your wooden tableware will become cherished heirlooms or stunning additions to your dining table.
Woodworking is a rewarding and fulfilling craft that connects us with nature and allows us to unleash our creativity. Whether you’re an experienced woodworker or just starting, making tableware from wood is a delightful project that combines both form and functionality.
We encourage you to explore different wood species, experiment with unique designs, and continue building your skills as you embark on this woodworking adventure. Don’t forget to let your imagination run wild and add your personal touch to each piece.
Thank you for joining us on this journey. We hope you enjoy the process of creating your own wooden tableware and that it brings warmth and joy to your dining experiences for years to come. Happy woodworking!
Frequently Asked Questions about How To Make Tableware From Wood
Was this page helpful?
At Storables.com, we guarantee accurate and reliable information. Our content, validated by Expert Board Contributors, is crafted following stringent Editorial Policies. We're committed to providing you with well-researched, expert-backed insights for all your informational needs.


0 thoughts on “How To Make Tableware From Wood”