Tableware
How To Refinish Dining Chairs
Modified: February 24, 2024
Discover the best techniques to refinish your dining chairs and bring new life to your tableware. Step-by-step instructions, tips, and tricks for a stunning transformation.
(Many of the links in this article redirect to a specific reviewed product. Your purchase of these products through affiliate links helps to generate commission for Storables.com, at no extra cost. Learn more)
Introduction
Welcome to the world of beautiful tableware! Whether you’re a passionate host who loves to entertain or simply someone who enjoys a good meal in style, having the right tableware can elevate your dining experience to a whole new level. From dinner plates and soup bowls to wine glasses and silverware, each piece of tableware serves a purpose and adds elegance to your table setting.
In this comprehensive guide, we will delve into the world of tableware, exploring everything from different types of materials and finishes to the art of setting a table. We will provide you with valuable insights and tips to help you make informed decisions when selecting and caring for your tableware.
Tableware comes in a variety of materials, with each offering its unique advantages and aesthetic appeal. From classic porcelain and bone china to durable ceramic and rustic stoneware, the material you choose depends on your personal preferences and the occasion. We’ll explore the characteristics of each material, highlighting their strengths and suggesting the perfect occasions to use them.
Furthermore, we’ll discuss the different types of finishes available on tableware, such as glazed, matte, and metallic finishes. Each finish has its distinct look and feel, and we’ll guide you on how to choose the perfect finish that complements your table setting and reflects your personal style.
In addition to materials and finishes, we will also delve into the art of setting a table. We’ll provide step-by-step instructions on how to create a visually appealing and functional table setting for everyday meals, casual gatherings, and formal occasions. From selecting the right tablecloth and napkins to arranging the tableware and adding decorative elements, we’ll help you create a stunning tablescape that will impress your guests.
Caring for your tableware is crucial for maintaining its beauty and longevity. We’ll share practical tips and techniques for cleaning, storing, and handling your tableware to ensure it stays in pristine condition. From hand washing delicate pieces to properly storing your tableware, we’ll equip you with the knowledge and tools to keep your collection looking its best.
Whether you’re new to the world of tableware or a seasoned enthusiast, this guide will serve as your go-to resource for all things tableware. So, grab a cup of tea or coffee, sit back, and embark on this journey into the fascinating world of tableware. Let’s elevate your dining experience and create memorable moments around the table.
Key Takeaways:
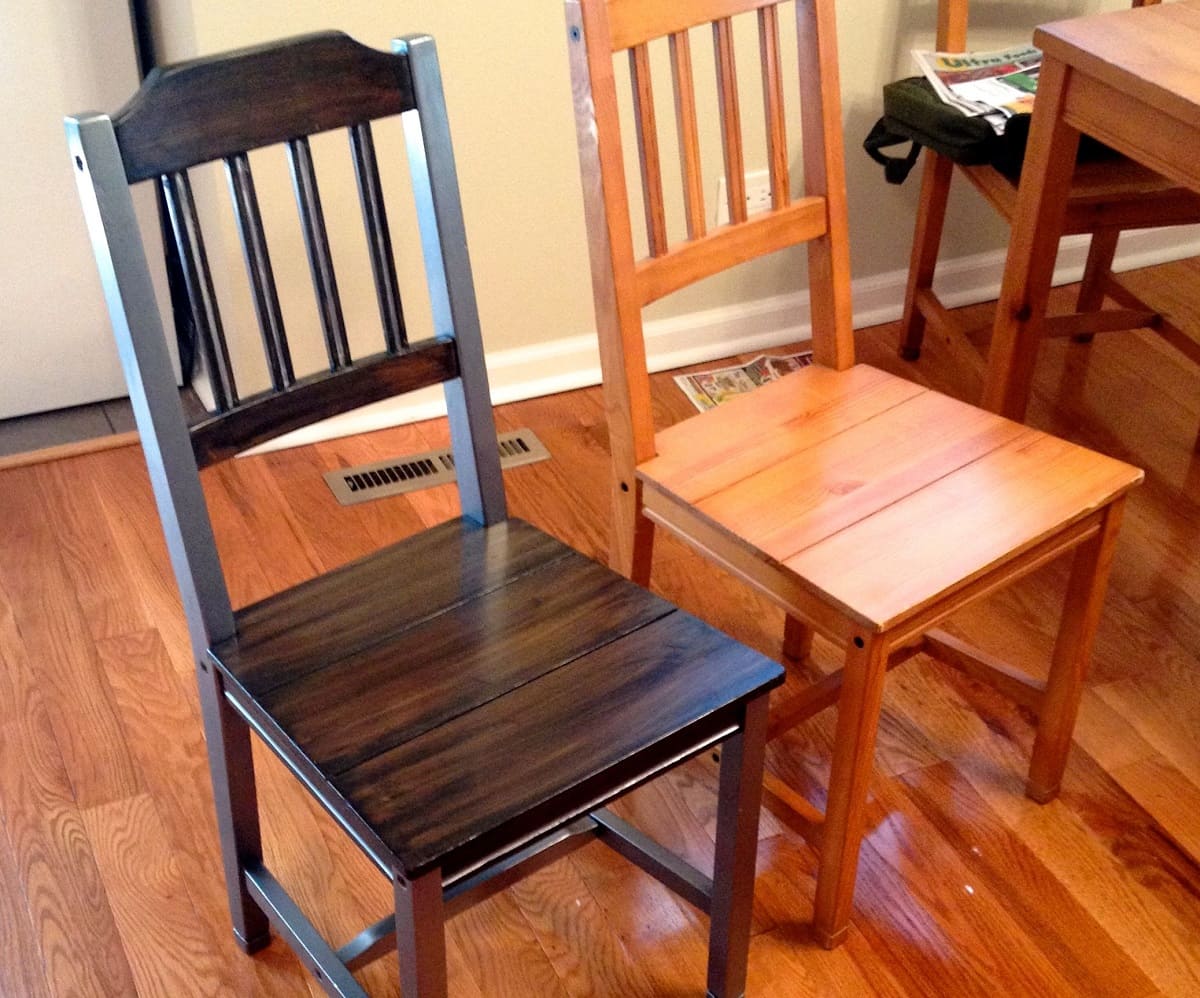
- Proper preparation is essential for refinishing dining chairs, including inspecting, cleaning, and repairing any damages. Sanding the chairs and applying a new finish can transform worn-out chairs into stunning pieces for your dining space.
- Refinishing dining chairs not only saves money and contributes to sustainability but also allows you to unleash your creativity and add a personal touch to your home. Proper maintenance will ensure the longevity of your beautifully refinished chairs.
Read more: How To Refinish Wood Dining Chairs
Materials Needed
Before you embark on the journey of refinishing your dining chairs, it is essential to gather all the necessary materials. Having everything on hand will make the process more efficient and ensure a smooth experience. Here are the materials you will need:
- Sanding block or sandpaper – to remove the existing finish and prep the surface for refinishing.
- Paint or stain – to apply a new finish and give your chairs a fresh look. Choose a color or stain that complements the style of your dining room.
- Primer (if necessary) – some finishes may require a primer to improve adhesion and enhance the durability of the new finish.
- Paintbrushes or foam brushes – to apply the paint or stain onto the chairs. Choose brushes that are appropriate for the size and intricacy of your chairs.
- Drop cloth or plastic sheeting – to protect your work area from any spills or drips.
- Painter’s tape – to tape off any areas that you don’t want to be painted or stained.
- Screwdriver or drill – to remove any hardware or screws from the chairs.
- Screw or nail filler – to fill any holes or gaps in the wood before painting or staining.
- Dust mask and safety goggles – to protect yourself from dust and fumes during the refinishing process.
- Clean cloth or tack cloth – to wipe down the chairs and remove any dust or debris before applying the new finish.
- Optional: Upholstery fabric and foam – if your dining chairs have seat cushions, you may choose to reupholster them as part of the refinishing process.
Having these materials ready before you start will ensure that you have everything you need at your fingertips, minimizing any interruptions or delays in your refinishing project. It’s also a good idea to set up a well-ventilated workspace with ample lighting to ensure a comfortable and safe environment to work in.
Now that you have all the necessary materials, it’s time to move on to the first step of the refinishing process: preparing the chairs.
Step 1: Prepare the Chairs
Before you can start refinishing your dining chairs, it’s important to properly prepare them. This step is crucial to ensure the success of the refinishing project and achieve a professional-looking result. Here’s how you can prepare the chairs:
- Remove the seat cushions (if applicable): If your dining chairs have removable seat cushions, carefully remove them by unscrewing the screws or bolts underneath. Set the cushions aside for now, as you may choose to reupholster them later in the process.
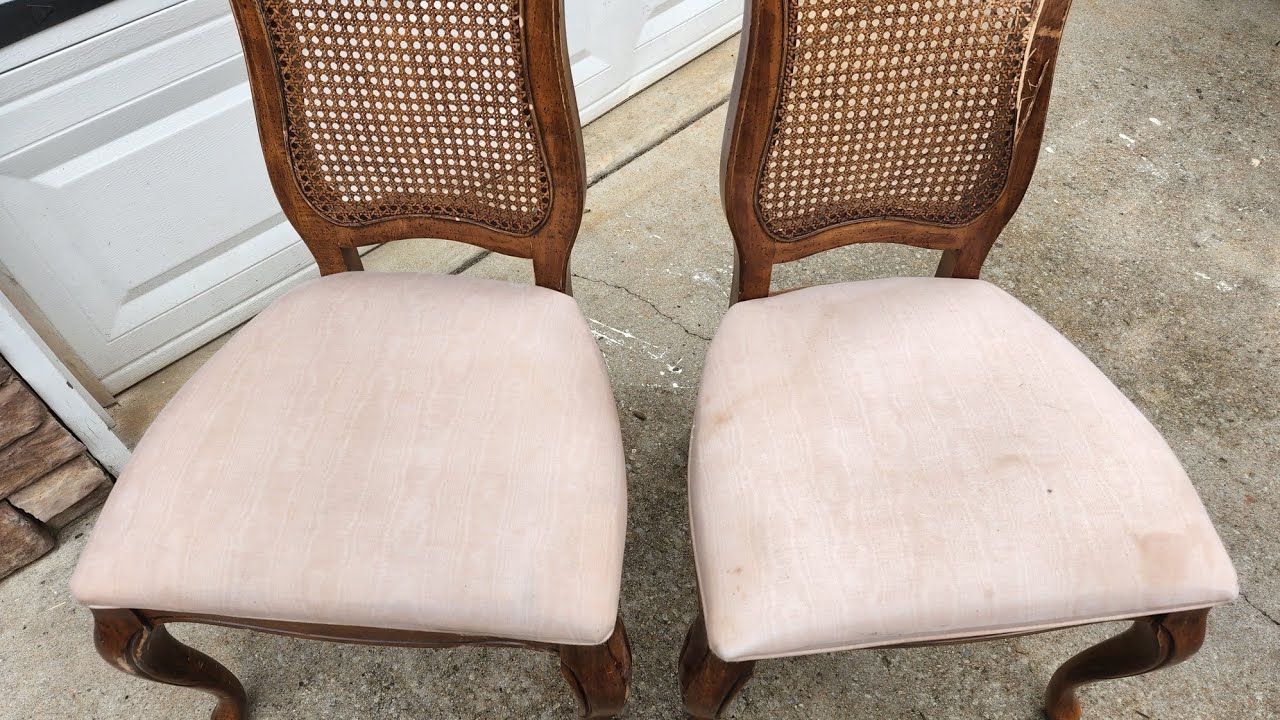
- Inspect the chairs: Take a close look at each chair and assess their condition. Look for any loose joints, cracks, or damages that need to be addressed before refinishing. If you discover any major issues, such as extensive structural damage, it may be necessary to consult a professional or consider replacing the chairs.
- Clean the chairs: Use a clean cloth or tack cloth to wipe down the chairs, removing any dust, dirt, or grime. Pay attention to the crevices and corners of the chairs, as these areas tend to accumulate more dirt. Cleaning the chairs thoroughly will ensure that the new finish adheres properly.
- Repair any damages: If you come across any loose joints or areas with cracks or damages, take the time to repair them before moving forward. Use wood glue to reinforce loose joints and clamps to hold them in place until the glue dries. For cracks or small damages, use wood filler to fill them in and smooth out the surface. Allow the glue and filler to dry completely before proceeding.
- Sand the chairs: Sanding is an essential step in preparing the chairs for refinishing. Use a sanding block or sandpaper to sand the surface of the chairs, focusing on removing the existing finish. This will help to create a smooth and even surface for the new finish to adhere to. Start with a coarse-grit sandpaper and gradually move to a finer-grit paper for a polished finish. Be sure to sand in the direction of the wood grain to avoid scratches and unevenness.
- Remove the sanding dust: After sanding, use a clean cloth or tack cloth to remove all the sanding dust from the chairs. Wiping them down thoroughly will ensure that the dust doesn’t interfere with the application of the new finish.
By following these steps to prepare your dining chairs, you’re setting a solid foundation for the refinishing process. Taking the time to inspect, clean, repair, and sand the chairs will help you achieve a professional result and ensure that the new finish adheres properly. Once you’ve prepared the chairs, it’s time to move on to the next step: removing the existing finish.
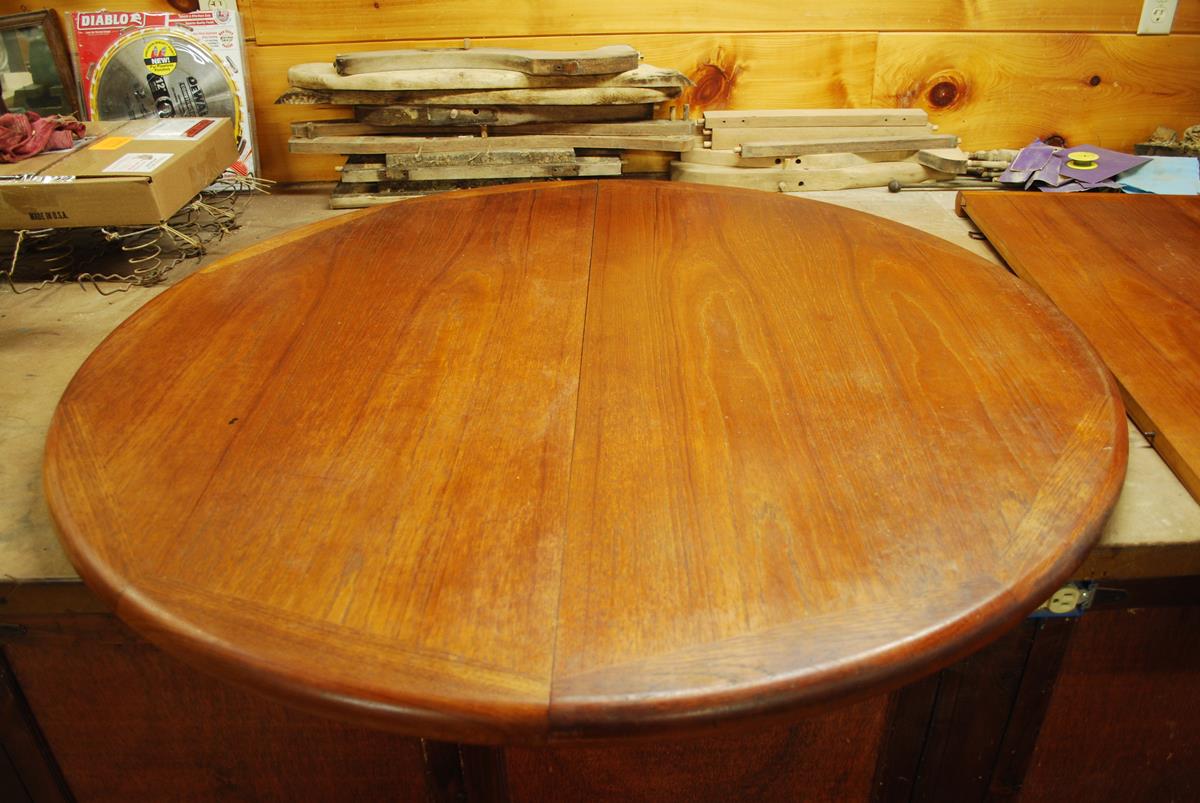
Step 2: Remove the Existing Finish
Removing the existing finish from your dining chairs is an essential step in the refinishing process. This step allows you to start with a clean slate, getting rid of any old or damaged finish and preparing the surface for the new finish to be applied. Here’s how you can remove the existing finish:
- Choose the right method: There are several methods you can use to remove the existing finish, depending on the type of finish and the condition of your chairs. You can use chemical strippers, sanding, or a combination of both. Research the best method for the type of finish you have and assess which method will be most effective for your specific chairs.
- Protect yourself and the work area: Before you start the removal process, it’s important to protect yourself and the surrounding area. Wear a dust mask, safety goggles, and gloves to protect yourself from any potential hazards. Lay down a drop cloth or plastic sheeting to catch any debris or drips.
- Apply the chemical stripper (if using): If you choose to use a chemical stripper, follow the instructions carefully. Apply the stripper evenly onto the surface of the chairs, ensuring complete coverage. Leave it on for the recommended amount of time specified by the manufacturer. This will allow the stripper to penetrate and break down the existing finish.
- Scrape off the old finish: Once the stripper has had time to loosen the finish, use a scraper or putty knife to scrape off the old finish. Work in the direction of the wood grain, applying gentle pressure to avoid damaging the wood. Repeat this process until you’ve removed the majority of the old finish.
- Sand the chairs (if necessary): After removing the bulk of the old finish, use sandpaper or a sanding block to further smooth out the surface. Sanding will help remove any remaining traces of the old finish and create a clean, even surface. Start with a coarse-grit sandpaper and gradually move to a finer-grit paper for a polished finish.
- Remove the dust: After sanding, use a clean cloth or tack cloth to wipe away any sanding dust. Be thorough in your cleaning to ensure that the surface is free from any debris that could interfere with the application of the new finish.
Remember to take your time and work patiently during this step. Removing the existing finish can be a labor-intensive process, but it is crucial for achieving a beautifully refinished dining chair. Once you have successfully removed the old finish, you are ready to move on to the next step: sanding the chairs.
Before starting the refinishing process, make sure to thoroughly clean the chairs to remove any dirt, grime, or old finish. This will help the new finish adhere better and result in a smoother final look.
Step 3: Sand the Chairs
Sanding the chairs is an important step in the refinishing process as it helps to create a smooth and even surface for the new finish to adhere to. Sanding also helps to remove any remaining traces of the old finish and gives the chairs a fresh start. Here’s how you can effectively sand your dining chairs:
- Choose the appropriate sandpaper grit: Start by selecting the right grit sandpaper for your chairs. Generally, it’s recommended to start with a medium-grit sandpaper (around 120 grit) and then move to a finer-grit sandpaper (around 220 grit) to achieve a polished finish. However, the specific grits you choose may vary depending on the condition of the chairs and the desired level of smoothness.
- Sand by hand or use a power sander: Depending on your preference and the size of your chairs, you can choose to sand by hand or use a power sander. If sanding by hand, wrap the sandpaper around a sanding block to ensure even pressure. For power sanding, use a handheld power sander with the appropriate grit sandpaper attached.
- Sand in the direction of the wood grain: Always sand in the direction of the wood grain to avoid creating scratches or unevenness. Applying gentle pressure, move the sandpaper across the surface of the chairs in long, smooth strokes. Be consistent and systematic in your sanding, ensuring that all areas are evenly sanded.
- Focus on problem areas: Pay extra attention to any problem areas or imperfections on the chairs. These may include rough spots, blemishes, or uneven surfaces. Sand these areas more thoroughly to achieve a smooth and uniform finish.
- Check the surface regularly: As you sand, periodically check the surface of the chairs to evaluate your progress. Look for any remaining traces of the old finish or areas that still feel rough. Continue sanding until you achieve a smooth and consistent surface across all the chairs.
- Remove the sanding dust: After sanding, use a clean cloth or tack cloth to thoroughly wipe away any sanding dust from the chairs. This step is crucial to ensure a clean and debris-free surface for the new finish.
Remember to take your time and be patient while sanding the chairs. This step is essential for creating a clean and smooth surface that will enhance the overall appearance of your dining chairs. Once the chairs are sanded and free from dust, you are now ready to move on to the exciting step of applying the new finish.
Read more: How To Refinish A Veneer Dining Table
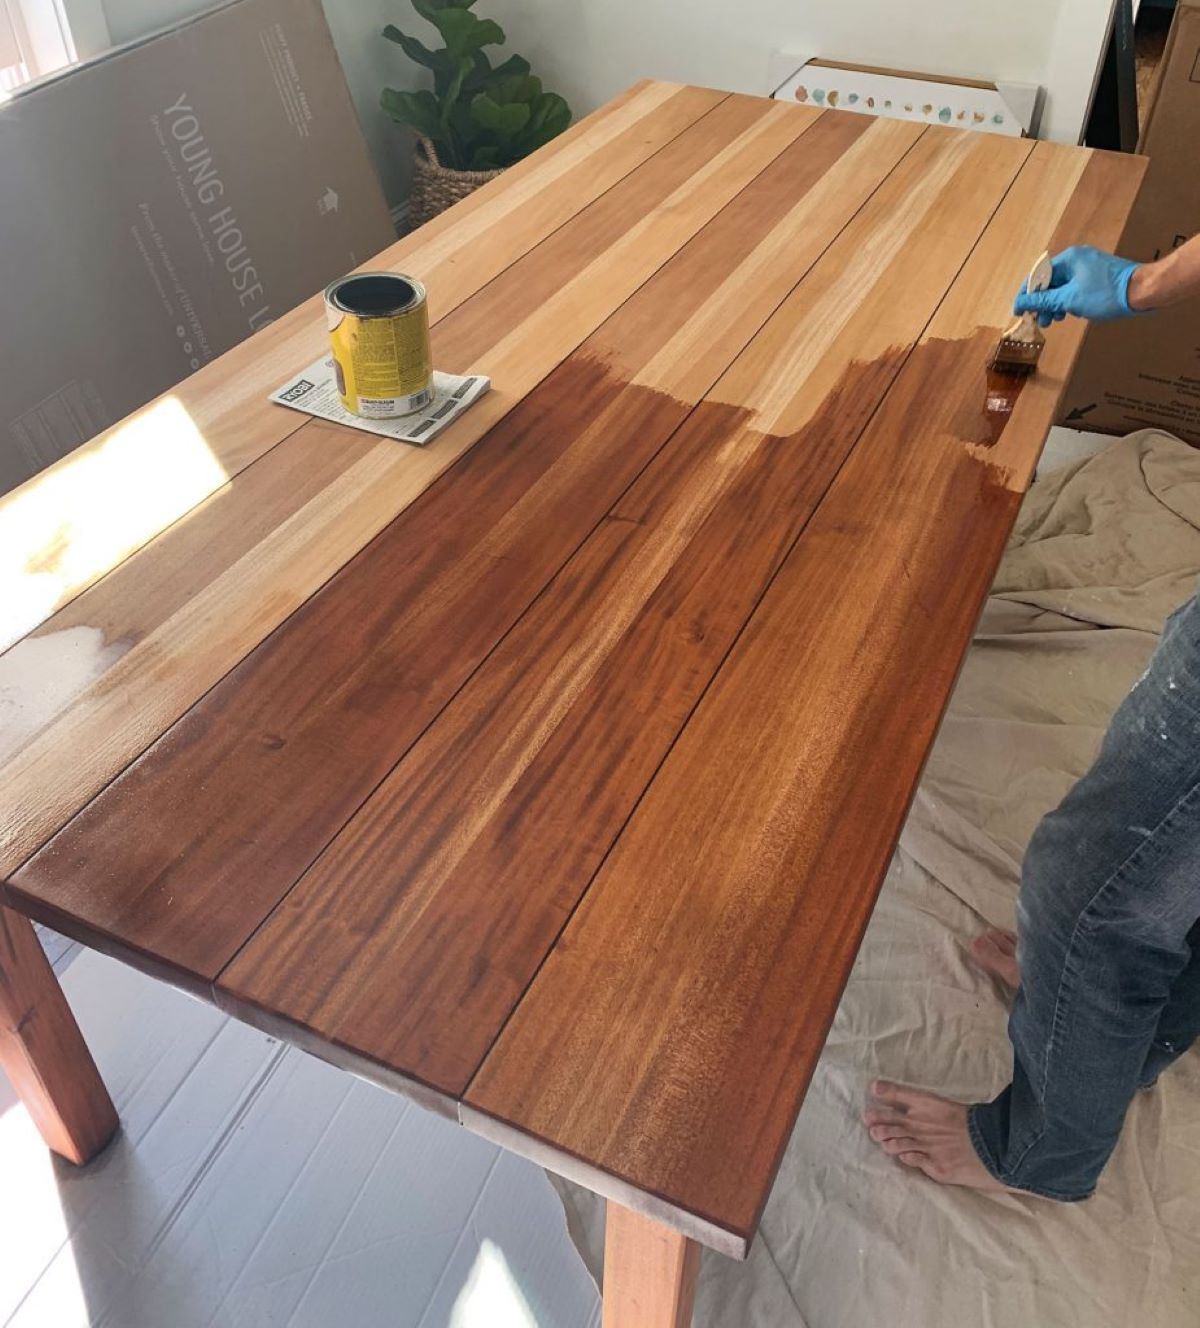
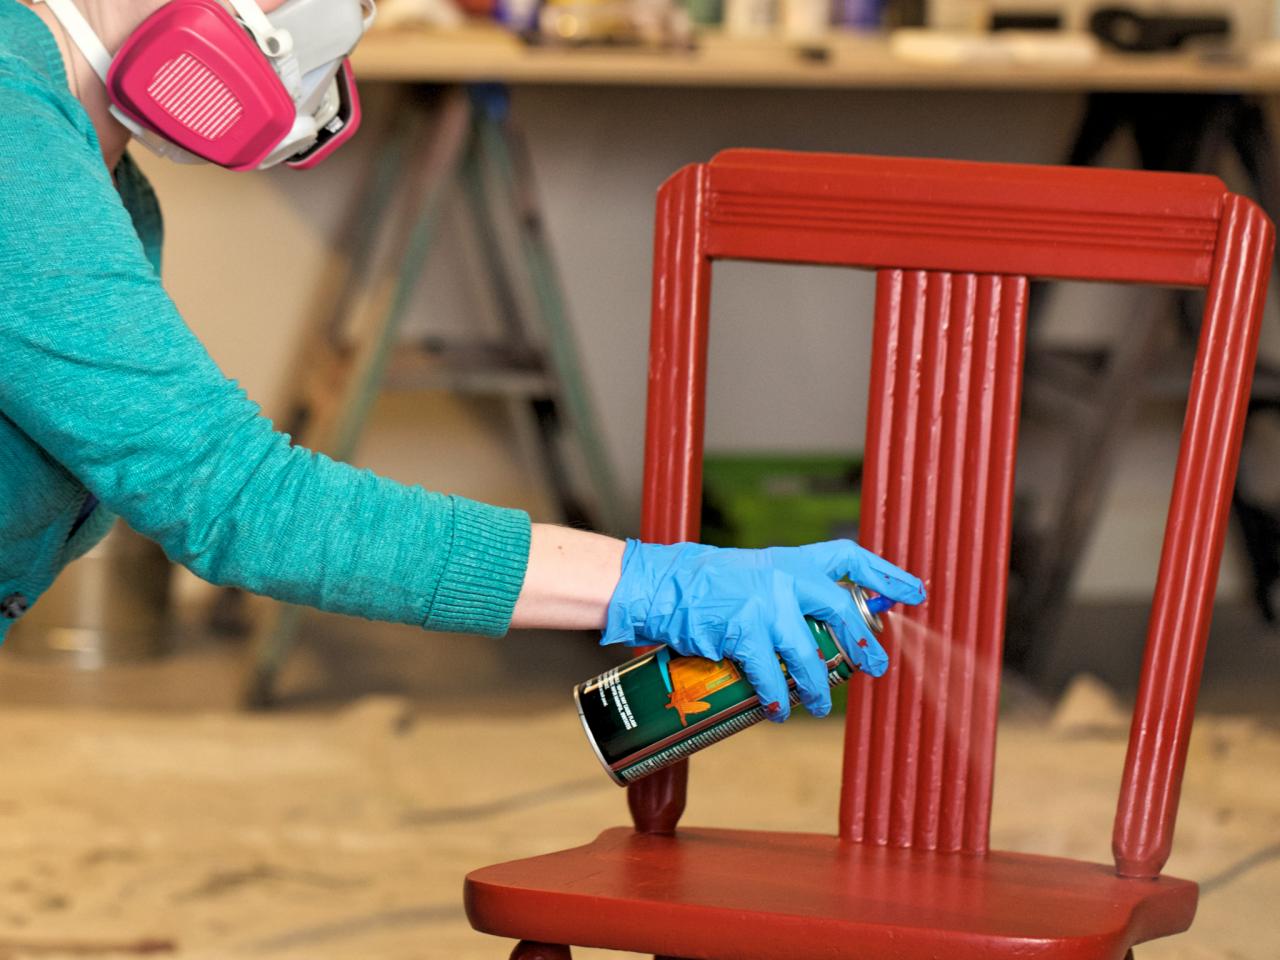
Step 4: Apply the New Finish
Now that your dining chairs are prepped and sanded, it’s time to apply the new finish. The new finish will not only protect the wood but also enhance the overall appearance of your chairs. Here’s how you can apply the new finish:
- Choose the appropriate finish: Decide whether you want to paint or stain your dining chairs. Paint offers a wide range of color options and can provide a more contemporary look, while stain enhances the natural beauty of the wood grain. Consider the style of your dining room and your personal preferences when choosing the finish.
- Prepare the finish: If you are using paint, make sure to mix it thoroughly to ensure an even consistency. If you are using stain, stir it gently to avoid creating air bubbles.
- Apply the first coat: Use a paintbrush or a foam brush to apply the first coat of the finish onto the chairs. Work in smooth and even strokes, following the direction of the wood grain. Take care to cover all areas of the chairs, including the legs, backrests, and any other surfaces that will be visible.
- Allow for drying time: Follow the instructions provided with the finish to determine the appropriate drying time. It’s essential to allow the first coat to dry completely before applying additional coats to prevent smudging or unevenness.
- Sand between coats (if necessary): Depending on the type of finish you’re using and the desired level of smoothness, you may choose to lightly sand the chairs between each coat. Use a fine-grit sandpaper, such as 220 or 320-grit, to gently sand the surface. This will help to create a smooth finish and promote better adhesion of subsequent coats.
- Apply additional coats: Once the first coat is completely dry and sanded (if necessary), apply additional coats following the same technique. For a more solid and opaque finish, you may need multiple coats of paint. For stain, multiple coats can deepen the color and enhance the richness of the wood grain.
- Allow for final drying time: After applying the last coat, allow the chairs to dry completely before handling or using them. This final drying period ensures that the finish fully cures and becomes durable.
As you apply the new finish, ensure that you are working in a well-ventilated area and follow any safety precautions mentioned on the product label. Properly applied, the new finish will bring new life to your dining chairs, showcasing their inherent beauty and protecting them for years to come.
Once the chairs have dried, you can move on to the final step of the refinishing process: reassembling the chairs with any necessary adjustments or finishing touches.
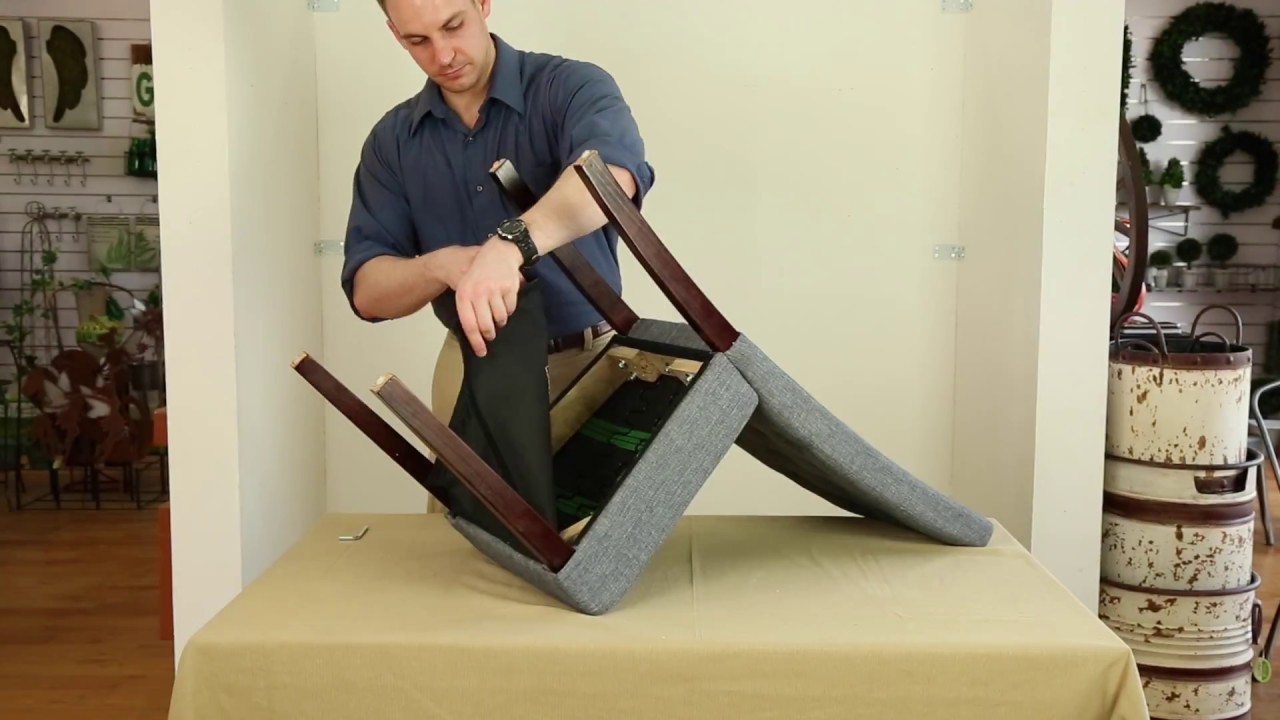
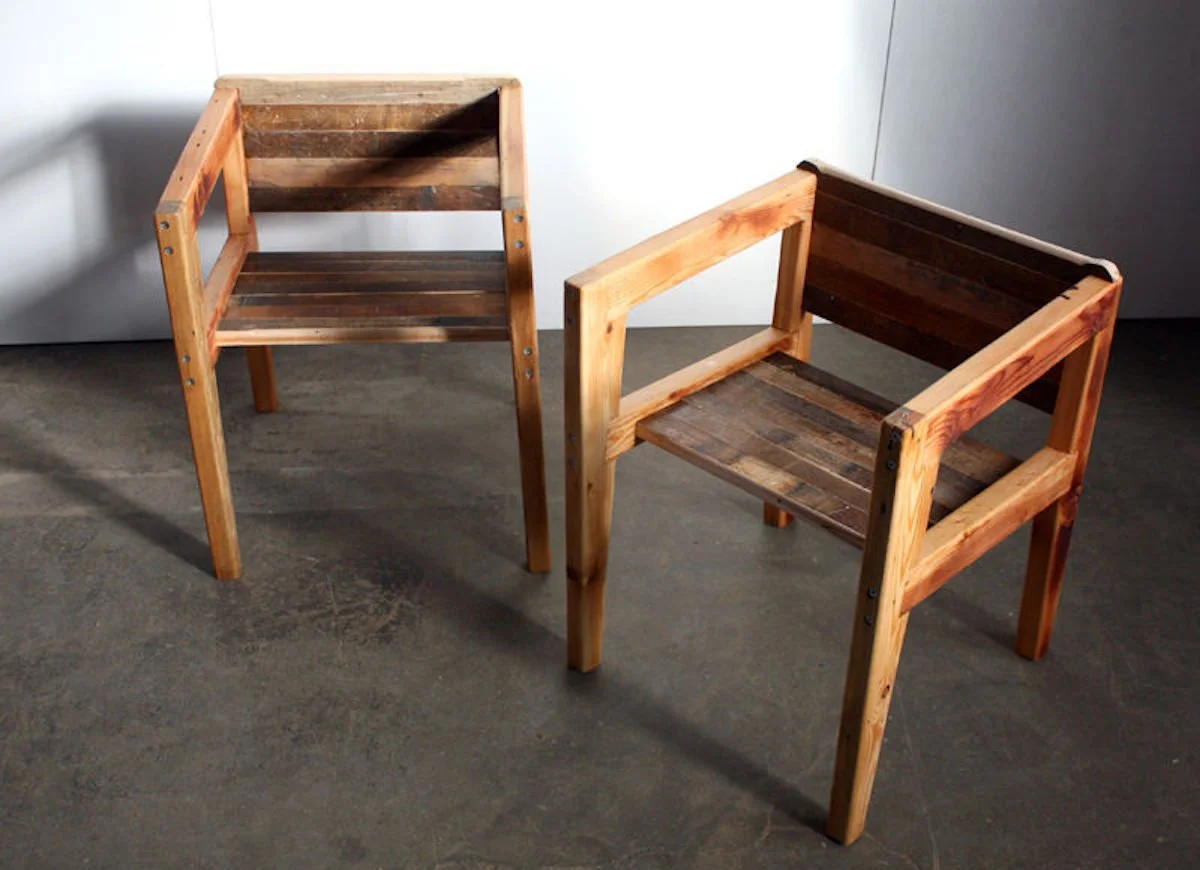
Step 5: Reassemble the Chairs
After successfully applying the new finish to your dining chairs, it’s time to reassemble them and make any necessary adjustments or finishing touches. This step will ensure that your chairs are ready to be used and enjoyed once again. Here’s how you can reassemble your chairs:
- Inspect the hardware: Before reassembling the chairs, take a moment to inspect the hardware, such as screws or bolts. Make sure they are in good condition and tighten any loose ones. If any hardware is damaged or missing, replace them with suitable replacements.
- Align the chair components: Align the various components of the chair, including the backrest, seat, and legs. Ensure that everything lines up properly and that any screw holes or connectors are properly aligned.
- Secure the components: Using a screwdriver or drill, reattach the components of the chair together. Start with securing the backrest to the seat, followed by attaching the legs. Follow any specific instructions provided by the chair manufacturer for reassembly.
- Check for stability: Once the components are secured, check the stability of the chairs. Sit on each chair and check for any wobbliness or loose joints. If needed, tighten screws or make any necessary adjustments to ensure that the chairs are stable and sturdy.
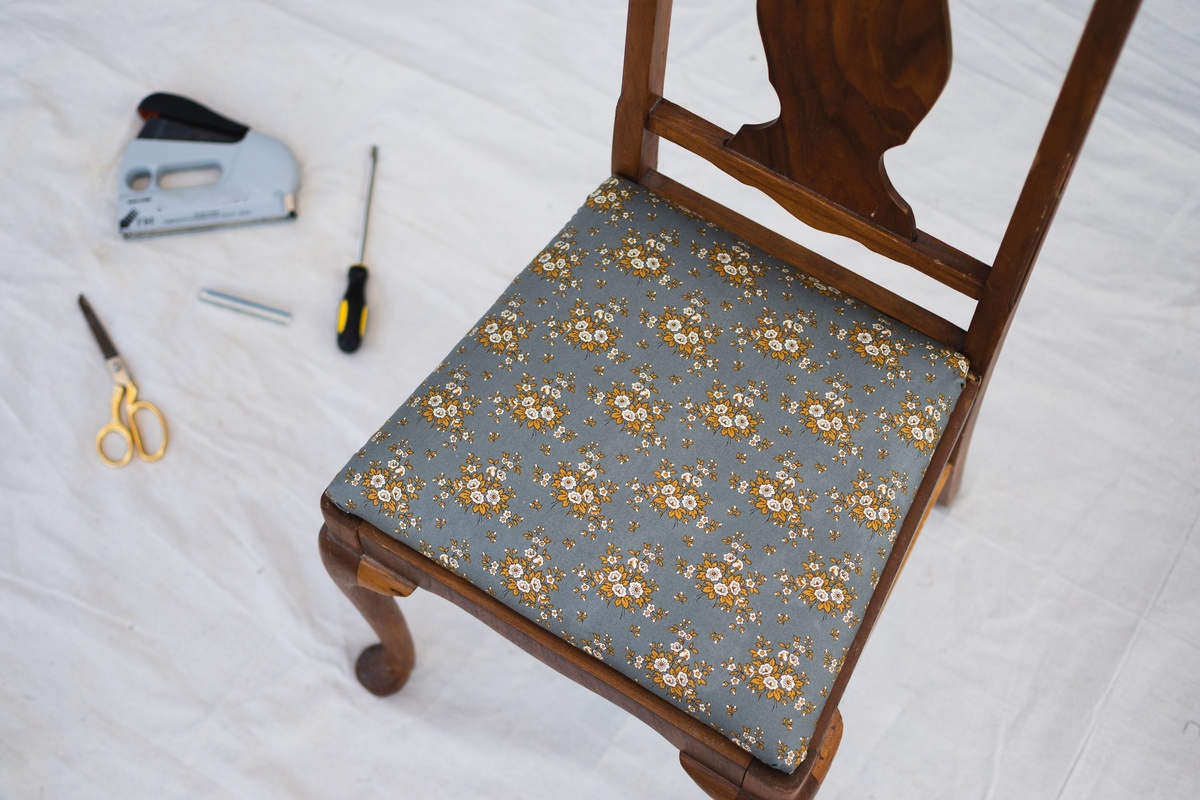
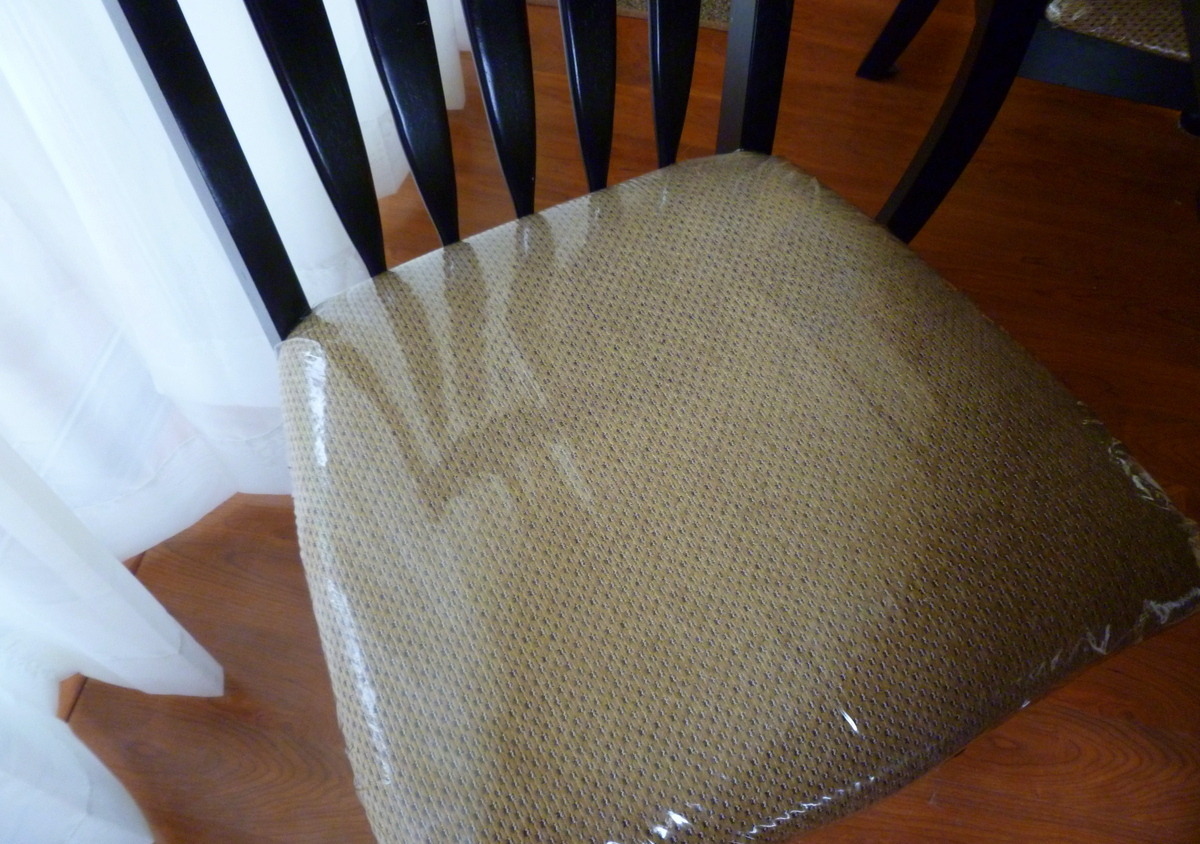
- Optional: Reupholster seat cushions (if applicable): If your dining chairs have removable seat cushions, you may choose to reupholster them as part of the refinishing process. Measure and cut upholstery fabric to the appropriate size and attach it to the seat cushion using a staple gun or upholstery tacks. Ensure the fabric is stretched evenly and neatly for a professional finish.
- Final touches: Take a few moments to inspect the chairs for any touch-ups or finishing touches. If you notice any areas that require additional paint or stain, apply a small amount using a brush. You can also touch up any scratches or imperfections with a bit of matching paint or stain.
Once the chairs are fully reassembled and any necessary adjustments or finishing touches have been made, they are ready to be used and enjoyed. Take a step back and admire your beautifully refinished dining chairs, knowing that the time and effort you’ve put into the refinishing process have brought them back to life.
Remember to follow the manufacturer’s guidelines for the specific type of chair you are working with, as assembly instructions may vary. With proper care and maintenance, your refinished dining chairs will continue to bring style and comfort to your dining space for years to come.
Now that you’ve learned how to refinish your dining chairs, you can apply these steps to other pieces of furniture and unleash your creativity to transform your home with beautifully refinished pieces. Enjoy the satisfaction of preserving the beauty and functionality of your furniture through the art of refinishing!
Conclusion
Congratulations! You’ve reached the end of our comprehensive guide on how to refinish dining chairs. By following the step-by-step instructions and using the necessary materials, you’ve successfully transformed your worn-out dining chairs into stunning pieces that can breathe new life into your dining space.
Throughout this journey of refinishing your dining chairs, you’ve learned the importance of proper preparation, from inspecting and cleaning the chairs to removing the existing finish and sanding the surface. You’ve also seen how applying a new finish can dramatically improve the appearance and protect the wood for years to come. The process of reassembling the chairs and adding any finishing touches has brought the project to a satisfying finish.
By refinished your dining chairs, you have not only saved money by giving your existing furniture a fresh look, but also contributed to sustainability by extending the lifespan of your chairs. Additionally, you have unleashed your creativity and added a personal touch to your dining space by selecting the perfect finish and potentially reupholstering the seat cushions.
As you embark on future refinishing projects, whether it be for other furniture pieces or even your entire dining set, remember to approach each project with patience, attention to detail, and a passion for craftsmanship. Refinishing furniture is not only a practical skill, but also an opportunity to express your creativity and showcase your unique style in your home.
Lastly, proper maintenance and care are essential to preserving the beauty and functionality of your refinished dining chairs. Regularly dusting and cleaning the chairs, using appropriate cleaning products, and avoiding harsh chemicals or abrasive materials will help to maintain their pristine condition for years to come.
Thank you for joining us on this refinishing journey. We hope that this guide has provided you with the knowledge and inspiration to confidently tackle future refinishing projects and bring new life to your furniture. Enjoy your beautifully refinished dining chairs and the joy they bring to your dining experiences!
Frequently Asked Questions about How To Refinish Dining Chairs
Was this page helpful?
At Storables.com, we guarantee accurate and reliable information. Our content, validated by Expert Board Contributors, is crafted following stringent Editorial Policies. We're committed to providing you with well-researched, expert-backed insights for all your informational needs.


0 thoughts on “How To Refinish Dining Chairs”