Home>diy>Architecture & Design>How To Design An A/V System For House
Architecture & Design
How To Design An A/V System For House
Modified: October 20, 2024
Learn how to design a powerful audio/visual system for your home with expert tips on architecture design and layout. Create the ultimate entertainment experience.
(Many of the links in this article redirect to a specific reviewed product. Your purchase of these products through affiliate links helps to generate commission for Storables.com, at no extra cost. Learn more)
Introduction
Welcome to the world of Audio/Video (A/V) systems! In today’s digital age, having a well-designed A/V system in your house can truly transform your audio and visual experience. Whether you are a movie enthusiast, a music lover, or someone who simply enjoys immersive entertainment, a carefully planned and executed A/V system can take your home entertainment to the next level.
In this article, we will explore the fundamental aspects of designing an A/V system for your house. We will delve into the components of an A/V system, assess the space and requirements, choose the right audio and video equipment, plan for connectivity and control, design the setup, tackle the installation and setup process, troubleshoot common issues, and discuss regular system maintenance and upkeep.
Building an A/V system from scratch or upgrading an existing setup can be an exciting yet overwhelming task. With the myriad of options available today, it’s essential to have a solid understanding of the basics to make informed decisions that align with your needs and preferences. Whether you are a DIY enthusiast or planning to hire a professional, this comprehensive guide will help you navigate the intricacies of A/V system design.
So, let’s dive into the world of A/V systems and discover how to create a personalized and captivating audio and visual experience right in the comfort of your own home.
Key Takeaways:
- Transform your home entertainment with a well-designed A/V system. Understand the basics, assess your space, choose the right equipment, and plan for seamless connectivity and control to create an immersive audio-visual experience.
- Elevate your audio and visual entertainment experience by carefully designing and maintaining your A/V system. From equipment selection to installation and troubleshooting, create a captivating entertainment hub within your home.
Read more: What Is AV On A Projector
Understanding the Basics of A/V Systems
Before diving into the design process, it’s important to have a clear understanding of the basic components that make up an A/V system. These components work together to deliver high-quality audio and video entertainment.
The primary components of an A/V system include:
- Television or Projector: The visual centerpiece of the system, responsible for displaying the video content.
- Audio Equipment: This includes speakers, amplifiers, and receivers, which ensure clear and immersive audio playback.
- Video Sources and Players: Devices such as Blu-ray players, streaming media players, and gaming consoles that provide the video content.
- Cables and Connectors: HDMI, component, and composite cables that connect the various components of the system.
- Control Systems: Remotes, touch panels, or smart devices that enable you to control and navigate the A/V system.
- Networking and Connectivity: A strong network connection is crucial for streaming content, accessing online media platforms, and integrating smart home automation.
Once you are familiar with the components, it’s essential to determine the purpose and scope of your A/V system. Consider the primary activities you will engage in, such as watching movies, gaming, or listening to music. Evaluating your budget and preferences will help define the level of sophistication you want your system to have.
For instance, if you are a movie enthusiast, you might prioritize a high-definition video experience with surround sound capabilities. On the other hand, if you are an audiophile, investing in high-quality speakers and amplifiers for pristine audio reproduction may be your main focus.
The size and layout of your house also play a significant role in determining the scope of the A/V system. The larger the space, the more speakers and audio zones you may need to ensure even coverage and sound distribution. Additionally, factors such as natural lighting, room acoustics, and furniture placement must be taken into account to optimize the overall audio and visual experience.
By understanding the components and defining the purpose and scope of your A/V system, you are laying the groundwork for a well-designed and tailored entertainment experience. In the next sections, we will dive deeper into assessing the space and requirements, choosing the right audio and video equipment, planning for connectivity and control, and designing the A/V system setup.
Assessing the Space and Requirements
Once you have a clear understanding of the basics of A/V systems, the next step is to assess the space and requirements of your house. Evaluating the layout, size, and specific audio and video needs will help you make informed decisions throughout the design process.
Start by evaluating the layout and size of your house. Consider the various rooms or areas where you would like to have audio and video capabilities. This could include the living room, home theater, bedrooms, outdoor spaces, or any other designated entertainment areas. Take note of the room dimensions, ceiling height, and any unique architectural features that may impact the placement and installation of equipment.
Identifying your audio and video needs is equally important. Determine the types of content you will primarily consume and the associated audio and visual requirements. For example, if you enjoy watching movies and want a cinematic experience, you may need a dedicated home theater room or a large living room setup with immersive surround sound.
Consider the number of people that will regularly use the A/V system and their preferences. If you have a large family or often host gatherings, you may need a multi-room audio setup to provide audio throughout the house. On the other hand, if you prefer individualized experiences, you might opt for separate systems in different rooms to cater to specific interests.
It’s important to factor in future needs and scalability as well. Consider technologies such as 4K or 8K video resolution, high dynamic range (HDR) content, or immersive audio formats like Dolby Atmos. Ensuring your system can support future advancements will minimize the need for frequent upgrades and ensure longevity.
Keep in mind the aesthetic considerations as well. Equipment placement, wiring, and cable management need to be carefully planned to achieve an uncluttered look and maintain the overall aesthetics of your space. Concealed wiring or wireless solutions can help achieve a clean and minimalist appearance.
By conducting a thorough assessment of the space and requirements, you will have a solid foundation to move forward with the design process. In the next sections, we will explore the selection of audio and video equipment, planning for connectivity and control, and designing the A/V system setup.
Choosing the Right Audio Equipment
When designing an A/V system, selecting the right audio equipment is crucial to achieving optimal sound quality and creating an immersive audio experience. From speakers to amplifiers and audio cables, each component plays a vital role in delivering high-fidelity audio reproduction.
Let’s start with speakers and speaker placement. The type and number of speakers you choose will depend on the size of the room and your audio preferences. For a small to medium-sized room, a stereo pair of bookshelf or floor-standing speakers can provide balanced sound. If you’re aiming for a surround sound setup, consider a combination of front, center, and surround speakers to create a three-dimensional audio experience. It’s important to position the speakers correctly for optimal soundstage and imaging, taking into account factors such as distance from the listener, angles, and wall reflections.
Amplifiers and receivers are the backbone of your audio setup. Amplifiers are responsible for powering the speakers and providing clean and distortion-free sound reproduction. Receivers, on the other hand, not only amplify the audio signals but also serve as the hub for connecting various audio sources and controlling the system. Make sure to choose an amplifier and receiver that are compatible with your speakers and have sufficient power to drive them effectively.
Audio cables and connectors are vital for maintaining signal integrity and minimizing audio quality degradation. When selecting audio cables, consider the quality of the cable construction, shielding, and connectors. Higher-quality cables can help reduce interference and deliver cleaner audio signals. Depending on the equipment and connections, you may need RCA, XLR, or speaker cables. It’s important to choose cables that are of sufficient length and gauge to reach your audio components without signal degradation.
In addition to the main audio equipment, you may also consider adding subwoofers or a dedicated bass management system for enhanced low-frequency response. This is particularly beneficial for those who enjoy deep and impactful bass while watching movies or listening to music.
Keep in mind that audio equipment preferences can be subjective. It’s always a good idea to audition different speakers and amplifiers to gauge their sound quality and compatibility with your listening preferences. Consulting with audio professionals or seeking recommendations from reputable sources can also help guide your decision-making process.
By carefully choosing the right audio equipment, positioning your speakers correctly, and using high-quality cables and connectors, you can create an audio setup that delivers captivating and immersive sound. In the next section, we will explore the selection of video equipment for your A/V system.
Selecting the Appropriate Video Equipment
When designing an A/V system, selecting the appropriate video equipment is essential for delivering stunning visual experiences. From choosing between a television or projector to selecting the right video sources and players, each decision will impact the quality and versatility of your video playback.
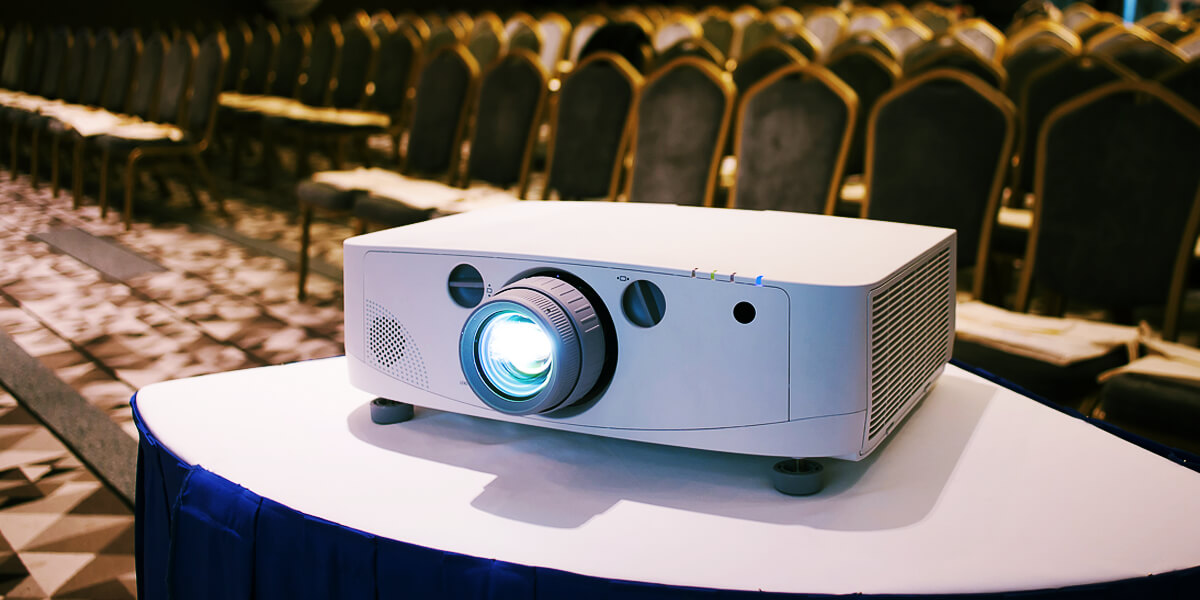
The first decision to make is whether to go for a television or a projector. Televisions are often the more popular choice due to their convenience and ease of installation. They come in a wide range of sizes, resolutions, and features, including 4K Ultra HD and OLED technology, offering excellent picture quality. Televisions are well-suited for smaller to medium-sized rooms where a single display can meet the viewing needs.
Alternatively, projectors can offer a larger and more immersive viewing experience, especially in dedicated home theater rooms or open spaces with controlled lighting. Projectors can project a much larger image onto a screen or even a blank wall, creating a cinematic feel. They are available in various resolutions and brightness levels. It’s important to consider factors like ambient light, throw distance, and screen size when selecting a projector for your space.
Once you have decided on the display option, it’s time to consider the video sources and players. Blu-ray players, streaming media players, gaming consoles, and cable/satellite boxes are common video sources that allow you to access and play different types of video content. Ensure that the sources you choose are compatible with the display and offer the features and flexibility you require, such as support for 4K HDR, Dolby Vision, or streaming services.
Now let’s discuss the cables that connect your video equipment. HDMI cables are the most common and versatile cables used for transmitting high-definition video and audio signals. They are capable of carrying the latest video formats and support features like ARC (Audio Return Channel) and CEC (Consumer Electronics Control). Ensure that your HDMI cables are of high quality and have sufficient bandwidth for the video resolutions and features you plan to use.
If you have older equipment or specific needs, you may also need to consider component and composite cables. Component cables offer analog video signals and are still used for some devices that lack HDMI connectivity. Composite cables are the most basic option, providing standard-definition video signals. Remember to choose cables of proper length and quality to ensure optimal video signal transmission.
When selecting video equipment, it’s crucial to consider factors such as resolution, display size, ambient lighting, and the type of video content you intend to watch. Researching and comparing various options, reading reviews, and seeking expert advice will help you make informed decisions.
In the next section, we will explore the planning and considerations for connectivity and control in your A/V system.
When designing an A/V system for your house, consider the size and layout of the space, the types of media you will be using, and the desired audio and visual quality to ensure the system meets your needs.
Read more: What Is An Av Adapter
Planning for Connectivity and Control
When designing an A/V system for your house, planning for connectivity and control is vital to ensure seamless integration and easy usage of the system. This involves considering factors such as wiring and cable management, network and internet connectivity, and remote control options.
Let’s start with wiring and cable management. Properly planning and organizing the wiring in your A/V system is crucial for achieving a clean and clutter-free installation. Ensure that you have enough power outlets conveniently located near your equipment to avoid having cables sprawled across the room. Consider utilizing cable management solutions such as cable covers, raceways, or in-wall conduits to conceal and manage the cables effectively.
For the best audio and video performance, it’s essential to use high-quality cables that are appropriately shielded and of sufficient length. This ensures minimal signal loss or interference. Consult the specifications of the audio and video equipment, and select cables that meet the required standards and resolutions.
Next, consider the network and internet connectivity for your A/V system. A strong and reliable network connection allows you to access online streaming services, download media, and control your system remotely. Ensure that your router is capable of handling multiple devices simultaneously and providing sufficient bandwidth for streaming high-definition content. Wired Ethernet connections are generally more reliable for streaming media, but Wi-Fi connectivity can also be used if your devices support it.
Additionally, integrating your A/V system with a smart home automation system can provide enhanced control and convenience. This allows you to control the A/V system, lighting, climate, and other home automation features through a single interface or mobile app. Ensure compatibility between your A/V equipment and the chosen automation system to enable seamless integration and control.
When it comes to controlling your A/V system, there are various options available. Remote controls, touch panels, smartphone apps, voice assistants, and universal remotes are common choices. Consider your preference for control interfaces and choose a method that best suits your needs and promotes ease of use.
It’s also worth exploring the option of implementing a centralized control system that integrates all the A/V equipment and enables control from a single remote or touch panel. This simplifies the user experience and eliminates the need for multiple remotes or confusing button combinations.
By planning for connectivity and control, you can ensure a streamlined and user-friendly A/V system. Well-managed wiring, a reliable network connection, and intuitive control options will enhance the overall experience and make using your A/V system a breeze.
In the next section, we will discuss the process of designing the setup of your A/V system, taking into account factors such as diagrams, equipment placement, acoustics, and lighting.
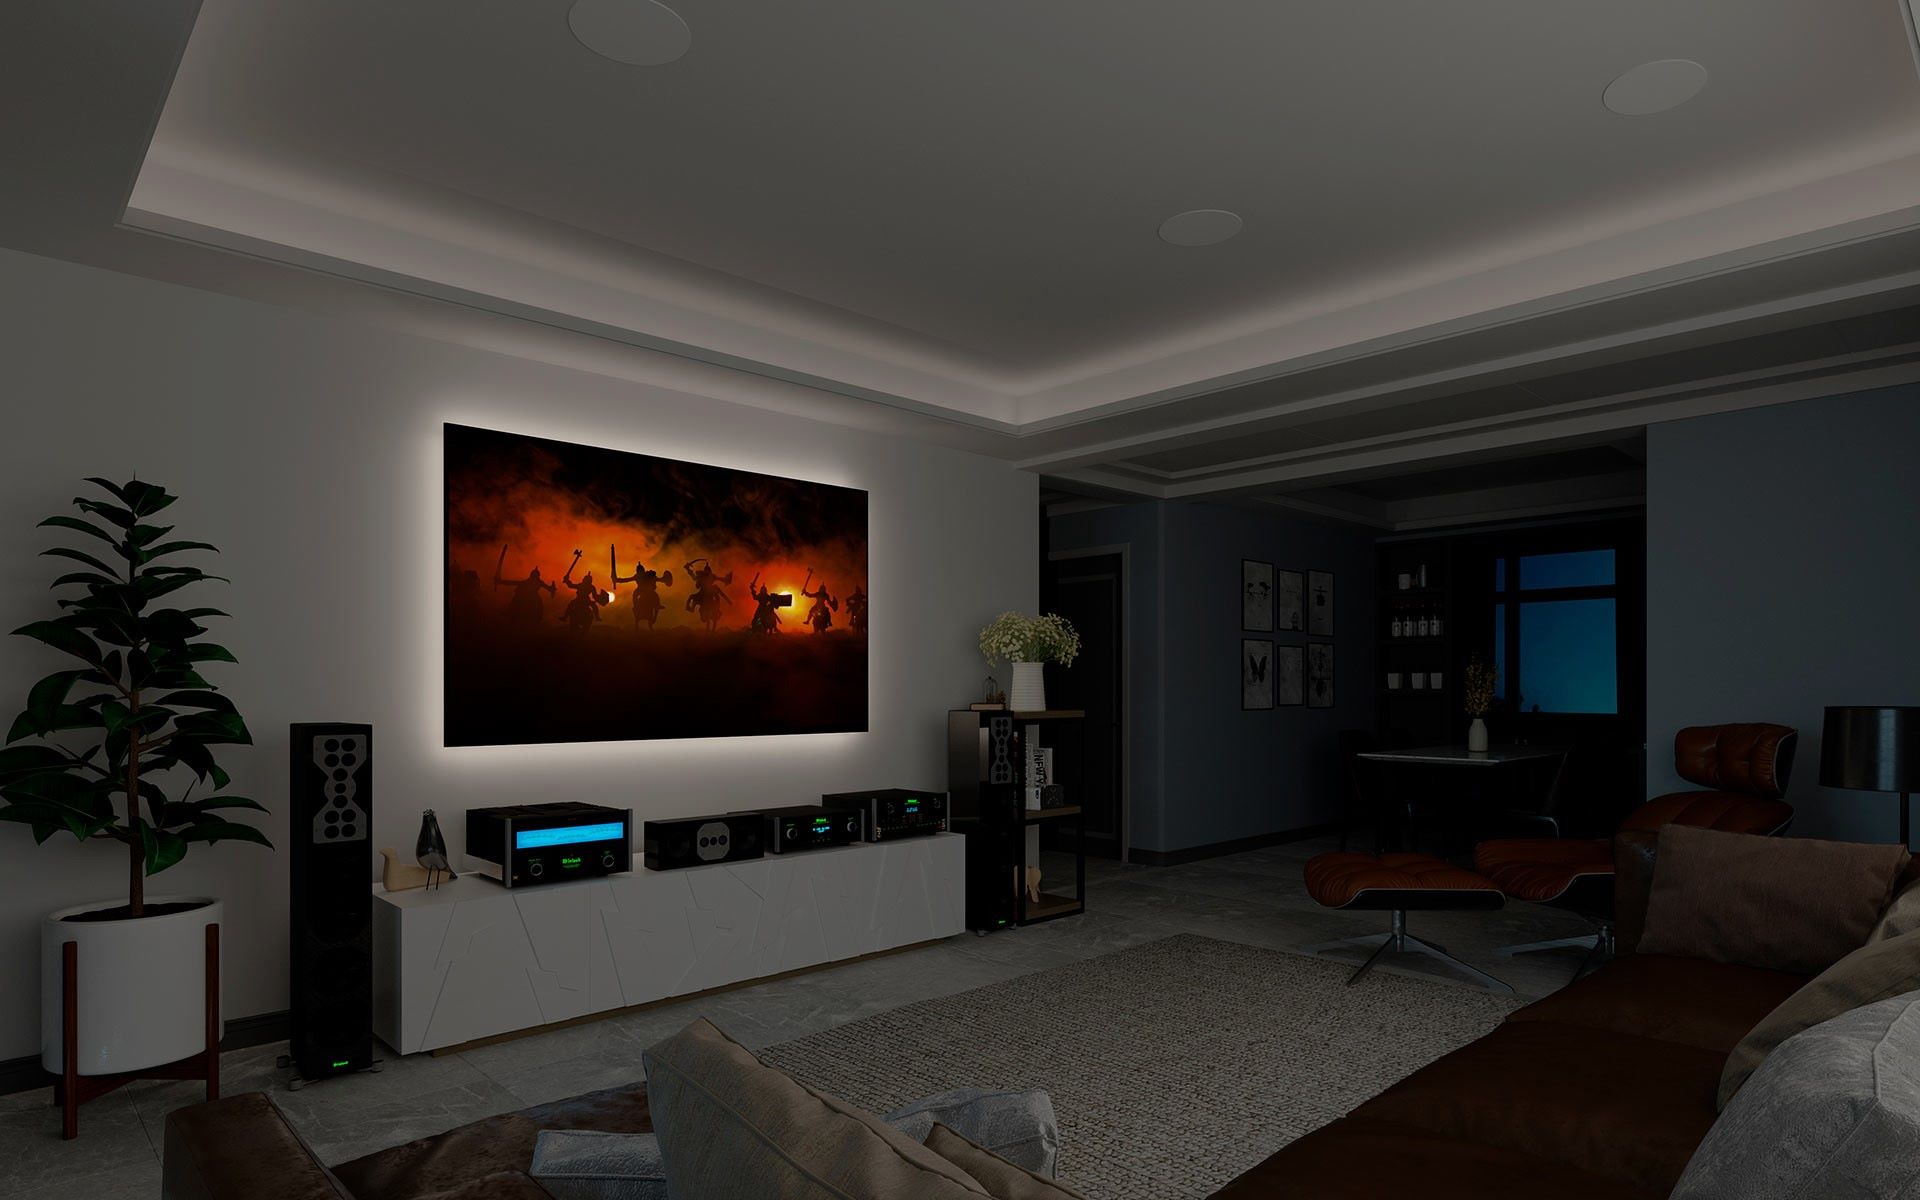
Designing the A/V System Setup
Designing the setup of your A/V system involves creating a cohesive plan that considers factors such as diagrams or floorplans, equipment positioning, and optimizing acoustics and lighting. By carefully designing the setup, you can ensure optimal performance and an immersive entertainment experience.
Start by creating a diagram or floorplan of your A/V system. This will help visualize the layout and placement of the equipment, as well as plan for cable runs and connections. Include the dimensions of the room, the location of doors and windows, and any architectural features that may impact the positioning of the equipment.
When positioning the equipment, consider factors such as line of sight, accessibility, and ventilation. Ensure that the television or projector is at an optimal height and angle for comfortable viewing. If you have multiple speakers, follow the guidelines provided by the manufacturer for correct placement to achieve the best soundstage and imaging.
Acoustics play a significant role in the overall audio experience. Pay attention to the room’s acoustical properties and make adjustments as needed. Use acoustic treatments such as absorbers, diffusers, or bass traps to minimize unwanted reflections, echo, or bass buildup. Experiment with different placements and configurations to find the best audio performance for your room.
Similarly, lighting can greatly impact the video quality and overall ambiance of your A/V system. Consider the amount of natural and artificial light in the room and plan accordingly. If possible, install blackout curtains or blinds to control external light sources. Dimmable lights or lighting control systems can help create the desired atmosphere for different viewing scenarios.
It’s also important to consider the aesthetics of your setup. Keep cables hidden and managed using cable covers, wire channels, or in-wall conduits. This will not only maintain a clean and organized appearance but also prevent potential tripping hazards.
Take the time to experiment and fine-tune the setup and positioning of the equipment. Adjust speaker placement, seating positions, and even room layout if necessary. Several factors, such as room size, shape, and furniture placement, can affect the overall audio and visual experience. By analyzing measurements, testing different configurations, and soliciting feedback, you can achieve the best setup for your specific space.
By designing the setup of your A/V system thoughtfully, you can optimize the performance, ensure proper equipment placement, and create an immersive environment for your audio and visual entertainment.
In the next section, we will explore the installation and setup process, including mounting the TV or projector, connecting and configuring audio components, and calibrating the system for optimal performance.
Installation and Set Up
Once you have designed the layout and positioning of your A/V system, it’s time to proceed with the installation and set up. This involves mounting the TV or projector, connecting and configuring audio components, and calibrating the system for optimal performance.
If you have chosen a TV as your display option, begin by mounting it on the wall or placing it on a suitable stand. Carefully follow the manufacturer’s instructions for correct installation, ensuring that it is securely attached and leveled. Consider factors such as viewing height and angle to ensure comfortable and optimal viewing positions.
For a projector setup, you will need to mount the projector on the ceiling or use a projector stand. Ensure that it is positioned correctly with the proper throw distance for your desired screen size. Adjust the lens zoom and focus to achieve a clear and sharp image. Take into account any keystone correction or image adjustment settings provided by the projector to fine-tune the image shape and alignment.
Next, connect and configure the audio components. Begin by connecting your speakers to the appropriate amplifier or receiver channels. Follow the manufacturer’s guidelines for correct wiring and polarity. Ensure that the speaker wires are properly secured and do not touch each other to prevent interference.
Connect the audio sources, such as Blu-ray players, gaming consoles, or streaming media players, to the corresponding inputs on your amplifier or receiver using the appropriate cables (HDMI, RCA, etc.). Ensure that the sources are set to the correct audio output format and adjust any necessary settings for surround sound or audio processing features.
Once the physical connections are established, configure the audio settings on your amplifier or receiver. This may include setting speaker distances, adjusting speaker levels, configuring bass management, and selecting sound modes based on your preferences and room characteristics. Consult the manufacturer’s manual or online resources for detailed instructions on accessing and adjusting these settings.
Lastly, calibrate the system for optimal performance. Use audio calibration tools, such as an SPL meter or an automated calibration system, to ensure proper speaker levels and balance. These tools measure the sound output and help you achieve a balanced soundstage and accurate audio reproduction.
If you have a projector setup, consider using video calibration tools or professional calibration services to fine-tune the image quality. These tools or services can help adjust parameters such as brightness, contrast, color accuracy, and gamma to optimize the visual experience.
Once the installation and set up process is complete, take the time to test and evaluate the system’s performance. Take note of any issues, such as audio imbalances or video artifacts, and make necessary adjustments. Experiment with different audio and video content to ensure that the system performs at its best under various scenarios.
By diligently following the installation and set up procedures, you can ensure a properly functioning A/V system that delivers exceptional audio and visual performance. In the next section, we will discuss troubleshooting common issues and regular maintenance and upkeep for your A/V system.
Troubleshooting and Maintenance
While A/V systems are designed to provide seamless entertainment experiences, occasional issues may arise. Knowing how to troubleshoot common problems and performing regular system maintenance will help keep your A/V system running smoothly and ensure optimal performance.
Let’s explore some common issues and their solutions:
- No audio or distorted sound: Check the connections between the audio components, ensure all cables are securely plugged in, and verify that the correct inputs and outputs are selected. Make sure the volume levels are adjusted appropriately, both on the amplifier or receiver and the audio source. If the issue persists, examine the settings on the amplifier or receiver for any audio processing or equalizer settings that may be affecting the sound quality.
- No video or poor video quality: Verify the connections between the video source and the display device. Ensure that the correct input is selected on the display device. Check the settings on the video source for any output resolution or format issues. If using a projector, confirm the alignment and focus of the projected image. Adjust the settings as necessary to optimize the video quality.
- Interference or noise: Ensure that all audio and video cables are properly shielded and not susceptible to electromagnetic interference. Keep power cables separated from audio/video cables to avoid interference. If using wireless components, make sure they are operating on clear frequencies and are not subject to interference from other devices.
- Remote control issues: Check the batteries in the remote control and replace them if necessary. Ensure that there are no obstructions between the remote control and the A/V equipment. If using a universal remote, make sure it is properly programmed and synchronized with the devices in the A/V system.
Regular system maintenance and upkeep are essential to keep your A/V system in top condition. Here are some practices you can follow:
- Dust and clean the equipment: Dust can accumulate on the surfaces and vents of your A/V equipment, affecting performance and causing overheating. Regularly clean the equipment using a soft, dry cloth or an electronics-friendly cleaning solution.
- Keep the area well-ventilated: Ensure that the A/V equipment has sufficient airflow around it to prevent overheating. Avoid placing equipment in enclosed spaces or stacks where heat can build up.
- Update software and firmware: If your A/V equipment has software or firmware updates available, keep them up to date. These updates often provide bug fixes, new features, and improved compatibility.
- Perform regular checks and inspections: Periodically inspect the cables, connectors, and connections to ensure they are secure and functioning correctly. Look for any signs of wear or damage and replace as necessary.
It’s important to refer to the manuals and documentation provided with your A/V equipment for specific troubleshooting steps and maintenance recommendations. In case of complex issues or difficulties, consider seeking professional assistance from a technician or A/V specialist.
By being proactive in troubleshooting and performing regular maintenance, you can maximize the lifespan of your A/V system and continue to enjoy high-quality audio and video experiences for years to come.
With this comprehensive guide, you now have a solid understanding of how to design an A/V system for your house. From understanding the basics to assessing the space, choosing the right equipment, planning connectivity and control, and conducting installation, calibration, troubleshooting, and maintenance, you are well-equipped to create an immersive and captivating audio and visual experience right in the comfort of your home.
So, dive in, explore the possibilities, and enjoy the world of A/V technology as you design and optimize your dream A/V system.
Read more: How To Attach Conduit Body To House
Conclusion
Designing an A/V system for your house is an exciting endeavor that can elevate your audio and visual entertainment experience to new heights. By understanding the basics of A/V systems, assessing the space and requirements, choosing the right equipment, planning for connectivity and control, designing the system setup, and performing installation and maintenance, you can create a personalized and captivating entertainment hub within your home.
Throughout this guide, we have explored the essential components of an A/V system, including audio equipment like speakers, amplifiers, and cables, as well as video equipment such as televisions, projectors, and cables. We’ve discussed the importance of assessing the space and requirements, involving considerations of layout, size, and audio-video needs.
Connectivity and control play a vital role in the seamless operation of your A/V system. With proper planning, wiring and cable management, network and internet connectivity, and remote control options, you can have a well-integrated and easily controllable system.
Designing the setup of your A/V system involves creating diagrams or floorplans, positioning equipment, and considering acoustics and lighting. This ensures proper functionality, aesthetics, and an immersive audio-visual experience.
Following the proper installation and set up process, which includes mounting the TV or projector, connecting and configuring audio components, and calibrating the system for optimal performance, is crucial for obtaining the best possible audio and visual quality.
Maintaining and troubleshooting your A/V system are equally important. By addressing common issues such as distorted sound or poor video quality, and performing regular maintenance tasks like cleaning, updating software, and inspecting connections, you can keep your system running smoothly and enjoy uninterrupted entertainment.
In conclusion, designing an A/V system for your house requires careful consideration of various factors, from equipment selection to placement, connectivity, installation, and maintenance. With proper planning, implementation, and ongoing care, you can create a personalized and captivating audio-visual experience that will enhance your entertainment and create lasting memories.
So, roll up your sleeves and embark on the journey of designing your dream A/V system, and get ready to enjoy stunning visuals and immersive audio right in the comfort of your own home.
Frequently Asked Questions about How To Design An A/V System For House
Was this page helpful?
At Storables.com, we guarantee accurate and reliable information. Our content, validated by Expert Board Contributors, is crafted following stringent Editorial Policies. We're committed to providing you with well-researched, expert-backed insights for all your informational needs.


0 thoughts on “How To Design An A/V System For House”