Home>diy>Building & Construction>How To Install A Toilet In New Construction
Building & Construction
How To Install A Toilet In New Construction
Modified: October 18, 2024
Learn how to properly install a toilet in your new construction project with step-by-step instructions. Follow our expert guide for seamless building construction.
(Many of the links in this article redirect to a specific reviewed product. Your purchase of these products through affiliate links helps to generate commission for Storables.com, at no extra cost. Learn more)
Introduction
Installing a toilet in new construction is a crucial step in completing a building project. A properly installed toilet ensures functionality, convenience, and comfort for its users. Whether you are a homeowner overseeing your own construction project or a professional contractor, understanding the process of toilet installation is essential.
Installing a toilet in new construction involves several steps, from gathering the necessary tools and materials to connecting the water supply. With the right knowledge and careful execution, you can successfully install a toilet that not only meets building code requirements but also provides lasting durability.
In this article, we will guide you through the step-by-step process of installing a toilet in new construction, ensuring that you have all the necessary information and techniques to complete the task efficiently and effectively.
So, let’s dive in and explore how to install a toilet in new construction!
Key Takeaways:
- Proper preparation is key to successful toilet installation in new construction. From gathering tools to preparing the bathroom area, attention to detail ensures a smooth and efficient installation process.
- Thorough testing and attention to detail are crucial for a reliable and visually appealing toilet installation. Regular maintenance and occasional inspections help maintain the toilet’s excellent condition.
Read more: When Is HVAC Installed In New Construction
Step 1: Gather the necessary tools and materials
Before starting the installation process, it is crucial to gather all the necessary tools and materials. This will ensure that you have everything you need at hand, preventing unnecessary delays or interruptions during the installation.
Here is a list of tools and materials you will need:
- Wrenches (adjustable and pipe)
- Screwdriver
- Hacksaw
- Tape measure
- Level
- Plumber’s putty or silicone caulking
- Toilet bolts and nuts
- Toilet flange
- Toilet bowl and tank
- Wax ring
- Water supply line
- Bucket or towels for cleanup
Make sure you have all these tools and materials readily available before you proceed with the installation. This will not only save you time but also ensure a smooth and efficient installation process.
It’s also a good idea to double-check the specifications and measurements of the toilet you are installing. Ensure that the toilet will fit properly in the designated space and that all the components are compatible with each other.
Once you have gathered all the necessary tools and materials, you’re ready to move on to the next step: preparing the bathroom area.
Step 2: Prepare the bathroom area
Before installing the toilet, it’s important to prepare the bathroom area properly. This involves ensuring that the floor is clean, level, and free from any debris or obstructions that could affect the installation process.
Here are the steps to prepare the bathroom area:
- Remove any existing toilet: If there is an old toilet in the bathroom, you’ll need to remove it. Start by shutting off the water supply to the toilet and flushing to empty the tank and bowl. Disconnect the supply line and remove the bolts securing the toilet to the floor. Carefully lift the toilet off the flange and set it aside.
- Clean the floor: Thoroughly clean the floor around the toilet flange. Remove any old wax ring residue or debris that may be present. It’s important to have a clean and smooth surface for proper installation.
- Check the flange condition: Inspect the toilet flange to ensure it is in good condition. The flange should be securely attached to the floor and have no cracks or damage. If there are any issues with the flange, it should be repaired or replaced before proceeding with the installation.
- Level the floor: Use a level to check the levelness of the bathroom floor. If any areas are uneven or out of level, you may need to make adjustments or use shims to ensure a stable and level base for the toilet.
- Measure and mark the bolt hole locations: Locate the position of the toilet flange on the floor. Measure the distance between the center of the flange and the wall behind it. Make two marks, proportionate to the measurement, on the floor to indicate the position of the toilet bolt holes. These marks will help guide the placement of the toilet during installation.
By properly preparing the bathroom area, you set the foundation for a successful toilet installation. Once the area is clean, level, and ready, you can proceed to the next step: installing the toilet flange.
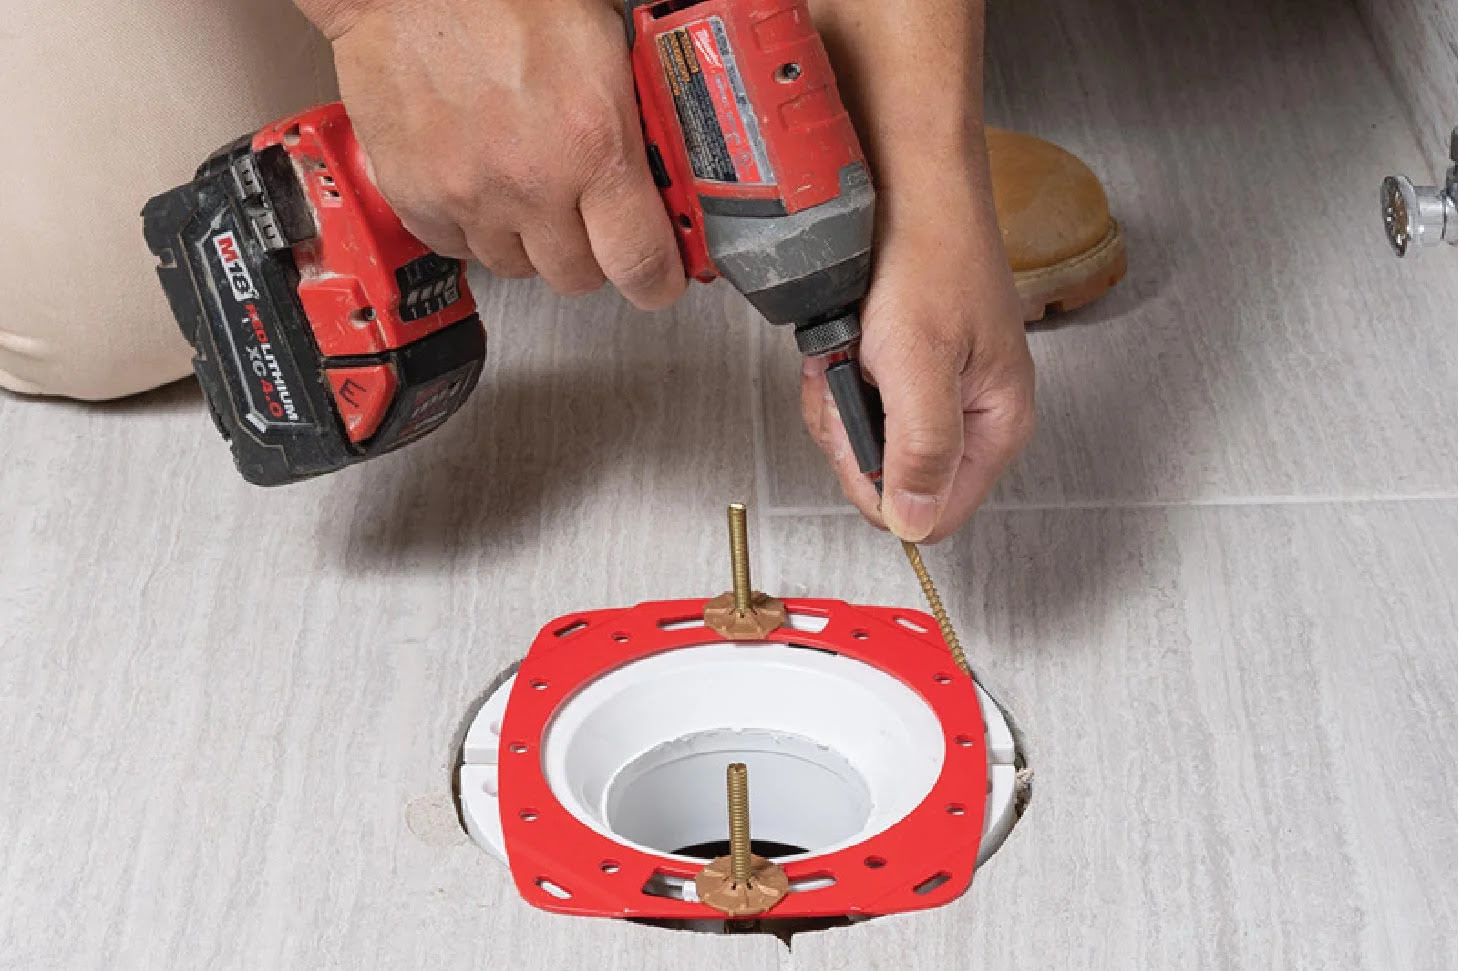
Step 3: Install the toilet flange
The toilet flange is a crucial component that connects the toilet to the drainpipe and provides a secure and watertight seal. Installing the flange properly is essential for the overall functionality and stability of the toilet.
Here are the steps to install the toilet flange:
- Inspect the flange: Before installation, check the condition of the toilet flange. Ensure that it is clean and free from any debris or damage. If the flange is old or damaged, it’s recommended to replace it with a new one.
- Position the flange: Place the flange over the drainpipe opening in the floor, aligning it with the marks you made in the previous step. Make sure the flange is centered and sits flat on the floor.
- Secure the flange: Once the flange is properly positioned, secure it to the floor using screws or bolts. Make sure the flange is firmly attached and does not move or wobble.
- Apply plumber’s putty or silicone caulking: To create a watertight seal, apply a thin layer of plumber’s putty or silicone caulking around the inner rim of the flange. This will help prevent any leakage between the flange and the toilet base.
Installing the toilet flange correctly ensures a solid foundation for the toilet and prevents any potential leaks. Once the flange is securely in place, you can move on to the next step: setting the toilet bowl.
Step 4: Set the toilet bowl
Setting the toilet bowl properly is an essential step in the toilet installation process. This step involves aligning the bowl with the flange and securing it in place to create a stable and leak-proof connection.
Here are the steps to set the toilet bowl:
- Position the wax ring: Place the wax ring on the flange, ensuring that it fits securely around the opening. The wax ring creates a watertight seal between the toilet bowl and the flange, preventing any leaks.
- Lower the toilet bowl: Carefully lower the toilet bowl onto the wax ring, aligning the bolt holes on the base of the bowl with the marks you made on the floor. Gently press down on the bowl to compress the wax ring and create a tight seal.
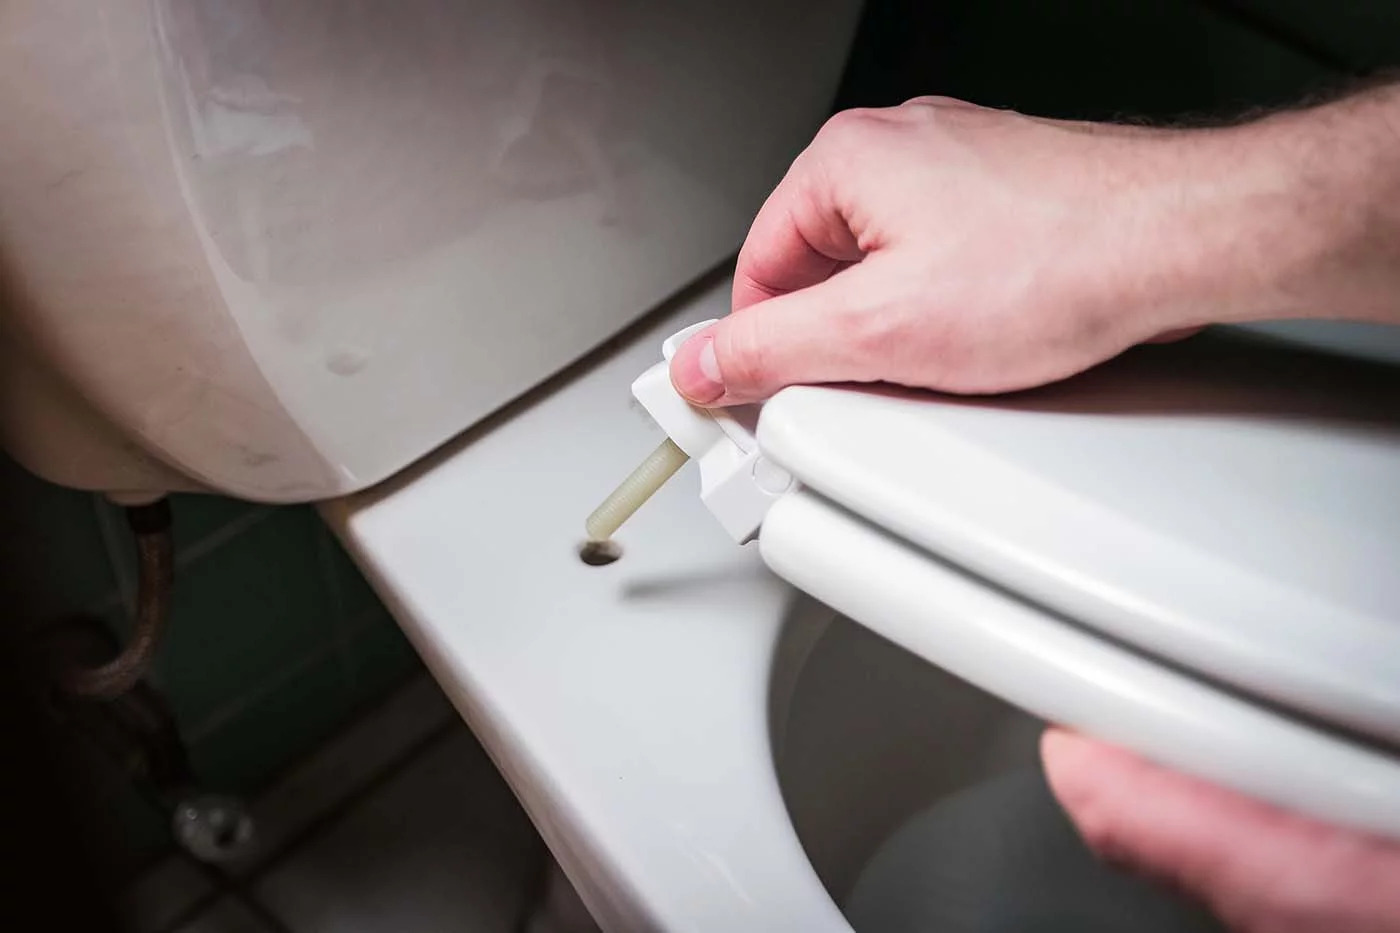
- Attach the bolts: Insert the toilet bolts into the bolt holes on the toilet bowl base. These bolts will secure the bowl to the flange. Make sure the bolts are positioned correctly and protrude through the holes on the base.
- Tighten the nuts: Place a washer and then a nut onto each toilet bolt. Using a wrench, tighten the nuts evenly on both sides. Be careful not to over-tighten, as this can crack the toilet bowl. Check the bowl for stability, ensuring it is level and secure.
Setting the toilet bowl accurately is crucial for a proper and functional installation. Make sure the bowl is aligned with the flange and firmly secured to prevent any wobbling or leakage. Once the toilet bowl is properly set, you can move on to the next step: installing the toilet tank.
When installing a toilet in new construction, make sure to properly secure the toilet flange to the floor to prevent any movement or leaks. Use a wax ring to create a watertight seal between the toilet and the flange.
Step 5: Install the toilet tank
Installing the toilet tank is the next step in the toilet installation process. The tank holds the water that is used for flushing and provides the necessary pressure to effectively empty the bowl.
Here are the steps to install the toilet tank:
- Place the tank onto the bowl: Carefully lift the toilet tank and position it onto the back of the toilet bowl. Make sure the tank sits securely in place and aligns with the mounting holes on the bowl.
- Attach the tank bolts: Insert the tank bolts through the mounting holes on the bowl and the corresponding holes on the tank. Place a washer and then a nut onto each bolt. Tighten the nuts using a wrench until they are snug but not overly tightened.
- Connect the tank to the bowl: Depending on the type of toilet you have, there may be a rubber gasket or a tank-to-bowl gasket that needs to be installed. Follow the manufacturer’s instructions to properly connect the tank to the bowl using the provided gasket.
- Attach the water supply: Connect the water supply line to the fill valve located on the bottom of the toilet tank. Tighten the connection using an adjustable wrench, making sure it is secure to prevent any leaks.
- Adjust the fill valve: Adjust the fill valve to the appropriate water level. This can usually be done by turning a screw or a knob on the valve. Follow the manufacturer’s instructions for the specific adjustment process.
Installing the toilet tank properly ensures that it functions efficiently and prevents any water leakage. Take your time to align the tank correctly and securely attach it to the bowl. Once the tank is installed, you can move on to the next step: connecting the water supply.
Step 6: Connect the water supply
Connecting the water supply is a crucial step in completing the installation of a toilet in new construction. This step involves attaching the water supply line to the fill valve on the toilet tank, providing the necessary water for flushing.
Here are the steps to connect the water supply:
- Shut off the water supply: Before connecting the water supply, ensure that the main water supply to the building or the specific water supply line for the toilet is shut off. This will prevent any water flow during the installation process.
- Inspect the water supply line: Check the water supply line to ensure it is in good condition. Replace the supply line if it shows signs of wear or damage.
- Attach the supply line: Connect one end of the supply line to the fill valve on the bottom of the toilet tank. Hand-tighten the connection and then use an adjustable wrench to give it an extra quarter-turn to ensure a secure fit. Avoid over-tightening, as this can cause damage.
- Turn on the water supply: Slowly turn on the water supply valve to allow water to flow into the toilet tank. Check for any leaks around the connection. If there are any leaks, tighten the connection slightly or replace the supply line if necessary.
- Check for proper water flow: Allow the tank to fill completely and check for proper water flow. Ensure that the water stops filling when it reaches the appropriate level, as adjusted in the previous step.
Connecting the water supply properly is essential to ensure the functionality and performance of the toilet. Take your time to check for any leaks and ensure that the water flow is adequate. Once the water supply is connected and tested, you can move on to the next step: testing the toilet.
Step 7: Test the toilet
Testing the toilet is an important step to ensure that it is functioning properly and does not have any leaks or issues. By performing a thorough test, you can address any potential problems before regular use.
Here are the steps to test the toilet:
- Fill the tank: Flush the toilet and allow the tank to refill completely. Make sure the water stops filling when it reaches the appropriate level, as adjusted in the previous steps.
- Flush the toilet: Test the flushing mechanism by pressing the flush lever or button. Observe if the toilet flushes effectively and if the water is properly drained from the bowl. The flush should be strong, and the bowl should empty itself adequately.
- Check for leaks: Inspect the area around the toilet, including the base and connections, for any signs of leaks. Look for water pooling or dampness. If you spot any leaks, tighten the connections or address the issue accordingly.
- Test the functionality of the toilet seat: Ensure that the toilet seat is securely attached and functions correctly. Confirm that it stays in place when in use and does not move or wobble.
- Check for proper water flow and drainage: Once the toilet is flushed and refilled, check if the water is flowing smoothly into the bowl and if it drains properly. The bowl should fill with water and then empty completely without any issues.
By thoroughly testing the toilet, you can identify any potential problems and address them promptly. This step is crucial in ensuring that the toilet functions properly and meets the required standards.
If the toilet passes the test without any issues or leaks, you can continue with the final step: caulking around the base of the toilet.
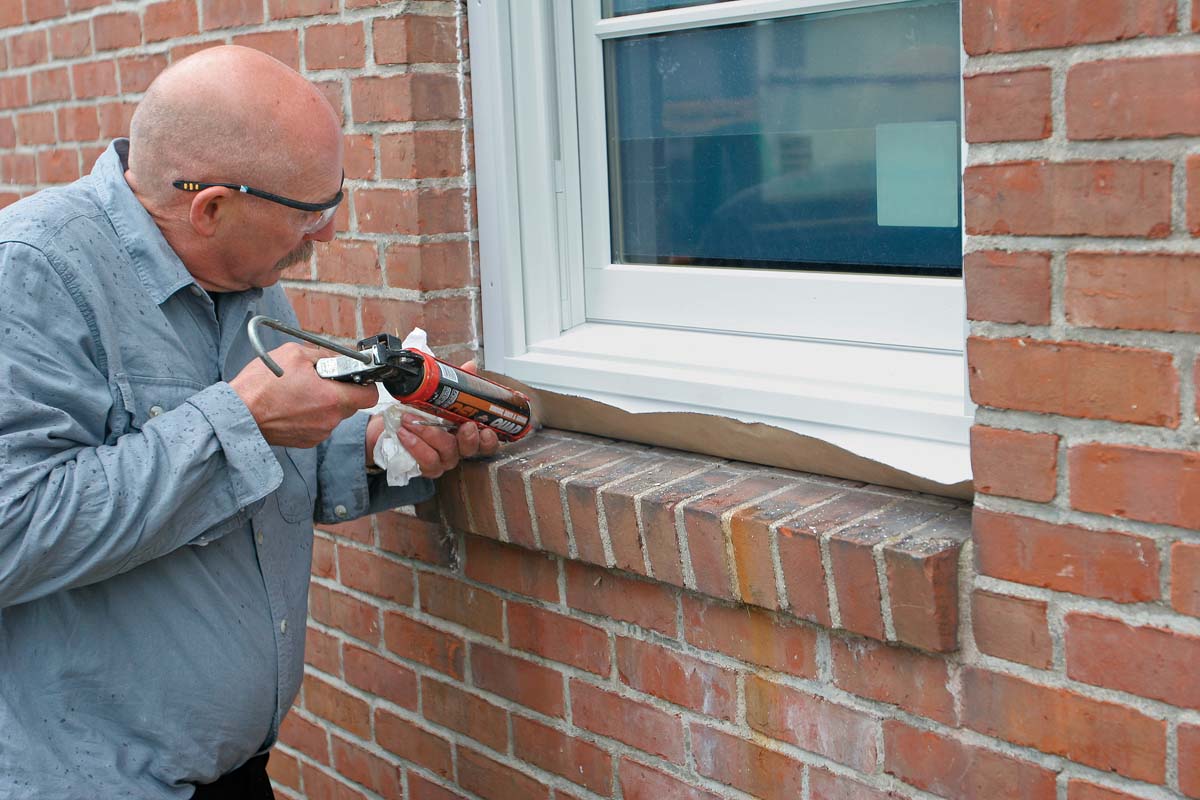
Step 8: Caulk around the base of the toilet
Caulking around the base of the toilet is the final step in the installation process. Caulking creates a watertight seal and provides a tidy and finished look to the toilet installation. It helps to prevent any water or moisture from seeping underneath the toilet, protecting the floor and minimizing the risk of damage.
Here are the steps to caulk around the base of the toilet:
- Ensure the area is clean and dry: Before applying caulk, make sure the area around the base of the toilet is clean and free from any dirt, debris, or excess water. Use a cloth or paper towel to wipe down the surface and ensure it is dry.
- Select a high-quality caulk: Choose a high-quality caulk that is specifically designed for bathroom use and is compatible with your flooring material. Silicone-based caulk is recommended for its durability and resistance to water and mildew.
- Cut the caulk tube tip: Cut the tip of the caulk tube at a 45-degree angle, making a small opening. Start with a smaller hole to have better control over the flow of caulk, and increase the size if necessary.
- Apply the caulk: Hold the caulk gun at a 45-degree angle and apply a steady bead of caulk around the base of the toilet, starting from one side. Move slowly and smoothly, ensuring even coverage. Use consistent pressure on the caulk gun to maintain a uniform line of caulk.
- Smooth the caulk: With a caulk smoothing tool or your finger, smooth the caulk along the base of the toilet to create a neat and professional finish. Wipe away any excess caulk with a damp cloth.
- Give it time to cure: Allow the caulk to cure as per the manufacturer’s instructions. This usually takes a minimum of 24 hours, but it’s best to wait longer to ensure a complete and secure seal.
Caulking around the base of the toilet not only provides a clean and finished appearance but also helps to maintain the integrity of the installation. It’s an important step in preventing any potential leaks or damage to the flooring.
With the caulking completed, your toilet installation in the new construction project is now complete. Congratulations! Remember to clean up any excess caulk and enjoy your newly installed toilet!
Conclusion
Installing a toilet in new construction may seem like a daunting task, but with the right tools, materials, and knowledge, it can be accomplished successfully. The step-by-step process outlined in this article provides a comprehensive guide to ensure a proper and functional toilet installation.
From gathering the necessary tools and materials to connecting the water supply, each step plays a crucial role in the overall installation process. By following these steps carefully, you can achieve a secure and leak-free toilet installation that meets building code requirements and provides lasting durability.
Remember to take your time during the installation process and pay attention to detail. Ensuring that the toilet is level, the connections are secure, and the caulk is applied properly will result in a reliable and visually appealing installation.
Regular maintenance and occasional inspections will help keep your toilet in excellent condition. This includes checking for any leaks, ensuring proper water flow, and addressing any issues promptly.
Whether you are a homeowner overseeing your own construction project or a professional contractor, having a solid understanding of how to install a toilet in new construction is essential. It allows you to take control of the process, save costs, and ensure the highest level of quality and functionality.
With this guide, you are now equipped with the knowledge and techniques needed to successfully install a toilet in new construction. So, go ahead and confidently tackle your next building project, knowing that you can handle the installation of a toilet with ease and proficiency.
Frequently Asked Questions about How To Install A Toilet In New Construction
Was this page helpful?
At Storables.com, we guarantee accurate and reliable information. Our content, validated by Expert Board Contributors, is crafted following stringent Editorial Policies. We're committed to providing you with well-researched, expert-backed insights for all your informational needs.


0 thoughts on “How To Install A Toilet In New Construction”