Home>diy>Building & Construction>How To Install New Construction Windows In A Brick House
Building & Construction
How To Install New Construction Windows In A Brick House
Modified: August 21, 2024
Learn the step-by-step process of installing new construction windows in a brick house with our comprehensive guide. Perfect for building construction projects.
(Many of the links in this article redirect to a specific reviewed product. Your purchase of these products through affiliate links helps to generate commission for Storables.com, at no extra cost. Learn more)
Introduction
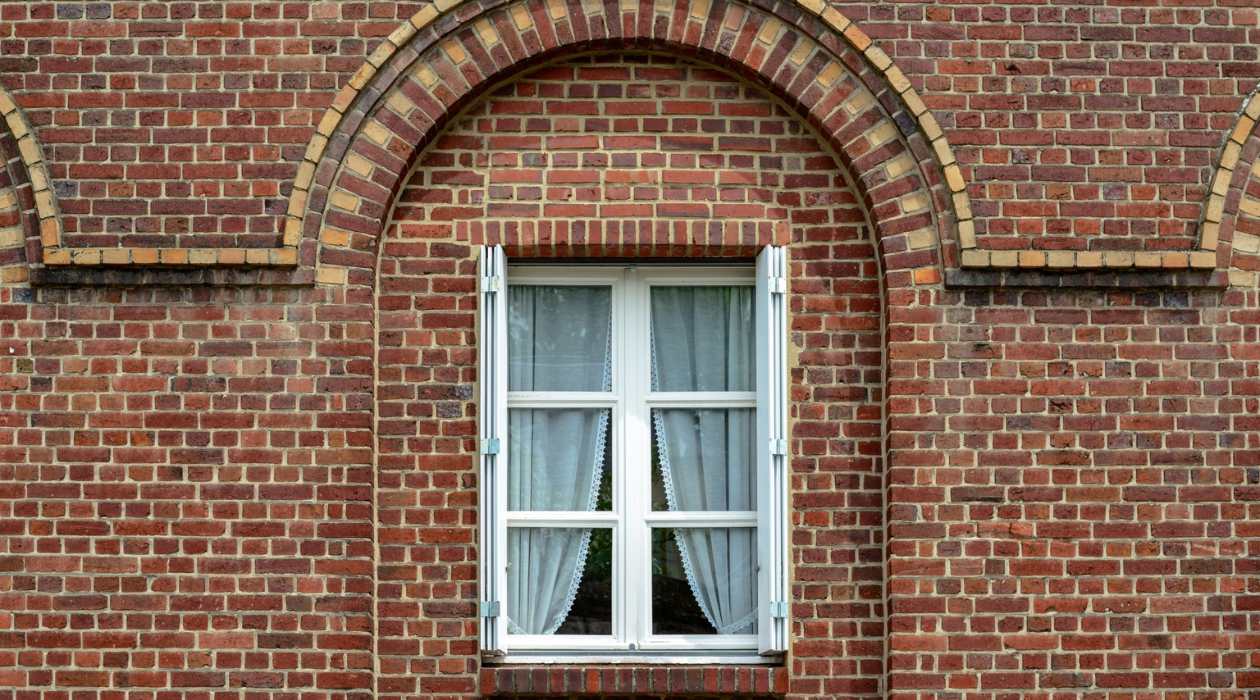
Welcome to the world of home construction and improvement! If you are planning to install new construction windows in a brick house, congratulations on taking the first step towards enhancing your home’s aesthetics and energy efficiency. Windows play a vital role in any building, providing natural light, ventilation, and insulation. By replacing your old windows with new ones, you can enjoy improved functionality, increased energy savings, and a fresh new look.
However, the process of installing new construction windows in a brick house may seem daunting at first. You may wonder, where do I begin? How do I measure the windows? What tools and materials do I need? Fear not, as we will guide you through each step to ensure a successful installation.
In this comprehensive guide, we will walk you through the process of installing new construction windows in a brick house, from preparing the area to the finishing touches. So grab your tools and let’s get started!
Before we dive into the nitty-gritty of the installation process, let’s briefly discuss why replacing your windows is a worthwhile investment.
First and foremost, new construction windows offer improved energy efficiency. Old windows can be a significant source of energy loss, leading to higher heating and cooling costs. By installing new, energy-efficient windows, you can minimize air leakage, reduce drafts, and maintain a comfortable indoor temperature year-round.
Secondly, new construction windows provide enhanced security and safety. Outdated windows may have worn-out locks or poorly functioning mechanisms, making them vulnerable to break-ins. New windows come with advanced locking systems and reinforced glass options, offering better protection for your home and loved ones.
Additionally, new construction windows can revitalize the appearance of your home. Whether you’re looking to update your curb appeal or increase your property value, installing stylish and modern windows can make a significant difference. You can choose from a variety of designs, materials, and finishes to match your personal taste and complement the architectural style of your brick house.
Lastly, new windows require less maintenance compared to older ones. Advances in window technology have made them more durable and resistant to wear and tear. With easy-to-clean designs and low-maintenance materials, you can spend less time on upkeep and more time enjoying the benefits of your new windows.
Now that you understand the benefits of replacing your old windows, let’s delve into the step-by-step process of installing new construction windows in a brick house. By following our guide, you’ll soon be enjoying the beauty, efficiency, and comfort that new windows bring.
Key Takeaways:
- Proper preparation, accurate measurement, and careful removal of old windows are crucial for successful installation of new construction windows in a brick house.
- Sealing, insulating, and adding finishing touches not only enhance the aesthetics but also improve energy efficiency and overall comfort of your home.
Read more: How To Install Windows On A Brick House
Step 1: Preparing the Area
Before you begin the installation process, it is crucial to properly prepare the area to ensure a smooth and efficient workflow. Here are the essential steps to follow:
- Gather the necessary tools and materials: Before you start, make sure you have all the required tools and materials on hand. This may include a tape measure, level, hammer, pry bar, utility knife, drill, screws, caulk gun, and window installation kit. It’s also a good idea to wear safety goggles and gloves to protect yourself during the process.
- Clear the work area: Remove any obstacles or furniture near the windows to create a clear workspace. This will help prevent accidents and allow you to move freely during the installation process. Cover the surrounding area with drop cloths or plastic sheets to catch any debris or dust.
- Inspect the existing windows: Before removing the old windows, carefully inspect them for any signs of damage or deterioration. This will give you an idea of what to look out for during the installation of the new windows. Take note of any areas that may require additional repairs or replacement.
- Disconnect utilities: If your windows have any electrical connections, such as security sensors or blinds, make sure to disconnect them before starting the removal process. This will prevent any damage to the electrical components and ensure your safety.
- Protect your furniture and belongings: Since construction work can generate dust and debris, it’s advisable to cover nearby furniture and belongings with protective sheets or plastic covers. This will prevent them from getting dirty or damaged during the installation process.
By taking the time to adequately prepare the area, you set the foundation for a successful window installation. This step is essential in ensuring a safe and organized work environment, making the rest of the process more manageable and efficient.
Step 2: Measuring and Ordering the Windows
Accurate measurements are crucial when it comes to ordering new construction windows for your brick house. Properly measuring the windows will ensure that the new ones fit perfectly, minimizing the need for adjustments during installation. Here’s a step-by-step guide on how to measure and order your new windows:
- Measure the width: Start by measuring the width of the window opening from jamb to jamb at the top, middle, and bottom. Take the smallest measurement and deduct 1/4 inch to allow room for proper fitting and adjustments.
- Measure the height: Next, measure the height of the window opening from the sill to the top jamb at the left, center, and right sides. Again, take the smallest measurement and deduct 1/4 inch from it.
- Measure the depth: Measure the depth of the window opening from the interior side of the brick wall to the exterior side. This measurement will determine the thickness of the new windows you’ll need to order. Keep in mind any additional space required for insulation or framing materials.
- Consider window style: Decide on the style of windows you want for your brick house, whether it’s double-hung, casement, sliding, or any other design. Take note of any specific window features, such as grids, tinted glass, or hardware options.
- Research window manufacturers: Look for reputable window manufacturers that offer high-quality products suitable for your specific needs and budget. Read customer reviews and compare prices to make an informed decision.
- Consult with professionals: If you’re unsure about taking measurements or choosing the right windows, it’s always a good idea to consult with a professional contractor or window specialist. They can provide expert advice and help you navigate through the process.
- Place your order: Once you have the accurate measurements and have chosen the window style and manufacturer, it’s time to place your order. Provide the supplier or manufacturer with all the necessary details, including the exact measurements, window style, and any additional features you desire.
- Confirm delivery and installation dates: Coordinate with the supplier or manufacturer to confirm the delivery and installation dates of your new windows. This will ensure that you have everything ready when it’s time to install the windows in your brick house.
Remember, accurate measurements are essential to ensure a proper fit and a seamless installation process. Taking the time to measure and order the right windows will help avoid delays, costly mistakes, and the need for extensive modifications during installation.
Step 3: Removing the Old Windows
Now that you have prepared the area and ordered your new windows, it’s time to remove the old windows. This step requires patience, precision, and careful handling to avoid damaging the surrounding brickwork. Here’s a step-by-step guide on how to remove the old windows:
- Put on protective gear: Before you start removing the windows, make sure to put on safety goggles and gloves to protect yourself from any sharp debris or glass fragments.
- Remove the window sash: Start by opening the windows and removing the sashes. Depending on the type of windows, you may need to release any locking mechanisms or undo any screws or fasteners holding the sashes in place. Carefully lift and remove the sashes one by one.
- Take out the window frame: Once the sashes are removed, you can now detach the window frames. Use a pry bar or a utility knife to carefully separate the frame from the surrounding brickwork. Gently pry the frame away from the brick while being mindful not to damage the bricks or the interior drywall.
- Inspect for any remaining obstacles: After removing the window frame, inspect the opening to ensure there are no remaining screws, nails, or other obstacles that could interfere with the installation of the new windows. Remove any debris or obstructions carefully.
- Clean the window opening: Thoroughly clean the window opening to remove any dirt, dust, or old caulk. Use a vacuum or a brush to clear any loose debris. Cleaning the opening will ensure a clean and smooth surface for the installation of the new windows.
- Inspect the surrounding brickwork: While the old windows are removed, take the opportunity to inspect the surrounding brickwork. Look for any signs of damage, cracks, or decay. If you notice any issues, consider hiring a professional to address the brickwork before installing the new windows.
Removing the old windows requires careful execution to avoid causing any damage to the brickwork or the interior of your home. Take your time, follow the steps meticulously, and remember to prioritize safety throughout the process.
Step 4: Preparing the Window Opening
After removing the old windows, it’s time to prepare the window opening for the installation of the new construction windows. This step involves ensuring the opening is properly aligned, leveled, and ready to accommodate the new windows. Here’s a step-by-step guide on how to prepare the window opening:
- Inspect the window opening: Take a close look at the window opening to ensure it is structurally sound and free from any damage or rot. If you notice any issues, address them before proceeding with the installation.
- Measure the window opening: Measure the width, height, and depth of the window opening to confirm that it matches the dimensions of the new construction windows you ordered. Double-check the measurements to ensure accuracy.
- Make any necessary adjustments: If the window opening is not perfectly square or level, you may need to make some adjustments. Use shims or wooden wedges to level the opening and ensure proper alignment.
- Seal any gaps or cracks: Fill any gaps or cracks around the window opening with caulk. This will help prevent drafts and improve energy efficiency. Make sure to use a high-quality exterior-grade caulk suitable for your brick house.
- Apply flashing tape: Install flashing tape around the perimeter of the window opening to provide an additional layer of protection against water infiltration. Apply the tape according to the manufacturer’s instructions, ensuring it is properly sealed and securely adhered.
- Add insulation: Insulate the window opening with spray foam insulation or fiberglass insulation. This will help improve energy efficiency and reduce sound transmission. Follow the manufacturer’s guidelines for proper installation and ensure adequate coverage.
- Check the installation requirements: Review the installation guidelines provided by the window manufacturer. Follow their instructions regarding the specific requirements for your new construction windows, including any special framing or anchoring techniques.
- Perform a final check: Before proceeding to install the new windows, double-check the window opening to ensure everything is in order. Verify that the opening is square, level, properly sealed, and adequately insulated.
By taking the time to properly prepare the window opening, you will ensure a secure and efficient installation of the new construction windows. Proper preparation is crucial for achieving a well-fitted and properly sealed window, providing optimal performance and longevity.
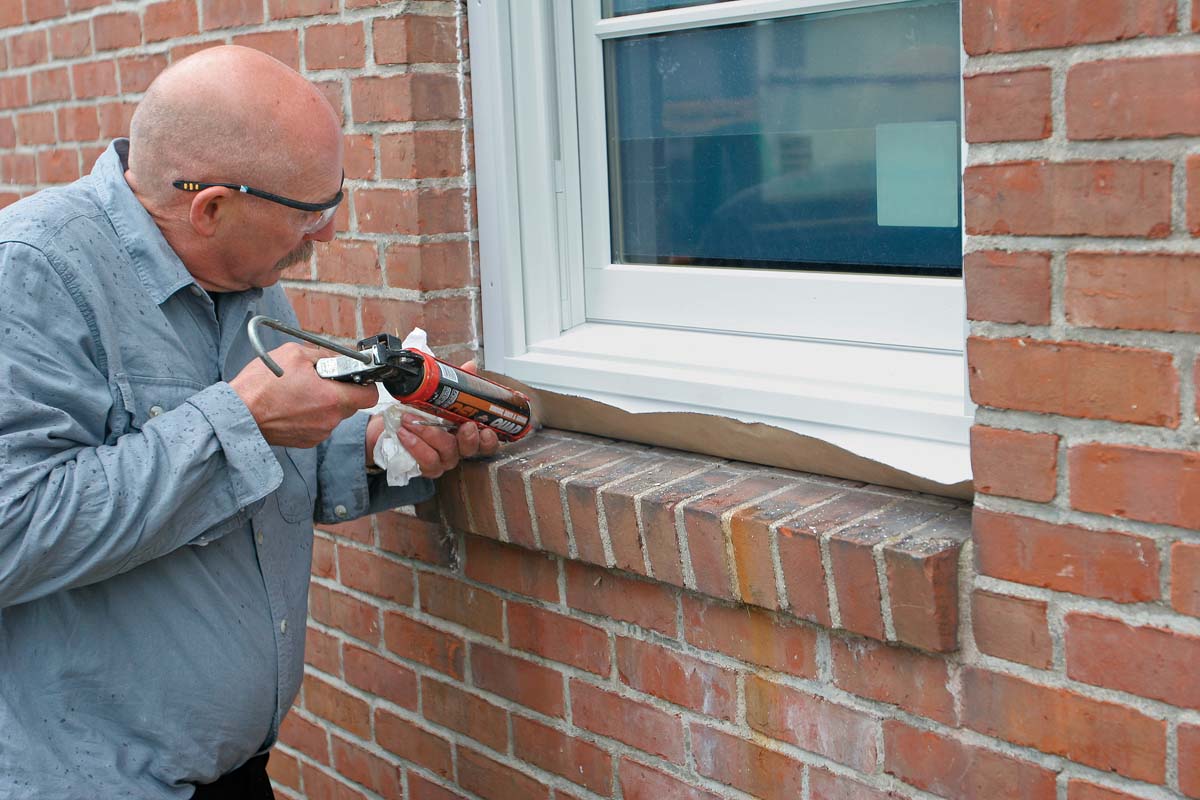
When installing new construction windows in a brick house, make sure to properly flash and seal around the window to prevent water infiltration. Use a high-quality silicone caulk to seal any gaps between the window frame and the brick.
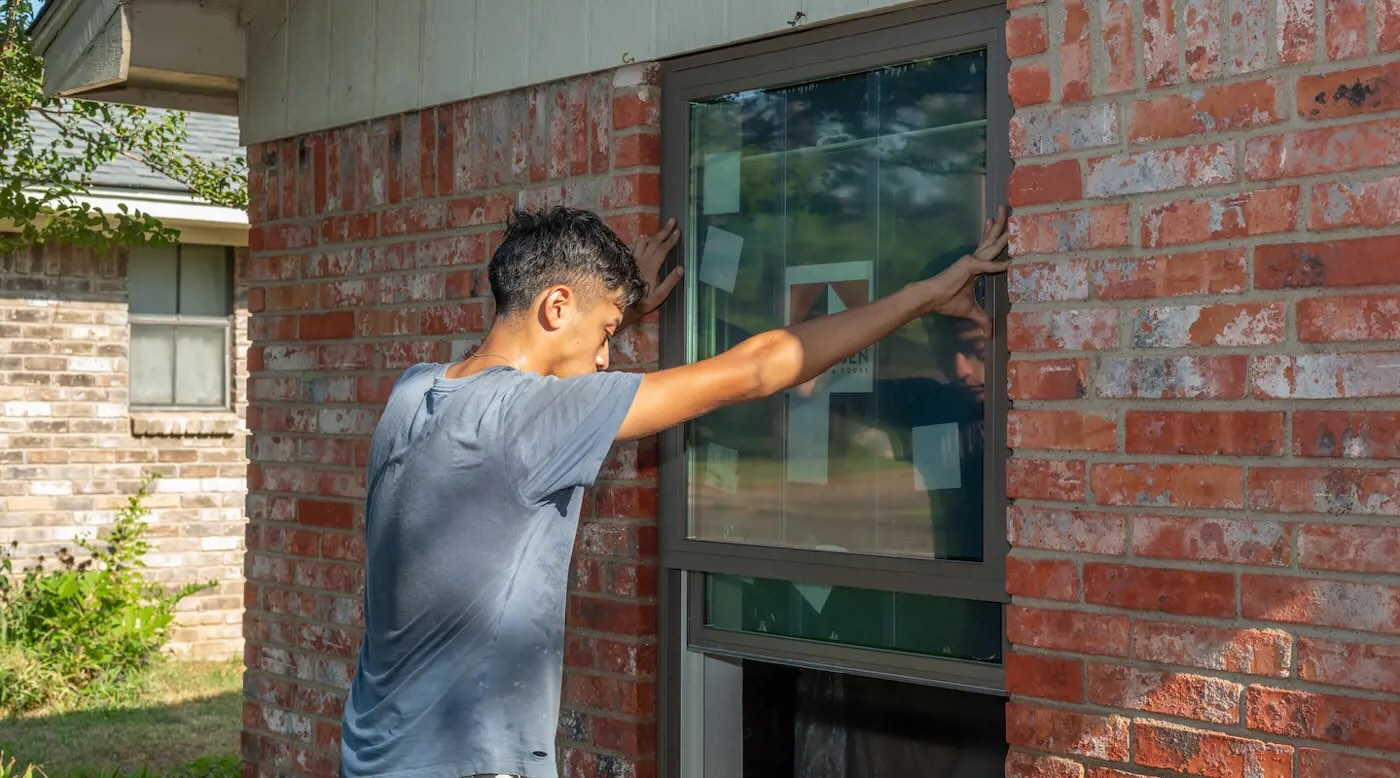
Step 5: Installing the New Windows
With the window opening properly prepared, it’s time to move on to the exciting step of installing the new construction windows in your brick house. Here’s a step-by-step guide on how to install the new windows:
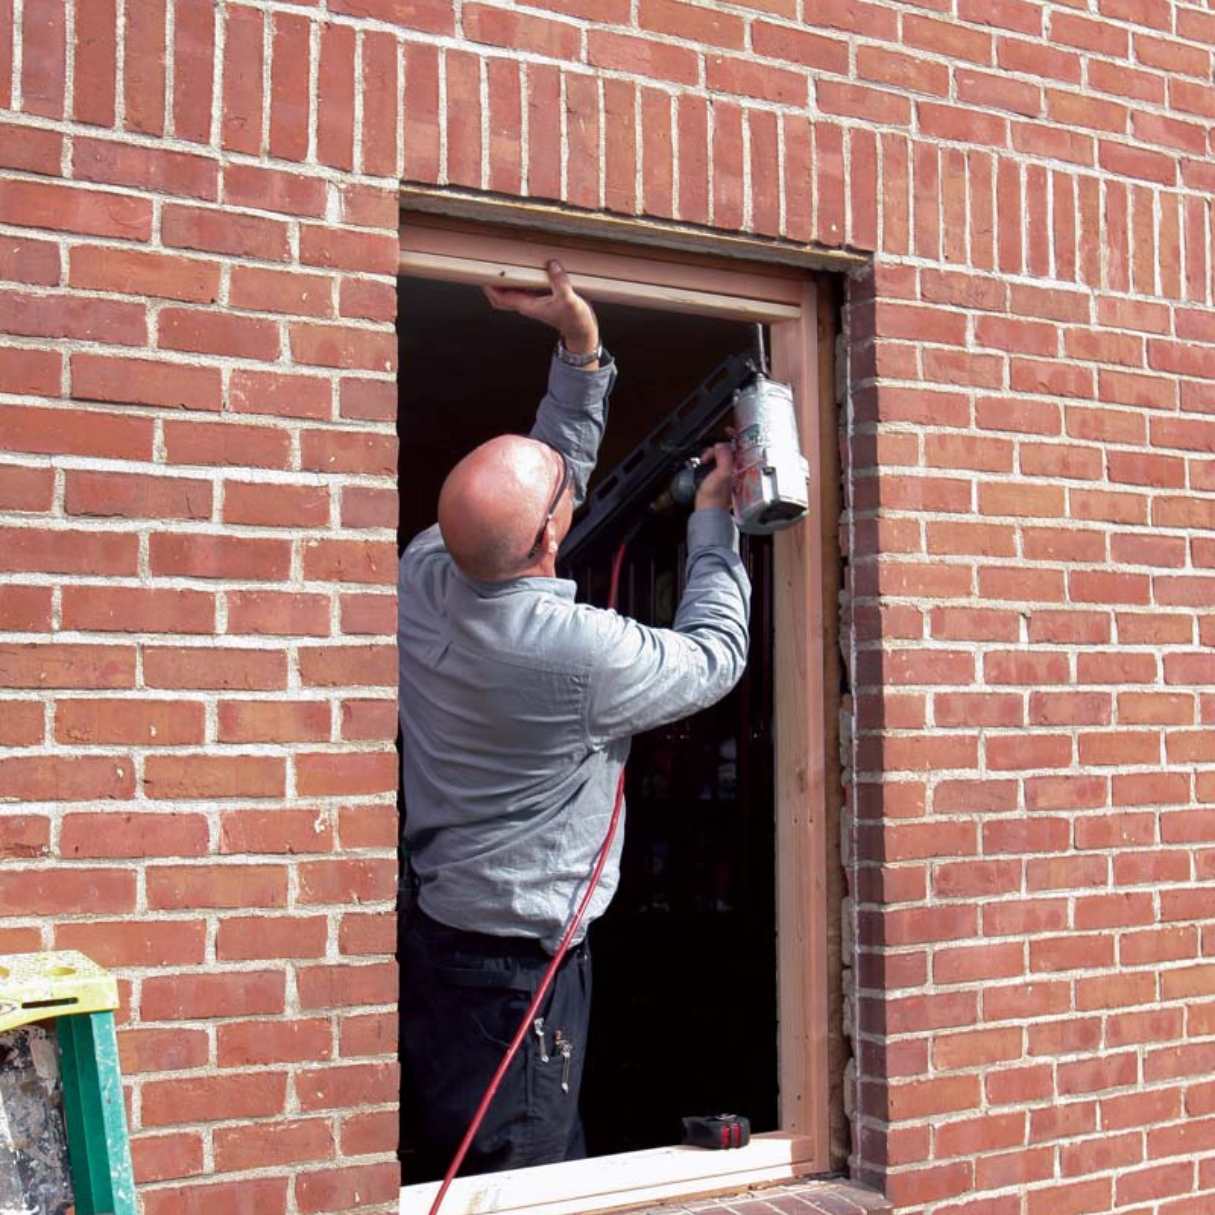
- Enlist a helping hand: It’s recommended to have someone assist you with the installation process, especially when handling larger windows. They can help align and hold the window in place while you secure it.
- Position the new window: Carefully lift the new window and position it into the window opening, ensuring it is centered and level. Use shims as needed to adjust the position and ensure a snug fit.
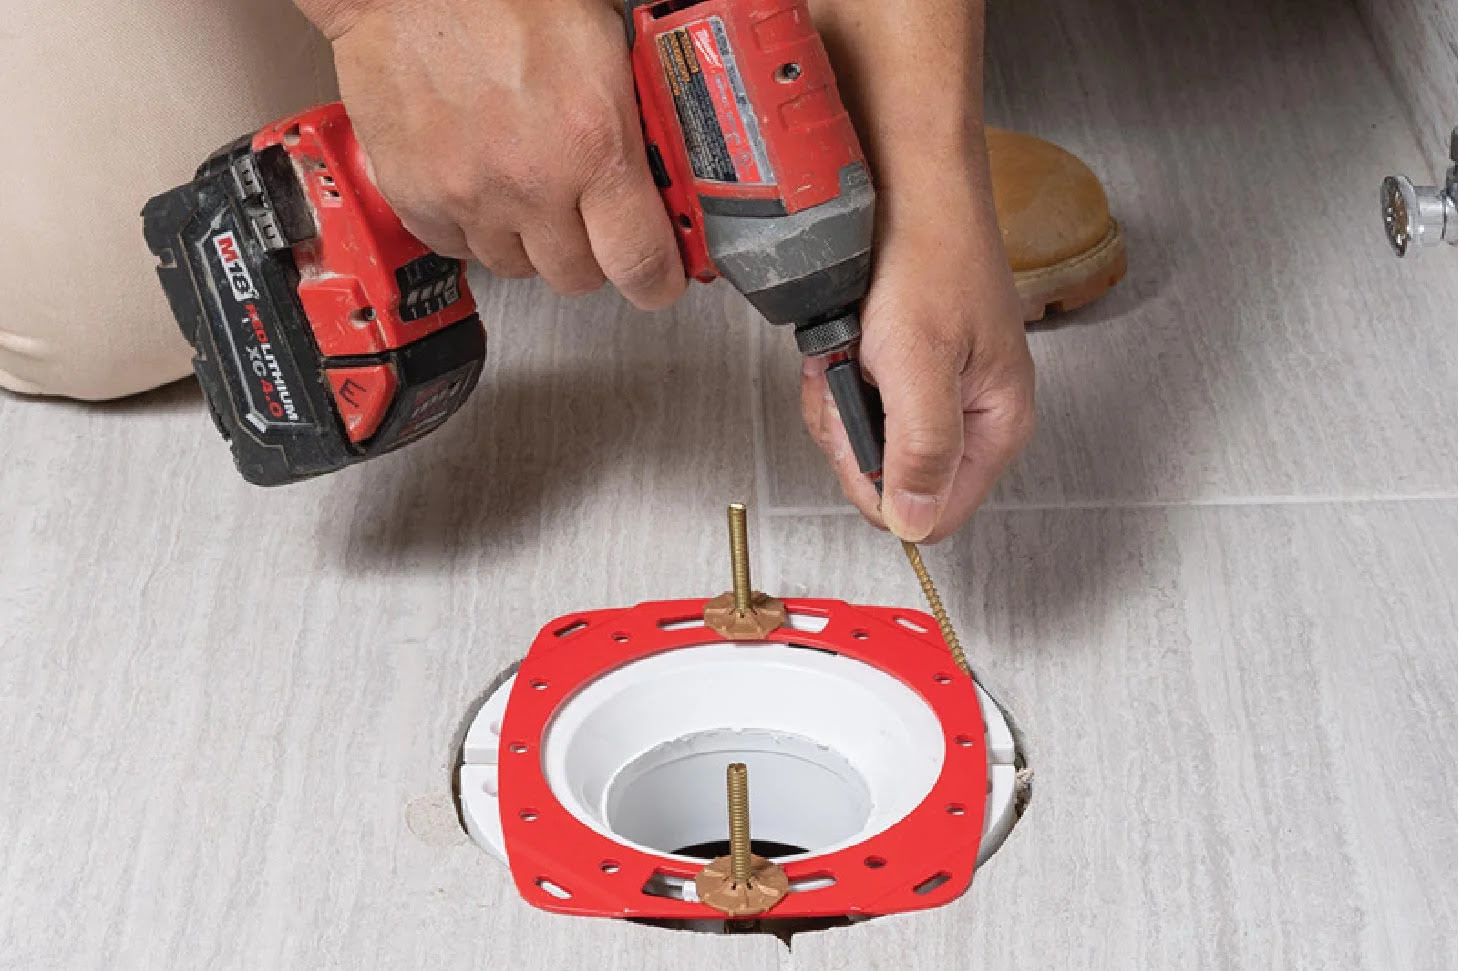
- Secure the window: Once the window is properly positioned, use screws or nails to secure it to the frame or brickwork. Follow the manufacturer’s guidelines for the recommended fastening method and placement.
- Check for proper operation: Test the newly installed window to ensure it opens, closes, and operates smoothly. Make any necessary adjustments to the alignment or hardware if needed.
- Seal the edges: Use caulk or weatherstripping to seal the edges between the window frame and the brickwork. This will help prevent air and water infiltration, enhancing energy efficiency and weather resistance.
- Repeat the process: Repeat the installation process for each window, following the same steps and ensuring proper alignment and sealing for each one.
- Apply finishing touches: Once all the windows are installed, inspect the exterior and interior for any gaps or unfinished areas. Apply additional caulk, trim, or sealant as needed to create a polished and weather-tight finish.
During the installation process, it’s important to prioritize safety and attention to detail. Take your time to ensure each window is installed correctly, aligned properly, and sealed effectively to maximize their performance and longevity.
Remember to refer to the specific guidelines provided by the window manufacturer for any unique installation requirements or techniques for your new construction windows. Following these guidelines will ensure a successful installation and help you enjoy the benefits of your beautiful new windows.
Step 6: Sealing and Insulating
Sealing and insulating your new construction windows in a brick house is a crucial step to ensure energy efficiency, weather resistance, and overall comfort. Proper sealing and insulation will help prevent drafts, minimize heat loss or gain, and enhance the overall performance of your windows. Here’s a step-by-step guide on how to seal and insulate your new windows:
- Inspect the window seals: Before proceeding, inspect the window seals to ensure they are in good condition and properly installed. Replace any damaged or worn-out seals to ensure a tight seal around the windows.
- Apply weatherstripping: Weatherstripping is a cost-effective way to prevent air leakage around the windows. Apply weatherstripping along the edges of the windows and the window frames to create a tight seal. Choose a weatherstripping material that is suitable for your specific window type and the climate you live in.
- Seal gaps and cracks: Inspect the window frames and the areas where the windows meet the brickwork. Use caulk or sealant to fill any gaps, cracks, or voids in these areas. Pay close attention to the exterior and interior surfaces to ensure a thorough seal.
- Insulate around the windows: Insulation plays a crucial role in preventing heat transfer and improving energy efficiency. Apply spray foam insulation or fiberglass insulation in the spaces and gaps around the windows. Ensure that the insulation reaches all the nooks and crannies to create a complete thermal barrier.
- Use window insulation film: Window insulation films are a temporary solution that can provide extra insulation during colder months. Apply a thin layer of window insulation film to the interior surface of the windows, following the manufacturer’s instructions. This will create an additional layer of insulation and help prevent heat loss.
- Consider window coverings: Window coverings, such as blinds or curtains, can also help improve insulation and energy efficiency. Install insulating blinds, thermal curtains, or window shades to reduce heat gain during summer and heat loss during winter. These coverings will provide an extra layer of insulation and enhance the performance of your windows.
By properly sealing and insulating your new construction windows, you can enjoy a more comfortable indoor environment year-round while reducing your energy costs. These steps will help minimize air leakage, maintain consistent temperatures, and enhance the overall energy efficiency of your brick house.
Remember to thoroughly review the instructions provided by the window manufacturer regarding specific sealing and insulation recommendations for your windows. Adhering to these guidelines will ensure optimal performance and long-term satisfaction with your newly installed windows.
Step 7: Finishing Touches
Now that you have successfully installed and sealed your new construction windows in your brick house, it’s time to add the final touches to complete the project. These finishing touches not only enhance the aesthetics of your windows but also provide additional protection and functionality. Here’s a step-by-step guide to help you add those final touches:
- Trim and molding: Install trim and molding around the edges of the windows to create a finished and polished look. Choose trim that complements the style of your home and matches your personal preference.
- Paint or stain: If desired, paint or stain the trim and molding to match the color scheme of your home’s interior and exterior. Use high-quality paint or stain that is suitable for the material of the trim and able to withstand outdoor conditions.
- Install window treatments: Add window treatments such as curtains, blinds, or shades to enhance privacy, control light, and add a touch of style to your windows. Select window treatments that suit your décor and provide the desired functionality.
- Exterior finishing: Apply exterior caulking and paint touch-ups to ensure a seamless transition between the window frames and the surrounding brickwork. This will further enhance the appearance and weather resistance of your windows.
- Interior finishing: Complete the interior finish around the windows by adding casing or molding to cover any gaps or rough edges. This will create a clean and visually appealing look inside your home.
- Consider window accessories: Explore window accessories such as window locks, handles, or decorative grilles to add an extra layer of functionality and personal touch to your new windows.
- Regular maintenance: Finally, make a commitment to regular window maintenance. Clean the windows inside and out regularly, check for any signs of damage or wear, and address any issues promptly to ensure the longevity of your new windows.
Completing these finishing touches will add the final charm and functionality to your new construction windows. It will create a cohesive and visually appealing look that harmonizes with the style and décor of your brick house. Don’t forget to maintain your windows and keep them in good condition to enjoy their benefits for years to come.
Congratulations on successfully installing, sealing, and adding the finishing touches to your new construction windows! You have not only improved the energy efficiency and functionality of your home but also enhanced its overall aesthetics. Sit back, relax, and enjoy the beauty and comfort that your new windows bring.
Conclusion
Congratulations! You have successfully navigated the process of installing new construction windows in your brick house. By following the steps outlined in this comprehensive guide, you have improved the energy efficiency, functionality, and aesthetics of your home. Let’s recap the key takeaways:
1. Preparation is key: Before starting the installation process, it’s important to gather the necessary tools, clear the work area, inspect the existing windows, and disconnect any utilities.
2. Accurate measurement and ordering: Take precise measurements of the window opening and order the correct size and style of new construction windows. Consult with professionals if needed to ensure accuracy.
3. Carefully remove the old windows: Take your time to remove the old windows, ensuring you don’t cause any damage to the surrounding brickwork or interior surfaces.
4. Prepare the window opening: Inspect and clean the window opening, level and align it, and seal any gaps or cracks. Apply flashing tape and insulate to improve energy efficiency.
5. Install the new windows: Lift and position the new windows carefully, secure them properly, and check for proper operation. Seal the edges with caulk and weatherstripping.
6. Seal and insulate: Sealing and insulating ensure energy efficiency and weather resistance. Apply weatherstripping, seal gaps with caulk, and insulate around the windows with spray foam insulation or fiberglass insulation.
7. Add the finishing touches: Enhance the appearance of your windows with trim, molding, paint or stain. Install window treatments and consider window accessories to complement your style.
Remember to regularly maintain your windows by cleaning them and addressing any issues that arise. This will prolong their lifespan and ensure their continued performance.
Installing new construction windows in a brick house is a significant home improvement project, but the results are well worth the effort. Enjoy the benefits of increased energy efficiency, improved aesthetics, and enhanced comfort. Your new windows will not only enhance your living space but also add value to your home.
Thank you for choosing this guide as your companion throughout the installation process. Your perseverance and attention to detail have resulted in a successful outcome. Now, sit back, relax, and bask in the beauty of your newly installed construction windows in your brick house!
Frequently Asked Questions about How To Install New Construction Windows In A Brick House
Was this page helpful?
At Storables.com, we guarantee accurate and reliable information. Our content, validated by Expert Board Contributors, is crafted following stringent Editorial Policies. We're committed to providing you with well-researched, expert-backed insights for all your informational needs.


0 thoughts on “How To Install New Construction Windows In A Brick House”