Home>diy>Building & Construction>How To Measure For A New Construction Window
Building & Construction
How To Measure For A New Construction Window
Modified: January 19, 2024
Learn how to measure for a new construction window in building construction, ensuring a perfect fit and seamless installation.
(Many of the links in this article redirect to a specific reviewed product. Your purchase of these products through affiliate links helps to generate commission for Storables.com, at no extra cost. Learn more)
Introduction
When it comes to constructing a new building or renovating an existing one, one of the key elements to consider is the installation of windows. Windows not only provide natural light and ventilation but also enhance the aesthetic appeal of the structure. However, before you can proceed with installing new construction windows, it is essential to accurately measure the dimensions of the rough opening. This step is crucial to ensure a proper fit and avoid any issues during the installation process.
In this article, we will guide you through the process of measuring for a new construction window. By following these steps, you will be well-equipped to determine the appropriate window size and ensure a seamless installation.
So, let’s dive in and explore the necessary tools, measurements, and techniques required for accurate window measurements.
Key Takeaways:
- Accurate measurements of the rough opening width, height, and depth are crucial for ensuring a perfect fit when installing new construction windows. Double-checking and preparing for any obstructions are essential for a seamless installation process.
- Prioritize safety and gather the necessary tools and materials before measuring for new construction windows. Consider the type of window installation and calculate the window size accurately to ensure a successful and aesthetically pleasing outcome.
Read more: How To Measure For New Construction Windows
Step 1: Gather the necessary tools and materials
Before you begin measuring for a new construction window, it is important to gather the necessary tools and materials. Having these items ready will help you streamline the process and ensure accurate measurements. Here are the essential tools and materials you will need:
- Tape measure: A reliable tape measure is crucial for obtaining precise measurements of the window opening. Ensure that the tape measure has both imperial and metric measurements.
- Pencil: Use a pencil to mark the measurements on the rough opening and take notes throughout the process.
- Level: A level is necessary to ensure that the window is installed straight and level.
- Sturdy ladder: Depending on the height of the window, you may need a sturdy ladder to safely access and measure the rough opening.
- Safety equipment: It is important to prioritize safety during the measurement process. Consider using safety goggles, gloves, and other appropriate safety equipment.
- Calculator: A calculator will be handy when calculating the window size based on the measurements.
Once you have gathered all the necessary tools and materials, you are now ready to move on to the next step: measuring the rough opening width.
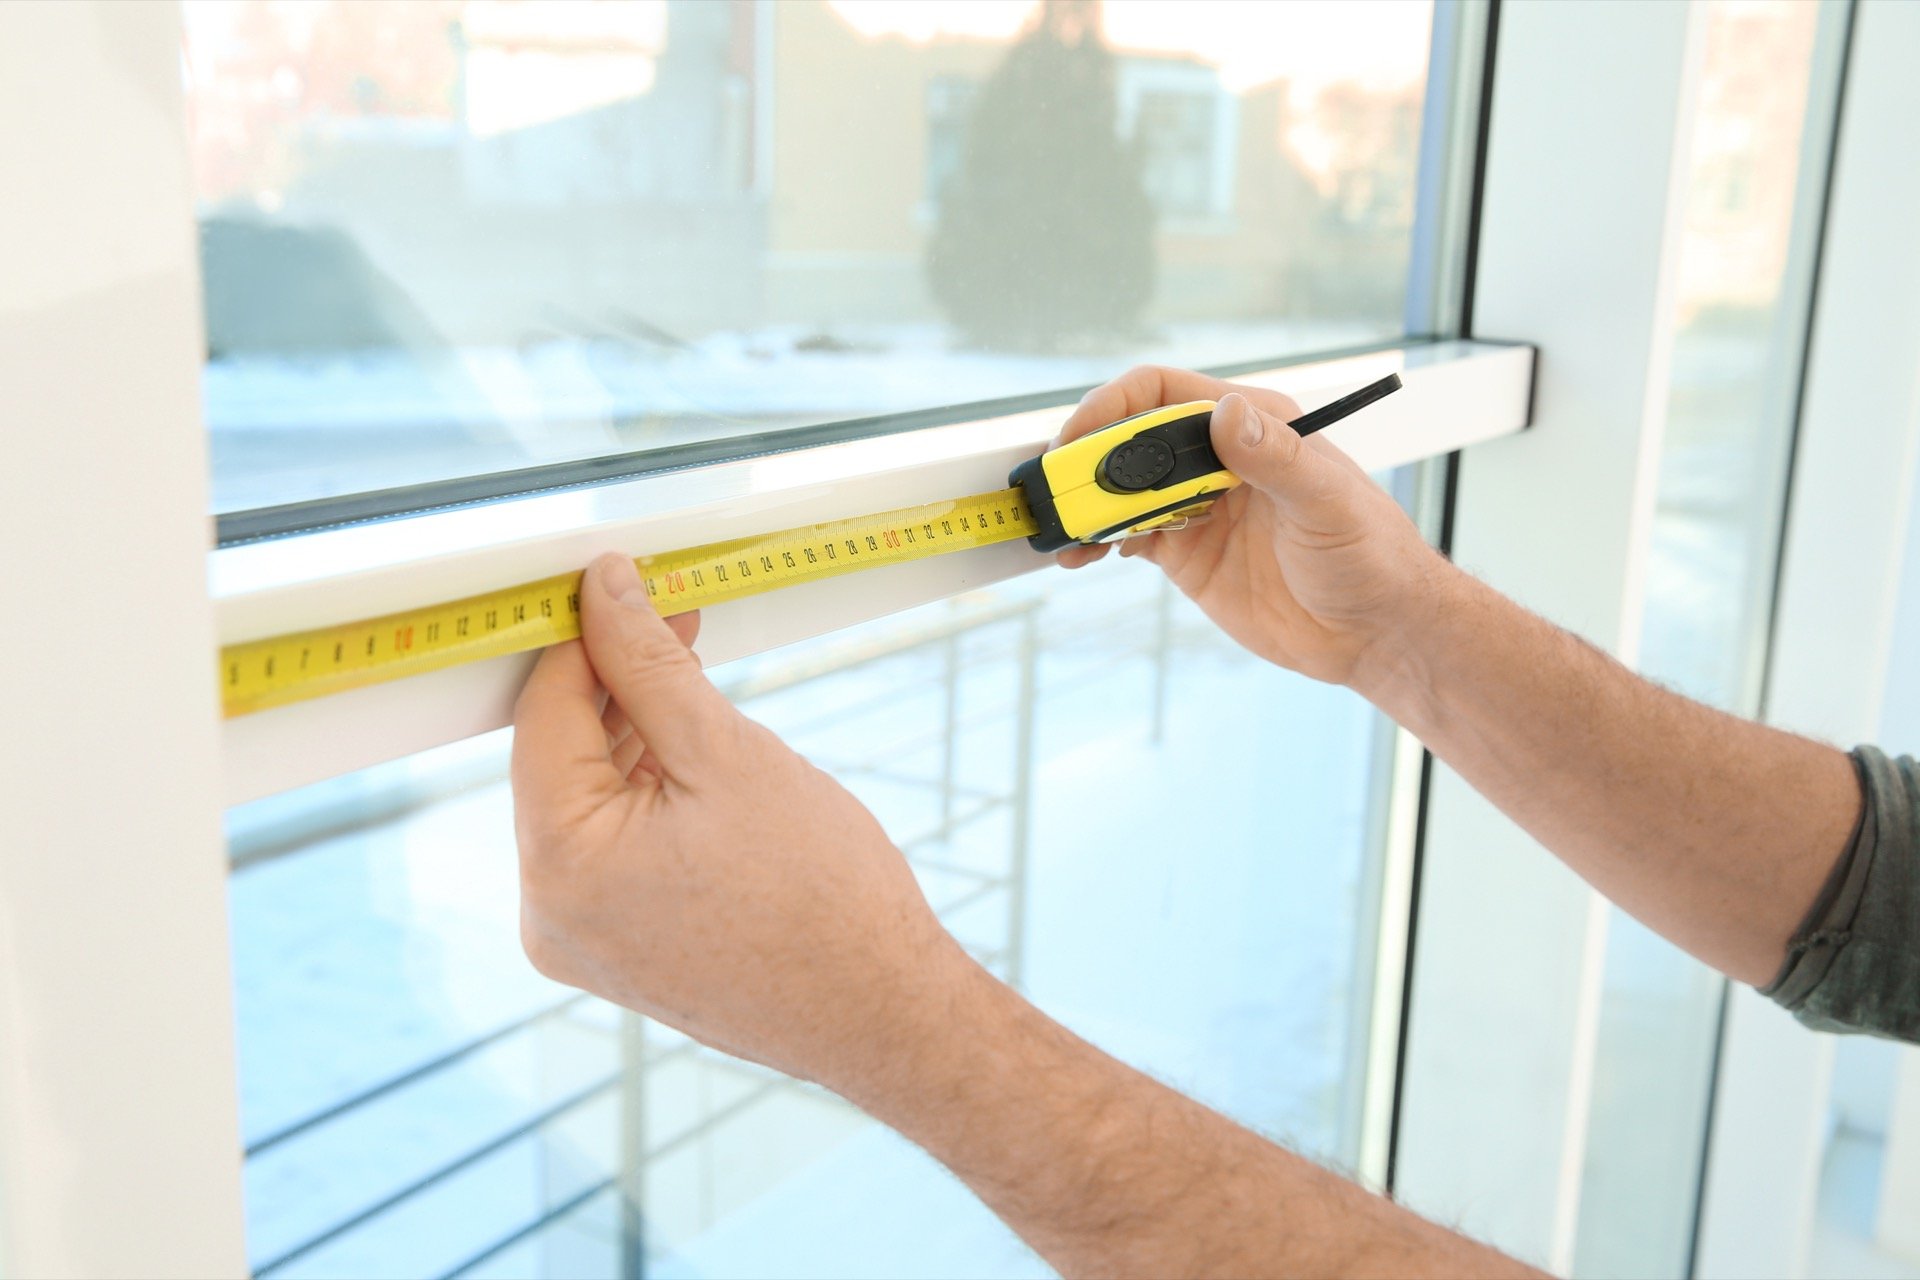
Step 2: Measure the rough opening width
To ensure a perfect fit, it is important to accurately measure the width of the rough opening where the window will be installed. Follow these steps to measure the rough opening width:
- Start by positioning yourself in front of the rough opening.
- Using your tape measure, measure the distance between the left side and the right side of the rough opening. Make sure to measure from the inner edge of one side to the inner edge of the other side.
- Note down the measurement in both inches and centimeters.
- Repeat the measurement at the top, middle, and bottom of the rough opening to ensure consistency. In some cases, the rough opening might not be perfectly square, and taking multiple measurements will help you identify any variations.
- Record the smallest measurement as the rough opening width. It is essential to use the smallest measurement to ensure a proper fit and avoid any issues during the installation process.
Remember to double-check your measurements to ensure accuracy before proceeding to the next step. Once you have determined the rough opening width, you can now move on to measuring the rough opening height.
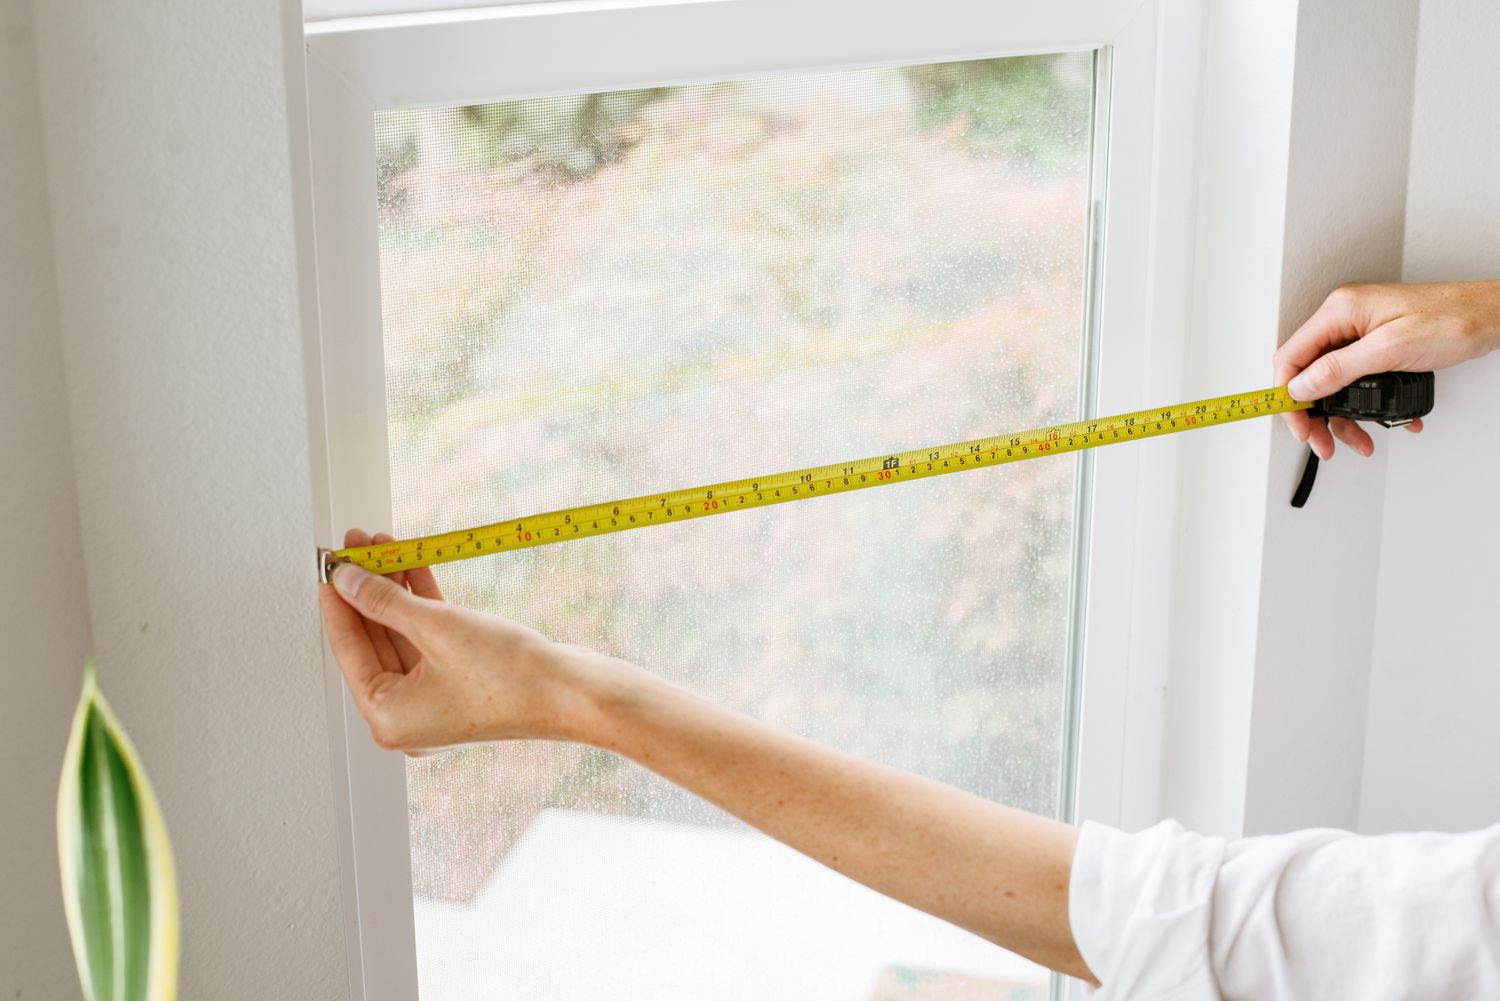
Step 3: Measure the rough opening height
After measuring the rough opening width, the next step is to accurately measure the height of the rough opening. Follow these steps to measure the rough opening height:
- Stand in front of the rough opening.
- Using your tape measure, measure the distance between the top and bottom of the rough opening. Again, measure from the inner edge of the top to the inner edge of the bottom.
- Note down the measurement in both inches and centimeters.
- Repeat the measurement on the left side, middle, and right side of the rough opening to ensure consistency.
- Record the smallest measurement as the rough opening height. This will ensure that the window fits properly and operates smoothly.
Just like with the rough opening width measurement, it is important to double-check your measurements for accuracy. Keeping your measurements consistent and using the smallest value will provide the best results.
Now that you have obtained the rough opening height, you can proceed to the next step: measuring the depth of the rough opening.
Step 4: Measure the depth of the rough opening
Measuring the depth of the rough opening is crucial to determine the correct size and type of window for your construction project. Follow these steps to measure the depth of the rough opening:
- Position yourself in front of the rough opening.
- Using your tape measure, measure the distance from the inner edge of the front of the rough opening to the inner edge of the back of the rough opening.
- Note down the measurement in both inches and centimeters.
- Make sure to record the exact measurement, as the depth of the rough opening will play a significant role in determining the type of window installation needed.
It is important to consider any obstructions within the rough opening, such as pipes, electrical conduits, or structural elements. These obstructions can affect the depth measurement and might require adjustments during the installation process.
Once you have measured the depth of the rough opening, you are now ready to move on to the next step: determining the type of window installation.
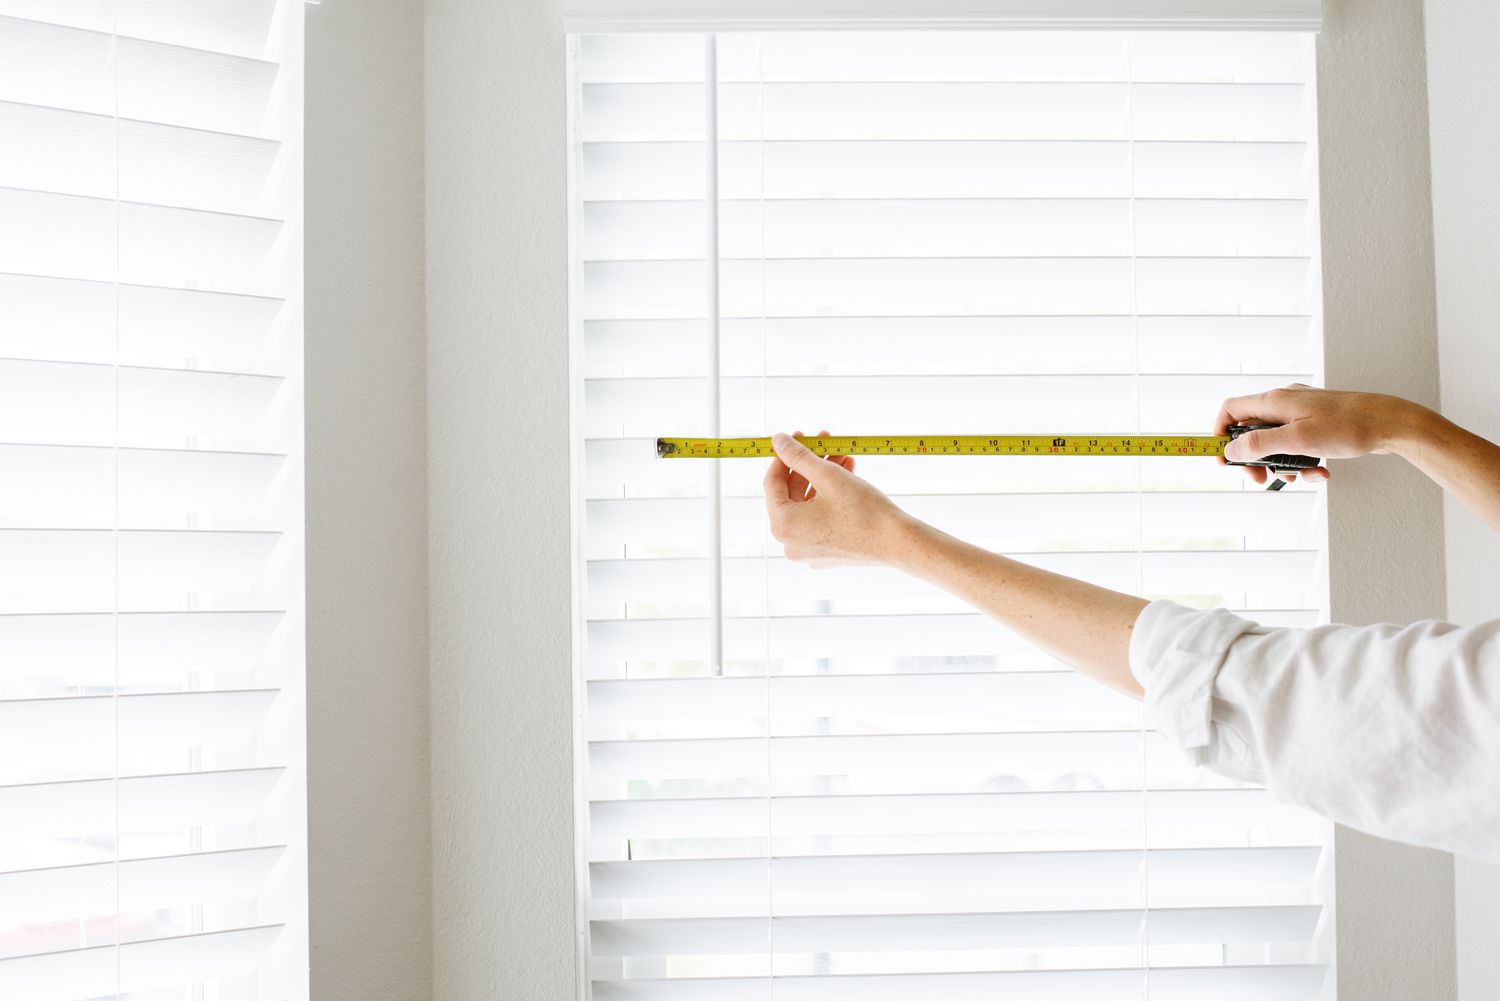
When measuring for a new construction window, always measure the width at the top, middle, and bottom, and the height at the left, center, and right to ensure accuracy.
Step 5: Determine the type of window installation
Once you have gathered measurements for the width, height, and depth of the rough opening, it is time to determine the type of window installation that will be most suitable for your construction project. There are typically two types of window installations: new construction and replacement.
If you are working on a new construction project or completely removing an old window frame, a new construction window installation is the ideal choice. This type of installation involves securing the window directly to the rough opening, utilizing nailing flanges or flanges with integrated J-channel.
On the other hand, if you are replacing an existing window and keeping the frame intact, a replacement window installation is the way to go. This installation involves removing the old sash and placing the new window within the existing frame.
Once you have determined the appropriate window installation type, you can proceed to the next step: calculating the window size.
It is worth noting that the type of installation may also depend on the specific requirements of your building project, local building codes, and personal preferences.
Step 6: Calculate the window size
Calculating the window size is a crucial step in ensuring that the chosen window fits perfectly within the measured rough opening. Follow these steps to calculate the window size:
- Start with the rough opening width measurement obtained in Step 2.
- Subtract a small amount, usually around 1/4 to 1/2 inch, from the rough opening width. This allows for proper clearance and ensures that the window can be easily installed.
- Repeat the process with the rough opening height measurement obtained in Step 3. Subtract the same small amount from the rough opening height.
- The resulting measurements will be the recommended window width and height. These measurements may vary slightly depending on the manufacturer’s recommendations and the specific window style you have chosen.
It is important to note that these calculations are made to provide a proper fit for the window within the rough opening. However, it is always a good idea to check with the manufacturer’s guidelines and recommendations to ensure the best outcome for your specific window model.
Once you have calculated the window size, you can proceed to the next step: checking for any obstructions or obstacles within the rough opening.
Step 7: Check for any obstructions or obstacles
Before proceeding with the window installation, it is essential to thoroughly inspect the rough opening for any obstructions or obstacles that may impede the installation process. These obstructions can include electrical wires, pipes, or structural elements that interfere with the window’s proper placement.
Follow these steps to check for obstructions or obstacles:
- Carefully examine the rough opening, both inside and outside the building, for any visible obstructions.
- Pay close attention to any electrical lines, plumbing installations, or HVAC components that may be in proximity to the rough opening.
- If any obstructions are identified, consult with a professional or seek advice to determine the best course of action. In some cases, relocation or modification of the obstructions may be necessary.
- Ensure that there is sufficient space around the rough opening for the window frame, nailing flanges, or other installation components.
- Make note of any necessary adjustments or modifications that need to be made to accommodate the window installation.
By thoroughly checking for obstructions or obstacles beforehand, you can anticipate any challenges and address them prior to the installation process. This will help ensure a smoother and more successful window installation.
Once you have checked for obstructions, you are now ready to move on to the final step: confirming the measurements and preparing for installation.
Step 8: Confirm the measurements and prepare for installation
Before proceeding with the window installation, it is crucial to confirm the accuracy of your measurements and make any necessary adjustments. Follow these steps to confirm the measurements and prepare for installation:
- Double-check all the measurements for the rough opening width, height, and depth that you obtained in the previous steps. Ensure that there are no errors or inconsistencies.
- Compare your measurements with the manufacturer’s recommended window size for the chosen installation type.
- If there are any discrepancies, re-measure the rough opening and make the necessary adjustments to ensure a proper fit.
- Ensure that all necessary preparations have been made, such as clearing any obstructions, removing debris, and ensuring a clean and level surface for the window installation.
- Prepare all the required tools, materials, and window components for the installation process. This may include sealing materials, fasteners, shims, and any additional hardware.
- Review the manufacturer’s installation instructions to familiarize yourself with the specific steps and requirements for installing the chosen window model.
- Wear appropriate safety gear, such as safety goggles and gloves, to protect yourself during the installation process.
- Ensure that you have assistance, if needed, to safely handle and position the window during installation.
By confirming the measurements and adequately preparing for the installation, you can minimize the risk of errors or complications. This will ultimately contribute to the success of your window installation project.
Once you have completed these steps, you are now ready to proceed with the installation of your new construction window.
Remember, if you are uncertain about any aspect of the installation process, it is always recommended to seek professional assistance to ensure a safe and accurate installation.
Conclusion
Installing new construction windows is a crucial step in any building project, and accurate measurements are key to a successful installation. By following the steps outlined in this guide, you can ensure that your new windows fit properly within the rough opening and enhance the functionality and aesthetic of your building.
Throughout the process, it is important to gather the necessary tools, such as a tape measure, pencil, level, and calculator, to assist you in obtaining precise measurements. Taking the time to measure the rough opening width, height, and depth accurately is crucial for determining the appropriate window size and ensuring a proper fit.
Additionally, considering the type of window installation, whether new construction or replacement, is crucial for selecting the right installation method and ensuring a smooth process. Checking for any obstructions or obstacles within the rough opening is equally important to identify any potential challenges and address them before installing the new windows.
Lastly, confirming the measurements and thoroughly preparing for the installation ensures that you are well-equipped and ready for the task at hand. By following these steps and seeking professional assistance when needed, you can ensure a seamless and successful window installation process.
Remember, it is always recommended to refer to the manufacturer’s instructions and guidelines specific to your chosen window model for the most accurate and reliable information. Prioritizing safety throughout the installation process is also essential.
With careful attention to detail, precise measurements, and proper preparation, you can confidently install your new construction windows and enjoy the benefits of enhanced natural light, improved ventilation, and the overall beauty they bring to your building.
Frequently Asked Questions about How To Measure For A New Construction Window
Was this page helpful?
At Storables.com, we guarantee accurate and reliable information. Our content, validated by Expert Board Contributors, is crafted following stringent Editorial Policies. We're committed to providing you with well-researched, expert-backed insights for all your informational needs.


0 thoughts on “How To Measure For A New Construction Window”